Killing Floor

Killing Floor

85 ratings
An Indepth Guide on being a Doctor.
By @TheyCallMePinCushion and 2 collaborators
Another indepth guide by Cereal Killer on how to be a useful Medic on all dificulties.
   
Award
Favorite
Favorited
Unfavorite
Introduction.
Hello and welcome to another indepth guide for Killing Floor,

In this guide i'll explain to you what the Medic is good for and how to use this class effectively. As with my other guides i'm going to post exactly the same thing in this section as this stands for every guide that i myself or my group creates.

1: As before this guide goes indepth with certain things other guides do not go into.

2: This is very much going to be a work in progress, things may change from time to time and when they do change they'll be for the better.

3: This guide will be regularly updated when we have the time and patients to write it, please don't spam the comments for updates they'll come when they come.

4: I myself and anyone else who works on this guide is by no means a "Pro" at Killing Floor we all makes mistakes from time to time as that's what Humans do. We just have a great understanding of how all the game mechanics work as we've played for a long time.

5: I own a Killing Floor server if you wish to join us you can find me @ 119.252.190.147:7707. The server is located in: Sydney Australia. We generally play Hell on Earth. All are welcome but be aware of high ping if you're connecting international.

Note: This server is ALWAYS Administrated and people caught doing wrong by Admins will be punished accordingly, don't argue with Admins and always play nice and fair.

6: Enjoy the Guide and please if you have something to add contact us.

SPECIAL THANKS: To anyone who has followed me and found this new guide from any of my previous ones.
Required Skills.
Alright for this guide there is ZERO skill requirements as this guide will focus on all difficulties not just 1.

Feel free to use these tips on Beginner, Normal, Hard, Suicidal & Hell on Earth, just be aware i will be focusing mostly on the harder difficulties (Suicidal, Hell on Earth).


So as per usual lets look at why you should aim for Level 6 Medic & what the benefits are:


As you can see you become a tank for damage, as a Medic your armor is like a thick skin and makes you almost invalnerable, you should ALWAYS buy it first for 89 pounds it's worth it and will keep you alive for longer than a Berserker if you use it correctly.

You also get a 25% speed increase carrying any weapon so you run almost as fast a Berserker (slightly slower by 5%).

You gain the ability to throw Healing Grenades that not only heal your team but also block the path of incoming ZED's that can save a life or 5 if used correctly.
Equipment.
In this section you'll find all the infomation of the weapons you'll need to know about and have on you to be an effective member of the squad.

Note: Obvious copy & paste work, but why change what is already accurate?

Sidearms:
This is the section for all small arms such as Melee & Pistols.

Combat Knife:

Weight: 0
Damage: Minimal
Speed: Moderate - Fast
Range: Very Close
Price: Spawn = Free

Clearly this is not the first choice of a weapon any Medic will pick to use on any difficulty, however it is not impossible for you to use it.

Just remember to always head slash otherwise you could end up dead in a heart beat.

Katana:

Weight: 4
Damage: Moderate
Speed: Fast
Range: Close
Price: Base = 2000

This melee weapon is one of any Berserkers favourite & it can be a Medics best friend too! It's ultra fast, ultra sharp and ultra deadly HOWEVER! it's practically useless on Suicidal & Hell on Earth, it does not stun and or flinch more that once on a Scrake or Fleshpound, it's very useful for taking out the Trash.

9MM Pistol:

Weight: Single = 0 | Dual = 4
Damage: Low - Moderate
Speed: Moderate - Fast
Range: Moderate
Ammo Price: 10 Per Clip | Full = 160 x2 for Duals
Dual Price: 150

One of the 2 weapons you're stuck with in the beginning of any match is this weapon, it's practially useless, the only times you ever use it is to take out troublesome trash such as Gorefasts, Clots & most importantly Crawlers you should use the lesser weapons for Crawlers as they're weak and deserve to die slowly!


MK 23:

Weight: Single = 2 | Dual = 4
Damage: Moderate - High
Speed: Moderate - Fast
Range: Moderate - Far
Ammo Price: 16 per clip | Full = 192 x 2 for duals
Price: 500
Dual Price: 1000

The Mark 23 is a great backup weapon for the Light Medic and should be concidered if you're carrying around any weapons that allows space for a Spare Pistol, accurate, powerful, deadly good choice.

44 Magnum:

Weight: Single = 2 | Dual = 4
Damage: High
Speed: Moderate - Fast
Range: Far
Ammo Price: 13 per clip | Full = 277 x2 for duals
Price: 450
Dual Price: 900

Another excellent choice for a Light Medic is the 44 Magnum, it only has 6 shots though so be willing to take a few hits if you forget to Reload, it's got more power than the Mark 23 if you prefer that.

Flare Revolver:

Weight: Single 2 | Dual 4
Damage: High - Very High
Speed: Moderate - Fast
Range: Far
Ammo Price: 13 Per Clip | Full = 277
Price: 500
Dual Price: 1000

The Flare Revolver is a great choice of weapon for the Medic or Berserker to carry around if you like to deal out some serious damage over time, it can light the ZED's on fire and cause them burn damage which works well against Fleshpounds as they won't rage as fast while they are burning.

Note: Scrakes will always rage when they get low on health so this weapon is not the best choice if you want to avoid taking damage on the run.


Hand Cannon:

Weight: 4
Damage: High - Very High
Speed: Moderate
Range: Very Far
Ammo Price: 15 per clip | Full = 180
Price: 500
Dual Price: 1000

This deadly monster of a weapon is an amasing choice for the Light Medic who chooses power over speed, it's Powerful as madness and it's got 8 Shots so you have room to miss a few shots, 1 shot to the head will take out most Trash. (Depending on difficulty)

Main Arms:
Section for all the heavier equipment you'll carry.

Lever Action Rifle:

Weight: 6
Damage: Moderate - High
Speed: Very Fast
Range:Very Far
Ammo Price: 20 Per Magazine | 160 Full
Price: 200

The Lever Action Rifle is a good weapon for taking out the Trash, such as, Sirens, Husks & Gorefasts at a distance, it's very fast to fire and it carrys 10 shots in the chamber which makes it a very useful weapon.

Crossbow:

Weight: 9
Damage: Moderate - High
Speed: Slow
Range: Very Far
Price: Base = 800
Ammo Price: 20 Per Clip | Full = 720

The Crossbow is the perfect weapon for a Medic since it's got serious range and even more serious power, It keeps the nastys at a distance and keeps you safe.

Medic Essentials:
Everything in one big doctor bag that you should need.

The Pricker (Medical Syringe):

Weight: 0
Speed: Fast
Range: Close
Healing Speed: Fast

The pricker my personal favourite is useful on yourself and other players, this little nasty is faster to heal than the Medic Guns so use it on a squad mate if you can.

MP7M:

Weight: 3
Damage: Moderate
Speed: Very Fast
Range: Moderate - Far
Price: Base = 3000 | Level 0 = 750, deduct 60 per level
Ammo Price: 10 Per Clip | Full = 200

The MP7M is one of the first Medic guns to have been released in Killing Floor back in 2009 it was introduced with the AK and Katana and a few other weapons, it's fairly weak but carrys alot of spare clips and good for healing at a distance.

Note: Level 6 Medic spawns with this & it's also a light weight weapon.

MP5M:

Weight: 3
Damage: Moderate
Speed: Very Fast
Range: Far
Price: Base = 5000 | Level 0 = 1250 deduct 100 per level
Ammo Price: 10 Per Clip | Full = 125

The MP5 my personal favourite Medic weapon it's fast but it runs out quick. It has a tendancy to recoil so burst fire is recommended, make your shots count as the damage is fairly low as with all Medic weapons.

M7A3:

Weight: 6
Damage: Moderate
Speed: Moderate - Fast
Range: Very Far
Price: Base = 7500 | Level 0 = 1875, deduct 100 per level

This is one of my least favourite weapons, too much recoil, expensive and uses much of your precious carry weight. If you like to use Rifles then perhaps you'll like this weapon, but you'd be better off buying a Crossbow.

Schneidzekk (KRISS Vector):

Weight: 3
Damage: Moderate
Speed: Very Fast
Healing Speed: Moderate
Range: Far
Price: Base = 10000 | Level 0 = 2500, deduct 60 per level
Ammo Price: 10 Per Clip | Full = 140

The best weapon for Medic to buy, it's powerful, very fast and best of all it's healing seems to work more often than the other medic weapons, this is most important on the harder difficulties, just keep in mind you happen to run out of bullets faster than you notice on the battle field with this weapon.

Medic Grenade:

Weight: 0
Damage: Low
Speed: Very Fast
Healing Speed: Fast
Range: Moderate Size Field
Price: Base = 40
Ammo Price: 40 a peice | Full = 200

This grenade is great for 2 things:
1: It's for healing your group as a whole, it's effective if you all huddle together.
2: It's great for blocking doors or halls as the ZED's try to avoid going through the smoke if they can, use it when you need to make a quick escape or block a raging Scrake or Fleshpound.

Combat Armor (Kevlar):

Price: Base = 300 | Medic Discount: Level 0 = 270, deduct 30
Further Equipment.
Hunting Shotgun:

Weight: 10
Damage: Very High
Speed: Slow
Range: Very Close
Price: Base = 750
Ammo Price: 15 Singe | 345 Full

The Hunting Shotgun is a big, heavy, powerful Shotgun that can deal large amounts of damage to targets at a close vicinity, it's got a large deal of recoil and pushback so make sure your shots count otherwise the reload time will most likely get you killed.

AA12 Shotgun:

Weight: 10
Damage: Very High
Speed: Fast
Range: Close - Moderate
Price: Base = 4000
Ammo Price: 40 Single | 160 Full

The AA12 Shotgun is beast of a shotgun, it deals major damage within a close to moderate distance and can can be fired in either a Semi Automatic or Full Automatic firing mode, it's big and heavy though so it weighs you down like mad and the price can outweight the benefit of buying it on higher difficulties. Make sure you have enough space and money to keep the upkeep on this beast.
Loadouts.
As a Medic there's only 1 class for you to be and that's Lightweight, as every single medic gun is light you can carry all 4 at the same time if you choose.

Here's a few loadouts which work great.

Loadout 1:

Flare Pistol:


MP5:


Schneidzekk:


Loadout 2:

Crossbow:


Schneidzekk:


Loadout 3:

Crossbow:


MP5:


Loadout 4:

Crossbow:


MP7:


Loadout 5:

Handcannon:


Schneidzekk:


MP5:


There's heaps of combonations you can make, make up your own and post it below. Don't forget the equipment list above to choose from either.
Knowing Your Enemies & Picking Your Targets.
In this section we talk about the enemies of Killing Floor, which are dangerous, which are just pets & which to kill first.

Pretty simple we start off with the pests, we then move to the dangerous & finally we move to what we need to try and focus efforts taking out as a team.

Let's begin with the pests:

Low Threat Level:
Take out these enemies after you deal with the more moderate enemies first, you'll need to leave as many of this trash as you can to avoid getting all the bigger nasties spawning.

Clots:

Rarity: Common
Health: Low
Damage Type: Claw, Melee.
Damage: Low.
Danger Level: Moderate.

Clots are small agile but slow and weak, 1 good slash or shot to the head will stop them in their tracks, they are plentiful though, keep this in mind as they can grab you and hold you still while the other groupies gang you and you'll never know what happened till to late. Keep them at a distance if you wish to stay alive.

WARNING: On Suicidal and Hell on Earth if you get grabbed you cannot jump to escape a Clots grasp keep this in mind if you are playing another class other than Berserker.

Bloat:

Rarity: Common
Health: Low - Moderate
Damage Type: Melee, Vomit
Damage: Low - Moderate
Danger Level: Low

The Bloat is a slow ugly sun of a gun, he really poses no threat and is really just a space filler and a bullet sponge, make sure you aim for the head and take him out there first so he can't get his juices all over you.

A well placed Hand Cannon shot can knock his noggin off without explosion or a slash from a Melee weapon to the head can pop him in no time, watch out for the fatty juices!

Stalker:

Rarity: Uncommon
Health: Low
Damage Type: Melee
Damage: Low - Moderate
Danger Level: Low

The stalker may look cute and cuddley in her half nude state but don't be fooled her claws will rip through that Kevlar if you give her the satisfaction of a hug. She often goes invisible until she's right ontop of you and then she'll uncloak to gut you, keep your eyes focused for her.

WARNING: Always keep on the move around her if you stop she'll rip your chest cavity wide open, she's always invisible until she's close enough to gut you but her downfall is that she always has to stop to claw, which makes her an easy target to avoid and kill.

Moderate Threat Level:
Take out first if possible as these nasties have a bad temper and often are the first to kill.

Crawler:

Rarity: Common
Health: Low
Damage Type: Frustration, Melee
Damage: Moderate - High
Danger Level: Above Moderate - High

"EWW A BUG, Someone step on it!" Well if that wasn't obvious enough this is a bug and you know what bugs are, a pain in the ♥♥♥ they need to be dealt with straight away.

WARNING:These little nasties are very annoying you are advised to use Pistol on them to avoid losing a lot of health and armor, These things jump so beware of how close you allow them to get, 3 - 4 good headshots (depends on difficulty) with the 9MM is enough to drop them for good.

Gorefast:

Rarity: Common
Health: Moderate
Damage Type: Melee
Damage: High
Danger Level: Moderate - High

The Gorefast is a common pain in the rear, he's slow and easy to kill, unless he gets close and then he'll charge, it's best to shoot this guy in the head before he has a chance to charge.

WARNING: It's advised to just run away and wait for them to get close otherwise you'll be swarmed or worse they'll get you while you are running.

Husk:

Rarity: Way Too Common
Health: Moderate
Damage Type: Melee, Ranged Fire.
Damage: High
Danger Level: Moderate - High

This one is a no brainer Unless you're a Level 6 Firebug this thing is going to make your daily stroll in the park a living napalm nightmare. These things rain Hellfire from their Husk Cannon non stop on Hell on Earth.

WARNING: The Husk constantly fires Napalm at you from his Cannon, DO NOT UNDER ANY CIRCUMSTANCE stop running while they're chasing you and always jump when they fire at you as you can dodge it's attacks. Try and take him out first with a well placed Headshot from any of your weapons or if you can take him out with a Melee swip to the head

High Threat Level:
Ok well if you've made it to this part of the guide then you know what's coming next, nothing but pain and suffering here we go.

Siren:


Rarity: Uncommon:
Health: Moderate
Damage Type: Bite, Scream.
Damage: Very High (Avoids Armor)
Danger Level: VERY HIGH!

This nasty lady tried to be a singer once, guess the audiences heads exploded from the awesomeness of her voice cause she won first prize in the "SHUT THE F UP" awards. Make sure you have a doctor handy as you'll need one after she's finished her solo.

WARNING: As much as the Siren is uncommon when she's around she should be THE FIRST nasty you take out at all costs, she's the one that gives you the most trouble and she's also the one that'll wipe you out in a second if given the chance. Her screams blur your screen and shake it around which puts your aim off so just run away and take her at a distance.

Scrake:

Rarity: Rare
Health: High
Damage Type: Melee
Damage: Very High
Danger Level: High - Very high

Alright if his blood stained Butcher uniform didn't give it away this guy means business, and OMG is that a Chainsaw he's got on his arm? No chance pal that's dealth right there, F***ING RUN!!!!

WARNING: The first chance this guy gets to swing that Chainsaw around in the air and near your body will be the last chance you have at surviving his vicious encounter.

BEWARE: Very Important that you remember when the Scrake gets low on health he will charge at you, this is one of the best stratergies to get him away from the crowd and to finish him off before he has a chance to corner you.

Stratergy:
For a Scrake it is important that you use a Medic Grenade at your own feet if you are planning on Soloing him, you'll be able to block most of his attack and just pumble him with bullets to finish him. (requires armor)

UNDER NO CIRCUMSTANCES PANIC!!!! If you panic and run away while he's sawing you then you'll end up dead alot faster you should allow your team to dispatch of him while you take the force if possible.

Fleshpound:

Rarity: Very Rare
Health: Very High
Damage Type: Melee
Damage: Ultra High
Danger Level: High

Well it's come to this some damn punk with grinders for hands? Jeez what next, Clowns with Maces? Oh... Wait....Damn, Well the simple thing here is to remember rule number 1, RUN FOR ET!

WARNING: Even though these things are very dangerous and should most certainly be delt with cautiously, as they get angry very easily, you only need to know their weakness to be able to kill them fast and easily.

Stratergy: With a Fleshpound there's 2 things you need to know and they are as follows:

1: So long as you stay out of their sight you can avoid getting them angry, any chance you get to break their LOS you damn well better take it.

2: Do only small amounts of damage at 5 second intervals, A Handcannon is sufficent enough to take out a Fleshpound without even getting it angry once.

Note: This is not recommended but you can use your Medic Grenade stratergy same as a Scrake if you wish to Solo him. (Requires Armor)
The How Too's of Survival as the Medic.
In this section i'll go over the few stratergy's that "I myself know" on survival as a Medic.
Video's will be placed here to help along with a small how to written guide below them.

Medic Grenade Trick:
The Medic Grenade trick is where you throw a Medic grnade at your feet to stop the horde from getting around you and munching away. Pretty simple really just throw and shoot.

How it works:


As you can see the enemies try and avoid it. when they get close they'll strafe around it.

Scrake:


Standing in the Green Health smoke will cause the Scrakes to often lose their path to you and just strafe randomly, as you can see though it won't always work and they'll often get a hit in just be aware of this.

Fleshpound:


Standing in the Green Health smoke will cause the Fleshpounds to often lose their path to you and just strafe randomly, as you can see though it's not fool proof and it won't always work and they'll often get a hit in just be aware of this.

NOTE: THIS IS NOT RECOMMENDED ON HARDER DIFFICULTIES BUT IT'S POSSIBLE

Kiting:
Recommended: Only for multiplayer, tried many different methods to stun a Scrake solo and all have failed. (On Hell on Earth)

Do the same as what a Berserker does, get a Melee weapon and just kite around your enemies get em in the back if you can to deal more damage.
Tips and Tricks.
In this section we're going to place some hints tricks and tips to help you complete Hell on Earth easier.

DODGING:

Jumping:
Simple really jump out of the attacking ZED's reach by pressing your jump key and moving away nothing more to say, timed correctly you can often avoid damage you'd normally take if you don't jump.

Running:
Keeping on the run from a raging Fleshpound you can sometimes keep away from him if he's far enough away until he calms down, this can be really hard as it requires a large map and lots of corners.

Fleshpound Note:
If a Fleshpound is charging at you DO NOT PANIC, dealing too much damage to a raging Fleshpound can cause a chain reaction of rages WHICH are almost impossible to end. Just keep running and shooting him in the head he'll die fairly quickly.

Scrake Note:
If a Scrake is charging at you DO NOT PANC, Medic Grenade your feet and just pumble him with Lead he'll die soon enough so long as you have Armor you'll survive this.

MONEY MAKING:

Hand Cannon Trick:
The Hand Cannon trick is the easiest and cheapest way to make money on CO-OP one team mate goes Sharpshooter, they then buy Dual Hand Cannons & drop them, while the other team mate sells them and tosses the cash they make to the buyer, you can end up with enough money to last you the whole game and then some if this is done right.

Flare Pistol Trick:
The Flare Pistol trick is the same as the Hand Cannon trick only as a Firebug instead of a Sharpshooter. Same rules apply buyer drops the weapons and seller tosses the cash to the buyer to ensure maximum profit.
Legend.
In here you'll find all the terms of each name i used throughout this guide and or ingame.

Trash: Trash is the General name used to signfy all the lesser specimens.
Clot, Gorefast, Bloat, Stalker, Crawler, Siren, Husk.

LOS: LOS is a shortened term for "Line of Sight"

Secondary: This should be fairly obvious what i'm using it for but incase it's not, Secondary is a term used to say use your Alternate Fire attack.

Handy: Handy is a term used for Hand Cannon.

L.A.R: L.A.R is short for Lever Action Rifle.

Rage: If not obvious enough Rage is short for angering something, (EG: That Fleshpound is charging.)

Medi Nade: Pretty obvious, Medic Grenade is what it stands for.
Credits.
Guide Created By:
Cereal Killer

Video Stars:
Cereal Killer
[0_Coy] P_3T_3R

Special Thanks:
Everyone who has followed me or supported me through my guide making. You guys are the reason i continue.

Tripwire Interactive: For making this fantastic game years of fun and a tone of support makes this game stand above many other titles of the same type.
Further Reading.
This section is for the rest of my guides which you may or may not wish to read:

Berserker Guide (Hell on Earth): http://steamcommunity.com/sharedfiles/filedetails/?id=163804340

Commando Guide: http://steamcommunity.com/sharedfiles/filedetails/?id=168227257
21 Comments
legit booty warrior Oct 3, 2018 @ 1:10am 
my fav med loadout is katana and hunting shotgun. yes you dont have a healing gun but you still can throw nades and heal with your syringe, and it allows you to handle any class on any difficulty on your own and minimize team damage. its like zerker and support but with the benefits of medics healing and armor.
Rümmler.363VD Aug 13, 2013 @ 6:21am 
I´ ve done pretty well with a M32 as backup weapon, along with Med Guns.
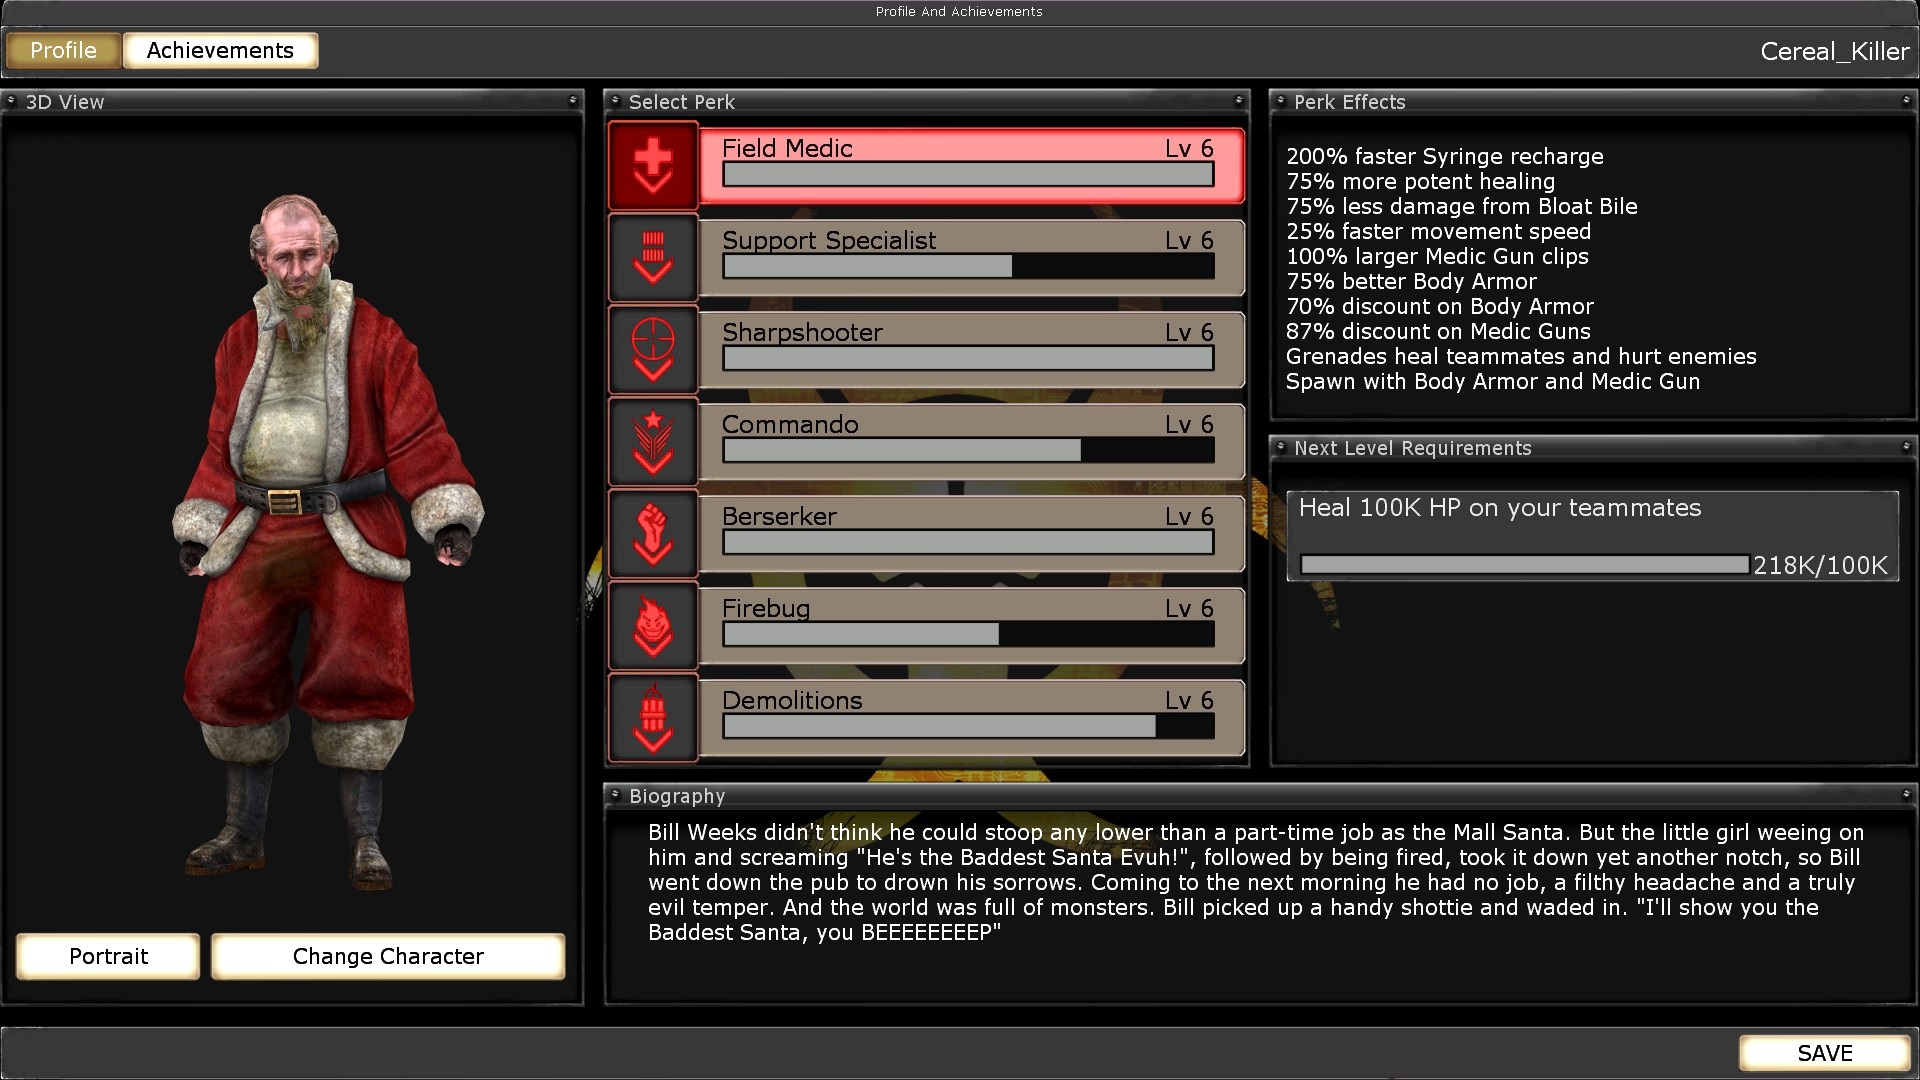
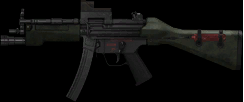
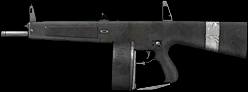
As long as you have your friendly-demo-next-door in your team you can get it pretty cheap.
shin1201 Aug 12, 2013 @ 8:40pm 
good!
Hero Aug 12, 2013 @ 6:36am 
also i prefer to kite as a medic, with the M7A3 Mp5m and Schneidzekk, use the M7A3 to clear all in fromt of you, crawlers, and if u get into a situation, press 3 for a clip of Schneidzekk, then 3 again for a clip of Mp5, and if u want to really fuck shit up, u can still carry a flare pistol, so ammo is never a problem, and its a awesome weapon (you can also carry a mk23, but flare pistol seems more logical)
Hero Aug 12, 2013 @ 6:36am 
every one hates on M7A3, but i find this gun to be awesome
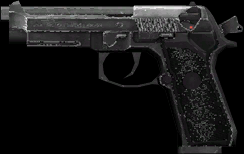
1. It carries alot of ammo
2. Its recoil isnt bad because of its slower fire rate, any one using if more then a few minutes should find no problem being able to h/s lines of trash with contuinued fire
3. It kills a crawler in 6p hoe in 2 shots
4. Its a slot 4 weapon (as in u press 4 to use it, i dont use the tier system), why is this good? because just about every other gun a med will use is slot 3, all other medic guns, the ever popular lar, the m79 is also a popular medic weapon, personally i hate having more the 2 guns in a slot.
TempR Aug 11, 2013 @ 11:59pm 
All helpful tips! Nice one.
Banfield Aug 11, 2013 @ 10:44am 
Great guide, mate - will keep in mind when I level my medic
Bicks Aug 11, 2013 @ 6:54am 
Great guide! Became a better medic in a matter of afew days! This guide is again exelent, Keep up the good work :].
Yousuke Shiba Aug 10, 2013 @ 11:51pm 
Good guide , i like it , keep it up !:Horzine:
@TheyCallMePinCushion  [author] Aug 10, 2013 @ 8:25pm 
Wrong guide sorry Leather Face. But yes i suppose there's a character in the game which has this correct.