Resident Evil 2
Оценок: 499
S Rank & Completionist Walkthrough (Route A Normal/Hardcore)
От WallaWallas
I originally created this guide for myself as a reference tool during my S-Rank runs, but figured I would share it just in case someone else finds it helpful as well.

I don't recommend using this guide for your first playthrough as that spoils a lot of the fun (and scares!) of your first time playing Resident Evil 2. Ideally, this guide is meant for those players who have already beaten Route A with either Leon or Claire and are looking to improve their time with little to no backtracking; or to pick up any items, secrets, or Mr. Raccoon Toys that you might have missed for a completionist run. You won't be breaking any speedrun world records with this guide, but will clear the 3.5 hour S-Rank limit with plenty of time to spare.

If you do find the guide helpful, please consider giving it a rating. If you have any suggestions, questions, or comments, please feel free to leave a comment.

Thank you, and enjoy!

Update: Based on the suggestions I have seen in the comments, I have added more details to the Sewers section.
3
13
3
2
   
Наградить
В избранное
В избранном
Удалить
Police Station
Once you enter the police station, turn 90 degrees right and flip the switch on the wall to open the gate that says, "Keep Out".

Make your way through the 1F East Area until you come back to the Main Hall and meet Marvin.

Use your knife to cut the tape on the 1F West Wall and make your way through the police station.

Leon's Desk Dial Locks
Left Combination: NED
Right Combination: MRG

West Office Safe
CCW 9, CW 15, CCW 7

Mr. Raccoon Toy located in the West Office.

Return through the door you entered the West Office and make your way toward the 2F Shower Room. You can stop inside the Dark Room on your way and drop off any extra items in the storage box. There is a locker within the Shower Room containing a portable safe with a Spare Key inside. Make sure to grab this.

Shower Room Dial Lock
Combination: CAP

Make your way toward the 3rd Floor, where you will find the Spade Key.

3F Locker Dial Lock
Combination: DCM

Continue through the West Storage Room and into the Library. Once in the Library, head down the stairs and into the lounge to grab the Unicorn Medallion before making your way back to the Main Hall. Make sure to grab the Red Book right next to the door leading back to the Main Hall.

Unicorn Medallion
Fish, Scorpion, Vase

Grab the Lion Medallion on the way down the stairs of the Main Hall.

Lion Medallion
Lion, Leaf, Bird

Place both medallions in the Goddess Statue after the scene with Marvin. This a good opportunity to store your extra items within the storage box before continuing. You need to bring the Spade Key and Red Book. Use the Spade Key to unlock the door leading to the West Office from the Main Hall before heading up to the 2nd Floor.

2F Waiting Room Safe
CCW 6, CW 2, CCW 11

Head into the Art Room, the Spade Key can now be discarded. Combine the Red Book and Statue Hand and place on the Emperor Statue. Make sure to grab the Weapons Locker Keycard before leaving the Art Room.

Emperor Statue
Examine the newly obtained item to remove the Red Jewel.

Make your way through the East Side of the Police Station and use the Bolt Cutter to access the East Office. You must grab the Valve Handle and Fuse to return back to the Main Hall. You can once again drop off any extra items in the storage box, except for the Bolt Cutter, Weapons Locker Keycard, and Valve Handle.

Make your way to the Operations Room through the Reception and along the west hallway of the Police Station. Use the Bolt Cutter in the Operations Room to gain access to the room just south. In this room is the Electronic Device. The Bolt Cutter can now be discarded.

Unlock the east door to the hallway and enter the Safety Deposit Room. Use the Weapons Locker Keycard to obtain the Shotgun/Grenade Launcher. Head down the hallway toward the Dark Room (you can drop off extra items in the storage box here before continuing) and head up to the 2F Shower Room. Use the Valve Handle to move through the showers. Open the door to the hallway, head into the S.T.A.R.S Office. In the office is the Battery, combine with the Electronic Device to create the Detonator.

Mr. Raccoon Toy located in the S.T.A.R.S. Office.

Return to the hall and continue south (hug the outside wall and walk to avoid alerting the Licker) and unlock the door into the Lounge. Enter the Library and take the ladder or stairs up to the West Storage Room. Once inside, arm the Detonator. Before entering the newly opened area, move the shelf that is now blocking the door back out to the Library.

Detonator
Head inside the newly opened area to to obtain the final medallion.

Maiden Statue
Woman, Arrow, Snake

As you try and make your way back toward the door to the Library, a Licker and Zombie will try to stop you. Use a Flash Grenade to easily run past both and return to the Library. Head back to the Main Hall. Place the final medallion in the Goddess Statue and head underground.

Use the storage box to store extra items and prepare for a boss fight soon after descending down the stairs.
Underground Facility
After the boss fight and before entering the Parking Garage, you will have the opportunity to store any extra items. You do not need any key items before entering the Parking Garage. Head up the ladder and try accessing the keycard terminal.

Note: When playing as Leon, go through the door that Ada walks into first to grab the Square Crank to avoid backtracking.

Bring the bent key from the Firing Range back to the Parking Garage.

Weapon Upgrade
Examine the unlock button to open the trunk for a Weapon Upgrade/Weapon.

Mr. Raccoon Toy located in the Firing Range.

OPTIONAL: Head to the Morgue through the Kennel. In the Morgue, you will find a Diamond Key on one of the bodies. The Diamond Key is necessary to obtain the final Spare Key for an inventory size upgrade. You can skip this if you want to save time. DO NOT backtrack to the Firing Range to open the Diamond Key door. It contains a roll of Film with the dial lock combination for the 3F Locker, which you have already opened.

The following section differs slightly between Leon and Claire, however, the objective is the same: Obtain Power Panel Parts.
Return to Police Station (Leon)
Go through the Kennel to access the Generator Room.

Power Panel Part
The Generator Room can be accessed using the Square Crank.

In the corner of the Generator Room is a circuit breaker.

Circuit Breaker
Switches: 3 and 4.

This will open the previously locked door east of the Firing Range and will take Leon back to the Police Station. Take the stairs up and you will be right to the Break Room. This is a good opportunity to drop off any extra items. For now, the only thing you need with you is the Fuse that is in the Break Room.

Optional: You can use any extra Wooden Boards you have on this hallway to make your life a little easier when you have to backtrack to the Parking Garage.

Mr. Raccoon Toy located in the 1F Break Room.

Head down the hall and insert the Fuse to open the gate. Make your way back to the Main Hall. Once there, drop off any extra items in the storage box but bring the Square Crank. Head up to the 2F Art Room but take a left when facing the Art Room.

Mr. Raccoon Toy located in the Chief's Office Hallway.

Use the Square Crank to open the gate and head up the stairs to the East Storage Room. Grab the Large Gear that is within, then head to the Balcony.

Climb down the ladder (which will break) to the Roof and take the north stairs down to the Boiler Room. Make sure to grab the Club Key that is taped to the whiteboard and store all extra items except for the Club Key in the storage box. Exit the Boiler Room, turn the water lever directly to your right, and head back up to the broken ladder. Turn the lever next to the ladder to put out the fire on the helicopter and enter through the door. Make your way down the hall until Mr. X emerges from behind the helicopter, and backtrack to the roof. Dodge Mr. X and head back into the same hallway that he came out of, you will end up back in the hallway of the Art Room.

Optional: Head toward the area you opened with the Square Crank north of the Art Room, but this time take the stairs down. Use the Club Key to enter the Observation Room to obtain the Bejeweled Box. You will need the S.T.A.R.S. Badge inside to obtain the Lightning Hawk Magnum and the weapon upgrade inside the Special Weapons Case.

Now make your way back to the Main Hall. Drop off any extra items in the storage box but make sure to have the Club Key with you. Head west through the Reception and make your way to the Records Room. The west hall will now have a Licker so make sure you are walking. Use the Club Key to enter the Records Room and obtain the Jack Handle, the Club Key can now be discarded.

Access the Clock Tower

Make your way back to the Main Hall and grab the Large Gear from the storage box. Head up the stairs to the 2nd Floor and into the Library. You can now lower the bookshelf and move the shelves to create a bridge to access the hall leading to the Clock Tower. This part can be a little tricky with Mr. X following you. Just kite him up the ladder and down the stairs and be patient moving the bookshelves.

Make sure to have the Large Gear with you.

Once inside the Clock Tower, turn right and insert the Large Gear into the mechanism to drop the stairs to 4F Clock Tower.

Clock Tower Stairs to 4F
Head past the 2nd mechanism on the way to 4F Clock Tower and grab the Small Gear

Clock Tower Small Gear Mechanism
Place the small gear in the mechanism you passed on the way up the stairs.

Remove the Large Gear from the 3F Clock Tower mechanism and place in the mechanism on 4F to ring the bell.

Final Power Panel Part
Once the bell breaks, you can grab the box containing the final Power Panel Part.

Mr. Raccoon Toy located in the Clock Tower Rear Hallway.

Once you have obtained the final Power Panel Part, head back into 3F Main Hall and go down the hall toward the east side. Unlock the door into the East Storage Room and run straight ahead back toward the staircase. Head to the 2nd Floor and run past the Art Room and toward the Fire Escape. Take the stairs down to the 1st Floor. Re-enter the Police Station and immediately go right into the Watcher Room and toward the Break Room. You can drop off all key items except the Power Panel Parts. Head down the stairs back to the basement and cut across the Parking Garage to the Jail.

Obtain Key Card
Make your way to the power panel and rotate the wires as shown to open the door.

Once you grab the Parking Garage Keycard, the jail cells will open releasing the zombies. Run past the cells hallway and flip the switch on the wall to open the side access. Mr. X will be waiting but it is much easier to get around him than all the zombies that were just released. Once you make it past Mr. X, a few more zombie stragglers will be waiting for you, be ready.

Once you make it back into the Parking Garage, head to the keycard terminal. You're now on your way to the Sewers...
Return to Police Station (Claire)
The door right next to the keycard terminal will now be open. Head inside to access an elevator that leads up to the Chief's Office. You will have access to a storage box, feel free to drop off all key items as you will not need any at this time. Head toward the Private Collection Room and grab the Heart Key off the back of the picture frame at the end of the hall. Use the Heart Key to head out of the Chief's Office.

Mr. Raccoon Toy located in the Chief's Office Hallway.

Optional: Take the stairs down to the Interrogation Room and use the Heart Key to enter and obtain the Bejeweled Box. You will need the S.T.A.R.S. Badge that is inside to obtain the SMG and the weapon upgrade inside the Special Weapons Case.

Head up the stairs to the East Storage Room.

Power Panel Part
Power Panel Part can be found in the room south of the 3F East Storage Room.

Mr. Raccoon Toy located in the room south of the 3F East Storage Room.

Note: Inside the East Storage Room is the Large Gear, make sure to grab it on the way out.

Make your way to the Balcony and climb down the ladder to the Roof. Take the north stairs down to the Boiler Room. To the left of the locked Boiler Room, turn the water lever and head back up to the ladder. Turn the lever next to the ladder to put out the fire on the helicopter and enter through the door. Make your way down the hall until Mr. X emerges from behind the helicopter, and backtrack to the roof. Dodge Mr. X and head back into the same hallway that he came out of, you will end up back in the hallway of the Art Room.

Now make your way back to the Main Hall. Drop off any extra items in the storage box but make sure to have the Heart Key with you. Head west through the West Office and make your way to the room south of the Operations Room. Use the Heart Key to enter the Records Room and obtain the Jack Handle, the Heart Key can now be discarded.

Access the Clock Tower

Head to the Records Room to obtain the Jack Handle and head to the Library. You can now lower the bookshelf and move the shelves to create a bridge to access the hall leading to the Clock Tower.

Make your way back to the Main Hall and grab the Large Gear from the storage box. Head up the stairs to the 2nd Floor and into the Library. You can now lower the bookshelf and move the shelves to create a bridge to access the hall leading to the Clock Tower. This part can be a little tricky with Mr. X following you. Just kite him up the ladder and down the stairs and be patient moving the bookshelves.

Make sure to have the Large Gear with you.

Once inside the Clock Tower, turn right and insert the Large Gear into the mechanism to drop the stairs to 4F Clock Tower.

Clock Tower Stairs to 4F
Head past the 2nd mechanism on the way to 4F Clock Tower and grab the Small Gear

Clock Tower Small Gear Mechanism
Place the small gear in the mechanism you passed on the way up the stairs.

Remove the Large Gear from the 3F Clock Tower mechanism and place in the mechanism on 4F Clock Tower to ring the bell.

Final Power Panel Part
Once the bell breaks, you can grab the box containing the final Power Panel Part.

Mr. Raccoon Toy located in the Clock Tower Rear Hallway.

Once you have obtained the final Power Panel Part, head back into 3F Main Hall and go down the hall toward the east side. Unlock the door into the East Storage Room and run straight ahead back toward the staircase. Head back into the Chief's Office.

Obtain Key Card
With Power Panel Parts in hand, head to the Private Collection Room and rotate the wires as shown to open the door.

Once you unlock the door, you will see a cutscene. You're now on your way to the Sewers...
Orphanage (Claire)
Turn around and pick up the Stuffed Doll behind you.

Missing Toy Block
Examine the back of the toy to obtain the missing Toy Block.

Replace the missing Toy Block and rearrange and rotate to match the following pattern.

Toy Block Puzzle
This will net you the Scissors.

Use the scissors on the taped up east wall and use the key bound to "aim" in order to crouch Sherry (this embarrassingly took me a while to figure out, I thought my game bugged!).

The rest of Sherry's section is linear.

When making your way to the Orphanage as Claire, there are two Mr. Raccoon Toys to destroy.

Mr. Raccoon Toy located in the Bus on the way to the Orphanage.

Mr. Raccoon Toy located in the 2F Orphanage. Head upstairs to the second floor before making your way to Sherry.
Sewers
Mr. Raccoon Toy located in the Sewer (Leon) right after escaping the alligator.

Note: If playing as Leon, you will play a short and linear section as Ada.

Make your way through the Sewers and up the ladder to the Control Room.

Control Room Dial Lock
Combination: SZF

Then down the ladder to the Monitor Room. Here is a storage box where you can drop off all key items.

Optional: Combine the Red Jewel and Bejeweled Box to obtain the S.T.A.R.S Badge. Bring this along if you would like to return to the Police Station.

Now head toward the Treatment Pool.

On the left, next to the cable car is the T-Bar Handle, grab it before turning around to the opposite side of the room toward the safe.

Treatment Pool Safe
CCW 2, CW 12, CCW 8

Head down the stairs near the safe. Once you make it down the stairs, head left and use the T-Bar Handle to open the gate. Continue to make your way through the Bottom Waterway. Just before the ladder is the Sewer Key, don't miss it. Once down the ladder, you will encounter many Adult-G enemies in the water. Make your way across the enemies and head into the Supplies Storage Room.

Inside the Supplies Storage Room you will find the King Plug and Queen Plug. This is a very simple "leap frog" like puzzle where you have to work your way back from the end. It's very linear and does not require further explanation. You can obtain the Flamethrower/Spark Shot from this room (Leon/Claire).

Mr. Raccoon Toy located in the Supplies Storage Room.

Make your way back through the Bottom Waterway. Once you're back in the room that has the stairs that go back up to the Treatment Pool, skip the stairs and flip the switch on the wall to open the shortcut to the Lower Waterway. Head through the door and dodge the Adult-G that will come out of the sewer to your right, and hop onto the ledge on the right with another gate. Use the T-Bar Handle to open the gate and access the Workroom Lift. Head up into the next room to obtain the Rook Plug.
Return to Police Station (Optional)
This is your opportunity to clean up any final tasks in the Police Station, as you will not be able to return after taking the cable car in the Sewers.

This is completely optional (if doing a speed run) but highly recommended (if doing a completionist run). If you do not plan on returning to the Police Station, skip ahead to section "Sewers Continued".

Inside the Workroom is the "Hiding Place" Film.

Hiding Place Film
Head out of the room and toward the Worker's Break Room.

Worker's Break Room Secret Elevator

Use the Sewer Key to unlock the Worker's Break Room.
Move the taped cabinet and take the elevator up.

Special Weapon Case
Make sure the USB dongle is not sticking out of the badge to unlock the case and obtain your weapon upgrade.

Make your way up the stairs and take the elevator up to return to the room behind the Goddess Statue.

Use the T-Bar to permanently open the path between the Police Station and the Sewers.

Use this opportunity to drop of all key items except for the S.T.A.R.S Badge, Diamond Key, and Spare Key. Head to the Dark Room through the West Office and develop the "Hiding Place" Film.

"Hiding Place" Photos
S.T.A.R.S Office & Press Room

Now go upstairs to the 2nd Floor, through the shower, and into the S.T.A.R.S. Office. Check the desk that had the Battery for "Hiding Place Location 1". It contains a box with a weapon upgrade.

Examine the back of the S.T.A.R.S Badge to reveal a USB dongle. Insert into the computer terminal to access the Armory. Inside is the Lightning Hawk/LE5 SMG. The S.T.A.R.S. Badge can now be discarded.

Exit the S.T.A.R.S. Office and head left toward the Linen Room. Use the Diamond Key to enter and obtain the second Portable Safe. Unlock it obtain the final Spare Key. Head back out to the Main Hall through the Lounge and Library.

Make your way back to 1F Main Hall run through the West Office and into the Safety Deposit Room. With both Spare Keys, you can now unlock all the lockers including one containing an inventory size upgrade.

Make your way back to the Main Hall and drop off any extra key items in your storage box on your way to the Press Room. Inside the Press Room and to the left of the main desk is "Hiding Place Location 2" containing Flamethrower/Spark Shot ammo. Return to the Sewers via the secret elevator beneath the Goddess Statue.
Sewers Continued
Take the elevator back down and head left. At the fork, take a left again and take the stairs up to the Treatment Pool. Return to the Monitor Room. With all chess plugs in hand, open the door down to the Garbage Room.

Chess Piece Puzzle
CW From Door: Bishop, Rook, Knight, King, Queen, Pawn

Note: Before descending down the stairs, feel free to store any extra items inside the storage box. There will be a boss fight after accessing the Main Power Room Switchboard below, make sure that you are prepared.

Main Power Room Switchboard
Switches: 1, 2, 4

NOTE: Once you board the cable car there is no going back to any of the previous locations.
Lab
In the lobby is a storage box. Feel free to drop off all key items besides the ID Wristband. Head to the Nap Room via the Cafeteria.

Mr. Raccoon Toy located in the Cafeteria.

Grab the ID Wristband upgrade from the Nap Room, then make your way toward the East Area of the Lab. Make your way toward the Greenhouse Control Room.

Control Room Codes
First code will open ladder access in Greenhouse.
Second code will unlock the solution dispenser in Drug Testing Lab.

Take the Dispersal Cartridge (empty) from the Control Room and insert it into the solution dispenser in the Drug Testing Lab. Press the following Green (G), Red (R), and Blue(B) button combination.

Solution Dispenser
G-R-G-B-R-G-B-R-G

Head back to the Greenhouse and down the ladder. Make your way to the only unlocked door.
Note: While you can easily dodge the zombies in this room right now, upon returning they will be accompanied by two Lickers. It might be worth your time to dispatch a few of the zombies now to make the Lounge safer upon return.

Tnd take the stairs up to grab the Signal Modulator from the area shown below:

Unlock the door on the north end of this room to unlock the shortcut to the East Area Lobby

Head back down to the Lounge Circuit Breaker.

Examine the Signal Modulator and match the MURF frequency before inserting into the circuit breaker.

Herbicide

Head into the Low-Temp Testing Lab to cool the solution.

Take the Herbicide and head back to the Greenhouse Control Room.

Return to the Greenhouse Control Room. You can either head left out the Low-Temp Testing Lab and head there through the Lobby, or head right and take the ladder back up through the Greenhouse. Insert the Herbicide into the solution sprinkler system to obtain the Senior Staff Wristband from the fallen staff member. Then head to the West Area of the Lab.

Optional Inventory Size Upgrade

With Signal Modulator in hand, head back to the Nap Room in the North Area of the lab first.

Examine the Signal Modulator and match the MUF frequency before inserting into the circuit breaker.

Mr. Raccoon Toy located in one of the beds that open in the Nap Room.

Once in the West Area, return power to area using the Signal Modulator.

Circuit Breaker OSS
Examine the Signal Modulator and match the OSS frequency before inserting into the circuit breaker.

There is a storage box next to the circuit breaker. Feel free to store all key items except the ID Wristband.

The remainder of the game is very linear and will consist of two more boss fights. Make sure to stock up at each storage box along the way.

Good luck!
Results
Leon Route A Normal (No S Rank Weapons)
This was my Normal time and Score when following my guide.

As you can see there was still plenty of time to spare. I did skip the optional "Return to Police Station" section that is marked "optional" within this guide. Finishing with an S-Rank will net you the Unlimited Samurai Edge Pistol, and I highly recommend using it when going for Hardcore S-Rank.

Leon Route A Hardcore (Unlimited Samurai Edge Pistol Used)
This was my Hardcore time and Score when following my guide.

Here were my times for major sections:
Solved medallion puzzle and headed Underground - 00:20:49
Completed Ada section and started Sewers with Leon - 01:02:21
Entered NEST Lab - 01:30:58

I highly recommend using the previously unlocked Unlimited Samurai Edge Pistol. Your inventory is even smaller than on Normal so not having to carry handgun ammo helps a lot. Not to mention, this allows you to save the majority of shotgun ammo for the final bosses while taking everything else out with the Samurai Edge.

I not only skipped the optional "Return to Police Station", but I skipped getting the Lightning Hawk Magnum as well. The hardest part was the last two bosses, G's final form, and Mr. X.

When fighting G's final form, use your pistol to shoot the eyes on his leg, shoulder, and back until he goes down on one knee; then blast away with the shotgun when his chest opens up. You can use Flash Grenades to stun him to make shooting his eyes easier. Make sure you have plenty of R+G+B herbs to not only fully heal yourself but to take less damage during the fight.

When fighting Mr. X, again, bring plenty of healing items to tank the fight. Unload everything you have with your Shotgun into his chest and finish him off with the Samurai Edge if necessary. Soon as the Rocket Launcher drops, hit him with two rockets and make your final run to the train.

Congratulations! You've unlocked the Unlimited LE-5 SMG! This is not an unlimited version of the SMG that Claire uses, but rather, the SMG that Hunk uses!

Looks so awesome in the player's hands!

NOTE: If you die at any point in your run, make sure to Return to Title and then load your save of choice. Loading or continuing from the death screen does not reset your timer to the time of your previous save!

The Unlimited LE-5 SMG makes short work of any other playthroughs you might have left. It not only shreds zombies but will easily take down bosses as well when you focus your fire on their weak points.

Claire Route A Hardcore (Unlimited LE 5 SMG Used)
The only time I didn't use the LE 5 SMG was to use the Flame Rounds on Plant 42 enemies in the NEST Lab.

Thank you and I hope you found this guide helpful!
Комментариев: 17
TRS25🐈 20 янв. 2024 г. в 20:00 
Add Mr.Racoon location while playing as Ada!

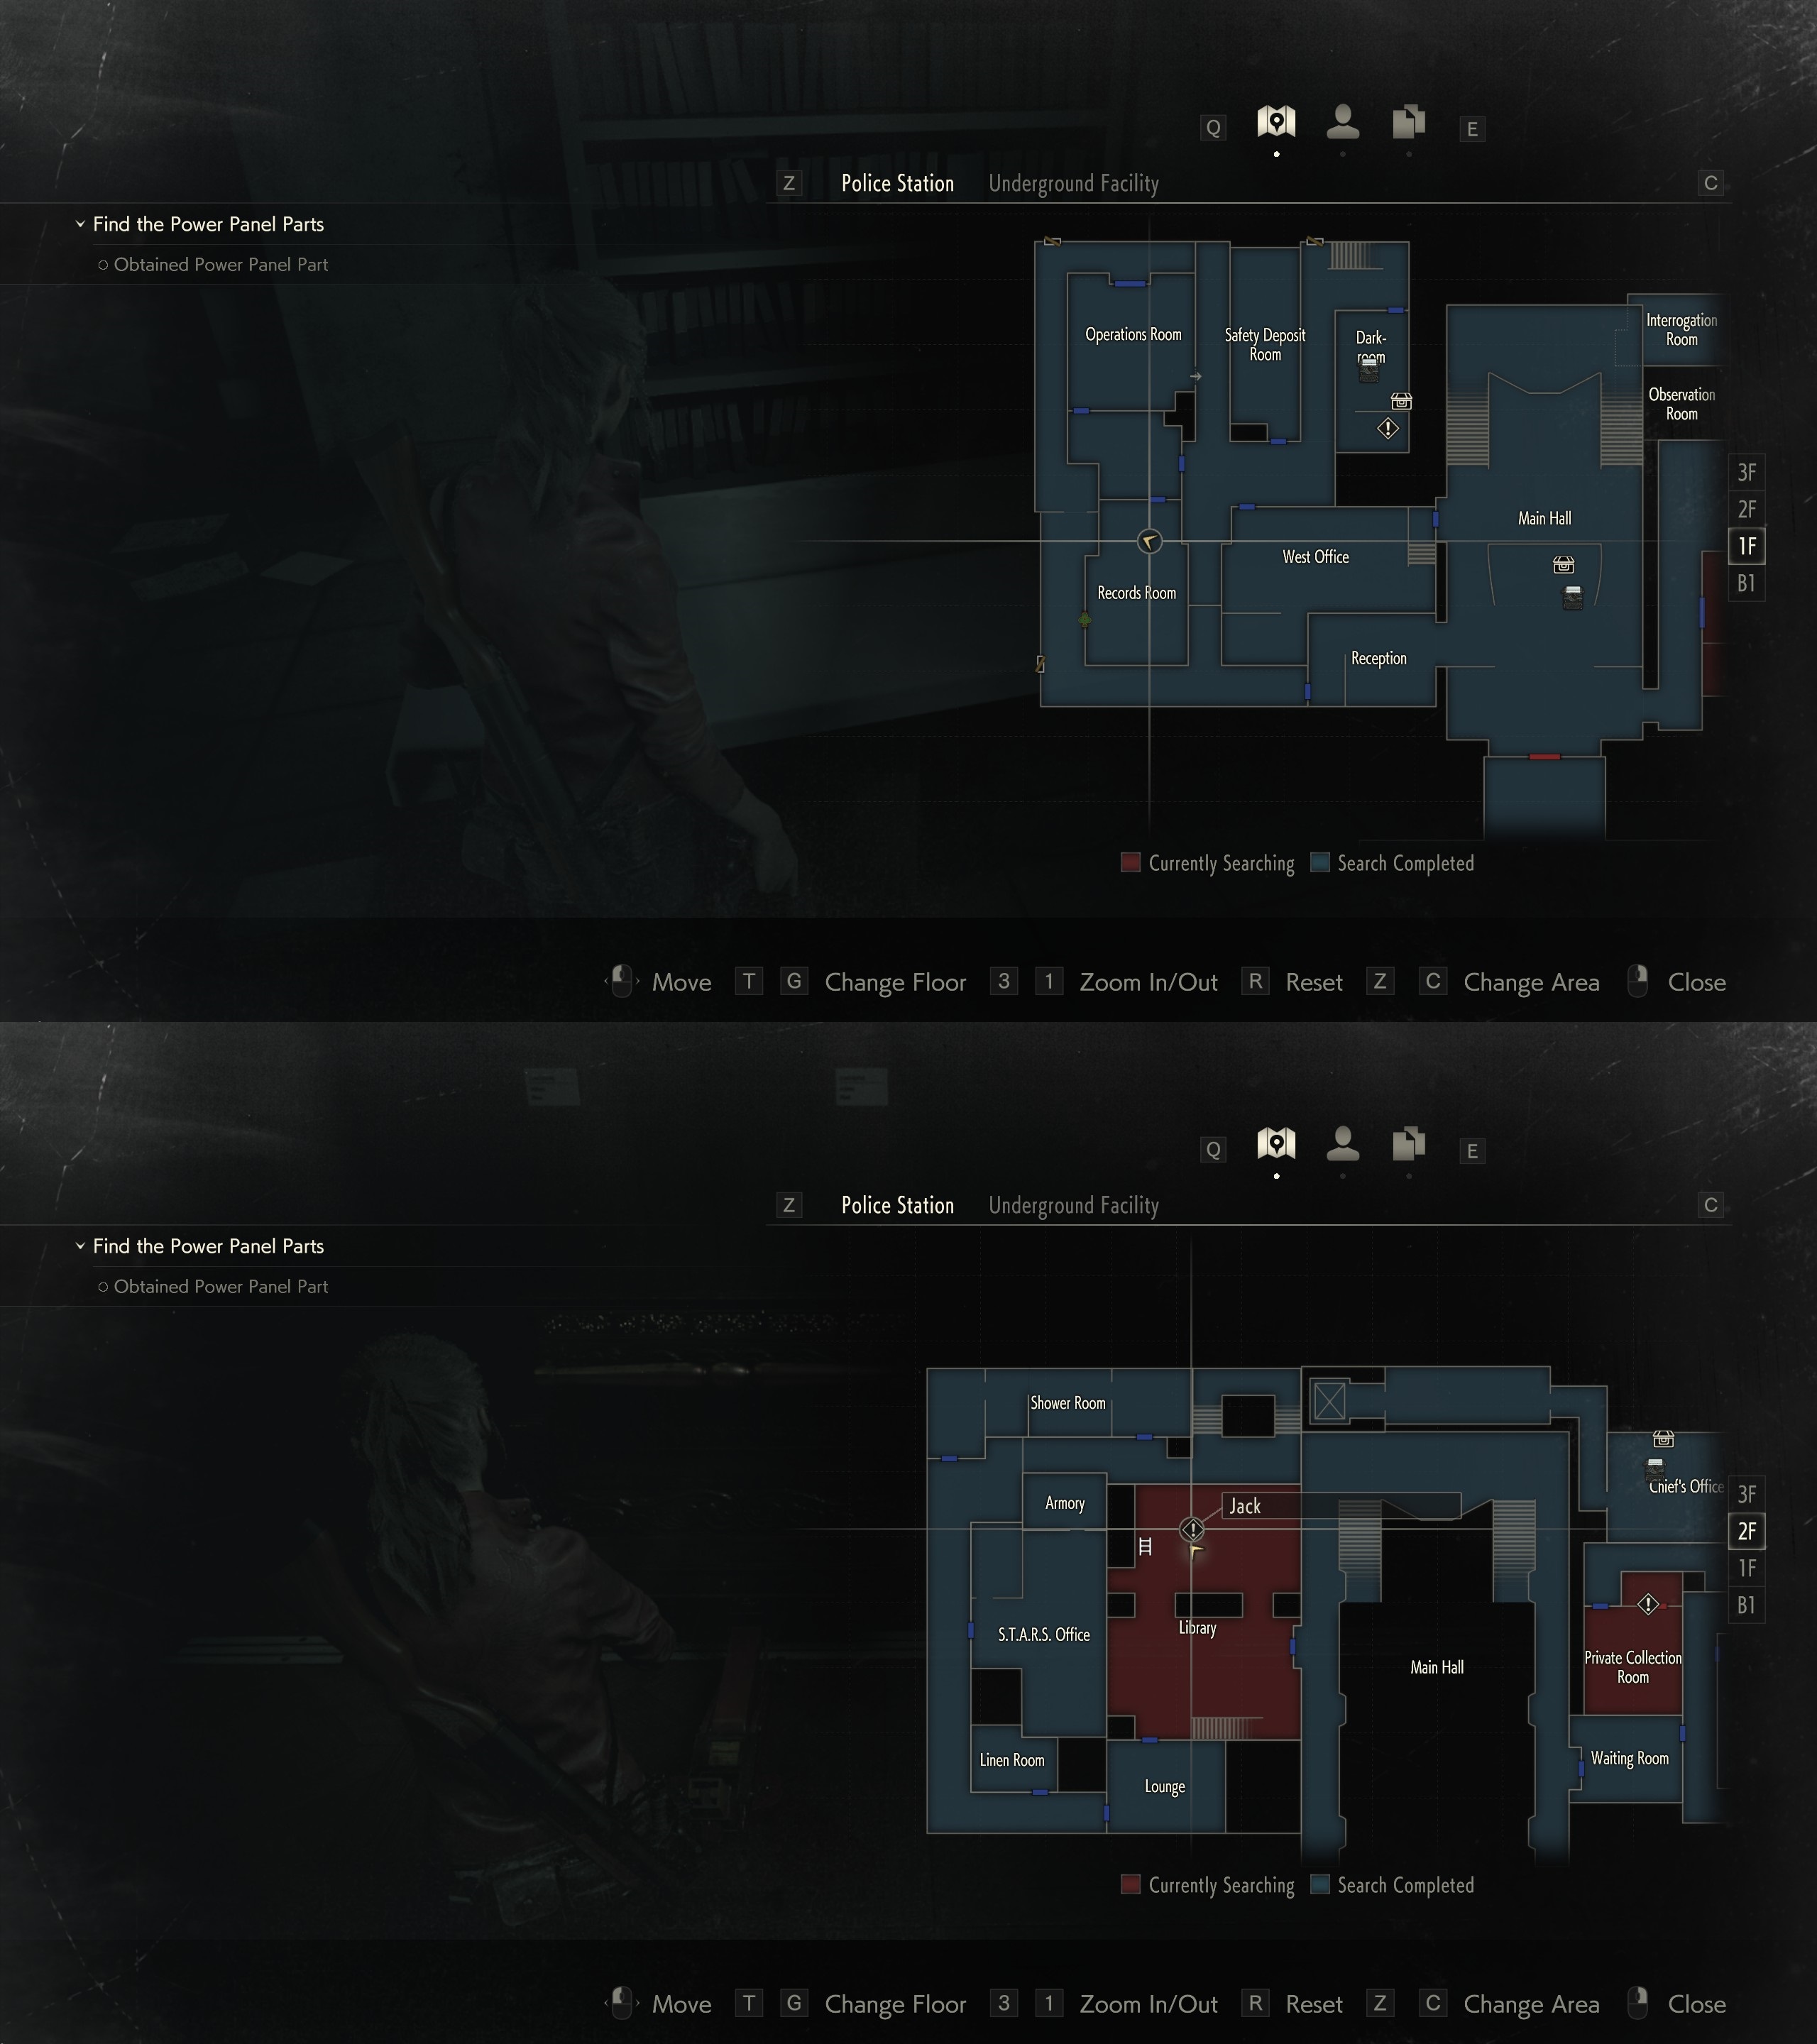
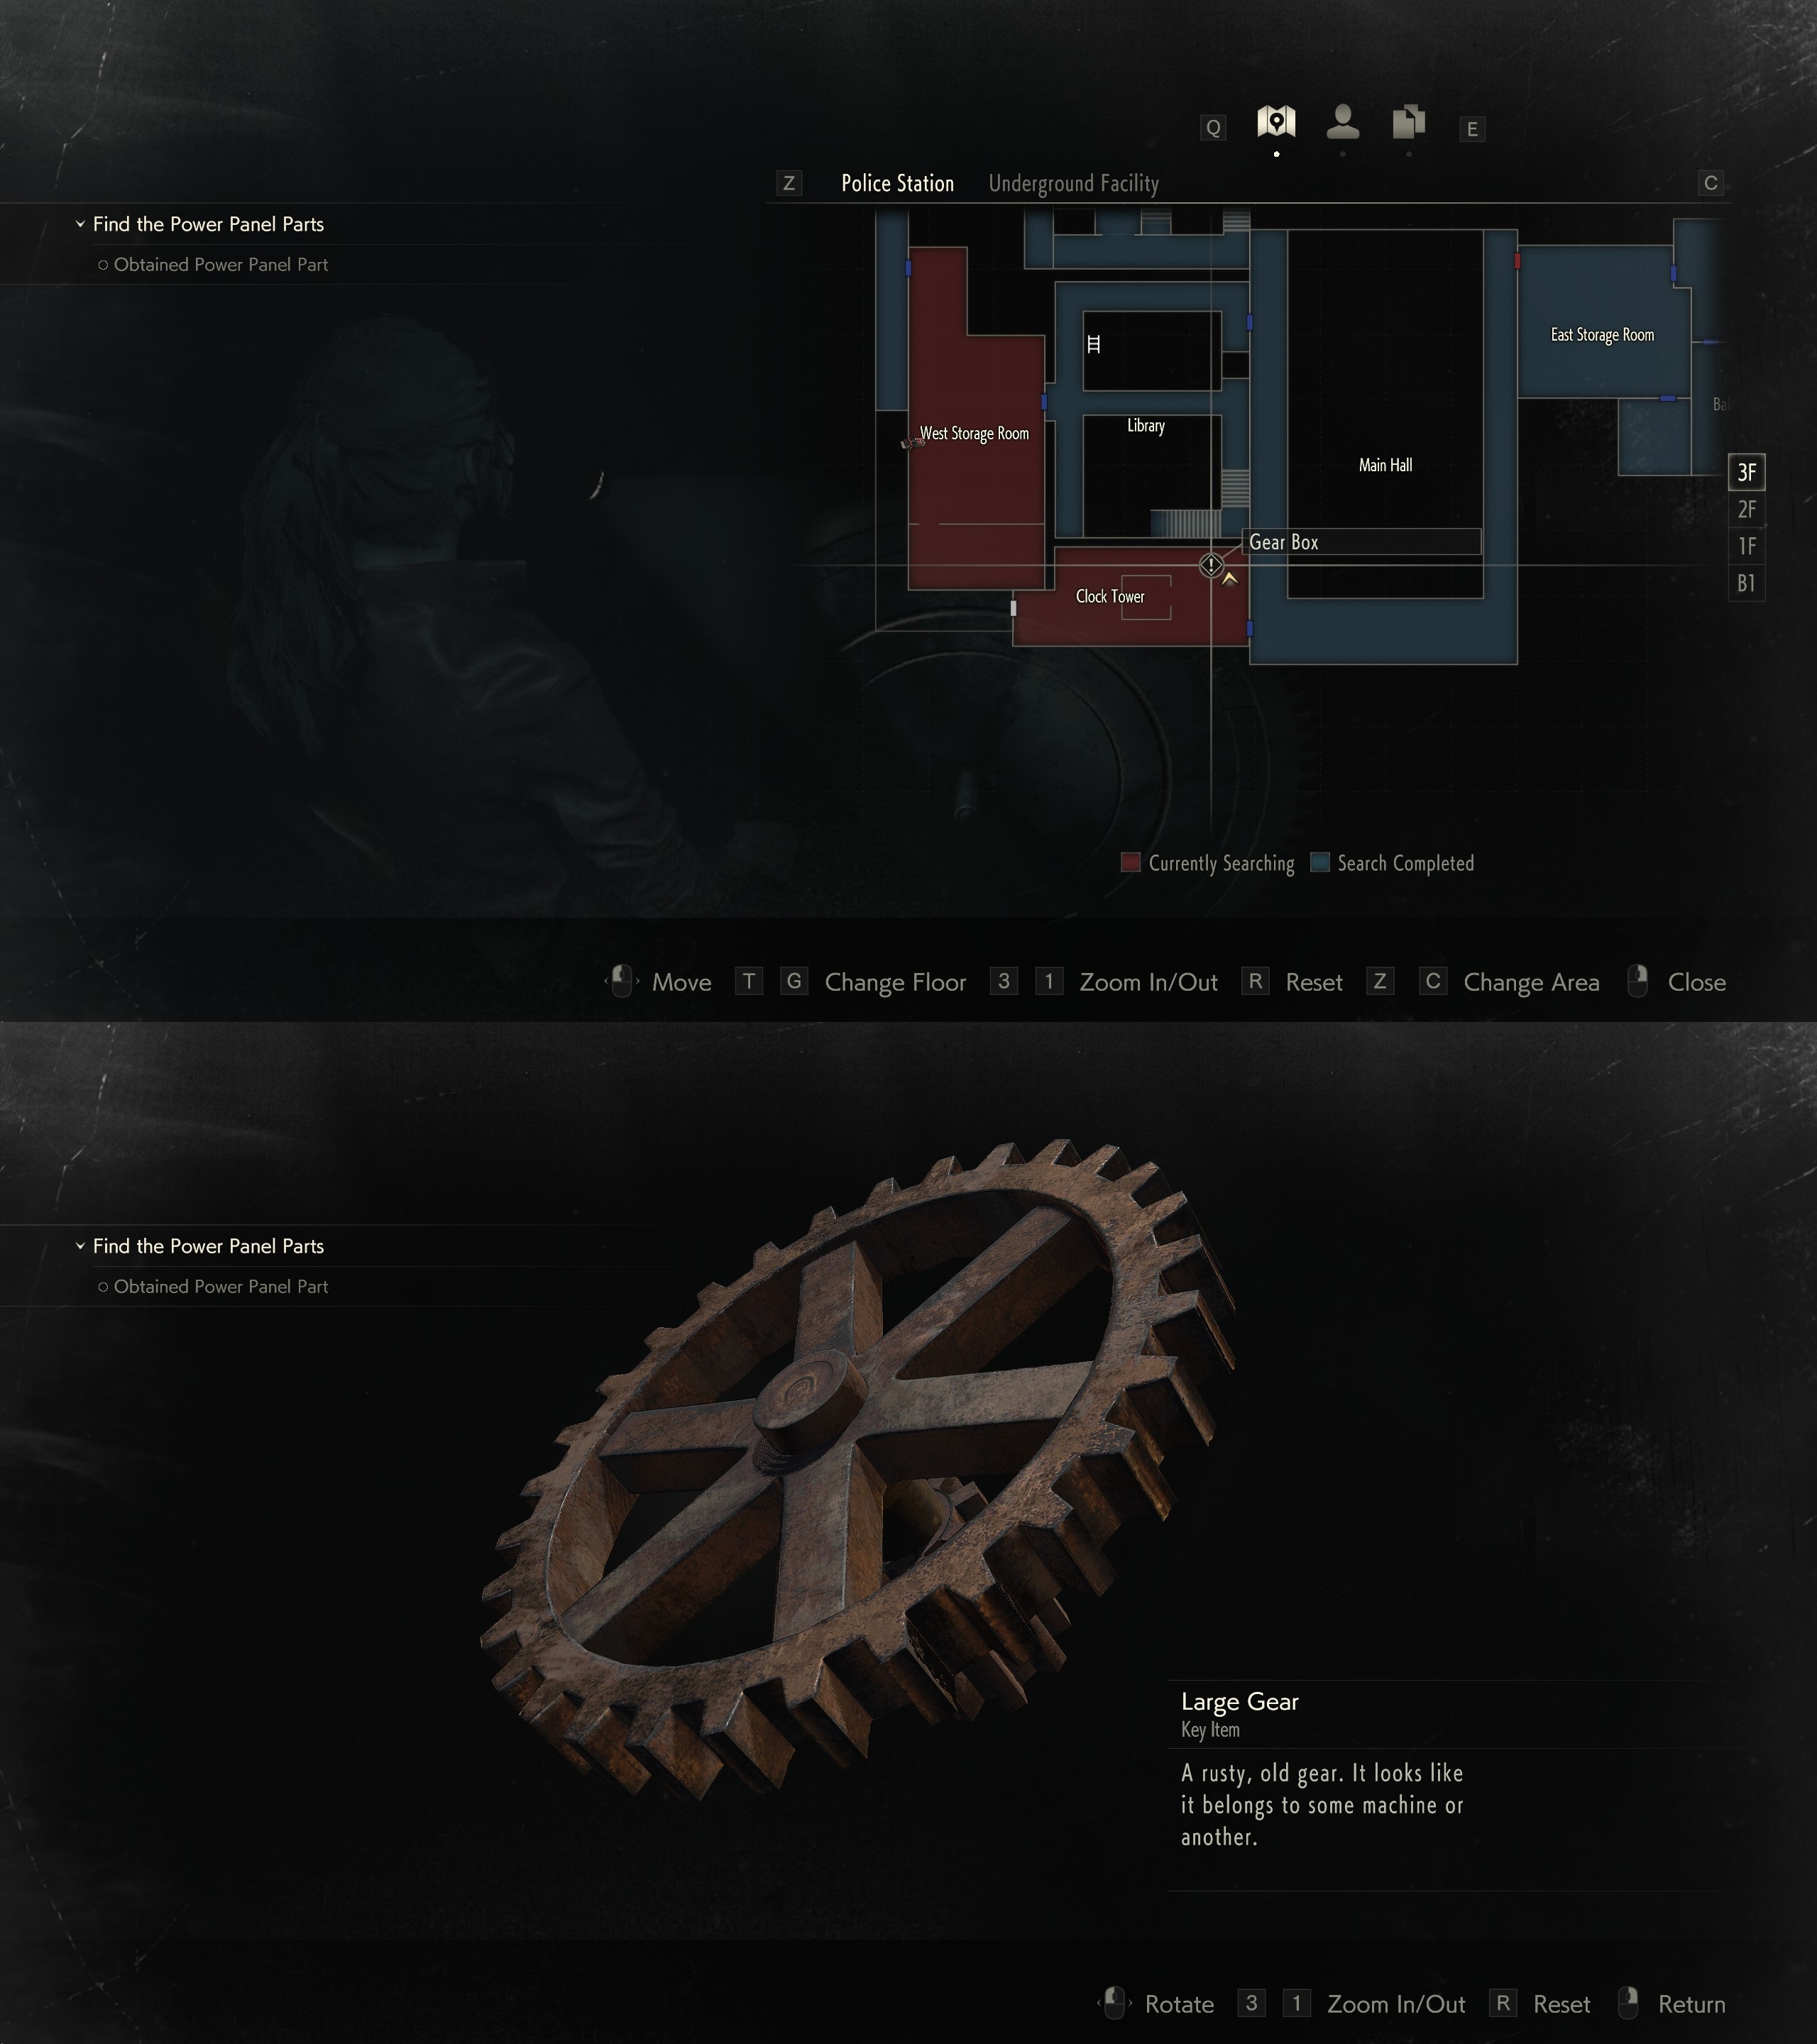
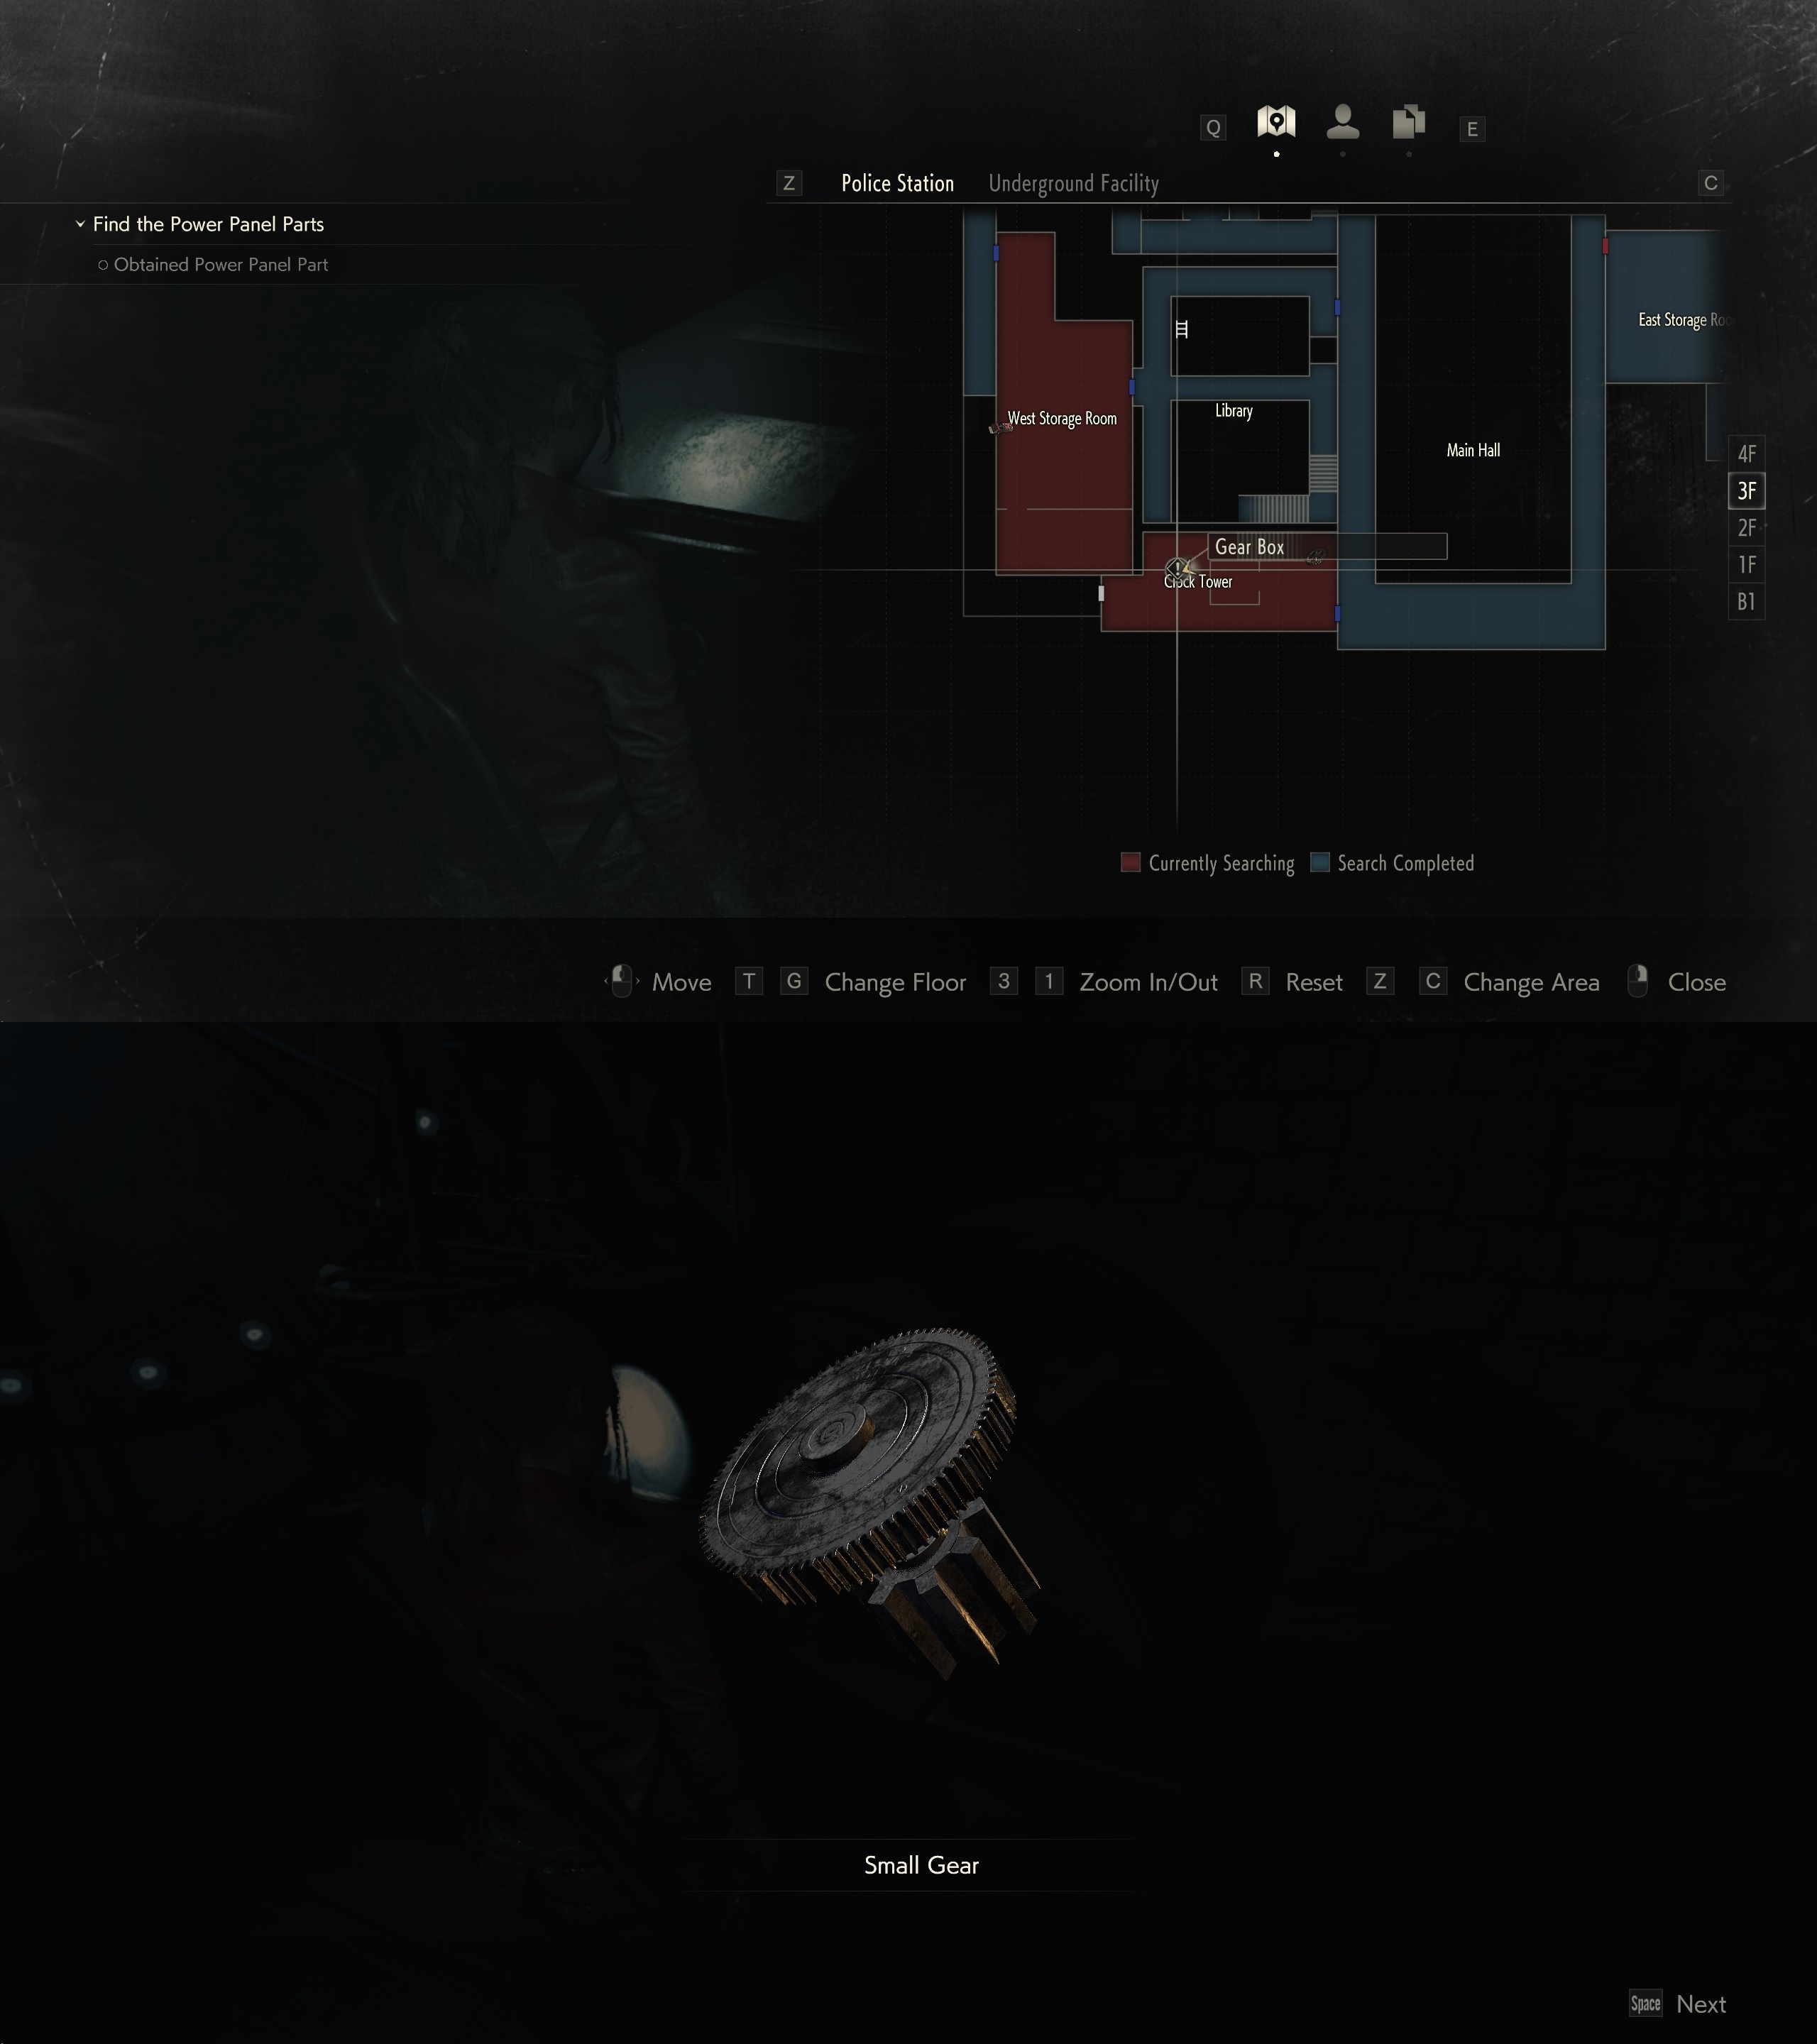
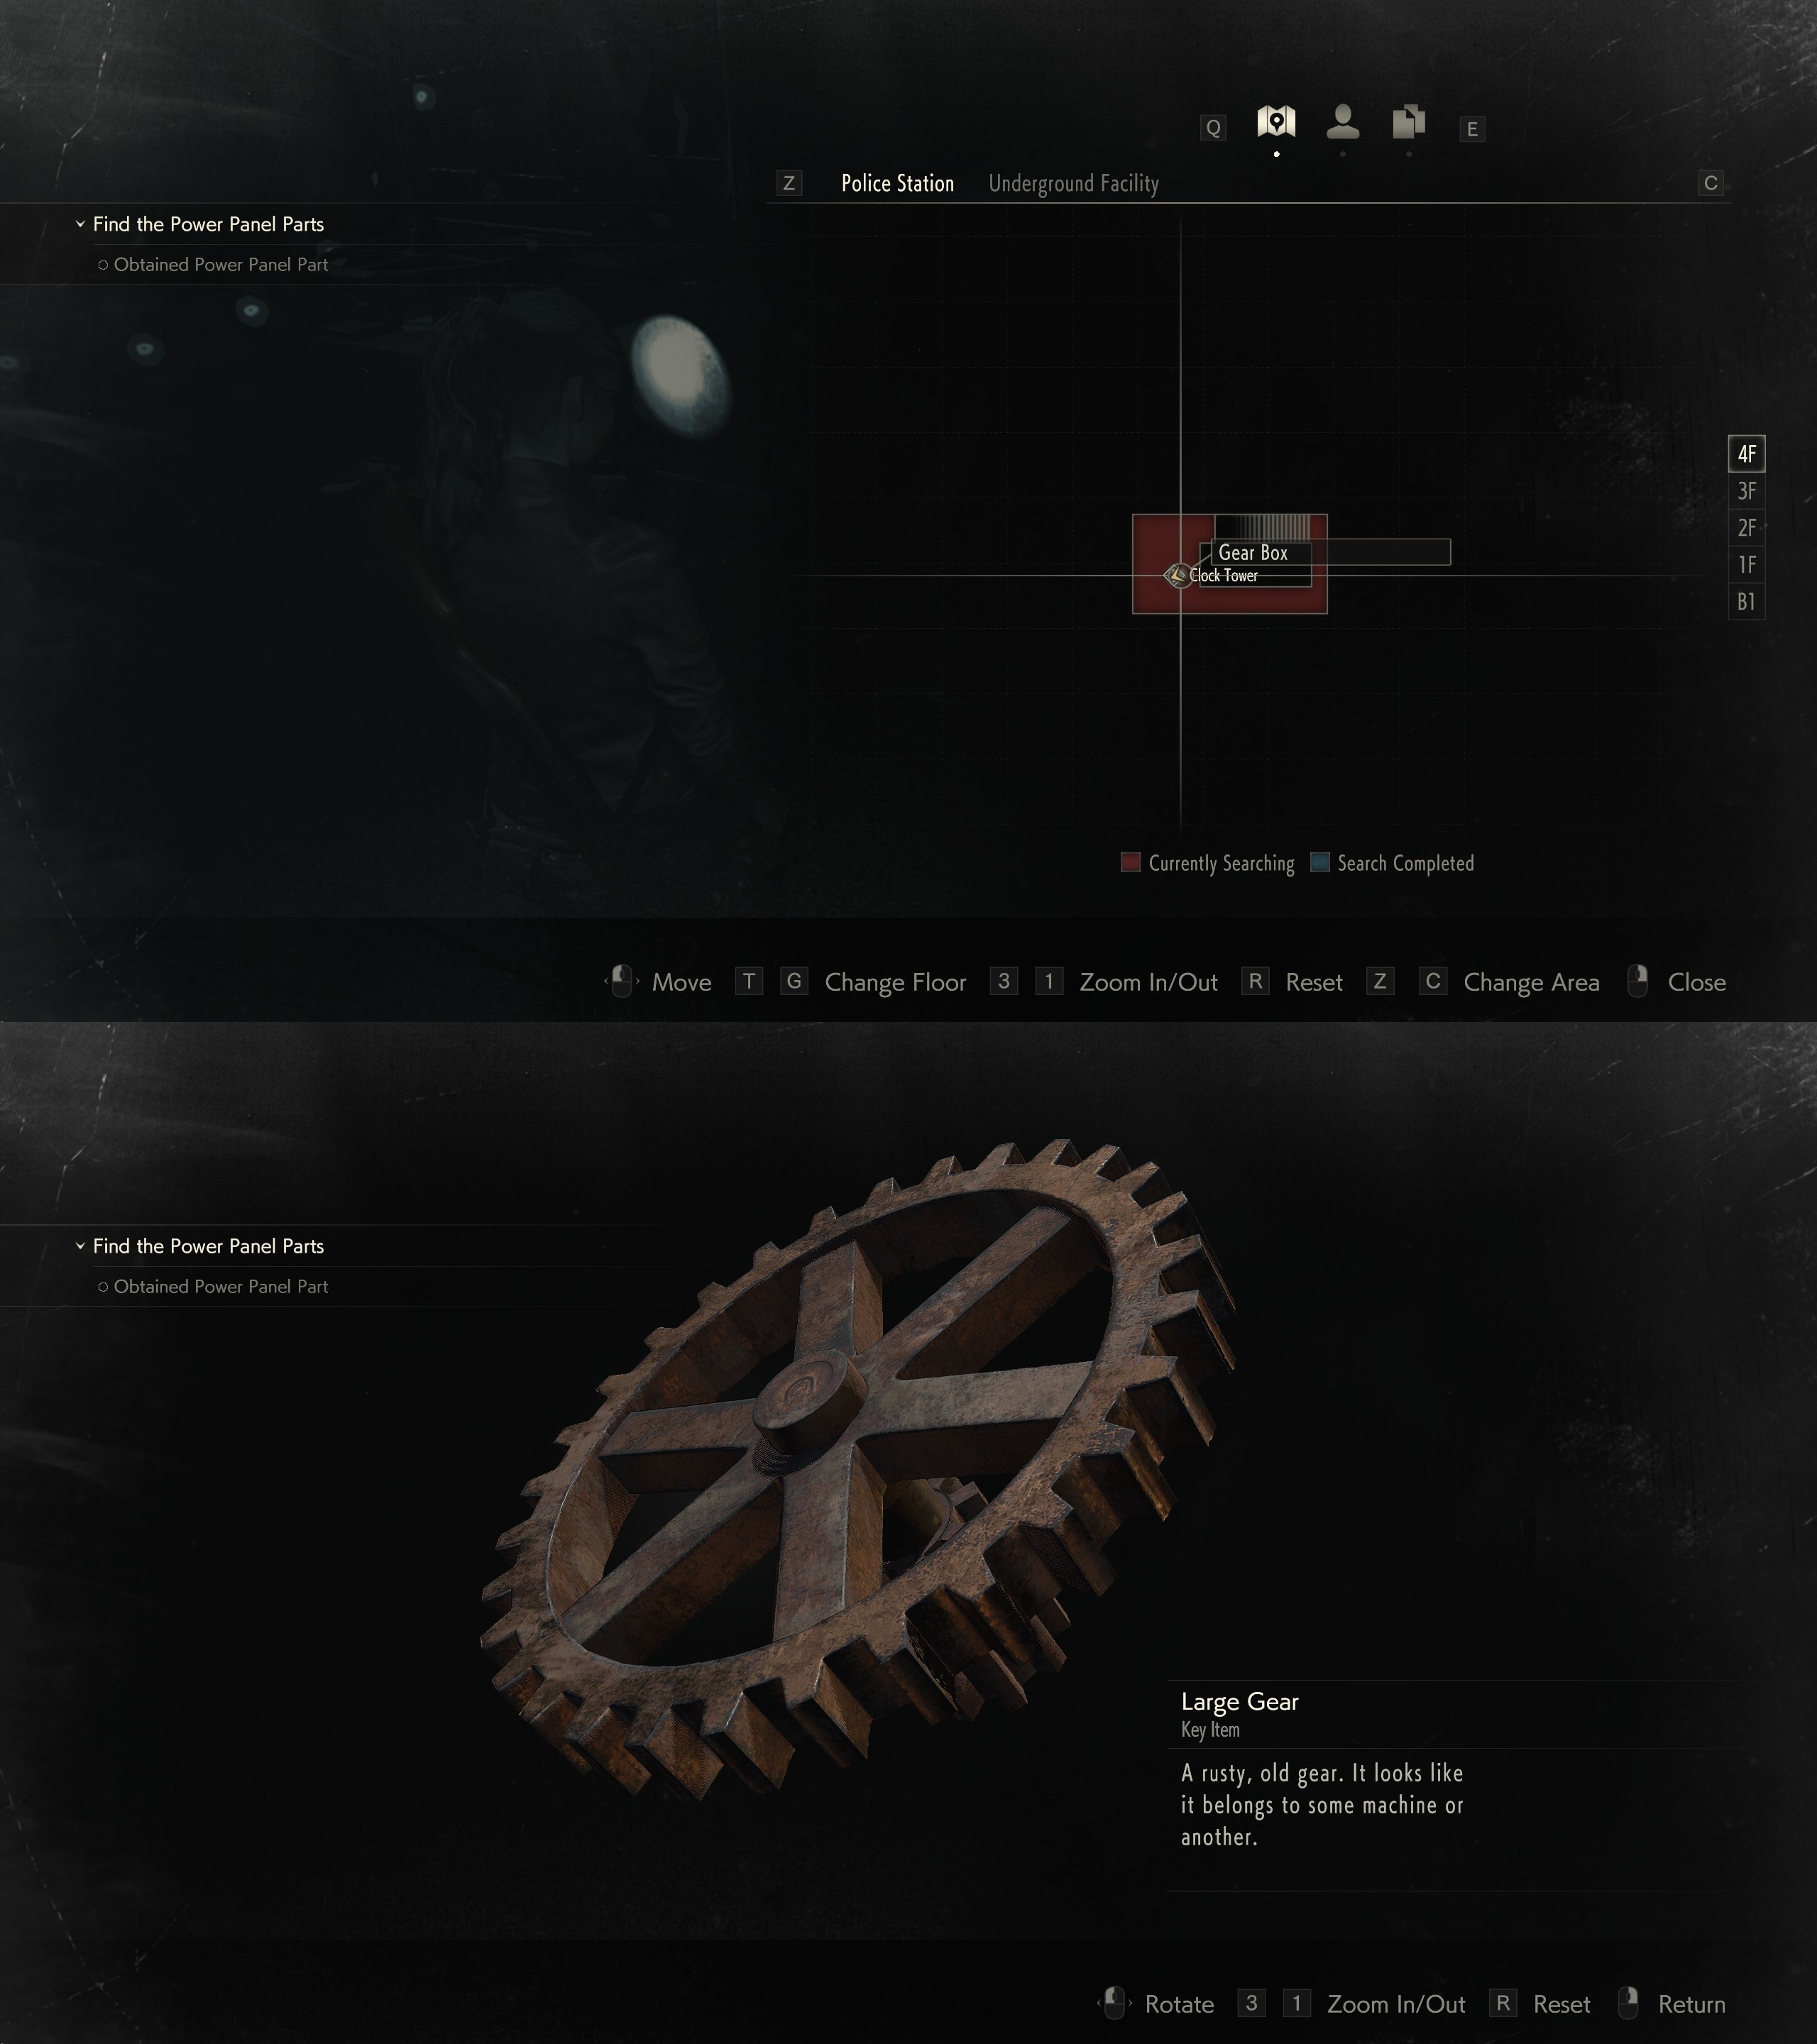
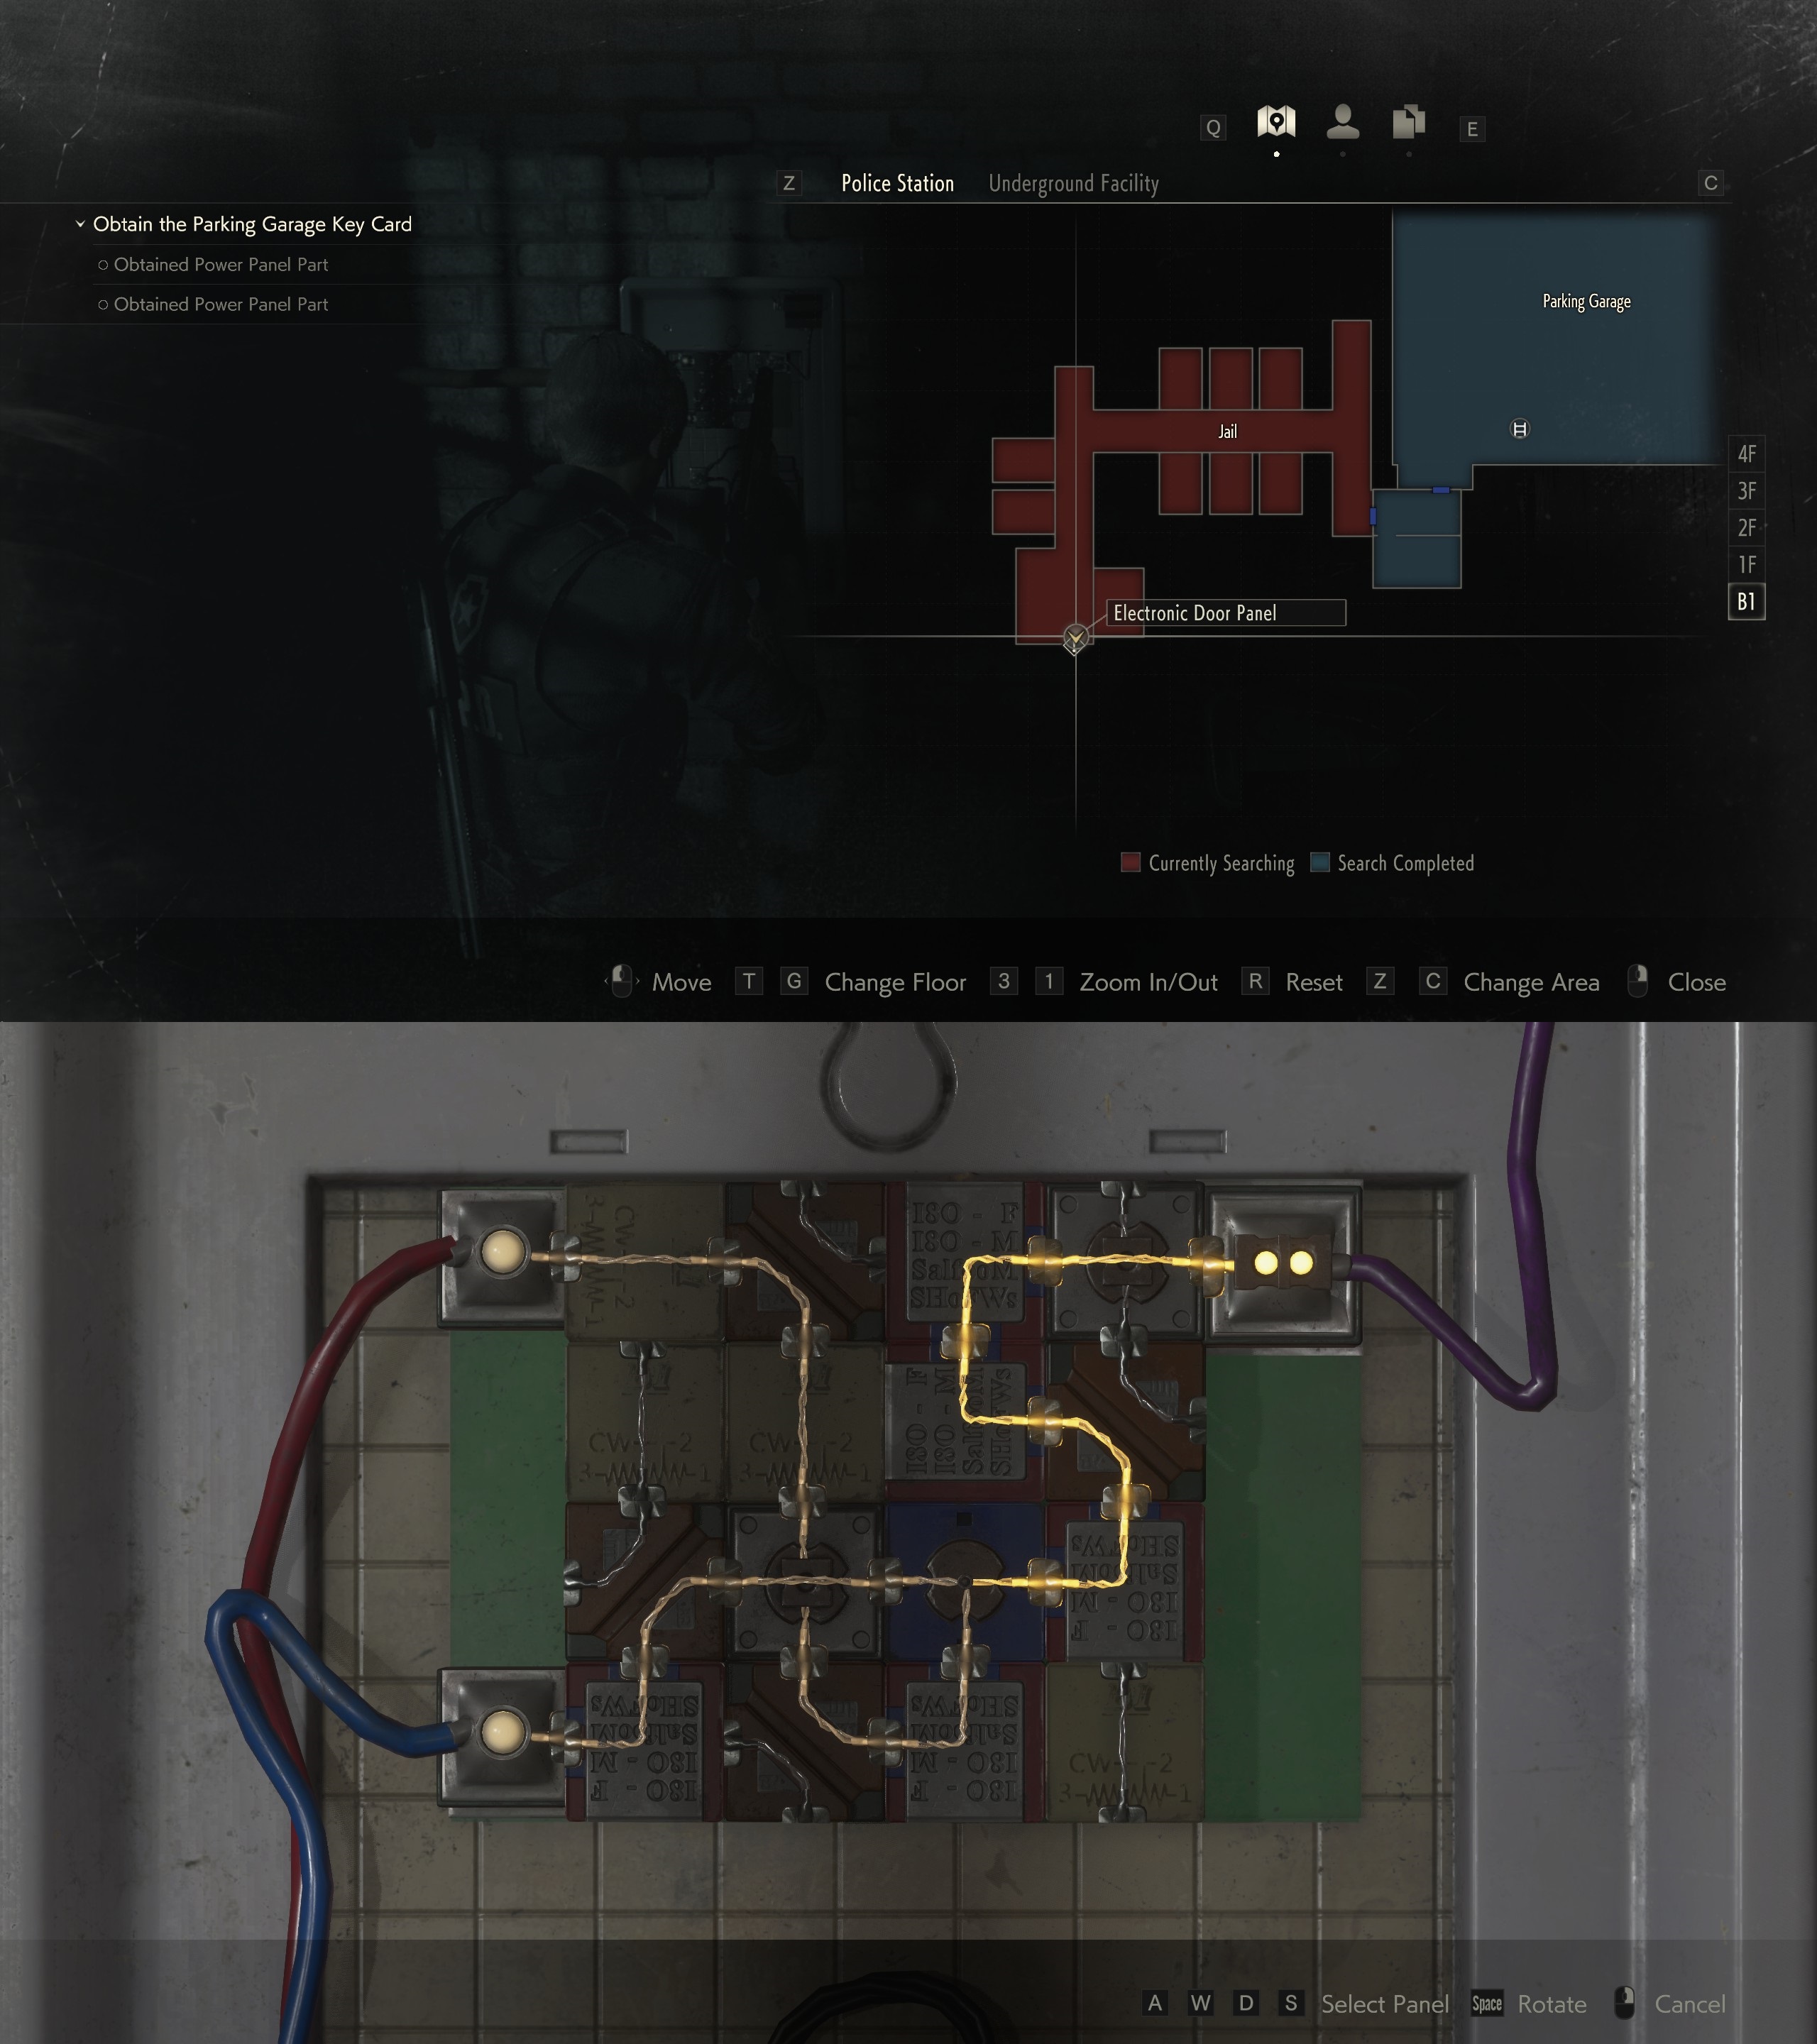
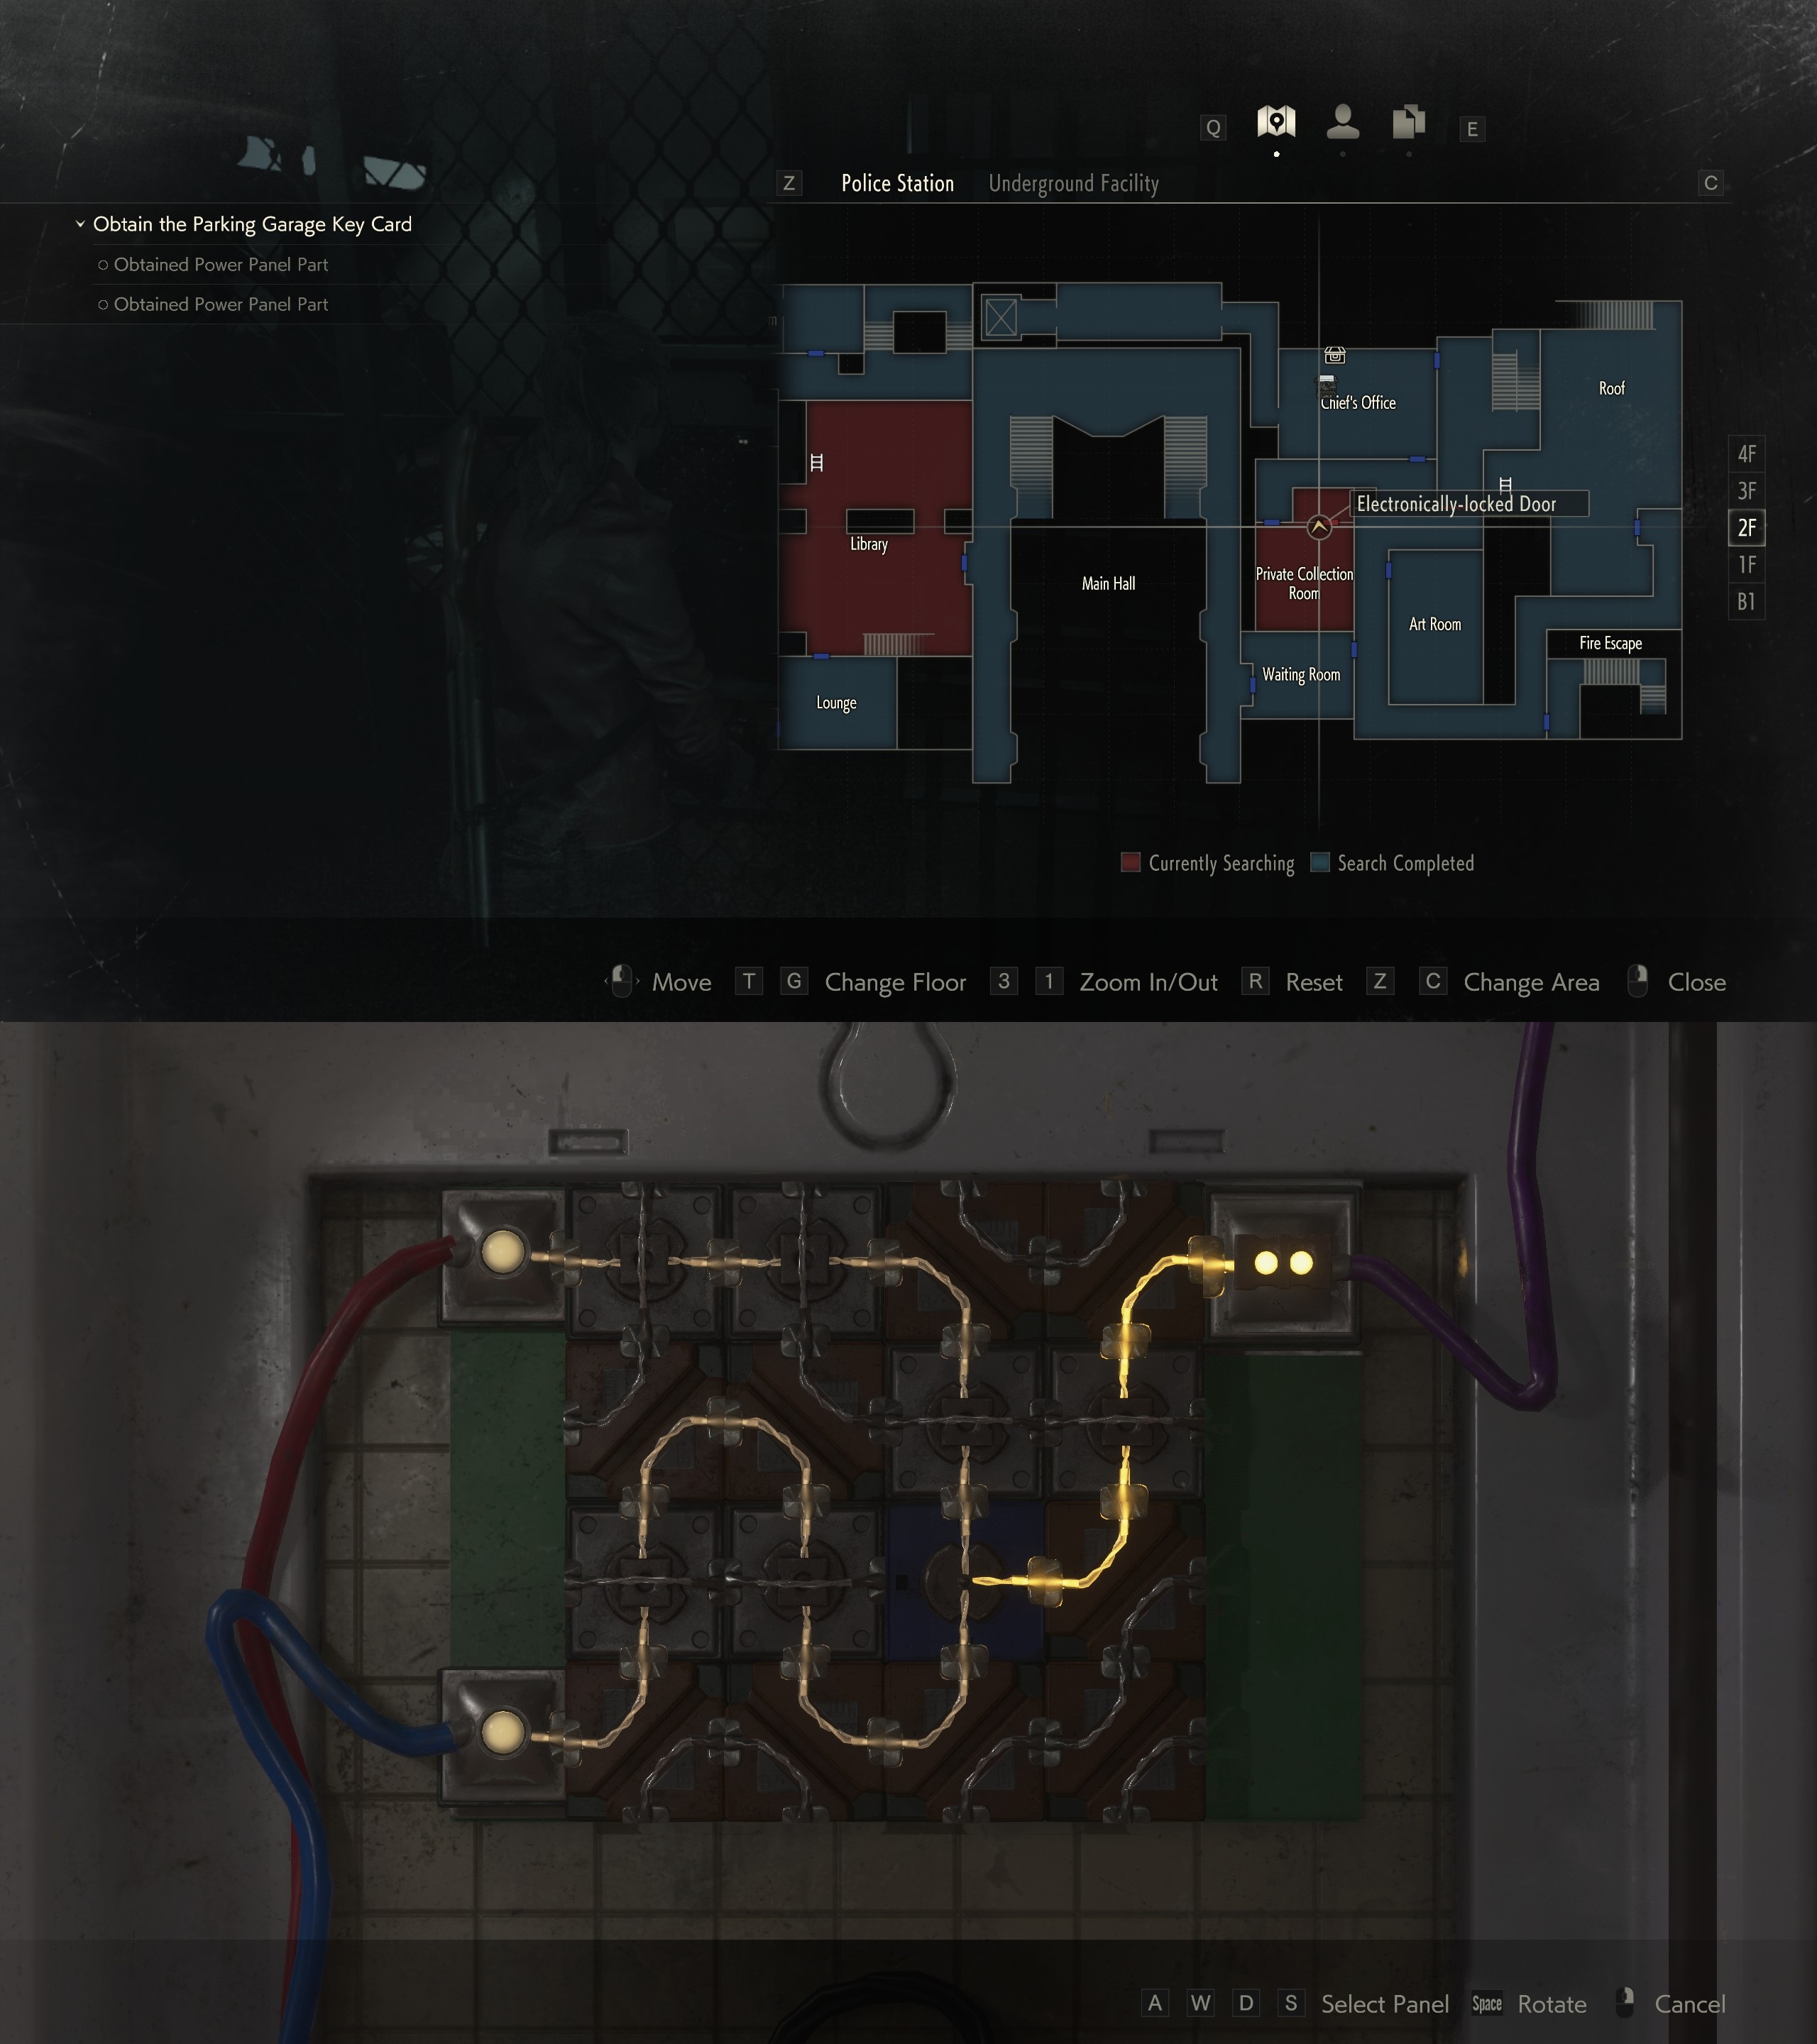
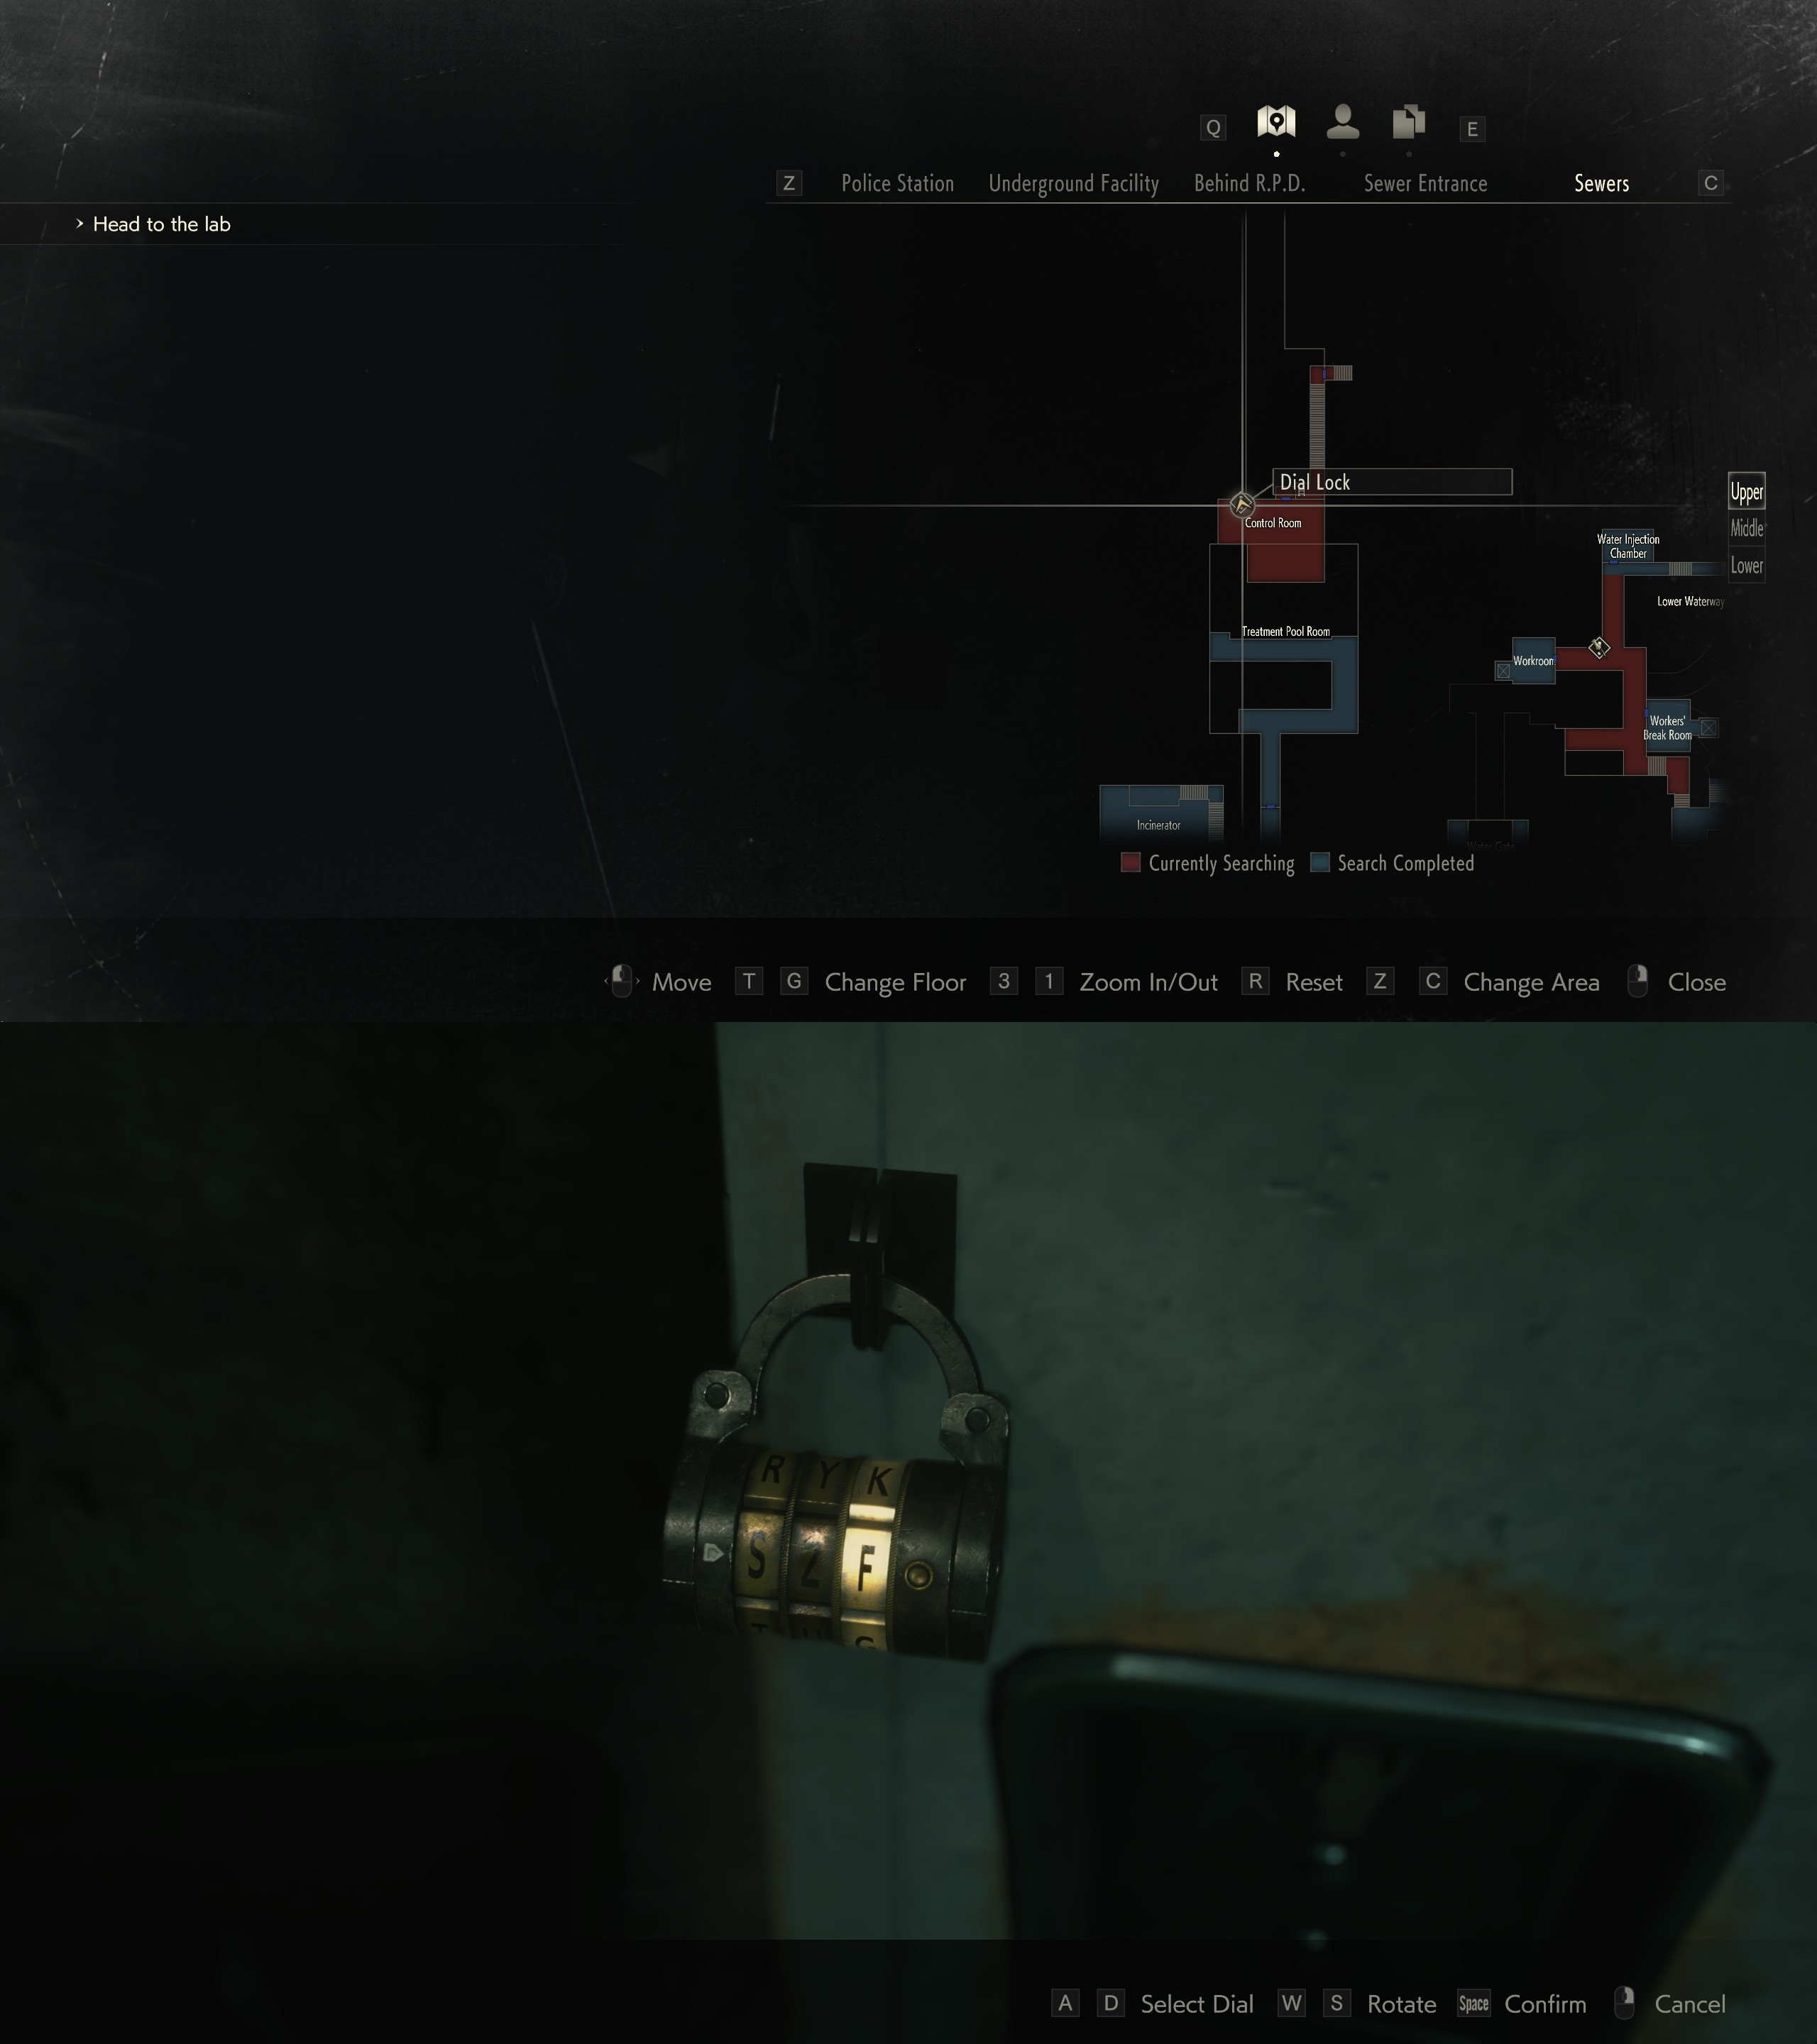
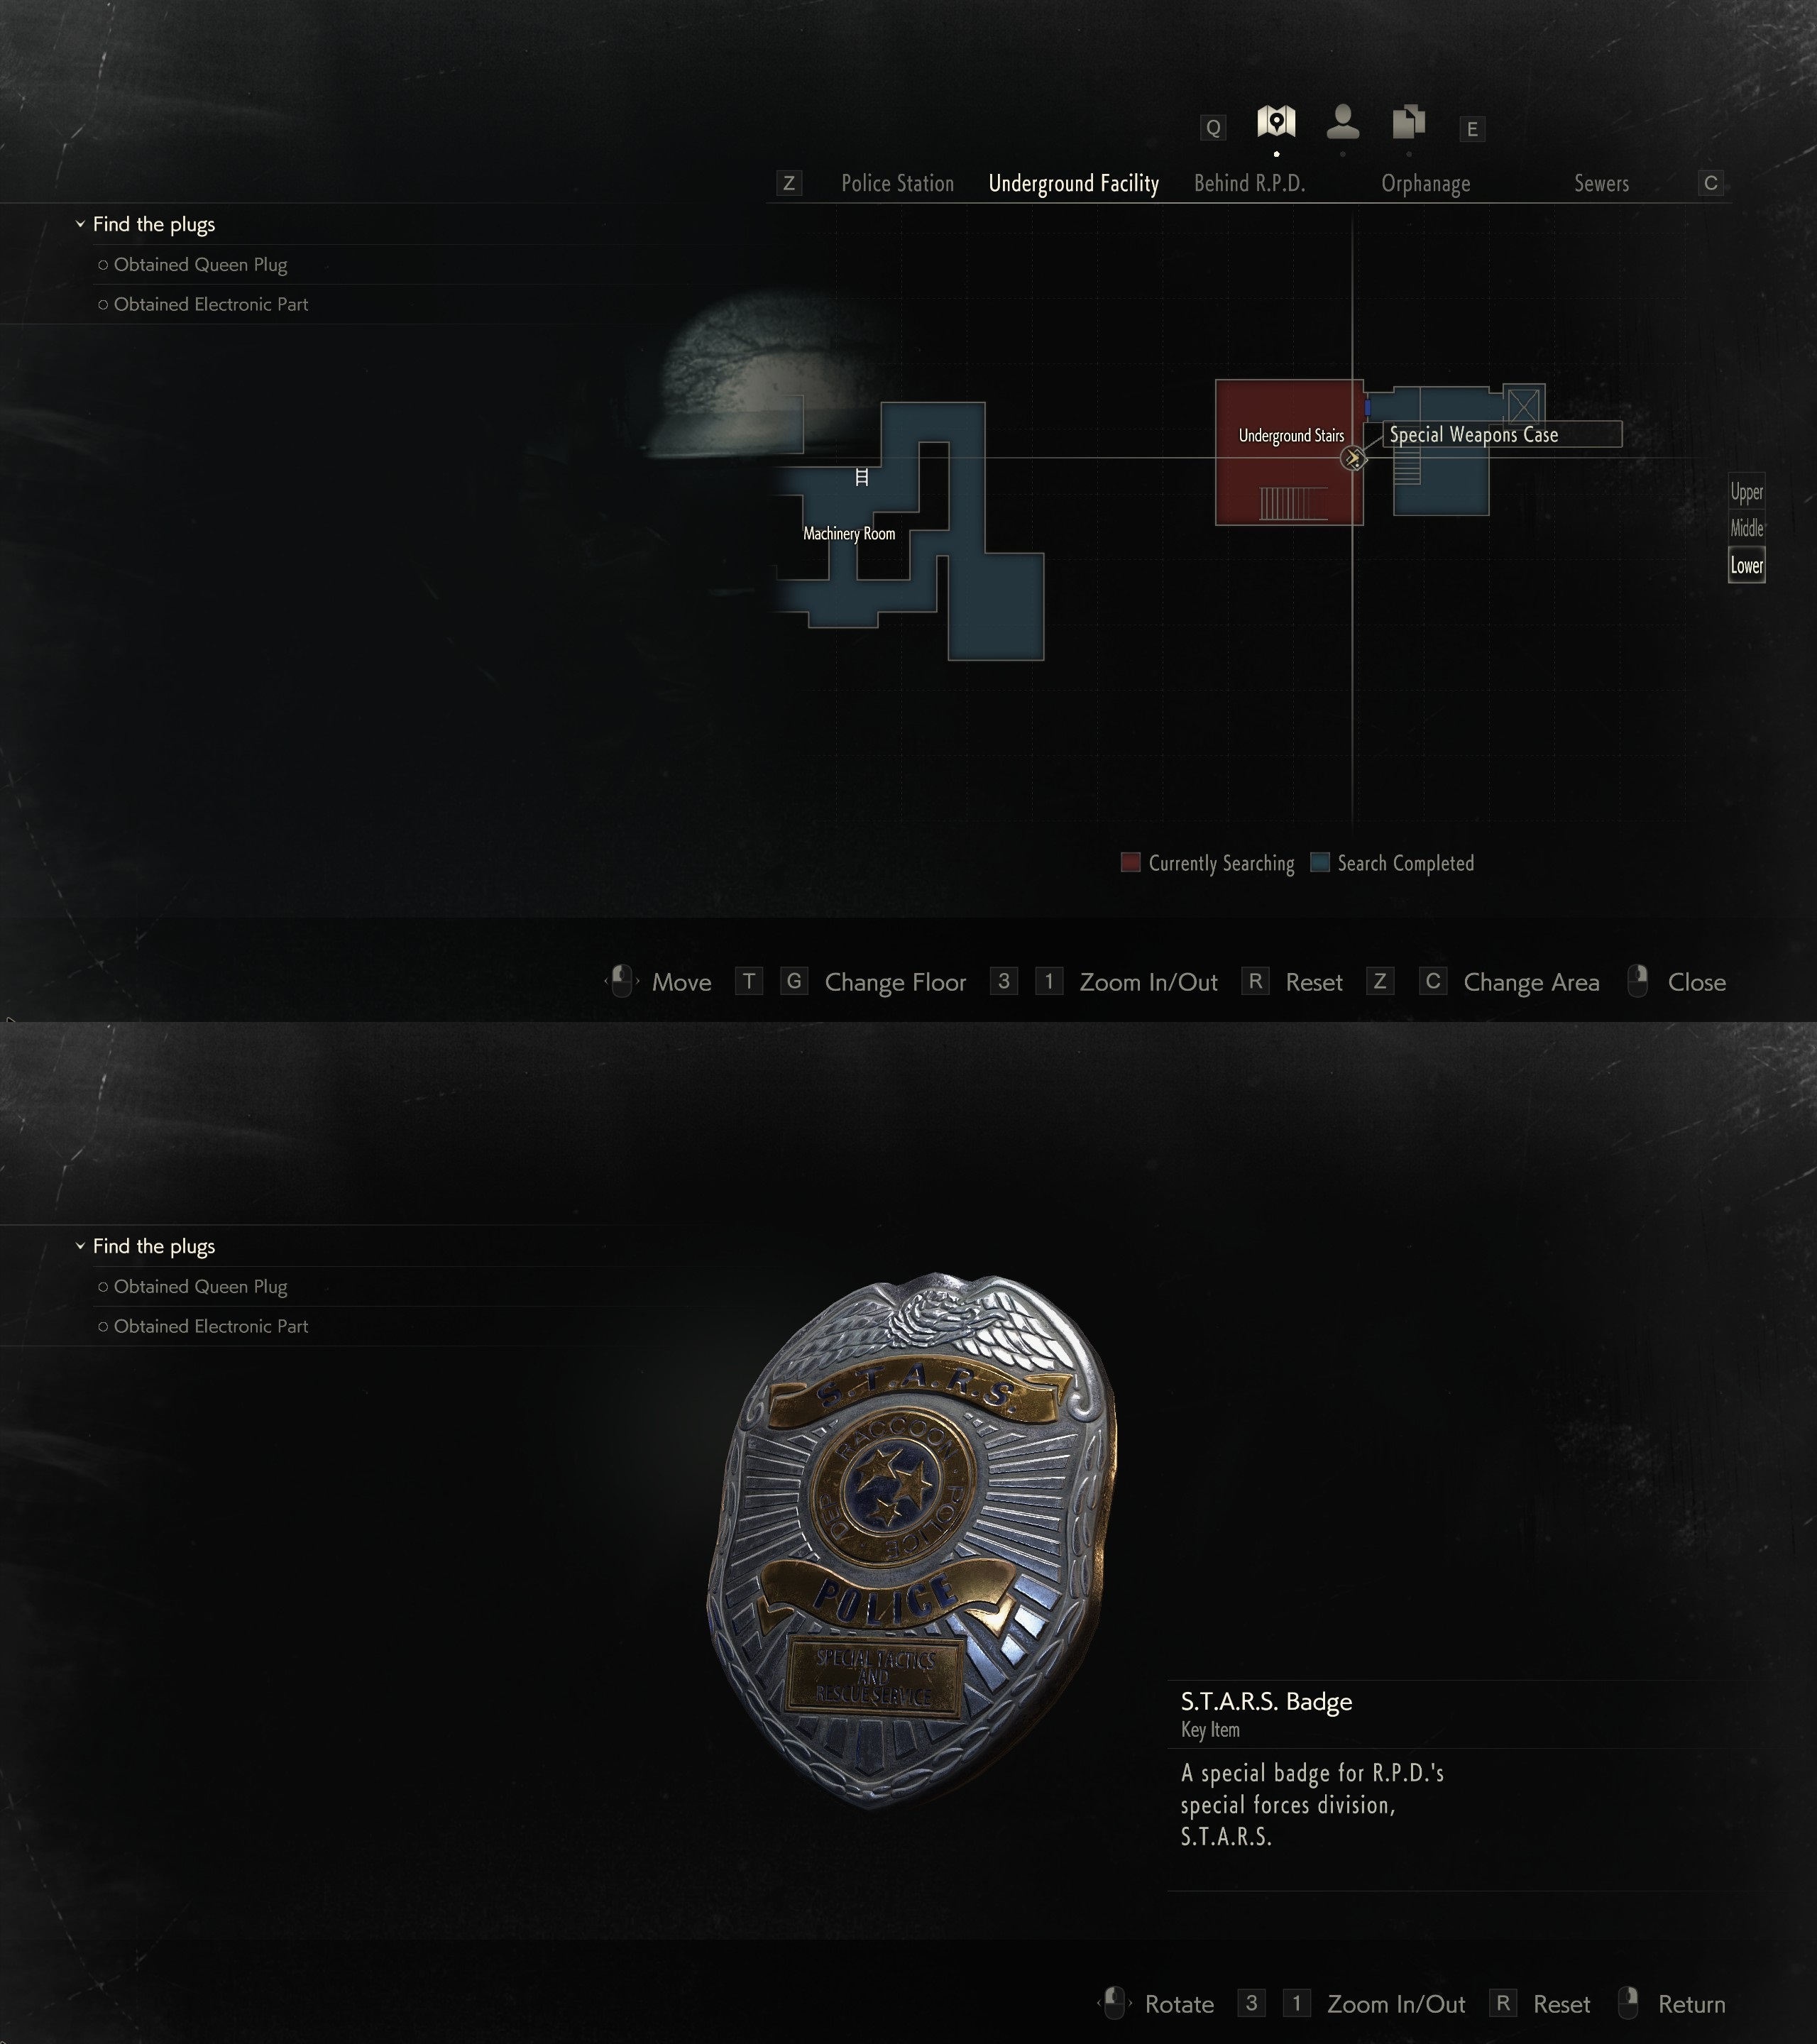
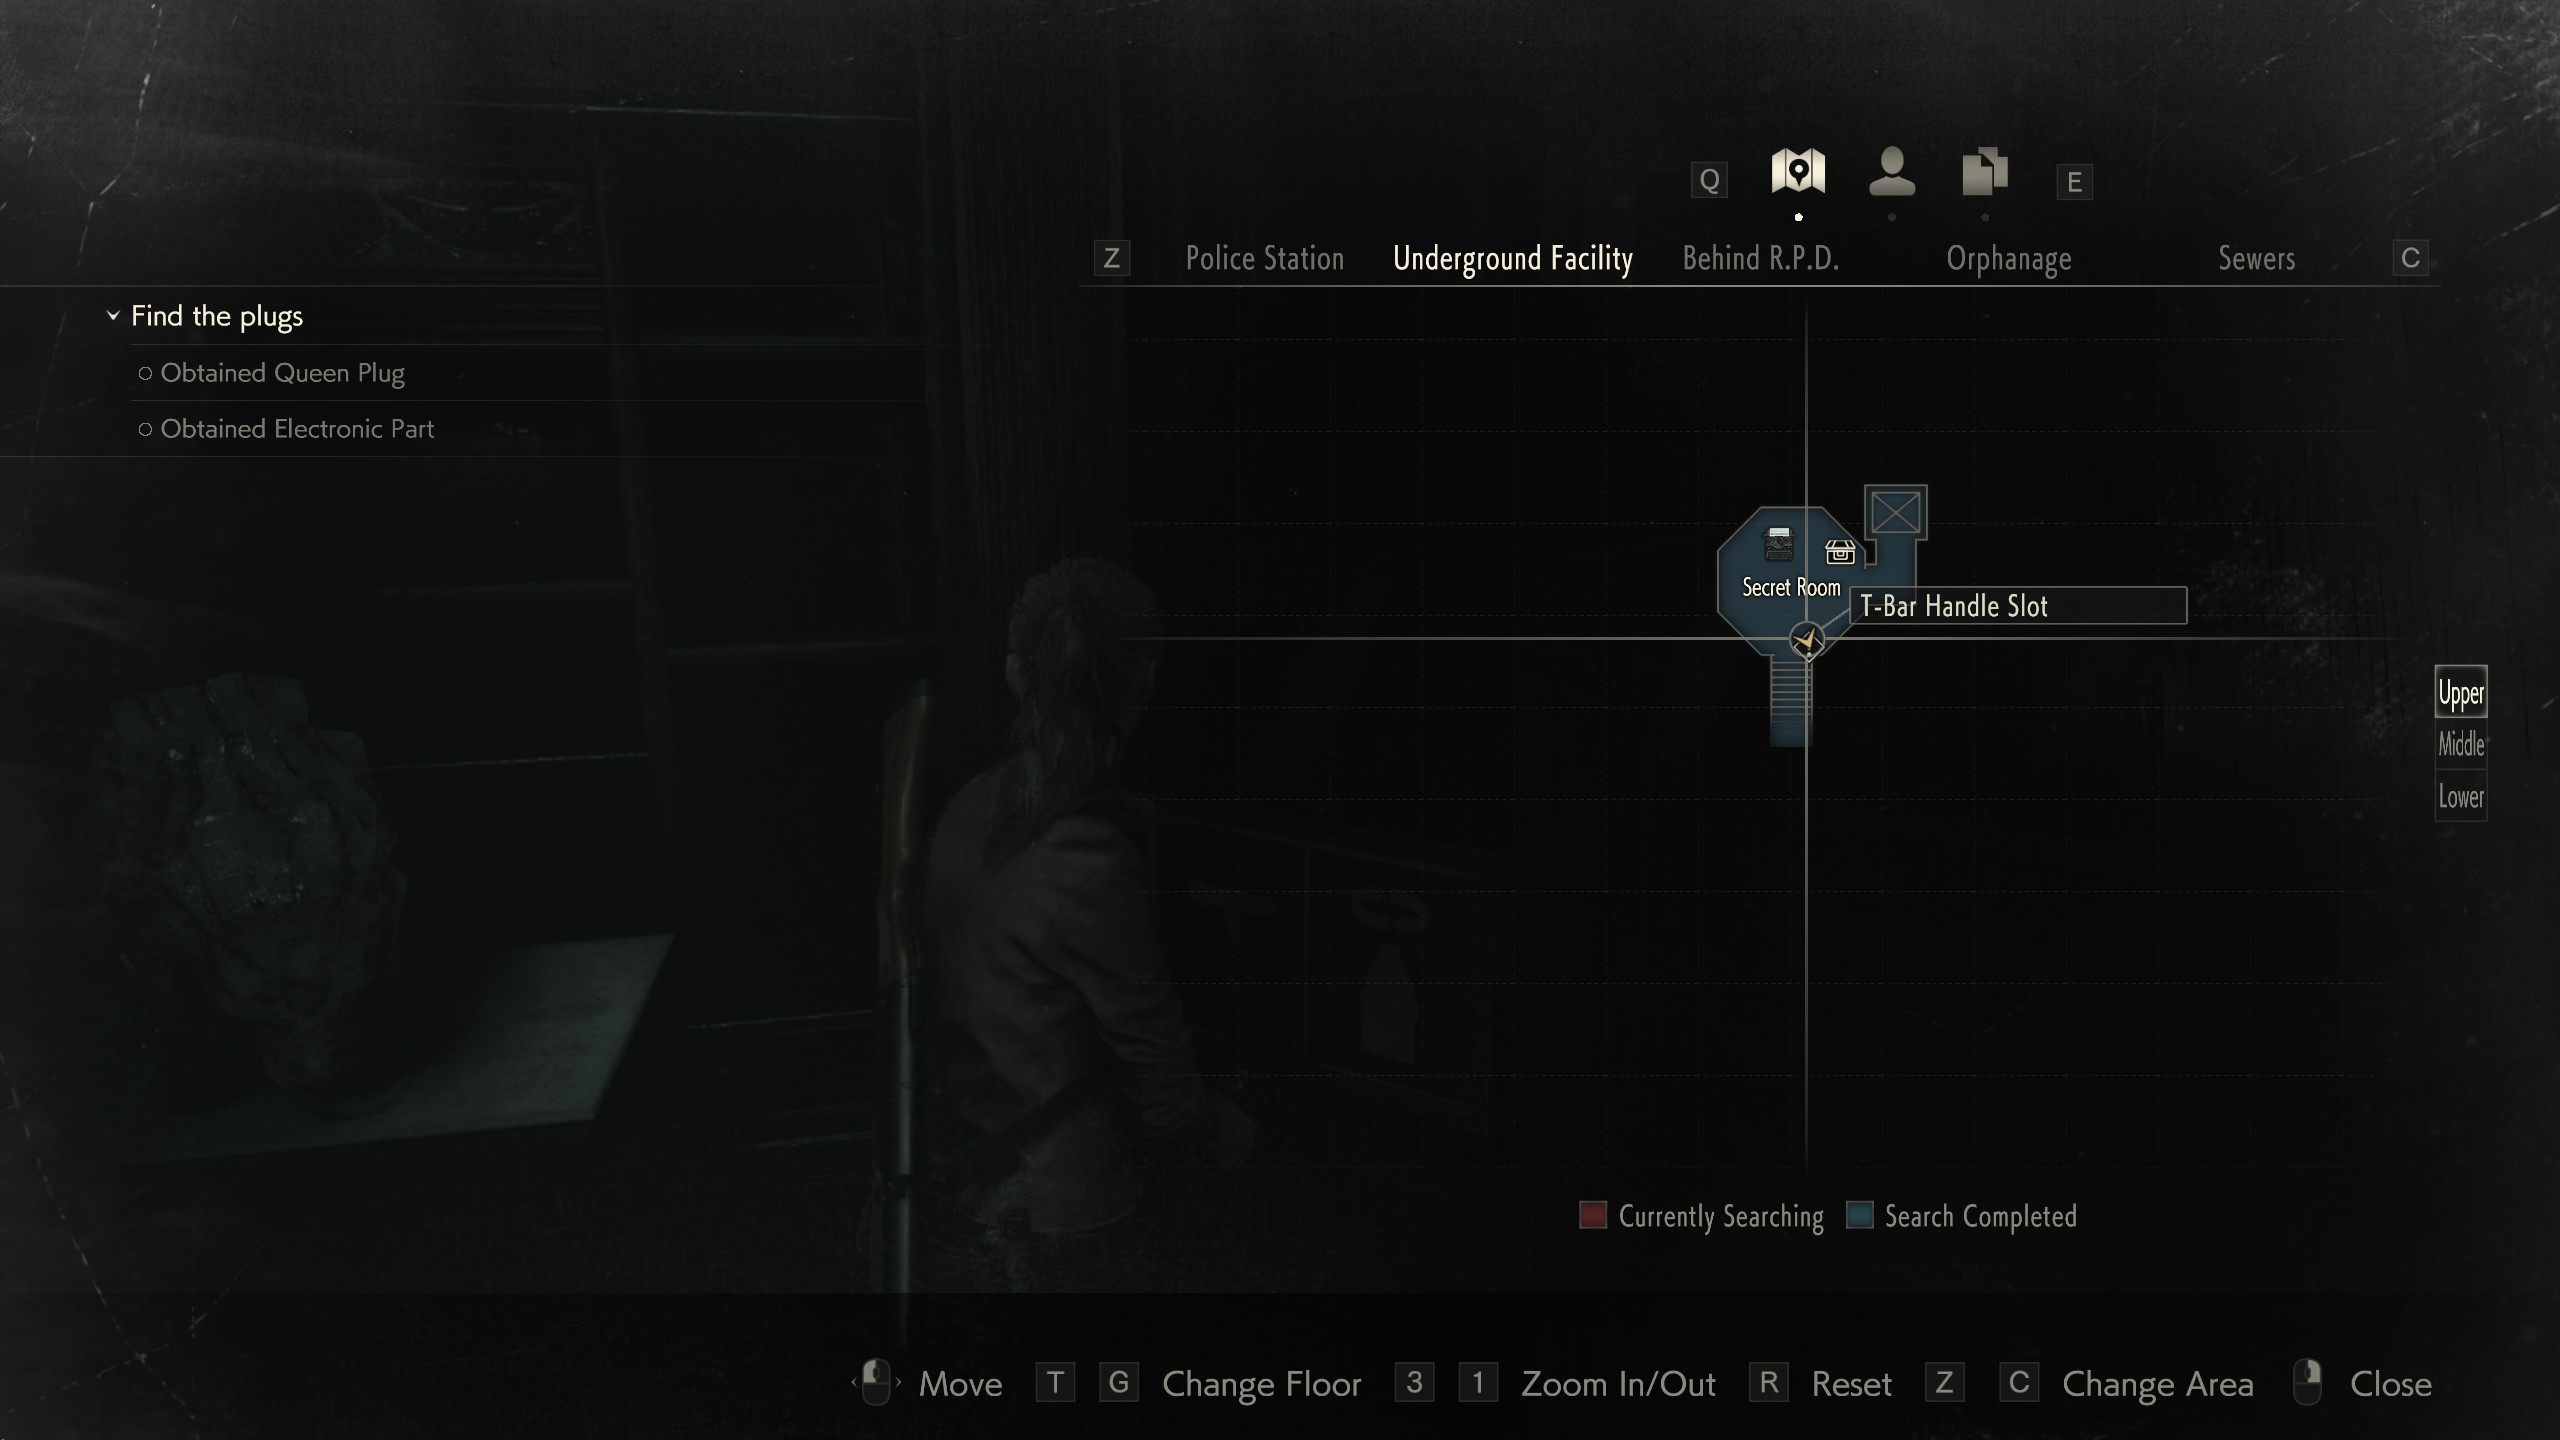
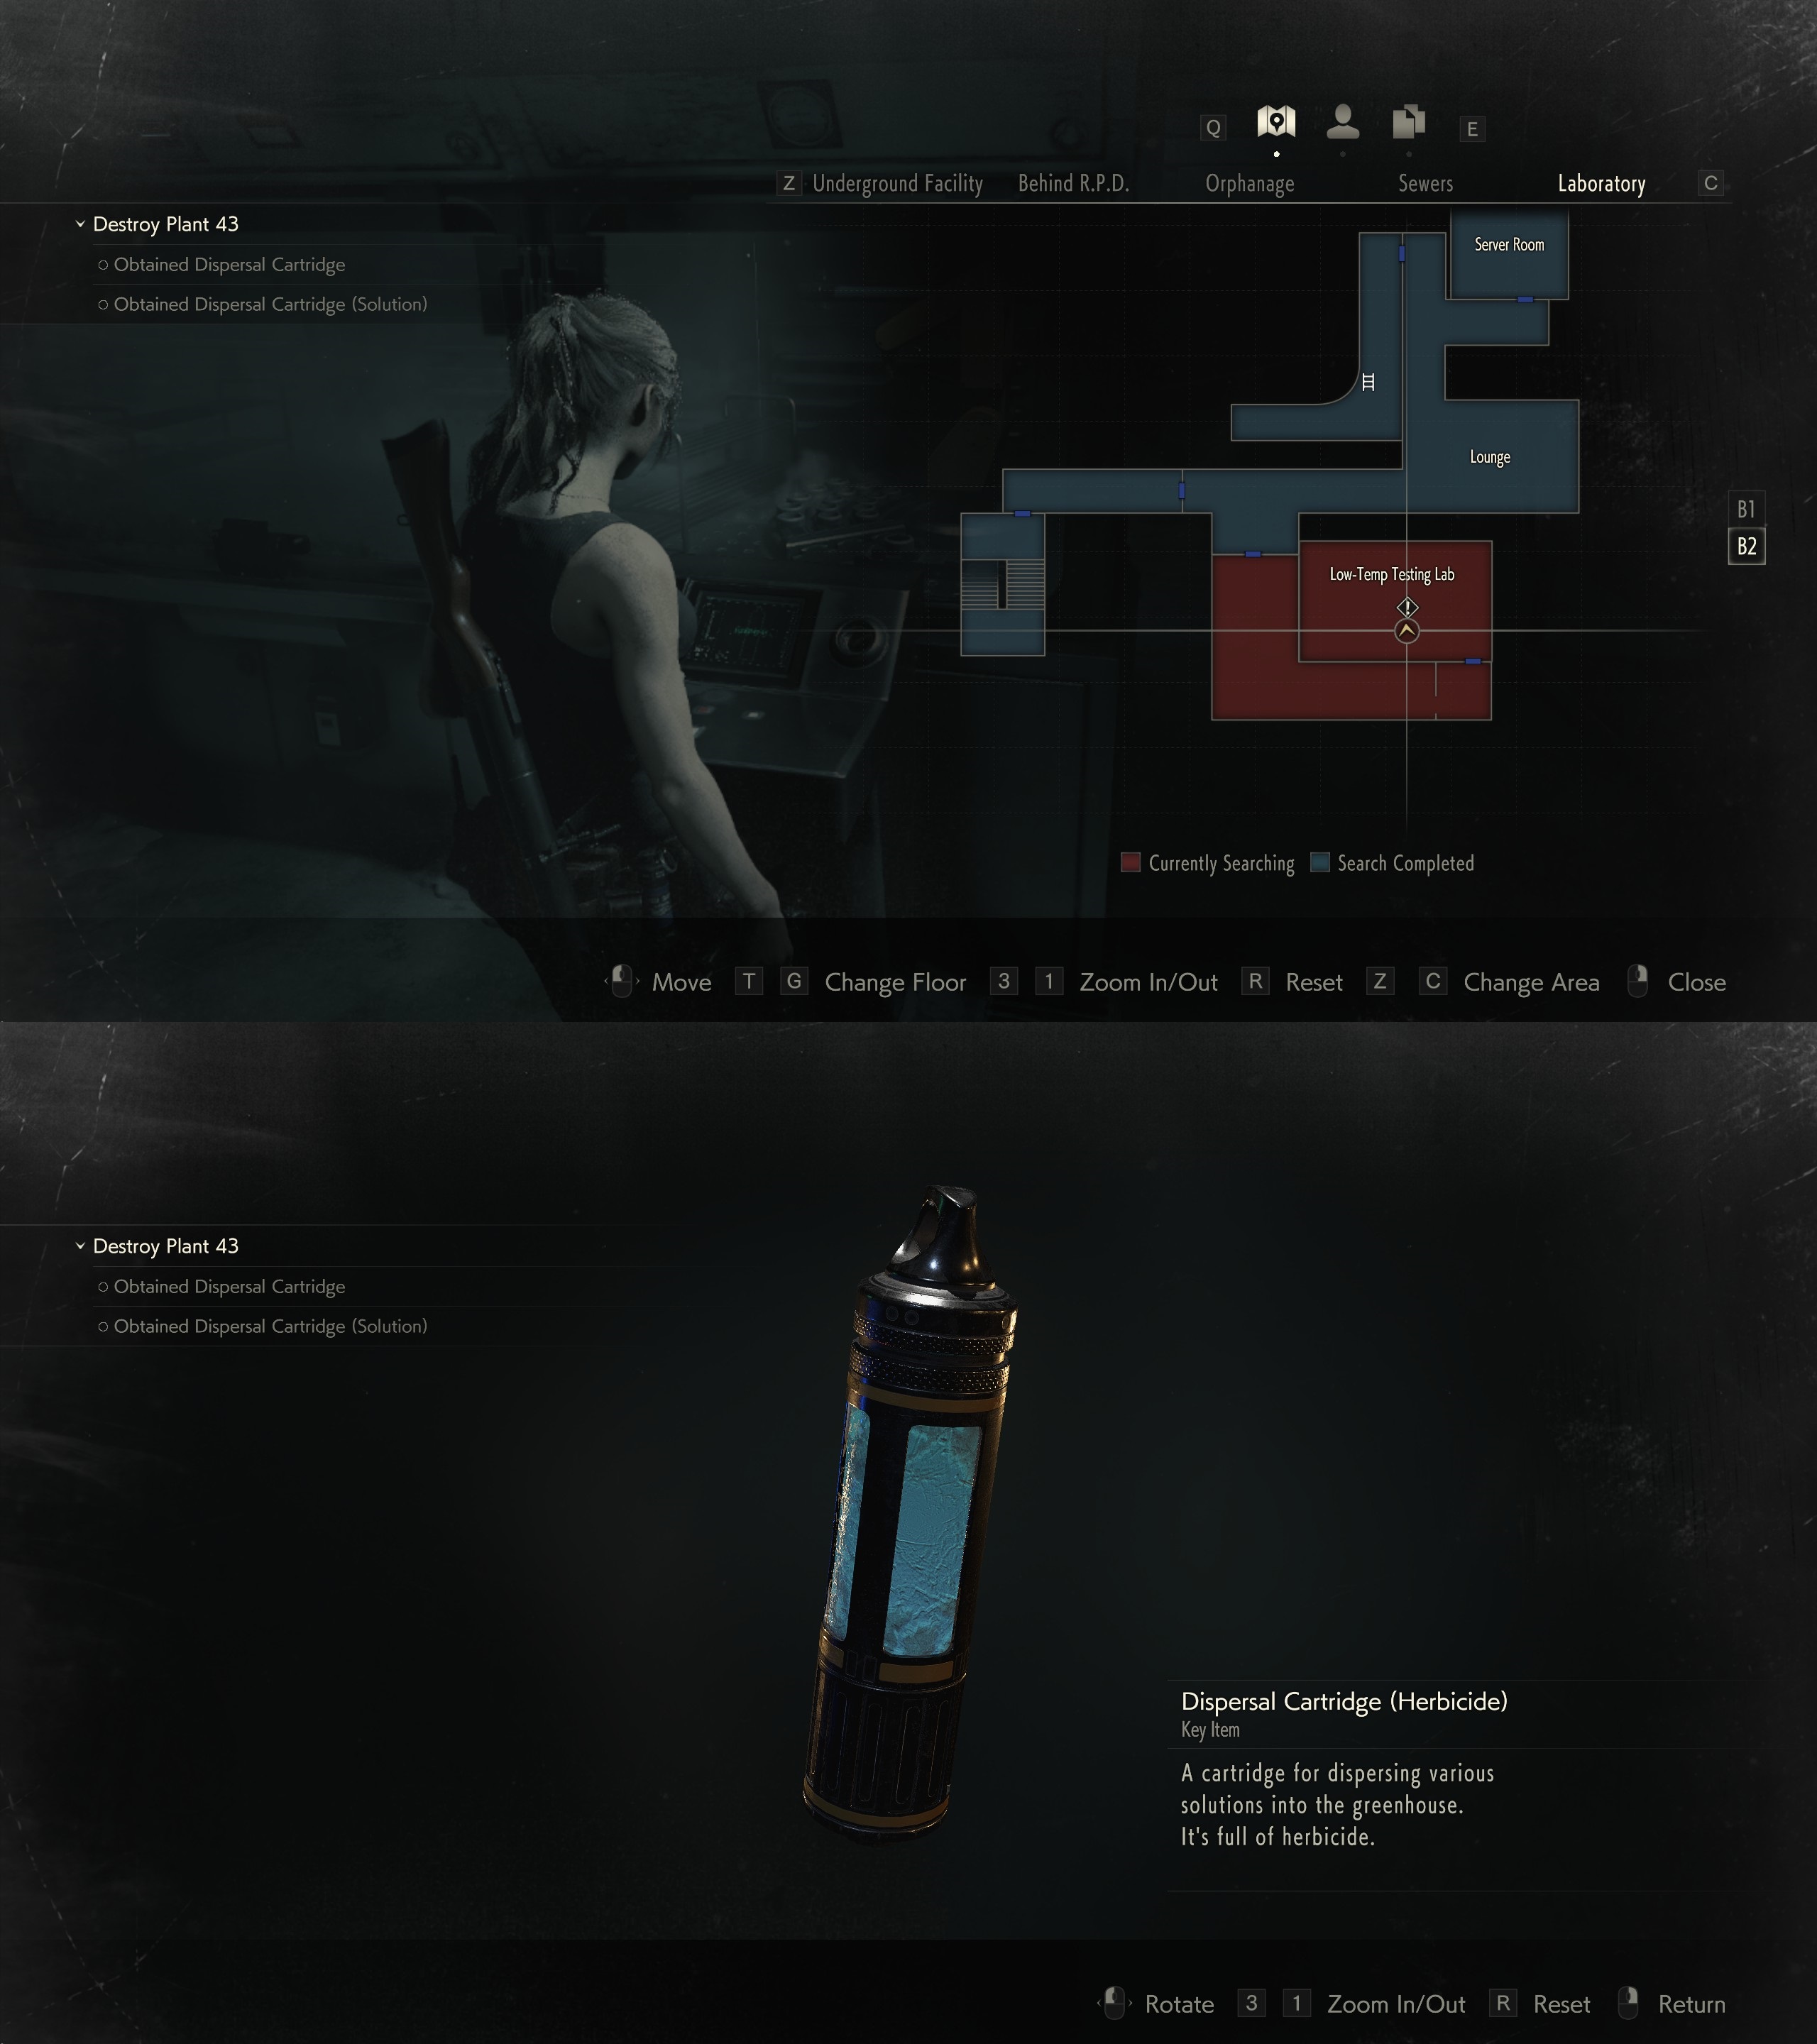
To the right of the "Incinerator" when playing Ada.
phud 23 июл. 2022 г. в 13:18 
@DisgracedPilot Before G3 is probably the best place to save for more casual players who aren't super confident in super aggressive bosses like G3 or Super Tyrant. The lab is decently easy since Ivy can be pretty easily dealt with given you have alright aim and keep adequate distance. G3 is an absolute pain in the ass on Hardcore, especially with Leon where you don't have access to acid rounds.
notuna 24 апр. 2022 г. в 7:50 
Thanks for the guide. I was a little confused for a second when I went for the elevator after reading the "Diamond Key" was optional.

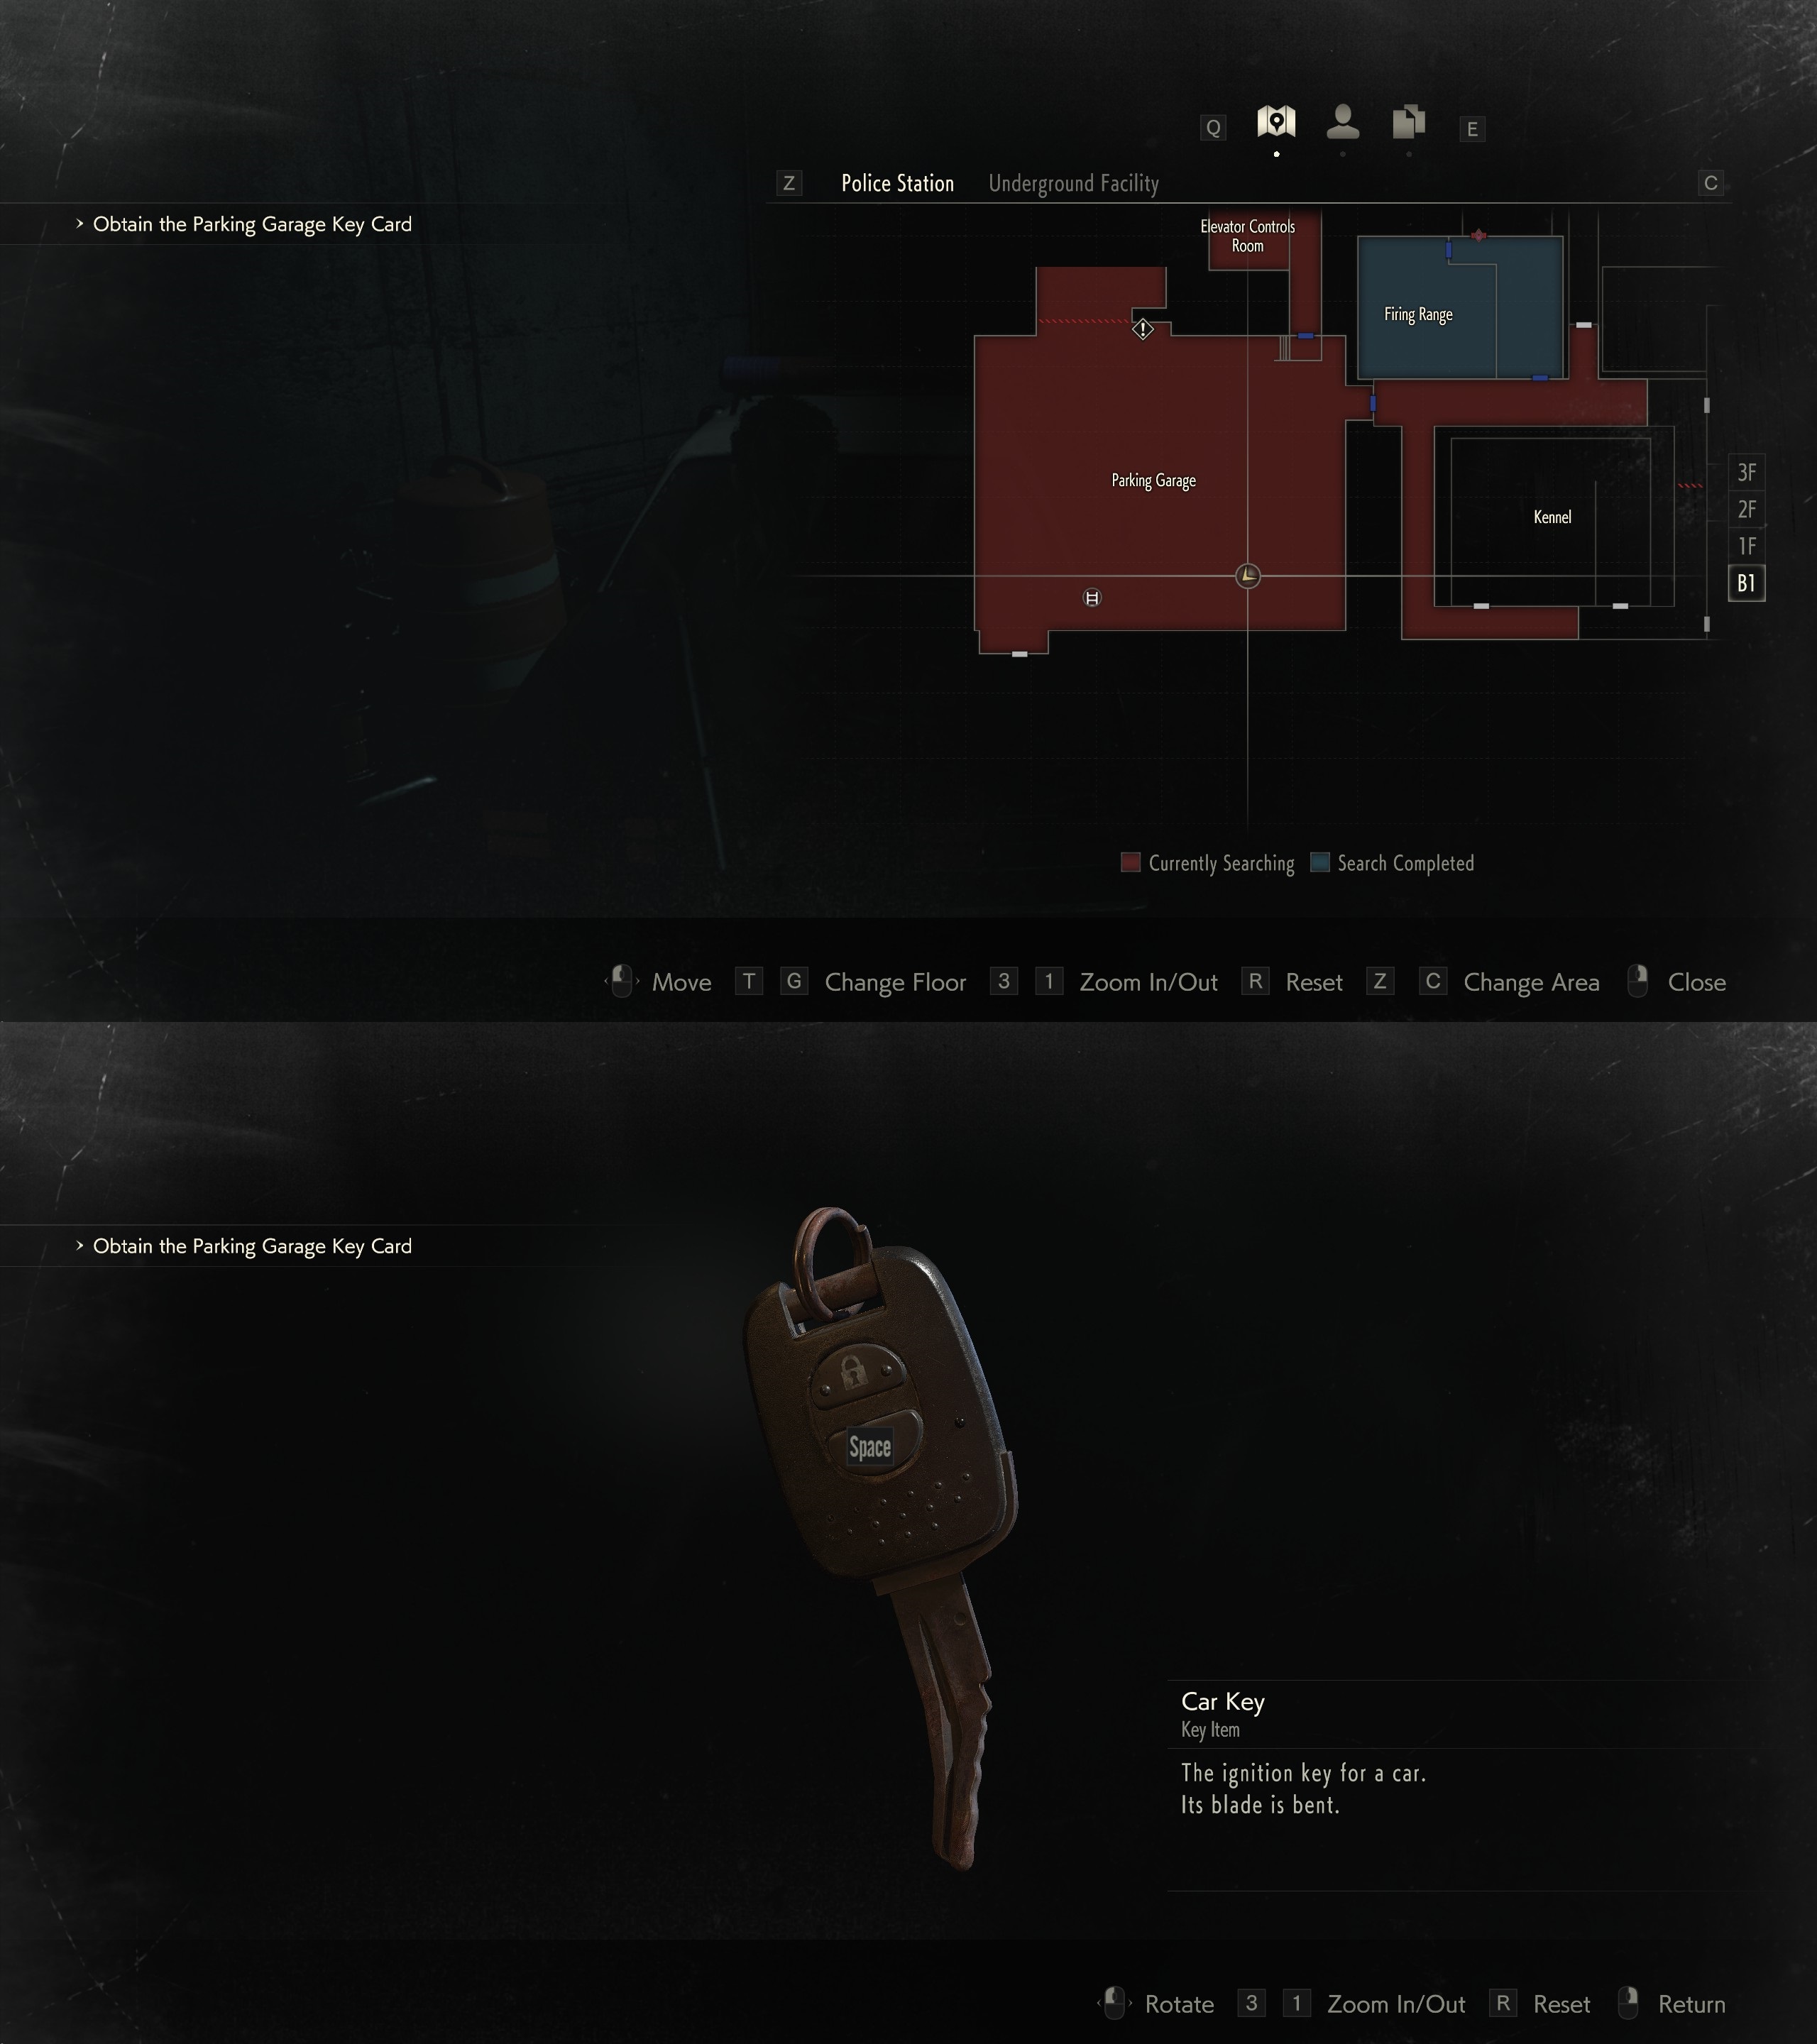
If you are playing as Claire you need it regardless, to enter the Elevator Controls Room
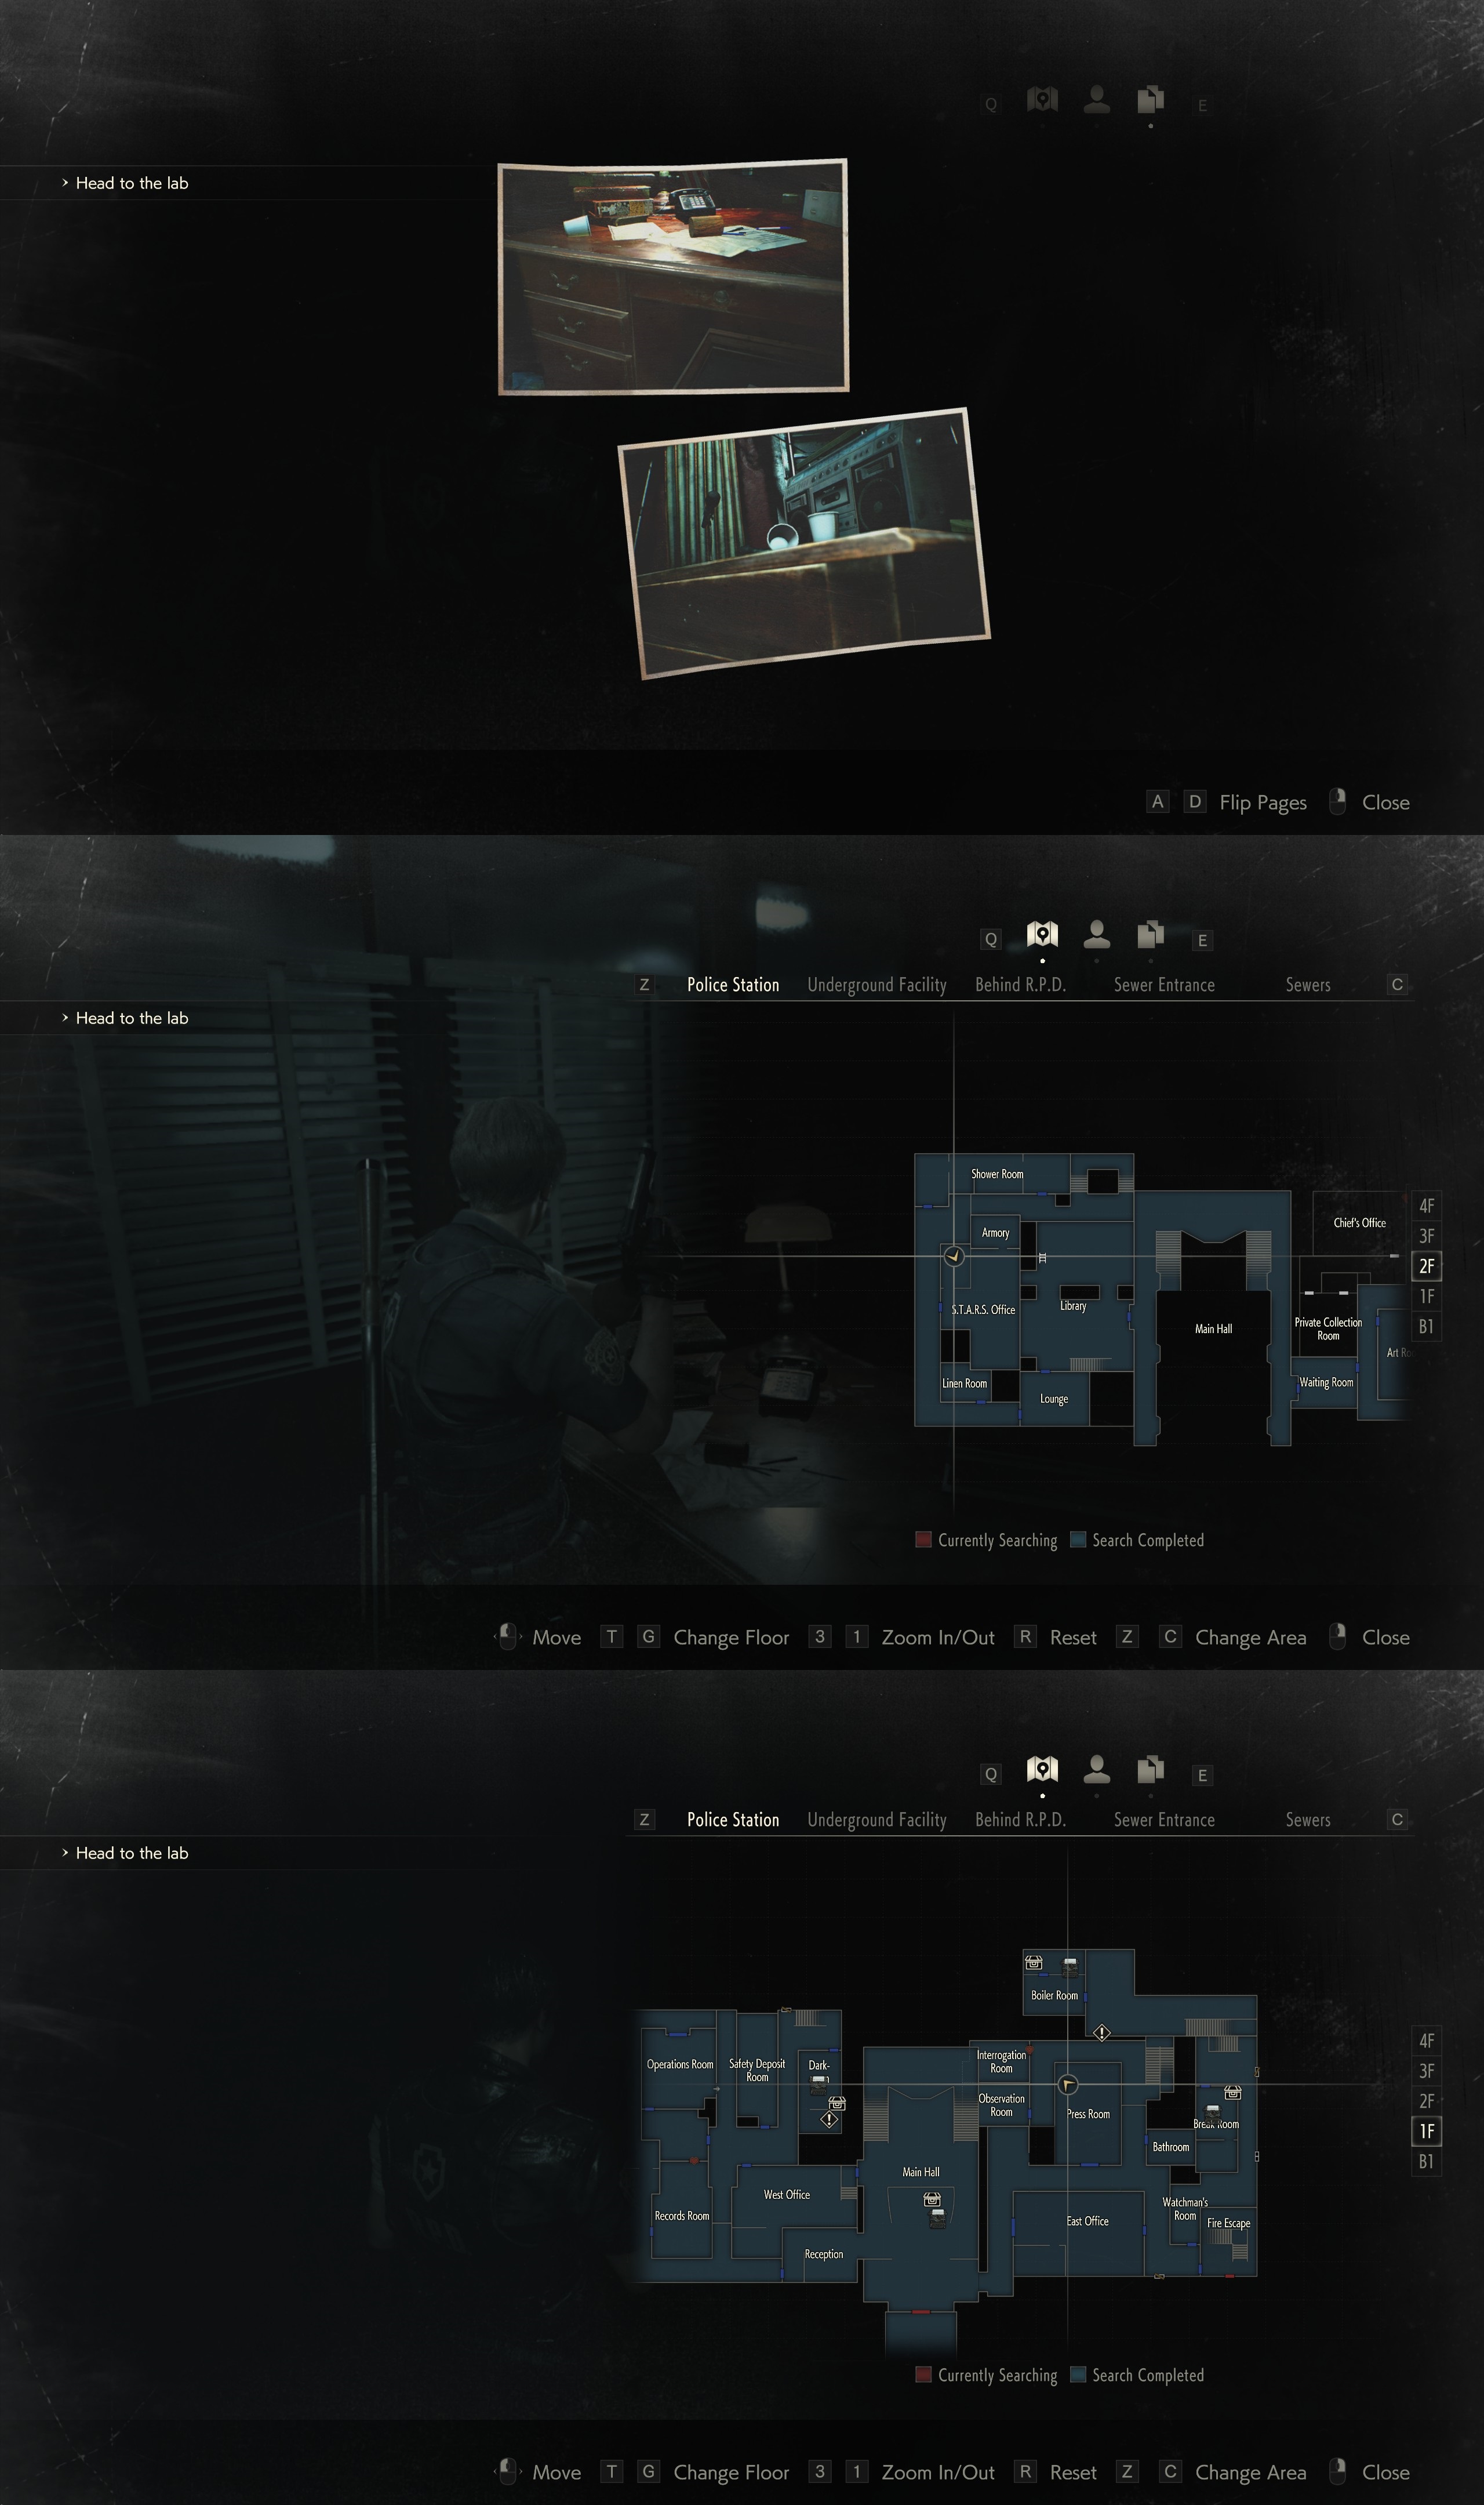
 :er_wave:
DisgracedPilot 19 сен. 2020 г. в 12:51 
Thanks for writing this really nice guide. I primarily used this guide along with assorted strategies from around the RE2 community to get the Hardcore S+ on Claire A. Some notes for others:

Save Points:

1. Before G1
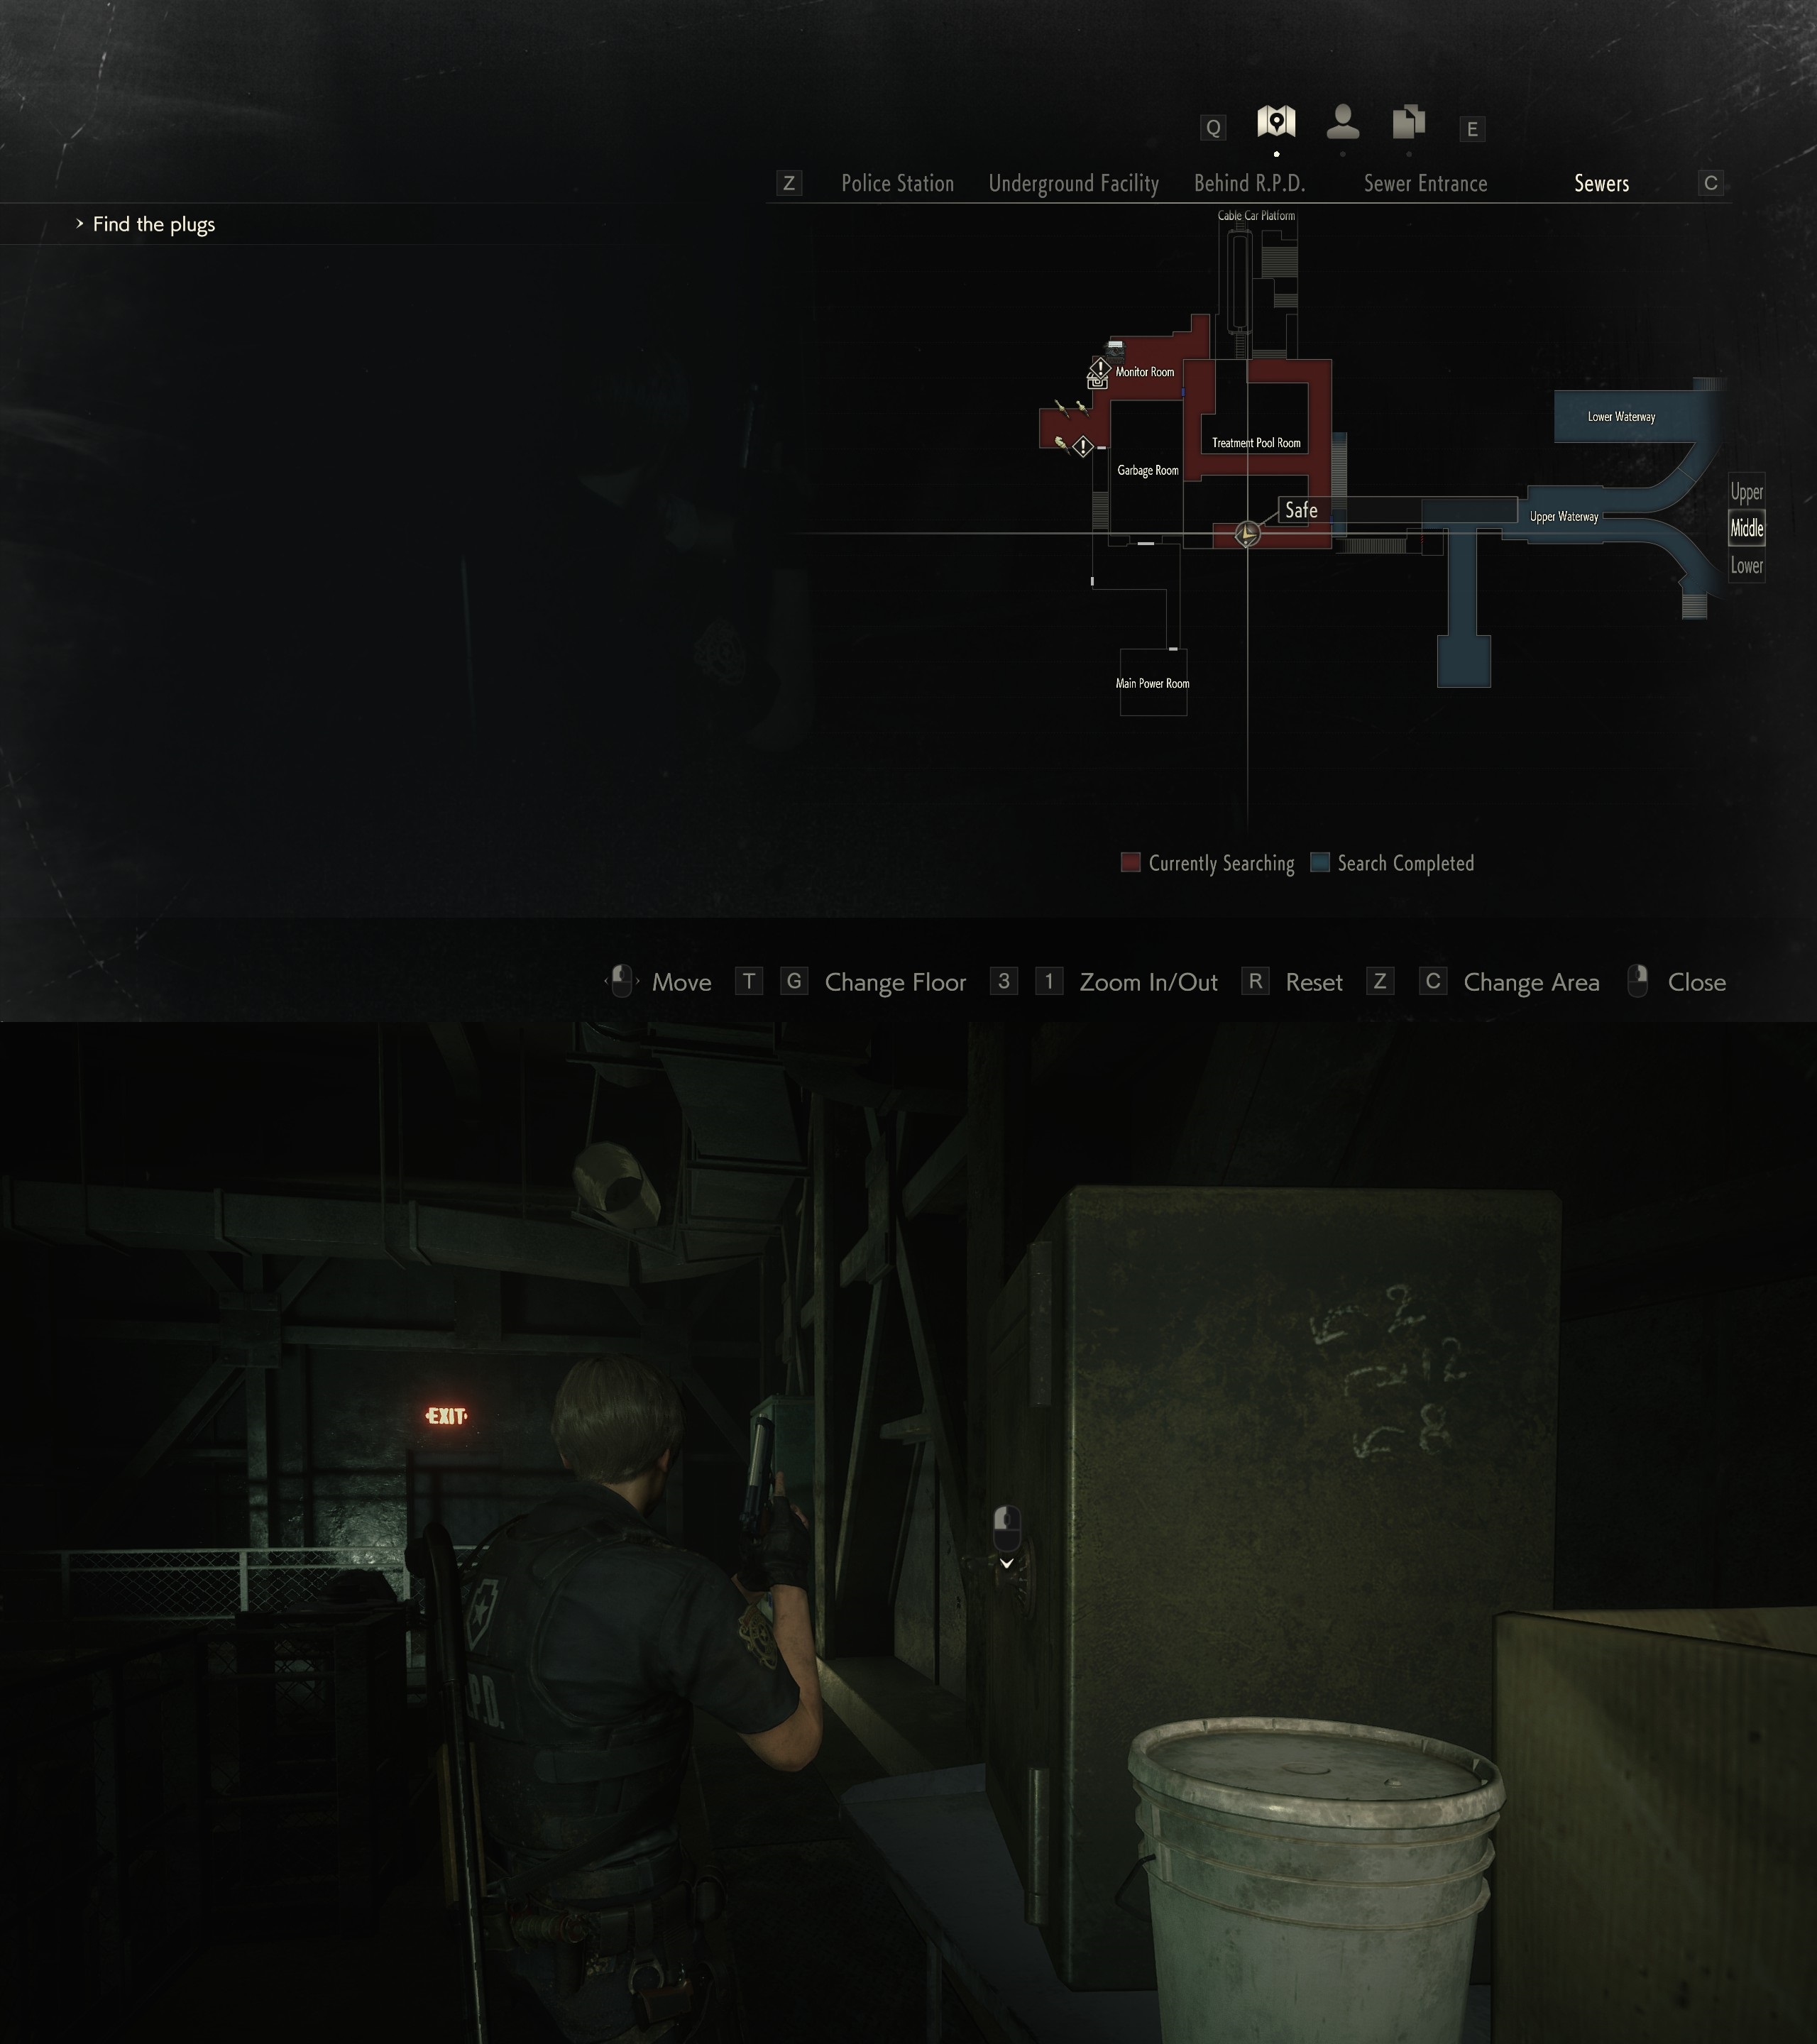
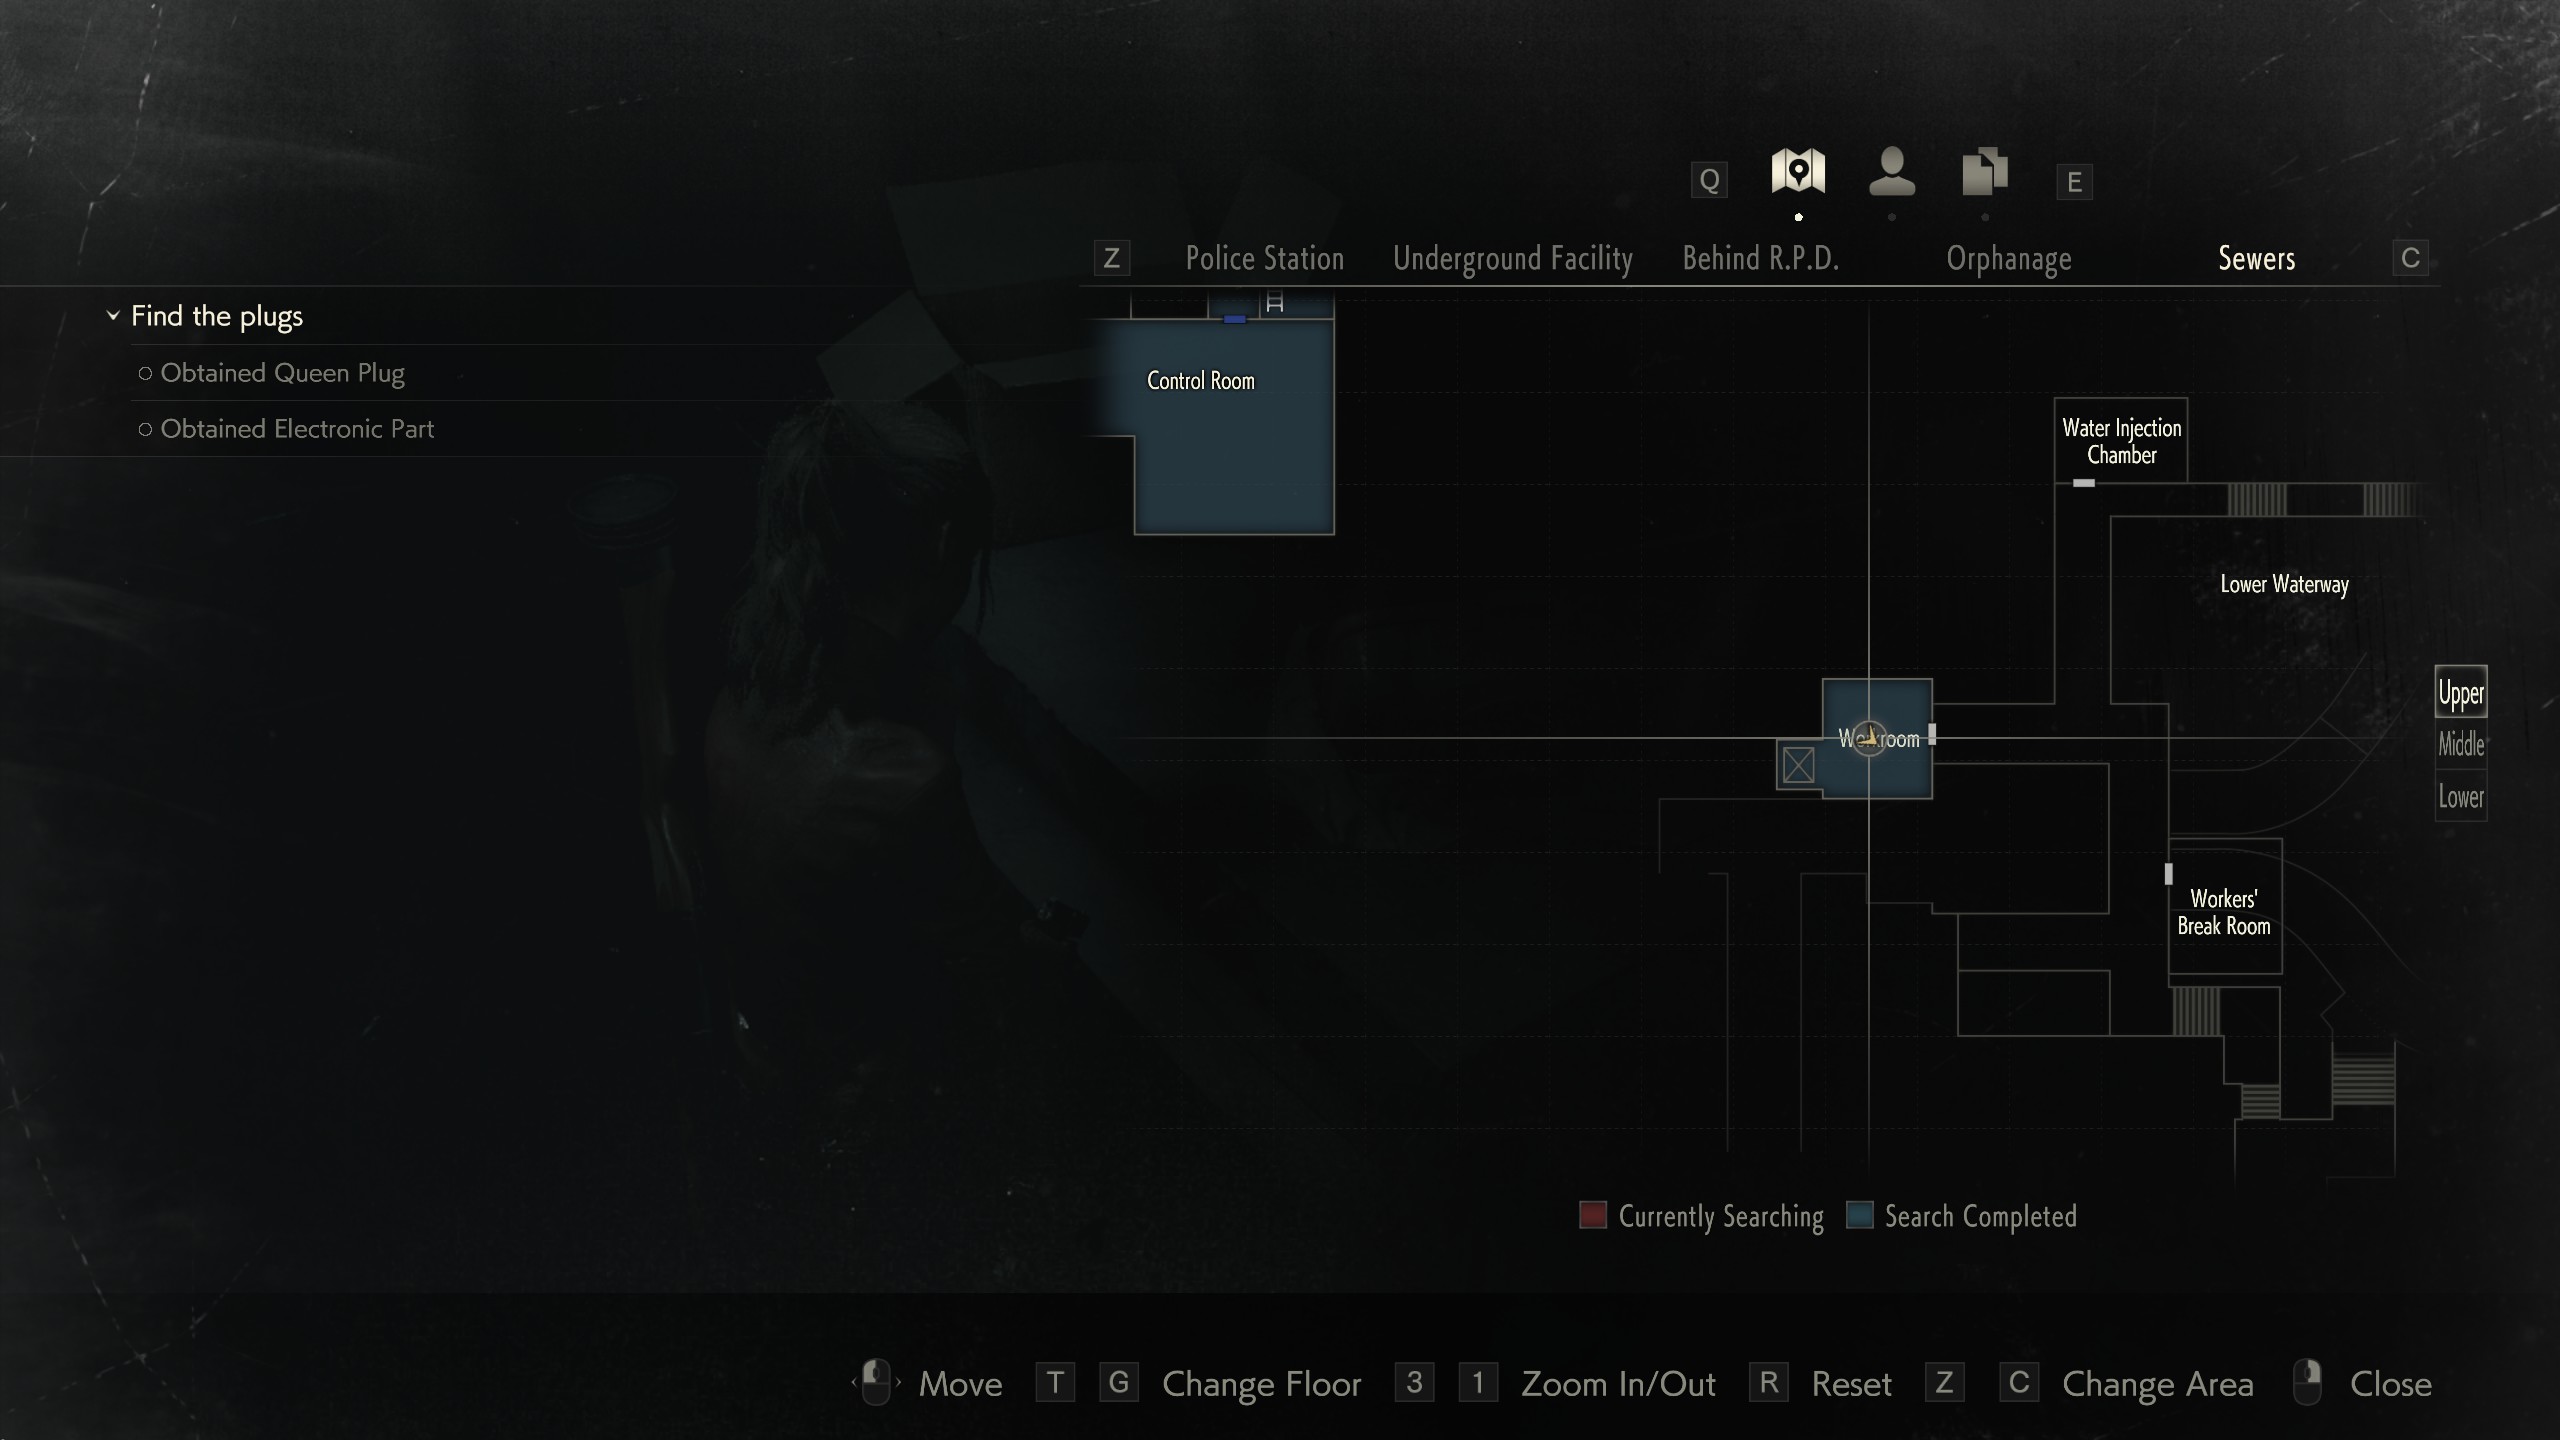
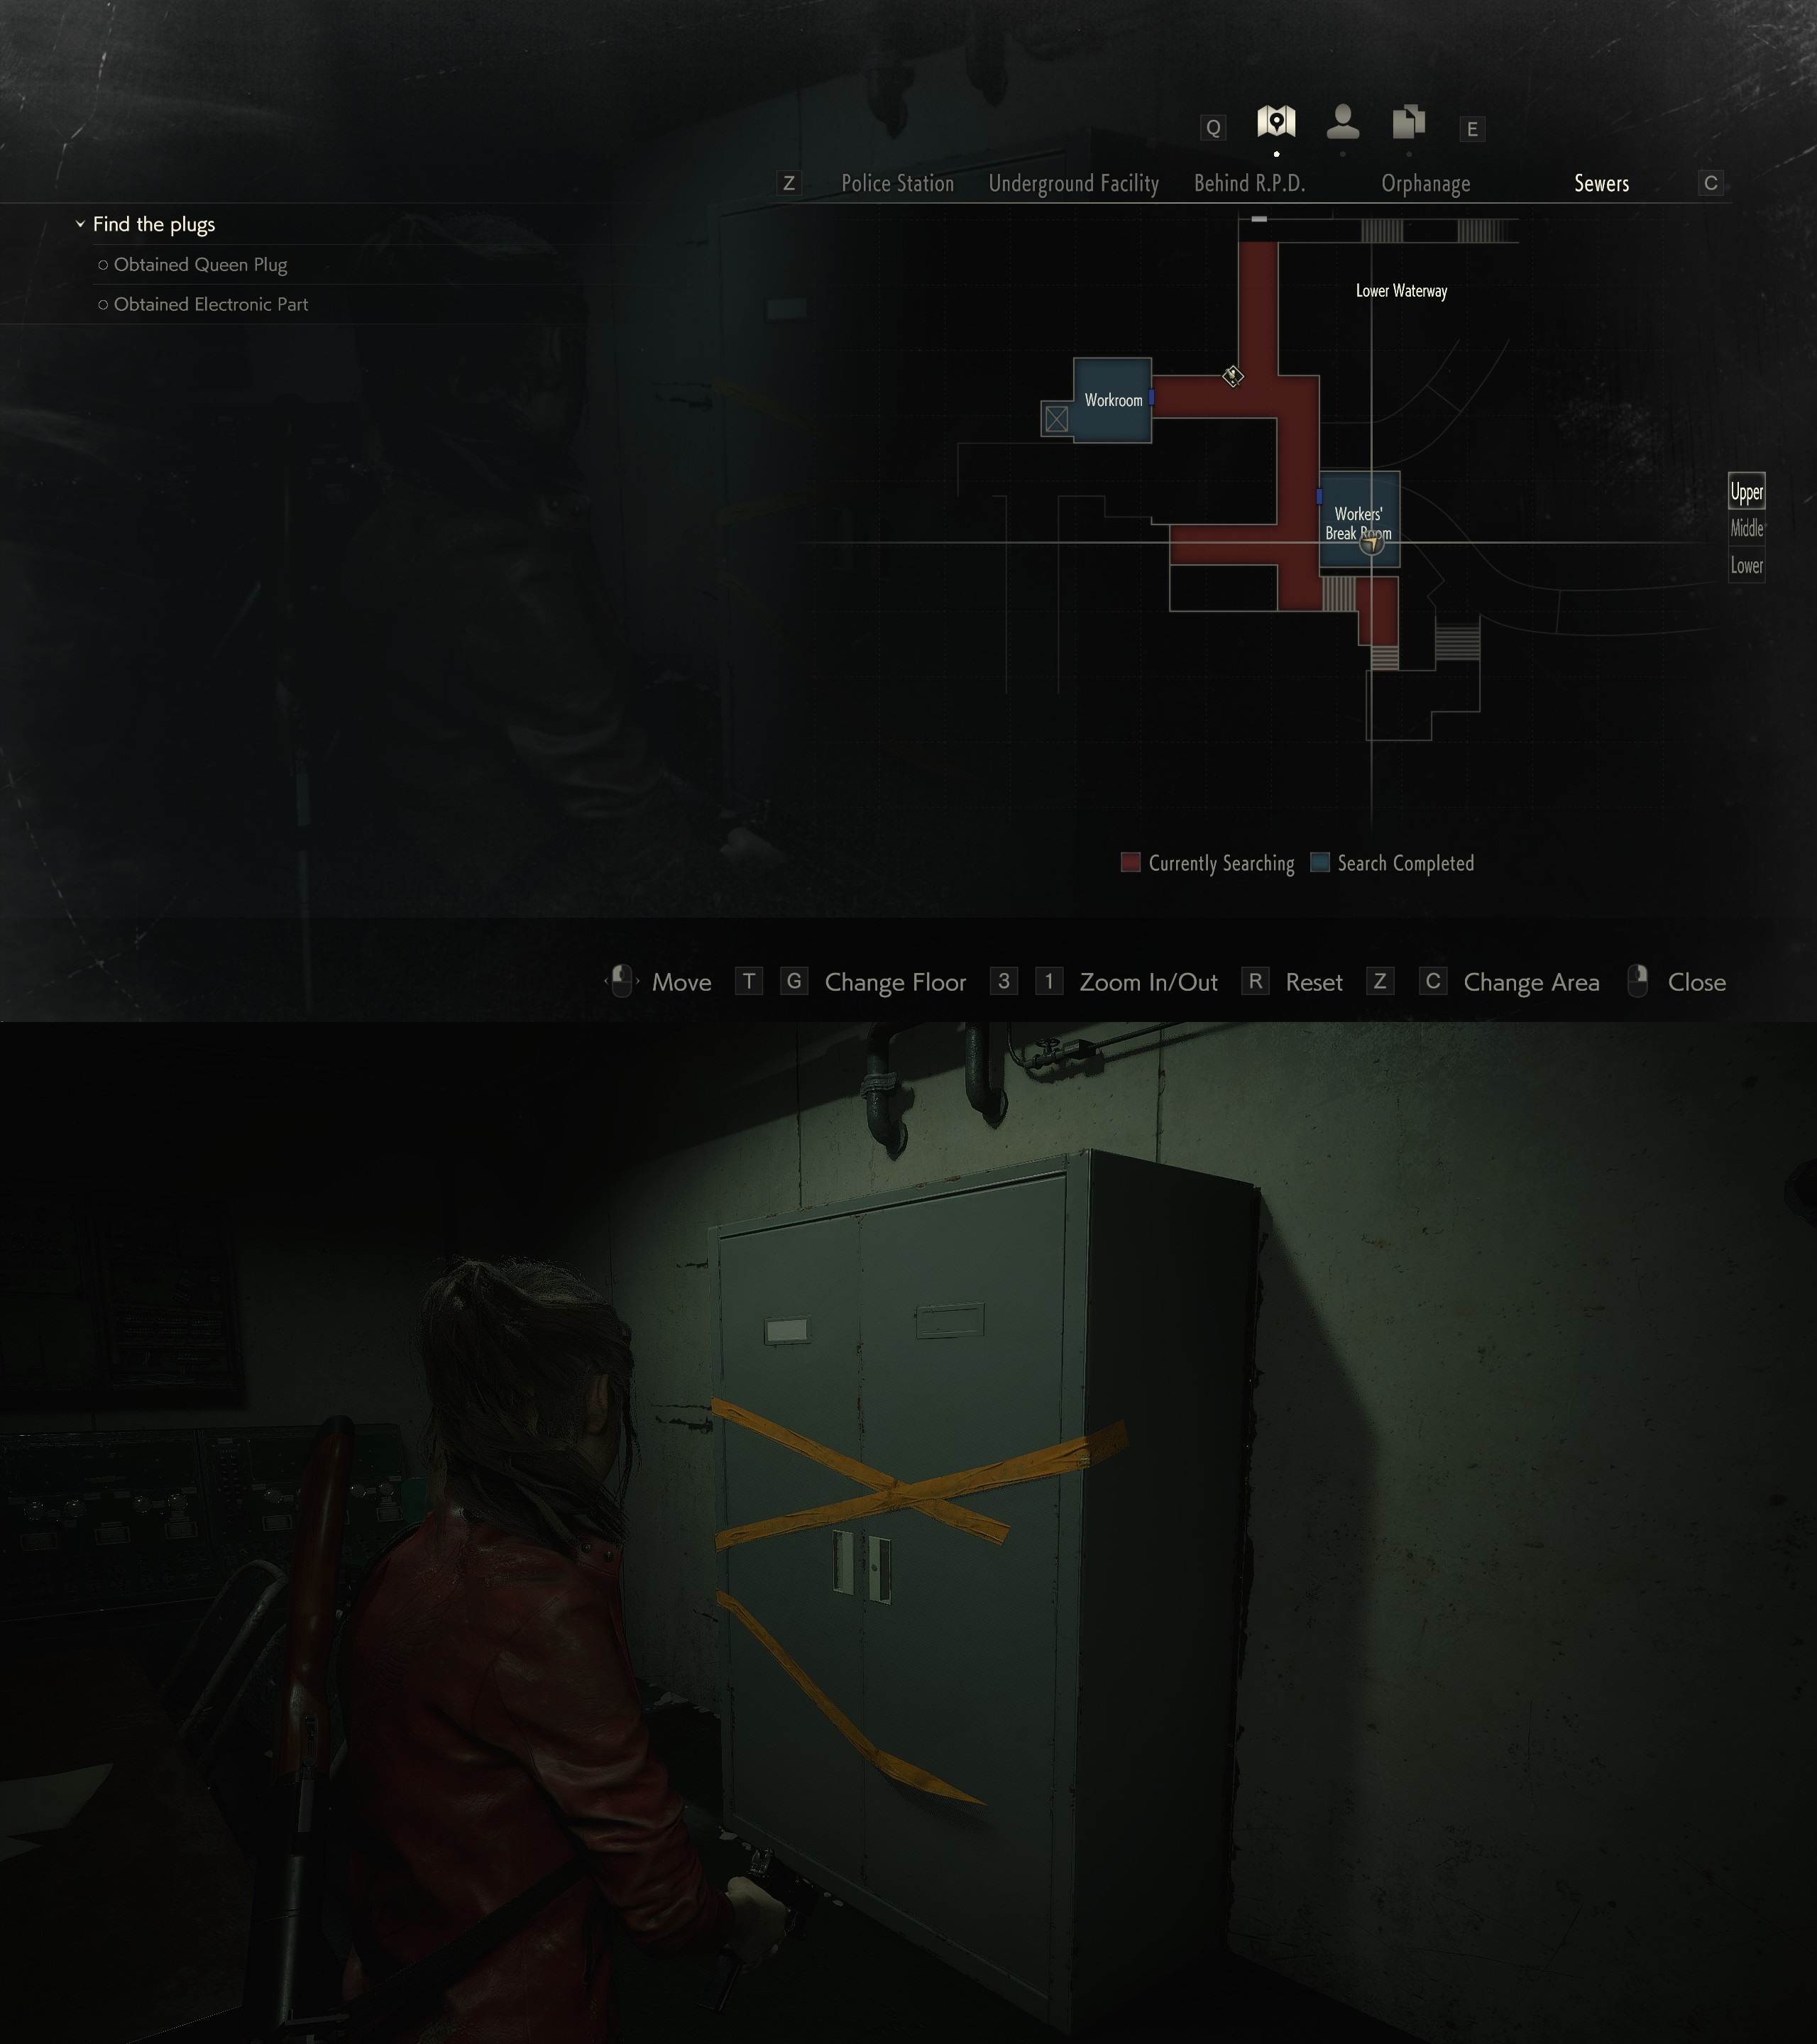
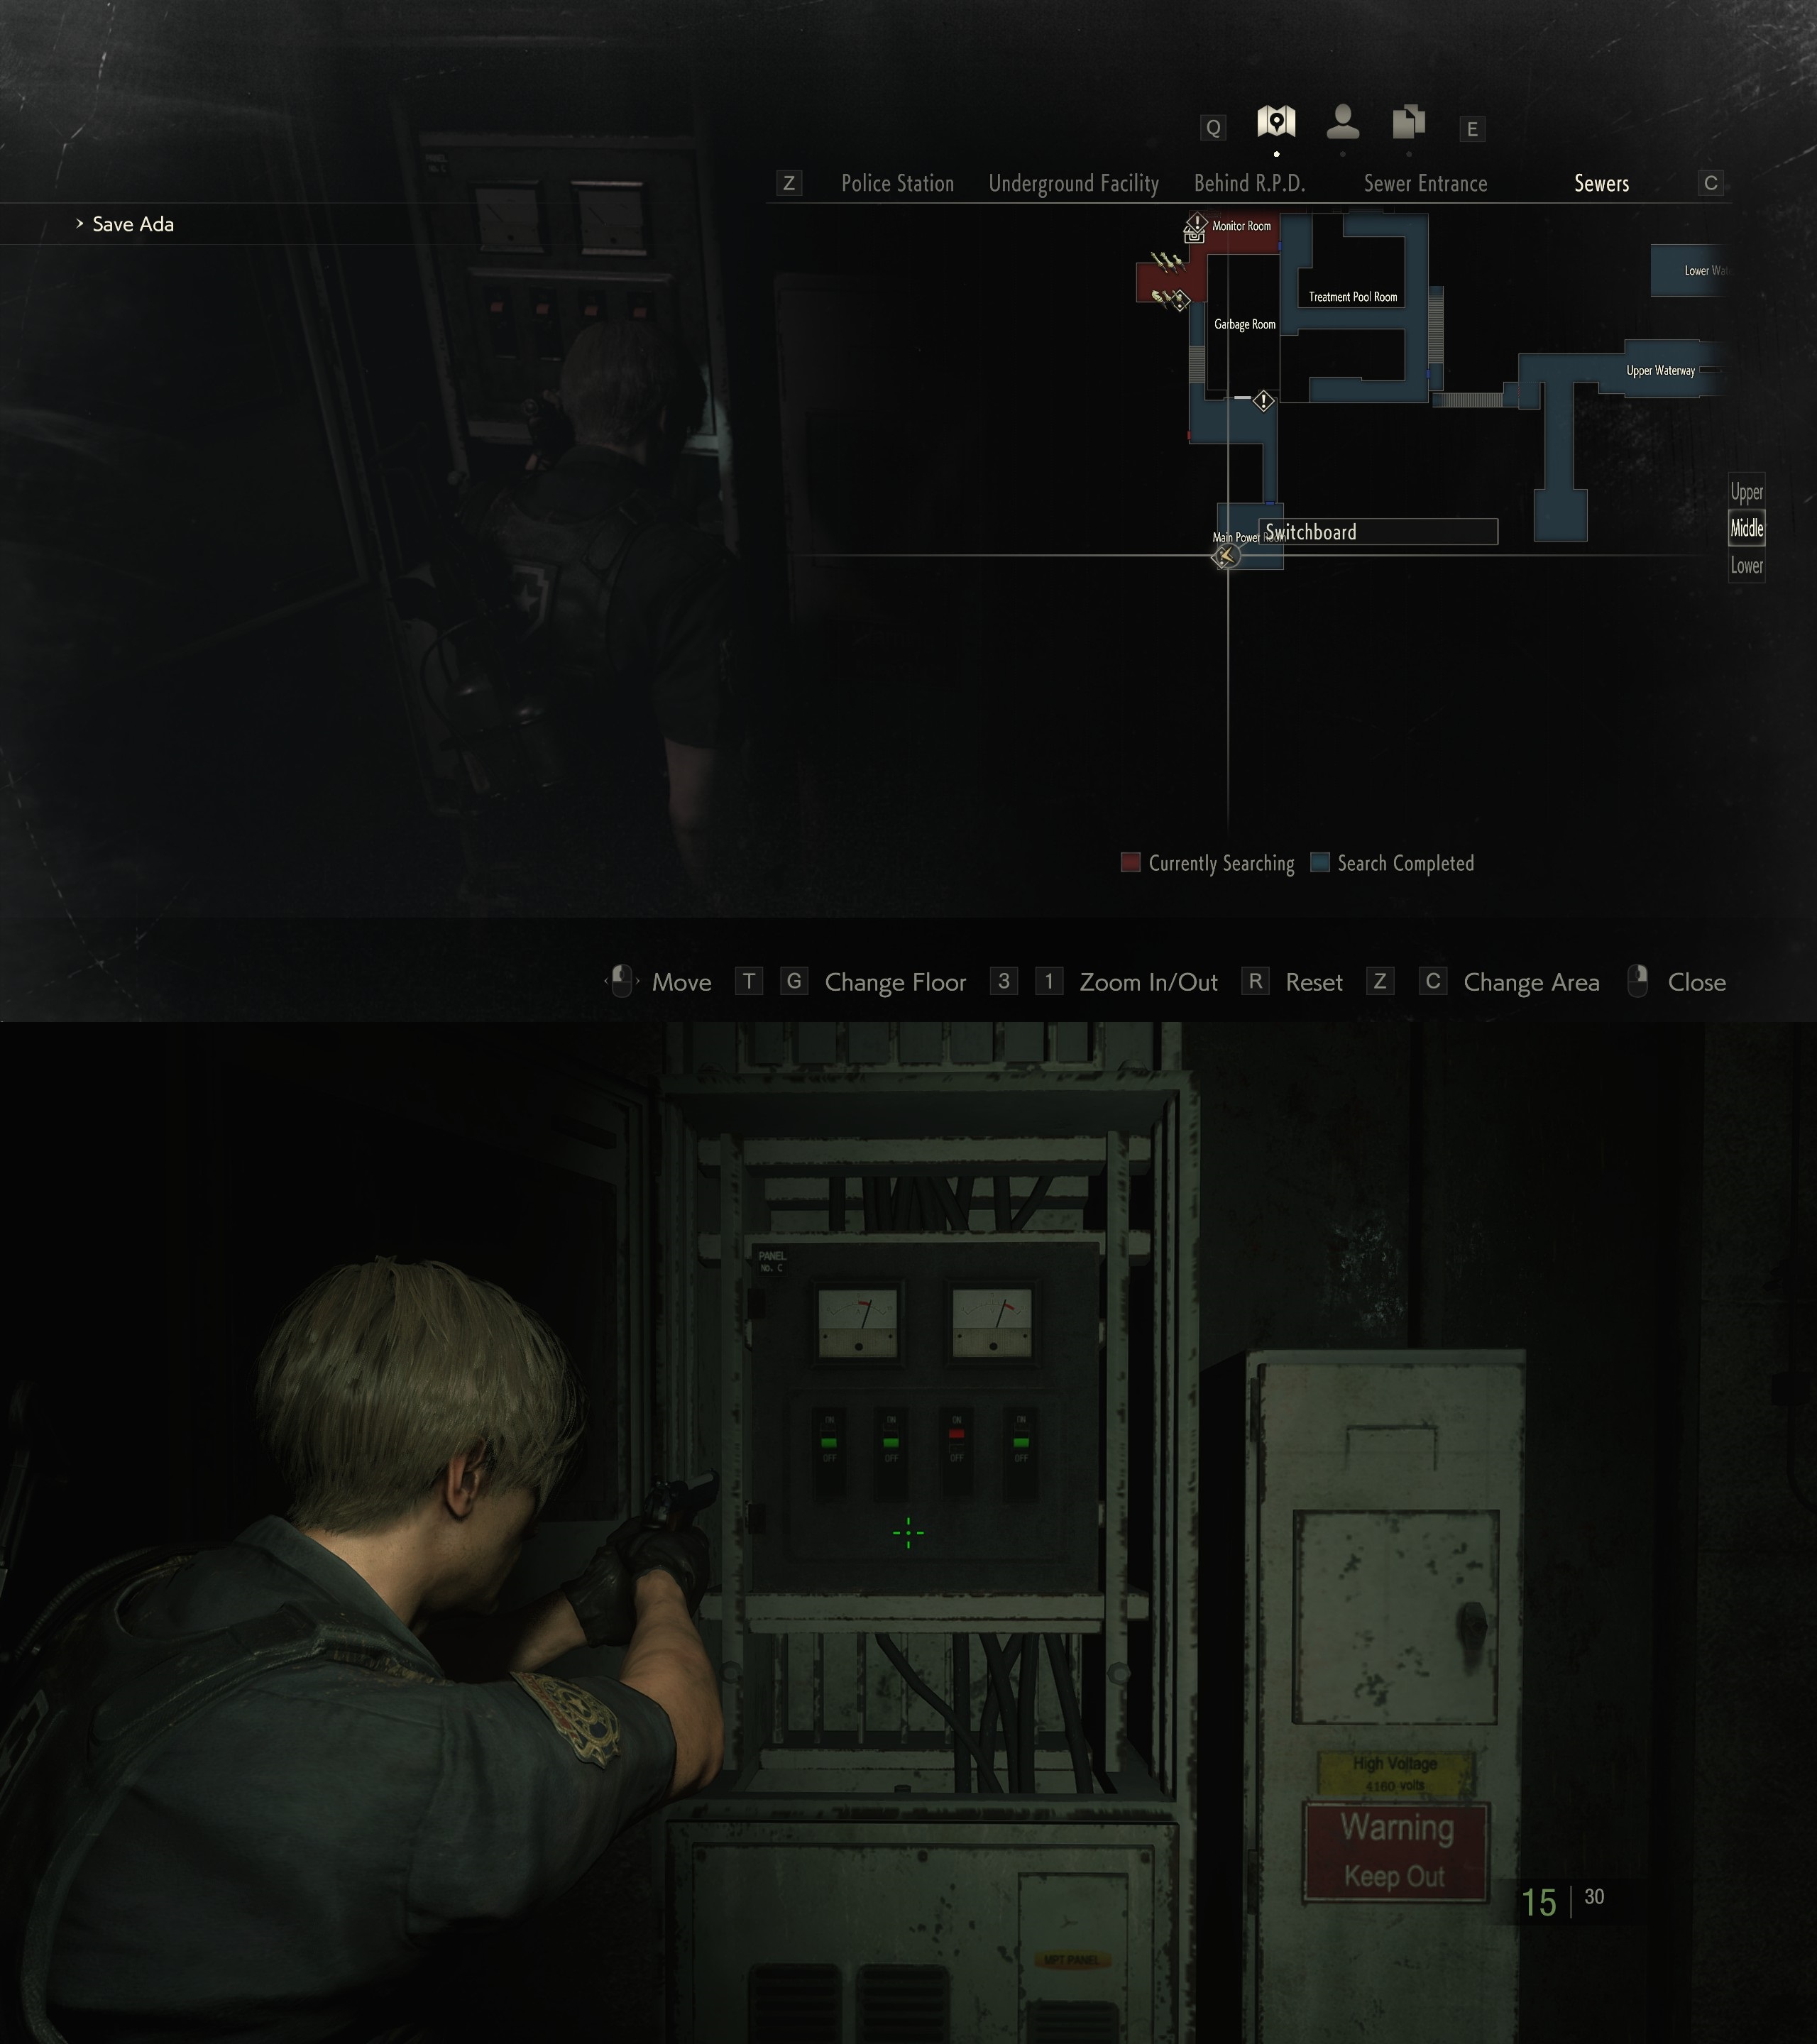
2. Sewer Monitor Room (upon first entry)
3. NEST Reception

You can adjust the save points depending on experience and play style, but I recommend using one save at #2. The circuit from Monitor Room -> RPD -> Supplies Storage Room -> Monitor Room may be one of the riskiest and most coordinated parts of the game.

Reference Times:

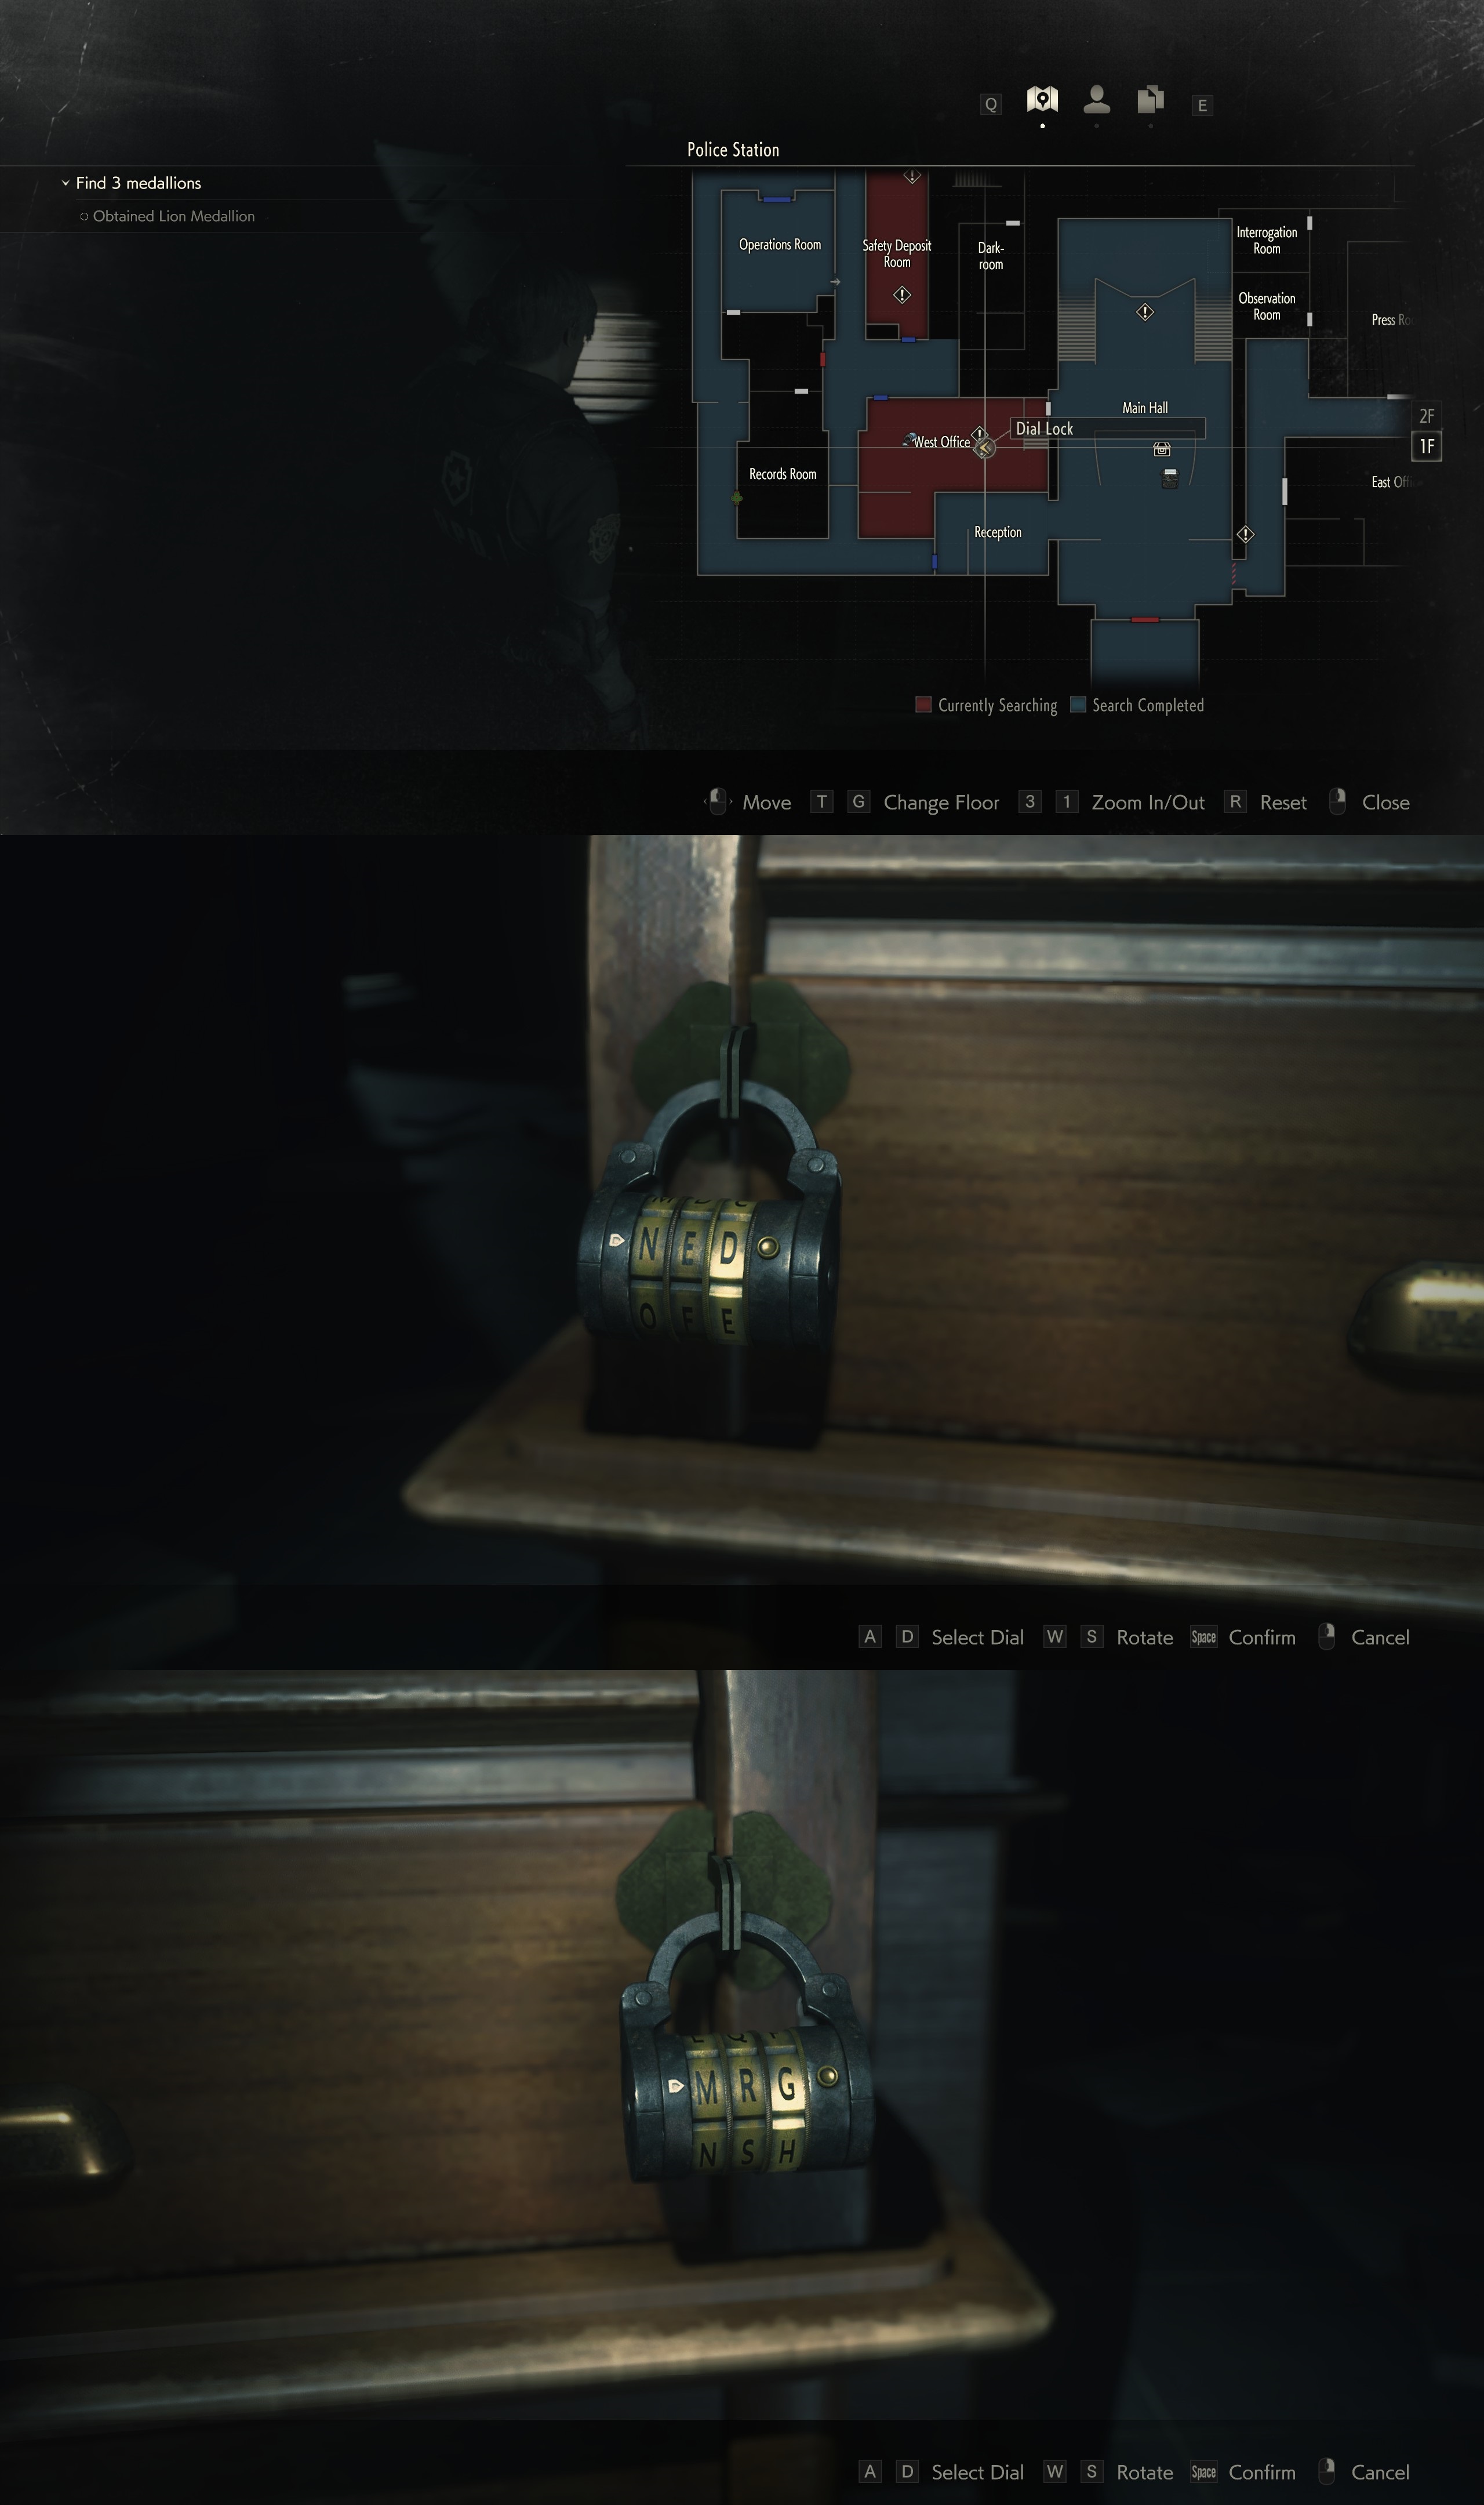
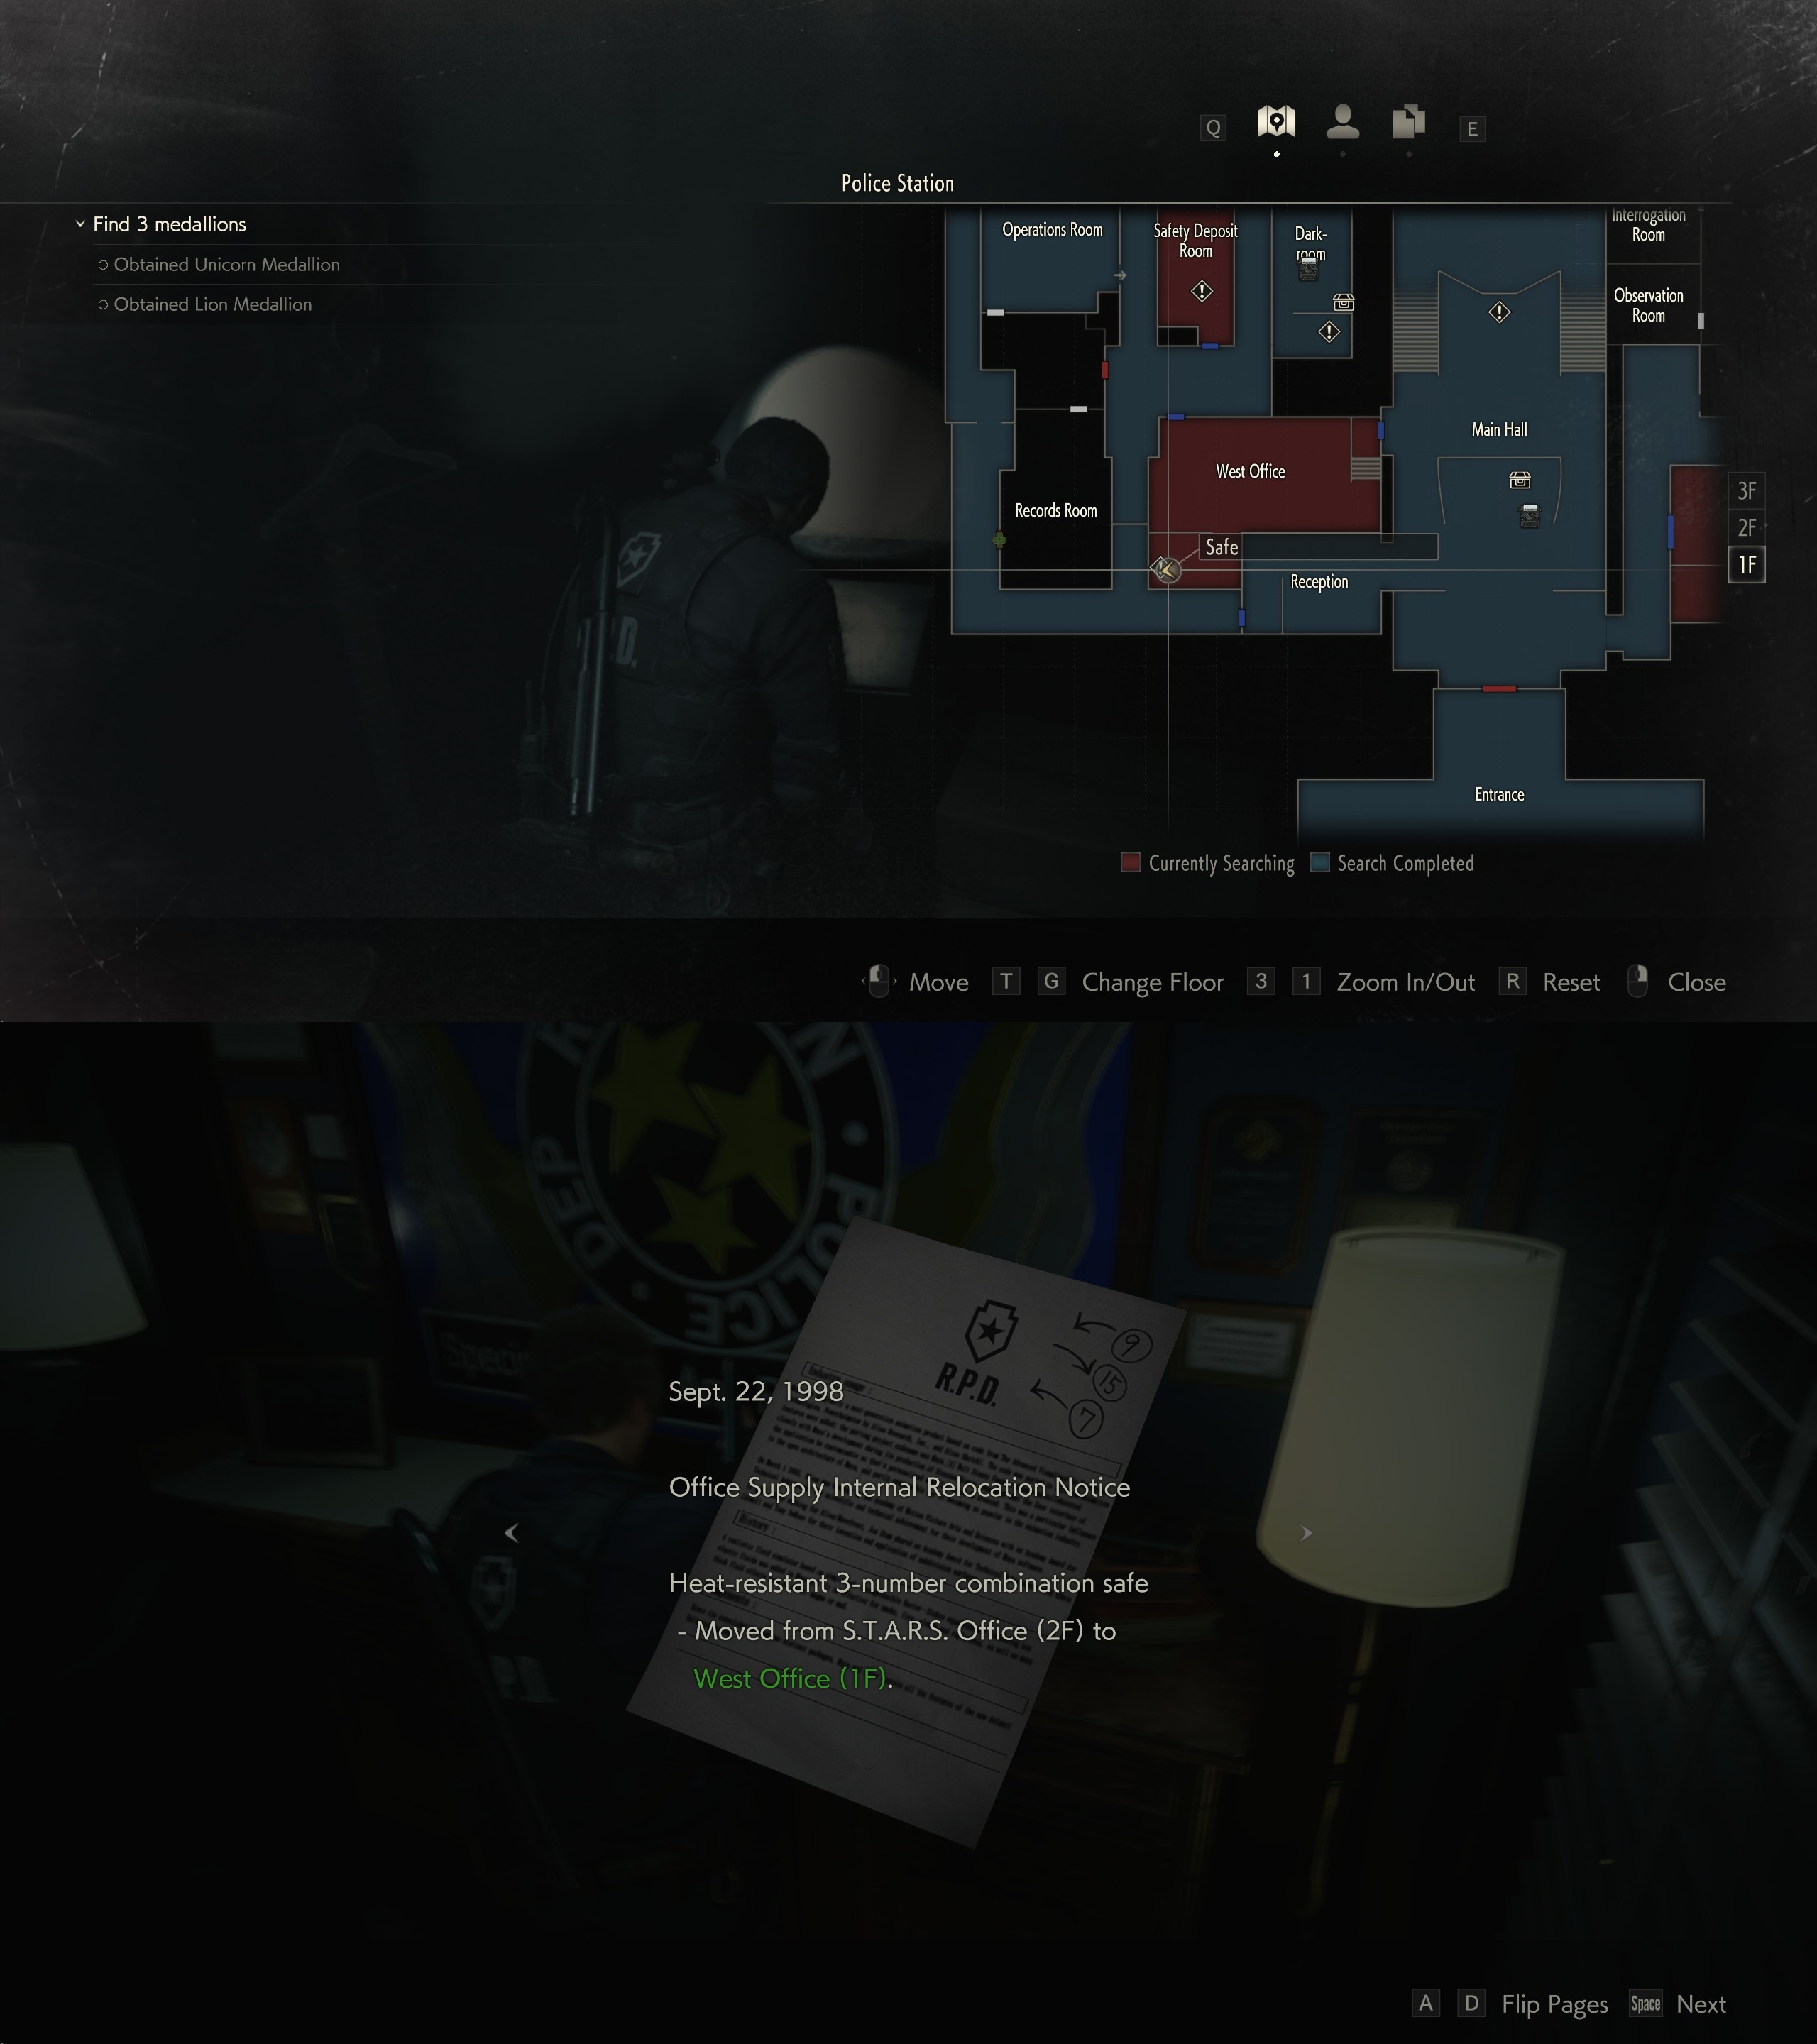
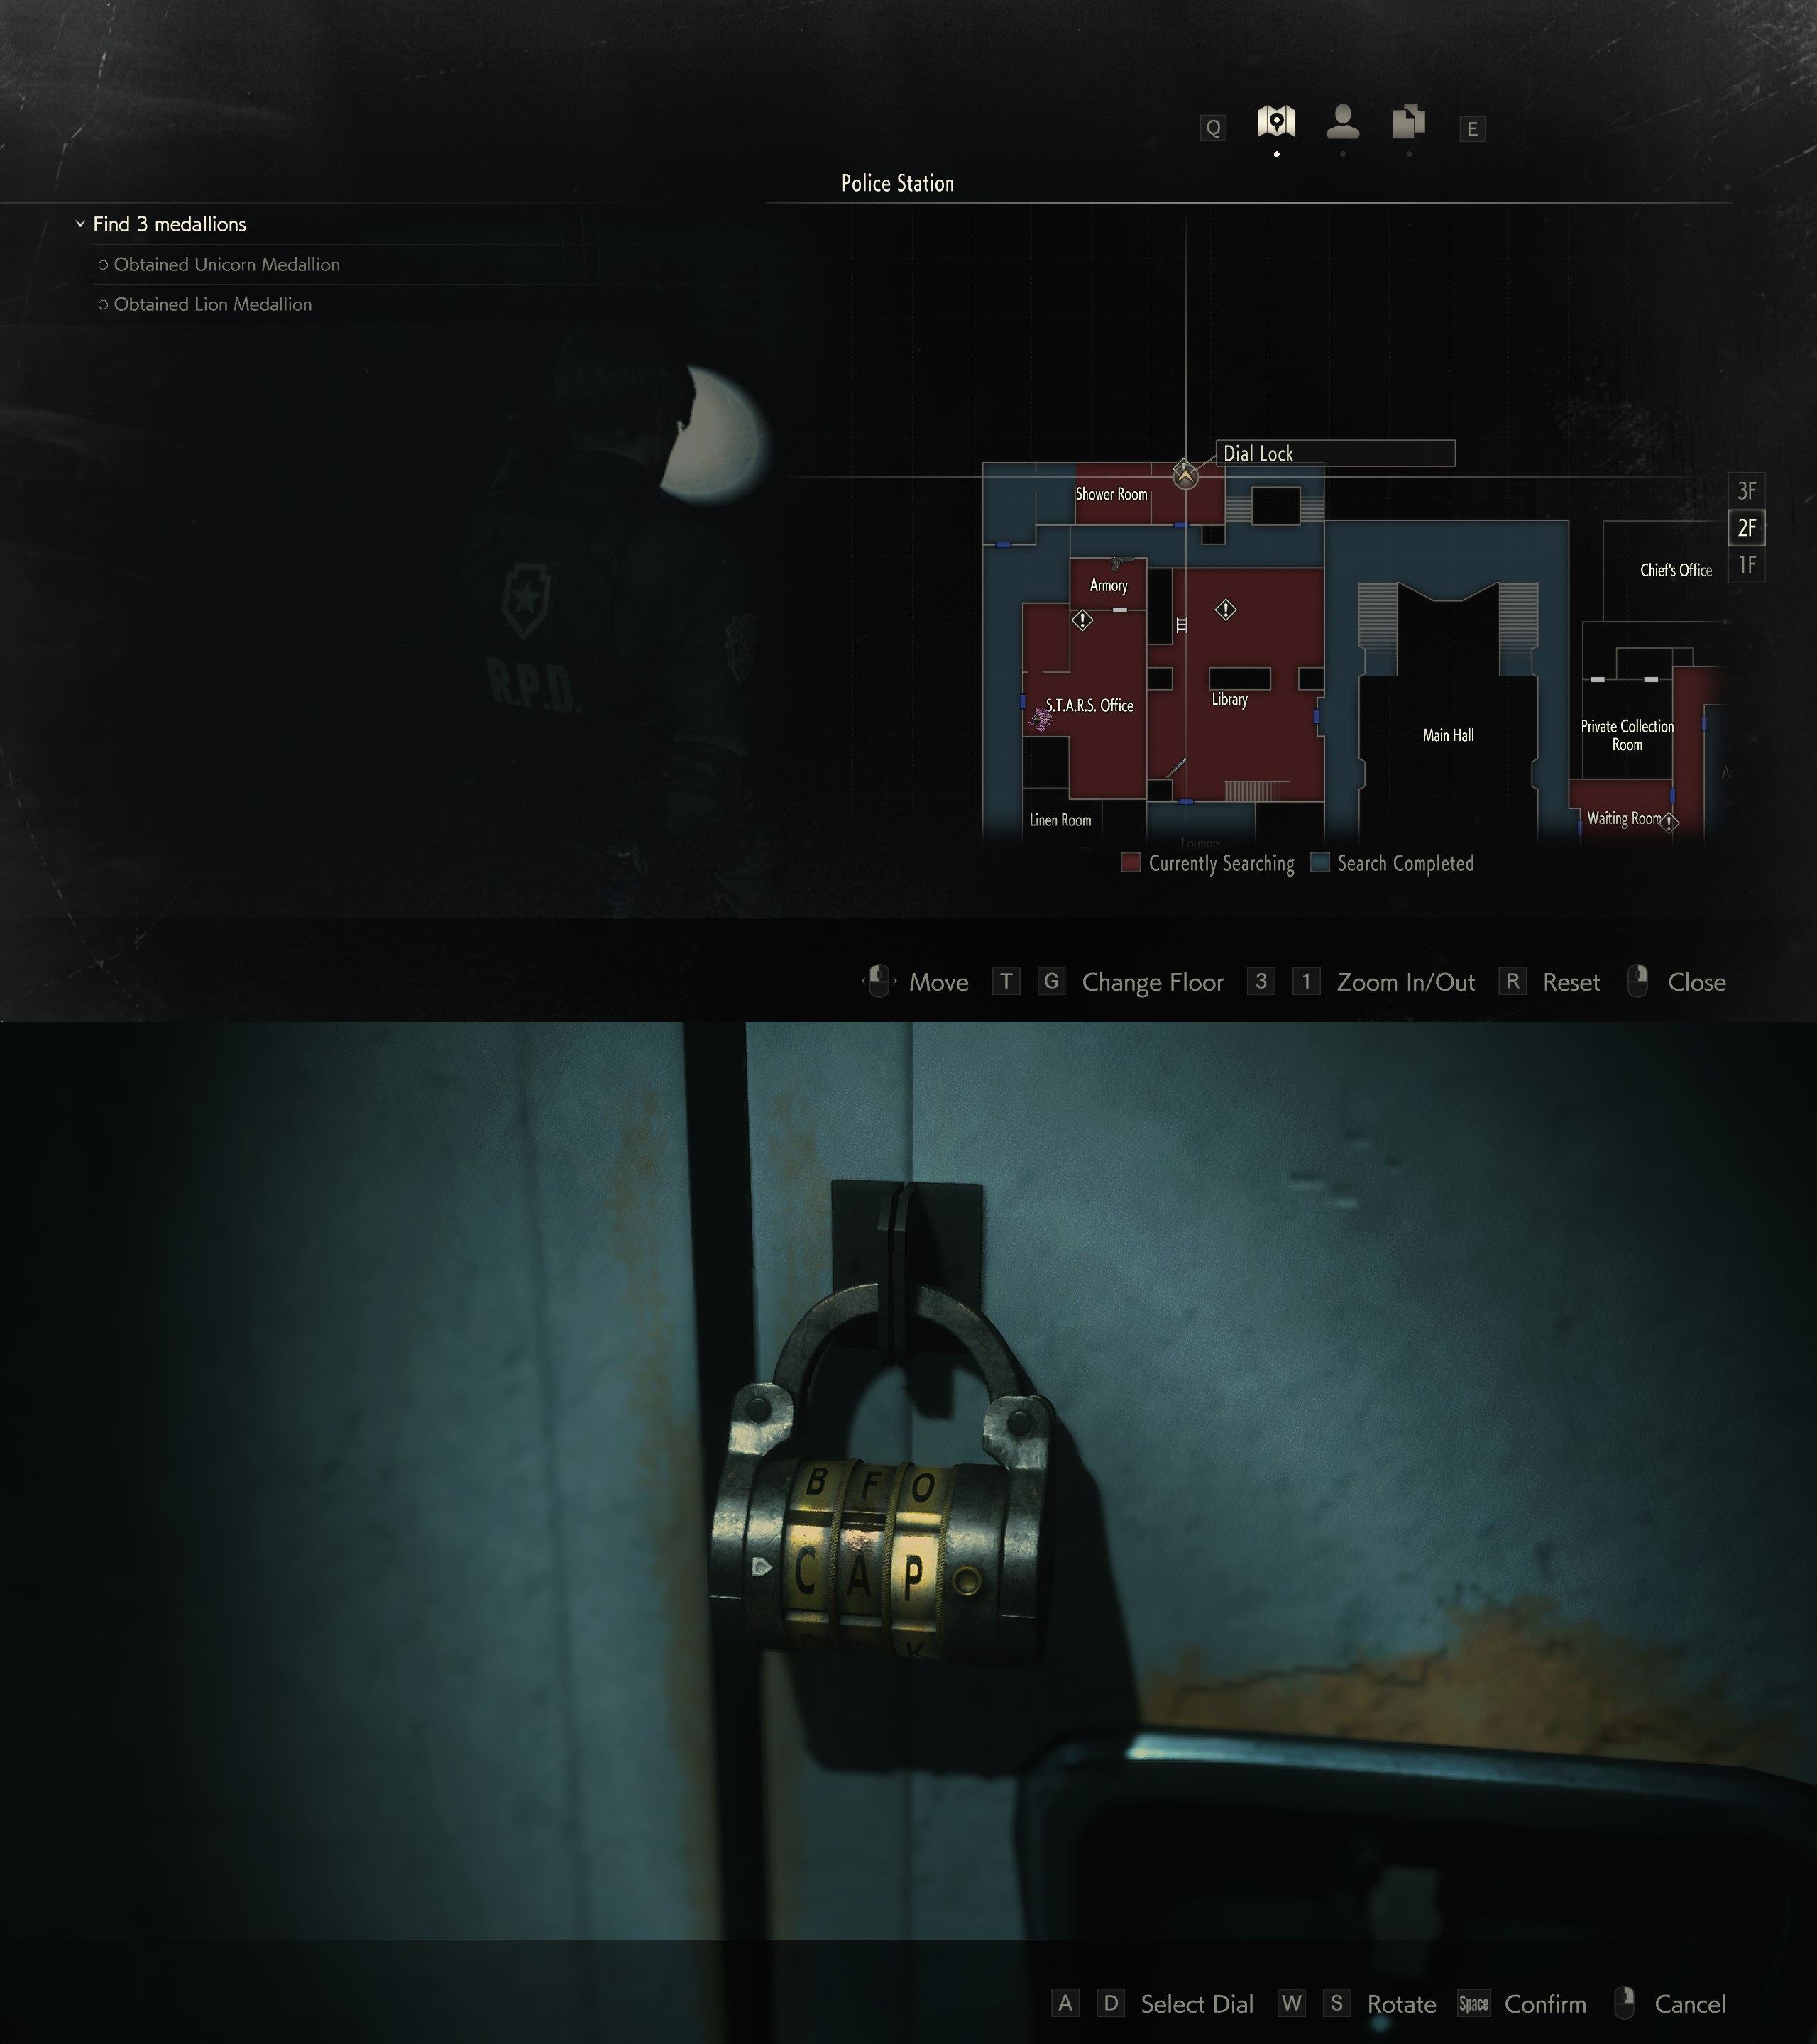
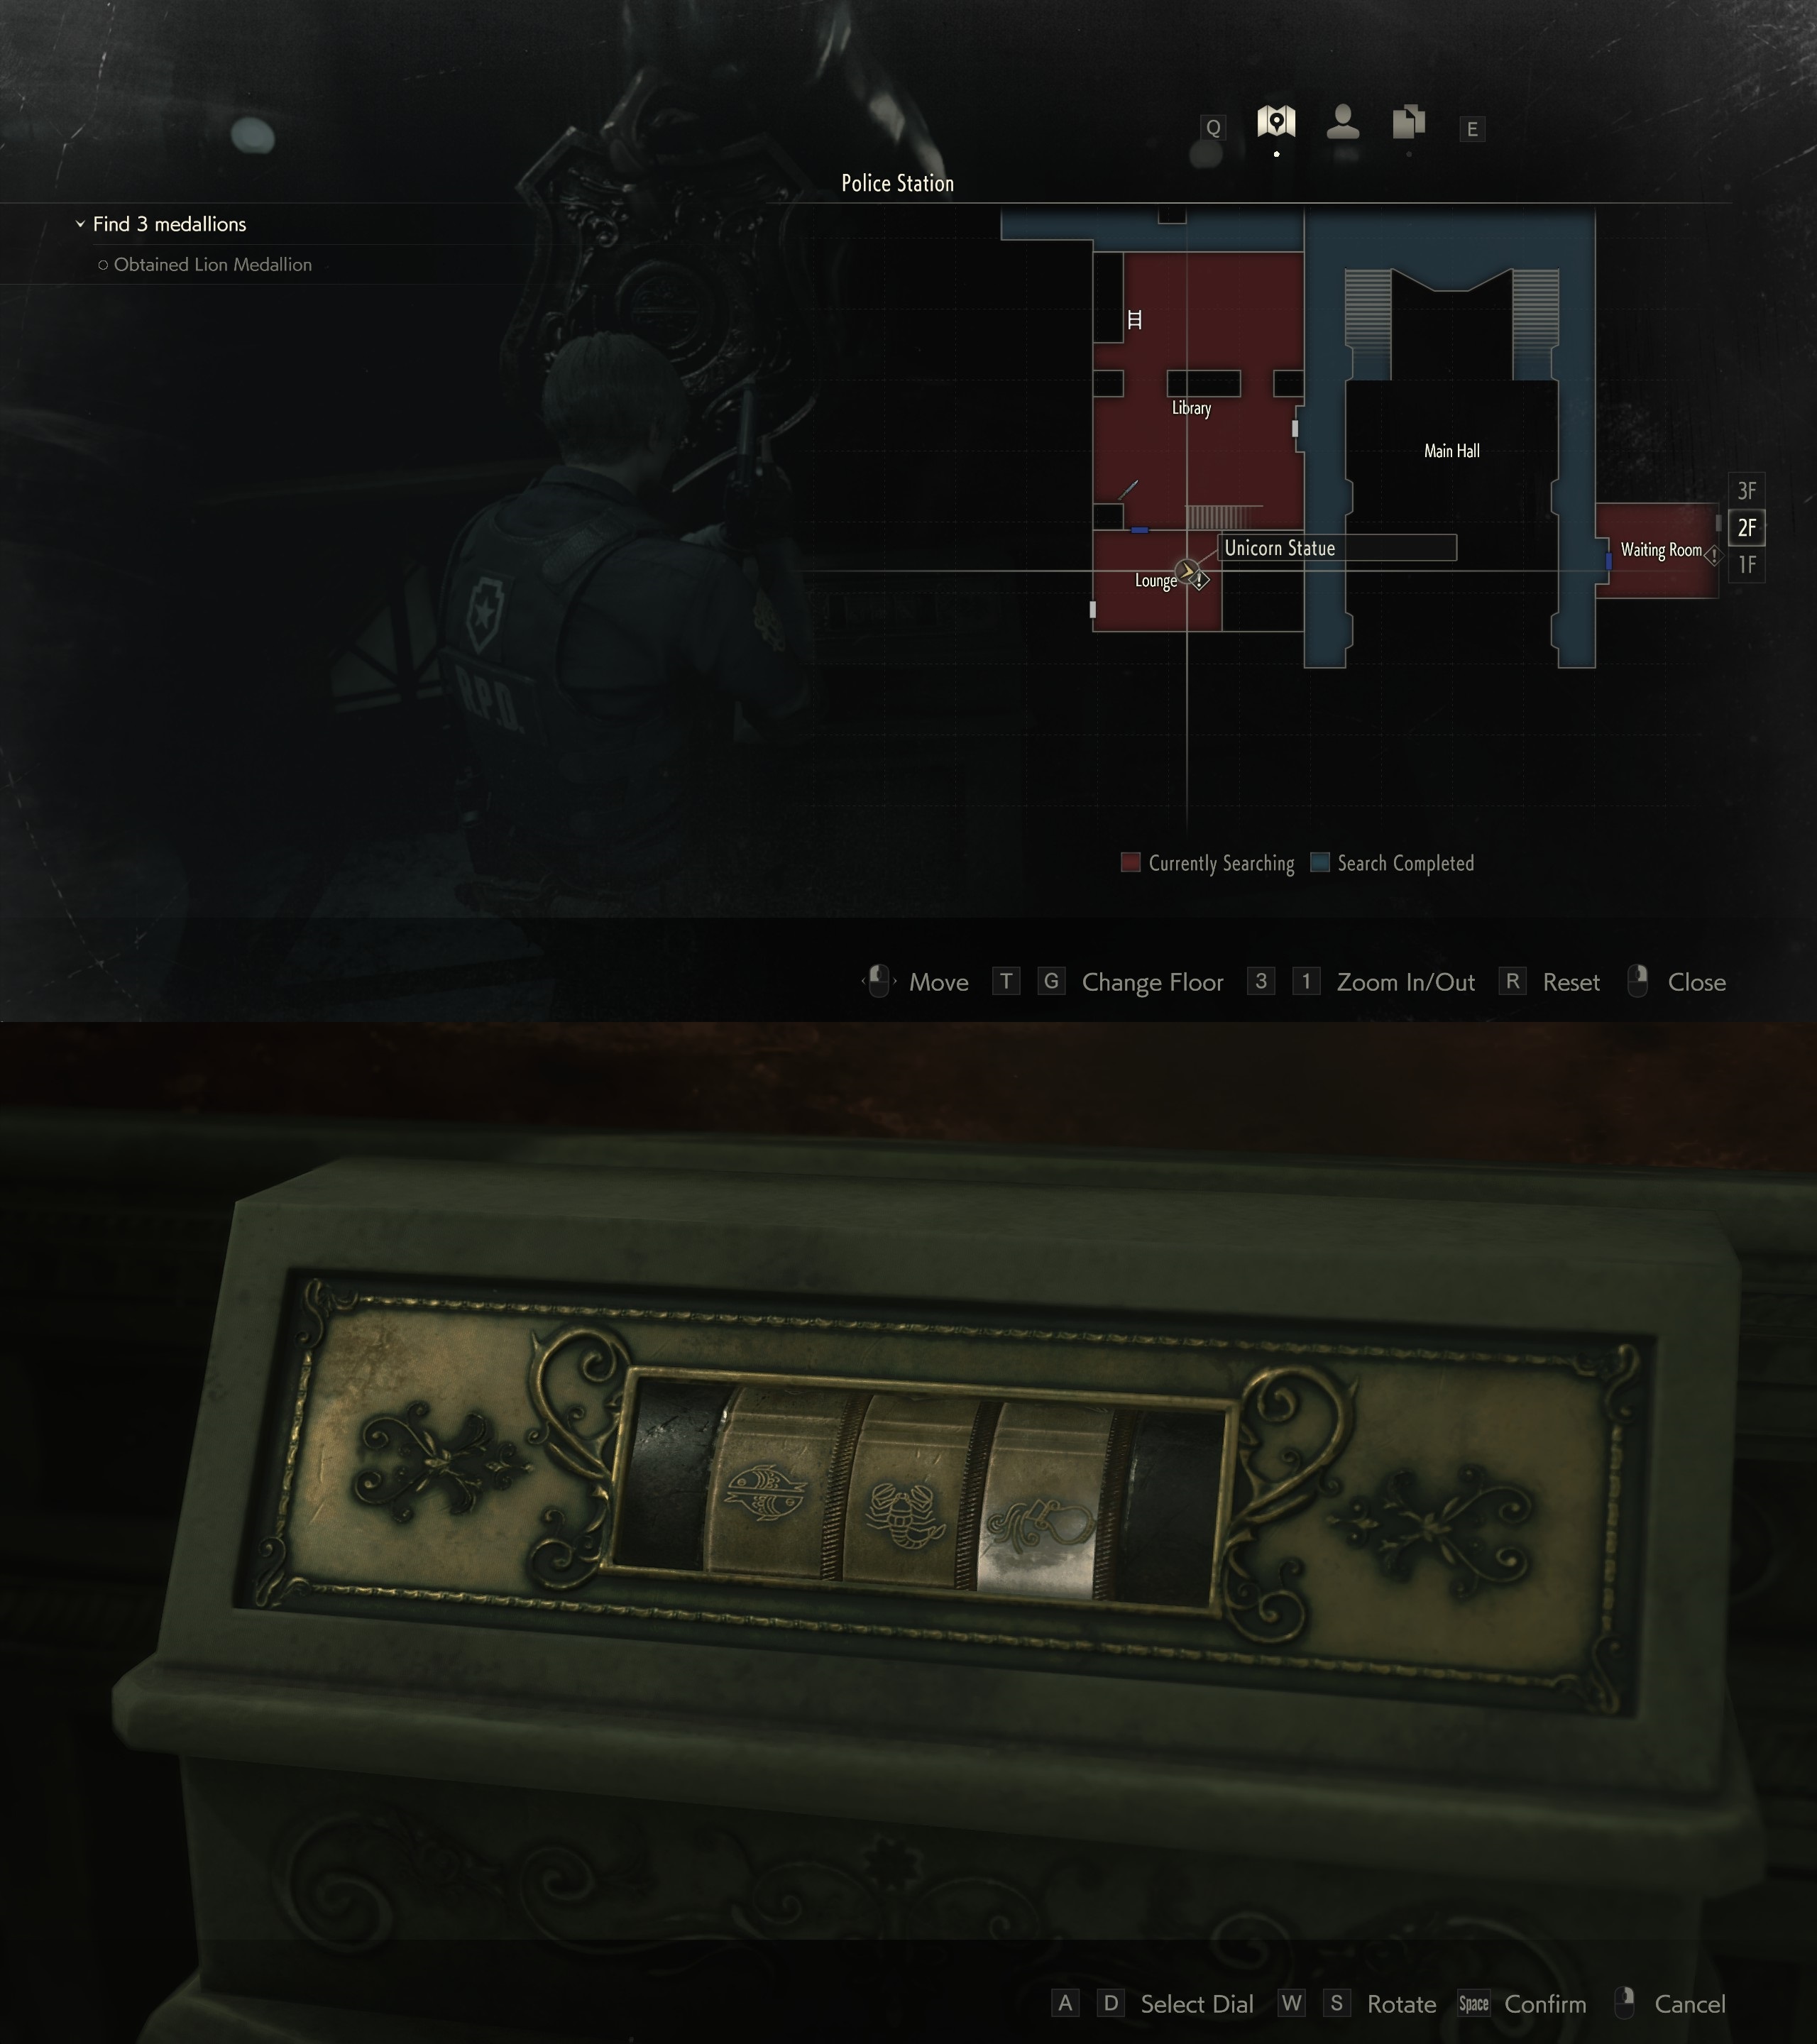
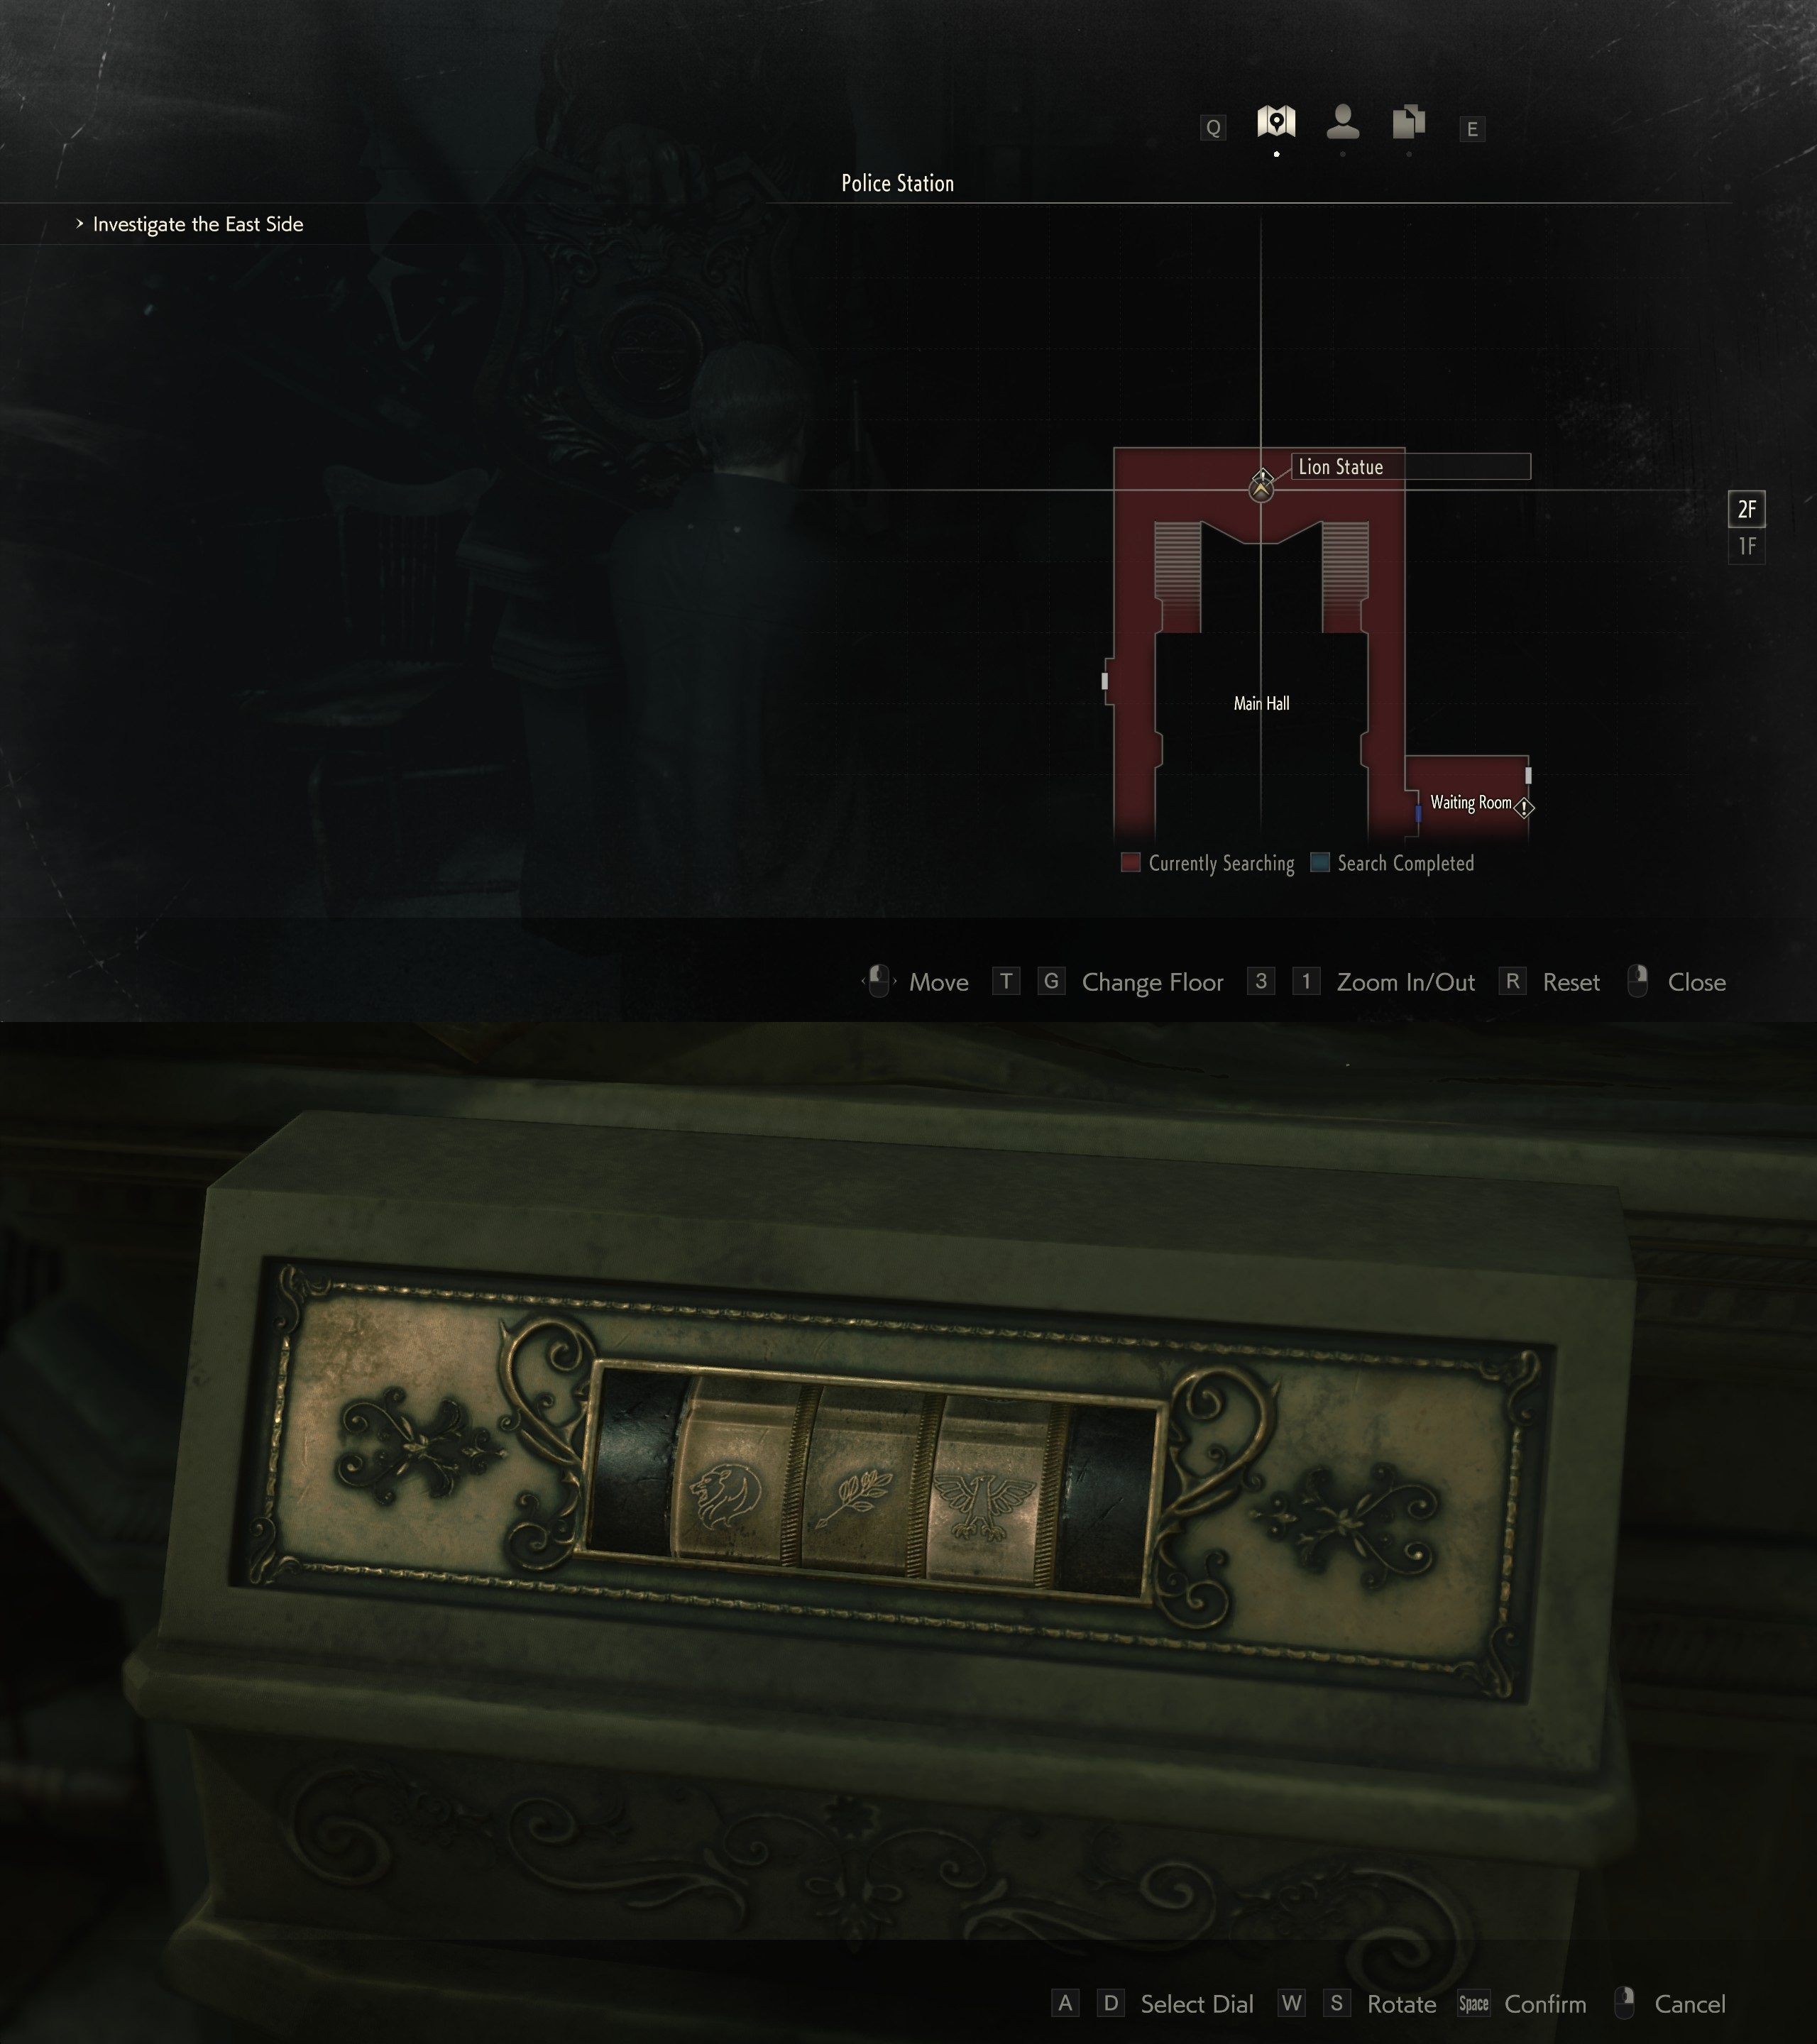
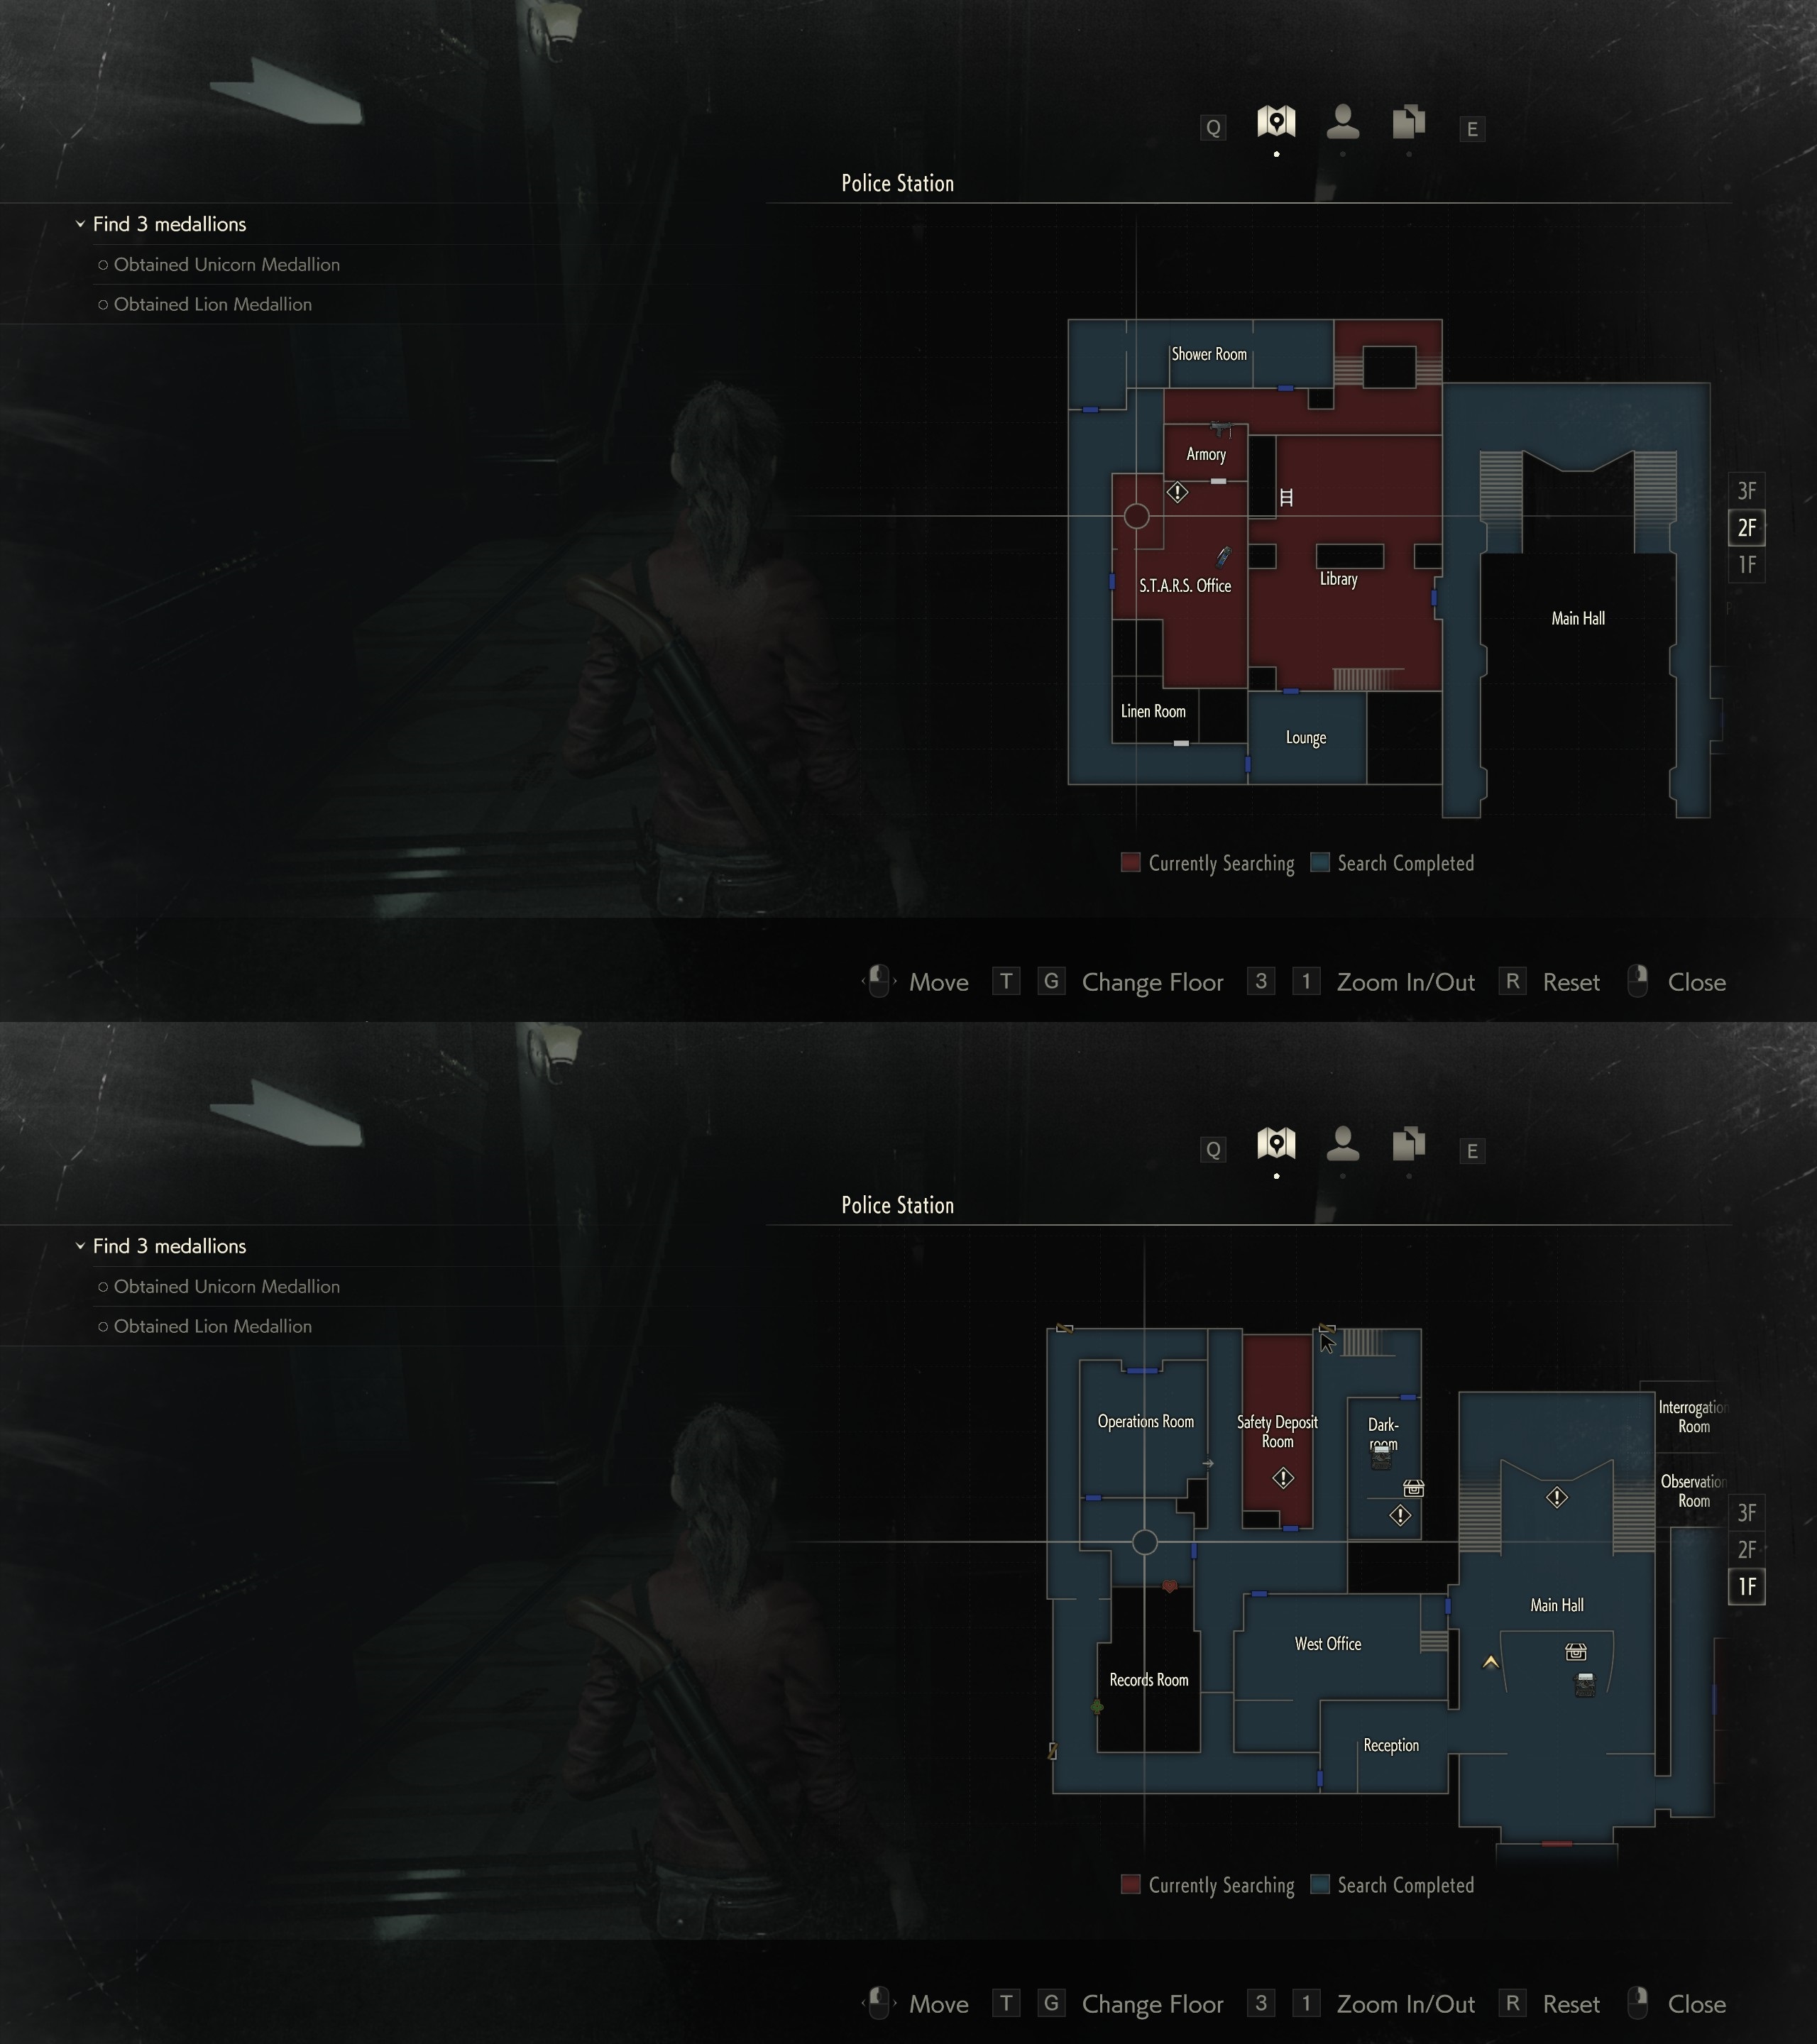
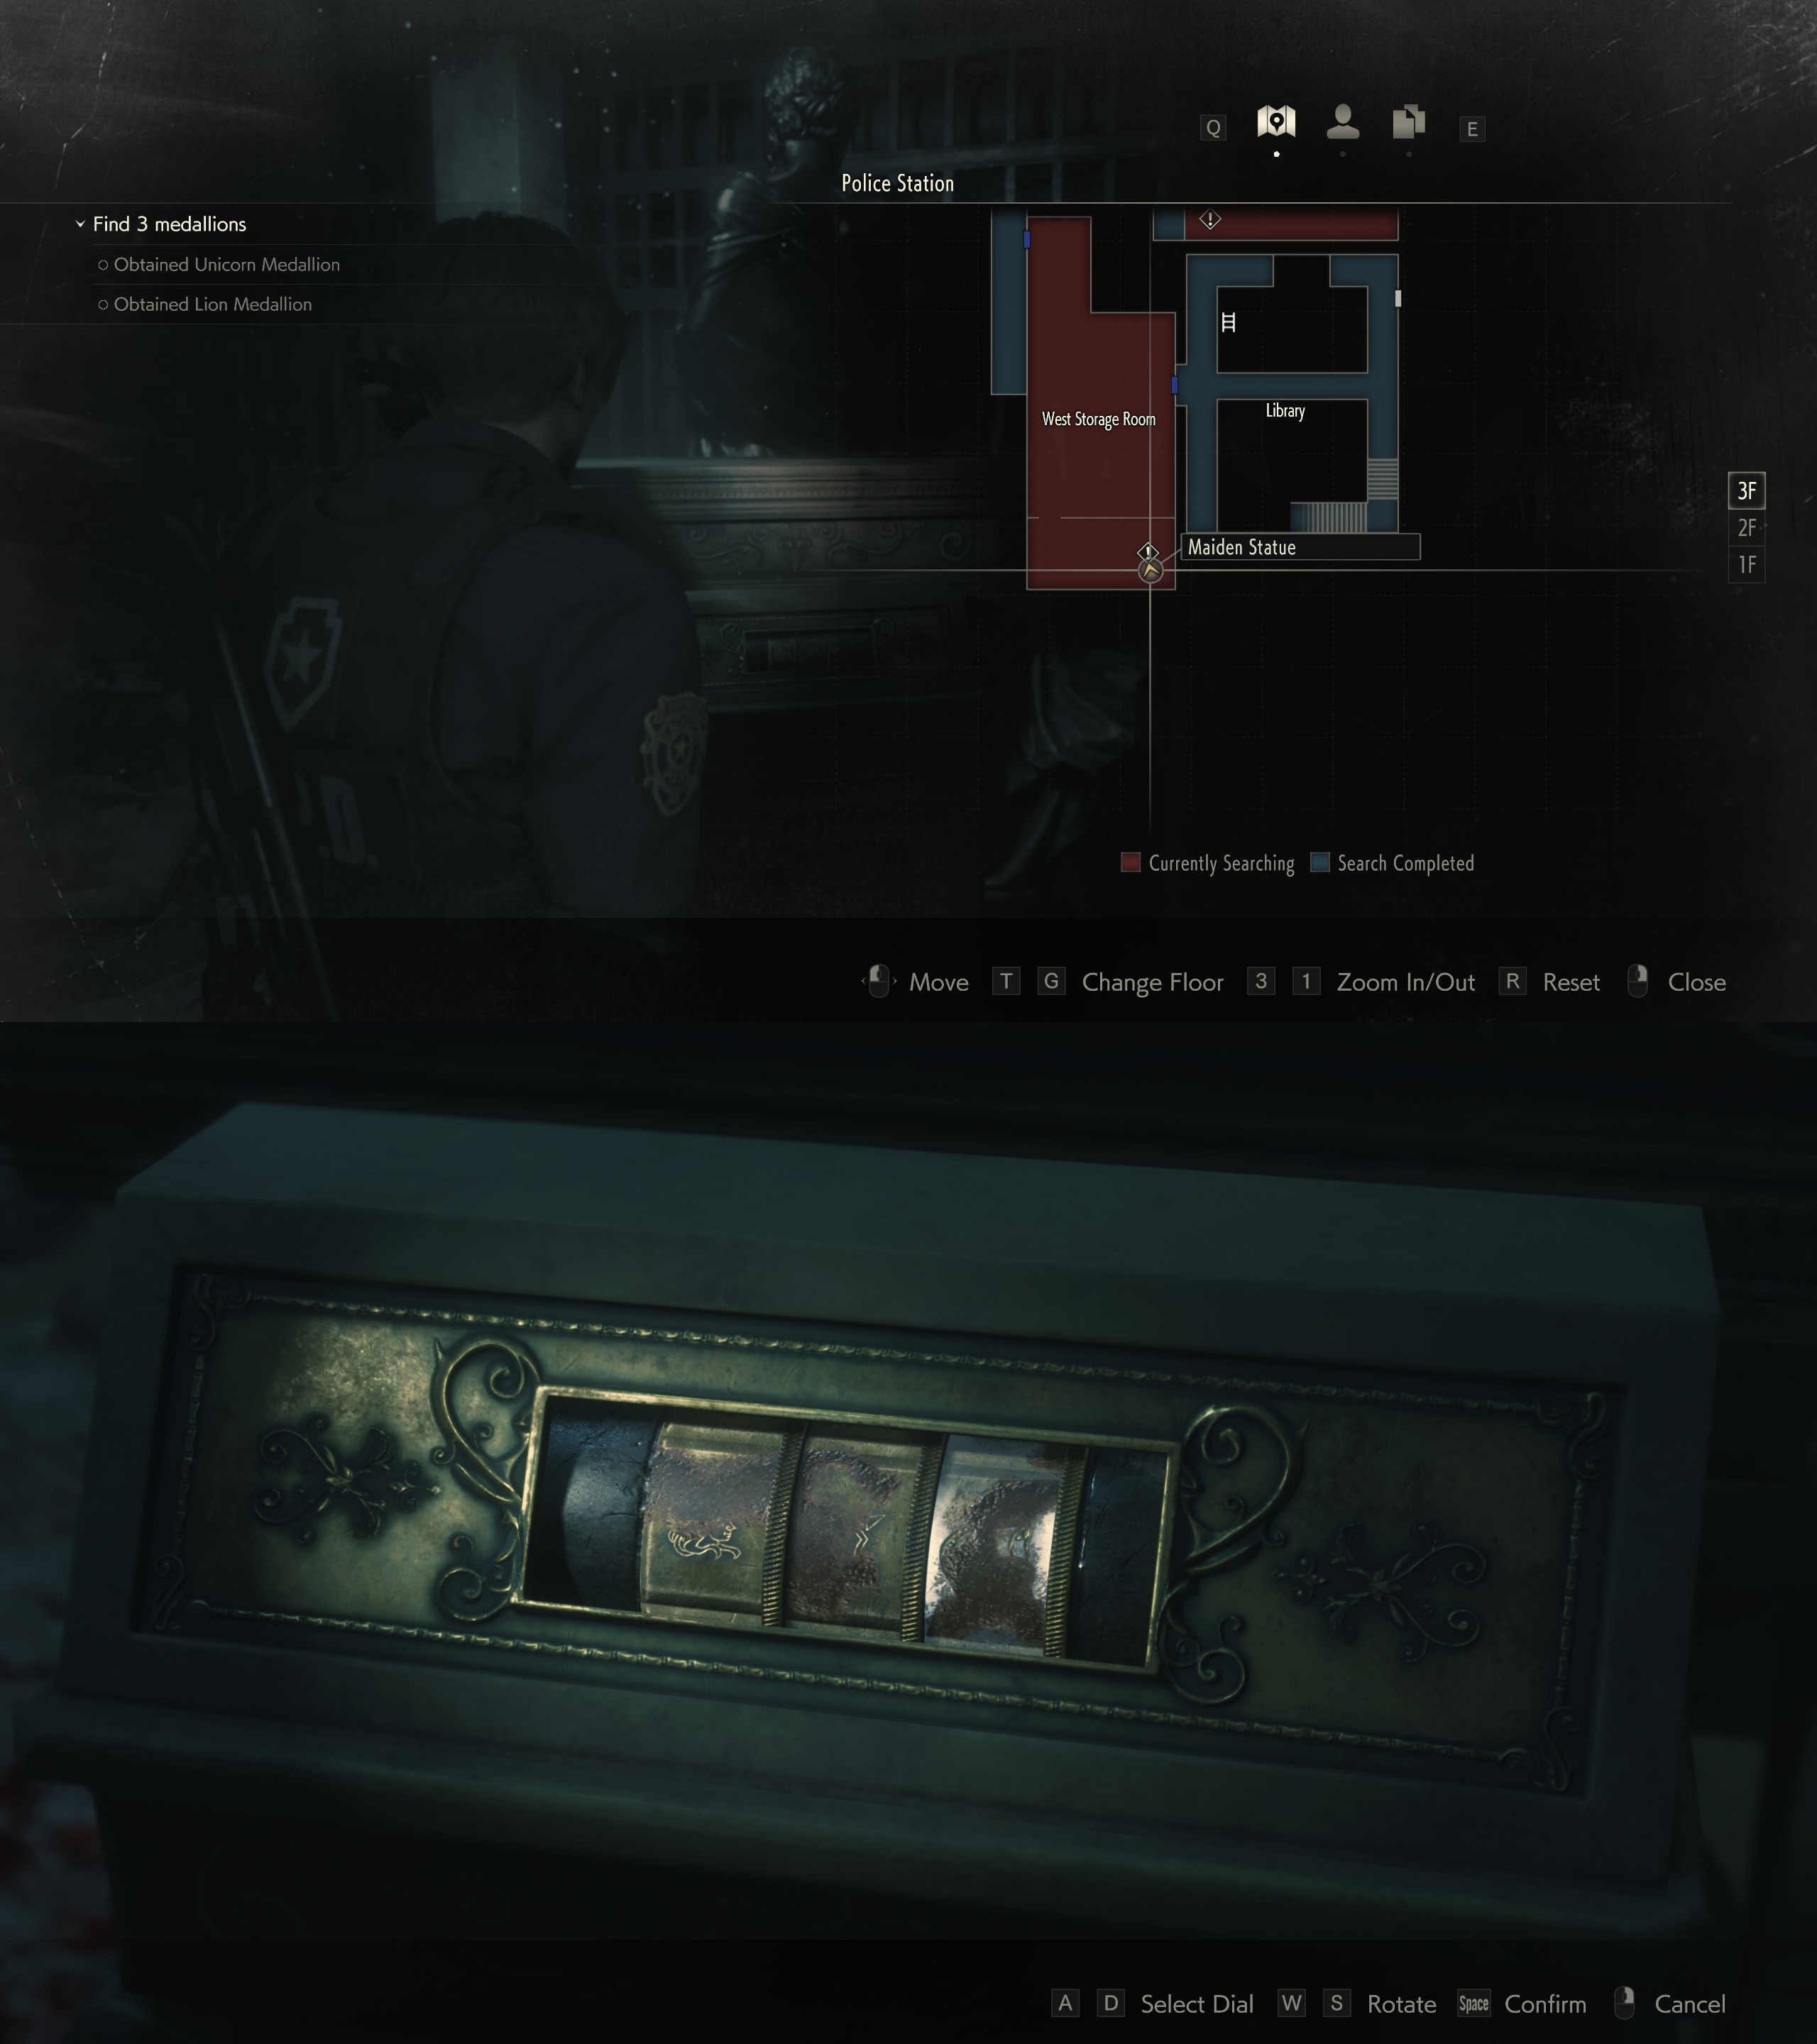
Completed the RPD medallion puzzle: 0:21
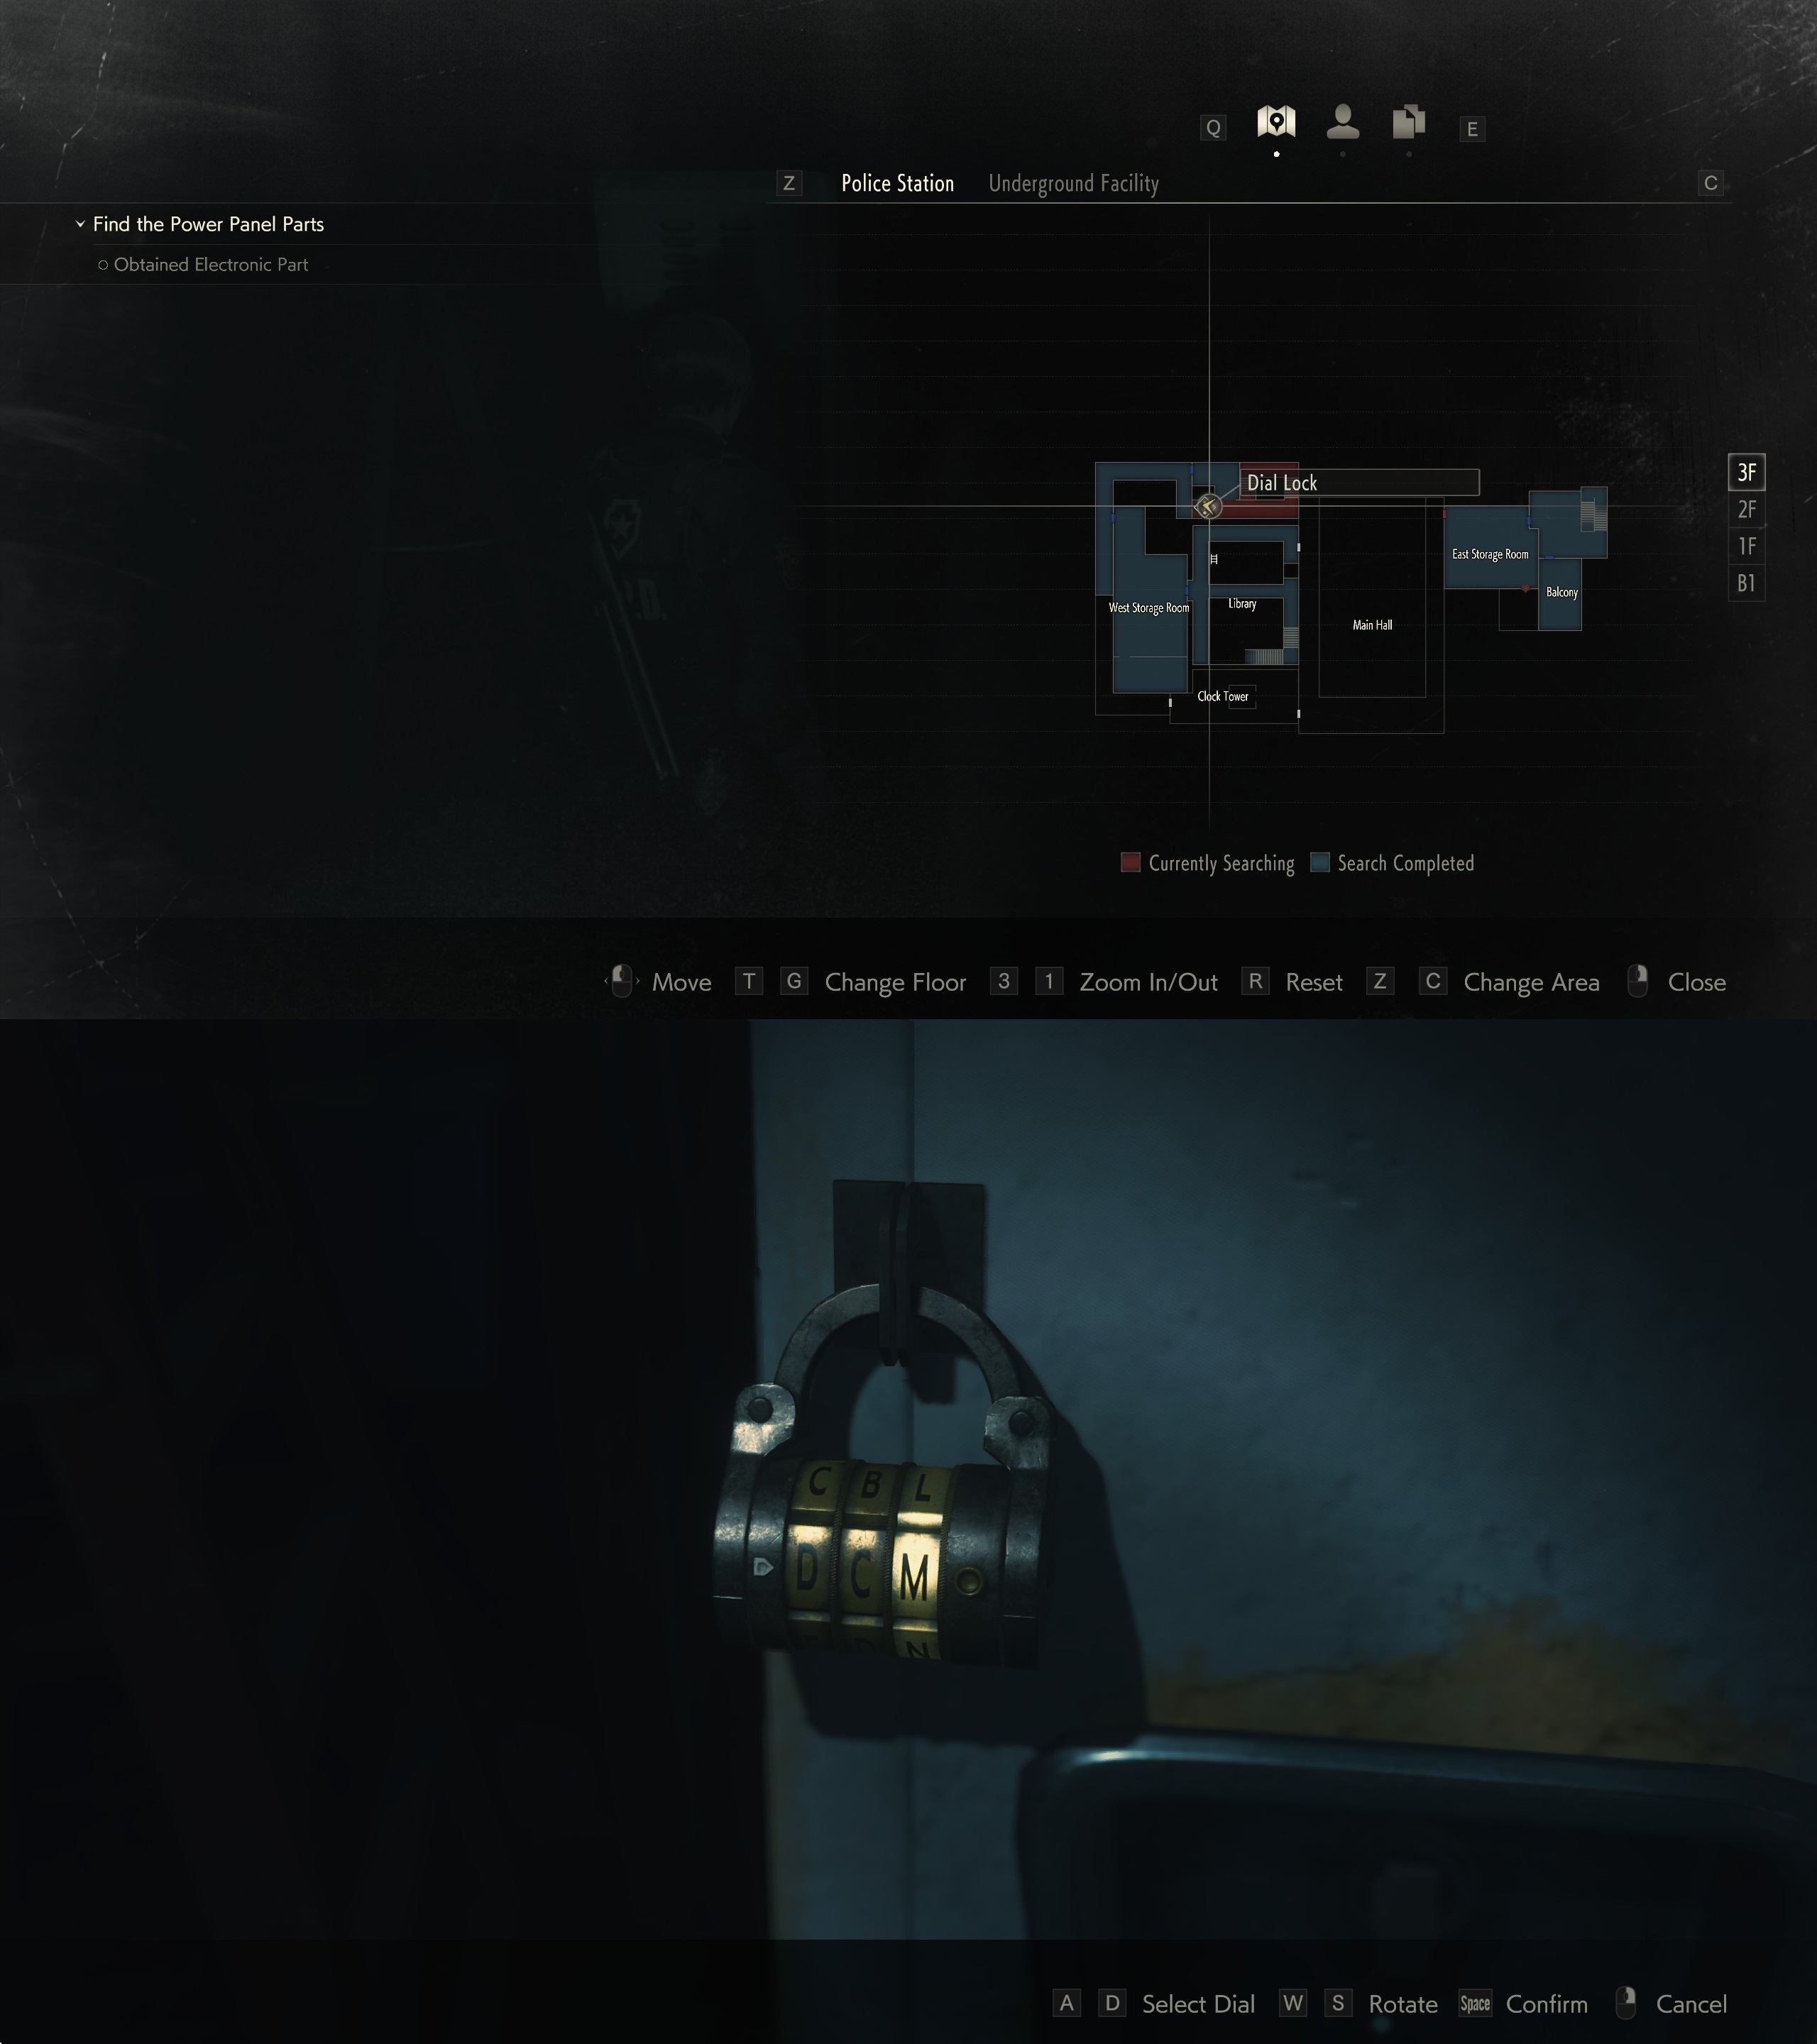
Entered Sewer Monitor Room: 0:58
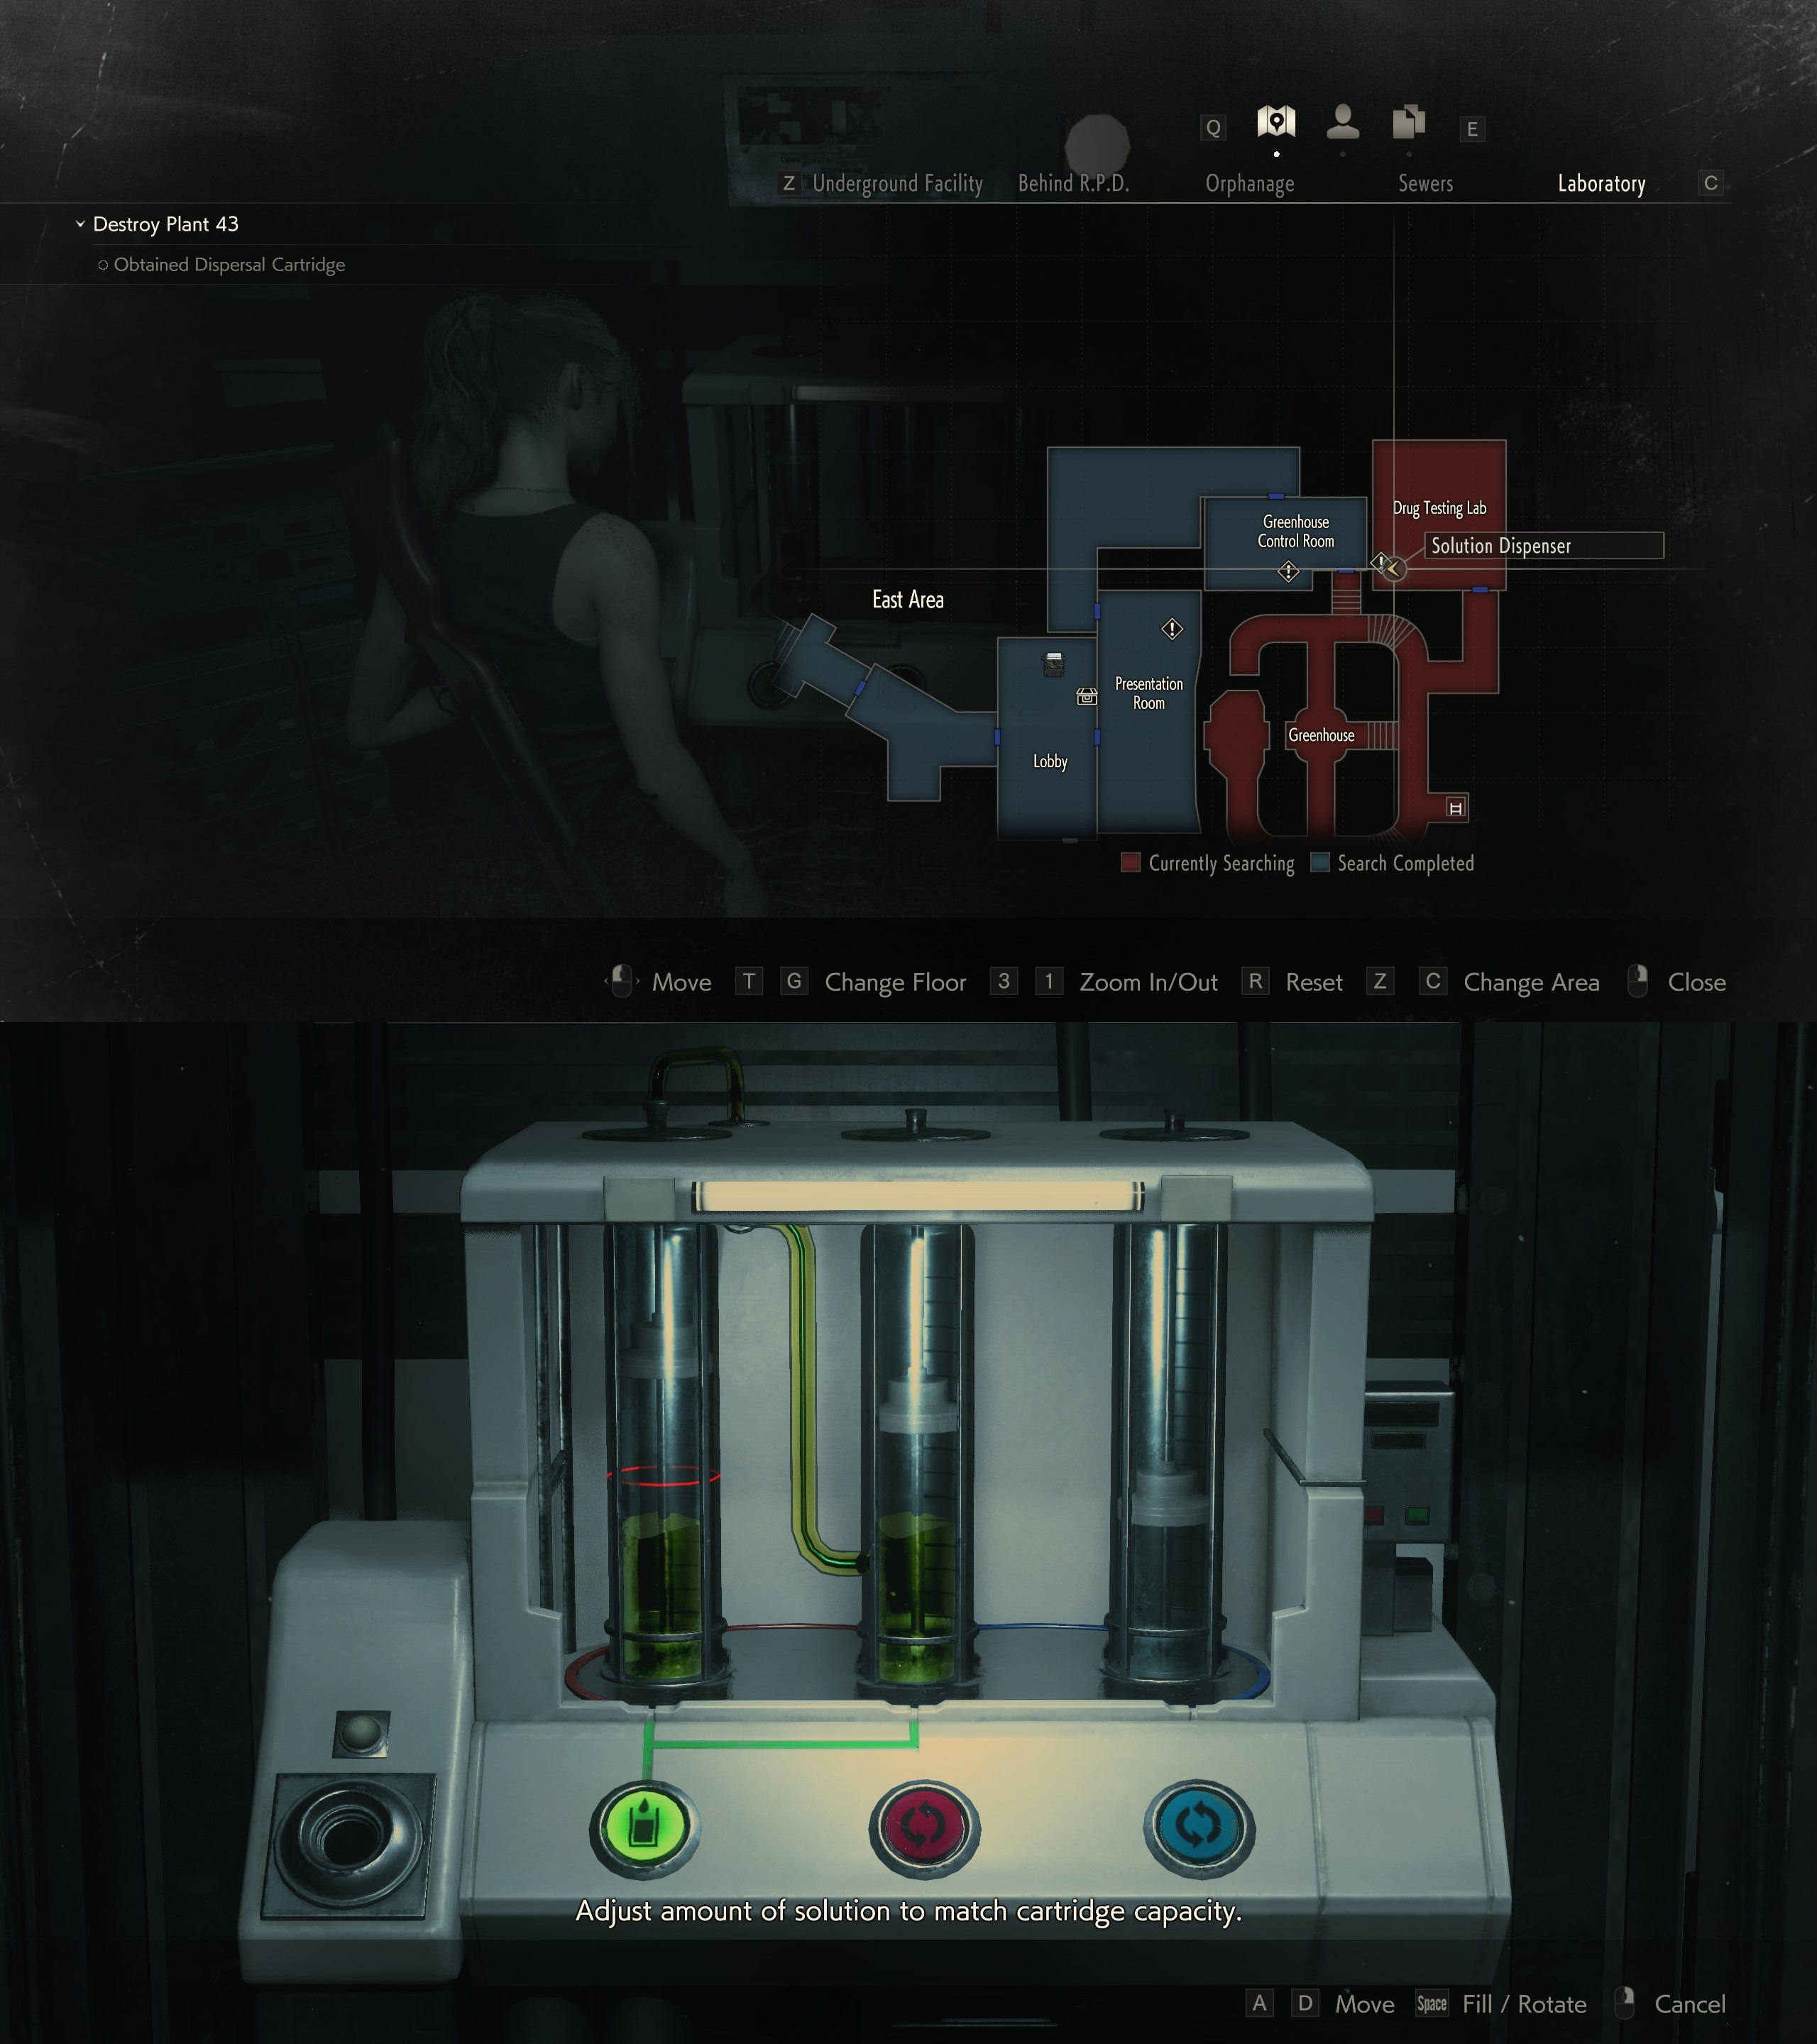
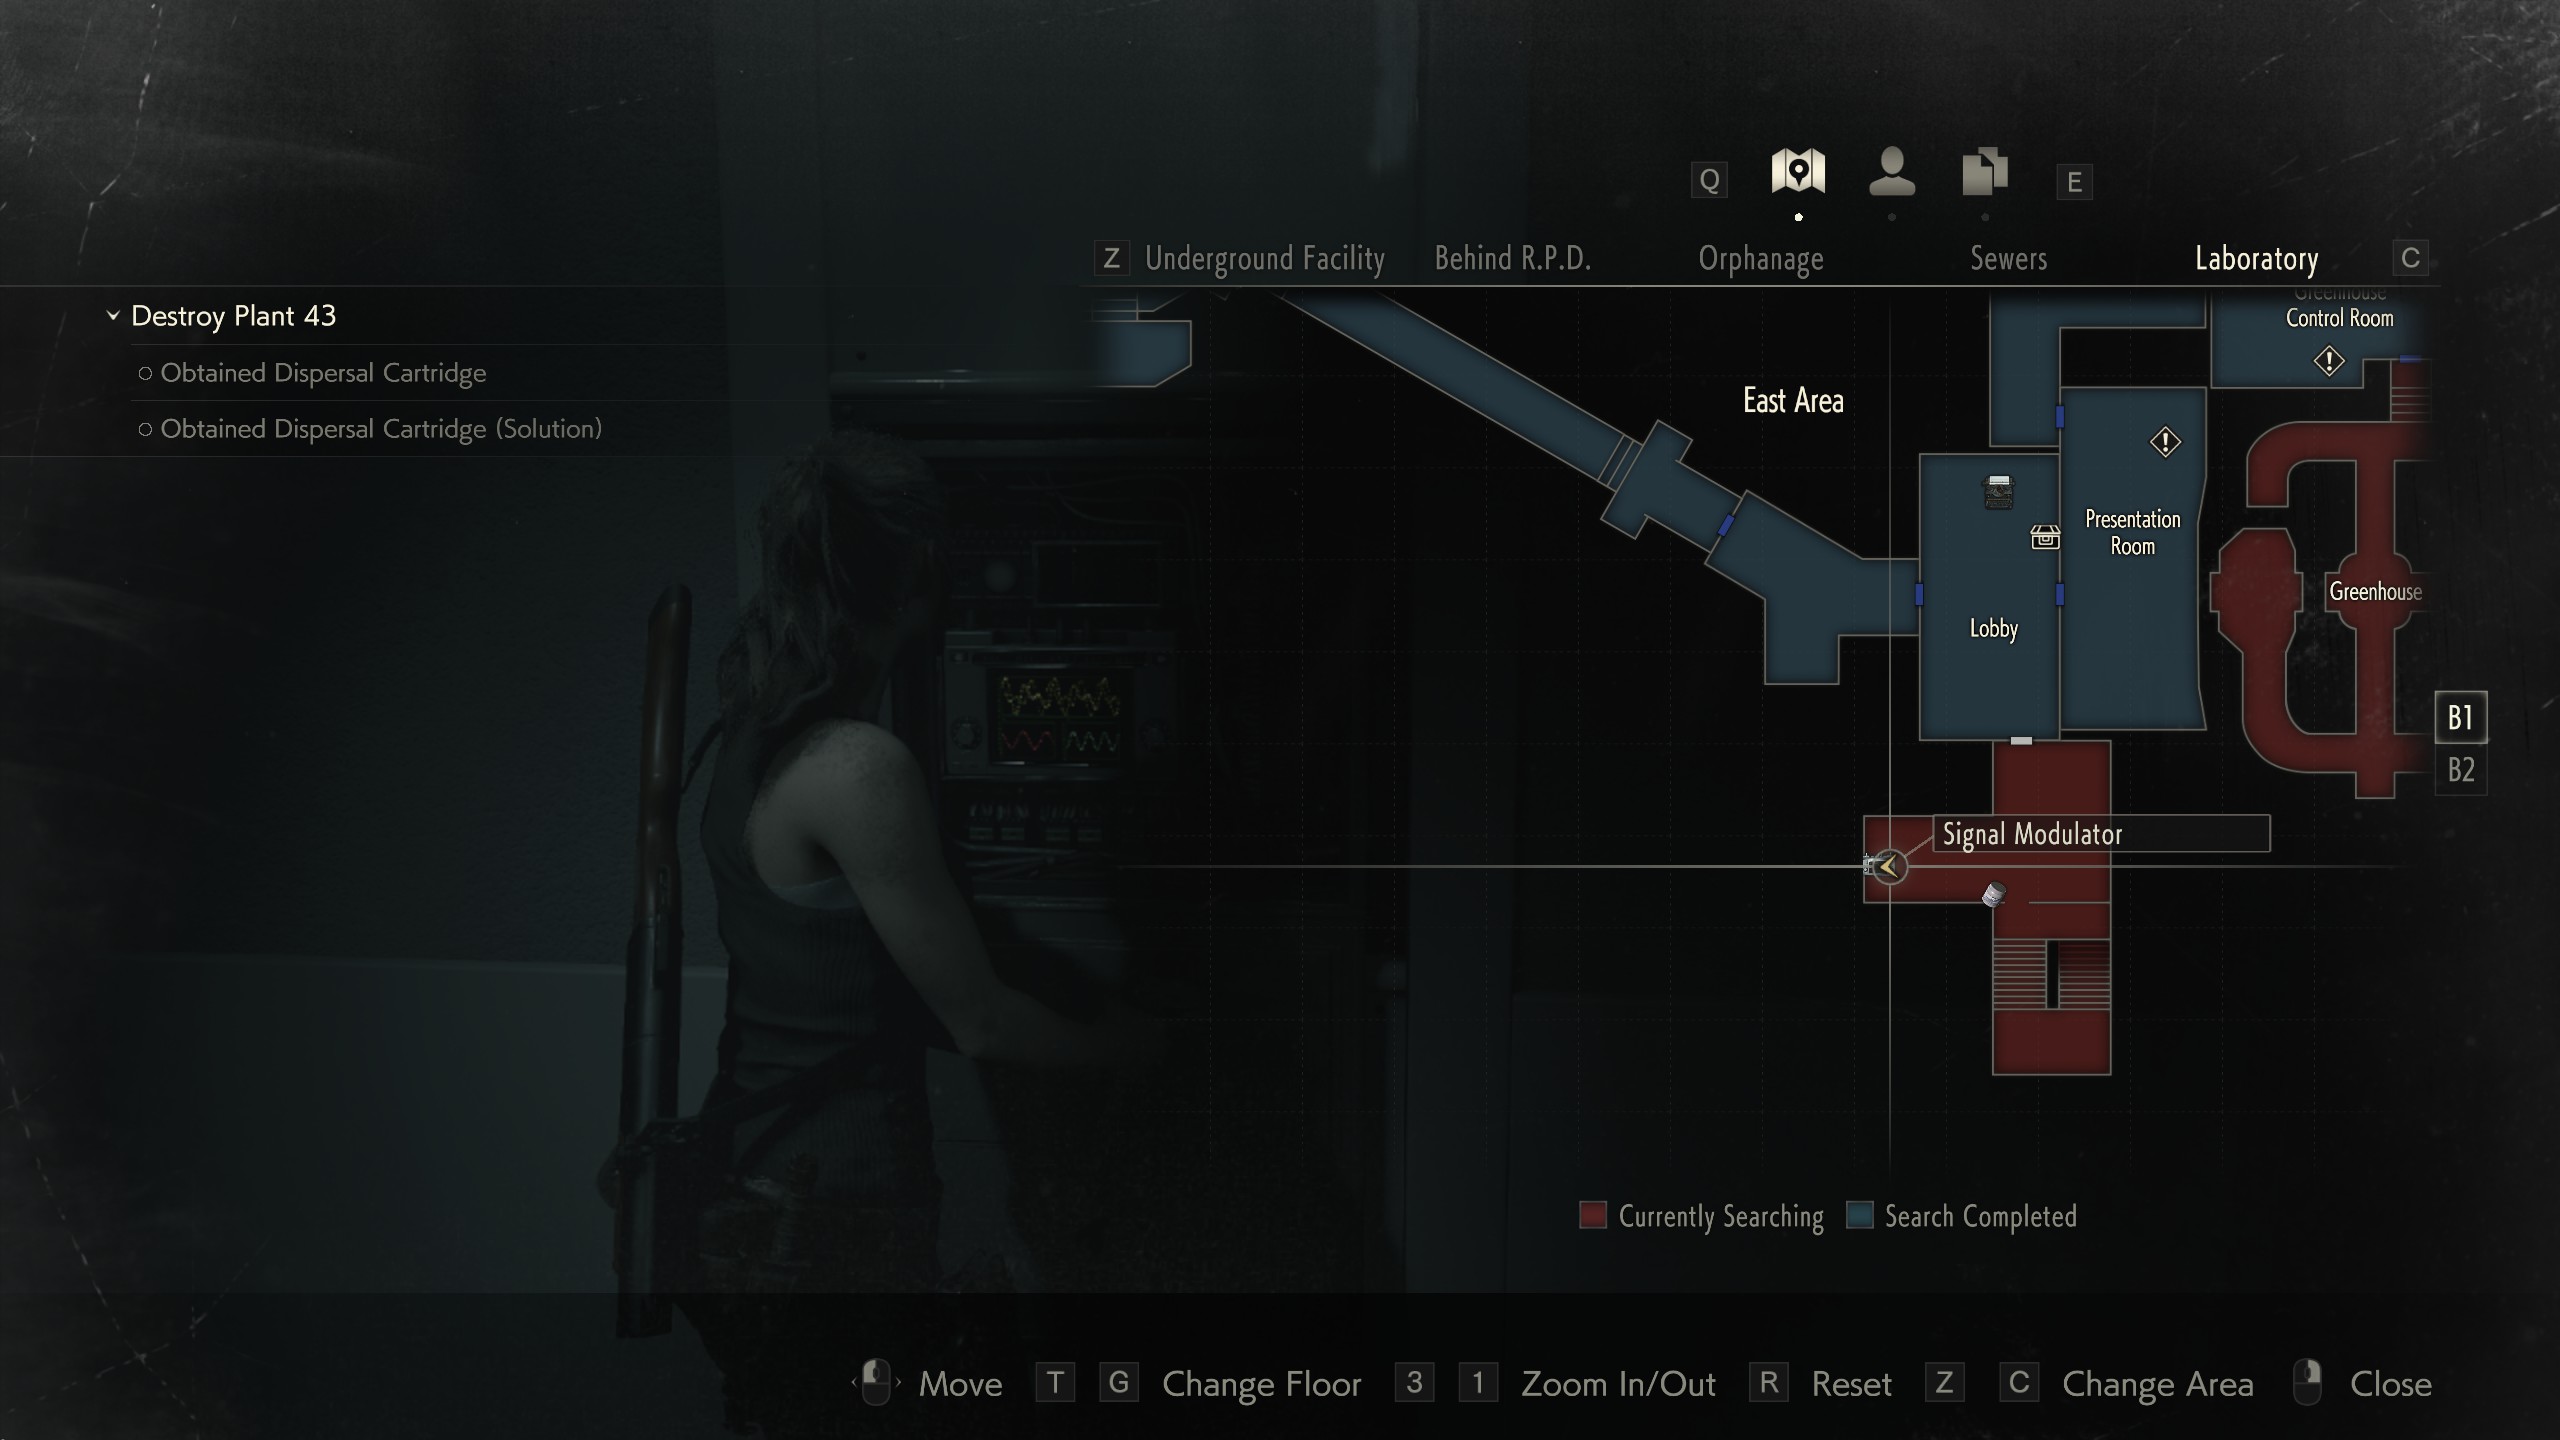
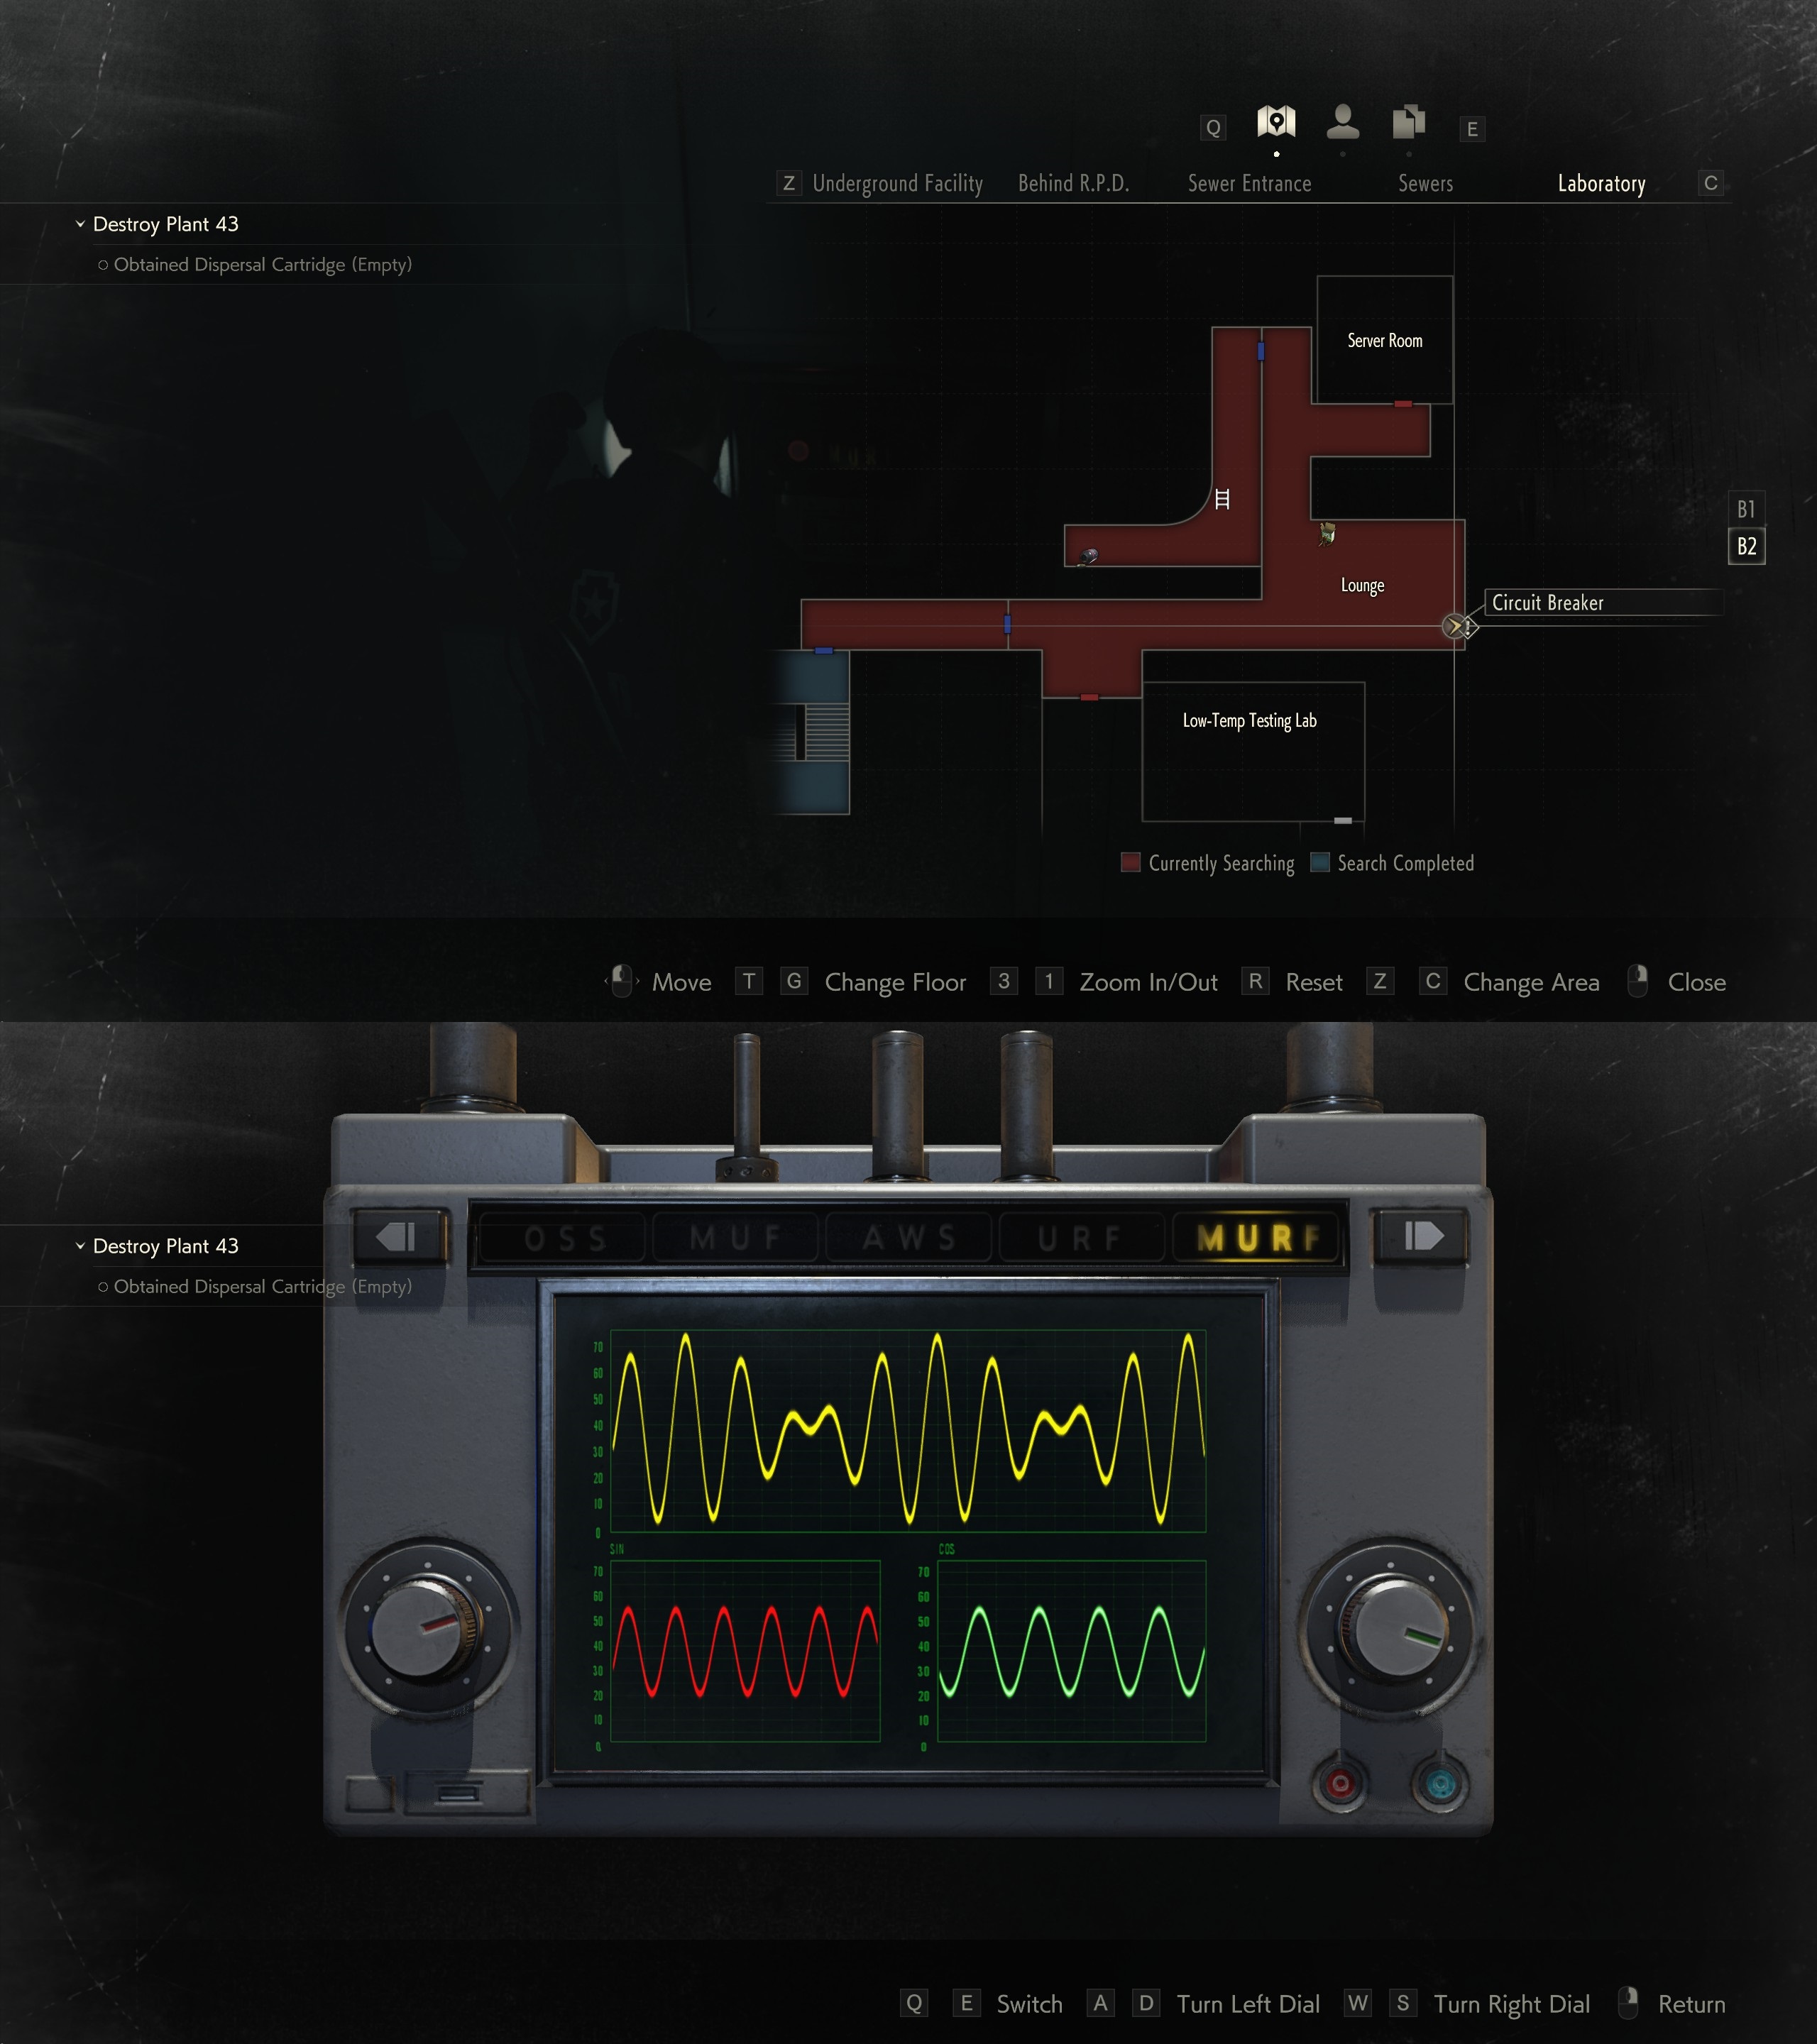
Entered NEST East Area Lobby: 01:32
Defeated G4 and completed game: 1:59

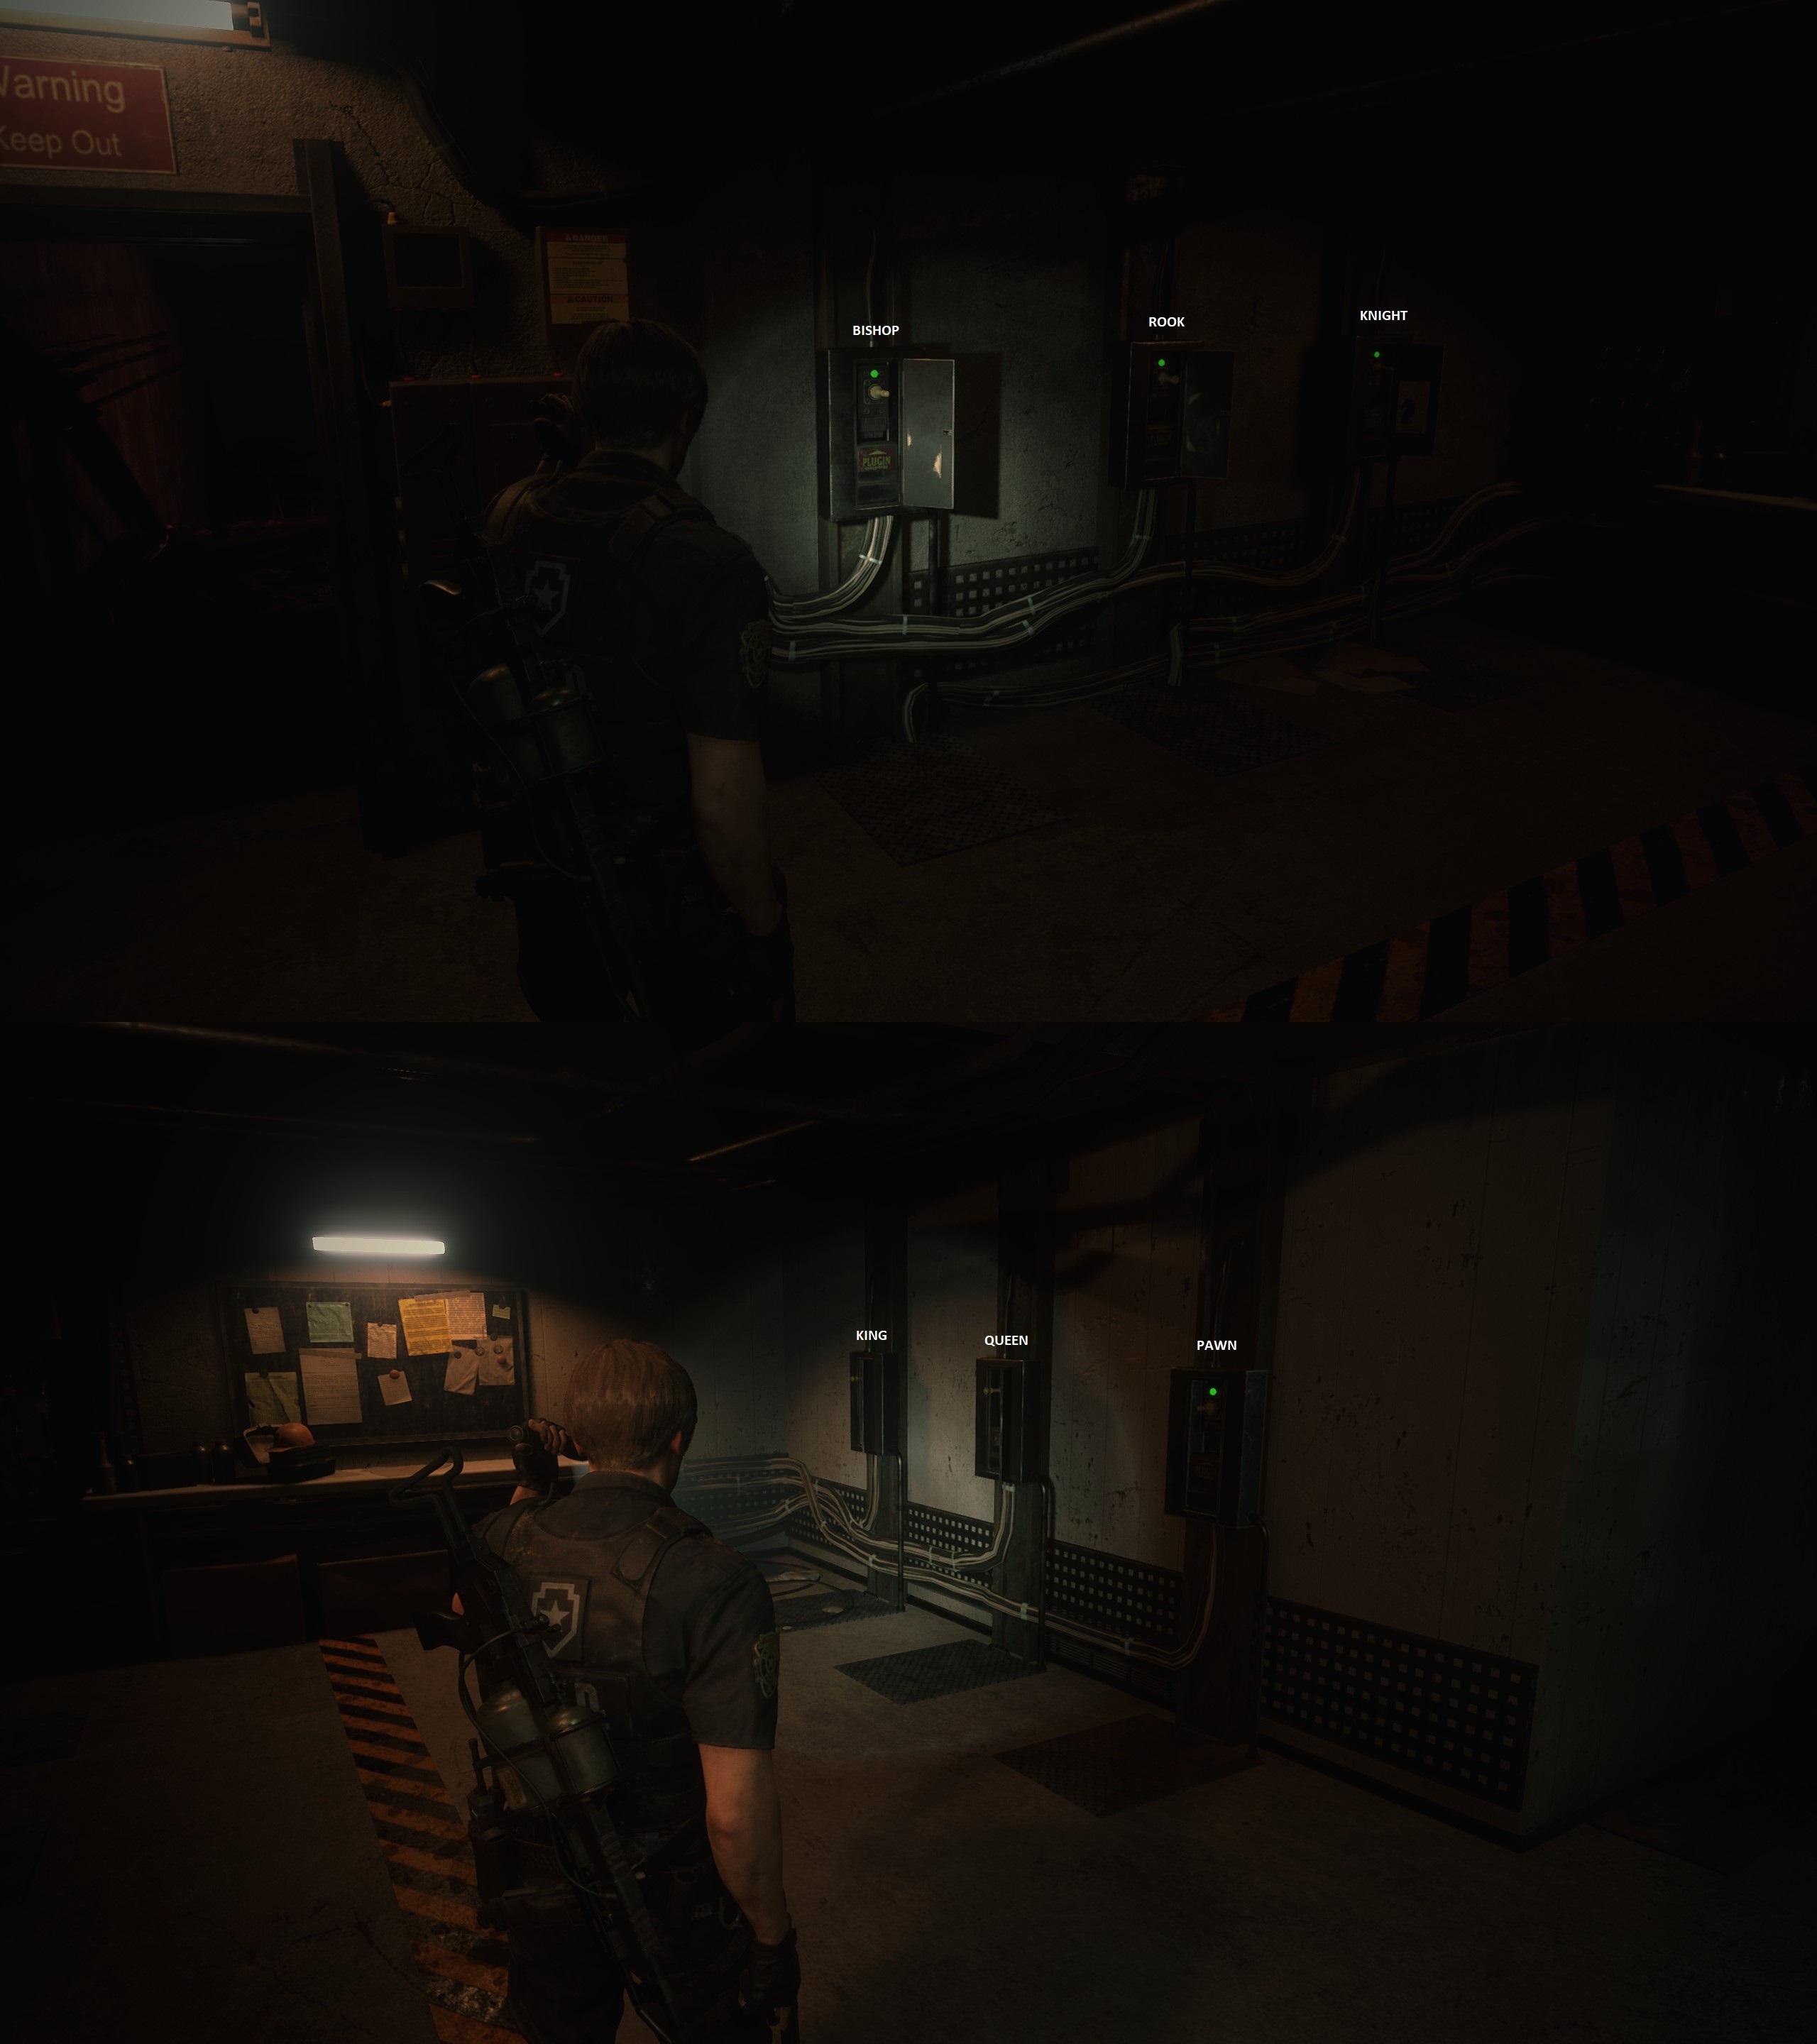
I had no problem going back to RPD and collecting the "Hiding Place" item in the STARS office and picking up the SMG. (I did skip the Press Room item because I don't use the Spark Shot except to leave the Sewer Supplies Storage Room.) I also got the "Small Carbon Footprint" achievement.
Lestat_91 7 июл. 2020 г. в 1:41 
This guide has help me a lot with codes and the walk thru thx !!!
#1 TIGGER 17 апр. 2020 г. в 9:25 
Thanks were do i pick up the Machine Gun
Reah91uk 3 апр. 2020 г. в 7:22 
I used this guide for S rank on Leon A Standard difficulty, worked for me and I even had time to open portable devices and pick up hidden items from the police station. I didn't get the best S rank timer score but I got it nonetheless. Now I aim to do Claire Hardcore S+ :re2stars:
Swisha 25 ноя. 2019 г. в 19:21 
Great Guide! Thanks for the help!
TreeTrunk 14 апр. 2019 г. в 0:29 
I got 3 achieves at the same time following this guide! Leon "S" Kennedy, Frugalist and Small Carbon Footprint! :skyelaugh: though I was using the infinite SMG :lunar2019grinningpig:
P15tol Pete 4 апр. 2019 г. в 12:18 
Great guide! And Thanks for writing it up properly, I hate how most of the guides on here are just a video with little to no explanation. Got thru in 2:38:59, without getting the magnum. I was worried I might struggle with the boss fights without the magnum, but their easy enough if you save up your grenades.