Cry of Fear

Cry of Fear

Not enough ratings
Cry of Fear - Doctor's Story Helpbook
By at
This is a guide for the unlockable game mode in Cry of Fear called The Doctor's Story. It has general strategies, hints, enemy informations and a walkthrough of the game.
2
   
Award
Favorite
Favorited
Unfavorite
1.Introduction
Doctor's Story is an unlockable game mode in Cry of Fear. It's obtained by completing the main storyline once - the difficulty level or ending doesn't matter.

In Doctor's Story the player has the chance to take part in the Cry of Fear storyline from Dr. Purnell's perspective. He enters the world of nightmare created by Simon to destroy the book he was writing, in an attempt to stop those horrifying events once and for all. His journey is not a pleasant one - he is armed only with his old trusty revolver, and has to stand up against terrible monsters that Simon's brain has created.

The concept of this mode reminds me of the special modes from classic horror series Resident Evil. Especially "The Mercenaries" from Resident Evil 3:Nemesis and "The 4th Survivor" from Resident Evil 2. Player has to make his way through one specific part of the map to the other when racing against the time, with very limited equipment . It is necessary to use skills to run away from danger, conserve ammunition and be very careful, because one mistake might lead to inevitable death.

For inexperienced players this can be very difficult, so I came up with the idea to make a walkthrough of this mode. This is the first version of it, so any suggestions on improving this are welcome. Also, my english isn't very good, so when you see some mistakes, feel free to point them out.

Note : The standalone 1.6 version of the game has an annoying bug that makes enemies go through walls, making this mode unplayable, at least for me. I was writing this guide when I played the 1.2 version, so some parts may not be 100% accurate with the current version of the game.
2.Equipment
In this game mode, your equipment is the Taurus .357 Magnum and Dr. Purnell's gas mask - and that's all. There are no syringes to replenish health, no extra melee weapons or firearms, and no sources of light besides gas mask nightvision or environmental light.

At the start you have 25 Magnum bullets (5 in the magazine + box of 20). On your way through the map you can find about 40-50 more bullets. In order to beat the game you have to use about 40-50 bullets, depending on how accurate you are, so extra ammo is a "must-have" in order to survive. Sure, it's possible to beat many enemies through the game with the melee attack, but it will require good dodging skills, appropriate timing on using attack, and a lot more time to spend, so it's not the best solution.

Fortunately, the Taurus .357 Magnum is a very strong weapon that drops almost all enemies in 1-2 shots. Only Taller and Sawrunner are able to survive several rounds, but spending them on those enemies doesn't make sense and I don't recommend using it on them.
If your plan on using ammo is good, you can kill all of the enemies that block your path and still save some rounds at the end.
The weapon is not ideal - it has slow rate of fire and reloads very slowly, so you must use it correctly to avoid situations like reloading when involved in a fight or fighting more than 1 monster at the time.
3.Enemies
Through the game you will encounter several enemies from the main story. Some of them have nearly the same positions as in normal game (Aquatic Twitchers mostly) and some of them will surprise you (especially the Sawrunner)
Here is the list of all enemies that you will meet in this game mode - strategies for fighting them will be explained in another part.


a) Aquatic Twitcher

b) Baby

c) Children

d) Dismembered Twitcher

e) Faster

f) Flygare

g) Human Flower

h) Sawrunner

i) Stranger

j) Taller

k) Slower
4.General tips&strategies
* Watch your health - you want to have as much health as possible through the game to the point when you reach the apartments. If you're at this point and your health is below 30% it could be very difficult to reach the end.
If you find yourself in a position where you can’t run away from the monster - use your gun. It's better to lose some ammo rather than health, because you cannot replenish it in any way so it's important to keep it high.

* Conserve your ammo - it's plain simple : you lose all your ammo - you die. If killing a monster is not necessary to progress - avoid it by simply walking/running from it. Try to aim steadily and pay attention to the recoil of the gun - you want to land most of your shots in order to complete this game.Your ammo is very limited and there are many enemies on your way, so you must have a good strategy of using it.

If you have trouble shooting at enemies like Slowers, Aquatic Twitchers or Children - use a melee attack at them first and then land a shot or two if needed. The melee attack stuns your enemies for a little while and gives you time to aim at them and shoot - this works excellent on Slowers, which are hard to put down when they're moving. Also, don't ever reload the gun when you still have bullets in the magazine, cause they will be lost and can't be retrieved.
If your plan on using ammo is correct, you will never have to reload when involved in a fight.

* Don't waste stamina - your stamina is crucial in few moments of the game, so always keep it at decent amount. Most important moment when you use it is when you have to run away from Sawrunner at the 3rd floor of apartments - he is very close when you enter the room, and if you don't make it fast enough to the end he will kill you.
If not making a speedrun, you can simply walk away from many of the monsters and not use the sprint in order to maintain your level of stamina.

* Don't kill if not necessary - most of the enemies can be avoided, so use it as your advantage. Only kill those enemies which are blocking your path, like those in narrow corridors or ventilation shafts

* Use the door animation in your advantage - you can trigger the animation of changing location in a moment before you even reach a door, and at some places it works great when you have to run from monsters. I will point those moments later in the guide.
Other good point of doing this maneuver is that it can freeze enemies in their starting position (in version 1.2) - this will come in handy in one part of the underground construction site.

* Try to memorize enemy placement - if you know where the enemy is, you have a huge advantage and can use it to either run past him or quickly take him down.

* Take the shortest route around the map - in some points you can go into some rooms that are not proceeding you through the map, but contain extra ammo. Unfortunately, they contain enemies as well, which means potential risk of losing health.
The risk is not worth it - it's a loss of time going to those rooms and backtracking from them; when you go in planned path you will have enough ammo anyway, and if you lose health trying to grab the ammo you may have not enough to even use it in the end.

* Use your knowledge from playing the main story and adapt it to Doctor's Story - you know the enemies you will fight : how they react, how fast they are, how to generally deal with them. Use this knowledge to adapt your strategy in this mode.

I will drop couple of hints about the enemies in this mode and how to generally deal with them - you can make your own strategy based on this, or just use mine.

a) Aquatic Twitcher - encountered in sewer/underground parts of the map and in flooded part of apartments. Their positioning makes them hard or even impossible to overrun most of the time.
In version 1.2 and above their number has increased a bit. You can encounter them in places which they were not before the patches, making the game a bit more of a challenge.
Usually they are seen in groups of 3-4. If you need to kill one, two bullets will drop it down no matter where you will shoot it - you don't need to make headshots on them. If you need to conserve ammo at point where they are lurking, you can try using one shot from the gun + melee punching with dodging backwards to drop them. This requires appropriate timing when doing it, and it will take longer time, but if you're low on ammo it can save some bullets.

b) Baby - encountered after the first Sawrunner and in the apartment building. Most of the time they come in group of 4 enemies, with the exception of one that is one room after the first Sawrunner encounter and one at the entrance door to first floor of apartments.
The one after running from Sawrunner is I think the only one that can be easily dodged - you need to quickly use the door trick before it attacks you. The positions of the rest on the map makes it impossible to run away from without taking any damage.
They're very weak and one shot in whatever body part kills them. It feels like almost a waste of ammo, but you must do it because their suicide attack makes melee impossible without taking damage.

c) Children - encountered only in apartment building. It is necessary to kill one of them, the rest can be dodged if the strategy is planned and executed properly. One shot kills them and you should only use the Magnum on them - there is no space for using melee attack and dodging like in main storyline.

d) Dismembered Twitcher - encountered in the first part of the map, only in ventilation shafts. They can be dodged, although it's good to kill the first one you see in order to save some time (luring him out may take a long time because the monster is very slow and often likes to stop for several seconds)
They take one shot and are not a real threat if you are not slow at movement - even in ventilation shaft you can easily get away from them.

e) Faster - encountered two times : first time is in a corridor before entering the underground construction site, and the second time is in second floor of apartments. In the first situation it is possible to run away from them, but it's quite difficult and if you don't have good timing it will simply not work.
In the second encounter it's necessary to kill one of them in order to get into the room without damage. They usually come in pairs. It takes two to three shots to kill it.
It's important to shoot them in the center of the body while being crouched - shooting it to the head is not a good idea because it has protective bars on it, and shooting while standing might result in shooting it in the arms, which don't do damage to them. If you must conserve ammunition when you encounter them - use the "one shot+melee" tactic like in case of Aquatic Twitcher, which puts them down with one execution of this combination (one shot and only one melee hit).

f) Flygare - encountered in almost all places in the game. It's the easiest enemy to dodge - there is only one place in a narrow corridor where the monster is blocking the path so it must be killed in order to advance.
They usually come in groups of 3-4, often with company of other types of enemies in wide open areas. It takes two shots to take one down. Best tactic to kill the one that is blocking the path is to get close to it while avoiding it's projectiles, crouch and launch two shots to the middle of it - you don't want to waste ammo shooting the bed's bars, because he can't take damage that way.

g) Human Flower - encountered once, at the exact same place where it's positioned in the beginning chapters of main storyline. Like in the main game, it's not really an enemy, but rather an obstruction. Anyway, better not come close to it.
General tips&strategies
h) Sawrunner - encountered three times in various places of the map - in the place where you hear chainsaw noises in main game for the first time (interesting fact - in this place there is 2 of them), second one is lurking in a corridor before reaching apartment building, and the third is in the building itself.
This enemy is fast and deadly, so be sure to have some stamina before entering the room where he is hiding. At the first two encounters you don't even need to sprint - you can simply walk away from them and they can't do anything as long as you're moving.
The third one can be really frustrating, because sometimes you will be stuck while crouching under the crashed bars when escaping - it's especially frustrating because you die literally one room before the end.

i) Stranger - encountered two times - one is in the room before the second encounter with Sawrunner, second one is in the apartment building at the second floor. The first can be dodged, although it will cost a little health - if you have full or nearly full you can just pass him and don't care about it.
I highly recommend to kill the second one, because even when you run away from it into the room nearby, you will have to immediately deal with one Faster and you can trap yourself in a situation where you must fight with Faster while having a Stranger behind you, who will drain your health all the time he's close around your character.
It's a very deadly combination and you should avoid it at all costs. It takes two shots to the head?/book? to make it vanish. It's slow, so take your time, aim the gun to the head/book and launch two shots at it.

j) Taller - encountered on wide open areas of the map, like streets or construction site. Like in case of Flygares - it's better to just run or even walk past them, cause they're very slow in all terms - moving, attacking or thinking. Attacking them is a waste of ammo and time. You don't have to fight any of them if you don't make any spectacular mistakes - like running directly into one and stopping.

k) Slower - encountered in many places through the game, mainly on the streets and at underground construction site. If you have good sense of movement, you can avoid all of them without taking any damage.
Usually they're seen in groups of 3-4. Almost always they can be killed with one shot at the head, but rarely you will encounter a situation that they can survive your shot. When this happens use your melee attack - it will kill them with the first hit. If it's too hard for you to kill a Slower from some distance, allow it to come closer and use the melee attack. It will stun the enemy for about two seconds, and this allows you to aim and kill it with one shot no matter where you will hit it.
5.Walkthrough (rooms 1-10)
After you know everything you need about enemies, equipment and general strategy - you're good to go. In the main menu of the game, select "Unlockables", then find the doctor icon and click on it - it will start the game.
You will watch a short intro that will lead you into the story of this game mode - you can skip it if you want by pressing "Enter". At this point - your journey begins.
The walkthrough will be fragmented to describing every room – every time you go through a door to a new location will be pointed out

Room 1:
You start in a small alley, equipped with your gun and gas mask. Go around the corner and go down the first staircase. Here you will encounter your first enemy – a Twitcher hanging by the wall. You can either ignore it and head downstairs, or stand at his side close to the wall and melee him to death. If you’re standing at his side, not in front of him – he can’t do anything to you.

Then head downstairs – at your right will be two Slowers standing on a car, and next two will run towards you from the left side. I suggest to go back to the stairs so they can’t get you and shoot every one of them – use only one bullet at one of them. If you shoot them in the head they should die from one hit. The one bullet you saved will come in handy for your next move. After dealing with them head to the left and go in the direction where you see a standing van. You can look to the right when you’re passing the crashed car – you will see a Human Flower, just don’t come close to it and you will be fine. When you pass the crashed car look for the boards at the wall to your left – crouch at them. You can see a Dismembered Twitcher at the end of the ventilation shaft. Break one board at the top, aim at the enemy and shoot – it will die in one hit. Now you can safely reload the gun, break the bottom board and enter the shaft.

Go through the shaft and you will see a little room with a Twitcher hanging by the wall and an entrance to another shaft. Just at the entrance you will encounter a Dismembered Twitcher. Here you can do two things – lure the enemy from the shaft, jump over it and head into the shaft, or launch one shot and kill it. I think he’s not worth using the ammo so the first tactic is better. After you used whatever tactic, head into the shaft and move forward. At the crossroad go to your left and go straight to the end of this shaft. Don’t take any left or right paths at the second crossroad – there are enemies there, so you should just move forward and not care about them. Crouch-jump into the next ventilation shaft and proceed to the end of it. You will finally see the exit to the streets.

After getting out head to your right and be careful – there’s 5 Flygares flying around, so sprint and avoid their projectiles. Head to the alley in front of you and run past 3 Slowers that are approaching. Go up the stairs, and if you have drained your stamina – you must wait until you will regain about 50% of it, because this is very important at this moment. Head towards next alley and when you are at a crossroad, go to the right and immediately sprint forward – there’s a Taller at the end so you must be quick and dodge him, otherwise you will trap yourself in a narrow corridor with Taller in front of you, and you want to avoid this. After you successfully dodge him, go downstairs and head to the door.


Room 2
In this room you have 4 Twitchers attached to the wall – simply sprint to next door or use “dodge+move forward”. Both this methods will result in no damage run from the monsters.

Room 3
Climb down the ladder and proceed to the next room

Room 4
Go to the next door, but before you do it make sure that you have at least two bullets in your revolver.

Room 5

Strangely, after you enter this room you will be turned to the right. There’s a Faster behind you, and another one at the end of the corridor you are facing. You can do two things in here – a)quickly rotate, kill the faster that was behind you, then go the way you were facing previously and kill another one, or b) go the way you are facing ignoring the Faster behind you, stand at the corner by the wall, make the second Faster come towards you, and when it is by the wall just run to the door. Eventually, if you don’t feel good about this dodging method, simply kill the faster by the door and run to it. Either way, proceed to the door*.

*Note – it is possible to head to a different room when you turn back, kill/dodge Faster and run to a door, but you don’t want to do it. You may gain ammo in there, but also there is many monsters so it’s a risk that is not worth it.

Room 6

Just head to the door in front of you and like earlier – make sure that you have some ammo in your gun.

Room 7

You are at the underground construction site. To your right you will have two Slowers approaching. Run past them/shoot them down and head to the doors to your right where you used the lighter to get the key in the main game – for this moment ignore the left path. At the right there is one Slower waiting, but if you will quickly move you will reach the door without getting damage.


Room 8

Grab the ammo from the desk and go back to Room 7.

Room 9(actually 7 again)

Run to the path on the left that you previously ignored – there are two Slowers there, dodge them and run, eventually kill them if you feel you’re not going to make it without using the gun*. There are two Flygares waiting for you after you exit the corridor – run past them and head to your left. There is a ladder – climb it. You find yourself on the surface of the construction site with several Tallers around. Turn about 180 degrees and move forward by the pipe. At the container turn left and go to the point where you will see a ladder. Don’t bother to use it – just jump down, it’s not a big fall and you won’t take any damage. Proceed to the door.

*Note : Here you also can go through a path that is not proceeding you through the game (the door where you type the code). Like the one before, you don’t want to go there – you will lose a lot of time, and potentially health.

Room 10
Proceed to the next room. At this point you should have about 10-15 bullets in the box + some in the gun – if not, it could be difficult to make it further.

6.Walkthrough (rooms 11-25)
Room 11

You are in a sewer. At the crossroad you can choose what path you want – left or right. I usually go to the right, so I will describe what is going to happen when you use it. Proceed through the corridor. At the second turn there is a Aquatic Twitcher lying on the ground – you can kill it, because it could ruin your plan you want to execute a moment later. At the crossroad go to the left – there is also one of the monsters here. Make it “wake up” and back up a little while being positioned near one of the walls. After he gets to the wall in attempt to attack, simply run besides him – it is not very hard, just wait and time your movement. Proceed through the sewer – at the crossroads take the left turns. You will end up in a place with a Flygare above you, two or three Aquatics on the floor and a ventilation shaft in front of you. Ignore the monsters, climb the boxes and shoot the bars to destroy them. Enter the shaft and get out on the other side.

Proceed through the corridors until you see a place flooded with water. When you reach the lights, one Aquatic will wake up – you must kill it because it’s blocking the path and it’s rather impossible to outrun it at this point. After you move ahead, another two will block your path – I recommend killing them, because dodging them here is hard to do. Climb the ladder ignoring the Aquatic behind it. Go forward, crouch under the pipe and proceed forward. There are 3 Aquatics here – one at the middle where you enter to the flooded area, then one at the right and one at the left. Run pass the first one at the left/right wall and then pass the other ones at the middle. Head upstairs and enter another room.

Room 12

Climb the ladder. Head upstairs and then to the left. At the crossroad head to the right. In the room to your right you will have a Sawrunner, so move quickly to the first crossroad you see and turn left, then go upstairs – he can’t reach you here. Go to the corridor you see and move forward. At some point you will see a staircase to your left – if you look at the top you will see your old friend. Go to the next room, then when you exit it turn left and head to the door.

Room 13

Go upstairs and move around the corner. Head towards the next staircase and go down to the next door. Be ready to move quickly in the next room so save some stamina. Be sure to have some bullets – you will surely need them.

Room 14

Immediately run to your right and use the “door trick” – the Baby monster will not even move if you will do it fast enough.

Room 15

Kill the Baby that is running towards you. For the moment ignore the rest of the monsters and go to the door to your left.

Room 16

Turn right and grab the ammo lying on the ground behind the shelve. Exit the room.

Room 17(back to 15)

Kill the three Baby’s that are in front of you. At the stairs in this corridor you can also see a Flygare – it’s blocking the path, so you must kill it in order to advance. Use the tactic I described in point 1.3 in the guide. After you kill it, enter the door to your right.

Room 18

Go around the laundry machines, grab a box of ammunition and get back to room 15.

Room 19(back to 15)

Go forward and to the door to your left.

Room 20

Go to the end of the corridor, grab the ammo and get back to the door.

Room 21 (back to 15…again)

Go to the door at the end of the corridor.

Room 22

There is a Stranger in front of you – if you’re low on health simply kill it and proceed to the exit. If you have full or nearly full – run to the door and don’t care about it, you will lose like 5-10% of health, which is not many and you can afford it. You will conserve some ammo as well.

Room 23

At this point you want to have some stamina if you somehow used it earlier. Go forward and then to the right. At the crossroad turn left and walk/sprint, because your old friend is right behind you. Follow the path, at crossroad turn left and run to the door.

Room 24

Go upstairs and go to your left. Ignore the Slower that is waiting for you and go to this park-like area. Sprint forward dodging all the monsters you encounter and head to the apartment building. Go through the door in front of you.

Room 25

Go upstairs, kill the Baby and enter the next room at the first floor.
7.Walkthrough (rooms 26-32) + the end
Room 26

Go to your right – at the corner there is a Aquatic Twitcher. Take several steps back and use the dodging method (make him follow you by the wall and simply run away). Move forward – there is another Aquatic in your way, but this time land two shots and go towards the door. There is another enemy in the room to your left when you kill the second Aquatic, but it will not even move out the room if you’re fast enough.

Room 27

Immediately go to the staircase – you will avoid the Flygare that is flying by your left side. Don’t go to the door yet, instead take the upstairs and you will see four Baby’s that are behind the bars. Also, you will find two boxes of ammo, which is enough for the rest of your journey. Kill the Baby’s here – if you will leave them, they might kill you just before the last room of the game, and here you can do it safe and steady. After you done what you wanted, head to the door on second floor.

Room 28

There is a Stranger in front of you – take him down. If you are a Silent Hill fan, you will notice the similarity of one thing if you go towards the stairs after killing it .
At your right there is an open room – inside a Faster is waiting for you, so quickly dispose of it and go inside. Go through the broken wall and quickly move through the second one – the Faster between the rooms will not even reach you if you are quick enough. Enter the next room.

Room 29

Go to your right and sprint to the left – use the “door trick” and the Faster will not have a chance to even move. Make sure that you have at least one bullet in your magazine before you enter next room.

Room 30

Immediately aim a little downwards and shoot – there will be a Child in front of you very close, so you must be quick in order to not take any damage. Go upstairs, then to the balcony. Climb on the board, ignore the Flygares and kill the Child on the second balcony. If you have more ammo, kill the Children in this room – if not, just run away from them to the next room. You MUST have some stamina before entering next room.

Room 31

Immediately run to your right, crouch under the crashed bars and go to the next room. The Sawrunner here is very close to you and if you are not quick enough he will obliterate you – just one room before the end, which can be really frustrating and will force you to replay the entire mode once again. Sometimes you will end up stuck at the bars – try doing a crouch jump when crouched, you will jump the fragment that is blocking you. If you are behind the bars and still have ammo – shoot that mincy little git, just for the satisfaction.

Room 32

If you killed the Baby’s at the moment when I pointed it, you can just go to the door in front of you. If not, you will have to deal with four of them at once, which will kill you if you’re low on health. If you make it to the door, the outro will be played and your rank will be shown after the cutscene ends.


Congratulations, you finished the unlockable game mode of Cry of Fear – the Doctor’s Story!
As a reward, you will unlock Dr Purnell’s gas mask for Simon in the main game. This is a great item, because you don’t have to carry any light with you and this makes the game much easier, especially on Nightmare skill level. You can find it in the special room where you change costumes.


Thank you for spending your time reading the guide.
My mission ends here. If at least it will help one person, then my mission was successful.
If you have any suggestions – feel free to post them, they might be helpful aswell.
9 Comments
Critical1001 May 1 @ 6:39am 
Thank you so much, I was debating on cheating at certain points but your guide was so easy to follow and clear, thank you so much dude. :steamthumbsup:
Lucile Murasakiiro Sep 27, 2024 @ 7:09pm 
It's good that there are still people playing this game and looking at this guide to this day, and I'm glad to be one of them.

Here's something you should add to the guide if you are still accepting suggestions:
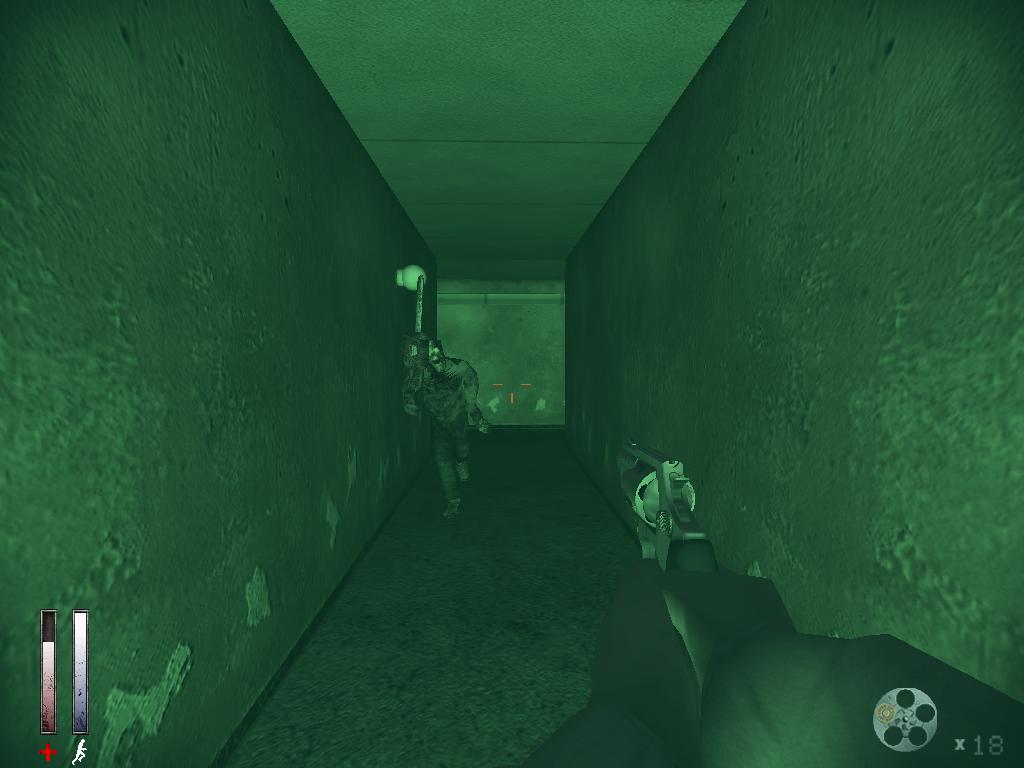
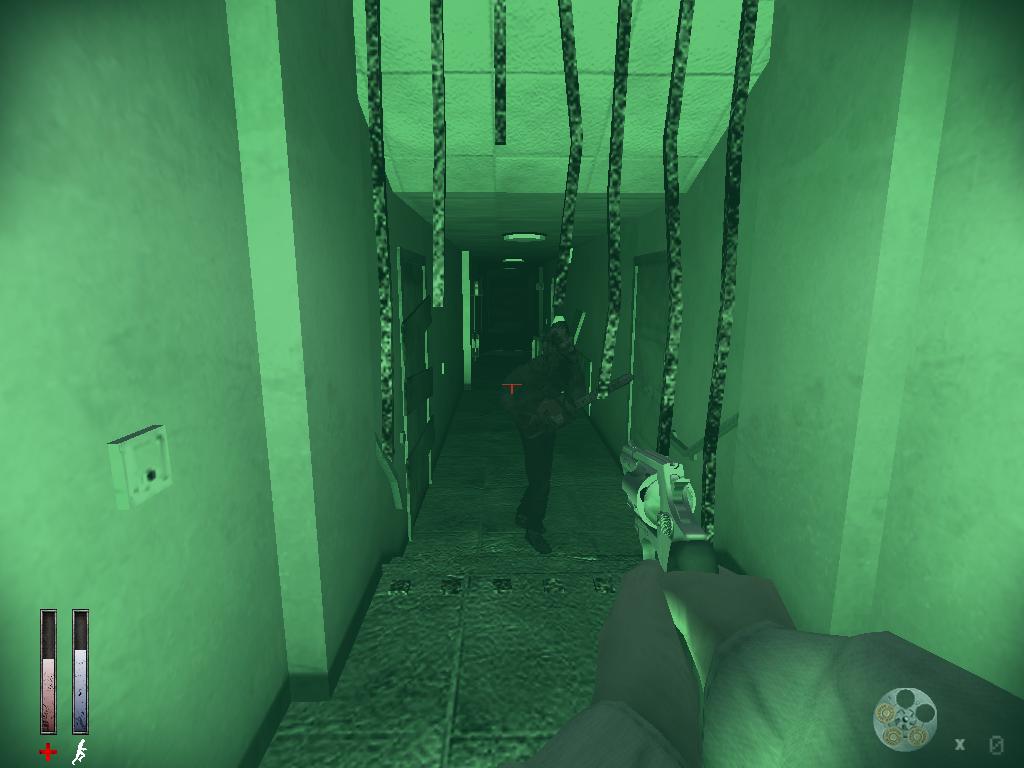
In the latest version of the game, the first time you encounter the "Sawrunner", the part where he can't reach you upstairs, if you walk/sprint until you get up-stairs, he will still not be able to reach you, IF you kept walking/sprinting to the exit door. If you stop after you get up-stairs and turn around to look at him, or if you go back to check if he is still down-stairs and get in his sight and/or get close to him, he will get up and start chasing you again which is a risk no one should take. So it's best if you just walk your way to the exit and never look and/or move back at all.

Just a piece of information I wanted to give out to people who will look in this guide in the future. :)
[UA]Віктор Молокан Mar 6, 2024 @ 8:22am 
that was so hard, so much tries, and finally i complete that.:HighAggro:
NånIdiotSomHeterJacques Oct 30, 2017 @ 6:07am 
The sawrunner can get up the stairs or maybe it was just a bug.
Rex-Wil Oct 24, 2017 @ 8:41am 
Thanks for all the help. Unfortunetly that last Sawrunner got me even when I was fully prepared due to crappy physics. Q_Q
IanTheStanMan Sep 4, 2017 @ 6:21pm 
Doctor Purnell (Intro):

"It's become clear that Simon is not progressing mentally, like I initially had hoped. I suggested that Simon should keep a book to write down the feelings and anxieties whenever he needed to. This seems to have gone out of control however, and during therapy sessions it has become clear that the book only has had a negative and terrifying effect. I cannot help Simon anymore. There is no treatment I can supply to alter his mind. I can only hope to stop his mental disorder before he does any damage to himself, or the ones around him. I have to find the book. I need to destroy it."

Doctor Purnell (End): "Entering the mind of Simon was not an easy undertaking to start with, wading through the arcane creations that his book has summoned was a nightmare I will never be able to grasp. But I made it, I managed to destroy the creations and their passage; the book."
InhalerOfMoistMeals Apr 13, 2015 @ 12:27pm 
Thank you so much! I just made it with 14 health left....
Rocadinis Mar 27, 2014 @ 9:00am 
Hi, can you tell me how do I unlock the doctor's story? Thank you.
Acin Oct 20, 2013 @ 5:46pm 
this guide was very helpfull I never could pass the dr mod thanks a lot :macface: