Dungeons & Dragons: Chronicles of Mystara

Dungeons & Dragons: Chronicles of Mystara

433 vurderinger
Shadow over Mystara in-depth guide
Af Xanathor
Expanding my Weapons, equipment, items guide to evolve it into a general reference guide based on my own experience.
3
4
3
5
9
5
3
   
Pris
Føj til foretrukne
Gjort til foretrukken
Fjern som foretrukken
Intro


Welcome to Xanathor's Guide to Dungeons & Dragons: Shadow over Mystara!

Hopefully this guide will level you up from figuring out which button opens the inventory, to being able to clear the game with 1 credit, but contains useful reference to veterans aswell.

This guide has been written entirely from my experience and hopes to have (mostly)everything covered, if there is anything missing or incorrect, or just a suggestion, feel free to let me know, infact please do so. :)

And now... the guide.
General Gameplay information & Character Moves
  • There exists an alternate version of each character that lets people make parties of say 2 fighters and 2 elves, they are dressed differently but function the same with the exception of Magic User and Cleric which each have certain unique spells to them, to select the alternate character without there being a main one press Spacebar or Start button.


  • Holding down Attack while hitting an enemy will do a knockdown attack, it doesn't do much damage though, can also be done by selecting "nothing" in the inventory and using it.

  • Pressing Attack multiple times while hitting an enemy starts a combo chain attack that varies by character. Magic User cannot do this.


  • Pressing Jump + Attack simultaneously will execute a desperate attack that varies per character, mostly an area attack except for the cleric who can turn all lesser undead and destroy them instantly, the Magic User doesn't get a desperate attack. Landing a hit with this attack will drain some hit points, but the Cleric can turn undead safely without sustaining damage.


  • Pressing the Inventory button opens the Inventory wheel, hitting Inventory again will cycle through its elements, to confirm, press use or swing your weapon. Cleric, Elf and Magic User get 2 aditional pages for their spells and can change pages by pressing jump.


  • Double tap forward will make your character run, then you can alter your running path, but you will stop if you turn around, you can run then move directly up or down to quickly change your horizontal lane, colliding with an enemy will knock them down and you can also knock down smaller bosses such as Tel'Arin.


  • Double Tapping Jump does a backhop/backroll/tumble/teleport as a defensive maneuver depending on your character, the teleport and tumble offers invincibility.


  • Forward + Attack will do a power attack that knocks down enemies, the Magic User's power attack is a special dagger stab.


  • Attack (hold) + Back will raise your shield without selecting it from the inventory, the Magic User and Thief can't do this. While Blocking, you can move back, up or down very slowly, but cannot advance while blocking. As soon as an attack is blocked, pressing Towards will execute the character's Down + Up attack as a retaliation. To stop blocking, release attack.


  • Up + Jump will make a high jump, good for avoiding projectiles like a fireball.


  • There are 2 miscellaneous movement options you can do, that are crouching, by pressing Down and Jump; and sliding, doing Down, Down-Forward, Forward and Jump. Crouching is typically used to avoid projectiles such as arrows and thrown spears, but can also be used to perform crouching attacks. Sliding can also help to evade projectiles but the primary use is to quickly reposition or pick up gold, scrolls and healing potions. Jumping while crouching will make you stand up.


  • You can perform Charging and Aerial attacks by inputting Down, Down-Forward, Forward + Attack and Down, Up + Attack respectively with the exception of the Magic User who cannot use them.


Character Names & Items given
Right at the begining of the game, after rescuing the villagers from being kidnapped, you are asked to enter a 6 letter name and depending on the name, you can get a free piece of equipment. Here is how it works:

Each letter and symbol has a value ranging from 0 to 9 and the sum of these values in a name are added up are linked to the name Types A through J, if the value in the name exceeds 9, each digit will be added again for a final value, for example:

The value 8 means 8(I)
The value 18 means 1 + 8 which equals 9(J)
The name Maller which represents 2 + 0 + 1 + 1 + 4 + 2 which yields value 10, then 1 + 0 resulting in 1(B)
The name EEEE which represents 4 + 4 + 4 + 4 which yields value 16, then 1 + 6 resulting in 7(H)
and so on.

here is the table with the letters and their values:

Value
Letters
0(Type A)
A, F, K, P, U, Z
1(Type B)
B, G, L, Q, V
2(Type C)
C, H, M, R, W
3(Type D)
D, I, N, S, X
4(Type E)
E, J, O, T, Y
5(Type F)
0, 5, I(Roman)
6(Type G)
1, 6, II(Roman)
7(Type H)
2, 7, III(Roman)
8(Type I)
3, 8
9(Type J)
4, 9, ?, !, &, -

Now that you have letter, you match it up with this table to determine what equipment you get:

Name Type
Equipment
Type A
Medal
Type B
Boots of Speed
Type C
Headgear(Elf gets Tiara)
Type D
Ring of Protection
Type E
Ring of Fire Resistance
Type F
Ring of Spell Turning
Type G
Gauntles of Ogre Power
Type H
Fighter and Dwarf: Anklet
Cleric and Thief: Brooch
Magic User: Rod of Fire
Elf: Earring
Type I
Fighter, Cleric, Dwarf, Thief and Elf: Bracelet
Magic User: Rod of Cold
Type J
Fighter, Cleric and Thief: Orb
Elf: Necklace
Magic User: Rod of Lightning

Regarding Types H, I and J:
Fighters cannot get: Rods, Brooch, Earring and Necklace
Clerics cannot get: Rods, Anklet, Earring and Necklace
Dwarves cannot get: Rods, Brooch, Earring and Necklace
Elves cannot get: Rods, Anklet, Brooch, Orb
Thieves cannot get: Rods, Anklet, Earring, and Necklace
Magic Users can only get Rods
The Spellcasting System
I'm having alot of problems trying to explain it to people but i will try to keep it as simple as possible to avoid confusion.

It's all about number of uses of spells per "spell level", there is no mana/mp here. Say you open your spell wheel, being a cleric, and you see you have 2 castings of Bless available then you turn the page and you also notice you have 2 uses of Hold Person, those 2 spells happen to share the same spell level, and you will not be able to use Bless twice and then Hold Person twice because those are both level two spells, and those uses are shared among them, so this is what you could do in this particular situation:

Bless + Bless
Hold Person + Bless
Hold Person + Hold Person

But if you happen to come across a lv 2 scroll and pick it up, it will grant you an aditional use for lv 2 spells! you would be able to do this instead:

Bless + Bless + Hold Person
Hold Person + Bless + Bless
Hold Person + Hold Person + Hold Person
and so on...

That is from a Cleric's perspective, the other 2 spell users also have certain spells that share the same spell level, those will be described in depth in their own sections.
Fighter
The Fighter:
The simplest character, yet very capable in every area offensively and defensively, being 2nd in highest hitpoints (Early on, but maxes it out at the very end, matching the Dwarf) and taking reduced damage. Able to use almost every weapon in the game except staves and wands. He fights and fights well. New players start here. 1/10 difficulty

His 4 hit attack chain has good reach and damage, easy followup with charge attack/uppercut

His Power Attack is slow but has big reach.

The fighter's Charge Attack is fast and carries enemies all the way to the sides and recovers quick enough to follow up with an Aerial Attack in the corner.

The Aerial Attack is the fighter's most interesting attack, does an uppercut like move which is great for hitting aerial enemies on reaction like the harpy/shadow elves. Holding down the button will let out a second swing. It's possible to loop this attack again and again into itself after landing with strict timing, one way to guide the timing of this trick is by doing a short slide as soon as you land and performing the uppercut again as you recover from it... or wait until the enemy is almost at the height of the fighter's head, if you do it too early, the 2nd hit will miss and the loop will fail. his trick will be called "looping" throughout the guide.

Albeit not a very useful move save for the Magic User and Thief, the fighter's backhop done by pressing jump twice quickly, jumps back a short distance, mostly used as a reposition tool but also lets him do an improvized jumping combo by doing a down attack, neutral attack, down attack, etc. if done fast enough but the timing is tricky(if you can land 4 hits from a single backhop, you are doing great). This combo mostly relevant when employing the 2H Sword as it lacks normal combos and this "Combo" is very fast, damage can add up insanely quick.

The fighter's Desperate attack is a spinning attack that hits all adjacent enemies, very quick and effective.

Here are the Fighter's throwing weapon speeds:

Daggers: Very Fast


Oils: Very Fast


Arrows: Fast


Hammers: Fast


The fighter has 2 weapons that change his fighting style, those are:

The Short Sword
And the Two-Handed Sword or Battle Axe .

Using the short sword will let him use it along with his normal sword, this turns your attacks into double swings, including jumping, crouching and running attacks, turns the fighter into a combo crazy maniac at the expense of the ability to use his shield and it will also modify his Aerial Attack, by adding a 2nd horizontal slash, after the first hit, that knocks enemies away sideways and happens automatically without the 2nd input. The Two-Handed Sword will also prohibit blocking and his combo string becomes more like the Magic User's having only 1 attack swing but each hit deals immense damage, second only to the sword of legend and has stupid reach, still conserves his charge and uppercut attacks and can be used to combo, another way to combo with this sword is doing a backhop and immediately do a down attack and a neutral attack followed to another down attack in that short period, novice players stay away from these weapons.
Dwarf
The Dwarf:
He is not a character i use much... Is also a fighter, but he plays very differently, if the Fighter is more about balance, the Dwarf is more like a wrecking ball. Being able to hit enemies multiple times with every attack including his normal swings and having the most hitpoints of the cast, gaining a full lifebar almost straight away. He is deadly and durable AND surprisingly maneuverable if you use his unique movement options. Intermediate character. 4.5/10 difficulty

If a Dwarf opens a chest, that chest will stay open for a moment, then he can hit it to reveal hidden gold.

His 3 hit attack chain is special, the swings can hit more than once and if you mash the button he will start swinging very quickly doing a lot of quick hits, must be actually hitting something in order to activate the ability.

The Dwarf's Power Attack is somewhat sluggish but hits 3 times, deals massive damage.

The Dwarf's Charge attack is a fast sideway slash that can hit up to 3 times with good positioning, the strongest charge attack of all. can be followed with his Aerial Attack and if his Charge Attack was perfectly positioned for those 3 hits, the Aerial Attack as a followup will also hit just as accurately.

The Dwarf's Aerial attack is by far his strongest attack, as if his attacks weren't strong enough. jumping and spinning in place, hitting many times at both sides, sometimes, with good positioning, enemies can be hit by attacks on both sides, resulting in extreme damage, in fact this attack with the sword of legend can deal one and a half lifebars of damage to the Red Dragon if done at the right spot. Some ways to land this attack perfectly is after his Charge and Power attacks both trying to be not too far nor close from the enemy when executing them and then doing the aerial attack afterwards.

The Dwarf has the ability to curl and come crashing straight down or at an angle like a cannonball by pressing down + jump or down-forward + jump during a vertical jump or high jump, while he is performing the move, he is invincible, like using a desperate attack.

The Dwarf has a special long jump that can be done without even running but is limited in height, but comes out very fast, covers alot of distance almost like a full slide. doing a normal swing from this jump also hits multiple times and can be an effective way to initiate a fight. Perform it by holding right or left and then jumping. To do a regular sideways jump, hold forward and up as you jump, this will result in a much higher jump, similar to the rest of the cast, but with the usual fast jumping physics the Dwarf has.

Pressing jump twice in quick succession will execute a backroll, like the Fighter and Elf's backhop, this does not offer any protection.

The Dwarf's desperate attack is a quick jumping, spinning attack which swiches your direction, pretty average as far as these attacks go.

Here are the Dwarf's throwing weapon speeds:

Daggers: Average


Oils: Average


Arrows: Very Fast


Hammers: Average


Once the Dwarf finds the Battle Axe he can use it just like the fighter does the Two-Handed Sword, wielding it slowly for huge damage per hit, and also losing his ability to block. The hitbox of his regular attack will reach higher so it is possible to anti air with it. His sideways jump attack becomes extremely good from this increased hitbox because it still hits multiple times. It's hard to pull off the rapid attack while using this weapon but it can be done, albeit with its usual limited usage.
Thief
The Thief:
With her all "over the place" fighting style using her multiple jumps and diverse abilities to move around, she's clearly the agility type, with an added bonus to open all chests without keys and detect traps... AND able to steal items by running onto enemies, some of them really nice too, add in trap detection and she's a really valuable adition to a party. On the downside, she is a front line character but does not wear any protection and cannot block. She is as durable as the Magic User but she does gain ALOT of levels, putting her hp pool to 3rd highest later on, but her defense will still be bad. NOT a character for beginers. 9/10 Difficulty

The Thief can double jump and triangle jump with her unique boots that she starts with, most useful to catch big air to completely leap through attacks like the red dragon's claw swipes or Synn's Fireballs and to jump again after hitting with a jumping down attack to reposition for another one.

Pressing jump twice in quick succession will perform a tumble, the Thief's only reliable defense, and a very good one, covers nice distance and is invulnerable and also a great repositioning tool for a backstab. Can cancel a tumble into a slide/run.

To use her steal ability, simply run into enemies and items might drop, some enemies cannot be stolen though like the Ezerhorden. Enemies will only drop 1 item, you can keep attempting a steal repeatedly until they do. Enemies will be nudged slightly backwards when the Thief does this, so it will not knock them down unlike the other characters run ins.

She has a sling which she can use to throw stones with unlimited ammo, can throw them while jumping and if you press the use key rapidly, the Thief will throw 5 stones quickly with a slight delay afterwards.

Pressing Back + Towards + Attack while behind an enemy will catch them and perform a backstab dealing major damage, cannot combo afterwards, Best used against Owlbears and Hellhounds. Does not work on bosses.

Her 3 hit chain attack is quick enough and has acceptable reach, a pretty average chain attack and easily comboable into her Charge and Aerial Attacks.

Power Attack wise, she's pretty standard, nothing special to report other than it does not have much use.

Her Charge attack hits twice and can be done consecutively for 4 hits and some nice damage.

Her Aerial Attack is a jumping upward slash followed by a throwing of a large burning oil to juggle the enemy, but can also be used at a distance just to throw those oils, but using the aerial attack to catch enemies in midair by reaction might not always work as she doesnt have that much of a hitbox like the fighter's, and with the added risk of taking big damage, not worth to do it as an antiair measure, stick to ground combos for it.

The Thief's Desperate attack throws 6 Large burning oils around her that only release 1 column, actually a bad attack to get enemies off you. The worst Desperate attack as far as defense goes, but sometimes you can use it to hit large enemies that have been knocked down with multiple oils and it can rack up damage fast, though at the expense of hit points, and most of the time it's not worth it.

Here are the Thief's throwing weapon speeds:

Daggers: Fast


Oils: Very Fast


Arrows: Fast


Hammers: Fast


Sling: Fast use, delayed recovery


The Thief doesn't get a unique weapon but she does use a dagger for backstabbing and also along her main weapon while doing her charge attack for that added 2nd hit if thats of some comfort :). The Thief's combat flow is all about keeping a move on, being all around jumping and tumbling, if you are gonna stand around and hit things, just best to play a fighter. She has an extremely low hitpoint count early on and no defense at all and unlike other melee classes, with her it's always an uphill battle all the way till the end.
Cleric
The Cleric:
The party's support specialist by excellence having great enhancing, disabling and healing spells, everyone loves a good Cleric. All of his beneficial spells can be casted on your allies by standing infront of them, with the exception of Bless which is already a party-wide enhancement, he has regular hitpoint count, but takes reduced damage like the Fighter and Dwarf, giving him that frontline edge compared to the more fragile characters, surprisingly good at fighting too. One interesting fact about the Cleric, he picks up items faster than any other Character. Good candidate for beginers. 3.5/10 difficulty

His 5 hit chain attack has short reach and slightly lower than average damage, but its still useful

His Power Attack is an overhead slam that has much better range than his normal attacks, can be very useful against enemies like gnolls who outreach him.

The Cleric's Charge Attack comes out QUICK, in the time a fighter can throw one, a cleric can be recovering form his 2nd Charge Attack.

The Cleric's Aerial attack is a quick upward hit, followed by an aerial overhead slam, the second hit might not always hit after hitting an enemy with a lengthy combo.

Although not a special attack, his running jump attack is worthy of mention for having a very wide hitbox, outprioritizing many enemies in the game like jumping troglodytes, not only good for an anti-air, but as a jump-in aswell.

Instead of a Desperate Attack, the Cleric gets a special Turn Undead ability that does not consume any health on use and can be used freely, any non boss undead enemy will be instantly destroyed, easy way to clear the screen, but you also forfeit any loot they might have had.

Here are the Cleric's throwing weapon speeds:

Oils: Very Fast


Hammers: Very Fast


The Cleric has 2 a unique weapons, the Morning Star and the Staff of Snakes . With the Morning Star, instead of losing the ability to block, he gains new abilities for his Power and Aerial attacks, the first becomes an extension of the chain, letting him reach far away enemies, and the second becomes a temporary spinning attack for about 2 seconds, hitting everything in range and knocking them towards where the cleric was facing before executing the move, can hit those knocked enemies again while they are grounded by the same attack while it lasts. The Morning star can also curbstomp certain knocked down enemies multiple times with the same attack, as the weapon is so slow, it sometimes gets stuck on them, this seems to happen much often against Dark Warrior II while its under its natural haste at low hitpoints and Tel'Arin's Haste. Against the Red Dragon/Synn, who can't be knocked down, doing a vertical jump and neutral attacking can hit them up to 5 times due to the freeze that occurs when you connect with the weapon.

The Staff of Snakes is an extremely disapointing weapon, upon hitting an enemy, snakes are created and bite the enemy continually for little damage, and the staff itself also deals extremely low damage, haven't seen an interesting use for this yet.
Cleric's spell details
The Cleric's spells is the reason why he is so popular in parties :) The cleric can choose to help the party or hinder the enemies with each of his lv 2 or 3 spells, so you can be a defensive or offensive cleric.

1st level Spells

No Spells here.

2nd level Spells

- Bless: Grants the whole party a damage increase of about 1/4th with their physical attacks, stacks with Striking. Longer duration as he gains levels.

- Hold Person: Paralyzes 3 humanoids at random for a short period or until they get hit, this spell catches them while they are grounded, jumping or being hit and makes them stand up if they aren't for a free combo chance. (Against hasted Tel'Arin, it will only last half as long.)

Hold Person works on Tel'Arin, Harpy, Ogre Bros and Nagpa.

Can grant an easy victory over the Ogre Bros, by constantly paralyzing the first Ogre and not letting him call for help and killing him before it happens.

3rd level Spells

- Striking: Gives the cleric a damage increase larger than of bless, can cast on others by standing close to them and stacks with bless. Lasts Longer as the Cleric gains levels.

- Continual Light: Stuns monsters that are facing the Cleric and about half a screen distance away. Doesn't work on undead.

Enemies hit with this in mid air get knocked down.

Continual Light can be used to remove the Ezerhorden's biting stance.

4th level Spells

- Cure Serious Wounds: The medicine man's main tool. Restores lost hitpoints, stand infront of a party member to heal them. Better healing as he gains levels and overall superior to Cure Critical Wounds due to negligible healing diference and more uses since its a lower level spell. Unaffected by Earrings.

- Sticks to Snakes: Grabs some sticks and throws them, turning them into snakes that bite the enemies for continous damage and even during another spell's freeze period. I really don't think it's worth to sacrifice healing magic for this.

Only has Sticks to Snakes.

5th level Spells

- Cure Critical Wounds: Stronger healing magic than Cure Serious Wounds. Not really noticeable, but more of a means for a cleric to store more than 9 healing spells. Will heal more hitpoints with higher levels. Unaffected by Earrings.

- Insect Plague: Summons a horde of flying beetles, ive never really used this spell, i always play the blue Cleric. This spell can do good damage if used right.

Only has Insect Plague.

6th level Spells

No Spells here.

7th level Spells

- Holy Word: Casts beams of light from the sky to hit lesser enemies for moderate damage. Misses Bosses. Follows the Ideology of the Cleric being of a supportive role.

Only bosses susceptible to Holy Word are Nagpa and Tel'Arin.

Only has Holy Word.

- Earthquake Sends an energy ball to the ground and knocks down while damaging every standing enemy including bosses. Arguably better than Holy Word.

Only has Earthquake.
Cleric's spell count
Cleric's magic uses per level: The Cleric doesnt get Lv1 or Lv6 spells so those are skipped. The cleric will restore his spell count at each level up. If you have excess spells due to scrolls, you will keep them. I hate this guy! why does the cleric get 3 more level ups than the Magic User?! >:(

To read the table:

The war machine would raise the cleric's level to 13, granting him: five Lv2 spells, four Lv3 spells and three Lv4 spells.


Level - boss
Lv1
Lv2
Lv3
Lv4
Lv5
Lv6
Lv7
Lv12 - Start
X
4
4
3
0
X
0
Lv13 - War Machine
X
5
4
3
0
X
0
Lv14 - Man Scorpions/Dark Warrior I
X
5
5
3
0
X
0
Lv15 - Tel'Arin
X
5
5
3
0
X
0
Lv16 - Manticore
X
5
5
4
0
X
0
Lv17 - Displacer Beast
X
6
5
4
1
X
1
Lv18 - Red Dragon
X
6
5
4
1
X
1
Lv19 - Salamanders/Tel'Arin & Tel'Erond
X
6
5
4
1
X
2
Lv20 - Ezerhorden
X
6
5
4
1
X
2
Lv21 - Dark Warrior II
X
6
5
5
2
X
2
Lv22 - Nagpa
X
6
5
5
2
X
2

This table outlines every instance that the Cleric gets to level up. The Manticore, Red Dragon and Nagpa are skippable bosses, and if you do skip them, you will not raise a level, since levels are tied to bosses and XP just serves as the score, in which case you will become lv 16 at the Displacer Beast if you skip the Manticore, using the numbers shown @ the Manticore.
Magic User
The Magic User:
The dedicater caster of the group, and my favorite character (probably why his section is the longest). Horrible at hand-to-hand combat and lowest hitpoints of all, 2 red dragon claw swipes is enough to kill a magic user at full health but he has good mobility with his teleport, slide and running all being cancelable into other evasive moves, and a very fast knockdown attack. On the upside, he is a spellcasting powerhouse, capable to kill bosses by himself with spells only, mostly all out offense with his spells but has one utility spell too. All this powerful magic advantage comes at a high price, this is the character with the steepest learning curve and least error margin of all. Novice players don't even think about using the Magic User. 10/10 difficulty.

His 3 hit "chain" is just the same staff swipe done 3 times, very low damage. The Magic User is the only character that cannot critical hit with his normal attacks except with his special Power Attack which follows it's own rules. It is worth pointing that his crouching attack can hit an enemy more than 3 times before it knocks down. but its not advisable as it has considerable startup, among the slowest in the game, and you can be hit back by the same enemy you are trying to attack, and has suboptimal hitbox. If the enemy has potent retaliations like hellhounds, best skip this one.

The Magic User's teleport move executed by jumping twice in quick succesion lets him move backwards a fixed distance while being invulnerable, can be used to maneuver around traps too and has a use in combos by being cancellable with a run and to cancel the end lag of attacks to keep on the defensive, incredible move. Theres a problem in certain spots of the game that if standing near the top or bottom of the screen it will cut the teleport's movement range and wont move you back much but all the invincibility frames still apply.

Some Advanced Maneuvering with the Magic User are Teleports cancelled into Slides. Teleports into Running, And Slides into Spells. Possible to do Teleport>Run>Running attack>Teleport loops but the timing is strict

His Knockdown attack is the fastest attack in the game, it's sheer speed can be used to interrupt enemies between their attacks like dealing with the flying beetles as they sweep across or stop a charging hellhound, can be used freely by selecting "Nothing" from the inventory and using it. Very good move.

His running attack is worth of mention because its a quick two hit and using it can prolong the 3 hit limit on his regular chain, in tandem with dagger stabs, and running slams, you can do more damaging combos, within the Magic User's fighting limitations of course, he will never come even close to the others in this regard.

His Power Attack is a poison dagger stab that does 1 damage, with a 1 in 20 chance to do massive damage based on a percentage of the enemy's hitpoints, every single enemy in the game including bosses are vulnerable to this critical hit, including the War Machine. This attack is fast and doesnt knock down unlike the other Power Attacks, and can be used in between his chain string. Against the smallest enemies like goblins it's best to just hit them with the staff instead, the higher hitpoints the enemy has, the more you should try to land a critical hit, you can tell a critical hit has happened when the screen flashes red instead of white for a regular critical and the enemy is instantly knocked down. Oddly enough, this attack has more vertical reach (sideways, not height) than the regular staff swipes meaning you can hit an enemy well outside their range if aproaching from the bottom or top, if only ever so slightly and mostly unnoticeable.

The Magic User doesn't have charge, aerial or desperate attacks. Sorry!

Here are the Magic User's throwing weapon speeds:

Daggers: Fast

Oils: Fast


The Magic User has 4 weapons that can add magical projectiles to his normal swings, those are the 4 wands of Cold, Lightning, Fire and Paralysis: . They are not particularly strong but they are better for giving him tactical advantage like hitting enemies from a distance with the wand of fire, or hitting grounded enemies repeatedly with the wand of cold, using the rods of the same element will enhance these projectiles' range. each have limited charges and will be lost once they are spent you can tell when the wands are about to run out when they start blinking.
Magic User's spell details
The meat of the Magic User's offensive capabilities, other than multiple lucky dagger Criticals in a row :D

Level 1 Spells

- Magic Missile: This spell creates 3 Projectiles (4 at lv 15+ and 5 at lv 20+) that home towards random opponents, if there are more missiles than enemies, they will hit some enemies multiple times. Great spell to have equipped all the time, don't forget you have it. Awsome for bosses and normal enemies alike, also the prefered method for dealing with gargoyles. The Magic Missiles can hit more than 1 enemy with a single projectile if they are very close to each other.

These missiles only last a certain period and that time will continue to tick while another person casts a spell or you send more missiles, its most effective if you let all missiles connect then use more. The Missiles ignore locking on enemies that have been knocked down, but if they lock on first and then the enemy gets knocked down, they will wait for them to get up going in circles.

Magic Missiles will ignore and pass through Lich Deimos.

Level 2 Spells

No Spells here.

Level 3 Spells

- Fireball: This spell sends an explosive ball of fire ahead towards the ground that hits all enemies in its area of effect and can also hit enemies while the fireball is being sent down if they collide with the projectile. A mediocre spell made worse by the fact that Lightning Bolt is superior in every aspect... unless you are fighting the Frost Salamander with Rod of Fire, and even then, not advisable.

Enemies hit by Fireball will not be damaged by another one while they lie on the ground, unless they get struck with something else first and will also miss completely against enemies trying to get up.

Lich Deimos, Hellhounds and the Fire Salamader are immune to Fireball.

- Lightning Bolt: Now that's what im talking about, full screen length and movable by 45 degrees up or down, aiming this from the edge of the screen can hit the entire screen but this spell only covers horizontal space, though it can hit enemies that are jumping while they are close to the ground and will also hit grounded enemies can you can hit them again with multiple castings of Lightning Bolt, unlike Fireball. If you cast Lightning Bolt at enemies that are trying to get up, it will miss... Unless when fighting the salamanders, they will be hit regardless.

The damage of Lightning Bolt fluctuates and can produce huge damage against the Ezerhorden.

Lich Deimos is immune to Lightning Bolt.

Level 4 Spells

- Wall of Fire: This spell sends a column of fire straight ahead ala Lightning Bolt, except you cannot change its angle but you can rotate 360s to have the Magic User spin in place with the spell before releasing it, serving as a moderate crowd controlling measure. This spell is actually bad, same dilema with Fireball, theres another lv 4 spell that's better, except Wall of Fire deals more damage than Ice Storm, if only slightly more. Wall of Fire will miss enemies trying to get up, like Lightning Bolt.

Shares the same hitting conditions as Fireball.

Does not hit Lich Deimos.

- Ice Storm: Ice Storm covers the entire screen and will hit enemies while they are in the air too, the only instances that it will miss are if Synn/red dragon are completely off the screen when they jump(no shadow), and if teleporting enemies have completely vanished (shadow elves, dark warriors, Nagpa). Unlike the lv 3 spells that they might sometimes miss even if they are in the spell's area, Ice Storm will always hit everytime.

Frost Salamander is Immune to Ice Storm.

Level 5 Spells

- Conjure Elemental: Think of an Ice Storm that does more damage and you got Conjure Elemental, you can summon an Efreet by facing left for fire damage and a Water Serpent by facing right for ice damage.

For the purposes of clearing the screen of annoying enemies, better use Ice Storm, Conjure Elemental's Superior firepower should be saved for bosses.

If you change directions and cast Conjure Elemental extremely quickly, the correct elemental won't come out.

Only the black Magic User uses Conjure Elemental.

As an interesting point, this is the only spell that by using its left and right properties, you can hit
every single enemy in the game, making it extremely reliable.

- CloudKill: Again, similar to Ice Storm with its ability to hit everything in sight, except this spell will outright kill any lesser monster that breathes, regardless of its hitpoints left. Thus making the green Magic User better at handling regular enemies, the bosses will still take normal damage, but this damage is lower than Conjure Elemental and undead bosses will be immune to this spell.

One thing about using CloudKill: The Magic User will jump to the middle of the screen to cast the spell so this might put you in harms way like a trap or right infront of the dragons so might want to consider that. Care must be taken while playing solo vs the Lich as the green Magic User since you will only be able to hit it with Ice Storm.

Only the green Magic User uses CloudKill.

Lich Deimos, the Salamanders and Ezerhorden are immune to CloudKill.

Magic User's spell details (cont.)
Level 6 Spells

- Flesh to Stone: Fires a beam directly forward that will hit standing enemies and turn them to stone, instantly killing them if they are regular enemies or dealing normal damage against bosses but it should be avoided as using it to damage bosses will result in low damage. Will not hit knocked down enemies. Not recommended to use this spell as you would be missing out on the infinitely more useful Projected Image, unless you manage to catch 5+ hellhounds or other high hp enemies in a single casting. Flesh to Stone's beam gets wider as the Magic User gains more levels.

- Projected Image: Creates multiple afterimages of the Magic User. While this spell is active, the Magic User move, attack, use items or cast spells and is Invulnerable to everything except Red Dragon/Synn's lethal breath weapons, Lasts longer as the Magic User gains levels. Be careful with Projected Image while theres a haste effect, the spell's duration will be cut in half.

Level 7 Spells

- Reverse Gravity: This spell catches enemies in a cylinder area centered on the magic user, lifts them up and slams them back to the ground for some nice damage. This spell is not that special as in it doesn't do more damage than Conjure Elemenal and has less reach, good candidate to use on annoying regular monsters. Deals inmense damage to the Dark Warrior II. Enemies that are being hit by something else or in certain situations while dizzy, won't be caught by Reverse Gravity.

Learned at level 15.

Level 8 Spells

No Spells here.

Level 9 Spells

- Meteor Swarm: The strongest spell in the game, using the Staff of Magic Attack along with Earrings produces the best result, NOT the Staff of Wizardry as its bugged and using this staff WITH earrings will produce damage similar to a starting, naked magic user's Fireball.

The actual bug in action:


Meteor Swarm otherwise can do up to 95% of Nagpa's Lifebar.

This spell's area coverage is similar to Lich's own Meteor Swarm, but unlike theirs, the meteors will not hit enemies in the air, only on the ground and while they are knocked down. Also like fireball they wont be hit if they have been burned already or they are trying to get up. To get hit by Meteor Swarm the enemies have to be hit by the actual Meteors as they impact the ground.

Learned at level 20.

Only the black Magic User uses Meteor Swarm.

- Power Word Kill: Probably the least visually interesting spell out there, outright kills enemies that have less than certain ammount of hitpoints, apparently. From my experience ive just seen it kill from life remaining comparable to twice the damage of an Icestorm.

Quickest way to end the fight with Nagpa, Ice Storm(maybe 2) + Power Word: Kill.

Learned at level 20.

Only the Green Magic User uses Power Word Kill.
Magic User's spell count
Magic User's Magic uses per level: The Magic User will restore his spell count when gaining levels. He doesn't get Lv2 or Lv8 spells so those are skipped. If you have excess spells due to scrolls, you will keep them.

To read the table:

Defeating the Man Scorpions/Dark Warrior I, would raise the Magic User's level to 15, granting him:
five Lv1 spells, four Lv 3 spells, four Lv4 spells, three Lv5 spells, two Lv6 spells
and one Lv7 Spell.

Level - boss
Lv1
Lv2
Lv3
Lv4
Lv5
Lv6
Lv7
Lv8
Lv9
Lv14 - Start
5
X
4
4
3
2
0
X
0
Lv15 - Man Scorpions/Dark Warrior I
5
X
4
4
3
2
1
X
0
Lv16 - Ogre Bros/Beholder/Green Dragon
5
X
5
4
3
2
2
X
0
Lv17 - Lich Deimos
6
X
5
4
4
3
2
X
0
Lv18 - Chimera/Black Dragon
6
X
5
4
4
3
2
X
0
Lv19 - Red Dragon
6
X
5
5
4
3
2
X
0
Lv20 - Ezerhorden
6
X
5
5
4
3
2
X
1
Lv21 - Nagpa
6
X
5
5
4
3
3
X
1

This table outlines every opportunity that the Magic User gets to level up. The Red Dragon and Nagpa are skippable bosses, and if you do skip them, you will not raise a level, since levels are tied to bosses and XP just serves as the score, in which case you will become lv 19 at the Ezerhorden, which will use the spell numbers shown @ the Red Dragon. Meteor Swarm/Power Word Kill would be learned once Nagpa is defeated instead of @ Ezerhorden. Skipping both bosses will prevent the Magic User from reaching level 20 and using Meteor Swarm/Power Word Kill.
Xanathor's Tower: School of Arcane Magic
If you want to improve your Magic User game, perhaps the first thing to get down is spell management and this mini guide will discuss my typical spell saving strategies(This section is meant towards solo play). Start by learning when you can use which spells and when you will level up to recover them, for example:

After defeating the Ogre Bros/Beholder(cannot do the Green Dragon solo), the Magic User will level up, and will have to face the Manticore and Lich with these newly refreshed spells, but Lich Deimos is immune to all except Ice Storm and Conjure Elemental (manticore is a boss that does not call out minions to help, making it a prime target for magic missiles). The rest of spells can be used more liberally against regular enemies in this segment.

It's good to use magic missiles throughout the level to help lessen the hordes of enemies as bosses normally bring in some henchmen and they would draw away missiles, if a boss comes alone then missiles become a much more useful tool and can be considered part of your arsenal against it.

The most important spell levels to save for bosses are lv 4, 5 and 6 (Ice Storm, Conjure Elemental/CloudKill, Projected Image).

From the start of the game up until Lich Deimos, you will need almost every spell if you wanna kill the bosses smoothly but you will fight multiple bosses in between the early levels, so here are some tricks for those.

War Machine + Man Scorpions/Dark Warrior I segment:

The War Machine Should be attempted without any offensive spell as its better to use them on the following boss but if its really giving you trouble then cast away, otherwise what good are saved spells when you are dead? The War Machine can get out of control easily, so keep Projected Image ready. Burning Oils are phenomenal against the War Machine, hitting it multiple times, and also useful to nudge it away from the edge of the screen if you drop them so that it lands near the ram, allowing more hits before it changes direction. Constantly removing the goblins is the key but be careful in multiplayer as the War Machine can start throwing burning oils randomly in all directions and can very easily hit you when you position yourself behind it at the start.

Harpy + Tel'Arin + Ogre Bros/Beholder segment:

This segment is very hard, 3 bosses to do and the first one being the worst of the bunch for the Magic User for being unable to block, using spells will make it easier, but you will have less for the rest. Personally, for the Harpy I use all my Lightning Bolts and Reverse Gravity along with the wand of cold if it comes to that for when she gets knocked down, it doesn't do much damage, but being hit repeatedly 20 times adds up. Against Tel'Arin go for critical hits, save Projected Images for when he hastes, I almost always get at least 1 critical hit and that pretty much guarantees me the fight and save the rest for the other bosses which can be complicated without spells. Neither of the bosses after Tel'Arin bring minions so Magic Missile is equally useful.

Manticore + Lich segment:

Do not use any Ice Storms, Conjure Elementals or Projected Images throughout this segment, you will need them for Deimos(the only spells that work on him. And if you are playing the green Magic User, ONLY Ice Storm will work against him, and the Projected Images will be needed to fight him as those spells won't cut it, the odd critical hit will be extremely useful.

The Lich is the big checkpoint for the Magic User, if you get past this point, you can clear rest as the bosses become more manageable due to the Magic User's spellcasting growth.

Displacer Beast + Manticore segment:

I highly discourage students of Arcane Magic to take the Black Dragon route, so i will only discuss going through the Chimera.

For this segment i recommend stockpiling lv 4 spells since you get access to 3 scroll dropping chests quickly granting you a total of 7 Ice Storms at the beginning of the Chimera Stage. Fight the Displacer Beast with Lightning Bolts, Reverse Gravities and Conjure Elementals, the dream is to be able to save up a store of Ice Storms if possible, but use them if you need them. Save all your Magic Missiles for the Ghoul/Troglodyte encounters before the Chimera to help you kill more of them before they leave, using lv1 spells to get possible lv3-5 scrolls is a good deal. Large Burning Oils will alleviate your spell usage vs the Chimera, Apply Projected Image before triggering the encounter to help yourself line up the shot.

Post Chimera...

After the Red Dragon, start stockpiling on Lv3 spells and avoid using them unless necessary, again what use you have for spells if you are dead. The strategy is to have many Lightning Bolts for the Ezerhorden as it's very weak to them, if you manage to stock 6+ Lightning Bolts with Earrings and Rod of Lightning, you won't even need to Ice Storm or Conjure Elemental, leaving them free to use against Salamanders and Tel'Arin(Tel'Arin also being a candidate for Magic Missiles and the Salamanders taking huge damage from Conjure Elemental's opposing element, the Frost Salamander also being one of Wall of Fire's good uses over Ice Storm.

Past Ezerhorden, save your newly acquired Lightning Bolts for Nagpa.

Save those Reverse Gravities (Lv7) you'd normally use on regular monsters for Dark Warrior II, He receives major damage from it and 4 castings of Reverse Gravity will remove over whole life bar from him(if geared). It's possible for a Magic User duo stockpiling lv7 scrolls to tale down the DWII to a single lifebar with Reverse gravity only.


Just Zap nagpa to death with Lightning Bolt, everything else should be thrown @ the
Dark warrior II as its extremely dangerous to fight it hand to hand. but if you saved those Reverse Gravities, you will have leftover spells which you can use in the previous stage which has a ton of enemies.

And throw everything against Synn and the Red Dragon of course, since they are their own segments. Reverse Gravity works nicely against Synn too but not the Red Dragon.

Once you start getting comfortable with spell management, these situations won't be as uncommon as you might think.


Here it finally is, my Master dificulty clear:


I Implemented some new technology during the early game of more aggressive spellcasting, doing it this way really helped during the Master clear attempt which oddly enough only took me 1 try.

Getting critical hits on bosses is huge, and can save up a lot of spells, I didn't end up using all the spells i prepared for the bosses thanks to some of them, from a purely spellcasting viewpoint the guidelines above still apply, that's assuming you wait until exhausting your magic before you actually try fighting a boss, playing it safely(its only later that a Magic User can kill bosses with just spells).

Another reason why Projected Image is GOD is because it lets you go in for those criticals. This run actually had quite a lot of critical hits(for my luck), it's usually not like that and those times i need to use my spells more. It's actually not a good idea to rely all on those critical hits, but use them more as a complement.

The Magic User is the hardest character to use, but as you attempt to get better and try to beat the game with 1 credit, I think he is the character that will grant your first 1 credit clear.

Elf
The Elf:
A mix of Magic and Fighting, but pretty fragile, she can fight very well though, i'd say she's a fighter with some magical capability with about 8:2 ratio, her magic attacks are really bad compared to what she can do with her attacks, her spell casting side leans more to a supportive mode than to deal damage. she's able to use an unlimited supply of arrows and has a couple of unique abilities. Intermediate, leaning to advanced character. 6.5/10 difficulty

Her 8(!) hit chain has great damaging potential, but you cannot hit an enemy 8 times, they will get knocked down in between the combo, but if enough enemies keep coming your way, you can get the 8 attacks off, a good way to deal with many enemies without dropping the combo. Her third hit hits twice.

While equipped with her endless Arrows , pressing use rapidly lets out 5 arrows in a row quickly with a delay afterwards, it's a special attack that can cancel other attacks like the charge/aerial attacks.

Her Power attack is fast, used for instantly knocking down enemies, nothing else about it.

The Elf's Charge Attack is a copy of the Fighters version with her own touches, it can be used to hit enemies right next to her. becoming active the moment the attack is executed and will let her hit enemies that compared to the fighter's Charge Attack, would make him charge past them without hitting.

The Elf's Aerial Attack is complex, its a mix of multiple hits on the ground, on the air, and slam back to the ground, while she's on the ground she steps forward to grab more enemies for the upward launch. This attack is among the stronger aerial attacks, able to be cancelled before she leaps to the air with the arrow multishot.

The Elf's jumping down attack is special in which she bounces back up when it hits, able to repeat this up to 4 times, a great way to keep on the offensive while being relatively safe in the air. Can be steered sideways, but not vertically.

The Elf's Desperate attack swirls leaves around her that can hit enemies multiple times, perhaps the best Desperate attack of all.

Here are the Elf's throwing weapon speeds:

Daggers: Fast


Oils: Fast


Arrows: Fast (Slow Recovery)
[While levitating with the boots, the elf can shoot arrows without much delay]

Hammers: Fast

The Elf has no special weapons that change her fighting style. :(
Elf's spell details
Not as damaging as the Magic User's, she can still put them to good use, plus has unique spells of her own.

Level 1 Spells

- Magic Missile: This spell works exactly the same as the Magic User's with its same limitations but they are less damaging, she will use 2 missiles initially, and 3 at lv 10.

Still a good way to deal with gargoyles.

Level 2 Spells

- Invisibility: Invisibility will make enemies ignore you for a certain period or until you attack, extremely good for sneaking in a free combo, Dark Warrior II and Tel'Arin come to mind... And can use this on allies by being near them like a Cleric would with his healing magic.

Lich Deimos and Synn can see through this spell.

Level 3 Spells

- Fireball: Another similar spell to the Magic User with no unique properties for the Elf. She also has Lightning bolt which is superior in every way, not much reason again to use this one.

- Lightning Bolt: Yet another shared spell, but this one has unique features for the elf. her's seem to fluctuate higher in damage compared to the Magic User's and can hit the War Machine and Ezerhorden twice if she keeps the bolt fixed on them while wearing earrings. This is the Elf's strongest spell too(!).

Fun Fact: With earrings, she can 2 shot the War machine with Lightning Bolt.

- Haste: Makes the whole party incredibly fast for a few moments. Now, i don't really like this spell because it makes you so fast that you are very likely to make mistakes while fighting but it does have its uses, they are just hard to use. With this spell you need to be careful around other characters that use beneficial spells such as Bless and Projected Image, as their durations will be cut in half while hasted.

Level 4 spells

- Ice Storm: A great spell, but the elf's damage on this spell is really low compared to the Magic User's, does about 1/4th of his damage if not less, but thats just due to the Magic User's huge spellcasting growth as he progresses. Still quite good to knock down all enemies for some breathing room, which makes it it's primary use.

- Polymorph Other: This spell turns a lesser enemy into a harmless animal, must get close like with a casting of Cure Wounds on an ally. As with other instant killing spells, you forfeit drops and XP. Gargoyles will still yield their potential scrolls because Polymorph Other kills the gargoyle instantly instead of polymorphing it. Using this spell proves that you are too good for Ice Storm.

Oprindeligt skrevet af Dead Herald:
PO is a throwaway spell that no one uses unless they are a nublet who thinks it's cool to toss away xp and loot by turning an owlbear into a bunny rabbit.

Level 5 Spells

- Conjure Elemental: The elf's version of Conjure Elemental will call a wind elemental by facing left and an earth elemental facing right, the wind elemental hits every enemy in the game, while the earth elemental can only hit enemies on land. Deals the same damage as her Ice Storm.
Elf's spell count
Elf's magic uses per level: The Elf will restore her spell count when gaining levels. if you have excess spells due to scrolls, you will keep them.

To read the table:

Defeating the Man Scorpions/Dark Warrior I, would raise the Elf's level to 9, granting her: Four Lv1 spells, four Lv 2 spells, three Lv3 spells, two Lv4 Spells and one Lv5 spell.


Level - boss
1st
2nd
3rd
4th
5th
Lv8 - start
4
3
2
2
0
Lv9 - Man Scorpions/Dark Warrior I
5
4
3
2
0
Lv10 - Ogre Bros/Beholder/Green Dragon
5
4
3
2
1
Lv10 - Displacer Beast
5
4
3
2
1
Lv10 - Red Dragon
5
4
3
2
1
Lv10 - Ezerhorden
5
4
3
2
1
Lv10 - Nagpa
5
4
3
2
1

This chart highlights every opportunity the Elf gets to level up and regain spells. The levels past Ogre Bros/Beholder/Green Dragon are not typos, she stops gaining levels at Lv10, but she still gets to recover her spells at said checkpoints, the Elf has the weaker spells and the least chances to recover them among the spellcasters and if that's not bad enough, she's the worst candidate to pick up scrolls in a party with a Magic User/Cleric. Needless to say, you won't be performing much spellcasting as her... not like she needs to though.
Character Tier List & Comparison
  • CHARACTER TIERS: This list explains the performance of each character when used at high skill level, irrelevant of individual player skill, meaning that a great Thief can always outperform a suboptimal Magic User.

S TIER

Normally, the Magic User's abilities skew towards boss killing, and bosses can be the biggest barriers in the game, leaving regular monsters to deal with but still offering amazing support like casting spells in between the enemies' attacks to help the others dodge them. The black Magic User boasts the largest boss killing potential among all characters(while staying safe casting spells) and his spellcasting ability scales really well with experience and equipment.


Having 2 differences in their key spells on a spellcasting character is enough to consider him separate rather than a pallete swap, the green Magic User is more efficient at regular monster sweeping with CloudKill, and slightly less so against bosses, although still very effective nontheless.


A+ TIER

The Elf is a great front line combatant with the ability to deal very large damage without needing special weapons coupled with supportive spells to help with tricky situations along with an extremely effective desperate attack and being also good in ranged combat


A TIER

Extremely resilient and able to deal that damage back to the enemies and some more, the Dwarf has some unique attacks that need to be used precisely in order to maximise his damage, but if properly used, there arent many other ways to outclass his offense.

Good balance of offensive and defensive capabilities and incredibly supportive. including his unique spells that set him apart from the other Cleric that can be used to great effect and losing none of his versatility.


B TIER

Sticks to Snakes, a bad offensive spell, being on the same spell level as Cure Serious Wounds, the best healing spell, is worse than having Insect Plague, a better offensive spell on the same level as Cure Critical Wounds, a less important healing spell. Earthquake is always better than Holy Word.

Very good durability and front line versatility gives the Fighter alot of staying power and his regular attacks and specials are solid and effective, but that's all he has going for him.


Thief Tier

Front line character with the resilience of a backline character, the Thief has nothing special, apart from her very niche thieving abilities. In terms of combat, She has to try harder than the others to contribute to the fight with an apalling desperate attack, low damaging aerial attack, though quite decent charge attack and only her tumble and jumping as a reliable defense, even then it might not be enough to compare her with the others. If you are still willing to put up with the disadvantages, you are offered with a viable, very active style character with a high skill ceiling.


  • COMPARISON TABLE: assigns a score from 1 to 10 to each statistic to easily compare it against other characters, a score with 3 numbers like 3/5/7 means the score evolution through early, mid and late game.

  1. Hitpoints: Lifebar Length

  2. Defense: The combination of a character's hit points, damage taken per attack and defensive options like blocking, evading and desperation attacks.

  3. Physical Ability: How good a character is at attacking with melee weapons, damage dealt and overall effectiveness of their special moves. (does not consider the Magic User's poison dagger)

  4. Magic Ability: How good a character performs with their spellcasting damage overall, including ammount of spells, non damaging spellcasting not considered.

  5. Combo Ability: Measures the variety of attacks a character can introduce in their combos and special combos like the Fighter's Looping.

  6. Versatility: Determines how diverse a character's gameplay can be, considering different kinds of tactics and overall utility. A more versatile character has ways to deal with more situations.

  7. Support: This statistic dictates how beneficial a character can be to the whole party, considers the abilities of properly timed area attacks, Supportive Cleric spells and party enhancements for example.

  8. Projectile Weapons: Means how efficient a character is with ranged weapons like bows and burning oils overall, includes the Elf and thief Special ranged weapons and abilities.

Character
Hit Points
Defense
Physical Ability
Magic Ability
Combo Ability
Versatility
Support
Projectile Weapons
Cleric
5/6/7
5
5/6/7
2
6
9
8/9/10
7
Dwarf
9/10/10
8
8/9/10
X
7
3
2
4
Elf
1/2/2
4
7/7/8
4/5/5
8
10
5
8
Fighter
6/8/10
7
7/8/9
X
10
5
3
7
Magic User
1/2/3
2
1
10
6
8
7
5
Thief
3/5/8
3
4/5/6
X
7
3
4
7
Equipment
HINT: Can view your equipment by pressing Control Key

Equipment tagged with Breakable has a % to break when you take damage, and can break even with the very next hit from picking it up.

Headgear:
Reduces damage taken, every piece of Headgear provides the same protection, only one for each character except the Elf. (Elf's Tiara, which is her second Headgear, further reduces damage taken.) found by using a Type C name, in the forest of despair's top hidden room, stolen from shadow elves (Circlet), can steal a Tiara from the Ogre Master Brothers. and in the last hidden room prior to the final battle with Tel'Arin in Synn's Castle (Tiara can be found in that chest).


Body:
Reduces damage taken, varies by character. (the reason why a fighter takes less damage than a magic user, for example.) Equipment by default and cannot be changed.


Feet:

- Boots of Speed: Increases walking speed only. Running, jumping and attack speeds remain the same. Breakable.

- Boots of Levitation: Allows levitation by double jumping in quick succession. (You lose the ability to backhop/teleport/tumple depending on your character) Pressing up/down, only while levitating, will control height, any other direction will move you normally including diagonals. Breakable.

NOTE: The chests at the Salamander bosses (Fire and Frost) have levitation boots but those will only last for the encounter and will be lost after the bosses are defeated.

- Boots of Striding and Springing: Allows the Thief to double jump and triangle jump when next to the edge of the screen. Can double jump once and triangle jump twice. Can be used to do multiple air attacks without touching the ground like the elf's aerial down attack. Thief starts with them and will stack with boots of speed/levitation.

Hands:

- Gauntlets of Ogre Power: Adds a fixed amount of damage after every attack. Breakable.


Shield:

- Shield: Only the Thief and Magic User don't start with this, the shield lets you block attacks and unlike the body equipment, you can change it for different versions. The vast majority of attacks can be blocked except grabbing attacks like bites, and spells.

- Flame Shield: Can block Fire attacks, Red dragon/Synn's breath weapons cannot be blocked.

- Ice Shield: Can block the Frost Salamander.


- Shield of Protection from Evil: Can block the Dark Warrior II's dark flames.


- Dragon Shield: Reduces damage taken from breath weapons, Red Dragon/Synn's lethal breath attacks will not kill instantly.


Offhand:

- Ring of Protection: Reduces damage taken slightly. Breakable.


- Ring of Fire Resistance: Provides immunity to Fire and Dark warrior II's flames. Does not work for the Red Dragon/Synn's Breath weapons. Breakable.

- Ring of Spell Turning: Grants invulnerability to level 3 spells and below. Spells like Fireball and Lightning Bolt. Breakable.

*Maybe the Lich has this ring seeing as only Ice Storm (Lv4) and onwards can hit him*

- Ring of Protection from Evil: Like ring of protection but for undead enemies. Breakable.

- Rods: Increases spell damage and item use of the matching element.

- : Fireball, Ring of Fireball, Wall of Fire, Conjure Fire Elemental (M.User, facing left) Burning Oils, Sword of Flame, Wand of Fire (increases the wand projectile's reach).


- : Ice Storm, Conjure Water Elemental(M.User, facing right) Sword of Frost, Wand of Cold (increases the wand projectile's reach).


- : Lightning Bolt, Ring of Lightning Bolt, Storm Blade


Accessory

- Necklace: Reduces magic damage taken.


- Earrings: Increases magic damage, spells like Cure Serious Wounds, Projected Image, etc. are not affected. Includes spells, rings, Efreet bottle, elemental swords...


- Anklet: Increases knockdown attack damage.


- Orb: Immunity to petrification.


- Brooch: does nothing at all. (Proves to the world you are too good for accesories)


- Bracelet: Increases physical damage.


Misc

- Cloak of Displacement: Immunity to ranged attacks.


- Skin of the Displacer Beast: Makes a Displacer Cloak by talking to the shopkeeper right after the Displacer Beast.

- Eye of the Displacer Beast: Lets you skip the Black Dragon normally incurred as a penalty stage at the Forest Labyrinth.

- Eye of the Beholder: Makes Boots of Levitation at the shop after the fight with the Beholder.

- Dragon Horn: Makes the Dragon slayer/Staff of Magic Attack/Staff of Snakes depending on who brings it to the shopkeeper after the Red Dragon.

- Dragon Scales: Cloak of Displacement/Dragon shield depending on who trades the scales at the shopkeeper after the Black Dragon.

- Skin of the Manticore: Increases the chances of finding other boss drops. (skins, eyes)


- Medal: The next item bought at a shop is free, does not work for the secret gnome shop.
Weapons
Basic Weapons

- Normal Sword: Pretty standard weapon, higher level for higher damage. Thief and Fighter get better versions as they go along.

- Short Sword: Same as the normal sword, but shorter reach and slightly lower damage. Elf gets upgraded versions and using it as a fighter allows dualwielding.

- Hand Axe: Good reach, otherwise nothing special. Dwarf's weapon of choice, gets more levels.

- Mace: Short reach and average damage, cleric's standard weapon.


Intermediate Weapons

- Bastar-d Sword: Stronger than a lv 4 Normal Sword and slight increase in range.

Found in a locked chest just outside the Red Dragon's chamber, in the 4 stepping stone hidden room early in Synn's Castle and bought from the gnome store.

- War Hammer: Slow and not as strong as a lv 4 Mace, each time it hits theres a slight delay as the weapon touches the enemy, almost always stuns. Found in the hidden room before Ezerhorden (Window) and bought from the gnome store.

- Morning Star: Like a War Hammer and it's stun property, but longer reach and higher damage, plus has unique special attacks for the cleric. down and up throws a spinning attack good for crowds, hitting multiple times. Towards + attack swings the weapon directly forward, revealing a chain and covers about 2/3rds of the screen's length.

Bought from gnome store and behind the 4 stepping stone door early in Synn's Castle.

- Two-Handed Sword: Huge sword like you'd expect, big damage, reach, unwieldly, hard to combo with and cannot block when using it. Strongest weapon after the sword of legend. Fighter only.

Bought from the gnome store and in the hidden room before ezerhorden.

- Battle Axe: Like the Two-Handed Sword, but for the dwarf and less damaging in comparison.

Found in the same chest where you would find the Morning Star.

- Dragon Slayer: Big damage vs Synn, Like having a Sword of Legend, otherwise its a lv 4 Normal Sword.

Made from the horn of the Red Dragon.


Magic Weapons

- Sword of Flame: hitting an enemy with this is like being hit with a burning oil, not very good for comboing but still has its uses like killing gargoyles.

Found in the Forest of Despair and before the Frost Salamander.

- Sword of Frost: Instead of knocking them up like the other swords, this one just nudges them backwards while encasing them in ice for a moment allowing more hits.

Found before the Fire Salamander.

- Storm Blade: Again like the sword of flame, the enemy will be knocked down as soon as you touch them with this, not the best candidate for comboing.

Can be found in the Forest of Despair and in the 3rd hidden room in Rafael Cave's chest opened by Elf (must skip red dragon).

- Staff of Striking: Magic User's Basic weapon, gives no bonuses.


- Staff of Magical Attack: Boosts power of all spells. Magic User only. Found in the 4 stepping stone hidden room early in Synn's Castle and made from the Dragon's Horn.

- Staff of Elemental Power: Boosts the power of Conjure elemental, Higher damage of C.E. than using the staff of Magic Attack. Magic User only. Found from the 3rd Cave below the path to the Red Dragon (must skip it).

- Staff of Wizardry: Boost power of all spells even higher than Magic Attack.

Allows the use of Final Strike once the experience of the whole party exceeds 2 million, everyone in the party presses attack, jump and inventory then the magic user presses all 4 buttons, then everyone drops to 1hp and the staff is lost. The staff glows once the requirements are met. Magic User only.

Found in the hidden room before the ezerhorden (window).

*BUG* The staff of wizardry WITH earrings makes meteor swarm do little damage *BUG*

- Staff of Snakes: Hitting the enemy with this staff creates snakes that will continue to bite them.

found in the 2nd hidden room before the ezerhorden (gargoyles) and in the same chest of staff of Elemental Power. Made from the Dragon's Horn by the cleric.


Cursed Weapons

http://steamcommunity.com/sharedfiles/filedetails/?id=154438325

Aditional thoughts on my Friend's Guide:
So you might think, I got my Holy Avenger and can kill undead in one hit, so what? I could have done so with the cleric that decursed the weapon with his turn undead anyways! Well yes, but turn undead wont give you xp/drops, and ghouls love dropping magic scrolls, so thats something to consider. Apart from its undead killing power, it's equal to a lv4 normal sword to everything else.


Wands

20 Charges Each, all bought from the gnome store.

- Wand of Paralysis: Paralyzes monsters on hit, 20 charges. Bought at Gnome store. Magic User Only

- Wand of Fire: shoots a small fireball straight ahead, knocks enemies down, cannot hit grounded opponents even while crouching. Magic User Only.

- Wand of Cold: Releases a series of ice spikes along the ground ala Large Burning oil, does small damage and can hit grounded opponents and keep hitting them until charges run out. Magic User Only.

- Wand of Lightning: Creates lightning bolts infront of the user like a wall, very good hitting at different heights. Magic User only.


Advanced & Co-op Tips
  • One mistake people commonly do is grabbing items for no reason (Melee picking up elemental rods while Magic User doesn't have one, Rich guy picking up all the money and not sharing it at the shops, Elf stealing scrolls). Other than sharing health potions and money, there's certain things that are better employed by specific classes.

  • To expand the previous point, Magic Scrolls should be picked up in this order:

    Magic Users FIRST: Everything except Lv2 as they don't have any spells of that level. If there are 2 Magic Users and one of them is stacking spells, those levels should be given to him. (a Magic User just before the Chimera with 2 Magic Missiles picking up a lv 1 Scroll wont be as good compared to the other Magic User who could have 8, so he can carry 9 Missiles for the Red Dragon, and the first Magic User would be replenishing his Magic Missile count after the Chimera anyways.)

    Clerics SECOND: Lv2 scrolls are always a Cleric's property (BLESS), or Lv4 scrolls that the Magic User decides not to pick up so you can heal Instead. (In some cases Lv5 too.)

    Elves LAST: You should never pick any scrolls if theres Clerics or Magic Users in the party, as the Elf's spells are way too inefficient. (Overall damage done by a Bless or Hold Person can do much more good than an Elf's Conjure Elemental, this is specially true as the game goes on.) Although Elves can pick up Lv3 scrolls as her Lightning Bolt can be use to some effect with it's spiky damage for certain situations.

  • Unless going for specific items from chests like magic swords, the Magic User should be the person that opens the chests and he is more likely to find Super Healing Potions, Cure Serious Wounds rings and scrolls, most importantly the scrolls as they are much more useful than finding a single throwing weapon. Notable chests when a Magic User opens them that always drop scrolls are:

    The chest @ the bottom of the screen just past the manticore (Lv 4)

    The chest @ the bottom of the screen in the next room where hellhounds patrol near fire traps (Lv 7)

    The first chest before encountering the Displacer Beast (Lv 4) Super Healing can also drop from this chest.

    If taking the Black Dragon route, The 3rd screen's bottom chest (Lv 4), if you reset the route, visiting this screen again will yield more scrolls.

    First 2 small chests near the top of the screen when taking the Chimera Route (Lv 4. Lv 4)
    Chest right when the Troglodytes ambush at the second part of the Chimera route (Lv 5)

    When going through the Red Dragon, the last chest on the right when the screen stops with the yes/no dialogs (Lv 5)

    Either of the Salamander routes, when the screen first stop and you are ambushed by 4 teleporting Shadow elves in formation surrounding a chest (Lv 5)

    First chest as soon as entering Synn's Castle (Lv 5)
    (Elves and Clerics can also find scrolls from chests, but their results vary. I can only confirm for Magic User.)


  • Against regular monsters and Bosses with Henchmen it's best if all the fighting classes split up vs individual targets, 4 people hitting a boss will produce the same overall ammount of hits than a fighter comboing it, wasting the other attacks. Magic Users attacking the Fighter's enemies is just getting in the way.

  • Special items dropped from bosses such as the Displacer Beast's skin can only be exchanged into something useful in the very next shop.

  • At the shops, putting your hand over another person's hand and pressing Inventory will give them 10 coins, pressing Use, will give them 100, very useful to help out a recently joined person or stacking money to buy the expensive stuff at the Gnome Shop.

  • In very specific situations, going through the Black Dragon route can be beneficial, as it's by far the best stage to farm scrolls, plenty of ghouls and troglodytes, along with chests with fixed scroll drops can be found and the posibility to repeat the stage up to 4 times.

  • Special weapons should go to the Fighter and Dwarf, they are the most effective combatants unless it's a Morning Star for the Cleric.

  • Only use Magic to attack gargoyles, they are immune to physical damage. You can also use the elemental swords and the Sword of Legend.

  • Pros and Cons of each route:

    1st Fork
    Dark Warrior I:
    + Keys (locked chest in the harpy fight with a healing potion)
    + Hellhounds (They drop Elemental Rods)
    - Much more suceptible to money issues in team games
    Manscorpions:
    + About 6000sp if the raft is properly steered
    + Can Farm scrolls of the troglodyte encounters

    2nd Fork
    Ogre Bros:
    + About 3500sp looking inside the hidden rooms.
    + Hell Hounds
    + Earliest chance for Earrings
    + Cheapest Store
    Beholder:
    + Equipment: Flame Blade, Storm Blade, Holy Avenger, Headgear, Gauntlets of Ogre Power, Earliest chance for Bracelet
    Green Dragon:
    + Dragon Scales
    - Very hard Boss
    - Skips a level for certain characters due to bypasing the manticore

    3rd Fork
    Chimera:
    + Boss is easily LBO spammable.
    + Good mix of generous health potions, scrolls
    +++ SECRET GNOME SHOP
    Black Dragon:
    + Dragon Scales
    + Extremely favorable for scroll farming
    - Very Hard Boss

    Skippeable Segment
    Red Dragon:
    + Money, Bastar-d Sword, Every accessory, Dragon Horn, 1 Level Up
    - Fight can be extremely tough

    4th Fork
    Fire Salamander:
    + Sword of Frost
    + Hellhounds (Rods)
    Frost Salamander:
    + Flame Blade
    + Gargoyle minions @ the boss(high chance for scroll drops)
    + Boss has extreme vulnerability to LBO spam
    Tel'Arin & Tel'Erond:
    - If you kill Tel'Arin first, Tel'Erond will kill Nagpa for you, skipping a Level Up, if aplicable
War Machine - Harpy tips
War Machine:

Dificulty Rating
Fighter: 2/10
Cleric: 2/10
Dwarf: 2/10
Elf: 1/10
Thief: 5/10
Magic User: 7/10

Here is the first boss of the game, but it can still give trouble. It charges back and forth, ocasionally stopping to use some of its weapons like Flamethrowers, extending chains and catapults, its pushed by 4 goblins and can be stopped by removing them, they only have 1 hit point. with 2+ players it will also start randomly throwing burning oils around.

At the start of the fight its a good idea to stand behind it to clear the goblins and with burning oils ready, since the War Machine cannot be knocked down, it will take about 4 hits while the fire is ongoing, if your character can block, then just block the War Machine's charges and hit the goblins.

The Elf can achieve an easy win by bouncing on the boss with her jumping down attack until it dies. and also with the Elf, by entering a Type H name for the earrings, its possible to 2 shot the war machine while playing Solo using Lightning Bolt, i don't recomend this as there are more useful items obtainable with name types and the Elf not lacking with ways to destroy the War Machine. Elf can also stand ontop of the boss and use her desperation move, it hits multiple times and will damage the War Machine much more than the damage you'd take from performing it, coupled by the fact that you heal some hitpoints after the fight.

With the Thief and Magic User, not having a shield, they miss on the easier ways of dealing with this boss, making them more dependant on using their starting burning oils. If the War Machine breaks loose of this tactic you can opt to wait until it stops to use its weapons to sneak in behind and repeat the process, the Thief can keep on the offensive with jumping down attacks and rejumping once the attack connects, keeping her relatively safe, the Magic User can use a couple of Magic Missiles to remove annoying goblins.


Dark Warrior I:

Dificulty Rating
Fighter: 3/10
Cleric: 5/10
Dwarf: 3/10
Elf: 4/10
Thief: 6/10
Magic User: 8/10

Pretty tall guy, hits like a truck too, stay on the defensive and watch out for its lightning wall he projects on his wakeup although it can be blocked, but the lightning that comes out right underneath you when he punches the ground cannot be blocked.

This boss is a prime candidate for throwing hammers, from up close these can hit twice and will rack up a ton of damage very quickly or can choose to stop throwing them to sneak a couple of hits and try to catch him again for some more.

In my opinion, this boss along with the Harpy are the hardest bosses for the Magic User, without being able to block or use throwing hammers, he has to rely entirely on his spells, any spells you used against the War Machine will directly influence how this fight will end up and going up against it with your staff can be very risky as he likes to block and quickly counter, doing huge damage. Throughout the level, going around picking up daggers can be very helpful.

On the other hand, classes like the Fighter have an easier time with this boss, along with hammers and his ability to loop his uppercut, can grant an easy win, just watch out for the skeletons that might interrupt the combo looping, and the Dwarf can use single throwing hammers to stun him in place to positiion for a charge + aerial attack combo, the Dark Warrior I being such a huge target that its very easy to catch it in the center of the Aerial Attack, 5-6 properly done Aerial Attacks can bring the fight to an end.


Man Scorpion(s):

Dificulty Rating
Fighter: 3/10
Cleric: 3/10
Dwarf: 3/10
Elf: 3/10
Thief: 6/10
Magic User: 5/10

This boss leaps from outside the screen, onto you for a free hit, but can be avoided being all the way right and crouching or moving down, The defense on this boss is pretty weak so stay on the offensive but watch out for its explosive jump move on its wakeup, but it can be knocked out of it easily by full screen area spells or an Efreet bottle. Continual Light works too, but it's harder to aim.

If playing with 2-4 players, 2 Man Scorpions will be in the fight, but the 2nd one has much less hitpoints than the red Scorpion.

Throughout the fight, it will be assisted by Ghouls and Troglodytes and they can drop magic scrolls so be on the lookout for potential drops.

Sometimes the Man Scorpion seems to be caught in a combo as soon as it recovers from a knockdown, most often happening from a dualwielding Fighter or Cleric and Elf.

The Man Scorpions can also jump around the stage to reposition but this also counts as an attack and its almost impossible to see coming, more the reason to keep the pressure on them so they cant use it.

The Man Scorpion can also throw it's spinning scythe which homes on a person for a bit, which can be avoided by running away, then tries to go back, but wont reattach to his weapon unless he is standing up and will continue to spin in place while it's down waiting for it to get up, hitting everyone near.


Harpy:

Dificulty Rating
Fighter: 3/10
Cleric: 2/10
Dwarf: 3/10
Elf: 3/10
Thief: 6/10
Magic User: 8/10

As a regular Magic User player, this is probably my most hated boss, she likes to fly around and being hard to catch, and also uses attacks which cannot be blocked, best to start describing said attacks.

While on the ground, the Harpy can use her club to hit people infront, but while doing it she also takes a large step forward mid combo, so if you are about half a screen away, she will reach you with it, this attack is best dealt with by counterattacking after blocking and if you are the fighter, you can proceed to loop her off the counter, but be careful with those shadow elves that might interrupt you, if you are playing coop, your friends can entertain them for you.

Sometimes when she is knocked down, she can get back up instantly and take to the air, if she didn't completely leave the screen then she might come charging down or flap her wings to push you back, but the part to watch out is when she does leave, that means her unblockable grab is coming next and it comes down very fast and there is no way to tell who she is coming after. The Harpy can also get up suddenly after being knocked down if people are hitting her, like a reversal maneuver to hit those overzealous attackers.

If you are not a Magic User, then make sure you bring throwing hammers to this fight, it can stop the Harpy dead on her tracks and back to the ground if she comes flying at you, if she's caught at the side of the screen and airborne, well timed throws can hit her twice, but its generally best to save them as a defense against her grab/swoops.

Throughout the fight, a wyvern rider can appear and throw a couple fireballs at the party which can be jumped over and then leave, but you can hit it with Magic Missile (only Magic Missile can hit it) if you wanna take it down fast as it can be annoying for the front line classes to deal with the fireballs while fighting the boss and only one missile hit is sufficient as it will get knocked off its mount.

There is a chest on the right side that contains a healing potion, but there is only 1 obtainable key to be found before the encounter and it only has a chance to drop, from the chest which contains the Efreet Bottle in the village of Trintan, and that key can be used in the first hidden room to open the rightmost metal chest for some nice items, that is assuming you don't take the land route after the war machine, since that stage contains at least 3 keys although skipping on all the potential money that can be found in the river stage and the possibly harder Dark Warrior, it might not be a good idea.


Tel'Arin - Beholder tips
Tel'Arin:

Dificulty Rating
Fighter: 4/10
Cleric: 1/10
Dwarf: 4/10
Elf: 3/10
Thief: 6/10
Magic User: 6/10

This guy comes to make sure that you go down with the ship, if he is defeated fast enough (before seeing the forest while falling) you will be able to choose the path for the next stage, otherwise you are stuck with the forest labyrinth.

Tel'Arin is like the Elf, he can use spells and fight, he will cast lightning bolt or fireball if you are just outside his reach and if further back he will do a jumping attack. Before actually engaging you, he will summon his undead, once they are defeated then he will come off his wyvern and fight.

Once he gets knocked down a couple of times, he will haste and double his movement, attack, and casting speed making him very hard to deal with, but if your class has a shield, you put yourself back to the corner and keep blocking his attacks until it wears off, Magic User can throw Projected Images and the Thief can start jumping.

Can be a pretty intimidating opponent, but there are ways to facilitate the whole process starting with burning oils. When Tel'Arin arrives after destroying the first wave of undead, knock him down and throw an oil, he will catch fire and bounce to the ground again, just before he hits the ground throw another oil and while it burns, hit Tel'Arin with your weapon, that will make it so that the oil hits him again, and so on, if playing single, after the barrage he will be almost ready to flee. Best done right after he arrives because he can raise dead just as he gets up and complicate things.

The other way is with the Cleric's Hold Person, you combo him normally and when he falls to the ground, cast the spell, he will be held but will stand up, letting you repeat a combo. coupled with bless/striking, this can produce ALOT of damage, Tel'Arin is definately the easiest fight for the cleric thanks to being able to also perform the burning oil trick, turn his undead, and just smash him silly with hold person... and the Cleric levels up after Tel'Arin, giving you another reason to go nuts.


Green Dragon(Elf route):

Dificulty Rating
Fighter: 8/10
Cleric: 7/10
Dwarf: 6/10
Elf: 6/10
Thief: 8/10
Magic User: 10/10

I only take the Green Dragon route in about 0.0000001% of my games. and because i have no effective way of fighting it and its detrimental to go this way (cleric actually misses a level up this way), missing on the benefits found in the other 2 routes.

Right way it will use its breath weapon and 2 more times as its health declines and it tracks very quickly, but there is a blind spot underneath the dragon at the side of the screen, like dodging the sideways Red Dragon Breath, Make liberal use throwing hammers and attacks while it's breathing because if you deal enough damage, it will immediately use the 2nd breath and again the 3rd if you continue hitting it. It also likes swiping it's claws as soon as you are in range, making it hard to mount an offensive, best way to deal with this boss is to pick another path.


Ogre Master Brothers:

Dificulty Rating
Fighter: 3/10
Cleric: 1/10
Dwarf: 3/10
Elf: 2/10
Thief: 6/10
Magic User: 6/10

This boss loves making an entrance by charging, and he will do so @ the middile so when its time to start the encounter walk along the bottom or top of the screen and it will miss, letting you sneak behind for some free hits, this boss is vulnerable to just about every strategy: hold person, throwing hammers, dagger spam, burning oils, etc.

Once he reaches a low enough health level, he will call his green brother, both are fought similarly, but the green brother likes throwing boulders from a distance and seems more prone to block and retaliate. Both brothers like charging back to the scene if they are knocked down near the edge of the screen, you can use that to your advantage.

It's possible to finish the fight without the first ogre ever calling his brother, that can be done using hold person or damaging spells. The spells have to be cast as soon as the Ogre hits the ground and cant waste any second, otherwise it will get up (and be immune to attacks at this point) and call the brother, if playing solo Magic User, if you run out of your current spell and he didnt die, there is not enough time to switch to another spell, easier done with the earrings found earlier in the stage and with elemental rods, even better with high spell count with scrolls if found from hellhounds, if you still carry your Wand of Cold it can also be used to hit the knocked down ogre continously and maybe get the kill. If thats not possible then it's not the end of the world, with Both brothers in the fight, the area of effect spells will double in effectiveness since it's catching both of them AND the Wand of Fire is also useful for catching them mid Charge.


Beholder:

Dificulty Rating
Fighter: 6/10
Cleric: 6/10
Dwarf: 5/10
Elf: 5/10
Thief: 8/10
Magic User: 3/10

Pretty unique boss encounter, the beholder has some special features like being able to disrupt spellcasting, the Beholder will also perform a counterattack when he's struck by the 5th attack in a row, since the Beholder cannot be knocked down, its very easy to do but at the same time its just as easy to avoid since it will always happen on the 5th hit. More the reason to be more careful with your assault and not just have everyone try to overwhelm the boss.

The Beholder gets pushed back slightly when it takes a hit and if this nudges him to the corner of the area, it will jump to the air and jump again to the scene, carrying an elemental weapon can help to lock him down in this state, hitting it while its coming down from the vertical jump.

The Beholder can put you to sleep and use an ability to hit surrounding enemies, but differs from his counterattack, this one does a clockwise spin but can be avoided by crouching near the Beholder or jumping if further back since it cannot be blocked.

Also Employs a charging attack when its in your same horizontal plane, like the ogre bros, this can be blocked, but when it lunges to bite you, you have to move out of the way, its considered a grab.

Do not cast spells if the beholder is looking your way or the spell will fail, this also includes using the ring of Djinn Summoning. The Bottle of Efreet works fine and also does Projected Image, if anything else works while its looking at you, let me know. Spells can be cast if the eye is closed.

Thats all bad news, but now some ways to help defeat the boss, as explained before with the elemental weapon part, another way is to deal with this boss by crouching right next to it in vertical lane either up or down, since this boss moves very slowly(moving while crouching is faster than the boss) unless its attacking, and it attacks when you are in its same horizontal plane, which means that only its dark spinny move can hit you but since you are crouching and next to it, it will miss. It's a perfect blind spot for all of its attacks but if another person triggers its counterattack by hitting it 5 times, that WILL hit you. Once you got the positioning down, you can stand up and hit it 4 times when its safe to do so and alternate from there.

Perhaps it's the Magic User who has the easiest time with this boss, with projected image and this boss immunity to knockdowns, theres an extremely high chance to get criticals and also the ability to use Magic Missle to its full potential, since it doesnt bring helpers. This is a boss that the Magic User can come with just Magic Missiles and Projected Images and have more than enough. Consider going through the Beholder if you had to use many spells against the Harpy andTel'Arin.

Manticore - Chimera tips
Manticore:

Dificulty Rating
Fighter: 2/10
Cleric: 2/10
Dwarf: 2/10
Elf: 1/10
Thief: 3/10
Magic User: 2/10

Probably the overall easiest boss of all, has no hidden tricks, unblockable attacks, or even underlings to help it, you are coming right after a shop too so those oils will be put to good use, regardless there are still some things that can be said about the boss.

The Manticore can do sudden charges if you step in its horizontal lane, that's the attack to watch out for, specially if you don't have a shield, one thing that can be done is quickly run in and out of this area to bait that charge and maybe pin it down next to the wall, if you are a shield user you can just hold back as its getting up to block any retaliation, otherwise keep hitting it, it shouldn't take long to kill it after the oiling.

The Manticore can perform other attacks when you invade its lane, like taking off to the air and push you back with its wings, followed by shooting spikes off its tail, either that or flying off the screen and come down onto you... though your mighty buckler can stop the Manticore flying down onto you, yup. Non shield users can just sidestep.

The Manticore can also decide to block attacks, which will signal its retaliatory charge but its slow enough to see it coming so sidestep when it blocks... and it's tail also can hit you while the Manticore is turning around so avoid fighting it from the rear as this is very fast although not very damaging.


Lich Deimos:

Dificulty Rating
Fighter: 5/10
Cleric: 4/10
Dwarf: 5/10
Elf: 4/10
Thief: 9/10
Magic User: 6/10

The final boss of Tower of Doom comes back for round 2, and has alot of nasty surprises like Paralyzing you if you just touch him by being near, giving him a free hit, if you are a low constitution class, this can be huge damage.

The Lich has many spells, He will use Lightning Bolt or Fireball if you step into its horizontal lane but are far away, he will use Earthquake and Animate Dead after he takes some damage, Earthquake hitting people standing up (jumping or crouching will miss), but if it doesnt hit anyone, Animate Dead wont happen. If you are standing close to him he can summon a ring of fire to hit anyone close to him and can Teleport to another spot in the arena. Also likes going into a "Staff Rush" mode like i call it, he will just target one person and charge at them and swing his staff like crazy, if you are a shield user you can stand back to the wall and tank it, but be careful with counterattacking if you are not a Fighter as the lich wont be caught in your Aerial Attacks and might hit you before you recover, and if you are a Fighter, don't perform the 2nd swing of your Aerial Attack to land sooner.

The Lich just bounces back a bit after you finish a combo on him, but sometimes, if done next to the wall he will bounce back but still be open to more hits after he lands from it and go on for a while in this locked state. Easier done if you carefully time your attacks to hit the Lich just after he can be hit again. Elf can use Haste to help with this task.

As his lifebar gets low enough, he will cast Meteor Swarm hitting the entire screen, except the top and bottom middle sections of the screen, the spell is cast relatively fast and can hit you if you are not quick enough.

I should point out that the Lich is almost immune to spellcasting, only Ice Storm and Conjure Elemental can hit it.


Displacer Beast:

Dificulty Rating
Fighter: 4/10
Cleric: 4/10
Dwarf: 4/10
Elf: 4/10
Thief: 6/10
Magic User: 5/10

Goblins, goblins, goblins, thats the name of this boss, been a while since a boss had underlings, so this one comes to break the combo.

This boss loves biting, and biting counts as a grab so you can forget you have a shield and go all out offensive for this encounter. The Displacer Beast is also pretty maneuverable, loves to jump from place to place and if you happen to be anywhere near its mouth, even if you are attacking it and let it recover for just an instant, expect a bite.

Anytime it bites, it can be stopped by another person hitting the Displacer Beast, this also works for every other monster that grabs people too.

This boss is very predictive with its actions, once it gets knocked down, it will recover, turn around and and attempt to bite without fail, except when you knock it down, you can go around(or alternatively dash and jump and you will land right behind)it will still do this and fail, freeing it up for another combo, etc etc... also loves whipping with its tentacles when it leaps across the screen.

But the goblins can ruin your day trying to interrupt and flank you, endless stream of goblins that will instantly replace the one you just killed. having more players can simplify this by having them clearing goblins while another person focuses on the displacer beast.

This fight is all about where the Displacer Beast is facing, if it's not knocked down, try to stay away of its face, if it's down on the ground, stand on its face.


Black Dragon(Forest Labyrinth):

Dificulty Rating
Fighter: 8/10
Cleric: 8/10
Dwarf: 7/10
Elf: 7/10
Thief: 10/10
Magic User: 10/10

Just like Green Dragon, i barely take the Black Dragon route, this boss fights the same as its green counterpart, only reason i can think that its better to take this path than visiting the gnomes is to stock up on spells which is possible to do due to being able to loop the stage up to 4 times before the black dragon comes and there are TONS of ghouls and troglodytes, but you can also navigate the Forest Labyrinth correctly and skip the encounter, you will still gain a level if your class would have leveled by fighting it.

The Black Dragon doesnt have helpers unlike the Green Dragon, so you can at least use Magic Missile properly.


Chimera(Gnome Village):

Dificulty Rating
Fighter: 4/10
Cleric: 5/10
Dwarf: 4/10
Elf: 4/10
Thief: 7/10
Magic User: 6/10

The chimera is more like an angrier Manticore, with more aggressive fighting style, and hellhound minions to boot, also has higher tendencies to block and counter in comparison and can also breathe fire which has enough reach to cover the entire screen, but it can still be avoided.

The chest nearby contains a Super Healing Potion should it come to that.

This boss signals the debut of Large Burning Oil spam, simply knock it down, and throw all 9 oils rapidly and it should be dead. Need to position properly so that the 3 explosions hit it. When the Chimera makes it's entrance, you can stand behind it and quickly go for the knockdown, one step forward after that and it should be perfectly positioned.
Red Dragon - Tel'Arin Tips
Red Dragon(Rafael Cave - B50F):

Dificulty Rating
Fighter: 6/10
Cleric: 7/10
Dwarf: 4/10
Elf: 6/10
Thief: 9/10
Magic User: 6/10

This is another skippeable boss just like the Black Dragon, but the difference is that everyone levels up here and adds a whopping 700,000 xp, pretty much mandatory if you are going for Final Strike, so not bad at all.

To fight this boss, in the cave of rafael you have to lean to the left as you aproach B50F depth and then you will need to make 3 dialog choices, NO NO YES and the Red Dragon will try to incinerate you, unless everyone moves to the right where all the metal chests are, you have to completely scroll the view or everyone will die.

Now for the Proper Fight, time to describe the Red Dragon's attacks... First up is its bite, can see it coming when it opens its mouth and starts moving faster and following someone, best avoided with a slide, then theres a claw swipe that can come in either direction, if you happen to stand at the side of the screen and the swipe is coming from that direction, there will be almost no time to dodge it, making it risky to be in such a position and if you are a Magic User, thats half your lifebar gone. The swipes ARE blockable though, nothing your little shield can't handle. The Red Dragon can also drop a fireball that converts into a column of fire that moves in the oposite direction of the hand that dropped it, it can also use it from both hands covering most of the screen and also can fly off the screen and cause a cave in, both of these attacks can be hard to avoid if you are in the wrong place, but if you can cast spells, even if they will miss, these attacks will continue to resolve while you are invulnerable when performing the spell and will also provide the cover for your allies as well.

As it's health declines, it will decide to use its breath weapon which has to be avoided or you will die, there are 3 versions of this attack: The first one is straight ahead and will prepare to use it immediately, it will inhale, pulling everyone near its face and you have to move away by running or sliding, walking is not enough unless you are equipped with Boots of Speed. The 2nd Breath will come from either side, and if it does, move towards the inhaling, underneath the head to avoid it. And the last breath comes from the background which covers the whole screen, unless you hide behind the rocks that are at the front and to the sides.

The Red Dragon has so much health that its lifebars are invisible, but now some ways to help defeat it: Dwarves love the Red Dragon as it cannot be knocked down, so it's the perfect candidate for their rapid and aerial attacks which deal massive damage, the elf can activate Haste and everyone just go all out to its head and it's possible to keep it stunlocked, a solo Magic User can also do this with good timed Magic Missiles, it might not look like it, but this boss is susceptible to large oil spam too, but the positioning is very tricky, best done when it does its large jump since you can see where it will land, and move acordingly.


Flame & Frost Salamanders:

Dificulty Rating
Fighter: 3/10
Cleric: 4/10 (9/10 Flame Salamander)
Dwarf: 4/10
Elf: 3/10
Thief: 6/10
Magic User: 2/10 (5/10 Flame Salamander)
[The ratings for the sword wielders asume they picked the correct elemental sword for the fight]

Both Salamanders are very similar and are fought at the same stage of the game so i feel like combining both sections. In their corresponding stages, you can find an elemental sword and shield that are strong against them, without the shield, Most of their attacks are unblockable, and with the sword, you can hit them endlessly against the wall, the attacks will knock them down but they can still be hit while they are falling for a free juggle endlessly and while they are on the ground they can also be hit continously as if they were standing up, and they have no escape against this.

The Salamanders love spinning their tail before they get up, hitting everyone but can be blocked with the proper shield, the salamanders also deal damage on contact, also blockable.

The Salamanders take extra damage from their oposing element's spells and items, the Frost Salamander in particular gets destroyed by large burning oils and the Efreet Bottle.

Going Fire or Frost is entirely up to you, but i'd say Frost due to the ability to use burning oils, and there also being an Efreet Bottle in a chest @ the Boss to help, but going Fire will let you have the awsome Sword of Frost... unless you are a Cleric, solo clerics should always go through the Frost Salamander as they have no way to fight the Fire one, no spells and inability to use the swords.

Magic Users should always consider going through the Frost Salamander as it has Gargoyles for helpers, which can yield some scrolls, in particular if you have someone else with an elemental weapon to kill them for you.

In the chests of both Salamanders, Boots of Levitation can drop that will only last for the fight, these can be used to levitate and avoid their spinning tails when they get up although you would be very vulnerable to everything else while levitating.

The Frost Salamander can call some Ice Spikes to hit a large area surrounding Itself and the Fire one will call some fireballs from the background and send them across the screen, but theres a gap in between some fireballs to squeeze through or can also jump with proper timing.


Tel'Arin/Tel'Erond(Dwarf Route after Rafael Cave):

Dificulty Rating
Fighter: 8/10
Cleric: 4/10
Dwarf: 8/10
Elf: 6/10
Thief: 9/10
Magic User: 5/10

Tel'Arin comes with his brother to try and stop you, very similar to his first encounter, but this time he won't call undead minions at intervals, you'd think the brothers would be enough.

Tel'Erond, the green elf, shares his brother's exact moveset and lifebar but not evenly, Tel'Erond will die MUCH faster than Tel'Arin (Tel'Erond has about 4 to 5 times less hitpoints) and there are 2 outcomes for this depending on who dies first: If Tel'Arin is killed first, Tel'Erond will stop and leave, apparently being freed from the brainwashing and he will take care of Nagpa for you later, (note that by freeing Tel'eron, you will forfeit a level up you'd would normally attain at Nagpa, and all the human characters level up there.) and if Tel'Erond dies first, the fight will continue regardless.


Tel'Arin:

Dificulty Rating
Fighter: 6/10
Cleric: 4/10
Dwarf: 6/10
Elf: 5/10
Thief: 8/10
Magic User: 5/10

If Tel'Arin & Tel'Erond were skipped, you will encounter Tel'Arin early in Synn's Castle, this encounter is the same compared to the first time @ the Skyship, but he wont call undead minions, but if playing with many people then Shadow Elf allies will join the fray.

Should he haste and prepare to make mincemeat of everyone, note that the stairs go up for a long way and its possible to outrun the haste, mixing long jumps with the running to prevent stopping suddenly because you can't run forever and stopping briefly will let him catch up.


Ezerhorden - Synn Tips
Ezerhorden:

Dificulty Rating
Fighter: 10/10
Cleric: 8/10
Dwarf: 10/10
Elf: 4/10
Thief: 10/10
Magic User: 4/10

The Ezerhorden is an extreme boss, either the easiest or the hardest depending on your preparations, and by preparations, I mean carrying a healthy ammount of Lightning Bolt rings and Rod of Thunder, possibly earrings too, this is the only way to deal with the ezerhorden safely and normally it will suffice due to its extreme vulnerability to Lightning Bolt, being able to damage it for more than half a lifebar per casting at times, some classes with earrings can score two hits per Lightning Bolt if you keep the bolt trained on the boss.

If that's not possible, be ready to face the Ezerhorden and it's deadly bite, very telegraphed by the ghostly boss transforming into a giant maw and chasing someone rapidly, its nigh impossible to dodge due to its persistence and its damage is very high and you cannot interrupt it by hitting it before it completes the transformation, but can be lessened a little if you let it catch you in midair, if there is a cleric, Continual Light will remove the biting mode.

Under all circumstances you should avoid trying to free people being bitten by hitting the boss because your friend will also take full damage from your attacks, specially if you wield a deadly weapon like the Sword of Legend, 4 hits WILL kill a Dwarf.

If there is a Cleric in the party, he can remove the biting stance with a casting of Continual Light.

Ezerhorden also summons some skeletons... but all the focus should go on the boss.

Ezerhorden is Immune to Magic missile, Fireball and Cloudkill.

Demonstration of how to kill Ezerhorden with Lightning Bolt, including pauses between casts. Note the accessories equipped:


Dark Warrior II:

Dificulty Rating
Fighter: 7/10
Cleric: 7/10
Dwarf: 6/10
Elf: 5/10
Thief: 9/10
Magic User: 3/10

Another Boss that can very easily get out of control, just like first Dark Warrior, employs similar tactics, but the 2nd is way more mobile and aggressive also blocks very often and to make things even worse it autohastes once its hitpoints drop to a certain level, and it happens automatically, he doesn't need to perform a move or anything, even if it's in the middle of a fighter loop combo, from which it will break free by dropping much faster.

The Dark Warrior II has a few attacks like punching the ground and projecting dark fire underneath you, can also spew some more from its chest, both of these are blockable if you are equipped with the Shield of Protection from Evil from a hidden room just before this encounter, oddly enough the Ring of Fire Resistance will also protect from this.

The Dark Warrior II's riposte speed is so fiendishly fast that the only way to avoid it is to predict it and react acordingly like sliding underneath it or performing an attack with alot of priority like a charging attack or just hitting it once and blocking in anticipation, if you do this being a fighter, it will open up a free chance to do a loop combo.

Hammers and Burning Oils are very useful for this fight, this being one of those bosses that can be struck twice per hammer but regarding the oil spam, its better to drop 4-5 oils and let it get up, because it can recover mid barrage, wasting the rest of the oils, even faster if its already in its hasted state. Dwarfs in particular can employ the same tactic from Dark Warrior I, using throwing hammers to stun it briefly to perform a perfectly positioned Charge + Aerial Attack for massive damage, perhaps half a lifebar with a good weapon. The Cleric has also a strange way to deal with this boss while it's hasted, using a Warhammer or Morning Star, Hitting the Dark Warrior II while grounded with these weapons will be stuck, and a single curbstomp attack can hit multiple times, more times than a regular combo, and this damage adds up quickly, the Elf can do this too with her desperate, leaf swirling, attack while standing next to it, also while its knocked down.

Dark Warrior II is very vulnerable to Reverse Gravity, taking major damage from it, not on the level of Ezerhorden with Lightning Bolt, but still very substantial damage, Magic Users should reserve Lv7 Spells for this.


Nagpa:

Dificulty Rating
Fighter: 9/10
Cleric: 3/10
Dwarf: 8/10
Elf: 2/10
Thief: 8/10
Magic User: 0/10

Bosses using minions to help out is common, but Nagpa brings in some other bosses to help instead! And having a Black Dragon and a Chimera interrupting you as you try to chase the small Nagpa around as it scurries and ocasionally teleporting from side to side can be very Irritating. The lifebar belongs only to Nagpa and if the Chimera or Black Dragon die, he won't call anymore, but this is very unlikely as Nagpa has very low life, it's very possible to finish the fight in 2 combos or just a couple of area spells as a Magic User, another very easy fight for him. As a solo Green Magic user, this is a good time for Power Word Kill, and a solo Black Magic user, employing Meteor Swarm, can deal up to 90% of its lifebar with that spell alone.

Nagpa by itself is a very simple boss, all it does to attack is cast Lightning Bolt, and it's not particularly quick and simply sidestepping will avoid it, all the fight really is dealing with the annoying helpers, and they all have their exact attacks as when fought before.

There are a pair of chests that should be opened before nagpa is killed to enjoy their useful contents like super healing potions or Djinn rings.

If you spared Tel'Erond, he will come and kill Nagpa for you, denying a level up and/or spell recovery for every character, except Dwarf since he reaches max level early in the game and has no spells.


Synn

Dificulty Rating
Fighter: 7/10
Cleric: 6/10
Dwarf: 4/10
Elf: 5/10
Thief: 8/10
Magic User: 4/10

Time for the last boss, and very deserving of the title, Synn can be a very daunting opponent.
She shares alot of similarities with the Red Dragon, the only diference is that instead of dropping a flaming ball from her claws and then converting to a wall that moves along, Synn will call 3 quick fireball spells to strike a wide area that covers almost all the ground, best dealt with by jumping away as it happens and running to the opposite direction, spells can also be used to provide invulnerability once the fireballs have been conjured.

Another diference is that instead of producing a cave-in when jumping, she will cast Meteor Swarm, much harder to dodge and there is no blind spot, have to keep looking at the shadows and moving acordingly, if Thief of Magic User, can also Tumble/Teleport. Another way to dodge it is to scroll the screen, so keep fighting on the sides and not at the middle so you have more space to scroll, this is because the spell's area will not move with you and stay there.

There will be no rocks in the foreground to hide against the breath weapon coming from the background, for that you will have to look for some darker blocks on the ground near the bottom and to the sides, standing on them will raise a wall to protect against it.

Synn has the Largest health pool of all the bosses, somewhere around 4 or 5 lifebars, but you also are at your strongest levels of experience and equipment which should even out.

If you happen to carry a Ring of Fire Resistance, that's half of Synn's attacks that you will be immune against, all you will need to look for are the claw swipes, bites and breath weapons which are also her easiest attacks to avoid, clearly a game changing piece of equipment, even worse with boots of speed and you can find both of them with a 100% chance of drop from chests in a hidden room before the Dark Warrior II.


THE END!
Version History & Thanks
7/4/13 - 0.1 Weapons & Equipment F.A.Q. state
10/17/13 - 1.0 in-depth guide upgrade
8/6/14 - 1.1 Tons of spelling errors fixed and added a 1 credit clear video with Magic User, apprentice dificulty
11/21/14 - 1.2 Updated Magic User 1 credit video to knight difficulty and in glorious 720p 60fps
11/24/14 - 1.2.1 Many fixes, including more spelling errors, improved the spell count charts for the spellcasting characters and fixed incorrect cleric spell counts.
3/24/15 - 1.2.2 Updated Ezerhorden tactics section with a "how-to Lightning Bolt" it video.
5/25/15 - 1.2.3 Updated Xanathor's Tower with more information and more Typo busting.
6/4/15 - 1.2.4 Reworked the Naming and Items chart to make it easier to read.
6/9/15 - 1.3 MASTER update! - Magic User 1 credit clear Master dificulty video added, showing my new 1 credit Magic User tech.
3/21/18 - 1.3.1 Fixed Table Formatting.


Thanks for reading my guide and I hope it was as helpful for you as it was fun for me write writing.
82 kommentarer
SilverCuppedRamen 5. maj kl. 13:04 
Thanks for the detailed guide :btd6thumbsup:
Honorable Discharge 30. nov. 2024 kl. 7:04 
I read elsewhere that you can jump after an attack to do the dodge movement. This will need confirmation.
Also, I have that issue where mashing the attack button has the game thinking I'm holding it, and thus the elf kicks enemy away, is it just me?
Bubbleknight 30. aug. 2024 kl. 22:55 
Something else I found. If the magic user does not use or pick up any wands and only buy the lightning wand from the gnome shop, you can use the lighting wand for a long time. I use it to stun lock kill Synn. Try it!
Xanathor  [ophavsmand] 27. juli 2024 kl. 3:38 
Nothing at all, just fluff.
sgt_hatter 25. juli 2024 kl. 23:09 
Each type has different stats, but do they actually have any effect in-game?
YOLO KNIGHT 18. mar. 2023 kl. 7:42 
I don't think I knew about half of the moves here. How I missed them is anyone's guess
TARTrazine 31. dec. 2022 kl. 22:26 
noticed a typo in Magic User's description: "The dedicater (sic) caster of the group"
RazorsEdge 6. juni 2022 kl. 12:36 
great guide my dude! it even has more info that certain wiki sites!

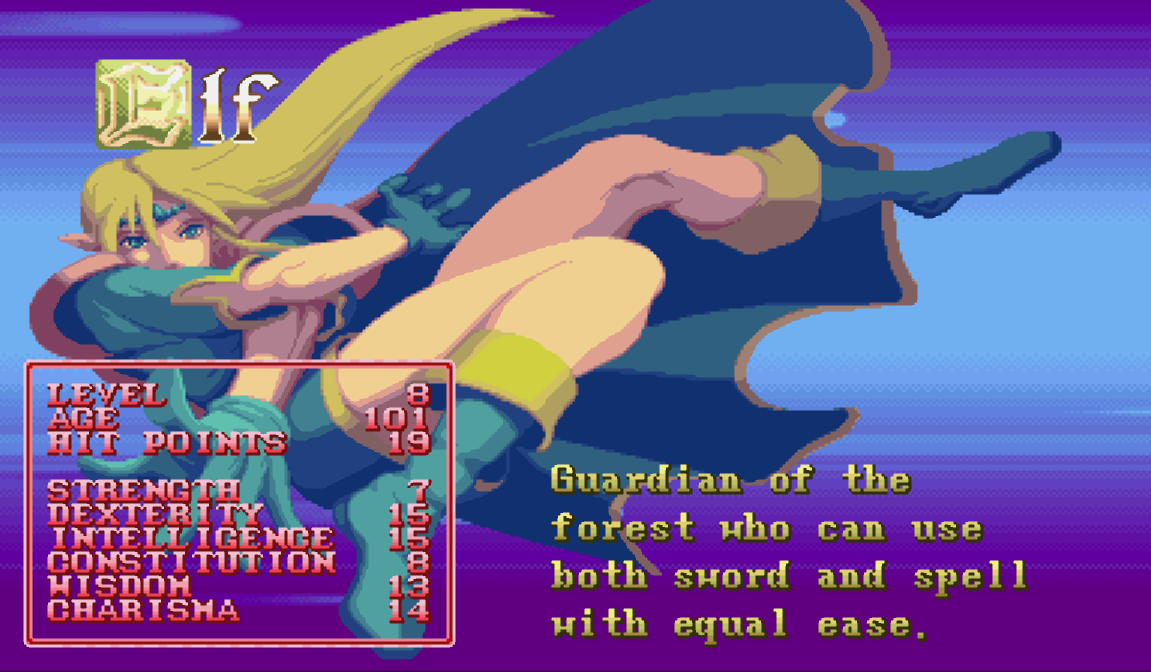
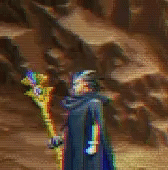
note: i believe the item ORB also grants inmunity to paralysis along with petrify
Xanathor  [ophavsmand] 3. maj 2022 kl. 15:30 
Yes I am aware of all of these strategies, and that is probably the appealing part of this game, the whole variety of things you can do. As for the more tricky strategies like 1 shotting the dragons, I decided to leave those out otherwise this guide would have no end.

just in glitches and exploits alone(like waiting before some bosses appear automatically after some time to deny reinforcements; or 2 specific characters trading headgear, etc), this game is as well made as the first generation pokemon games in my opinion!
trueancestor 3. maj 2022 kl. 2:29 
part 7 comment:

For synn's castle before Tel'Arin, there is one room which need 4 trap-pads to open. You can solo (except MU since he can't even push the 2 statues) this, by triggering the last pad with a lightning bolt ring. so set the 2 statues in lower lane, stand on one of the upper lane pads facing the other pad, and fire lightning bolt ring.

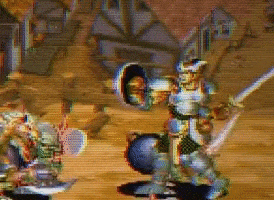
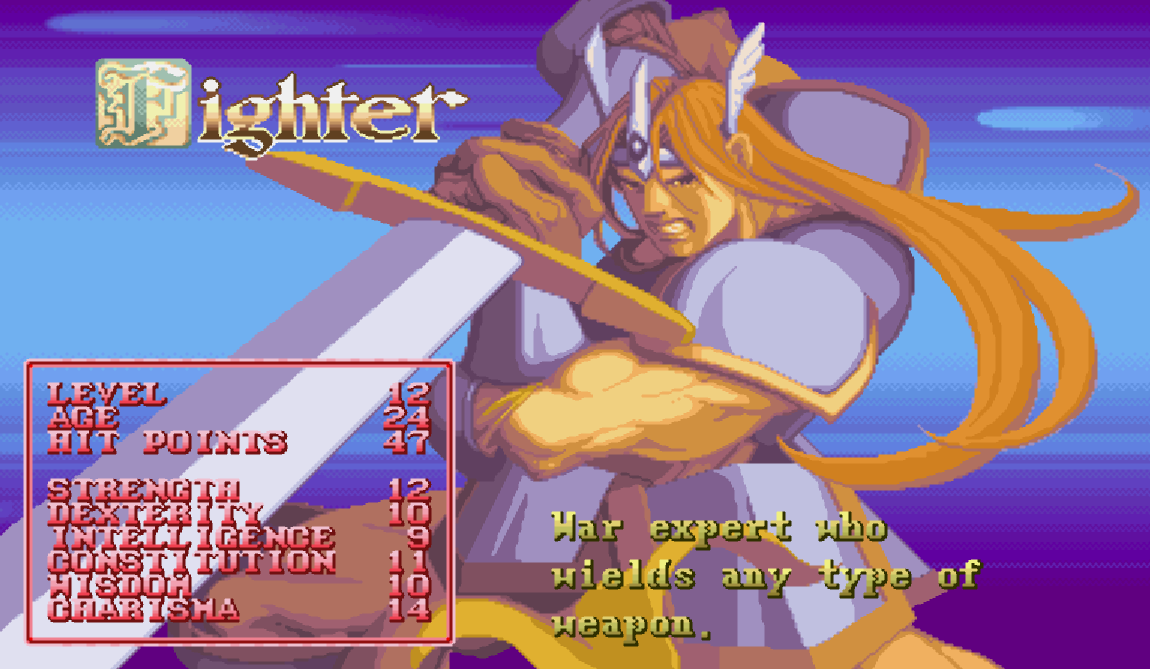
You might know this already, but fighters can crit with lightning bolt rings with 3 attacks followed by lightning bolt if he has earrings and rod of thunder. Even Synn is susceptible to this and most of her life can be taken with this.