SRPG Studio

SRPG Studio

Not enough ratings
How to use your own resources
By SapphireSoft
This guide will explain how to use the original image you created.
   
Award
Favorite
Favorited
Unfavorite
Prepare the Project folder
1. To use the original image, the project folder must exist. If you do not have a project folder yet, launch SRPG Studio and select "Test Play" or "Map Test".


2. A folder named Project 1 has been created. You can place images, music, scripts etc in this folder. Since this guide wants to use images, access the Graphics folder.


By the way, what is Project1.srpgs? This file contains the data you created with SPPG Studio. Since it is a very important file, we recommend that you back it up frequently. If your SRPG Studio is not a demo, you can launch SRPG Studio by clicking on this file.

3. You select the folder to access depending on the type of image. If you want to use images like forests and rivers, select "mapchip". In this guide, you want to display the face image, so select "face".


4. Face images must be separated by 96 x 96. Now, if you do not have such an image, please use the following image.


Let's copy this image into the "Face" folder.


You prepared the image.
Register images in the project
1. Next you have to register the image using SRPG Studio. Select "Graphics" from the "Resources" menu.


2. To add your own face image, select "Face" in the original tree and press the Add button.


3. In this dialog, the contents of the face folder are displayed. As you prepared the image in advance, the file is displayed. Select the file and press OK.


4. The file name is displayed under "face". Press OK to register.

Set face image on unit
1. Let's set registered face image to unit. First, select "Database".


2. At first, the face image of the runtime is displayed. You can change it by clicking.


3. The file you registered is displayed under "Original". Select it and press OK.


4. The original face image was set for the unit. Let's run the map test.


5. It was displayed correctly in the game.

3 Comments
RadiantTower Mar 8, 2021 @ 3:20am 
Basically, go to the tools tab, click options, go to the expert tab and check the 'Enable "Map Tree" in the tool menu' box.

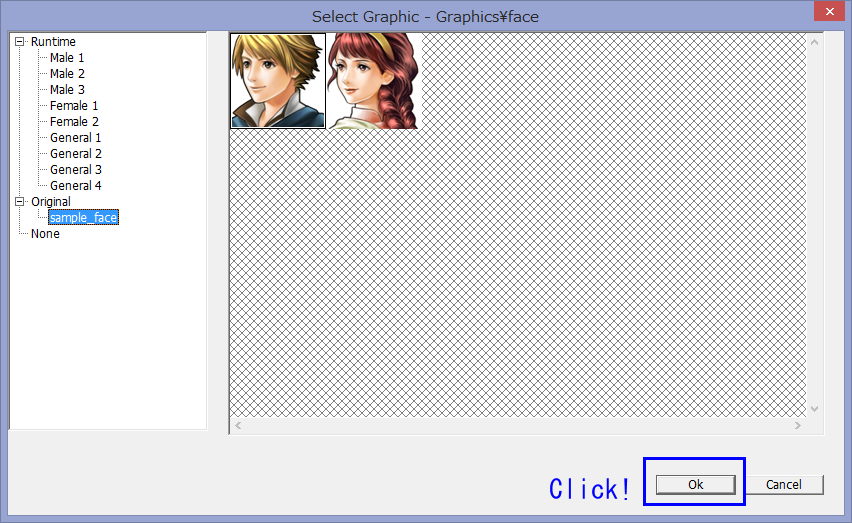
Then you can go back to the original tool tab and select the newly revealed "Map Tree". Click "create map tree", name the map tree whatever you want, and then you have two options. You can select single or multi.

If you select single, the mapchip created is not animated. If you select multiple, then the mapchips you selected will be animated based on the file name. Each box in the multi section can be clicked on and the top-left most square of the selected mapchip will show in the maptree. The whole mapchip will load in the map editor but this one tile within the map tree editor exists just to show you which mapchip you selected. Using these squares, you can stick static and animated mapchips together.
RadiantTower Mar 8, 2021 @ 3:20am 
For future readers, a discussion thread answered his question.
https://srpg-studio.fandom.com/wiki/Resource_Format_Guide
Juicestand Aug 29, 2018 @ 10:57pm 
would you happen to know how to add more water or animated map tile sets? I can't wrap my head around how it happens or how it's done!