Absolver

Absolver

163 ratings
obliviondoll's guide to the basics of Absolver
By obliviondoll
This is intended as a complete guide to ALL the basics of Absolver. It isn't a comprehensive walkthrough of every step from the tutorial to being the best competitive player out there, but it should help you find your own path through the game world and into PvP when you feel ready.
4
   
Award
Favorite
Favorited
Unfavorite
Introduction and Controls
UPDATE 17th Feb 2019: Updated school code - XBox release included a change in formatting of codes so they all changed.

I think the first thing to do here is to answer the obvious question: What is Absolver?

Absolver is a fighting game, but not a typical one. It has some rhythm game mechanics, and a semi-open-world PvE experience which plays slightly more like a one-vs-many brawler type game. The main PvP game mode is 1v1 duels, and the best part of the PvE experience is when you're facing off against a single opponent in the open world or in Downfall. Most players view it as a fighting game, because while it has elements from other genres, 1v1 combat is the core of what Absolver is.

The controls for the game are somewhat unique, but also fairly similar to many third-person brawlers and RPGs. The game has a "harder" lock-on system than the likes of the Arkham series, but softer than some other games. You are required to lock onto a target to enter combat mode, and will automatically lock onto a target when attacking them while unlocked. In spite of this, locking on doesn't prevent you from using movement inputs to aim your attacks at off-target opponents.

And on the topic of the controls, the defaults are as follows:

Movement:
WASD
Left stick

Camera control/style ability:
Mouse
Right stick
NOTE: camera control is not available in combat mode. When locked on, this controls your style ability instead. Style inputs are recognised as having 4 directions - up/down/left/right. Depending on style, these directions may produce different results.

Lock on controls:
Middle mouse button (click scroll wheel) to lock, and scroll to switch targets.
Tap RB/R1 to lock or unlock. Hold RB/R1 and use right stick to switch targets.
NOTE: Under options/gameplay, there's a new "switch target on attack" option. If you turn it on (defaults to "off"), attacking off-target by using movement input with your attack will also change your lock-on target, and turn the camera to the new enemy. Your mileage may vary, but I personally find it very useful.

Stance change:
QEZC
Hold RT/R2 and use right stick

Emote/co-op/start duel menu:
T + mouse
LB/L1 + right stick
NOTE: You may only REQUEST to co-op with someone or end a fight, but when setting combat mode, it just happens with no requirement for the target to accept. If you initiate combat by accident, the player doesn't get an on-screen pop-up notification like they do for the other options. You might be able to cancel the fight simply by moving far enough away, instead of having to bother them with a "stop fight" request.

Attacks:
Left click for sequence, right for alt
X/square for sequence, Y/triangle for alt

Defense:
Shift to block
LT/L2 to block
Space to dodge
B/circle to dodge

Shard use:
Power 1:
1 on keyboard
Left on controller d-pad
Power 2:
3 on keyboard
Right on d-pad
Unfold Weapon:
2 on keyboard
Up on d-pad
Drop/fold weapon:
Ctrl on keyboard
Down on d-pad

Miscellaneous stuff:
F to interact with objects (pick up items/weapons, open doors/cairns, activate/sit at altars).
A/X to interact with objects.
R to "rush" (sprint mode).
Click left stick to rush.
NOTE: You can mash the interact button while falling into deathpits or deathwater to (sometimes) pick up loot if you pushed a living NPC off a ledge and they dropped items in an "unreachable" location.
Starting the game - Styles
When you first start Absolver, you have the most difficult and important choice in your character's early stages of development. You have to customise your appearance. This is entirely personal preference, so do whatever you think is cool. Or funny. Or distracting.

Once that's done, you pick something far less crucial - your fighting style. Each style comes with a basic starting move list, and a special defensive ability. There are 5 styles in the game right now, but you can only choose between 3 when you start the game. The 4th and 5th have to be learned later if that's your preference. Before I list the styles, it's important to COMPLETELY IGNORE the difficulty ratings on this screen. They don't help.

Kahlt: Absorb
Windfall: Avoid (not "dodge")
Forsaken: Parry (not "block")
Stagger: Stumble/Special Attacks
Faejin: Special Attacks

Kahlt is the "easiest" style. Because you have no directional inputs to worry about, you only have to time it right and it kicks in. On success, you ignore the stun from the hit (even better than if you blocked it), which can translate to frame advantage against heavier hits, but still leaves you neutral against faster attacks. It also applies a protection buff (temporary "armour") and a "resilience" effect which allows you to resist stun from follow-up attacks for a VERY short window after an absorb. That said, it's also the only style that's directly countered by attacks it has exactly ZERO built-in counterplay against. Breaking attacks (the animation looks like lava, and there's a distinctive startup sound) can't be absorbed with the Kahlt special, and they hit stamina hard on block as well, so you REALLY want to be dodging them. Additionally, when absorbing a hit, you're putting your HP on the line. The damage from the attack is still applied to your healthbar, but as a white segment which you can recover. It fills slowly over time, and fills faster when you land hits. But if you take any kind of hitstun, you lose any remaining white health, in addition to taking damage from the hit that interrupts you.

Windfall is the "medium difficulty" style. And by that, I mean it's the hardest of the 3. When playing Windfall, your style ability has 4 directions, although left and right are functionally identical. Up makes your character jump, which counters low attacks. Down is a duck, which makes high attacks miss over your head. The sides step in the relevant direction, avoiding any type of straight attack. When you avoid in the right direction and at the right time, the opponent gets slowed down temporarily, and it prevents goldlinking, giving you a window to attack. You also remove some of the opponent's stamina, and apply a stamina regen debuff*. This doesn't directly "stun" the opponent or prevent them from acting, but it gives you a significant opening in which to counterattack.

Forsaken is the "hardest" style. It's easier than Windfall, and safer than Kahlt, so that's not really accurate. To parry, you need to time the incoming attack like with the other styles, and you need to pick which side the attack will be hitting you from. A very limited number of attacks are "omniparry" (sometimes called "uniparry") meaning you can parry either side as long as you time it right. When you successfully parry, your opponent is stunned. This is a fixed-duration stun, no matter the attack parried, and lasts long enough to guarantee damage on the target.

All the starting styles listed above have both a stamina cost and a stamina recovery effect. When you use your style and miss, it costs stamina, and when you succeed, you get your stamina back (and then some). Windfall gives the most stamina, while the other styles recover a bit less.

Stagger, the 4th style, is weird. Its "defensive" ability is drunk, and is therefore a set of unique attacks instead. These attacks have defensive properties, but they are treated more like attacks than like the defensive skills of other styles. They don't refund stamina on success, but they do apply a stamina buff to the user. Unlike Windfall's debuff, which only affects recovery rate, Stagger's buff also reduces the stamina cost of your follow-up actions after a successful stumble. They also chain with your other attacks as normal (see "goldlinking" in the section below on attacks), and can be feinted like any other attack.

Faejin is the game's 5th style, and is a part of the Downfall expansion. You can learn it in a school like any other style, but Downfall is a more efficient way - it automatically unlocks when you raise your "Gleam Level" to 6 by playing the new content. It is the most complex style in the game, and if you're still learning, I don't recommend it for serious play. Even then, it pays a price for its flexibility, which gives it less of an advantage with each use than other styles. Faejin functionally has 2 different style abilities, and which version of the style you're using depends on whether you're in a forward-facing or backward stance. Front stance actions are mostly parries and attacks. There's one pure attack, one pure parry, and 2 combination parry attacks. The back stance moves are purely evasive, much like Windfall but without most of the benefits - there's a slight slowdown effect but nothing like Windfall's. Also, the front stance actions leave you in your current stance, while back stance actions turn you to the front stance for the same side you're already on.

So, which should YOU pick? Beats me. I went with Kahlt because the stance looks the most similar to how I stand when I'm sparring in real life. I've also spent a lot of time playing Windfall on a character I designed to behave like a dancer, as well as having some experience with the other styles to get a feel for them. There is a somewhat-variable meta as the game updates and players find (or are given) new ways to use the styles. But the most important thing is finding the style you're most comfortable with. You can fairly quickly switch out and try another style anyway, so don't panic if you feel like you chose "wrong" in the beginning. In top-tier competitive play, Forsaken is the strongest right now, but KNOWING your style matters more than one option being the "best".

*NOTE: Windfall's stamina regen debuff will rarely have any effect in PvP. Stamina recovery is either halted or more drastically slowed by every valid response a player might have to being avoided, so it doesn't make enough difference to worry about.
Starting the game - Attacks
The tutorial explains some of this, but not much. There's a "helper" NPC (Talem) who mentions some more information about the topics I'm covering here as well. That said, much of the important information is glossed over, or only included in text dumps in a vaguely-hidden part of the menu (Meditation/Practice/Menu/Tips).

When you start the game, you can't access meditation until you've gotten most of the way through the tutorial. You CAN already start learning attacks before that point, and a few of the attacks you come across in the tutorial area can be hard to find as a low-level player. it's worth knowing how to learn attacks so you can make good use of this time.

When you face someone using an attack your character doesn't know, blocking it adds it to your move list as a locked attack. Every time you block, you gain a small portion of XP toward unlocking it for use in your own decks. Dodging attacks (using dodge iframes) will give you more XP than blocking. Using your style ability will give even more. This XP is shown in the form of a blue circle that fills up around the attack icon. Blue XP isn't confirmed though, you have to kill the attacker to lock the XP in, which turns it white. If you die, you lose any blue XP you had on attacks. This means you can potentially think you learned a move only to forget it after a swift kick to the head - so be careful! You also lose the blue XP if you flee combat, so don't think you can just grind up a chunk of XP then run to an altar to heal and come back later. You have to win the fight in one go.

Once you can access the meditation screen, you're instructed to go into practice mode and edit your deck. There are multiple on-screen prompts for how to do this, and it's very much worth a try even if you failed to learn a single new attack. The default starting decks (for all 3 styles) are pretty bad, and you start with access to very few options to mix things up, but it's a good idea to do what you can.

Another important thing to note about attacks is a technique known as "goldlinking". In the introduction, I said there are rhythm game elements, and this is why. When you attack, DON'T hit the attack button again until your first attack hits. If you time the input right (there are markers on your stamina bar), you skip the recovery animation for your current attack, chaining into the next hit faster than usual. This has more impact on slower and heavier attacks, but even with jabs, it's a notable improvement in your attack speed. Once you're more comfortable doing this, you'll find that deliberately dropping goldlinks becomes a part of the next level of mindgames.
Starting the game - Combat Deck Editor
We've just covered attacks, now on to how you string them together. The first thing you'll notice is that you have 4 "stances" in the deck editor screen. The icons beside them show the stance indicators in the following order:

1. Front right (FR)
2. Front left (FL)
3. Back left (BL)
4. Back right (BR)

On the left, you have "sequence" attacks, and when you first start, you have only 6 slots for attacks here - 2 in each front stance, and 1 for each back stance. You eventually unlock a total of 12 sequence slots as shown below. On the right side of the screen, each stance has a single "alternative" attack. The sequence attack slots can be filled with any attack at all that can be equipped in the stance shown. Alternative attacks can only be attacks which change your stance, so you can never force your character into 100% reliance on positioning and manual stance changes to move between your options. While this feels like an arbitrary limitation at first, it's a balancing factor and stance changing is a helpful tool once you're more familiar with how deck flow works.

.jpg]

Looking at this image, you'll see that there are stance indicators before and after every attack, both sequence and alternative. This is because attacks can (but don't have to) change your stance. The stance the move begins in is shown to the left of the attack slot, while the right side shows the attack's end stance. In the image above, the first attack in FR (Mawashi) ends in BL, so the second attack begins from that stance. Pushed Back Kick doesn't change stance, so it ends in BL still, leading into Tetsuzanko, which ends in BR. This means that if you start in FR and attack 3 times, you'll be in your BR stance. Following the BR string, you find that it ends in BL, and the sequence from there leads into FL, which in turn leads back to the FR string, creating a 12-hit looping sequence.

As a new player with a beginner deck, you'll quickly notice your FR stance is 2 attacks that both start and end in FR, looping on themselves. While short loops like this CAN be good in the right deck, these beginner deck loops aren't how to do it, and you'll want to change things when you have some more tools with which to do so.

Even if you've learned every move available in the tutorial, your deck options are going to be quite limited when you're first able to view the editor. You can improve the deck slightly, but it won't be GOOD until you get a bit further into the world and learn more varied attacks, as well as unlocking the full set of sequence attack slots (you never get more alt slots).

In an unarmed deck or with wargloves, all front-stance attacks can be mirrored. An attack you can use in FR can always be used in FL instead. In the same way, back stance attacks can mirror left to right. Front to back mirroring isn't an option, though, and neither is using the same attack in multiple places. In my example deck, if you replaced Mawashi with Hook or Jab Punch (which both end in FR), the second attack in the chain will disappear because it can no longer be placed there. In sword decks, many attacks (mostly sword attacks and punches) are locked to a specific stance - attacks available in FR may not be available in FL and vice versa. Building attack strings which flow together in ways which either feel comfortable for you, or seem hard for an opponent to anticipate, is key to building an effective deck in Absolver.

Another core element of deckbuilding is looking at attack properties. The default view shows bars which give an approximation of the power/speed/range of the attack. It also lists special properties on any attack which has them, with a description of the effect. If you select the detail view option in the deck editor, the bars on the side of the screen are replaced with frame and hitbox data. This is done by pressing L on the keyboard, or clicking the right stick on a controller.

High attacks can be ducked, with either Windfall or a ducking attack.
Low attacks can be jumped, again, using attacks or Windfall.
Mid attacks can't be jumped or ducked, but will never have the "horizontal" property.
Horizontal attacks can't be sidestepped, but any other attack can be (once again, strafing attack or Windfall).

Stagger's backstep kick and Faejin's back stance backstep dodge have their own unique evasion property which no other move in the game has. This allows these two actions to avoid every attack that doesn't have the "thrust" hitbox property.

Knowing this information lets you counter back stance Faejin, Stagger and Windfall, and we already know Kahlt has to dodge breaking attacks, but how do you beat Forsaken and front stance Faejin? Parry is based on both timing and direction. As such, if your attacks are paired so one comes out faster and the other is slower, or they come from opposite sides, the player will have a more difficult time reading/anticipating your moves to parry them. Forsaken's parry has an active frame count of 5 (Faejin's is shorter), but if you have too big a gap, they can whiff one parry then nail a slower attack anyway. Keeping above 5 frame startup difference is good, if you have to use attacks coming from the same side, but a 10-frame jab paired with a 25-frame heavy hit won't mix anyone up. You can also feint an attack you expect the enemy to parry, then use a different attack to catch them before they recover. Building "feint traps" into your deck to support this is also useful against other styles, but Forsaken is the weakest to feints.
Deck Editor - "must-have" tools
In this section, I'll cover the idea of what you NEED to include in a deck. But first, what things AREN'T "must-have" options?

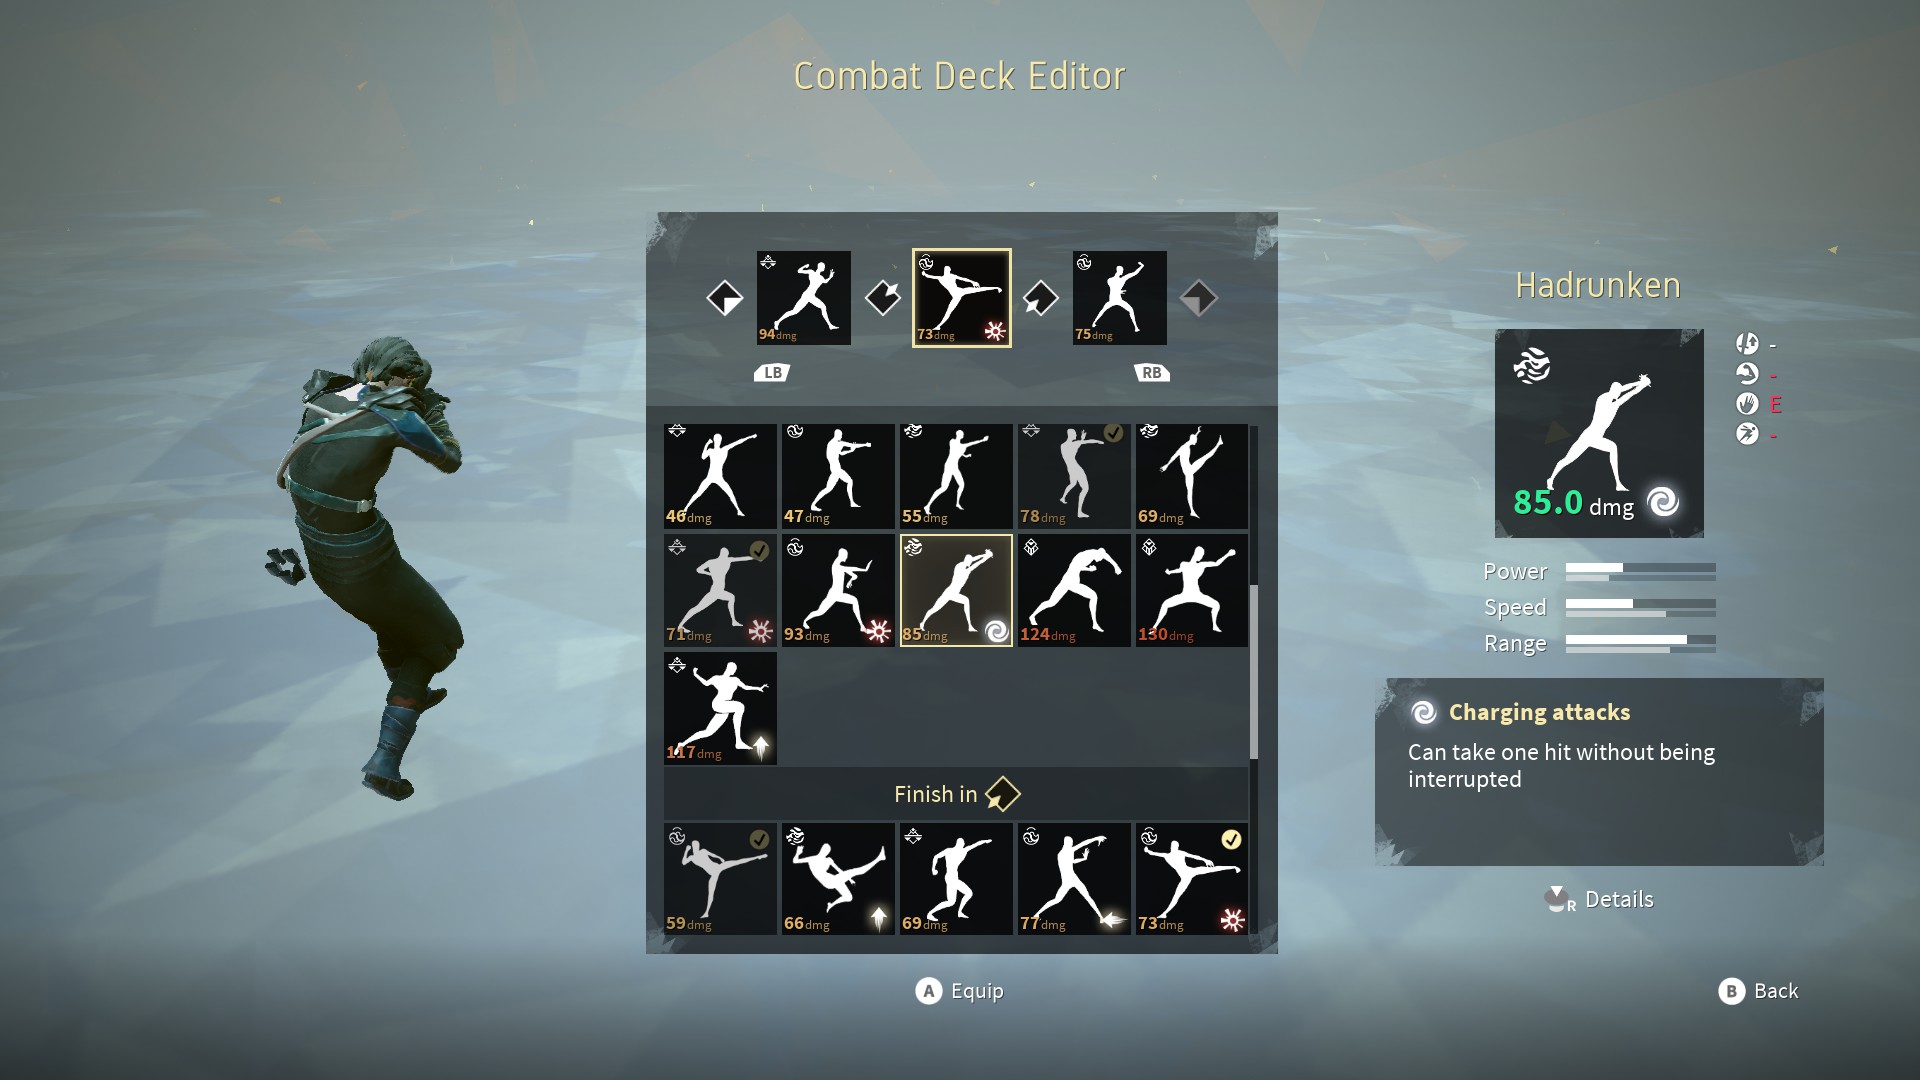
Charging attacks: Many people think you "need" one of these to break jab spam strings. They work, but there are better solutions. Charges have their uses, but they're not good at trading with anything that has comparable speed, and because you still eat the damage you get hit with, they can leave you hurting more than the enemy.

Jab spam: Some people think this is a "must-have", but jabs, especially sequential jabs, are highly vulnerable to ducking and strafing attacks, and run EXTREMELY stamina-negative when blocked. They also run frame-negative even on hit, so you'll find newer players with jab strings taking turns jabbing one another and the one who remembers to block occasionally will win, or the one who has more HP. This NEVER happens in higher-level play because it's bad play.

Full deck: Many people insist that you MUST have every slot filled in your deck editor at all times. This is a benefit, because it means you have more attacks available, and that means more attacks your opponent has to learn. At the same time, however, it means you have many tools you can't access directly, needing manual stance changing, or multiple attacks, or even both, in order to lead into the attack you want to use.

Even assuming "sequence for combo and alt for finisher" isn't a necessary approach to deckbuilding, although it is comfortable/familiar for many players. My new school deck was built "upside down" according to many players, with the alternatives providing a fast attack loop with evasive options and the sequence attacks being full of heavy hits. It gives me much more varied strings of heavies I can throw at someone's guard to mix them up, step cancel options you wouldn't normally get when your heavy hits are all limited to alts, and other distinctive properties that make it feel different from when you have more fast attacks than hard hitters.

And now, on to the things you really DO need to include in a deck...

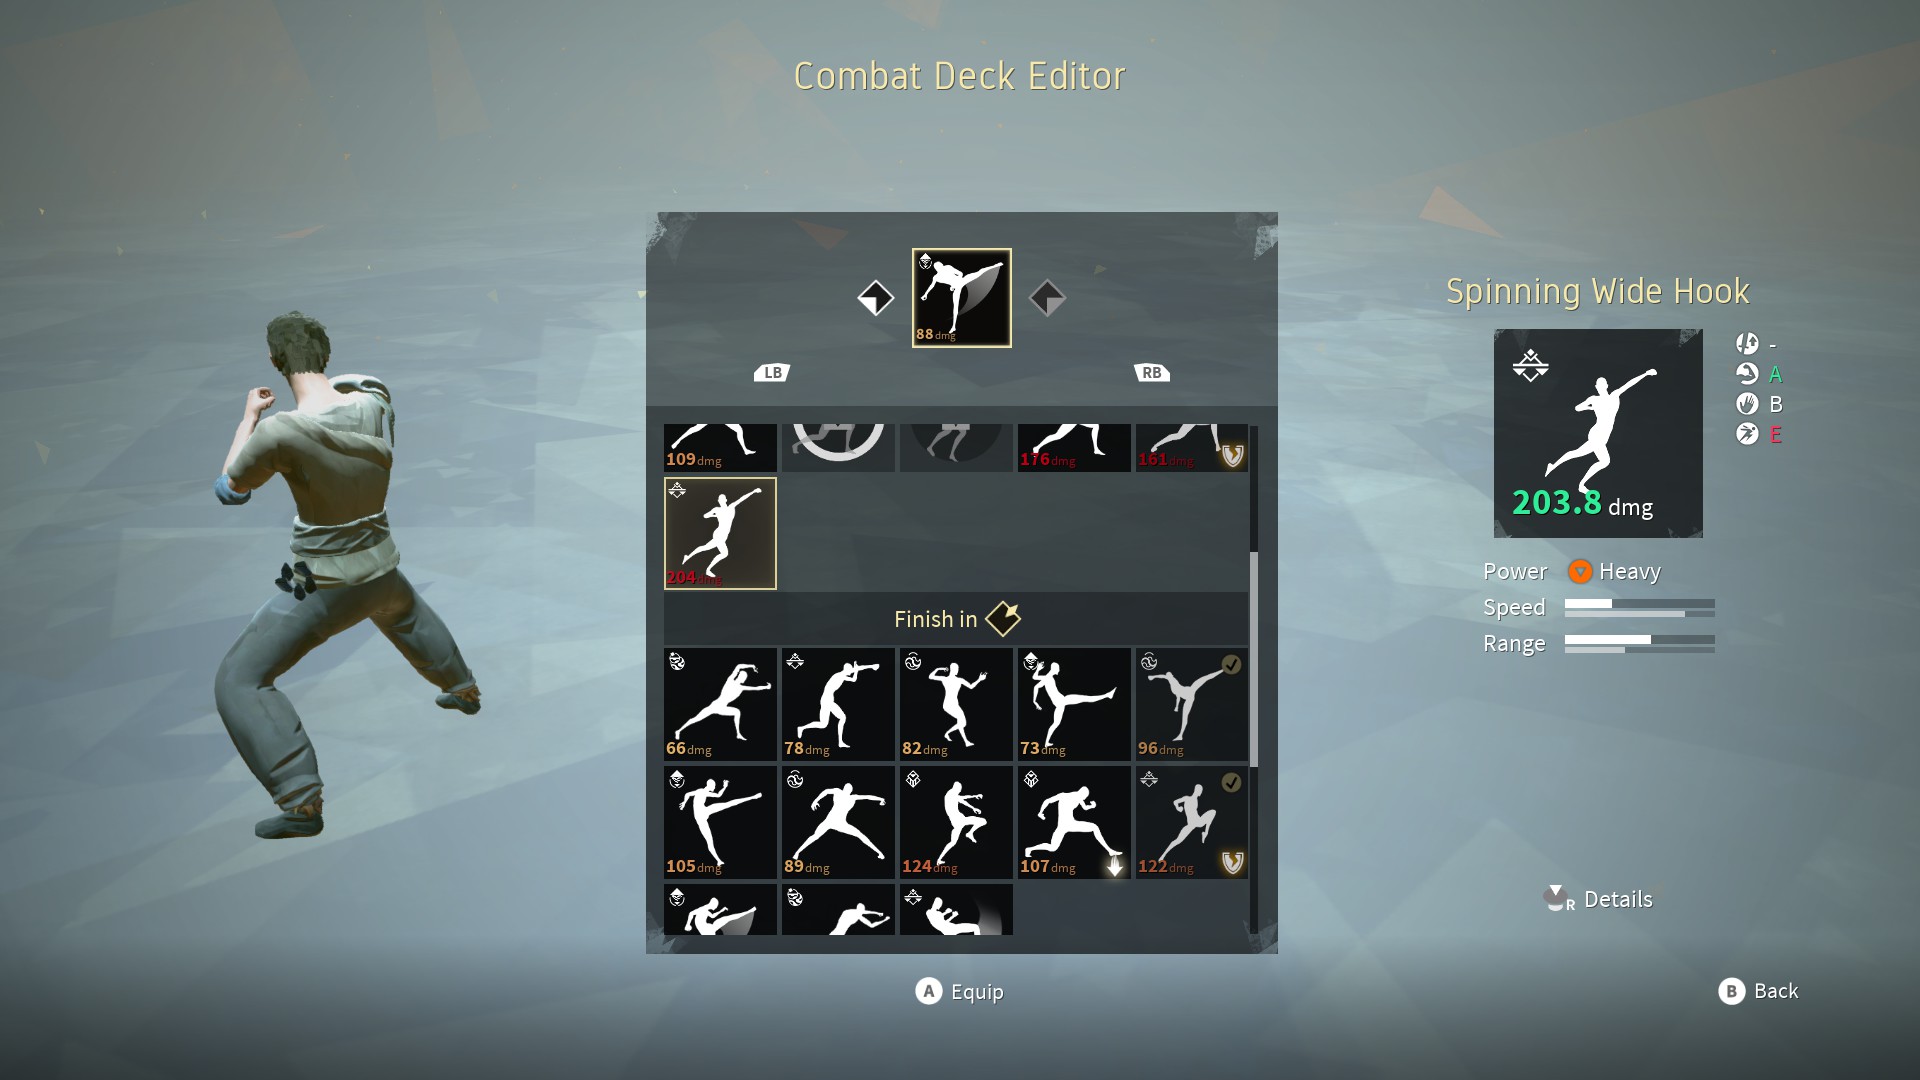
You realistically need easy access to something that chunks stamina on guard. The obvious option is a breaking attack, but it's not the only solution. If you don't want breaking attacks, you'll want more heavy hitters which can chunk stamina down if they're blocked. While not ideal as an all-round solution, stopping attacks also typically have good impact on guard, so those can help to put pressure on a person trying to turtle up as well, just don't rely on them as a complete solution on their own. The big heavy slow hits like Spinning Wide Hook, or Upper Elbow, can be good options. My sample deck in the previous section uses a mid-string breaking attack, a pair of stopping attacks in other strings, and some harder hits mixed into the sequences and alts, ensuring a variety of tools for dealing with defensive players.

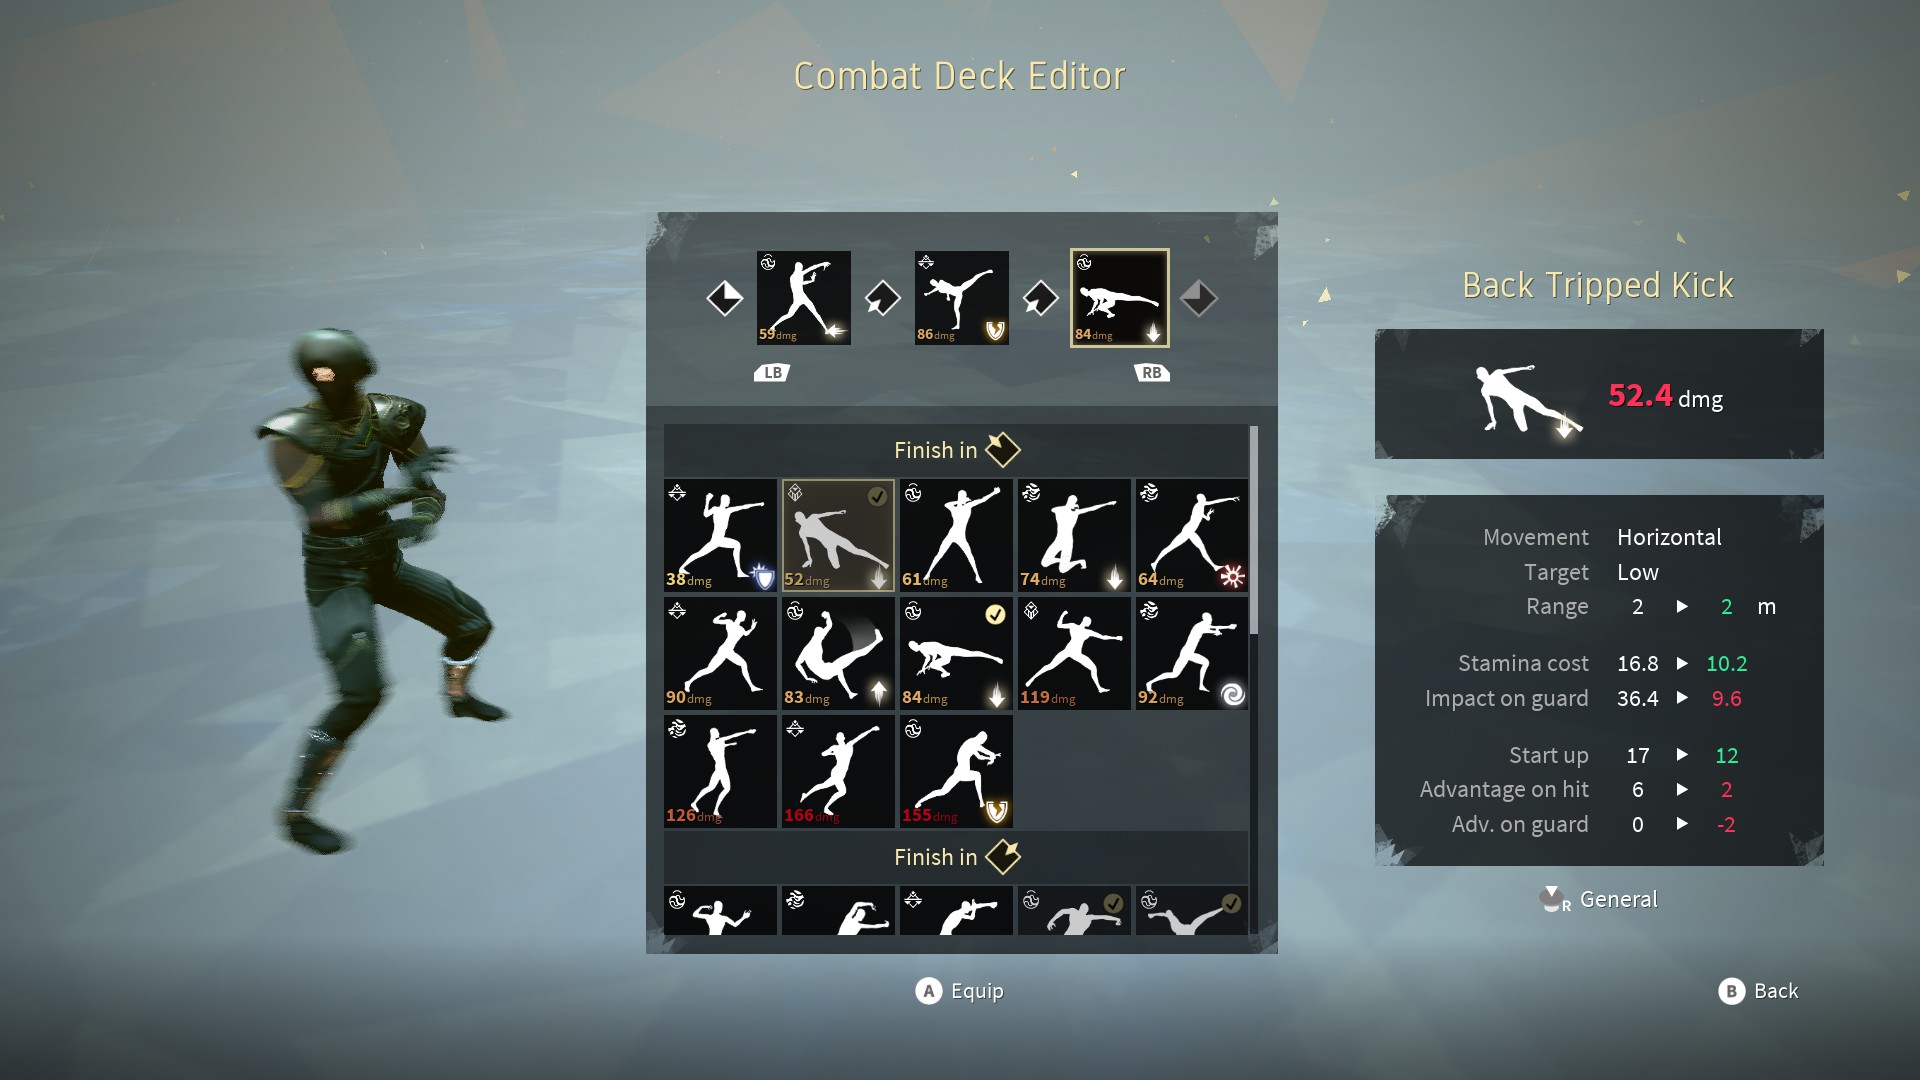
Another thing you need is access to a fast attack as an opener. This can be borderline mid speed if you have some kind of defensive property with it - like Back Tripped Kick which isn't super-fast but ducks so it can counter jabs reliably (another reason jabs aren't great). Parry And Strike is basically a "safe jab" with the parry effect countering half the attacks in any given deck and the speed of the attack making up for the low damage. Other jabs ARE useful options in the "fast attack" role, but they're often counterable unless you specifically build around them, so you don't specifically need a jab as your fast opener. Hook is a strong option in the sample deck, with high speed, good damage and horizontal coverage, but it lacks range.

On that note, a long-range "poke" is nice to have, and if you have a place you can fit one I recommend trying to do so, but you can go without and not lose out too much. This is more likely to be needed if you use attacks that push the opponent back, simply because without the range you won't be able to follow that attack up and will be forced to only use it as a disengage option. In the sample deck, Mawashi, another relatively fast almost jab-like attack, has lower damage than Hook but good reach, and it chains into Pushed Back Kick, which can be used to extend past Mawashi's range into a distant opponent if they don't expect you to keep attacking after the first kick fell short.

Any other "must-have" moves will depend on your style. For Windfall, there really isn't anything beyond "stamina breaking tool + fast interrupt tool" that's particularly required. Kahlt benefits more that other styles from having evasive openers (especially strafes since those counter breaking attacks which would otherwise force you to dodge). Forsaken can get free 14-frame hits out of their style ability so they want a couple of the highest-damage attacks within that startup range in order to get good benefits when parrying. Stagger has in-built mixups for their style which give good coverage but notably lack in range, speed and damage, so they want more of the attacks which cover the extremes of high damage and speed or have better range.
Attack properties
There are a variety of properties an attack has, which determine what it's good for, and what it can't do. First off, the basics:


Damage: This is, of course, how much health your opponent will lose when you hit them. The value you see here will be reduced by an amount related to the amount of armour your opponent has. You can't see an opponent's exact protection values, or their exact health, so don't count on this value showing you exactly how fast you'll kill every opponent every time.

Power: Attacks have a rating of light/medium/heavy. These match up with resilience, which is also light/medium/heavy. Many bosses in Downfall mode have light resilience as standard, and the Shield power gives you one tier of resilience. This takes a player to light, or a boss with light resilience to medium. Absorbing also gives one level of resilience per absorb, but for a very short time, so it's hard to stack this effect.

Speed: This is a rough indicator of the startup and recovery times of the attack, but is not a solid value of direct use.

Range: This is a bar instead of a hard number, and the detailed view gives you more useful range information.

And on the topic of detailed view, when you click your right stick or press L on the keyboard, you get to see details, which shows more specific information:


Movement: This indicates if an attack has horizontal coverage or not. Attacks can have horizontal, thrust or vertical movement, indicating the way the attack movement travels. It's worth noting that "vertical" attacks, while straight and able to be strafed and sidestepped, are not thrusts and can be avoided using the Stagger and Faejin backsteps.

Target: This indicates the height of the attack - high, mid or low. Thrusts can be any height, while verticals are always mid, and horizontal attacks can never hit mid.

Stamina cost: This is self-explanatory - it's the amount of stamina you need to spend to use the attack.

Impact on guard: This is the stamina cost to the opponent if they block your attack with LT/L2/Shift.

Start up: The startup for the attack in frames (NOTE: many modern fighting games use "frames" as a measurement in 60fps, Absolver uses 30fps measurements. When comparing to Street Fighter or Tekken, double these values to get the actual attack speed).

Advantage on hit: This is frame advantage. It's a measure of how many frames you will be into your next (goldlinked) attack before the opponent can initiate their own action after being hit. This is specifically "on hit" so if they block, use the next value.

Adv. on guard: This is, much like above, the frame advantage you get when your opponent blocks your attack. While some fast attacks are neutral on hit, very few attacks run frame negative. By contrast, there are quite a few attacks that are -2 on guard or even worse, meaning that blocking gives your opponent frame advantage, so be careful with people blocking then jabbing you out of your combo against attacks like this.

One final thing to note is special properties of some attacks. On the basic view, these are listed below the power/speed/range bars:


Charging (shown): This is a "super armour" special property. It allows the attacker to ignore hitstun from one attack. This only applies if the attack is not a stopping or charging attack, and any two hits will break it.

Stopping: As noted, these attacks will interrupt a charging attack with a single hit. They don't have anything else totally unique, but they are sometimes considered to be "mini breakers" because they have a good amount of impact on guard, and higher-than-normal advantage values.

Breaking: These attacks do MASSIVE stamina damage when blocked, and are often referred to as "guardbreaks" or "GBs" even though they aren't guaranteed one-hit stamina breakers. As with Stopping attacks above, they typically have very high advantage numbers, even on guard.

Strafing: This is a special evasive property, which allows the attack to dodge an incoming hit and counterattack. It only works on straight attacks (thrust/vertical movement), not horizontals.

Jumping: Like strafing, this is an evasive effect, allowing you to jump over low attacks and attack back.

Ducking: The opposite of jumping, ducking attacks let you pass under high attacks and hit back.

Parry: Parry effect attacks do what Forsaken does, but most of them only parry to one side, and the few with double-sided parry frames are sword moves. Also, they have separate parry windows on each side, and only one is viable to actually use on purpose. There are also parry attacks which can't parry low attacks, much like the Faeijin side parries.

NOTE: There are also doublehits which can be argued to be a special property, but the game doesn't label them as such. These attacks CAN interrupt charges, but do so by hitting twice, not by having a special charge-breaking effect like stopping attacks do.
Defense
So, we've covered attacks, and we've covered styles, which are one part of the process of defending yourself, but there's more to it than just that. In addition to your various style abilities, you can dodge attacks and block. It's worth giving some more information about these aspects of the game, since they're as important as everything else - after all, the goal is to make sure you don't die before your opponent. It's also worth noting that all defensive actions help you to learn any attack you don't know yet. If you block, dodge, or use your style ability against an attack, you gain XP toward unlocking the move for yourself. Styles give the most credit for this, and blocking gives the least, with dodges somewhere in the middle.

Blocking (Shift/LT/L2) is your most basic defensive action. Hold the button down, and your character raises their hands to guard against attacks. When your enemy hits you, you lose stamina, based on the "impact on guard" value of the attack. While your guard is up, you recover stamina at a slower rate, though. Against fast attack strings, blocking will run stamina-positive - your opponent will spend more on their attacks than you spend on defense. Tapping the button and releasing it between attacks, while not practical against fast attack strings, will help you maintain your stamina against mid-speed attacks. Heavier hits take chunks off your stamina bar that you can't compensate for as easily. If your stamina hits 0 while you're guarding, you get stamina broken. In this state, you're totally open to hits, BUT your stamina recovers at an accelerated rate. If you can force a stamina-break at a point where your opponent doesn't have good punish options available, you can use this to recover without getting heavily damaged by the opening you gave them.

Against heavier hits, you want to be dodging (space/B/circle) instead. This has iframes - a small window allowing you to ignore ANY attack at all if you time your dodge correctly. It's a helpful movement tool, letting you back away from many shorter-range attacks, or sidestep some straight attacks even with less-than-perfect timing. You can also dodge toward an opponent to get better effective range with some attacks. Most slower attacks will follow you after you dodge, though, so you need to be careful to at least be CLOSE to timing it right to avoid the tracking effect allowing the attack to catch you out.

Styles are also important, as mentioned previously. I won't go into detail since I've covered them earlier, but it's worth noting that your style ability is an important stamina management tool. While Stagger doesn't give stamina back directly, it does give you a regeneration buff, making it easier to keep your stamina high. All 3 starting styles directly refund their own stamina cost on success, and give additional stamina with it.
Schools
A common assumption is that schools are like a "clan" system. They do represent something of a loyalty system for players, but they're primarily a learning tool. When you join a school, you immediately gain access to the school's style and an unarmed deck. If there are any moves in the deck which you don't already know, you can learn them by using those attacks as part of the deck. You'll gain XP much like you do when defending against attacks (the XP is on the same meter for both). You also learn the school style by using it to defend against attacks, and once you unlock it completely, you can use it even if you leave the school or the mentor changes the style.

There are 4 ways to join a school:

1. There is a school for the Stagger style run by "Rakkio", the NPC mentor. Once you find him, you can join his school by speaking to him. This method (obviously) only works for Rakkio's school.

2. If you meet a player, in the open world or in PvP, who has a triangle beside their name, they're in a school. A hollow triangle indicates a student. A half-filled triangle is a disciple, which means the player has used the school rewards in PvP and earned enough school XP to max out their level with the school. A solidly filled triangle means that the player is the mentor of their own school. In any case, you can find the player's name in your "encounters" list, and from there, use the "join/view school" option, then if you like what the school looks like, you can hit the "join school" button.

3. In the in-game menu, there is a "School" button. This lets you create your own school, and also lets you join schools by using another player's "school code". My school code is #9928 so if you enter that code into "find school" you'll get my details. As before, this page gives you a "join school" option.

4. In the Oratian Quarter, there is another NPC (called "Hayen" in patch notes, but unnamed in-game) who talks to you about schools. He has the same join/create school options, as well as other options you find in the "school" menu. Prior to Downfall, he was the only way to access these pages.

I mentioned that you get access to 2 things immediately, but that isn't all you get. Each school also has 2 powers, a weapon, and 2 additional school decks - one for wargloves and the other for swords. There is also a school mask, which serves as "uniform" for students. Any amount of these school rewards which you equip increases the amount of school XP you earn in Combat Trials (PvP). This XP unlocks more rewards, and eventually elevate you to the rank of Disciple. This rank gives you an achievement, and makes you someone other students might ask for advice. Also, as a disciple, you can participate in the School challenges, a seasonal PvP event which allows individual players and schools to compete for bragging rights and some in-game rewards.
The (Semi) Open World
Absolver has a small open world. It's a series of interconnected regions, linked with narrow paths, with seamless loading but not a complete open world with full dynamic interaction. The different parts of the map were labeled "zones" by the developers in pre-release content, and that's the term I usually use for them. I sometimes call them "areas" or "regions" so you might see any of those terms in this guide.

In each zone, there is an altar. These locations let you heal, and respawn the zone's enemies. If there are other players in the zone, enemies are not spawned in active aggro range of those other players, so if you're trying to respawn a boss, make sure no players are in the boss room when you sit at the altar. The menu is where you queue for "combat trials" (PvP), as well as setting graphics, audio and gameplay options, access meditation or the essence menu, among other things.

The game's map isn't the best, but there IS a map, contrary to what many players believe at first. The "headstone" in the Guidance Bridge (the area you enter as you come out of the tutorial) is a map. It doesn't make it clear where you are, and many players aren't sure where the starting area is supposed to be. You can sit at an altar, and look to the left of the menu. There's a shadow of the same map there, with your location marked as a green dot. It isn't particularly helpful at first, but the more you wander the game world, and the more altars you stop at and see where you are, the more sense it will start to make. I've edited this image of the "headstone" map to show the connections between zones, and where they are in relation to one another.


I've also re-highlighted the markers for the boss locations (marked ones in orange and cutscene bosses in red). The Guidance Bridge is a "safe" area. There are no NPC enemies, but with up to 3 players in zone, you will sometimes encounter other players who may choose to attack you. While not "safe" per se, you will only have other players to worry about. It's also one of two places which have no boss enemies necessary for story progression. The other location without a boss is the Oratian Quarter. it's worth visiting the Quarter for loot (both NPC drops and in-world items). Also this area is where you'll find Hayen, the school NPC who I mentioned earlier. Finding and talking to him will cause him to spawn next to the altar on future visits to the Quarter, which is useful for when you plan to make (or join) a school.
Basics of Gear
Absolver's armour system LOOKS like a typical quality-scaling RPG gear system on the surface, if you don't look too closely at the numbers. Once you've figured it out, you'll quickly realise that, while not good for every playstyle, the gear you start the game with is actually viable in competitive PvP. This is because every item in the game is either viable at a competitive level, or can be repaired into something that is.

There are a variety of rarity ratings on items in Absolver. Other than "unknown", none of them matter for stats. They're only relevant to the value of the item (in fragments) and how likely it is to appear in a rift coin/disk or a PvE drop. Unknown items are ones which are damaged. All unknown items have a "repair" option which will improve the stats. They gain a small amount of additional protection, and become slightly heavier. The increase in protection is (slightly) larger than the increase in weight, so repaired items are superior for their weight.

When you look at the items in the gear menu, there's an "options" prompt with 2 or 3 items in a drop-down menu. You always have salvage and dye options (though sometimes they're greyed out). Damaged items also have the "repair" option. Salvage is only unavailable on "unique" items, which are impossible to obtain multiples of. Dye is locked on some unique items, and on certain masks which don't have colour variants.

There are a variety of ways to get new items in Absolver. Any NPC you can fight in the open world, you can get to drop their clothing - usually in their damaged state. Normal NPC masks aren't dropped, but the marked ones have a chance to drop their masks when you kill them (or are in the zone when they're killed by another player).

Repairing and dyeing items costs "fragments", a currency which is quite plentiful in the game. NPCs may drop fragments at random, 50, 75, or even 100 at a time (possibly more but I haven't seen it). The Downfall game mode has chests which award you with progressively more fragments the deeper you go - up to 500 per chest. Rift Coins and Disks (more on these later) may award you with fragments as well, and if all else fails, you can top your fragments up by salvaging gear you don't want.
Stats, Levels, and Prestige
There's a lot to cover here. Absolver has some RPG-like leveling mechanics. You start as a level 0 character in the tutorial, and will usually be level 2 by the time you get into the open world and reach the point where you can meet other players. I'm not going to go over all the specifics of stats, but there's a few things worth mentioning.

First, yes, you can respec. But only once you've passed max level (60) and entered prestige. You don't lose your stats going prestige, and it's automatic. In place of new stat points, you start earning "crystals", which are a currency you can spend on a variety of things. One of those things is the "reset" option on your character stats page, which costs 1 crystal.

Following that, it's worth noting that there are softcaps on most stats. If you put enough points into strength, even if all your deck's moves scale better on strength, and you're Kahlt, which is a strength-based style, you will eventually hit a point where dexterity will increase your damage on your deck more than strength. Similarly, there comes a point where endurance and vitality almost give no additional benefit (stamina and HP respectively) if you overdo them.

On the topic of styles, these do change up your effective stats. Each attribute has a "base" level on the left, a scaling value in the middle, and a derived value on the right. If you learn a new style, it has a different balance of stat scaling, so you'll get more benefit from some of your points and less from others compared with your usual style.

As for prestige, there are 4 "tiers" of prestige (bronze, silver, gold, jade), and they don't indicate a player's skill. They're just a measure of time/XP earned, not a true indication of the opponent's skill. Within each tier of prestige, there are 11 separate prestige loops to run. With each tier requiring a full 60 levels to complete, this makes a final tier jade prestige player effectively a minimum of level 2640 and probably more than 2700, since many players have done multiple prestige loops on that level already. NOTE: because of the shape, many players refer to your prestige indicators as "doritos", and jade is sometimes referred to as emerald, or as "moldy doritos".

One last thing to mention is "Gleam Level". This is only for the "Downfall" mode, which is unlocked after becoming an Absolver (completing the main story). You earn "gleam" through this mode - and only this mode - which functions much like XP for normal leveling, but with different requirements per level, and a maximum level of 10 (at least for now). These levels unlock unique items in the essence store (see below) which aren't available through any other means, including 4 unique powers you can't get in the open world, and cosmetics/weapons which are different from the ones you can unlock through PvP progress.
The Essence store
This ties in with both the leveling and gear systems covered earlier. The essence menu has some items which are earned through Combat Trials, and like the Combat Trials screen, essence can only be accessed in the altar menu, not in the regular menu you can view elsewhere in the game world.

In the essence menu, there are several sections.

The first tab lets you deal with the "rift" items - Rift Coins are PvP rewards, while Rift Disks are purchased using crystals, the currency you earn from prestige leveling. Both are basically lootboxes, but with no microtransaction mechanism behind them. Rift Coins contain a single item, and are capped at "rare". Rift Disks have one item that's guaranteed to be "rare" or better, and none of the items is limited in its maximum rarity, so it's possible that you might get a set of 3 "mythical" (highest-rarity) items if you're lucky.

On the second tab are items you can buy with fragments. These are divided into "gear", "powers" and "weapons", which are fairly self-explanatory. Many items also list a level requirement. This is not your character level, but will be either your Combat Trials level (white) or your Gleam Level (blue). it's worth noting that CT levels don't scale up in their cost per level like the XP requirements for character levels, so the grind toward the maximum requirement of CT3000 is a constant one at the same rate all the way. And it isn't a "ranking" system, so you can't lose levels by playing poorly. Gleam Level is more like normal leveling, but only goes up to 10, and doesn't scale as far as your character levels do.

The third and final tab is another page on which you can spend crystals. This is where you can buy emotes and intro animations. The intros are only for 1v1 Combat Trials, while emotes can be equipped to your emote wheel.
Credits/Sources/Other Stuff
While this is my own work, I learned a lot about Absolver from too many people to list by name. I would like to specifically shout out Abslover (that's "abs lover" not "ab solver"), who was the first person to get me truly interested in deck theory. Both balistafreak and Nanohologuise were inspirational for me writing this guide. They have also both created their own more in-depth analytical content, which will be more useful for players who are already familiar with the basics I'm covering in this guide.

Comprehensive deckbuilding guide, by Nanohologuise:
https://steamcommunity.com/sharedfiles/filedetails/?id=1418580543
https://docs.google.com/document/d/1r_aqe64YhT5tcfxFBwPv_joLV2MFQRmY8lxfHkwgTqE/

Move Compendium with the most complete data available on all attacks in the game, by balistafreak:
https://steamcommunity.com/sharedfiles/filedetails/?id=1226563063
https://docs.google.com/spreadsheets/d/1_6kC-2C-bfgDwfI-R2UZCTa9rEa4vr2Q6ZKep88CA9E

Both guides are technically on Steam, but they are actually links to Google documents with the information, so I've provided the Steam page and the direct link for each.

This guide has been posted on Steam, and a PS4-focused version has been published on GameFAQs/GameSpot and should also be posted on Neoseeker soon. If you see this guide posted under a name other than "obliviondoll", or on any site not listed in this section of the guide, it was not posted with my permission.

Lastly, I should of course thank the developers at Sloclap for making the game, and Devolver for helping them bring it to life. Obviously. Also here, have a link to the official Absolver Discord https://discord.gg/dsWgaR8 I'm a curator there, and there's a lot of other friendly and helpful people willing to beat you to a pulp then discuss how they did it so you can be the one giving advice to the next guy who joins!
19 Comments
stortz Aug 22, 2020 @ 2:35am 
diminished returns start at 15 by what I'm seeing
obliviondoll  [author] Aug 22, 2020 @ 1:02am 
Soft caps are soft because they aren't specific numbers. The more points you put into a stat, the less value each new point adds.

And assuming you mean "protection" when you said "defense", that doesn't have any soft cap. It actually scales higher the more points you add, essentially being the exact opposite. If you have 10 protection, adding 10 more doesn't do much. If you have 90 protection, adding 10 more is much more valuable.
stortz Aug 22, 2020 @ 12:12am 
you spoke of soft caps for stats but didn't mention the number
what is the soft cap for stats and defense?
obliviondoll  [author] Aug 9, 2020 @ 4:09am 
i'm glad to see this is still helping people out!
Sargond Aug 8, 2020 @ 11:05pm 
Truly a great guide. Fantastic job mate!
BluBurrito Mar 29, 2020 @ 9:54am 
Thanks a bunch! it all makes sense now lol
obliviondoll  [author] Mar 29, 2020 @ 7:49am 
You're talking about the sorting options for gear. They are, in order from left to right:
Sort by age (newest first)
Alphabetical sort (A - Z)
Sort by weight (lighest first)
Sort by blunt protection (highest first)
Sort by cut protection (highest first)
BluBurrito Mar 29, 2020 @ 4:06am 
Great guide! Is there a chance you could go into more detail on gear? specifically the different types like weight, blunt protection and cut protection (and that other thing to the right of the "most recent gear" button that i cant seem to figure out)? even if it's not as important as other aspects of the game it would be cool to know! :brownchicken:
李小狼 Mar 1, 2020 @ 2:20am 
厉害啊
obliviondoll  [author] Dec 29, 2019 @ 10:12pm 
Thanks! I'm glad it's still helping people out!