Call of Duty: Black Ops

Call of Duty: Black Ops

51 valoraciones
Verruckt - My strategy
Por Feelin' Salty?
Hi everyone...!!!This is my first map guide i have made and i hope that i can help you. I am going to explain you my strategy in verruckt zombie map (rezurrection map pack) in co-op and give you some useful advice as to how to suceed in Verruckt! I hope you will read this guide and i am looking forward to read your comments.
   
Premio
Favoritos
Favorito
Quitar
1 - Introduction
Welcome to my in-depth guide. In this detailed article I will present and analyse the best camping strategy to apply when playing Verrückt with 4 players. Also, except of my strategy, I will cover different utilities that are available at this map like weapons and Perk-a-Colas, and I will give some personal tips on how and when use these various utilities.

Edit: After the short ''patch'' of 18th August, I have included Monkey Bombs into the wonder weapons' review, besides the 2 regular wonder weapons (Ray Gun, Winter's Howl). I have also changed several things on this article, such as including two new sections (Introduction and Zombie Behaviour), reordering some sectors, rewriting the part about map's secrets (including also new easter eggs) and removing wonder weapon's ratings, the section about power-ups (no reason to include that at first place) and some screenshots / images.

I don't have to say anything else and prolong your agony. It's time for the real meat of this guide to start. Let's break it down!
2 - My Strategy: Explaining my main plan
In this section I will explain you my strategy about Verrückt. It's too simple and easy to understand, but you should pay attention because what I am going to write in this section is the key in success.

My plan is this: camping at MP40-Double Tap place (right up image). Many players tell me that camping is a stupid strategy but in Verrückt this strategy is a must-do. Though I prefer training, I highly suggest applying this camping plan in Verrückt because it's the only way for an easy, interesting and amazing game that can lead you to high rounds. Also factors like luck and teamwork play an important role in the outcome of the game.

At the beggining of the game you will realise a difference between Verrückt and other zombies maps. The spawn (starting) room is separated by an electric door (right middle image), so actually there are 2 spawn rooms. Characters Dempsey and Nikolai begin the game at one of the two rooms, while Takeo with Richtofen are located at the other side. The 2 players located at the room with Quick Revive's perk machine play an important role into my plan. These players has to open all the doors (5 in number) until the power room and turn on the power (just to know 3 doors cost 750 points and the remaining 2 cost 1000). Then the electric door opens and the whole team gets reunited (Power will reunite you). As you might have thought, you have to spend a lot of money at opening doors, so don't waste your points unreasonably. The faster you turn on power, the better for the whole team.
In the meanwhile the 2 other players should have cleaned the debris (right image below). This door leads you at the camping place where the main part of action will take place.
Be careful: You mustn't open the door which is at your back (the door next to Double Tap's machine). Also one player should guard the back window, opposite from the door you must not open. The other 3 players has to guard the MP40's corridor.
Be careful: Don't stay near the stairs because you are vulnerable and can easily get downed.

That's the main idea of my plan. In the following sections I will explain the steps you have to apply for completing my strategy.
Up image:Opening this door will lead you to the camp spot.

Left image:This door must remain CLOSED. Don't open it, no matter what.


Right image:The first door you have to open, next to Quick Revive's machine (costs 750).
3 - Rounds 1-6
The game has finally started and it's time for action... Starting in, you have the M1911 pistol with 8/32 bullets and 2 grenades. On round 1 use only your knife. Keep the bullets for the next rounds. On rounds 2,3,4,5 use your pistol to weaken zombies and make some points. Fire 8-12 bullets or more (depending on which round you are) and then use your knife once or twice, so you can get the maximum points you can earn by killing 1 zombie. Also you can let the zombies come in throught the barricades so you can earn power-ups (max ammo, insta-kill etc.). Also by rebuilding a barrier you can earn maximum 60 points.

If you think that pistol isn't much efficient you can buy a wall weapon but I wouldn't suggest that unless you have run out of ammo or your teammate have got downed.


On round 6, you should apply the first step of my plan. The players at Quick Revive's room open the first door next to the Quick Revive's machine (look image). The door costs 750. Then they should buy Thompson off the wall and they have to wait for 1-2 rounds to make some points. Also, the 2 other players should clear the debris and go to the camping place, where they should buy MP40 and Bouncings Betties, and camp there.


NOTE: More information for the weapons named here, as well as for all wall weapons and pieces of equipment included in this map, on the ''Wall Weapons'' section.


4 - Round 7+
On round 7 or 8 the players who have to open the doors until the power room should move on and open and the remaining doors until the power room. Then they should turn the power on and quickly move to the camping spot where the rest players wait. It's important to arrange from the beginning who player will guard the back window (down image) and who players will guard the corridor (see 2nd section and the down left image in this section). Co-operation, team spirit and strategy are important in Verrückt. And if you want to succeed you must have them ALL. Since everyone has taken his place, the real challenge begins.

Kill the zombies and make some points that you will spend later, using the Mystery Box or buying perks. You should have taken all the perks until round 10, but if you get them few rounds later, it's ok. Just make sure you will stay alive until you get them (especially Juggernog). Also, buy betties (see wall location in down right image) and place them at your back and near the barrier your teammate guards (up big image), so you make a field of betties that will secure a way to escape and stay alive at tight situations. (place your mines as you see at the following picture to make a field full of them).

At the end of each round make a crawler and leave it alive so you can easily move. This will allow you to buy perks or ammo or use the Mystery Box without a zombie chasing you. Get what you want, go back at the camping spot, take your places and kill the zombie-crawler. Then a new, huge wave of zombies will come with only purpose your defeat. You should fight back...

NOTE: Since you have taken place at the camping spot there is no reason to leave it in the middle of a round.

REMEMBER: Move only at the end of the round!
5 - Zombie Behaviour
I have done with explaining to you the main idea of my plan and how you should apply it. At the following sectors of this article, I am going to give you inform you about various things in the map, starting up with how zombies behave into Verrückt.

Zombies in this map are much more aggressive than in Nacht der Untoten (previous map in the game). Unlike the predecessor map, zombies are now able to attack players through the barriers, and will continue to do so in all maps after this one. Zombies in this map are also much faster than other maps, as well as smarter. Zombies can easily overrun players if they don't sprint with a pistol, submachine gun, or shotgun. Furthermore, the player will be downed in two swipes from a zombie, unless they have acquired Juggernog. Crawlers move quickly as well. Lastly, zombies are more likely to "double hit" the player than in Nacht der Untoten, making a zombie that gets close much more dangerous.
6 - Wall Weapons
In-depth review and ratings of all available wall weapons and equipment. The ratings given here apply only to Verrückt and only for this camping strategy.

- Kar98k: A useless bolt-action sniper rifle without the sniper scope nor damage. One-shot kill until round 3 if you aim for headshots but there's no reason on buying this ♥♥♥♥. It has 2 wall locations and it costs 200. Rating:1/10


- Gewehr 43: Semi-automatic rifle with low firecap, low damage and slow reloads. Useful for as long as you stay at the starting area, thus until round 5-6. It costs 600 and located at the German side. Rating: 2.5/10


- M1 Garand: A Gewehr 43 with more ammo but less firecap. However I love this weapon because it reloads very fast when it's clip-empty. What else applies for Gewehr, applies to this gun too. It also costs 600. Rating: 3/10


- MP40 (image): Not the best weapon in the map but it's the most useful if you apply my plan. A very solid gun, quite efficient with good aim, decent ammo and quick reloads. It's cheap and you can find it at the suggested camping place. Combine it with Douple Tap for more efficiency. Rating: 8/10.


- Thompson: Better stats than MP40, 20/200 bullets, deadly accuracy, fast reloads and great point-racking potentials. However, it has small clips and it's location won't help you after early to mid 10s. However, if you spawn at the Quick Revive's room, this weapon plays an important role into my strategy (read on section ''Rounds 1-6'' for more information). It costs 1200 points. Rating: 6.5/10.


- STG-44: Hybrid of SMG and assault rifle, this weapon is literally a MP$) with slightly higher fire rate and accuracy but less ammo. However, it has the worst location on my plan, so you'd rather avoid this weapon. Use Double Tap for more efficiency. It costs 1200. Rating: 5/10.


- M1897 Trench Gun: Pump-action shotgun with adequate ammo, tight spread and strong damage. However, this isn't the shotgun you want to use in Verrückt because it has bad locations, high cost and it suffers from slow speeds, and overall handling. Formidable weapon though an extremely hard one to master. Rating: 3.5/10.


- Double Barreled Shotgun (image): Stronger than the Trench Gun with insane range but reloads are a big issue. It's kills with one shot until round 15-16, it has 2 wall locations (one near the camp place) but an automatic weapon would be a better choice. But if you wish, you can try it. Speed Cola is necessery in order to use this gun. It costs 1200 points. Rating: 5/10.


- Double Barreled Shotgun Sawed-Off w/ Grip: I wonder why this weapon contains the word 'grip' in it's name. This shotgun has no grip, but it has the advantage of a grip which is slightly higher accuracy. However, it has wider spread than the regular DBS and worse location.
Reload speed remains an issue. Rating: 3.5/10


- (Deployable) BAR: Deployable? Whatever. Worthless piece of non-deployable ♥♥♥♥ with the lowest damage and fire rate of any automatic weapon, small clips, low ammo count, sluggish reloads... Everything on this weapon are just pathetic. Can do some damage with Double Tap early-on, but with an unthinkable cost of 2500 points, this weapon is a must-avoid! One of the most useless and pathetic weapons in the map, and in the game overall. As stated above, never buy this ♥♥♥♥. Rating: 2/10.


- Bouncing Betties (right image): Deadly pressure-activated landmines. You can't move them though. There are 2 wall locations where you can buy them and they are cheap. You only need to buy them once and at the begining of a new round you will recieve 2 of them. Very useful tool at my strategy. Rating: 8/10.


- Stielhandgranate (down image): Same damage and blast radius like usual grenades but faster to throw. There are 4 wall locations where you can buy these bad boys at the cost of 250 points. One location is at my suggested camp area, near to Double Tap. Useful to make crawlers or massive kills during Insta-kill. Rating: 6.5/10.

1) These screenshots are the images of all weapons you can find at my strategy area.

2) I have rated all the weapons based on their usefulness at my strategy. So don't be surprised by the ratings.

3)WARNING: In Verrückt, you can't Pack-a-Punch any weapon.

4)You won't find Bowie Knife on Verrückt's walls.
7 - Mystery Box & Wonder weapons
As you know, instead of using wall weapons, you can try your luck on the Mystery Box and grab one good weapon. But the Mystery Box is a gamble because you can get good weapons like Ray Gun, RPK, HK21, Galil, etc. or you can end up with weapons that aren't so useful in this map like Ballistic Knife, Explosive Tip Crossbow or China Lake. Remember that you don't have the advantage of upgrading your weapons via the Pack-a-Punch machine.
And that's the reason why I don't recommend to use box weapons like sniper riffles (L96A1, Dragunov), Explosive Tip Crossbow or other explosive guns. Also, on later rounds you should avoid low ammo SMGs (Spectre), semi automatic riffles (FN FAL, G11) or pistols because they aren't much efficient and make your survival a very difficult case. Use them only in the early rounds to make some points.

The first mystery box spawns at the power room (down image), opposite from the power switch. When you open to the power room, don't be tempted to use the box right away because it's a mysterious thing and it may be waste of points. Buy a good wall weapon (MP40, Thompson, STG-44, etc.) and use it to make points. Then you should use mystery box. Oh, I have almost forgotten: there isn't Fire Sale in Verrückt (Fire Sale drops boxes at all spots at the cost of 10 points).


In Verrückt's Mystery Box we find 3 wonder weapons, Ray Gun, Winter's Howl and Monkey Bombs:

  • Raygun: A very powerful pistol-like weapon that shoots green radioactive blasts. The damage is very high though the blast radius is very small. The ammo count is very good (20/160). This hot baby is a must-have if you want to stay alive in high rounds, but be careful because if you shoot a zombie too close to you, you gonna hurt yourself by earning splash damage. So be very, very careful with the Ray Gun. Shoot zombies' legs to make them crawl (look at the image).


  • Winter's Howl: Another pistol-like wonder weapon. This ''freezing pistol'' is hard in use but it can buy you some time to revive a downed teammate. The Winter's Howl fires a freezing beam which slows down any zombies that are not outright killed. It loses its one-shot-kill potentials very early in the game, requiring multiple shots to slow down a single zombie to a fast walk. Slow zombies can be dangerous however, so use it with extreme caution. It takes forever to reload for a pistol, and it has low ammo and short firing range.


  • Monkey Bombs: Monkey Bombs are an extremely useful tool at your disposal. A thrown 'monkey' attracts zombies for approximately 8 seconds before detonating an explosion in a small radius. This feature can buy you time in serious situations like reviving a downed teammate or catching up a dropped Max ammo. However, keep into your mind, that a Monkey Bomb needs some time to be armed and that could be devastating in really tight situations.

Left image: At my camping place, there is a Mystery Box spawn spot.
8 - Perk-a-Colas
Perk-a-Colas or Perks are soda machines that you can fing throughtout the map. There are 5 different perks in Verrückt, but you can only buy 4 of them. So pay attention to this section because it's very useful and should help you out with your final Perk-a-Colas selection.

  • Juggernog: Juggernog is a must-have. It's a red vending machine costing 2500. It makes you able to withstand more hits (5 instead of 2). I think the first perk you should buy. Try to get it as soon as possible.


  • Quick revive: This fishy, tasteless perk is located at one of two starting rooms.It is a useful perk because it increases your revive speed by 50% at the cost of 1500 points. In solo mode Quick Revive differs from co-op mode (actually it allows you to revive yourself). If you have deciced to get this perk get it as soon as possible, after getting Juggernog.


  • Speed Cola: The second perk you must buy after Juggernog. This perk is a must-have in zombies because it makes you reloads 50% faster and lets you switch weapons faster. It costs 3000.

  • Double Tap (Root Beer): Useful but not a necessity. Double Tap allows you to shoot your weapon twice faster than normal. Suitable with MP40 or large clipped guns such as HK21 (my favorite) or RPK. You can also combine it with Ray Gun. Double Tap Root Beer's machine is located at the camping area and you can get it at the cost of 2000 points.

  • Mule Kick: If you ask me 3 words to describe this perk, I would tell you: useful, expensive and risky! This amazing perk allows you to carry 3 weapons at the same time but it's a risky perk too, because if you get downed, you will lose your third weapon and that might be something really useful like a wonder weapon. I suggest taking your chances and try this perk. You won't be disappointed! It costs 4000.


Juggernog, Speed Cola, Quick Revive and Double Tap requires the power to be on. In Verrückt co-op, Mule Kick doesn't require power on.
9 - My combination
This section is about my personal choices at weapons and perks in Verrückt. Is what I choose to use in order to survive in high rounds. As I said moments ago, this section is personal and it's not necessary to do what I am telling here. I just let you know how I play in Verrückt co-op.

To start up, I always get Juggernog and Speed Cola. These 2 are the most useful perks, so they are a must-have and you can't survive without them. Then I get to choose between Mule Kick, Quick Revive and Double Tap. In Verrückt, I usually prefer Double Tap than Quick Revive (especially if I get early the Monkey Bombs). So my perk combination is: Juggernog, Speed Cola, Mule Kick and Douple tap. If you get Mule Kick, be careful about your third weapon: If you die, you lose it.
If you decide not to take Quick Revive, just inform your teammates to let them know. Make sure that at least 2 players in your team have Quick Revive.

About my weapon combination, things are much simplier: I always get Ray Gun, HK21 and MP40. My third weapon is MP40 because if I die, I can easily rebuy it. I also get Bouncing Betties and Monkeys Bombs.

ADVICE: When max ammo drops out, throw your monkeys so you buy time to reload your guns and get full ammo.

10 - Easter Eggs
There are several minor Easter eggs that can found around Verrückt.

Radios

There are several radios hidden throughout the map. In World at War the radios aren't interactive, in Black Ops, however, at least one of them is. It is on a desk, visible from a window on the balcony of the American side. When shot, it will play music from campaign, much like the one in Nacht der Untoten.


Musical Easter Egg (Secret Song)


The musical Easter egg Lullaby for a Dead Man, by Kevin Sherwood and Elena Siegman, can be activated on this map. The song will start once the player flushes the left most toilet (look the images below) in the left upstairs three times.


Screaming Table


There also is an interactive spot on an operating table by the Juggernog machine. To activate it, the player will need to press the "Use" button (the F button in most occassions) while standing next to it. Once done, it will make a drill sound and man can be heard screaming in the distance.
11 - Conclusion & Things you must remember
To sum up, if you follow my strategy, then there are some things you should do:

-First of all, you should keep this door closed (if you want to survive...)


-Secondly, 1 of you has to guard this window (down image).


-Also, don't forget to cover your backs, the stairs, the wall window and the window your teammate guards with Bouncing Betties.

-In tight situations, you can use the electric trap (down left image) or lead the zombies to places where you have placed mines (betties). Also use a Monkey Bomb (if you have one) to buy some time. In order to use electric trap you must turn on the power (down right image).
That's all I had to say about my strategy in Verrückt co-op. I hope you find my guide helpful. Read on and don't forget to leave your comments. Have a nice game and... GOOD LUCK TO ALL!!!
82 comentarios
Ae7Df2aAc3b1E1 2 NOV 2015 a las 10:39 a. m. 
old strategy but nice explain
Ace Mambo 24 AGO 2014 a las 4:54 a. m. 
this strategy is very old but thank u for explain to new player :bloody:
Feelin' Salty?  [autor] 3 DIC 2013 a las 7:55 a. m. 
@xlBadBoy[FR]
You must buy the last DLC map pack for Black Ops, named as ''Rezurrection''. The ''Rezurrection'' DLC map pack includes a brand new map, the Moon, and the four World at War zombies maps (Shi No Numa, Nacht Der Untoten,Varruckt and Der Riese), and it costs 13,99 euros (I am not 100% about the price)
76561198077624989 3 DIC 2013 a las 7:20 a. m. 
Whow you unloack Veruckt ? pls
Feelin' Salty?  [autor] 16 NOV 2013 a las 5:08 a. m. 
@Cpl Tank Dempsey
Thank you for your comment. I haven't given a 10/10 rating to any weapons in this guide. The highest in rating weapon is the MP40 (8/10), because it plays a very important role in my camping plan. The only weapons that deserve 10 marks of 10 are the wonder weapons ( not all of them, but the most, like the Thundergun, the Wave Gun etc.).
(((TAPKyC))) 16 NOV 2013 a las 5:05 a. m. 
Will you make the same guide to another maps?
(((TAPKyC))) 16 NOV 2013 a las 5:02 a. m. 
in rating
(((TAPKyC))) 16 NOV 2013 a las 5:02 a. m. 
Which gun has 10 marks of 10?
(((TAPKyC))) 16 NOV 2013 a las 5:01 a. m. 
yes I remember
Feelin' Salty?  [autor] 16 NOV 2013 a las 4:59 a. m. 
@Cpl Tank Dempsey
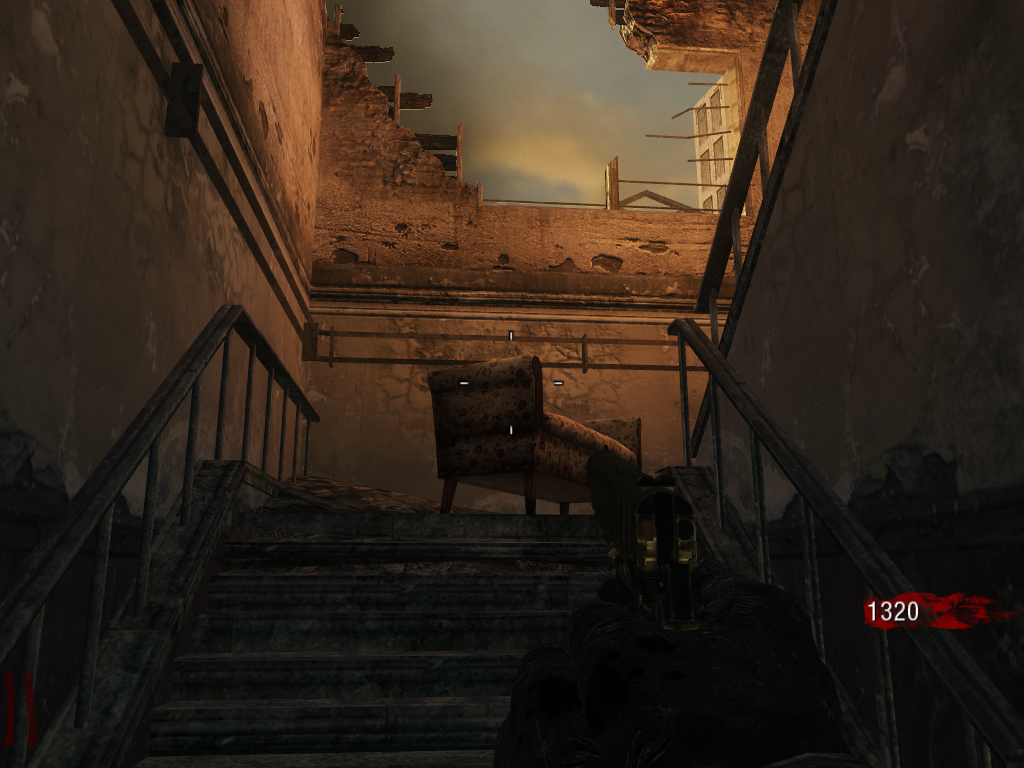
Despite the fact I already know that thing with the chair in Kino Der Toten, thank you for informing me. I didn't mention that on my guide, because I didn't find it very important or interesting. However, thank you again. I don't know if it's Peter McCain's voice, but some research on the internet would clear things up. Thank you for comment, because you tried to help me, and I will eagerly wait your answer-comment about the BAR issue (your last comment was about the BAR, if you remember).