Exanima
268 évaluations
The Many Enemies of Exanima
De derp12332112
This guide is, hopefully, a very helpful guide about the several types of enemies found with the world of Exanima and later Sui Generis.

'"SPOILER ALERT"'

This does give a lot of giveaways at the different encounters, and unless you wanna spoil yourself, I'd recommend going out there and fighting them head on yourself. Trust me, while it probably means death, it's a lot more fun to learn it on your own.
12
5
3
15
5
9
3
2
   
Récompenser
Ajouter aux favoris
Favoris
Retirer des favoris
GUIDE KEY
Welcome to my first Exanima guide! This will give you a rundown of all of the enemies that you can encounter thus far! I'll try to update this every now and then, since highschool College can get busy! For now, enjoy what content there is so far.

Name
The name of whatever this thing is

Description
What it looks like and what it has

Behavior
What it does during your adventures

Strategies
How to beat it/Get around it

Difficulty Rankings

Inept- Not very difficult at all, should only give trouble to brand new players

Aspirant- Might not be a problem if you can face it correctly

Novice- Shouldn't give you too much of a hassle if you know how to move

Adept- Could be a potential issue, take it seriously if you care

Expert- A problem. Deal with it or run

Master- A challenge!

Otherworldly- An unfamiliar or unorthodox encounter of great danger

Traits

Boss- Purposefully difficult in several ways so that it can impede players progress

Daunting- Will cause companions to flee in fear

Resistant- Unable to be affected by influential thaumaturgy

Thaumaturge- Has access to Psychic Abilities
Floor I - The Fall
Whether by choice or by force, you find yourself thrust in the dark recesses of some sort of storeroom. The faint light of the setting sun above illuminates the dust stirred from your impact. With naught but a torch in hand to illuminate the coming darkness, you must find a way out.

Silently waiting in the shadows, the raised bodies of unfortunate victims await to greet their latest visitor....


Zombies
Inept Difficulty

Description
From freshly killed to rotting corpses, zombies are slow, unreliable works of necromancy that, despite popular belief, "think" on their own. They have no desire for flesh, but wont hesitate to attack if they feel threatened even lightly. The zombies here in particular are dressed in typical peasant attire, with a few wearing padded clothes and wielding rusty weapons.

Behavior
As to the name, zombies are quite brainless, and are unable to attack and defend properly. They will not try to block any of your attacks, and will swing at you wildly, even if you're a bit out of range. Also note that they are not all aggressive, meaning that it is possible to walk past them without any sort of conflict, just make sure that you don't enter a combat stance. Another thing to note is that others will notice if you're fighting one, and they will take your combat as a form of aggression, which means that multiple can end up clumping to you at once, as seen here:


Strategies
Zombies are the easiest enemies you will encounter, as they have little health, slow movements, and typically crude weaponry with little armor. However, always be cautious, as one cleaver strike or hook swing can cause lethal damage, so be wary even when fighting a loner. The easiest way to put them down is to wait for their swing (always be sure to see if they will swing twice), then follow in with your own.


And that's it for the first floor, but why are there so many undead in here in the first place?
Floor II - The Living Quarters
The second floor is mostly the same as the first, but some of the undead have low leveled equipment that could be useful as extra covering. Many will wield rusty weapons instead of rudimentary utensils, so watch out.


To the South East, there's an entrance to the underground burial grounds.
Floor II 1/2 - The Catacombs
The discrete stairway gives way to a great spacious cave brim with the smell of ashes and dust. The only audible noise to be heard are the great torches still flickering in the dark. Atop steep cliffs and creaking wooden bridges, you make your way through....

THE CATACOMBS


As to the name, it would seem that this would be some sort of underground graveyard. Rows of burial urns sit on rough stone shelves, and dim torches in the dark create a quite eerie atmosphere, of which wouldn't be complete without trash bridges! Watch the bridges though, as a couple of spots host weakened or loosened boards that will send you crashing into the depths. In that darkness are armored skellies, similiar to those of level 3.

While they shouldn't pose much of a threat by now, their armor is still effective against crude weapons, and their rusted blades can still cut you for red damage, so stay sharp.

There is also a particularly well armored skeleton in the "Graveyard" section of the map. You'll find it by taking a secondary bridge connected to the main one:


Graveyard Skelly
Adept Difficulty

Description
A skeleton in a full set of rusted armor wielding a rusted two handed sword, it looks sort of like a mockery of a once greater warrior. Stay on your guard.

Behavior
The graveyard skelly is quite tough for early game, combining its rusty but effective armor with its two handed sword to make one of the tougher foes thus far. It does nothing except for patrol the graveyard area, and will occasionally be found outside of it walking near the stone gateway nearby. However, most of the time it'll just be standing near the far side of the graveyard. In terms of combat, it would probably be about an Adept, since it has some offensive capabilities and can block itself quite well.

Strategies
It is reccomended to deal with this thing using a longer weapon, as its two handed sword will give it an edge against shorter weapons. If you don't have one, however, try and corner it so it can't run anywhere. It's large sword will be quite clumsy in a tighter spot, giving you the advantage. Also watch out for the many empty graves in the yard, since they can trip you up or even cause you to fall down. It might be better to bring him outside of the graveyard and fight him more in the open if you can afford it.

That's it for level 2 and a half. For a side note, there are two entrances to the catacombs, one leading to level 2 and the other leading to level 3.
Floor III - The Exit?
Floor 3 is one of the smaller maps, but has the equipment that you'll need to survive level 4. Like normal, there are zombies roaming the halls, but there are also-


Skeletons
Novice Difficulty

Description
Skeletons are the most formidable foe you'll come across as of now, and for good reason. Unlike their rotting counterparts, skeletons are, well, skeletons, hollow shells of raised bone that are brought back to life through necromancy. The ones in level 3 will vary, some wearing rusted pieces of armor, some not having anything at all. They all will be wielding rusty weapons, and will be far more of a challenge than your average zombie.

Behavior
They are all aggressive, meaning that they will attack you on sight if you get close enough. If you're already hurt or unskilled, I'd recommend not fighting them at all, as they are difficult to the inept exanimite. They'll patrol the halls around the north eastern section as well as the portal area of level 3.

Strategies
Treat them as Novice-Adept level fighters, as they can block and have some offensive skills, such as the riposte. Specifically for level 3, try not to get caught in the tight corners of the halls or held up on a wall, as the skeletons can just bang on you there. Keep on backing down the hallway, but make sure you're not leading yourself into a dead end.

--------------------------------------------------------------------------------------------

There is, however, a unique zombie here, one that you need to watch for:


The Proctor
Novice Difficulty

Description
Whoever it was, it isn't anymore. It wears the normal proctor attire of boots, tunic, and chainmail, which will protect it from your bladed weapons. It also wields one of the better one-handed swords in the game, so pay attention. It still has a readily done ponytail, as it was a recent turn of events that caused its untimely demise, meaning you probably aren't the only living person down there.

Behavior
It will patrol the eastern corridors of the level, so you'll probably run into it if you want to progress. As she is a fresh zombie, it will attempt to block your attacks, so don't swing wildly. It also possesses some other forms of attack that most zombies do not, such as the remise.

Strategies
As it is a zombie, don't take it like some end-game content. However, as it does wield a sharp and dangerous sword, swinging it wildly can be effective if you don't pay attention to your self defense. It is recommended that you keep some distance away from it, and stab at it from some safety. While it does have a chainmail shirt, it is a short-sleeve, so its arms are still exposed to bladed edges, and it wears no helm. Try to aim for its exposed head for a quicker kill.

That's the end for the "tutorial" levels. The portal that leads to level 4 is your last checkpoint thus far, so if you permanently die, you will reload directly after you pop out of the exit.
Floor IV - The Archives
This is where your problems start, friends. Floors 1-3 are considered the Tutorial zone, and past the Portal the real game begins.

As stated before, you exit the portal to an unfamiliar building that is more ornate compared to what you have seen with before. As you creep about the desolate halls, you'll eventually come across some tough skeletons:


Archive Guardsmen
Adept Difficulty

Description
Skeletons dressed in strange, bronze equipment wielding a variety of weapons should terrify a player at first sight. They come equipped in a random array of bronze armor, some wearing chest plates and braces, others wearing greaves and helmets. They seem to primarily use heavier weaponry, such as large two-handed maces, weighted hand axes and polearms.

Behavior
There are a multitude of them stalking the hallways, and will follow a patrol route throughout the facility. They are pretty good at fighting, around an Adept, and can prove themselves to be a hassle to an unwary exanimite. They wield their weapons with skill, and can best you quite quickly if you're unskilled or unarmored, so watch it.

Strategies
As stated before, they follow a direct patrol route, meaning that they will eventually begin to amass in one area if you are unable to deal with one of them fast enough. If you feel that you're being overwhelmed, it is paramount that you attempt to block the others off and deal with them one at a time.

There is also a zombie in a locked room somewhere near the beginning of the level, having nothing but a light arming sword and some layers of clothing. He shouldn't be much of a problem.

You've got something bigger on your hands.

--------------------------------------------------------------------------------------------

Somewhere in these halls, there's something stalking the floors. Heavy foot steps pad through the empty corridors, and a great shadow flickers past entrances and doorways. Pray for courage or speed should he see you, for his strength is great, and his blood lust unsatisfied....


-SIR-
Otherworldly Difficulty | Daunting, Resistant, Boss

Description
A disgustingly large beast of inhuman proportions, Sir is a force to be reckoned with. An abomination of some other world, Sir wears no armor, but makes up for it with brute force. His grotesque arms are gnarled with weaves of tightly packed muscle, and his hands are edged with mangled talons able to cut flesh and cleave bone. Indeed, his wrathful roar will send any inexperienced exanamite into flight (and so will his arms), and his shocking steps cause tremors to be heard across the level. He must be dealt with.

Behavior
He will patrol the main halls of the level, making loud footsteps as he trots along. He will scare away any skeletons that see him, and will occasionally make sport of chasing them. If he sees you, he will make a large bellow that tends to jump first time delvers. He will then proceed to give chase, only stopping if you shut a door in his way or face him mano e' mano.

Strategies
Sir has one of the largest health pools in the game, and combining that with his large reach and strong hitting arms, he is by far one of the most difficult opponents you will come across game 'round. His attacks will do large amounts of impact damage, and his claws will cut exposed parts of your body. It might be a good idea to sneak around him first, and collect the brass pieces of armor scattered in the chests of the level to help make you more prepared. Even then, watch out for the skeleton guardsmen, as they can prove to be barriers to your progress.

If you plan on combating him like a hero out of the books, I would recommend that you prepare yourself properly. If you are somehow unable to attain the entire plate set, then take the armor pieces from the bodies of the guardsmen to have some additional protection. You should probably use the longer weapons available from the corpses as well, to add some much needed distance from your body and Sir's fearful blows. It really doesn't matter where you swing, as long as you hit him. That is one of his few but advantageous weaknesses: no armor. Hit his arms as much as you can, and head shots will do tremendous amounts of damage and stun-lock him if you can manage it. There is no need to worry about the skeletons during the fight, as they will automatically run away from him.

Another way to deal with him that is somewhat easier is to lead him to a large hole located in the South-Western corner of the level. It will have a death sign similar to that of the level 1 maze alongside a bunch of boards covering it. First off, you'll have to attract him towards the hole by getting in his field of view. Don't worry about the skeletons, they'll steer clear of Sir as long as he is close by. Heck, they might even run alongside you. Once you get to the hole, inch around the sides of it until you reach the far end. If done correctly, Sir will run straight forwards and fall into the hole. If his arms get caught on some of the boards that are left around, downwards swing on his head until he is dead. This will not only get rid of a huge issue in an easy way, but also give you some (somewhat) well earned experience.


The Archives are but the beginning to the bitter truth that encompasses the Underworld.
Area V - The Crossroads
Welcome to...

THE CROSSROADS


A sprawling (underground?) metropolis that would might have served as the central hub of our cultist group, the Crossroads is a beautiful collection of streets and alleyways that serve as a reminder of what great a civilization this group might have been. Its archaic shops show many wares of different shapes and sizes as well as different basic services. A cobbler, a weaver, a clothier, and a potion/alchemy shop can be found in the local market (Signs will hang above their door to show it's appropriate service, so think Elder Scrolls style). A hospital to the near side of the entrance shows a sign of a past infirmary, with rooms for the injured and offices for the doctoral. A city would not be without a system of justice, however, and a police "station" lies at the far end of the map. The architecture and magnificence of this place make you wonder,

"Who did this? How? And what happened to them?...."

--------------------------------------------------------------------------------------------

Be on your guard, however, as the past owners and pedestrians still walk the streets, but not in the way you would hope....


Skeletons
Novice Difficulty

Description
Mostly like the other skeletons, except for a change in weaponry. Unlike the former skeletons, these pedestrian ones are quite harmless save the few with crude weapons.

Behavior
They are mostly found in the market area, but they are still spread out among everywhere else. You're bound to run into them if you explore the floor, as they will tend to be in rooms that hold useful loot. Some of them don't patrol, and will stay within the confines of the room that they have spawned in.

Strategies
They shouldn't be serious danger at this point in the game, but some of their weaponry will have crush damage, so watch for that.

--------------------------------------------------------------------------------------------

Also in on the floor are enforcers of the judiciary system, still making sure no riff-raff is going on in their city.


Red Guards
Adept Difficulty

Description
Dressed in old suits of metal banded fiber, these undead guardsmen walk the streets of the plaza, looking for someone or something to kill with the skill it earned in life. They possess several different ornamental weapons that are as effective as they are beautiful.

Behavior
There are several of them about the main pathways as well as inside of the hospital and police station. They will attack you on sight, but will stop giving chase if you get far enough away. They are quite good in combat, having probably trained a lot beforehand. They will assist their fellow comrades as well as the pedestrians if they see you in a fight, which means you can have quite a few on your tail in a short while.

Strategies
It is best to treat them as the normal patrolling enemy; If you don't deal with one quick enough, more will show up. As they have multiple different weapons, you won't run into the same style of combat every time, meaning that you might have to switch it up. Some will have shields that will be annoying, others will use large two-handed clubs to beat armor, so stay on your guard.

--------------------------------------------------------------------------------------------

There also happens to be a triad of the most skilled human sized warriors thus far, being a challenge even to a highly experienced exanamite:


Blademasters
Master Difficulty

Description
Stalking the grounds of the Crossroads, these undead will put up a fight worthy of only the best of exanima's players. Garbed in good quality blue armor similar but far better than that of the Red Guards, these slaughterhouses wield two exceptionally deadly blades with explosive force. You must be ready for anything, lest you run into one of these unprepared.

Behavior
Each one will be patrolling a different sector of the map, one to the Northwest, one to the South, and one to the East. They tend to be alone, but can sometimes have a Red Guard accompanying them. They are aggressive at first sight, and will doggedly chase you throughout the crossroads if they see you. They are probably faster than you considering you should have some heavier armors by now, and they might be able to hit you mid-run with their fast swinging blades. They are incredibly skilled in combat, having several defensive and offensive skills that you can openly notice during a fight.

Strategies
Boy would Derrin be useful right about now....
Blademasters are by far the most difficult normal-sized enemies thus far. Fast and dexterous, they are lightning quick with their block and equally strong in their swings. Armor will help to mitigate the damage, but you'll still take substantial impact if they get a good swing at you. Be careful when fighting them in close quarters combat, as their short-ish sabers can maneuver quite well in tighter spots.

If you catch them in the open, try and use a longer, heavy hitting weapon such as a halberd or polehammer. You might be able to hit them while they swing at you. A shield could prove equally useful to help block their secondary swing to your opposite side, allowing you a quick stab or swing if you can manage it. While heavy hitting weapons are effective against its armor, it might prove too slow for a quick showdown thanks to their blocks. Using the Lightning Mace against them might prove effective, but unless you want to spend lots of crystal energy with contact damage, it might be better to opt for a quicker weapon.

If you've done the arena already, then you might know some good strategies to fighting dual-wielders in-game. At the same time, these guys are probably stronger than the master difficulty ones that you tend to find in the arena, meaning that if you think you have anti dual-wielding skills down, then have at them. However, if you don't, then the companion Derrin would prove most helpful in this situation. A longer weapon is recommended so that he could prove more of a supportive character rather than a primary force of attack.


Floor V 1/2 - The Sewers
After walking around for a little while in the Market area of the Crossroads, you might have found a note within the office of the local alchemist describing a strange, almost living substance that infects whatever it comes in contact with. These, "Things", almost of pure lovecraftian make (And much like the thing from the movies) can be found underneath the Crossroads, in its sewer system. The entrances can be found in the Northwest and Southeast corners of the map.

Hope you brought a light, because it's awfully dark down here....

Save a few dim sources, your torch (or better yet, night vision helm) will be the only viable way to navigate the dank recesses of the Sewers. To fix this, there are lamps scattered about the pathways. Pull the lever beneath to light a beacon of hope. With a combination of eerie music, unsettling squishing sounds, and excessive amount of mortified shrooms, the Sewers is likely the last place you'd like to be. Even Derrin remarks his general dislike of the current location, and recalls its familiarity to an "Ants Nest".

After creeping through the small corridors a while, you'll eventually hear the brief sounds of something scenting the air, followed by a rush of footsteps, where you'll meet the most common (and most annoying) bugger in the systems:


Licker
Adept Difficulty | Resistant

Description
Even with night vision, it can be hard to see them coming save the sounds of their arrival. A gross, festering humanoid covered in fungal growth and completed with sharp claws and jagged teeth, the Licker (as I've named it due to its resemblance to the RE creature) is a fast and brutal thing capable of bombarding threats with a barrage of heavy blows. A perverse excuse for a pugilist.

Behavior
These can be found patrolling all over the Sewer system, sometimes in packs of two or three. They are aggressive on sight and run very quickly, so be ready for a fight. They attack through swinging their long claws, which won't cause much red damage if you have armor. However, the shear amount of swings they can pump out will drop your stamina at an alarming rate. They also possess a "pounce" attack, akin to Sir's overhead save the fact that they can lunge forwards unexpectedly.

Strategies
Though dangerous in groups, they shouldn't be too difficult alone, just be sure to keep your distance. The claws at their finger tips make their swings slightly longer than a pugilist's but not longer than any contemporary weapon you should possess by now. Since they will attempt to charge you, stab attacks will prove most effective against a single opponent, as they will run into it attempting to pounce you.

When going against multiple at once, it is advisable to not get backed into a tight area or a corner, as they have a huge advantage in enclosed spaces. This also somewhat applies to singular ones. Swing wildly to ward them off, as they will try to give you a nice group hug, pummeling you with no chance to recover. Having Derrin is your best bet for surviving against multiple unless you can manage to shut them behind a door.

--------------------------------------------------------------------------------------------

Even worse than the Lickers, something nasty makes a distinct gurgling noise in the darkness ahead. As you hear heavy footsteps trot over to you, what reveals itself is sure to send a shiver down your spine....


Eater
Adept Difficulty | Resistant

Description
A farce for what was once human, the Eater looks akin to a pitcher plant with legs and long, bony arms. Filled with some liquid substance, its gelatinous gut wreathes and bobs with its every movement. It's head, or what's left of it, is naught but a small pair of eyes atop a gaping abyss one might've called a mouth, ringed with ugly teeth. Dear lord, what breathed life into something so physically putrescent?

Behavior
There are only a few compared to the army of Lickers, but they are nonetheless dangerous in their own special way. Trading speed for brute strength, Eaters use grossly elongated arms shod of muscle and bone to devastating effect. They will swing wildly like their quicker counterpart, but slower and much harder. As described above, they also emit a strange, gurgling sound that can help alert you to their presence. It sounds almost like someone trying to hack something out of their throat.

Strategies
Although slow, their long, hard-hitting arms give them an advantage above medium and shorter length weapons. When wielding something such as a sword, you risk being in too close to those groping arms begging you to come nearer. As they have a very protrusive and exposed gut, stabbing them with a long weapon like the spear or awlpike can prove very effective. Swings can sometimes be useful, but tend to be blocked and mitigated by their bony arms, which function somewhat like a pair of rerebraces.

Overhead attacks can do critical damage as per usual, but are not recommended. As described, their smaller head makes headshots much more difficult, and while the stun-lock it induces may be worth it, the chance of getting knocked down because you raised your arm may prove to be more appreciated.

--------------------------------------------------------------------------------------------

Past the hewed corpses that you've left behind, you might happen to stumble upon an unorthodox familiarity; A skeleton, but something about it is not quite right....


Invaded Skeleton
Adept Difficulty

Description
At first glance it looks akin to all the others you might've encountered by now, but only once it steps into the light will you see its horror. Instead of being held together by presumably sorcery, it is bound by a parasitic host, much like the massive shrooms and growths seen about the sewers. At its core lies a cancerous mass with a visible ring of teeth, perhaps for ingestion. The skeleton itself is not the danger, it is merely a base of operations for this parasite. Best slay it, and pray the owner of the husk finds peace.

Behavior
They work much like all the other skeletons, patrolling the hallways and using the rusty gear scattered about the level. None should be particularly dangerous by now, but always be weary of those wielding heavy weaponsl. They will fight alongside their other infested brethren, and can prove to be troublesome in combination to their close-combat allies.

Strategies
They aren't any different from the other skeletons save the disgusting noises they make when idle and hit. Some of the equipment they use has crush and pierce, but tend to be on the slower side. Still, keep your wits about you and kill it quickly, lest you attract the attention of the more annoying inhabitants.
Area VI - The Foundry
A cold and empty facility lined with monochrome lights, the absolute silence muffled only by the occasional clamor of your equipment. While it doesn't seem nearly as messy as some of the other floors, it makes up for it with an odd touch of dreariness with its environment of metal and stone.

Matching their abode, statues of great sentries line coves in the wall, standing guard over empty halls and silent workshops. More importantly, they are posted near the many signified doorways that lead deeper into the level, and your instincts warn you to heed the sigils lest you awaken the sleeping wardens....


Golem
Master+ Difficulty | Resistant

Description
Hulking suits of inflexible armor that move with creaks every step and swing, golems are dangerous beings that shouldn't be tampered with. They wield huge halberds that can send anything flying, and are very well armored considering they're walking suits of metal plates.

Behavior
A majority of the golems you come across will be dormant in their coves, lining the many halls and doorways. In terms of doorways, they will activate if you do not possess the correct token designated for that door. For all golems, they will activate at a random period of time if you linger for too long, whether it's hitting them in their still state or just standing in front of them. Due to their random awakening intervals, you can spend probably a minute or two hitting it until it wakes up, or you can walk up to it and it awakens in a literal 2 seconds. It really is random.

Strategies
Golems are very difficult enemies to combat on open ground, since they have incredible reach with their height and added weapon length. They can hit you far out of your own melee range even with the longer weapons, but if you get up close you might be able to score some hits with little alarm.

If you plan on fighting them on open ground somehow, it's only near possible if you're facing only one, as facing two on open ground might prove to be a impassable barrier to even the most well armored and experienced exanamites. In terms of single combat, you must master your crouching combat skills, as ducking underneath their attacks is paramount to your survival. Their attacks tend to be aimed towards your head, so ducking underneath their swing requires timing and skill. Just watch out, because if you crouch too early they will switch to a downwards swing and hit you quite hard despite armor. Using a medium sized weapon such as a hammer might be helpful, as you don't want to be too close nor too far. Another thing to take into consideration is that fact that they do not block at all.

If you happen to bump into two, well, it might just be best to run away. If you don't feel like it, however, than try and lead them into a smaller hallway. This hallway will give you a significant advantage as they will be unable to swing properly due to the lack of room plus their large size. Take the initiative and use smaller weapons with impact and crush damage to pummel them into submission in their confusion. Always watch for a somehow loose swing, however, as they can springboard off of the walls and pillars sort of like how you flick your finger and thumb: It'll hit you with some force.

--------------------------------------------------------------------------------------------

There also happens to be a number of powerful undead walking the halls, difficult enemies that can be very dangerous even alone:


Ancient Praetorians
Adept/Expert Difficulty

Description
Usually dressed in full suits of rusted plate armor, these skeletons and ancient undead are a real pain even to a good exanamite. They possess a cadre of weaponry from across the level, including the strange Spetum, a spear with a swords blade at its end. Their armor, even when rusted, is effective against your bladed weapons, and still looks really cool to top it off.

Behavior
Found primarily in the eastern sections of the floor, these soldiers might prove more annoying than the golems at some points of time. They will, like other undead, patrol a route about their area, and if you're not careful, you might find yourself surrounded by several at once:

They are very aggressive, giving chase almost at first sight. Another thing to note is the fact that the golems will not attack them, considering that they are the ancient guards of the factory.

Strategies
Like other patrol-type enemies, these ones can amass if you do not dispatch one quick enough, but unlike most others, these ones can whallop you even alone. They have really good combat skills, equal to those of an arena master, meaning that you need to put your game into high-gear if you're even thinking about facing multiple.

Facing one of them should be somewhat simple, nonetheless, as you have plenty of open room in this level. Still, take into consideration the fact that you are dealing with a very skilled opponent that may or may not be able to hit you despite your best efforts in blocking. It might be best to practice in the Arena against some high level enemies to prepare yourself for these guys.

Fighting multiple at once is a tough feat, but possible. If you accidentally run into more than one, then there are some strategies to help clear the way to survival. If you happen to be near one of the longer hallways, try and bring them there. It will give you plenty of leg room and allow you to back up as not to get flanked. Something that is also quite important to pay attention to is the fact that there are golems everywhere, and that they might awaken if you stay too long in their vision.


Just be warned, as there is a undead captain up in the northwestern part of the map, wearing full captains armor and wielding a large sword. Remember, blunt trauma is the way to get them.

Continued in the next section due to Character Limit
Area VI (Continued)
(Continuation of Floor VI)

After clearing out the rough factory area, you're most likely to stumble into an empty corridor leading to a doorway that lacks golems. It bears the insignia of the three ribbons, one impossible to possess at this time. Inside, you'll find an absolute overkill of a machine....


-Golem President-
Master+ Difficulty | Resistant, Boss

Description
A huge golem unlike any other, this one stands far out of the crowd with its even larger size, beautiful golden sheen, and omega ban hammer. Its razor blue eye will pierce your soul, its mallet your blunt judgement, and its body an impassable wall to your progress and prize. It stands guard in the north most storage chamber, defending a magnificent accolade, a sentinel awaiting a champion worthy of it. You must get past.

Behavior
The President is found in the northern chamber of the golem factory area, an area littered with patrolling skeletons. Like other golems, this one will stand completely dormant in the center of his room, but unlike other golems, he will activate immediately if the player steps into the room. He should stand there in guard mode for a few seconds, and will advance if the player does not. His sheer size will give him lots of momentum when swinging his maul, meaning that he can send a normal sized person flying to the other side of the room with a well aimed swing. The maul itself has a very high amount of impact and a slightly lower amount of crush, making it very effective against the better armors available in the level.

Strategies
The President is quite effective at his job, and you should probably take that statement into consideration. The President's room is a large, circular room with tons of open space; A bad thing for you. Like the other golems, the President requires room to swing his maul effectively, and if he can swing it effectively, he is bound to hit you. When facing him, be sure to shut the doors behind you in the room connected to the boss room, as to make sure no extra enemies come in to bug you.

Stepping into the area is bound to give you some chills once he begins to animate. First timers will have a difficult time comprehending the situation, as he is big like Sir and wields a hammer as big as you. However, there are some effective ways to fight him. If you plan on combating him fairly, make sure you bring a long, blunt weapon such as a polehammer or poleaxe to hit him from a distance. If you want, use the awlpike that is available in the level, as it is the longest usable weapon thus far. Like other golems, the President will not block any of your attacks, meaning that you can hit him as much as you'd like as long as you make sure your not aiming for his weapon. However, be sure to watch his hammer, as keeping some distance from him might get you into his prime hitting area near the head of the maul. Aim for the legs and arms, as they will stick out forwards the most. Don't try and aim for his torso or head unless your going for a close melee attack, as it will only bring you closer for grappling. Another thing to take care of is the fact that as he is bigger than you, he can send you flying or take you off the ground if you get caught up in his arms or trampled by his legs.

If you don't feel like fighting him in a legitimate manner, than there are some other ways to "fight" him. There is a way to take advantage of the doors that lead into the room, and by using this way you can keep yourself relatively safe and unharmed if done correctly. It is recommended to use a longer weapon, but feel free to use a shorter one. By opening only one door, you can ensure that his swings will not hit you fully. When you enter the room, through the only open door of course, back up when he activates. Camp right in front of the door and stab forwards every time he comes within reach. Be careful not to back up too much or he will attempt to come through. If his swing hits the end of the door and causes it to open, quickly switch to non-combat mode and shut it ASAP. It is imperative that you keep him under control during this strategy, since he can easily kill you if he corners you.

That is the end to the Golem Factory. After this level, you should be quite prepared for other encounters if you found the equipment lying about the floor.
Area VII - The Markets
Oh boy, this one is big.

Welcome my friends, to the long awaited

MARKETPLACE


In this whirlpool of shopping, games, and revelry, one would imagine crowds of bustling ongoers enjoying the night to its fullest.

This is not the case.

Empty streets, torn down stands, heaps of rubble, and a copious amount of huge abysses really contrasts with its original purpose. There aren't even any skeletons to be found, so what became of these people? We're not totally sure, but we do know one thing; You're NOT alone in those ruins.

Rushing out of holes, corners, and crevices in the walls, monstrosities of great strength and terror come out to meet their latest meal....

HobGoblin
Adept Difficulty | Resistant

Description
Fast, strong, and far superior to their sewer counterparts, HobGoblins tower over their cousins from down below. Far less moist, they have become used to the dryer parts of the underground, having more calcified, hardened skin alongside almost feathery bristles growing out of their skull. They're far larger then their counterpart, and have the speed to boot. Compared to the light strokes of the sewer Licker, HobGoblins can knock you down with forceful blows. With a beastly mentality, they wander the empty streets, following a sound that we've all forgotten....

Behavior
If it wasn't bad enough, these things patrol the Western side of the Marketplace in packs. If you run into one, chances are there are a few more nearby. They have an incredible sense of smell, being able to sense you from far out of your sight range. They'll come running from any direction, and will ambush you through the many crevices and holes found about the level. They attack much like their smaller brethren, but with far more raw power in exchange for slightly less speed. In their packs, these things are easily able to rip apart any solo exanimite.

Strategies
While very dangerous in groups, they are significantly easier alone. Treat them like a much larger Licker and you can kill it relatively quickly. They have more callous skin and health then their counterpart, so blades are slightly less effective against it. If you run into a big one, use a long, heavy hitting weapon to keep its swings into submission. If you can stun lock it, you can kill it before it manages to get you on the floor. Unless you want a brutal pounding, minimum encumbrance is HEAVILY recommended to help make some distance. Otherwise, they'll catch up to you in combat and wail on you without mercy.

--------------------------------------------------------------------------------------------

After several encounters with the HobGoblin folk, a ferocious demon of a monster will most likely appear. It's sight will be something to behold, for it has been teased for quite some time....


Fael
Otherworldly Difficulty | Daunting, Resistant, Mini-Boss

Description
Dwarfing their wolfish companions, Fael are large alien like creatures almost the size of a horse. With devilish horns, large protruding growths on their back, and lack of eyes, Fael look entirely different from a majority of the beastly creatures encountered thus far. Loitering around with the packs, they hunt for unsuspecting prey such as yourself. Fast, dexterous, and all together a powerhouse, they will prove your worth in combat.

Behavior
There are several of them patrolling around the map, frequently migrating with Hobgoblins. They swing fast and with uncompromising strength, knocking you down onto the ground before pouncing you. They also seem to have far superior intelligence compared to their company, dodging blades and taking advantage of your openings during attacks. Their long reach and insatiable hunger for food makes these things incredibly dangerous.

Strategies
Fael are dangerous enough alone, but can prove to be an undenied death when supported by the smaller creatures. Of all the monsters in this game, Fael are the most swift and deadly. While Sir packs a punch, he lacks the speed and conviction that these devils otherwise possess. Because of this, outrunning them is almost impossible once contact has been made.

When facing them one on one, having a low encumbrance is a necessity. Due to their shear speed, they'll catch up to you no matter what, so you might as well be fleet of foot as well. Their swipes have quite a lot of power in them, and a direct hit will do SUBSTANTIAL stamina damage, even with the best plate armors on. Don't get too close to them either, as their size will topple you over and leave you victim to a fearsome overhead. They are also quite bony, which makes them far more resistant to slash damage. They won't even flinch to the sharpest swords. Their pair of horns and claws will block blows as well, making strikes even more difficult. Using the polehammer is recommended, because it's probably your best bet in doing heavy damage, and while you can't stun it, you can at least slow it down a little.

Fighting them with their friends (Or even worse, multiple Fael) is absolutely bonkers. Striking at one will leave you open for another, and getting surrounded is guaranteed defeat. Separation of this group is crucial, because it'll give you some leg room to move and swing. Try to use doors, alleys, and gates to divvy them up.
Area VIII - The Gentry
The very well off seldom choose a life near the common folk, and the same can be said and seen in the underworld. Favoring a habitat woven with lush villas, away from the metropolitan plebians, the homes of the wealthy silently await the return of their long deceased owners.

The forlorn apartments with their ornamental living quarters and chore rooms bestow a certain homeliness that is checked by the gaping maw of the abyss that has ripped its way through the heart of the area. The erosion caused by the rift paints the floor with cracked streets, shattered bridges, and collapsed ruins, but perhaps a cunning explorer could make their way across the forsaken fractures by rudimentary means.

The area is populated with raised corpses; Civilians, Praetorian, and even Archive Guardsmen can be found dead or undead in various areas of the level. More importantly however, there are some strange outliers that are far more familiar than we'd like them to be....


Mercenaries
Novice Difficulty

Description
Dressed and armed with surface equipment, these freshly raised dead stand out from the rest of their decaying compatriots with their familiar style. They wield effective and dangerous weapons with the typical sluggish brutality of their undead kind, stumbling into one another as they do so. Although easy to handle as far as sentient enemies go, their armor makes them tougher sponges than most other zombies, so take care not to trade blows.

Behavior
There's around a score of them concentrated in the West and South portions of the area, mostly shut behind the doors of the still standing apartments. They can be prone to infighting, so don't be surprised if you find yourself standing in the aftermath of a post-mortem struggle. Sometimes they can be found in the open streets and alleys if they've squeezed through open doors and gaps.

Strategies
They're mostly split up into smaller groups of maybe 5-7 throughout different buildings, so don't get backed into a corner by a group of them. As zombies, they are easily dispatched singularly due to their slow swings and inability to properly defend themselves. When fighting a group, it's not uncommon to cause infighting from their attempts to swing at you only attacking their fellow mates, so take advantage of their chaos when its presented.

--------------------------------------------------------------------------------------------

While known foes wander the majority of the area, take heed of this warning and steel your self should you run into a wielder of fate itself. Guarding the crumbled epitaph of the upper caste stand mighty and powerful warriors suited for the night time stories mothers tell their children to stay in bed by. They wield the bite of their weapons and the steel of their focus like the darkness wields fear, and they will prove it this day.


Guardians of the Gentry
Master+ Difficulty | Thaumaturge

Description
Garbed in a highly decorated and light yet tough armor, Guardians look a world away from the majority of the underground humanoids. They're well equipped, utilizing Foundry weapons with skill. However, their greatest strength comes from their access to Psychic abilities, giving them an enormous edge over the average combatant. Their unique combination of combat prowess and Thaumaturgic mastery makes them difficult opponents that only the most well prepared exanimates can tackle head on.

Behavior
There are four of them spread throughout the grounds of the area, watching over the remains of their home. They're relatively idle, but can still be found patrolling small zones in the more open spawn points. Like most other Ancients, they're aggressive on sight, giving chase to the intruding player almost immediately.

In combat, they'll be quick to show profession in both melee and thaumaturgic application. Utilizing both Force and Energy abilities, they are capable of decimating the opposition with a deadly combo of thaum-enhanced blows. Each Guardian possess a different cadre of distinct abilities;

Polehammer Guardian - Wields a hard hitting polearm with access to Force abilties.
Spetum Guardian - Wields a quicker, bladed polearm with access to Force abilities.
Axe and Shield Guardian - Wields a short battleaxe and shield with access to Energy abilities.
Dualwield Guardian - Wields a pair of arming swords with access to Energy abilities.

Strategies
Companions
There are many creatures in the world of Exanima and soon to be Sui Generis, and companions count too! Why not have them in here? For those noobs that need to know, hit T to talk to them when you're close by.

Remember, there's nothing better in a dungeon then having someone else to suffer with you. Companions are just another part of this huge world, and having feelings and priorities as you do. Most CAN and WILL take red damage and DIE, permanently losing them to the clutches of Exanima. Keep them well, and they will support you in combat as best they can.

Derrin
Derrin is a farm hand that can be found in level 1. He claims that his father was a soldier and that he knows a tiny bit about combat, but not enough to be reliable. He is of normal height with an average build. He comes equipped with nothing but a piece of wooden debris. While initially bland, he might soon show himself to possess both impressive prowess and intellect with time....


Derrin is a foundation, a clean slate, a perfect piece of paper, something that is up to you to mold. Like a recruit in the Arena, he is brand new, and will require attention to train and keep alive. However, unlike the recruit, you cannot choose his skills. He'll also learn by exploration and combat, so take him with you.
  • Armor him up. Like you, he takes red damage. Unlike you, he is pretty bad at defending himself, so armor him up immediately. Trust me, he'll need it.
  • Keep him close, because he struggles to fight alone. Assist him in combat when you can, and be careful when facing two guys at once and you both get separated, because if he isn't clothed properly, he will probably take some heavy damage.
  • Be sure to check on him often. Even if he says he's alright, one hit can make the difference between pristine and just breathing.
  • If you don't want to bring him along, keep him in a locked room and tell him to stay there. Make sure the door is an "pull" door from the outside so that stragglers don't get to him. Once again, he probably isn't properly prepared yet, so keep him safe like he's your child (Or mother, or father, or whatever you care about, idk)
  • He gains skills based on what you give him. It's best you try to stick him with one setup, as giving him a two-hander after he's already used up skills in shields will put him at a disadvantage.
  • It is HIGHLY recommended that you give him a long, pointy weapon such as the spear or even better awlpike from level 6, as it means that he can give you support from a farther distance with a thrust without seriously injuring you if he hits you with the blunt side during a swing.
  • If you plan on giving him any sort of one-handed weapon, be sure to get him a shield too. While he still gets the encumbrance, he'll now have a secondary form of defense that can help ensure his good health.
  • By the time you reach level 7, Derrin should be an Expert or maybe even Master, proving himself to be a powerhouse in combat. He'll probably be an invaluable asset by this time.

Also, be careful where you take him. For instance, the maze in level 1 can be quite deadly for him, so it is HIGHLY recommended that you bring him to the exit of the level and leave him there. Since the maze just loops around back to it, Derrin will be kept safe and not be left behind in the end. Also watch him when on the boardwalk later on in the catacombs, as he can fall through just as easily as you can if not easier.

If you're not sure you've cleared the entire map of anything that could harm him, just lock him in a another room until you've cleared the maze. That will guarantee his safety.

--------------------------------------------------------------------------------------------

Robby
( EDIT; His name is apparently Themin, but I don't care, he's always Robby in my heart <3 )
Robby is what I've decided to name him. Robby is a skeleton that met his untimely demise in level 7, and his corpse can be found on the other side of the tavern separated by a huge rift. He comes equipped with full suit of rusted plate armor from level 6, with a spetum and small salve lying nearby.


You'll have to resurrect Robby for him to join you. Robby is as skilled as most of the other soldiers from level 6, so roughly an Adept or maybe even Expert. As he comes fully geared with rusty equipment and lacks the ability to take fatal damage, you won't need to worry about healing him. What sets him apart from most of the other undead is his passive personality, compared to the normal aggressive nature that most undead tend to have. This means that he will get along with Derrin (If you still have him around) and he won't constantly try to kill him. This makes him a great semi-permanent member to your party, as his combat experience will be put to good use!
  • Robby already has a full set of rusty armor, but it is recommended that you give him something stronger alongside some padding for underneath.
  • His Spetum is quite a versatile weapon, so unless you'd like to give him something else he should be fine combat wise.
  • His passive personality is quite a uniquity, and it might prove to be impossible to find another undead like him, making it worthwhile to use up a bond keeping him around.
  • Unlike living companions, you CANNOT talk to Robby. This means you can't order him to do specific things, although you can still equip him by interacting with him.
  • Due to the above problem, Robby will not stay behind when you try to do something audacious. If you ever feel fearful of losing Robby to some black abyss, you can simply break your bond with him and raise him up later when you're back.
  • With the introduction of Time Orbs that bring items back into their initial condition, Robby's armor is now top-tier plate armor. You can either keep it for yourself or keep it on Robby, but regardless of your choice, his armor is some of the best you can obtain at this point.

Person 2?
It has been confirmed that there will be another companion in level 5, and I would suspect that it would be the Knight, in order to unlock him as playable in the beginning choices.

For some extra knowledge, the Knight was originally playable in the pre-7.0 update version of Exanima, and had a full set of plate armor (save gauntlets and a helm) with a flanged mace, making him the easiest to play as but the most difficult to increase in skill since he already started out with a set group of them. He may or may not come like this again, we'll just have to wait and see.
The Beyond?
I love this game with a lot of passion, and cannot wait for it to come out! I would also like to continue this if I get enough support too! Who knows what awesome creatures will come next? Ghosts and more have been described by our fellow Necromancer friend who is on the run, so who knows?

See you later!
154 commentaires
MIM 27 aout 2024 à 0h25 
Wooo the gentry is in working progress
BagelBob 19 nov. 2023 à 21h09 
Ah yes, the blademasters have been dethroned as the hardest normal sized enemy by some magic knights
derp12332112  [créateur] 22 oct. 2023 à 18h56 
@Lintogahn You can do that, but I don't recommend it. It puts both you and Derrin in unnecessary danger for very little experience; The vast majority, I dare say like 90% of your experience will come from exploration that accumulates as you travel through the dungeon. Just be thorough and both you and your (living) companions will get maximum gains.
Lintowgahn 22 oct. 2023 à 4h06 
Companions also get exp and learn like the player? So it is advisable to rush to derrin when you start the game before you get killing undead just to give him most exp early on?
derp12332112  [créateur] 2 juin 2023 à 18h54 
@sergant The best technical way to farm exp is to walk. You get a majority of your exp from absorbing exploration experience which is received from entering new "areas". I'm not sure how far or deep the specifics go, but walking vs running through everything will significantly increase your experience gains per level.

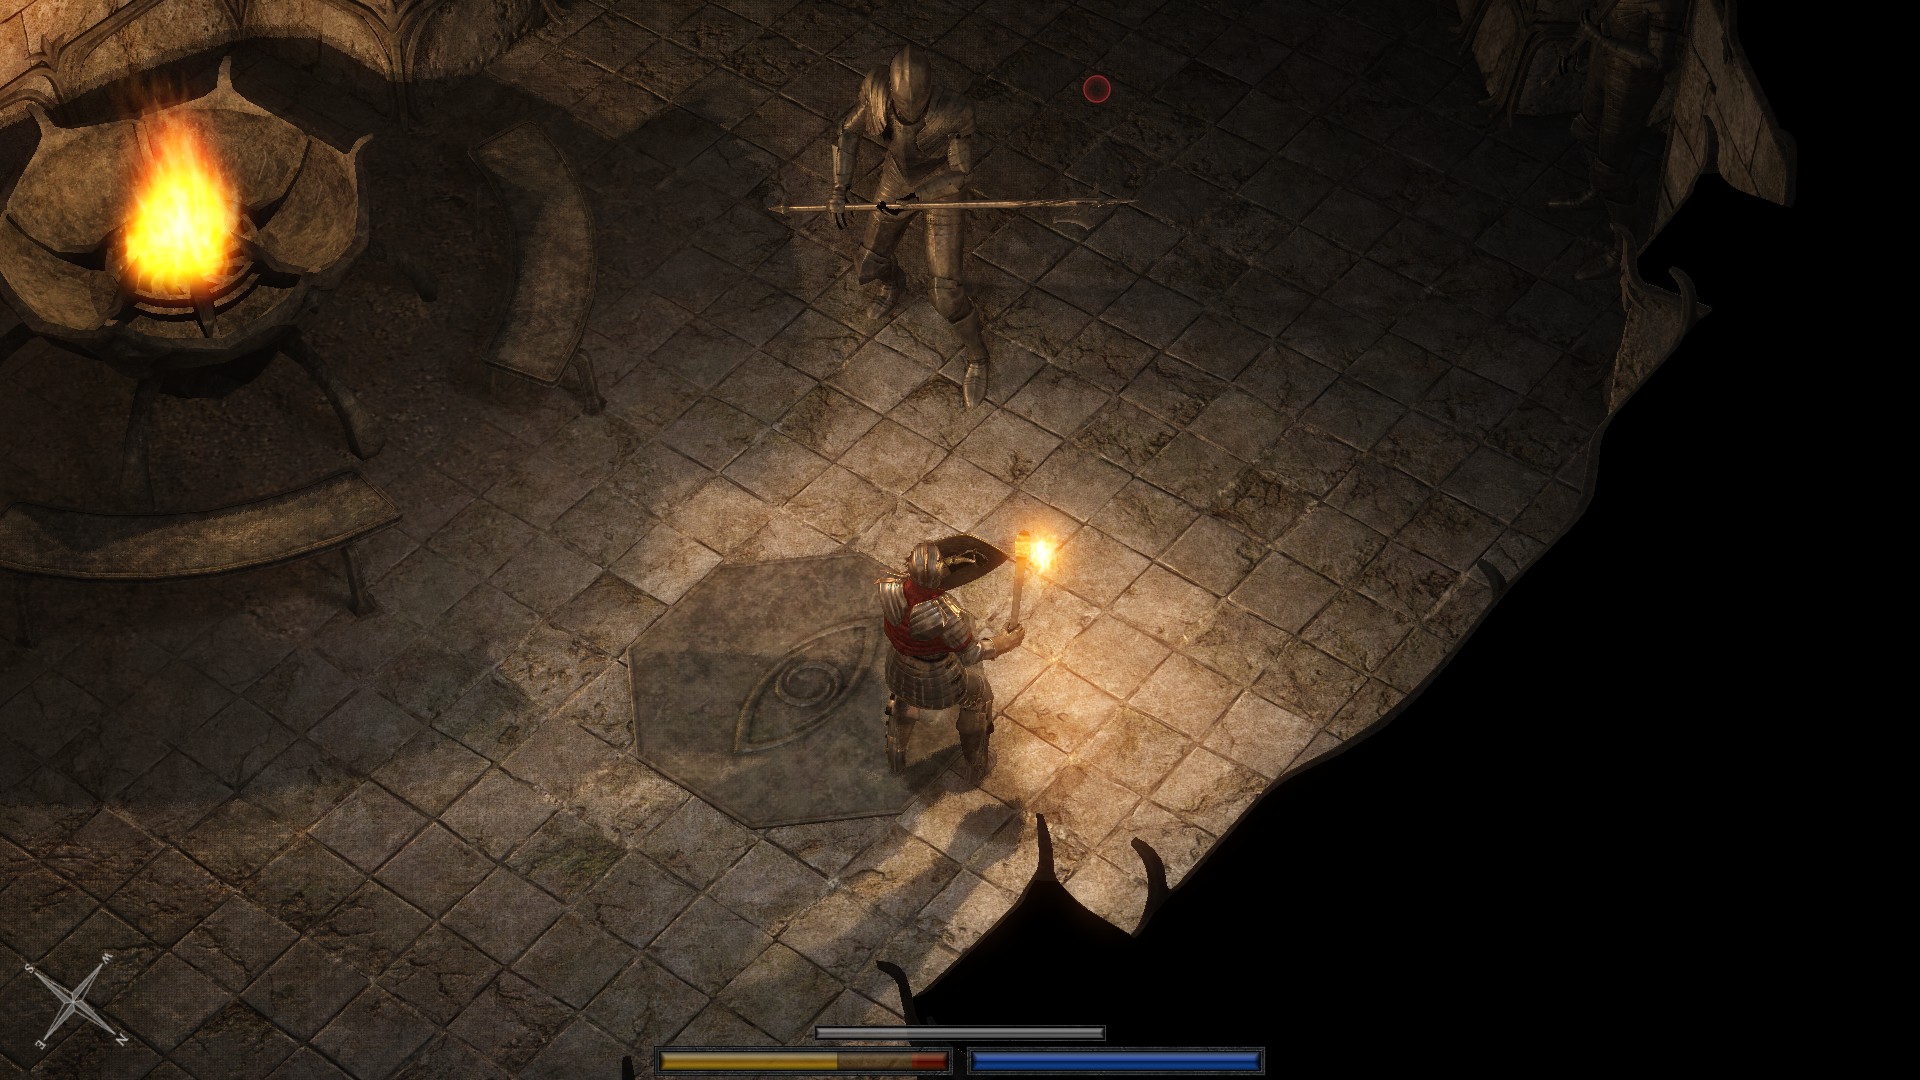
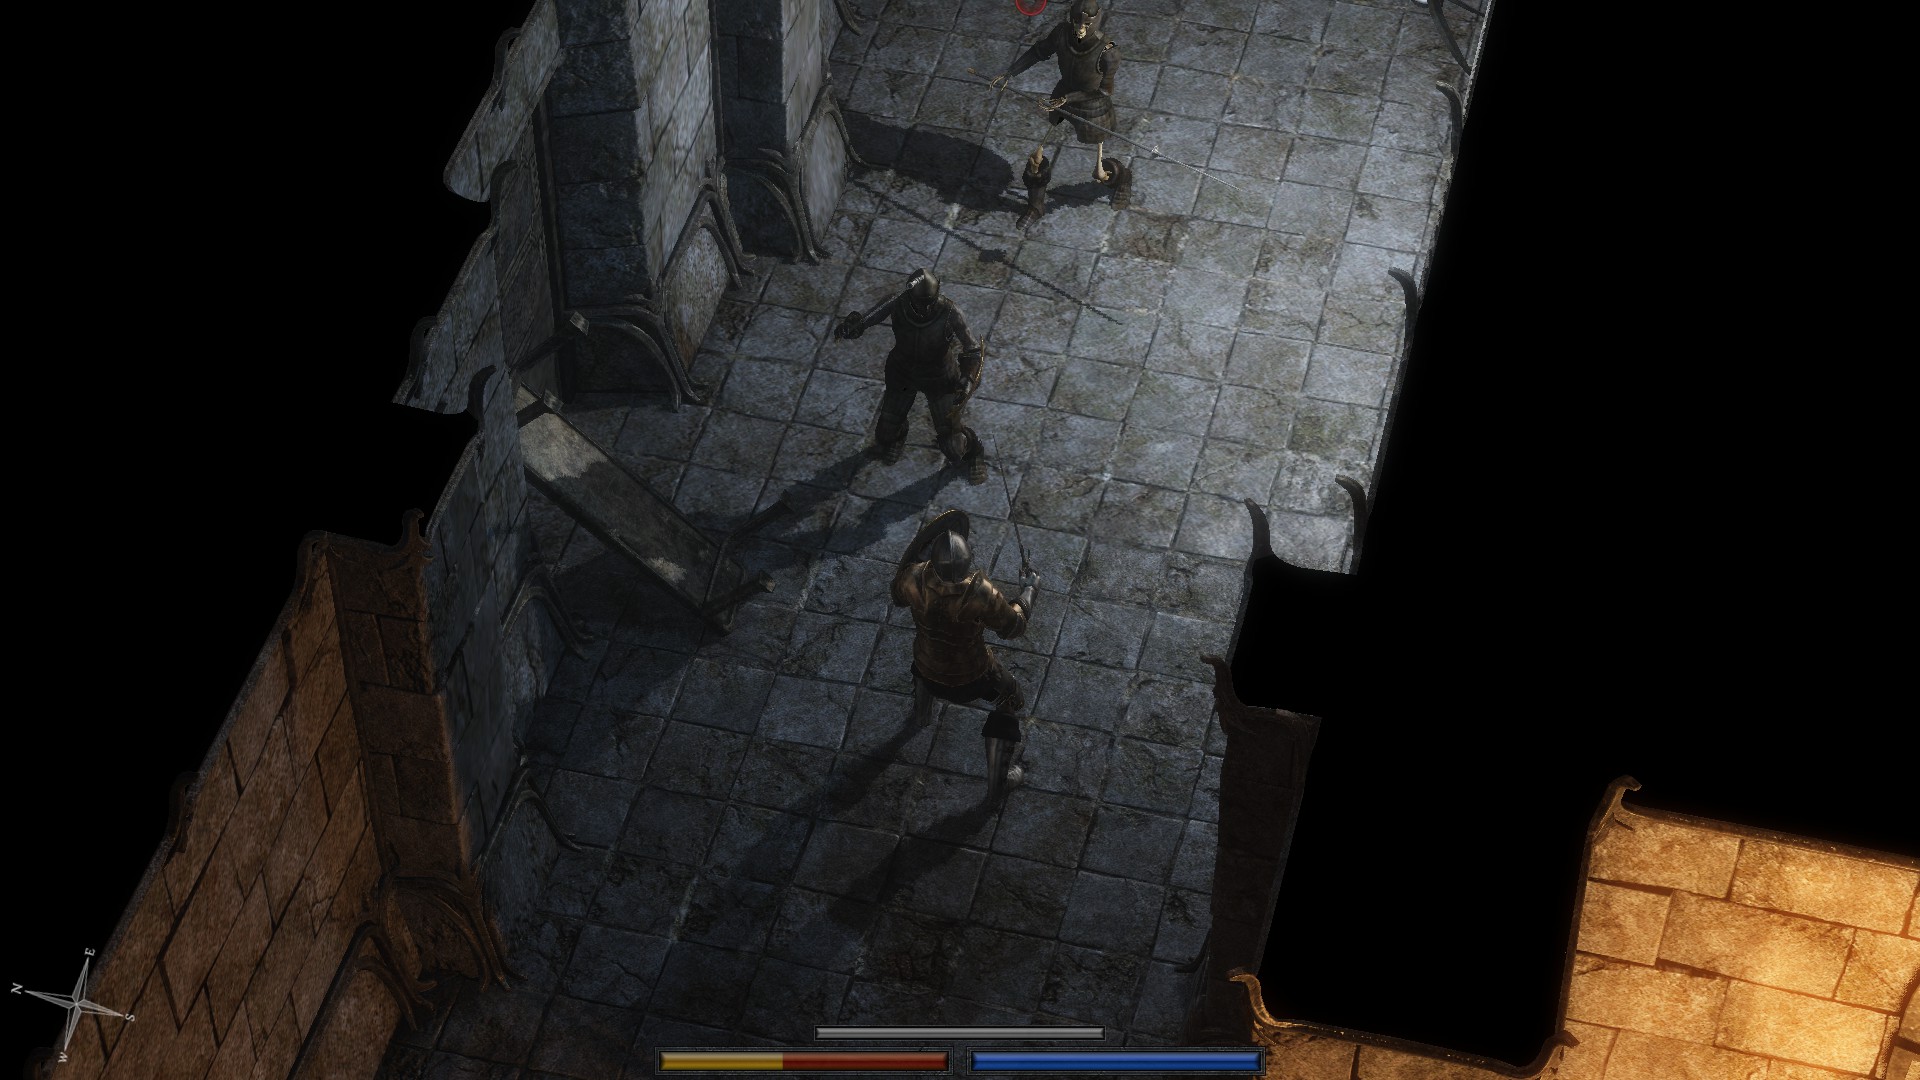
Markets currently has no additional connections. The next level will be on the other side of the underworld map (SE of Foundry, E of Crossroads)
sergantuss 23 mai 2023 à 14h32 
what is the best way to farm exp in this game?
i made it(randomly) to market area and i dont even have like 30% of *magic* spells.

is there any kind of *ending* in market area? or its just an area that dont have enter to any new areas for now?
O.T.T Pro 23 mars 2023 à 19h10 
Okay so just discovered, if Derrin NEVER met them, any undeads raised by you will always take a passive stance to him. if they did, Derrin's and possibly the undead's memories of fighting won't let them cooperate. May be a necro, but still an important distinction.
derp12332112  [créateur] 6 nov. 2021 à 9h43 
I'll update this guide soon lol. It's been a hot sec. New Pictures soon to come. Might also make a guide for the new Mod.
Smeebo 6 nov. 2021 à 3h38 
Theres one more companion undead that can be raised, in the Market sewers. The Scientist/assistant/alchemist that you find the satchel next to, remains passive with Derrin, and while not as Skilled, a friendly body IS still a body that helps in combat
pokeface119 6 aout 2021 à 13h57 
Pole Hammer is what I used to kill all the Blademasters and Fael on floor 7, You don't have to hit the Fael's body. You can just back up while swinging so long as you have ample room and you'll almost always hit their hands, arms, face.