Delver
125 ratings
The Complete Guide to Delver [Update 1.0+]
By TenLetters
An in-depth guide that has everything you need to know about Delver as of update 1.04
7
   
Award
Favorite
Favorited
Unfavorite
Welcome
This guide will describe how to play the game and go in-depth on what items and enemies do, what every level contains, how to get achievements and secrets, and what to do when escaping.

The most recent and major update for Delver was 1.0, which fully released the game on Feb 1st, 2018.

Notes:
  • Notes give important information about the section.
  • If you need to find something easily, press ctrl + f and put in a word you're looking for.
  • If information needs to be added or changed, then put it in the comments and we'll look over it.

Table of Contents

  1. Welcome
  2. Controls
  3. Player Stats and Leveling
  4. The Dungeon
  5. Enemies
  6. Melee Weapons
  7. Ranged Weapons
  8. Wands
  9. Armor/Shields
  10. Rings/Amulets
  11. Uniques
  12. Enchantments
  13. Gold and Valuables
  14. Junk
  15. Food
  16. Potions
  17. Scrolls
  18. Bombs
  19. Bag and Belt Expansion
  20. Breakables
  21. Hazards
  22. Achievements
  23. Secrets
Controls
Delver can be played with just a keyboard, keyboard and mouse, and controller. If you want to rebind any keys, press pause (esc) and go to Options>Input. Mouse bindings are in the Input menu while keyboard and controller bindings can be accessed through Keys and Gamepad next to Back.

Notes:
  • Gamepad controls are not binded, so the player must manually bind every button on a controller to use it.
  • Mouse Button 1 and 2 are left and right click, and Mouse Button 3 is middle/scroll click.
  • Holding Mouse 2 on dialogue like NPCs and notes can skip through them extremely fast.
  • The WASD keys are to move while the arrow keys are to look (if using keyboard only).

Controls

Use - E or Mouse Button 2
Attack - Space or Mouse Button 1
Drop - Q
Inventory - Tab or Mouse Button 3
Statistics - C
Item Next - Right Bracket ( ] ) or Scroll Down
Item Previous - Left Bracket ( [ ) or Scroll Up
Map - M
Pause - Esc
Forward - W
Backward - A
Strafe Left - S
Strafe Right - D
Turn Left - Left Arrow Key
Turn Right - Right Arrow Key
Look Up - Up Arrow Key
Look Down - Down Arrow Key
Player Stats and Leveling
Notes:
  • Every stat starts at 4.
  • Every time the player levels up:
    -Hp increases by 1 for every odd level achieved and at level 2.
    -Enemy hp and damage is increased.
    -Better loot and more gold can be found.
  • Stats show the player's total exp out of the exp required to reach the next level, so the exp counter doesn't reset when the player levels up.

Level Exp Requirements
Level
1
2
3
4
5
6
7
8
9
10
11
12
13
14
15
Exp (req)
default
8
32 (24)
72 (40)
128 (56)
200 (72)
288 (88)
392 (104)
512 (120)
648 (136)
800 (152)
968 (168)
1152 (184)
1352 (200)
1568 (216)


Health
Increases maximum health points.

Health Upgrade
Stat
4 (default)
5
6
7
8
9
10
11
12
13
14
15
16
17
18
19
20
Hp added
0
3
4
4
5
6
6
7
8
8
9
10
10
11
12
12
13


Attack
Increases attack power with melee and ranged weapons.

Attack Upgrade
Attack damage is increase by 1 for every upgrade.


Magic
Adds additional charges to magic wands

Magic Upgrade
Charge additions depend on the wand type, but the minimum amount added is 1 for every upgrade. Magic damage is increased by 1 for every upgrade.


Defense
Reduces amount of damage taken when hit.
Having more defense can prove useful near the end of a run when the player encounters harder enemies like goblins, eyes, skeletons, and the Lich.


Speed
Increases movement speed.
Increasing movement speed can counteract the speed disadvantages of shields and armor or just make the player more versatile and dodgy.


Agility
Increases attack speed and movement speed while charging an attack.
The longer an attack is charged, the more damage the attack will deal. This skill, when upgraded, is beneficial for using weapons with a long charge time like swords and the longbow.
The Dungeon
The Dungeon contains 4 areas with 2 levels for each, 3 intermission levels between each area, and the boss room, which adds up to a total of 12 explorable levels.

Camp
The Camp is where the player spawns before they can enter the Dungeon. There are several NPCs at the camp, 2 of them being shopkeepers, that the player can interact with. Near the camp is The Dungeon entrance itself. Once the player has entered it, they cannot return outside until they've retrieved and successfully brought back the Yithidian Orb.


Dungeon
Not to be confused with The Dungeon in its entirety.
The Dungeon area is the first main area the player enters. Most of the area is held up with wooden and stone structures that contain many storage containers, furnishing and decor, and several adventurers that still linger within. There are some areas that show the sky, but most of the Dungeon area is located underground.


The Well
The Well is the intersection between the Dungeon area and the Caves area. Two shopkeepers are located near a well, one selling general items and the other selling bag and belt expansion items. There's also a subsection of The Well called The Pit, which is straight ahead from where the player entered. The Pit contains loot that can be useful for a run and several spiders that spawn if the player has entered the loot room.


Caves
The Caves area is the second main area of The Dungeon. The cavernous terrain is uneven and contains pitfalls as well as things like minecarts, crates, and lifts. Many bugs like spiders and worms live in the Caves along with floating eyes and bats.


Lost City
The Lost City is the intersection between the Caves area and the Sewer area. It is a cold, frosty, and seemingly abandoned area that has two things that can be discovered: a room filled with bookshelves and paintings with a secret and a possible unique weapon, and a big inaccessible gate that presumably leads to the Lost City.


Sewer
The Sewer area is the third main area of The Dungeon. It contains a complex sewers system filled with pipes, drains, storage containers, and of course water. Stronger monsters like goblins roam the sewers which make traversing the sewage tunnels more difficult than in previous areas.


The Breach
The Breach is the intersection between the Sewers area and the Ruins area. A shopkeeper that sells scrolls is located there.


Ruins
The Ruins is the fourth and final main area of The Dungeon. The area is filled with lava and ancient structures as well as many traps and reanimated skeletons that the player must be extra wary of.


Yithidia
Yithidia is the final level of The Dungeon where the Yithidian Orb is located. It is heavily guarded by the Lich and many skeletons guarding it. Once the Yithidian Orb has been grabbed, the player must backtrack through every area and level until they've reached the first level, Dungeon 1, to exit where they entered. While going back, The Dungeon will shake constantly while striking purple lightning randomly and skeletons will spawn in every area to stop the player from escaping.
Enemies
Enemies, aka monsters, are the opposing force in the game that tries to prevent the player from getting the Yithidian Orb and escaping with it.

Notes:
  • As the player progresses, levels get more difficult with different and harder enemies and more dangerous terrain.
  • If an enemy dies regardless of whether or not the player killed them, they still give exp.
  • Enemy hp, damage, and exp yield scales up based on player level.
  • Surprise monsters have a chance to appear when breaking breakables.
  • Most ranged enemies can melee hit players if they're too close.
  • There's a small chance for sewer monsters like goblins and vampire bats to spawn in the Caves area.
  • The Ruins monsters start spawning in all areas once the Yithidian Orb is grabbed.

Small Spider
A smaller version of the spider that moves and attacks by lunging towards the player
Surprise monster
Gives 3 exp

Red Slime
A special slime that has a chance of reanimating or splitting into two
Surprise monster
Gives no exp

Thief
There are 2 variations of the thief that attack with a dagger
Dungeon monster
Both give 3 exp


Druid
A man with a green cloak that attacks the player with a staff
Dungeon monster
Gives 3 exp

Druidette
A woman with a purple cloak that lunges towards the player with a staff
Dungeon monster
Gives 3 exp

Slime
A green slime that attacks by biting
Dungeon monster
Gives 3 exp

Mage
A man with a blue cloak that fires green bolts
Dungeon monster
Gives 3 exp

Bat
A brown bat that flies around and lunges towards the player with a bite
Dungeon and Cave monster
Gives 3 exp

Spider
A big spider that moves very fast and attacks with its legs
Cave monster
Gives 3 exp

Worm
A big gray worm that lunges towards the player and has a chance of inflicting 10 poison
Cave and sewer monster
Gives 3 exp

Eye
A giant floating eye with tentacles that fires purple bolts
Cave and sewer monster
Gives 3 exp

Zombie
An undead human that attacks by biting and has a chance of inflicting 10 poison
Dungeon and cave monster
Gives 3 exp

Ghost
A ghost that spawns when discovering the Lost City secret (refer to the Secrets section for more information) and fades the closer it gets to the player
Special monster
Gives 5 exp

Vampire Bat
A purple bat that flies around and lunges towards the player with a bite
Cave and sewer monster
Gives 5 exp

Goblin
A goblin that attacks with a club
Sewer monster
Gives 5 exp

Goblin Warrior
A stronger variant of the goblin that has more hp and attacks with a dagger
Sewer monster
Gives 5 exp

Skeleton
A skeleton that attacks with a dagger
Ruins monster
Gives 7 exp

Skeleton Minion
A smaller and faster version of the skeleton
Ruins monster
Gives 7 exp

Skeleton Mage
A skeleton with a red robe that shoots either a purple missile bolt, a spread of 3 bolts that inflict 2 slow, or a red bolt that inflicts 6 burning
Ruins monster
Gives 7 exp

Animated Skull
A floating, blue burning skull that attacks by biting
Ruins monster
Gives 3 exp

The Lich

The Lich is the boss that is found at Yithidia, the last room after the Ruins. The Lich shoots either a spread of 6 purple bolts or a fast white bolt. In order to get the Yithidian Orb, the Lich must be killed to open a passage to it.
When escaping with the Orb, the Lich will reappear at every ladder leading to the previous area.
Gives 9 exp
Melee Weapons
Notes:
  • There are 5 conditions to a weapon: broken, worn, normal (no prefix), fine, and excellent.
  • Just because a weapon is broken doesn't mean it's unusable. However, the range is slightly decreased.
  • Melee weapons have durability that is degraded when used to hit things.
  • Two-handed weapons cannot wield a shield.
  • The engraved and steel weapons look identical.

Weapon damage listed is normal tier

Iron Dagger
2-3 damage
Short range and medium charge time

Iron Sword
4-7 damage
Long range and slow charge time

Iron Mace
2-4 damage
Medium range and slow charge time

Iron Spiked Mace
4-6 damage
Medium range and slow charge time

Steel Dagger
4-6 damage
Short range and medium charge time

Steel Shortsword
5-8 damage
Short range and fast charge time

Iron Hammer
8-10 damage
Two-handed
Long range and slow charge time

Steel Mace
3-6 damage
Medium range and slow charge time

Steel Spiked Mace
5-8 damage
Medium range and slow charge time

Steel Sword
6-10 damage
Long range and slow charge time

Steel Hammer
7-10 damage
Two-handed
Long range and slow charge time

Engraved Dagger
4-8 damage
Short range and medium charge time

Engraved Shortsword
5-10 damage
Short range and fast charge time

Engraved Sword
6-12 damage
Long range and slow charge time

Gilded Mace
6-10 damage
Medium range and slow charge time

Gilded Spiked Mace
8-12 damage
Medium range and slow charge time

Jeweled Dagger
5-10 damage
Short range and medium charge time

Jeweled Shortsword
6-12 damage
Short range and fast charge time

Jeweled Sword
7-14 damage
Long range and slow charge time

Gilded Hammer
10-14 damage
Two-handed
Long range and slow charge time
Ranged Weapons
Notes:
  • There are 5 conditions to a weapon: broken, worn, normal (no prefix), fine, and excellent.
  • Just because a weapon is broken doesn't mean it's unusable.
  • Ranged weapons have durability that is degraded when an arrow is shot.
  • The ranged stat is how far a shot arrow can go.
  • Two-handed weapons cannot wield a shield.

Weapon damage listed is normal tier

Shortbow
1-3 damage
4 range
Fast charge time

Composite Bow
4-8 damage
4 range
Medium charge time

Bow
4-8 damage
6 range
Medium charge time

Hunter's Bow
3-9 damage
Medium charge time

Longbow
7-14 damage
8 range
Slow charge time
Wands
Wands are magic weapons that shoot magic projectiles with various effects.

Notes:
  • There are 4 conditions to a wand that determines its damage and charges: worn, normal (no prefix), fine, and excellent.
  • Wands come in lesser, normal (no prefix), and greater types except for the Storm and Paralyze wands.
  • Wand durability is the amount of charges there are and can be increased by leveling up the magic skill.
  • Magic and elemental damage is not affected by the attack stat.

Wand damage and charges listed is normal tier

Missile Wand

Purple/pink wand that fires a quick bolt without needing to charge
Size and firing rate dependent on wand type
1-2 magic damage
20/30/60 charges

Ice Wand

Green wand that fires spread bolts
Lesser shoots 3 bolts, normal shoots 5, and greater shoots 10
3-5/4-8/9-16 ice
24/10/5 charges

Fire Wand

Red wand that fires an explosive projectile
Size, drop range, and explosion radius dependent on wand type
2-10/4-14/10-30 fire
10/6/4 charges

Storm Wand

Wand that fires a quick bolt of lightning
No lesser/normal/greater version
4-24 lightning
6 charges

Paralyze Wand

A wand with leaves wrapped around it that fires a slow and non-lethal bolt but stuns
No lesser/normal/greater version
1-2 paralyze, which stuns the target
3 charges
Armor/Shields
Notes:
  • There are 5 conditions to armor and shields: broken, worn, normal (no prefix), fine, and excellent.
  • Just because an armor piece is broken doesn't mean it's unusable.
  • Armor and shields have durability that is degraded when hit.

Armor and shield defense listed is normal tier

Skullcap
1 AC


Leather Armor
3 AC


Leather Pants
1 AC


Buckler
2 AC
-1 speed


Iron Cap
2 AC


Quilted Leather Armor
4 AC


Quilted Leather Pants
2 AC


Round Shield
3 AC
-2 speed


Iron Pot
3 AC
-1 speed

Ring Mail
6 AC
-1 speed

Ring Mail Greaves
3 AC
-1 speed

Chainmail Coif
4 AC
-1 speed

Chainmail
7 AC
-2 speed

Chainmail Greaves
4 AC
-1 speed

Heater Shield
5 AC
-3 speed


Steel Helmet
5 AC
-2 speed

Scalemail
8 AC
-3 speed

Scalemail Greaves
5 AC
-2 speed

Steel Armet
6 AC
-2 speed

Platemail
9 AC
-3 speed

Platemail Greaves
6 AC
-2 speed

Tower Shield
8 AC
-4 speed and -3 agility


Gilded Helmet
6 AC
-3 speed

Gilded Platemail
11 AC
-4 speed

Gilded Platemail Greaves
7 AC
-3 speed
Rings/Amulets
Notes:
  • There are 5 conditions to rings and amulets: broken, worn, normal (no prefix), fine, and excellent.
  • Just because an accessory is broken doesn't mean it's unusable.
  • Rings and amulets have durability that is degraded when hit.

Ring and amulet stats listed is normal tier


Ring/Amulet of Protection
3 AC

Ring of Health
3 health

Amulet of Health
1 health

Ring/Amulet of Speed
2 speed


Ring/Amulet of Greater Protection
3 AC

Ring/Amulet of the Wolf
4 speed

Ring/Amulet of Greater Health
6 health
Uniques
Uniques are special weapons, armor, and accessories that have set stats and can rarely be obtained once every life.

Notes:
  • Just because a weapon, armor piece, or accessory is broken doesn't mean it's unusable.
  • Uniques do not spawn enchanted because of their unique stats. However, using a Scroll of Enchant Weapon/Armor can apply the attack/defense stat.
  • The game counts bag and belt expansion items as uniques, which means that they rarely appear once every run as well.

Melee

Lucky Dagger
1-6 damage
Short range and medium charge time

Dusk
5-14 damage
Long range and fast charge time

Dawn
7-12 damage
Long range and fast charge time

Manon's Mangler
13-22 damage
2 health and 2.2 knockback
Long range and slow charge time

The Forgotten
5-13 ice
Short range and fast charge time

@'s sword of the RNG
1-25 damage
Short range and fast charge time

Ranged

Ashen
7-10 fire
4 range
1 speed, 4 defense, and 2.2 knockback
Fast charge time

Silverhorn
5-12 damage
5 range
2 speed and 4 health
Very fast charge time

Liathon
3-6 damage
6 range
1 speed, 2 defense, and 4.4 knockback
Medium charge time

Bow of Thorns
3-6 vampyric, which heals the player by the amount of damage dealt
6 range
4 health, 4 defense, and 2.75 attack speed
Fast charge time

Wands

Demonhorn Staff
Wand with bone horns that fires a quick bolt without needing to charge
2-4 magic damage
1 speed, 4 health, and 2 defense
20 charges with medium fire rate

Numidor
Wand with ruby jewels that fires a quick but slightly inaccurate bolt without needing to charge
2-4 magic damage
20 charges with medium fire rate

Skeleton's Focus
Wand with a skull that fires a spread of 5 bolts without needing to charge
1-3 magic damage
30 charges with an extremely fast fire rate

Heretic's Legacy
Crossbow that shoots a spread of 5 poison bolts
3-6 poison
10 charges with slow charge time

Armor/Shield

Rathorian Helm
4 AC
2 health and 2 agility

Rathorian Breastplate
6 AC
-1 speed and 2 magic

Rathorian Greaves
4 AC
1 speed and 2 agility

Rathorian Shield
5 AC
2 health, 2 agility, and 2 attack

Hero's Hood
4 AC
2 health and 2 agility

Hero's Tunic
4 AC
1 speed, 2 attack, and 1.1 magic resist

Hero's Boots
4 AC
2 agility, 2 magic, and 1.1 attack speed

Rings/Amulets

Survivor's Ring
4 AC
2 health, 2 agility, and 1.1 attack speed

Magebane
4 AC
4 agility, -6 magic, and 4 attack

Doomed Charm
-2 speed, 6 health, -4 agility, -6 defense, and 4 magic


Shadow's Rest
4 AC
2 speed, 4 agility, and 2 magic
Enchantments
Enchantments are random modifications indicated by prefixes and suffixes on weapons, armor, and accessories that buff or debuff the player's stats when the enchanted item is equipped.

Notes:
  • An item's name is light blue if it has 1 enchantment and light green if it has 2 enchantments.
  • An enchanted item can glow with different colors:
    -Green for poison
    -Red for fire
    -Purple for magic
    -White for lightning
    -Blue for any other enchantment
  • Unidentified items don't glow but can have either light blue or light green text.

Prefixes

King's: 9 attack
Knight's: 6 attack
Brawler's: 3 attack
Fighter's: 1 attack
Coward's: -1 attack
Drunk's: -3 attack
Demon's: -6 attack

Balanced: 5.25 attack speed
Quick: 1.05 attack speed

Blessed: 6 defense
Protected: 3 defense
Glowing: 1 defense
Cursed: -3 defense
Unholy: -6 defense

Sorcerer's: 6 magic
Wizard's: 3 magic
Mage's: 1 magic
Trite: -1 magic
Insipid: -3 magic
Vapid: -6 magic

Fleet: 4 speed
Nimble: 2 speed
Light: 1 speed
Heavy: -1 speed
Unwieldly: -4 speed


Suffixes

of Precision: 4 attack
of Biting: 2 attack (damage added directly onto weapon stat)
of Skill: 1 attack

of Speed: 6.3 attack speed
of Haste: 3.15 attack speed
of Heft: -3.15 attack speed

of Fire: 3 fire
of Burning: 5 fire

of Ice: 3 ice
of Blizzard: 5 ice

of Force: 5.25 knockback

of Storm: 3 lightning
of the Tempest: 5 lightning

of Magic: 6 magic
of the Mind: 3 magic
of Intellect: 1 magic

of The Arcane: 3 magic damage

of Paralyze: 1 paralyze

of the Worm: 1 poison

of the Eagle: 4 speed
of the Snake: 2 speed
of the Rabbit: 1 speed
of the Turtle: -5 speed
Gold and Valuables
Gold

Gold is the main currency in the game. It can be found throughout the dungeon, from enemies, and from breakables.

Notes:
  • The only thing the player doesn't lose when they die is gold, which can be used for the shopkeepers at camp and the bag and belt expansion shopkeeper at The Well to improve future runs.
  • Gold can appear as a coin, a piece of gold, a pile of coins, or a pile of gold.

Valuables
These items give gold when picked up, so if you see them, they're basically gold.
They are a new addition to the game from the 1.0 update.

Gold Candlestick
5 gold


Emerald
25 gold


Ruby
75 gold


Diamond
250 gold
Junk
Junk are items that have no special stats and mainly serve as decor.

Notes"
  • Most junk can be thrown to damage breakables and enemies.
  • Junk has 3 conditions: normal (no prefix), worn, and broken.
  • When junk is damaged either by hitting it or throwing it hard enough, its condition goes down until it breaks and dissapears after being already broken.
  • 2 out of 3 candles and a lantern emit light.
    -The lantern's light is brighter than the candles.
    -Candles and lanterns can be held in the shield slot as a portable light source while being able to hold a weapon.
  • Notes contain text that talks about activities, discoveries, and occurrences around the dungeon


List of junk: cup, bottle, tankard, bowl, plate, book (3 variants), candle (3 variants), lantern, skull, bones, bone, and notes
Food
Food gives the restore health effect, which restores health over time.

Notes:
  • Like every effect, restore health does not stack.
  • The bottle and ale look the same, but the bottle isn't consumable.

Apple
Somehow, not moldy yet.
6 restore health

Bread
Stale but filling.
9 restore health

Cheese
Sharp and pungent.
13 restore health

Meat
Of unknown origin but looks edible.
15 restore health

Steak
Looks tasty! Preserved with salt.
18 restore health

Ale
Might have gone bad. Still smells of hops.
36 restore health, 27 disorientation (screen sway)
Potions
Potions are consumables that give a unique effect. When you start a life, all potions are unknown until the player either drinks it to find out the effect or identifies them using a Scroll of Identity.


From left to right: Bright, Red, Blue, Green, Purple, Dark, Gold

Notes:
  • Potions are randomized; no potion has the same stat every life.
  • Potions have a small chance to be identified when consumed.
  • Potions can be thrown by scrolling onto the specific potion in your hotbar and holding the drop (q) key.

Cola
Gives 18 restore health to the player. Heals but doesn't inflict effect when exploded.

Healing
Heals the player by 6-7 health points. Heals when exploded.

Poison
Inflicts 10 poison. Deals small damage and inflicts 10 poison when exploded.

Paralyzation
Inflicts 10 slow. Deals small damage and inflicts 2 slow when exploded.

Resist Magic
Gives 10 magic shield to the player, which reduces magic damage and renders poison useless. Damages but doesn't inflict effect when exploded.

Iron Skin
Gives 10 iron skin to the player, which reduces physical damage. Damages but doesn't inflict effect when exploded.

Restoration
Heals the player completely and removes all debuffs and buffs except restore health. Heals but doesn't remove debuffs and buffs when exploded.
Scrolls
Scrolls cast a specific effect when used.
All scrolls look the same.


Scroll of Teleport
Teleports player to a random location.

Scroll of Flame/Burning
Deals damage and has a small/large chance of burning enemies around the player.

Scroll of Blizzard/Freezing
Deals damage and slows enemies around player. *Effect infliction chance is not noticeable.

Scroll of Health/Greater Health
Heals the player by 6/12 health points.

Scroll of Resist Magic
Gives 15 resist magic, which negates all magic damage dealt to player.

Scroll of Haste
Gives 15 haste, which gives a speed boost to the player.

Scroll of Enchant Weapon
Enchants a held weapon with attack. Enchant amount for each scroll varies with weapon.

Scroll of Enchant Armor
Enchants a random piece of armor (must be equipped to armor slots) with defense. Enchant amount for each scroll varies with armor.

Scroll of Identify
Identifies every item that has an unknown stat in the player's inventory (i.e. potions, weapon and armor stats, anything marked with ???).

Scroll of Discern Reality
Reveals the map of the current level.

Scroll of Invisibility
Gives 15 invisibility, which reduces the aggro radius of enemies.

Scroll of Levitate
Gives 5 levitate, which makes the player fly in the direction they're walking towards.
Bombs
Bombs are explosives that can be thrown to destroy breakables and damage enemies in an area.
They are a new addition to the game from the 1.0 update.

Notes:
  • Bombs can only be obtained from breakables.
  • There's a chance that a bomb from a breakable can be lit, but it can be picked up to prevent it from exploding.
  • The fuse time for bombs is 2 seconds, which starts once you press attack (left click, space).
  • *Holding a bomb when it explodes results in a bug where the explosion will repeat extremely fast resulting in instant death or lag that can result in a potential crash (i.e. spawning too many fire and arrow entities.
  • Bombs have a chance to become a dud when fused. Fusing a dud takes around half a second to explode.
  • Hitting a bomb will instantly explode it.

Bomb
The bomb deals 9 AOE damage maximum.


Fire Bomb
The fire bomb deals no AOE damage. However, its explosion produces an area of fire which inflicts burning to the player and enemies, and it can destroy items that are in contact with the fire.


Arrow Bomb
Rather than dealing AOE damage, the arrow bomb shoots out 8 arrows that can be picked up if not broken.
Bag and Belt Expansion
The bag expansion item increases the inventory slot by 1 and the belt expansion item increases the hotbar slot, which also counts as an inventory slot, by 1.
They are a new addition to the game from the 1.0 update.

Notes:
  • The maximum amount of bag and belt slots are 36 and 10, respectively.
  • It's extremely rare but possible to find a bag and belt expansion item, but they are not soulbound, or permanent. The shopkeeper at The Well sells soulbound bag and belt expansion items.

Shopkeeper Prices
Item
1st Upgrade
2nd
3rd
4th
5th
6th
Bag
30 gold
52
118
228
382
580
Belt
60 gold
120
300
600
1020
Max
Breakables
Breakables are world props or entities that can be broken by the player, enemies, or any form of damage towards it.

Barricades
Barricades block pathways and can be broken to clear them. They have a small chance to spawn items and a surprise monster.


Crates, Barrels, Chairs, Benches
These breakables act as decor and appear in all areas except in the Ruins. They have a chance to spawn a surprise monster and drop random items and bombs.


Pots
Pots appear in all areas except in the Sewers and Ruins. They have a chance to spawn a surprise monster and drop random items and bombs.


Book Piles
Book piles only appear in the Dungeons area. When broken, they can drop gold and produce ripped paper particles.


Spider Eggs
Spider eggs only appear in the Caves area and can spawn as small or tall and grounded or hanging. Tall spider eggs have a chance surprise monsters as well as a zombie and can drop random items and bombs. When a grounded spider egg is broken, a spider web is created on the ground that inflicts 1 slow when walked on.
Hazards
There are many hazards in the dungeons that can damage or kill the player as much as any enemy would.

Notes:
  • Spikes and spike traps in the ruins have a gold appearance rather than white.

Traps

Magic Missile Trap
Magic missile traps deal 3 damage and fire red bolts when a player or enemy is near its line of fire. They're fairly hidden until they fire a missile, which can be avoided easily once discovered.


Spike Trap
Spike traps deal 2 damage and are inactive until an enemy or the player goes near one. When close or on one, spikes start popping up and down repeatedly until anyone in proximity leaves it. Some spikes automatically pop up and down in specific generated rooms, so the player must know when to cross them. It's possible for the player to safely go across a spike trap with default speed once the spikes have retracted as long as there's nothing blocking the way like a door or an enemy.

Teleport Trap
When activated, the victm is teleported to a randomly designated area on the map, which can prove to be either beneficial or hazardous to the player.


Damage Trap
Deals 4-5 AOE damage upon activation. There's a chance for the explosion to inflict 6 burning.


Poison Trap
1 damage is dealt and inflicts 10 poison.


World Hazards

Spikes
Unlike the spike trap, regular spikes are static. When in contact, they deal 2 damage and bounce or knock back whoever touches them, so it's easy to not get caught in them.


Water
Water generates in the Dungeons and Sewers. Anyone that wades through the water is slowed by a small amount. If an enemy or the player is burning, they can extinguish themselves by going into water. Items and small monsters are hidden when inside water, making it considerably difficult to locate items and fight monsters.


Lava
Lava can generate on any floor. When in contact, damage is slowly dealt and can inflict 6 burning, so one can afford to swim through lava. In the Wilderness (the very first level of a save), the player must walk through lava in order to reach the end of the level, which shows that lava doesn't result in instant death.


Pitfalls
Pitfalls can generate on any floor except the Dungeons and Sewers. If a land enemy or player falls off into a pitfall, they will instantly die. However, such a death can be avoided if the player is careful enough since not many enemies can knock the player back very far.


Purple Pots
Purple pots explode when hit and deal 7 damage maximum. They can easily be discerned between normal pots due to their difference in color and pattern on the pot.


Crushers
Crushers appear in the Ruins. They deal fairly fast intervals of 4 damage while getting crushed by one. Depending on the level generation, some crushers are slow while others can go fast, but they're fairly easy to avoid getting crushed.


Falling Tiles
Falling tiles appear in the Ruins. When stepped on, they shake and make a cracking noise which leads to the tile falling into lava. They can be avoided if the player gets off once they hear the noise or run across tiles fast enough.


Purple Lightning/Fire
Purple lightning strikes will appear when the Yithidian Orb is obtained at Yithidia, the end/boss room. Purple lightning strikes will occasionally strike the floor the player's currently on and has a chance to spawn purple fire that inflicts 6 burning. It's rare for the lightning to hit the player, but if it does, it deals 1 damage.
Achievements
There are 26 achievements that can be unlocked in Delver.

Welcome Delver
Died, for the first time.
It's as simple as it says: die.

There and Back Again
Escaped with the Orb.
Retrieve the Yithidian Orb and return to the start alive with it.

Dungeoneering
Make it through the Dungeons
Pass the Dungeons area by reaching the end of Dungeon 2 and entering The Well.

Spelunking
Make it through the Caves
Pass the Caves area by reaching the end of Caves 2 and entering the Lost City.

Washed Away
Make it through the Sewers
Pass the Sewers area by reaching the end of Sewer 2 and entering The Breach.

Archeology
Make it through the Ruins
Pass the Ruins area by reaching the end of Ruins 2 and entering Yithidia.

Run!
Grab the orb.
Once the boss, or the Lich, has been killed, a wall will uncover revealing the Yithidian Orb. Just grab the orb from the pedestal.

Mages Guild
Bought something from the wizard.
Buy one of the items that the wizard at camp sells.

Joff's Supplies
Bought something from Joff.
Buy one of the items that Joff at camp sells. Note that Joff has an identical brother named Jeff located at The Well. Buying from Jeff does not get the achievement.

Storyteller
Listened to the wise.
Talking to the scholar and then returning to camp from dying or escaping will present more dialogue from him. Talk to him once for every life 5 times.

Belt it On
Buy a belt slot.
Buy a soulbound belt expansion item from the hooded shopkeeper at The Well.

Bring it All
Buy a backpack slot.
Buy a soulbound bag expansion item from the hooded shopkeeper at The Well.

Lift With Your Back
Max out on backpack slots.
Have the maximum bag slots (36).

Suspenders Required
Max out on belt slots.
Have the maximum belt slots (10).

Treasure Hunter
Find 300 gold in one run.
Tip: The higher level you are, the more gold you can find. Don't forget to pick up valuables.

Reaper
Kill 150 monsters in one run.
Tip: Search every level entirely for enemies. Break every breakable for a chance to get a red slime or small spider to kill.

Gourmand
Chow down on 40 things in one run.
Tip: Eat as much food as you can find.

Alchemist
Use 15 potions in one run.
Tip: Drink as many potions as you can find. Be cautious when drinking poison and paralyzation.

Well Read
Use 10 scrolls in one run.
Tip: Use as many scrolls as you can find.

Thick Skinned
Take 400 damage in one run.
Tip: Falling into a pit deals 1000 damage.

Magician
Zap wands 300 times in one run.
Tip: Putting points into your magic skill when leveling up increases the amount a wand can fire.

Clumsy
Trip 10 traps in one run.
Tips: Spike and magic missile traps don't count towards the achievement, so only pressure-activated traps count. One trap can be repeatedly used for the achievement. Dropping a junk tier item (bones, books, etc.) on a trap will activate it. Being skillful with this can activate a trap from a safe position without causing harm.

Unwell
Become poisoned 10 times in a run.
Tip: Zombies, worms, poison traps, and poison potions inflict poison.

WTF
Identify 5 items in a run.
Tip: Identify 5 items with unknown stats using a Scroll of Identify or successfully identify 5 potions by drinking them.

Wall Hunter
Find 5 secret areas in one run.
Tip: Look to the Secrets section of the guide for secret locations.

Skills in a Jar
Buy a magical elixir from Joff.
Tip: Buy the strange elixir from Joff at camp.
Secrets
Secrets are areas that the player can discover in a run.
They are a new addition to the game from the 1.0 update.

Notes:
  • When a secret is discovered, the player is notified with the message, "A secret has been revealed!"
  • Secrets are required to get the achievement Wall Hunter (refer to the Achievements section for more info).
  • Some secrets don't trigger a "secret discovered" message, which means that it doesn't count towards the Wall Hunter achievement.
  • In the Lost City, there's a small chance for The Forgotten (refer to the Uniques section for more info) to spawn in the secret room.

Wilderness (very first level of a save)

To find the gravestone, turn right after you break the first wooden barricade. Next to the gravestone is a skull and 15 gold.


Turn right to find a small tunnel after you cross the lava and get into the water. Inside the tunnel is 10 gold and some bones.


Dungeons

Behind several barrels is a door that leads to a bunch of gold and some loot.


There's a door located in front of a magic missile trap's line of sight. Behind it is a random item.


A middle area can be accessed by finding the button to open a hidden and locked door that leads to a teleporter to the middle area, which contains lots of gold and some loot.


Behind the fireplace is a door that leads to a small room with random items.


This secret does not trigger a "secret discovered" message.
A hidden button can open a locked door that leads to a room with gear.


This secret does not trigger a "secret discovered" message.
Behind a cloth cover in one of the jail cells is a small area with a random item. If the button on the jail is pressed, the cell door will close and open after a few seconds.


This secret does not trigger a "secret discovered" message.
To the left of a floating skull is a door that leads to some scrolls.


The Well

Go to The Pit, which is located beyond the bridge straight from entering The Well. When you go down and see a locked door, go to the left and touch the pillar to reveal a key for the locked door. Behind the locked door is a bunch of random loot.


The only way to reach this area is to either use a scroll of levitate or by boosting yourself using a greater fire wand to the door, but both methods are risky and can lead to getting stuck and/or death. Beyond the door is a diamond, an emerald, and a hole in the cave wall.


Lost City

When you enter the Lost City, take the leftmost path and find a stuck door. Break the door and go to the desk with a large painting above it. After you discover the secret, ghosts will spawn in the level.


The Breach

The only way to reach this area is to use a scroll of levitate. When you head down from the shop, you'll see a small pool of lava. Above it is a bloody room filled with letters scattered on the ground, 5 gold indicated as an asterisk symbol instead of gold, and @'s sword of the RNG (refer to the Uniques section for more info). The secret message is different for this secret and says "YASD has been revealed!".


When you reach the ladder that leads down to the Ruins, find an area of lava that looks swimmable. If you go fast enough, you'll lose around 15 health, but discover the secret and find 30 gold.
29 Comments
Karl Dec 26, 2023 @ 10:40am 
@Samoth Thanks a lot mate! Your method is the best for getting to that secret.
Max von der Mühle Dec 20, 2022 @ 4:40pm 
I Think you should add a bit of information to the "Potions" section. Potions can be identified by drinking them, but it is also possible to partly identify them by making them explode, as every effect gives off a different color when it explodes:

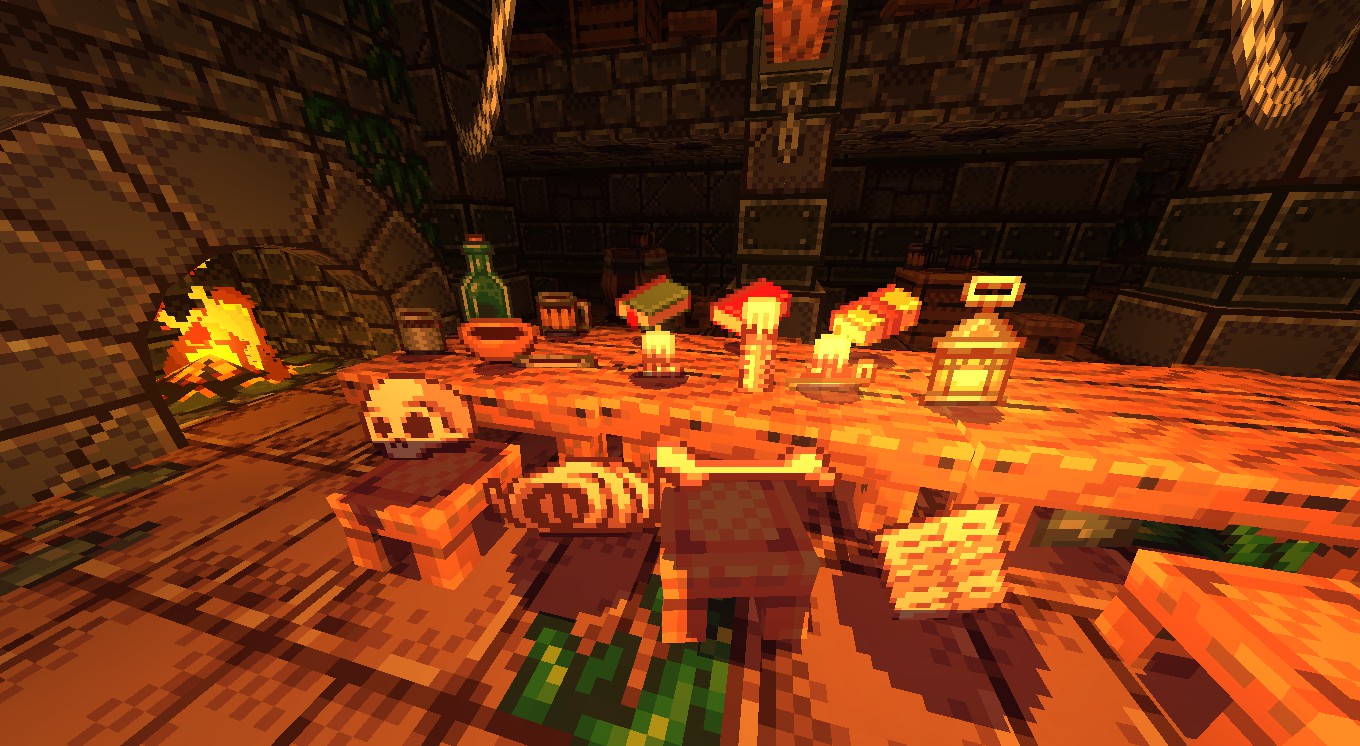
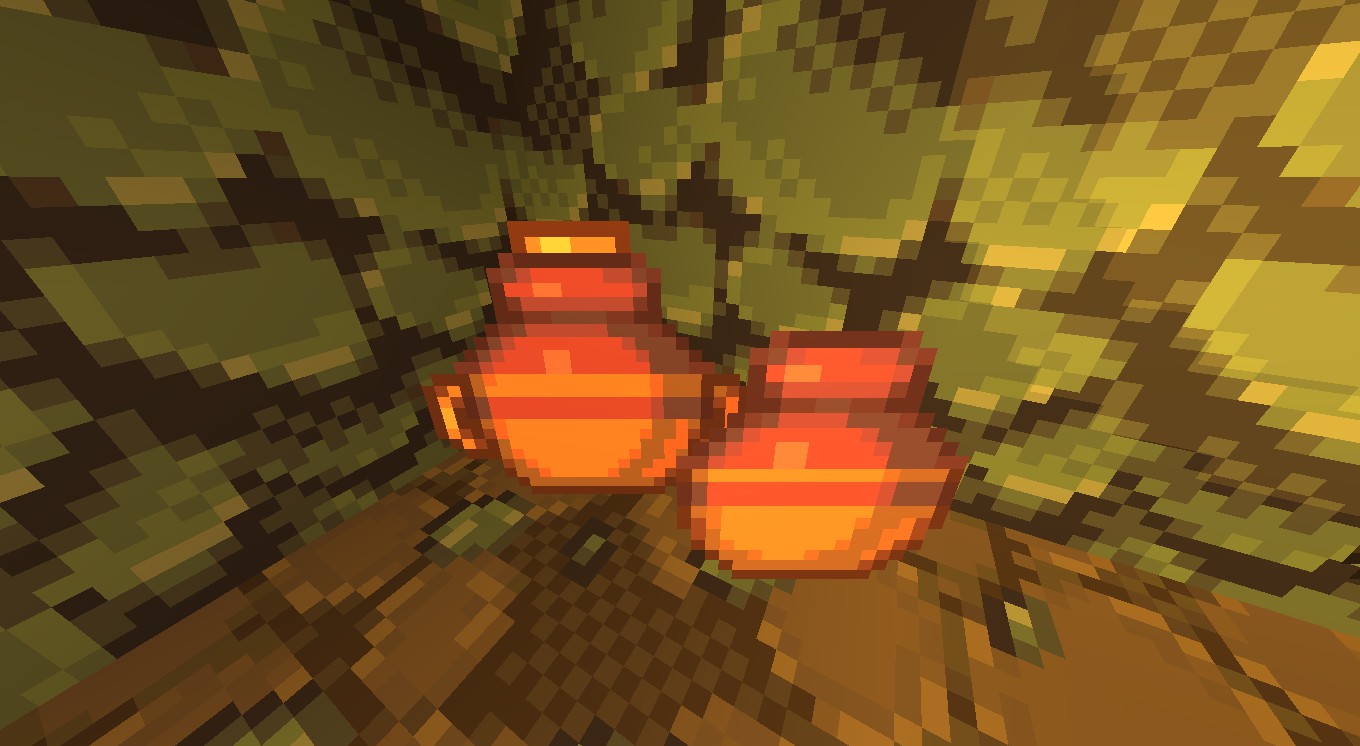
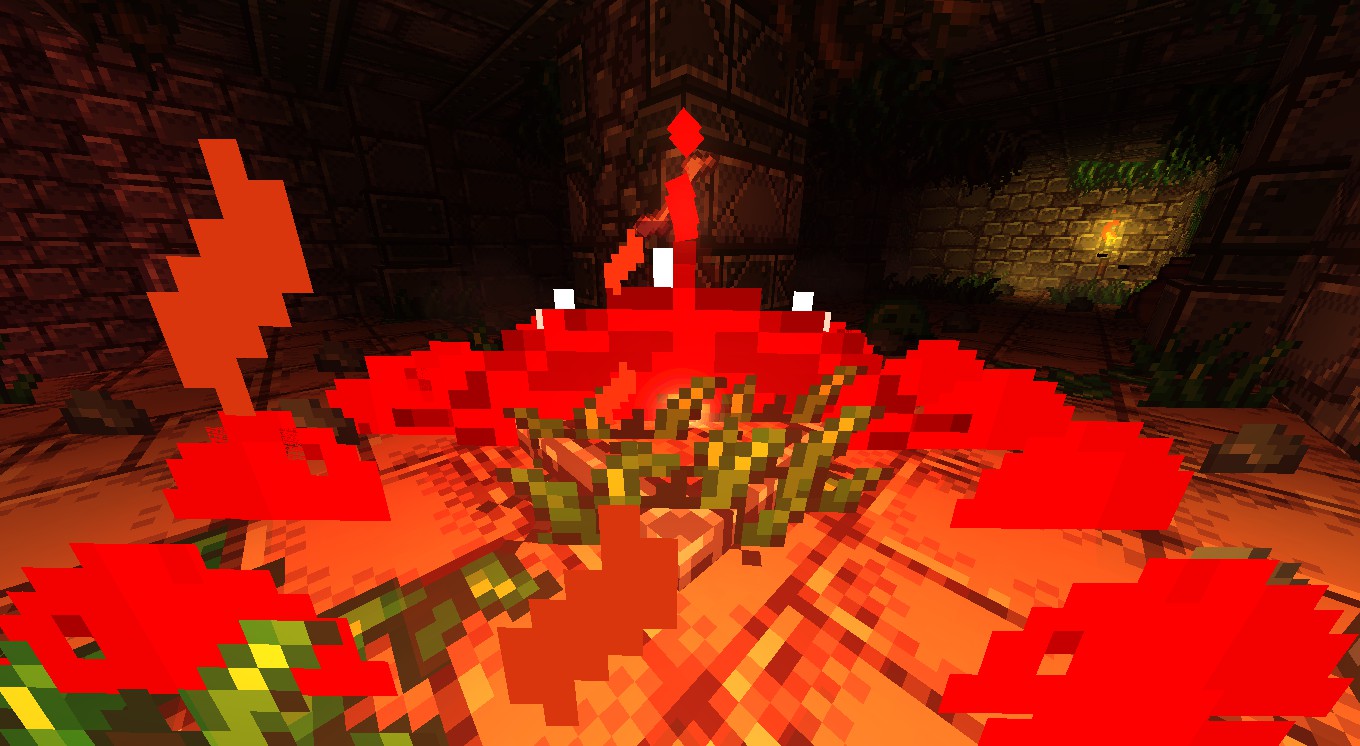
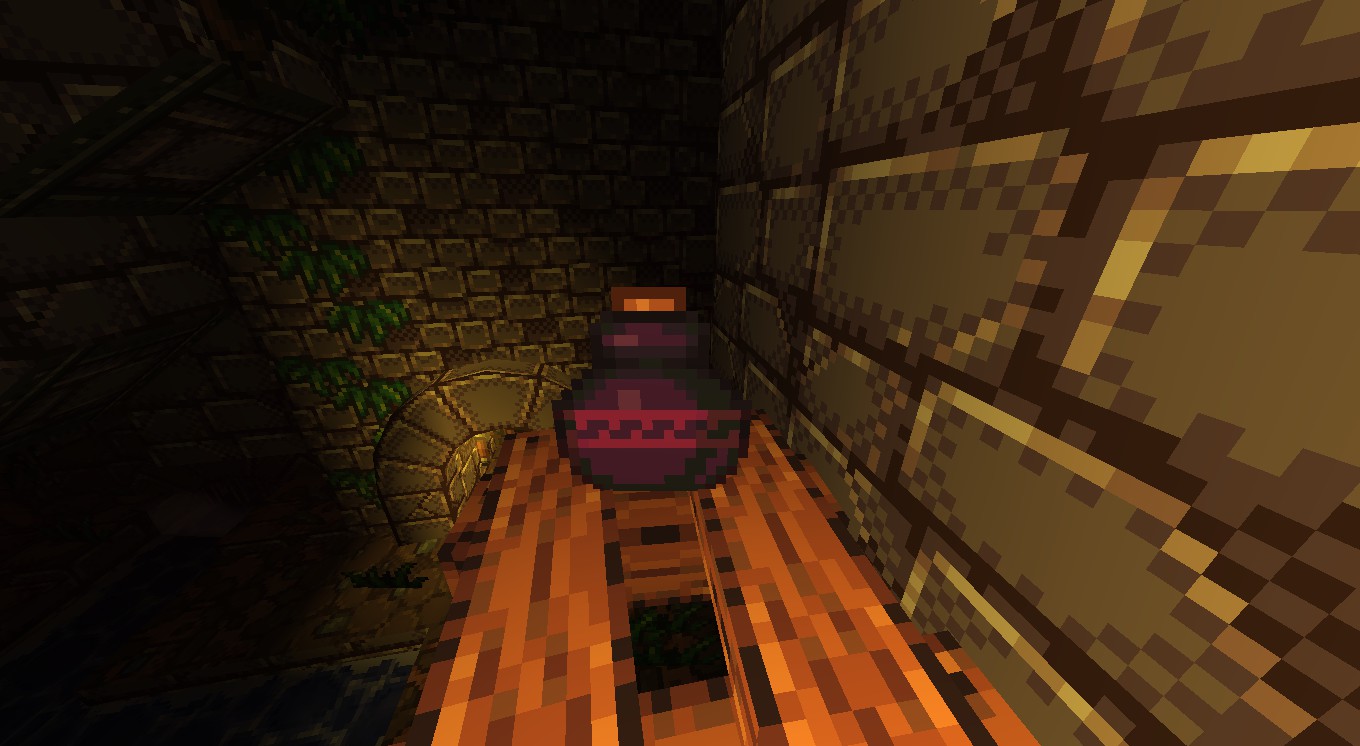
1. The poison effect is green
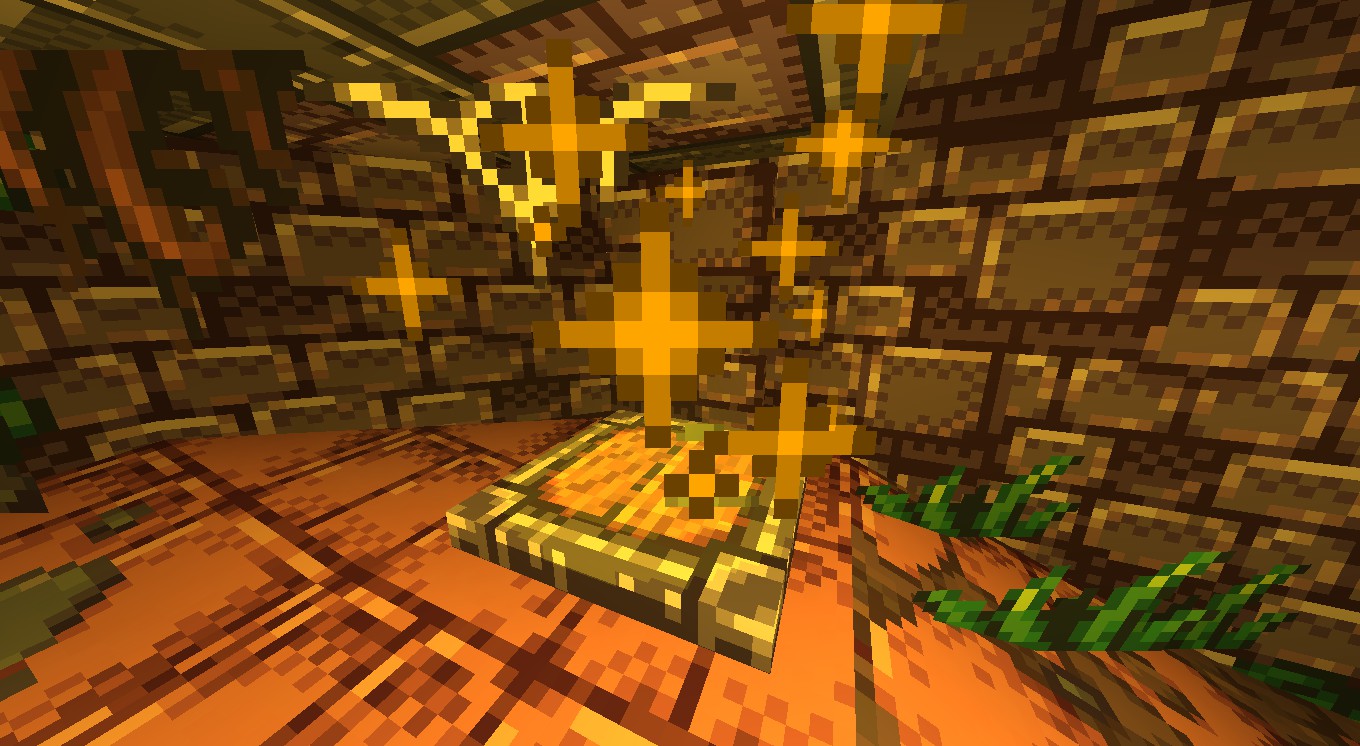
2. The paralyze effect is yellow
3. Iron skin is white
4. Magic shield is purple
5. Restoration, healing and cola are all light blue.

Since all health restore potions have the same color, you can only find out which one is which by drinking them. All the other potions can be identified by exploding them.
Empy Sep 16, 2022 @ 12:07am 
I would like to make a potential correction to this guide. Agility does NOT let you charge faster with a bow, It only lets you be more mobile while charging an attack, as the description (sort of) says. I tested this with the builtin debug tools and this seems to be the case. Maybe it's a bug?
♡ mae ♡ May 27, 2022 @ 5:46pm 
Having a bit of trouble with the thick skinned achievement. I've fallen into pits, end screen shows 400+ damage but achievement doesn't pop. Any reason why this might be?
Samoth Aug 7, 2021 @ 10:08pm 
Update: iron skin mitigates burning damage, and magic resist protects you from actually swimming in lava
Samoth Aug 7, 2021 @ 10:06pm 
The secret that leads to the sword of RNG in The Breach can be accesed by going to the second secret (swimming on lava to get to the gold) and then jumping into the pit, the pit transports you to the sword of RNG room. BTW you can cancel lava damage with a combo of iron skin + magic resistance (maybe only one of the two, but I activated both potions just in case). You can swin into the lava and lose 0 health
Fyyara May 31, 2021 @ 2:02am 
There is another secret in the caves which triggers the "secret discovered" message. In the area with green pillars and water, there will be a low cave you can swim into. Easy to spot if you're looking for it. @ me for screenshots
「Galaxy」 Apr 18, 2021 @ 11:08am 
作者太厉害了,很有帮助的攻略,谢谢啦!
Nem tudom Feb 20, 2021 @ 6:48pm 
The amount of care and effort you've put into this is amazing!
Congratulations, and thank you!
Shad0WeN Mar 18, 2020 @ 10:19pm 
@ TenLetters If you want to use them I took screenshots of that Breach secret awhile ago but never got around to publishing them:

https://steamcommunity.com/sharedfiles/filedetails/?id=2026809288
https://steamcommunity.com/sharedfiles/filedetails/?id=2026802847