Total War: NAPOLEON - Definitive Edition

Total War: NAPOLEON - Definitive Edition

44 ratings
Italian Campaign on Very Hard (Campaign) Difficulty
By pgeerkens
An outline for playing the Italian Campaign of NTW, on Very Hard campaign difficulty. In addition to the specific recommendations for this campaign, suggestions on campaign timing, diplomacy, and finance that are of general value in other campaings are included.

Emphasis is put on timely resolution for the major obstacles encountered when playing this campaign on the hardest difficulty level: Arriving at Parma before the Austrians asemble a full-stack army, and financing a sufficient force to capture Ancona in Winter of 1796-7.
2
   
Award
Favorite
Favorited
Unfavorite
Introduction
This guide attempts to establish a framework of thinkiing about campaign management in Napoleon Total War (NTW), using a walk-through of the Italian Campaign as a context for discussion. Elements of finances, timing, and strategy will be touched upon, as levers to use in unlocking the puzzles of speedy campaign conclusion.

Finances is the means by which an army sustains and replenishes itself in the field. These are obtained by wise investment of current funds, with an eye to an ever increasing future payout at a known future time. One must spend money to make money - but the game lays many unwise temptations before the unwary player. In the context of a 40 move campaign across the length of the Po Valey:
  • We will determine which investments achieve profit in our required time frame; and
  • Outline rules of thumb for applying these principles to other campaigns.

Timing is the achievement of specific goals in a set time. On Very Hard difficulty, this campaign will lay very specific timing challenges on the player. Early on a very specific challenge must be overcome. Rather than coming on in a succession of short stacks, as at lower difficulties, the Austrians will advance west from Parma, in July 1796, with a full stack army. Turin must be captured and Piedmont subdued before this to avoid a two-front war. This guide will describe a maneuver for capturing all of Piedmont except Valle d'Aosta, and arriving before Parma with a healthy full-stack army two turns before the Austrian army can assemble.

Diplomacy is the art of convincing others to assist one; and feel good about it. The Papal States and Venice will be intransigent foes, but Tuscany, Lucca, and a rump Piedmont can all be reasoned with to avoid conflist. Read forward to learn more.

Finally, remember that throughout the compaigns of both 1796-7 and 1800, Napoleon astounded Austrian commanders with the speed of his marches. This might be the great hallmark of his career, repeated at Ulm, Austerlitz, Corunna, Eckmuhl and throughout the 1813, 1814 and Waterloo campaigns. Whereever Napoleon was, it was always several hours closer than opposing commanders thought possible. To do the same we shall have to be just as assiduous as Berthier and Napoleon were, poring over maps in his carriage to plot march routes.

When moving armies, occasionally there will be directions to move through or bya settlement. This is intentional, for either of two possible reasons: Most commonly, the specified route is slightly faster; occasionally it is desired to preserve intacat enemy buildings. Additionally, and I have neglected to point out these occasions, units will balk at entering an already occuppied settlement. This can often be overcome if the units already inside escort the balking units in.

To maximize movement, and in particular movement of reinforcements to the front, the default of skirting around settlements is often inferior. In most cases it is faster to move through settlements. For the opening phase, Early April through Late July, the following settlements should always be moved through instead of around unless noted otherwise, particularly by reinforcements - provided no other consideration such as not damaging enemy infrastructure prior to imminent capture is relevant:
  • Coni
  • Mondavi
  • Savona
  • Novi
  • Alessandria
  • Lodi
  • Parma
  • Reggio
In other cases it can usually be assumed that the default of skirting the settlement is faster.

Also note that stacks accompanying a leader receive a significant movement bonus. Massena and Seruier can be used to speed up reinforcements by escorting stacks along the main road from Turin to Bologna.

With these new tools in your arsenal, one can confidently plan on assaulting Klagenfurt in summer of 1797, with a full purse and several turns to spare.
Finances
"An army marches on its stomach", and "a hungry army is worse tha none at all", as the old sayings go. This section will outline how one can be assured of a healthy purse, even through the twilight of two-front war with Venice and the Papal States in Fall 1796. The insight provided will, it is hoped, also assist the reader in planning campaign finances in other Total War campaigns and games.

Break Even
When evaluating investment decisions, in addition to knowing that an investment is long term profitable, it is important to have a clear concept of when break-even is required by. For this campaign, early game investments made for strictly financial reasons must have a break-even of late January 1797. That is when the troops must be ready to march on the Papal States, after which the increased revenue of Marche and the associated mission reward is easily sufficient to carry one through the campaign.

  • Simple Interest
    Investments such as Administrative Buildings that directly increase income are a simple interest investment. They are evaluated as:

    BE = Game-Turn + Build-Time + Cost / ( Delta-Tax-Rate * Asset-Base )

    For the case of upgrading the Tax Office in Genoa to a Magistrate in Late April, 1796:

    BE = 2 + 5 + 1500 / (5% * 1247 * 55%) = 2 + 5 + 44 = Turn 51

    Our investment is recouped, roughly, several turns after the game time limit expires. Clearly a poor investment.

  • Compound Interest
    Investments that directly increase Town Wealth, and thus indirectly increase income, are a compund interest investment. They are evaluated as:

    BE ~ Game-Turn + Build-Time + SQRT(2 * Cost / (Asset-Growth * Tax-Rate * 55%) )

    Yes, I know the exact formula is really should be the general quadratic formula That's much harder to estimate in your head, and only varies by a turn or two from this approximation.

    For the case of creating a Theatre in Novara in Late May, 1796 (estimating the region tax rate as an average of 22% over the life of the investment):

    BE = 4 + 3 + SQRT( 2 * 750 / (4 * 22% * 55%) ) = 4 + 3 + 55 = Turn 62

    This is an even worse investment than the Magistrate.

    But what is that 55% you ask? That is the adjustment for Upper Class tax rate, unalterable in this campaign at 15%, to convert Positive Wealth Growth into Net Wealth Growth. I leave it as an exercise for the reader to measure this value for other tax rates in other campaigns.

  • Other Campaigns
    Don't let this dissuade you from these investments in other, longer, campaigns. It is the combination of short game length, smal tax bases, and high public order that makes these investments unwise in this particular campaign. In particular, those investments that increase Region Wealth in all controlled territories can be very lucrative once your region count is high. In general, investments that increase Region Wealth tend to be better early-game investments, while those that increase Income tend to be better late-game investments.

    Likewise, note that the cost of Town Watch in each regions varies as the square of the Town Watch Level. Investments that drive this expense down are always worth checking out.

Military Necessity
Certain investments cannot be evaluated strictly on a financial basis. Those that increase (or have other beneficial effect on) Diplomacy, Campaign Map movement speed; replacement rate, or troop quality and variety can be regarded as a military necessity. Calculation of Break-Even can only assist in prioritizing the builidng order for militarily necessary investments, the player must make the final judgement calls based on game experience and situation.

Garrisons
  • Newly captured regions
    It is tempting, on occasion, to just let a strike happen for a turn. After all, it's just a hundred or so of Town Wealth lost. Wrong. That lost Town Wealth is a lost asset not a lost income. At a tax rate of 26%, that is 26 GP of lost income every turn for the remainder of the game. Repeated 4 times, over 15 turns average, amounts to lost purse of 4 * 15 * 26 = 1560 GP.
  • Diplomacy
    The AI (for each unplayable faction) tracks which of your shared border territories have zero garrison, and measures the count of these as a sign of weakness, for lack of a more precise term. I believe this sign of weakness affects War/No-War decisions. Consequently, I recommend keeping a garrison of one militia unit in border territories when you don't wish to be attacked.

Building Strategy for Italian Campaign
  • Supply Post in Mondovi to get the Grenadiers and experience;
  • Cantonment in Milan and Barracks in Modena;
  • One militia unit each in Liguria, Novara and Lodi as acquired. Later, when the main assault is launched on Klagenfurt, one each in Parma, Modena, and Emilia-Romagna

Note that for the first few months Napoleon's need is for troop quantity, not quality. To this end, National Guard units are recruited in Nice, instead of Line Infantry, almost until Nice is retired as a recruiting site. These units, with their free chevron in Late May (from the Supply Post in Mondavi) and the morale boost from French Generals are quite capable of holding Austrian Line infantry until the French artillery and cavalry does its thing. As with the Revolutionary Guard, merge them aggressively prior to obtaining a forward Supply Post, to free up funds for the fusiliers who will replace them from Late Summer 1796.
Opening - April Through July 1796
  1. Early April 1796
    • Buonaparte
      1. Attack Eugen d'Argenteau;
      2. Detach artillery onto nearby road in light forest, just into Liguria;
      3. Advance to vanquish remnant of d'Argenteau;
      4. Detach dragoons into grassland as bait; and
      5. Rejoin artillery waiting in ambush.
    • Massena
      Joins Serurier.
    • Seruier
      Stationary.
    • Builds (Nice)
      • 1 Chasseur du Cheval
      • 2 National Guard
    • Result
      .
    • Allied Response
      Michele Colli will move on dragoon bait, and be ambushed by Napoleon. Remnant will retreat into Mondavi.
  2. Late April 1796
    • Buonaparte
      1. Dragoons rejoin main body; and
      2. Leaving one artillery behind, advance through Savona to Genoa and storm it.
    • Massena
      1. With just sufficient troops to do so, advance on Mondavi and eliminate ambush survivors;
      2. Advance Napoleone's detached artillery into Mondavi; and
      3. Advance into Coni after Serurier vacates it .
    • Seruier
      1. Detache Massens as above;
      2. Advance on Coni, accepting its surrender; and
      3. Advance just to the border of Torino.
    • 2 Nat. Gd. reinf. in Nice
      • Advance towards Genoa
    • Builds
      • Militia in Genoa;
      • Nat. Gd. in Nice;
      • Supply Post in Mondavi;
    • Result
      .
  3. Early May 1796
    • Buonaparte
      Assault Alessandria.
    • Massena
      1. Rejoins Serurier; and
      2. Advance (alone) into bait position on road to Turin, within Serurier's ZOC.
    • Seruier
      Advance into a light forest ambush position beside the road to Turin.
    • Reinforcements
      1. Nat. Gd. in Nice & on Coast Rd. towards Genoa.
      2. Chasseurs du Cheval in Nice to Coni
    • Builds:
      • 1 Militia Alessandria
      • 1 Nat. Gd. Nice
    • Result
      .
    • Allied Response
      Colombo, advancing to attack Massena, is ambushed by Serurier. This is an opportunity for Massena and Serurier to gain a morale bonus characteristic - pursue and eliminate all survivors with Massena, Serurier and the chassers de cheval.
  4. Late May 1796
    • Buonaparte
      Advance on and assault Nuara.
    • Massena
      1. Rejoin Serurier;
      2. With minimal detachment, attack and eliminate any remnant of Columbo's force;
      3. Advance on main road as far toward Alessandria as possible.
    • Seruier
      1. Assault Turin; and
      2. Advance on main road as far toward Alessandria as possible.
    • Reinforcements
      Advance toward Parma along main road.
    • Builds
      • One unit in Nice; and
      • Repair cantonment in Turin.
    • Result
      .
    • Allied Response
      NA.
    • Diplomacy
      Make Trade Agreement with Piedmont-Sardinia.

  5. Early June 1796
    • Buonaparte
      1. Advance on and assault Milan,
      2. Return one infantry unit to Nuara; and
      3. Advance on Lodi and accept its surrender.
    • Massena
      Attached to Serurier.
    • Seruier
      Advance on main road toward Parma.
    • Reinforcements
      Advance along main roads toward Parma.
    • Builds
      One unit in Turin.
    • Construction
      Cantonment in Milan (for Cisalpine Legion).
    • Resulting in
      .
    • Allied Response
      NA.
    • Diplomacy
      NA.

  6. Late June 1796
    • Massena
      Attached to Serurier.
    • Seruier
      Advance on main road toward Parma.
    • Buonaparte
      1. Main body advances by Piacenza to join Serurier and assume command; and
      2. Trailing infantry advance from Nuara to Lodi (or further if you prefer).
    • Reinforcements
      Advance along main roads toward Parma.
    • Builds
      • One unit in Nice (or Turin instead, if cantonment repaired); and
    • Result
      The army has here advanced slightly too far; there is just room for a pair of Austrian regiments to squeeze behind it by the Po River. The reinforcements advanced up on them however, and Napoleon deigned to assist in an efficient elimination.

    • Allied Response
      A small detachment may try to squeeze behind the main army.
    • Diplomacy
      NA.

  7. Early July 1796
    • Trailing reinforcements eliminate any Austrian detachments that have worked their way behind.
    • Seruier
      Detaches from Buonparte to garner reinforcement boost for trailing troops.
    • Massena
      Attached to Buonparte.
    • Buonaparte
      Assaults and captures Parma.

      With reinforcements coming, consider consolidating a pair of Nat. Gd. or Rev. Gd. units. Upcoming opponents are stronger and more numerous, and these unit types really need a couple or more chevrons to hold their own. Reducing the count of these units by 3 or 4, judiciously over the remainder of the campaign, can combine increased troop quality with decreased troop expense. My preference is to consolidate at two or three chevrons.
    • Reinforcements
      Advance along main roads toward Parma through Savona and by Genoa and Piacenza.
    • Builds
      • One unit in Turin; and
    • Result

      Note that most of the main army can reach Modena - but doing so now would be foolish. That Supply Post is just one turn away from completion. Let's allow the Austrians to pay for, and advance by two turns, our reinforcement boost.

      Additional reinforcements are nearby; and Serurier is trailing to garner a small reinforcement boost for two trailing infantry.

    • Allied Response
      NA.
    • Diplomacy
      Negotiate Trade Agreement with Lucca.

  8. Late July 1796
    • Trailing reinforcements eliminate any Austrian detachments that have worked their way behind.
    • Seruier
      Detaches from Buonparte to garner reinforcement boost for trailing troops.
    • Massena
      Attached to Buonparte.
    • Buonaparte
      • Assaults and captures Modena, having moved by and not through Reggio;
      • Lead full stack as far toward Mantua as possible, with 3 artillery, excess detached in Modena.
    • Reinforcements
      Advance along main roads toward Modena.
    • Builds
      • One unit, plus one militia, in Milan;
      • One militia in Mantua;
      • One unit in Turin;
      • Supply Warehouse upgrade in Reggio; and
      • Convert Tax Office in Modena to Cantonment.
    • Result

    • Allied Response
      NA.
    • Diplomacy
      Negotiate Trade Agreements with Lucca and Papal States, paying any nominal fee requested.
    [/olist]

Mid-Game I - Taming The Doge and Baiting the Pope
Situation
A healthy full-stack army has taken Modena in Late July, reinforcing at a moderate clip and financed by a comfortable purse (~5000 GP) and income stream (~3800 GP/turn). Peeking inside Mantua, there are no Austrian reinforcements training and no Venetian forces yet nearby. The opening AI script is now over, so details of how to accomplish various goals must be left to the reader. Just the plan outlines, with monthly results as played through by myself, can now be provided.

Advance the turn, and the Doge declares war. Calling our allies is recommended, just this once, as it seems to bind the Piedmont-Sardinia rump to us more strongly. The Pope will decline war just now, but his forces are mustering to our border; controlling the timing of his DOW is one of the goals of this phase.

Managing our finances through the Mid-Game is crucial. This is perhaps the defining element of the Mid-Game, as forces must somehow be purchased and maintained with an ever dwindling income. Progression to the End Game occurs when all necessary forces have been raised, with Turn income sufficient to comfortably maintain them. The screenshots for this section wil display the Goverment - National Summary tab so that the projected turn income as well as current treasury is displayed.

Our forces should be arrayed somewhat like this:
.
  • Militia and two recovering units in Modena;
  • Full stack under Napoleone and Massena between Modena and Mantua;
  • Serurier in Parma;
  • Cisalpine Legion and Militia;
  • 2nd Grenadiers plus two between Piacenza and Parma;
  • Two units on road between Alessandria and Piacenza;
  • One unit in Turin.

The Plan
The goal for this phase is to punish the Doge's DOW by acquiring additional Venitian territories needed to finance our attack on Klagenfurt. Meanwhile the Pope's DOW must be first cowed, and then induced so as to avoid war with Tuscany and Lucca.

There is a region half-way between Modena and Matua that is just within reinforcing distance of both cities. The full-stack under Napoleon will assautl and capture Manuta to gain its artillery, possibly harassing any nearby Venetian forces, and then return to this spot. A second full-stack under Serurier will then assemble just north of it.

When this second stack is ready it will strike north, capturing in turn Verona, Brescia, and optionally Padua. A DOW by the Pope will then be triggered by negotiating Peace; a Trade Agreement; and an Alliance with Venice. This latter is too much for the Pope and he will promptly negotiate a retraction of it by Venice with a DOW on us.

In the west, our diplomatic relations with rump Piedmont-Sardinia in Valle d'Aosta are very poor; and they are notoriously fickle. A slow buildup of forces around Turin, however, coupled with a gradual improvement in diplomatic relations, can forestall a DOW on us. It is unclear just what size of force is sufficient for this task, but a viable full-stack has always been found both sufficient and affordable. A brace each of artillery and cavalry, with a mixture of fusiliers, revolutionary guard and militia to make a full-stack,, wil be recruited be assembled around Turin before the King's forces recover from winter attrition in April 1797. Our fourth general slot is reserved for command of this force, just in case.

The Turns - August 1796 Through November 1796
  1. August 1796
    Napoleon has taken Mantua and returned to the Modena-Mantua road. Recruitment of Cisalpine Legion in Milan and Chasseurs (plus one 6-lb artillery) in Mantua has begun. Massena is in Reggio to prvide a movement boost next turn to the reinforcements there. Upgrade to Barracks in Mantua was performed prompty on capture,
    .
  2. September 1796
    Serurier has taken Verona, detached Massena to Mantua, and assumed ambush position for the road to Padua. Napoleone has assumed an ambush position for the main road east of Modena. Next turn Massena, with the newly arrive artillery and reinforcemnts from Milan, will assault Brescia.
    .
  3. October 1796
    Serurier vanqished the Austrians in Vicenza and assaulted Padua to start the month, and negotiated Peace, Trade Agreement, and Alliance with the Doge to provoke a DOW by the Pope. This allows Napoleone to advance his ambush position into Emila-Romagna and provke a response from the Papal force in BOlogna. Massena hastaken Brescia and advanced toward Trento with a modest force.
    .

Mid-Game II - Taming The Pope
Situation
Venice is tamed for the moment, sufficciently long for us to capture Ancona. Napoleone is in ambush position on the main road just east of the border with Emilia-Romagna, to provoke the papal forces there. Serurier likewise is approaching from the north to assist in the mop-up.

The Plan
The conquest of Ancona wil be undertaken by two full stacks uner Napoleone and Serurier, to acquire both the additional income and the Mission Bonus. A handful of additional units (perhaps three fusiliers, one each chasseurs a pied and chasseurs au cheval) will follow the two full stacks under Napoleone and Serurier. This ensures that heavily hit units can be consolidated (preserving their experience) and that the Revolutionary and National Guard units can be consolidated. Note that a three chevron Revolutionary Guard unit is arguably more potent than a one chevron Fusilier; and cheaper.

At the earliest moment that funds allow, construction of Barracks in Trento; and Supply Warehouses in Bozen and Rovigo should be begun. These will ensure the availability of full replacements in Trento and Podova provinces during the End-Game.

The Turns
  1. November 1796
    Papal forces in Bologna accepted the bait, and were soundly trounced in an ambush. Napoleone and Serurier then assaulted Bologna, eliminated Papa forces from northern Elimia-Romagna, and hopped back into Modena region to replenish. A Trade Agreement was negotiated with Tuscany immediately upon capture of Bologna.

    Massena has advanced to Bozen, with possibilities of assaulting Innsbruck - the gold mine there is quite attractive as an asset. THe surplur milita will be disbanded if a defensive posture is assumed.
    .
  2. December 1796
    Napoleone has advanced to Cesena with the first fully replenished stack. Serurier will shortly follow with the final fully replenished units, plus the brace of newly recruited 8-lb artillery. This gives Serurier and Napoleone seven battteries between them, including three 8-lber and the howitzer.
    .
  3. January 1797
    Napoleone and Serurier have advanced to Fano in tandem, with the trailing reinforcements on the road behind them. Carefully note that they have bypassed Fano to preserve the Supply Warehouse there. That ensures they wil replenish fully immediately upon capturing Ancona.

    Massena has declined to assault Innsbruck this game; disbanded the excess milita; and temporarily detached one heavily hit Cisalpine Legion to Modena to replenish and return. Milan and Turin are beginning serious recruitment for defence of our western border.
    .
  4. February 1797
    Napoleone and Serurier have assaulted Ancona. The Barracks there has been left to burn, but it could be repaired - there are sufficient funds now. Napoleon and Serurier have only advanced to just shy of the border of Emilia Romagna, so that they spend only one turn in that territory with minimal replenishments. Unless Tuscany has ended up at war with Piedmont-Sardinia, negotiate an Alliance with Tuscany as soon as Ancona is captured.

    Single Militia have been recruited in Parma and Modena, for diplomatic reasons as noted earlier. One more will be recruited in the spring for Bologna, but not in Ancona as it is not adjacent to Tuscany or Lucca. Contrarily, none have been recruited for Padua and Verona - to tempt a second DOW from Venice as soon as they rebuild their forces.
    .[/olist]
End-Game - Taming The Kaiser
The Situation
Napoleone and Serurier are marching north from Ancona with the Treasures of Rome in tow. Massena is guarding our northern flank, his depleted Cisalpine Legion now fully replenished and recalled. A deterrent force is assembling in Turin province to forestall any hostile actions by Piedmont-Sadinia. Diplomatic relations are good with Lucca and improving with Tuscany and Piedmont-Sardinia.

Our purse is full and turn income high, but the latter will drop as our last recruitment efforts occur. We aim to keep turn income above 800-850 GP so that our purse continues to grow, as a war chest against adverse circumstances. The Barracks in Trient is complete, ans the Supply Warehouses in Bozen and Rovigo approaching completion.

The Plan
Napoleone and Serurier will march north to Bozen and then east towards Klagenfurt. There they will attempt to negotiate 5 turns Military Access through Fruili province from Venice.

If the Doge declares war then Napoleone ane Serurier will descend on Venice (and Padua if necessary), assaulting and capturing them.Military Access will then be negotiated as part of the peace settlement with rump Venice in Fruilli. This will also entatil a delay as they replenish. A note: when negotiating military Access, attempt to make the payment by turn, for the same duration. This provides a turn-by-turn incentive for the grantor to not renege on the arrangement.

Massena may move north against Alvinczy and Innsbruck, depending on circumstances.

The Turns
  1. March 1797
    Napoleone and Serurier have advanced to the vicinity of Modena, now nearly replenished. Their reinforcements to bring them back up to a full stack each have been recruited, and marched to Trient. They also serve as a reserve for Massena while Alvinczy postures south of Innsbruck with his small detachment.

    The deterrence force in Torino province is now recruitted and nearly assembled, with a brace each of artilery from Mantua and Revolutionary Guard from Nice and Modena in transit. Diplomatic Status is at -104, but will now imporve almost steadily until the end of the game.
    .
  2. April 1797
    Napoleone and Serurier have drawn close to Bonzo, catching up to their reinforcements ther, and are preparing to turn east,
    .
  3. May 1797
    Napoleone has just eliminated a small Austrian detachment attempting to track French movement through Trento province. Serurier has setup an ambush along the Trento-Carinthia border to deter any advance by the Austrian force guarding the border.
    .
  4. June 1797
    Military Access has been negotiated with Venice (for 1760 GP), allowing Napoleone and Serurier to duck the full-stack Austrian border guard. To pin it in place, they have used less than full movement, preventing Austrian observation. This location is still well within range of Klagenfurt next turn
    .
  5. Early July 1797
    VICTORY.

    The final battle was anti-climatic. The garrison was less than a full-stack, with only a single 6-lber battery and one brace of grenzers. A broken remnant of Austrian Chevaux-Leger recovered morale out of sight, and routed one regiment of fusiliers before breaking (and shattering) a second time.
    .
18 Comments
pgeerkens  [author] Dec 10, 2023 @ 6:32pm 
@Cobra D: Thank you.
Cobra D Dec 10, 2023 @ 6:17pm 
Wow, great guide!
pgeerkens  [author] Sep 14, 2023 @ 5:44am 
Thread on my speed-run through this campaign on easier difficulties.

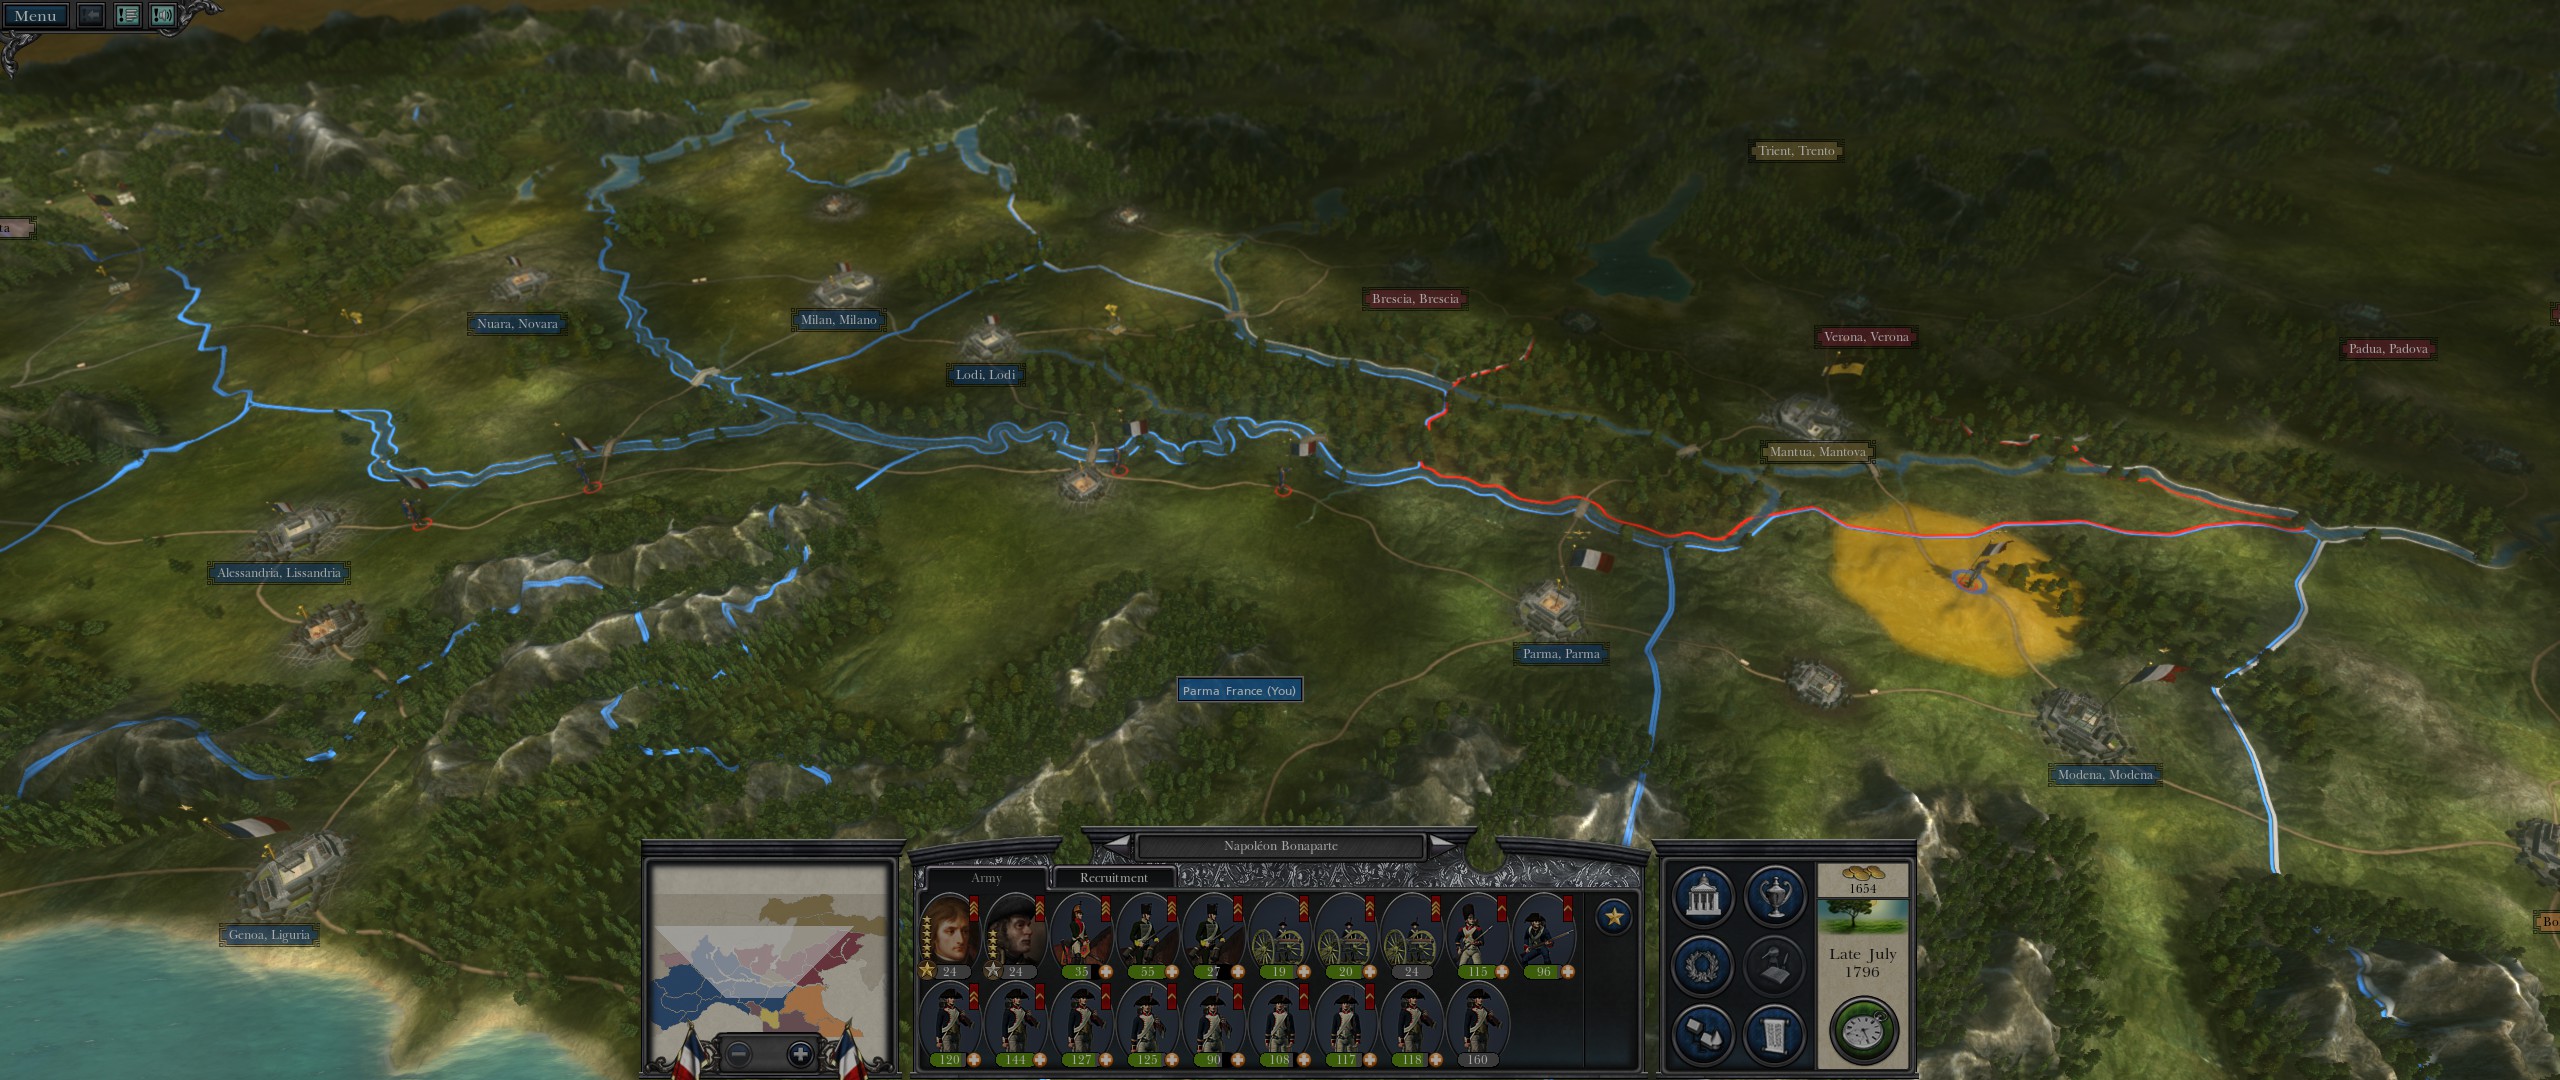
Completion was possible:
1) Playing N-N: in Early November 1796, Turn #15; and
2) Playing H-H: in Early January 1797, Turn 19.

https://steamcommunity.com/app/34030/discussions/0/3768984515564484856/
pgeerkens  [author] Sep 14, 2023 @ 5:39am 
Oops! Missed that. Thank you.

A detailed reply is available on this Discussion thread:
https://steamcommunity.com/app/34030/discussions/0/3820796859475356639/
debtmars Sep 12, 2023 @ 6:52pm 
See my rely three comments below-VH Campaign. Easy Battle.
debtmars Sep 12, 2023 @ 4:52am 
Did some more checking. The Venice Game Start Diplomacy Historical Grievance is -95, but Total is -43, after adjustments. Early August 1796, Venice Historical Grievance is -87, and Total is now -75, after adjustments. It seems that a DoW requires a Total value of at least -100, rather that is my assumption. Thoughts?
debtmars Sep 12, 2023 @ 4:39am 
VH Campaign. Checked the Diplomacy with Venice at game start is only -43, not -95 as I have read it should be. Currently, Diplomacy with Venice is -75 in Early August.
pgeerkens  [author] Sep 9, 2023 @ 5:41am 
@debtmars: Are you playing on a lower Campaign Difficulty? If you'e playing on a lower Campaign Difficulty, the AI is throttled relative to Very Hard in building up troops (because both income buff is smaller, and recruitment slots are reduced) and consequently becomes less aggressive. You may need to DOW the Doge in this instance, and be prepared to turn back quickly against the Pope.

If this is not the case, I will need some screenshots of your situation.
debtmars Sep 8, 2023 @ 10:47pm 
I can't seem to get the Doge to make a DoW against me. Suggestions?
pgeerkens  [author] Feb 19, 2020 @ 12:22pm 
Corinthia:

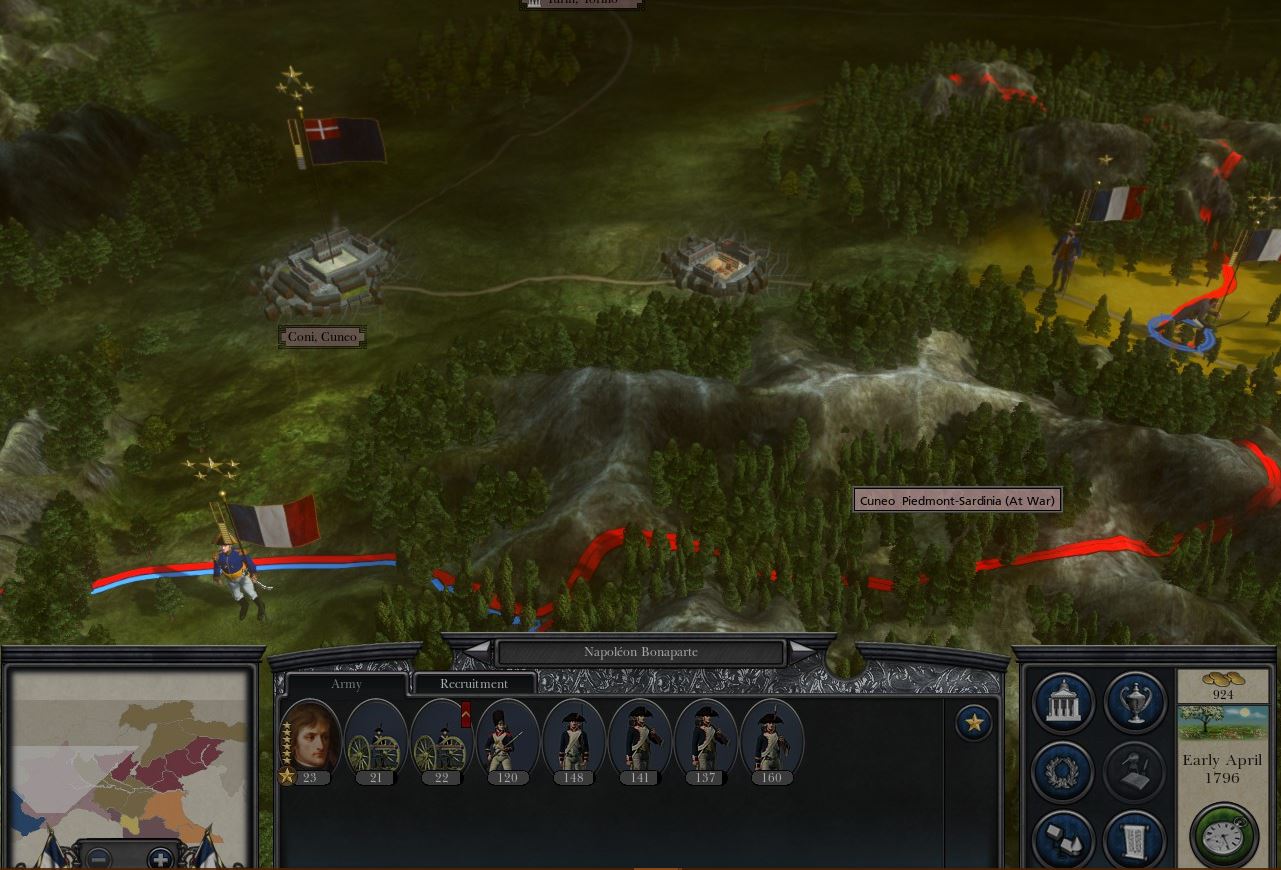
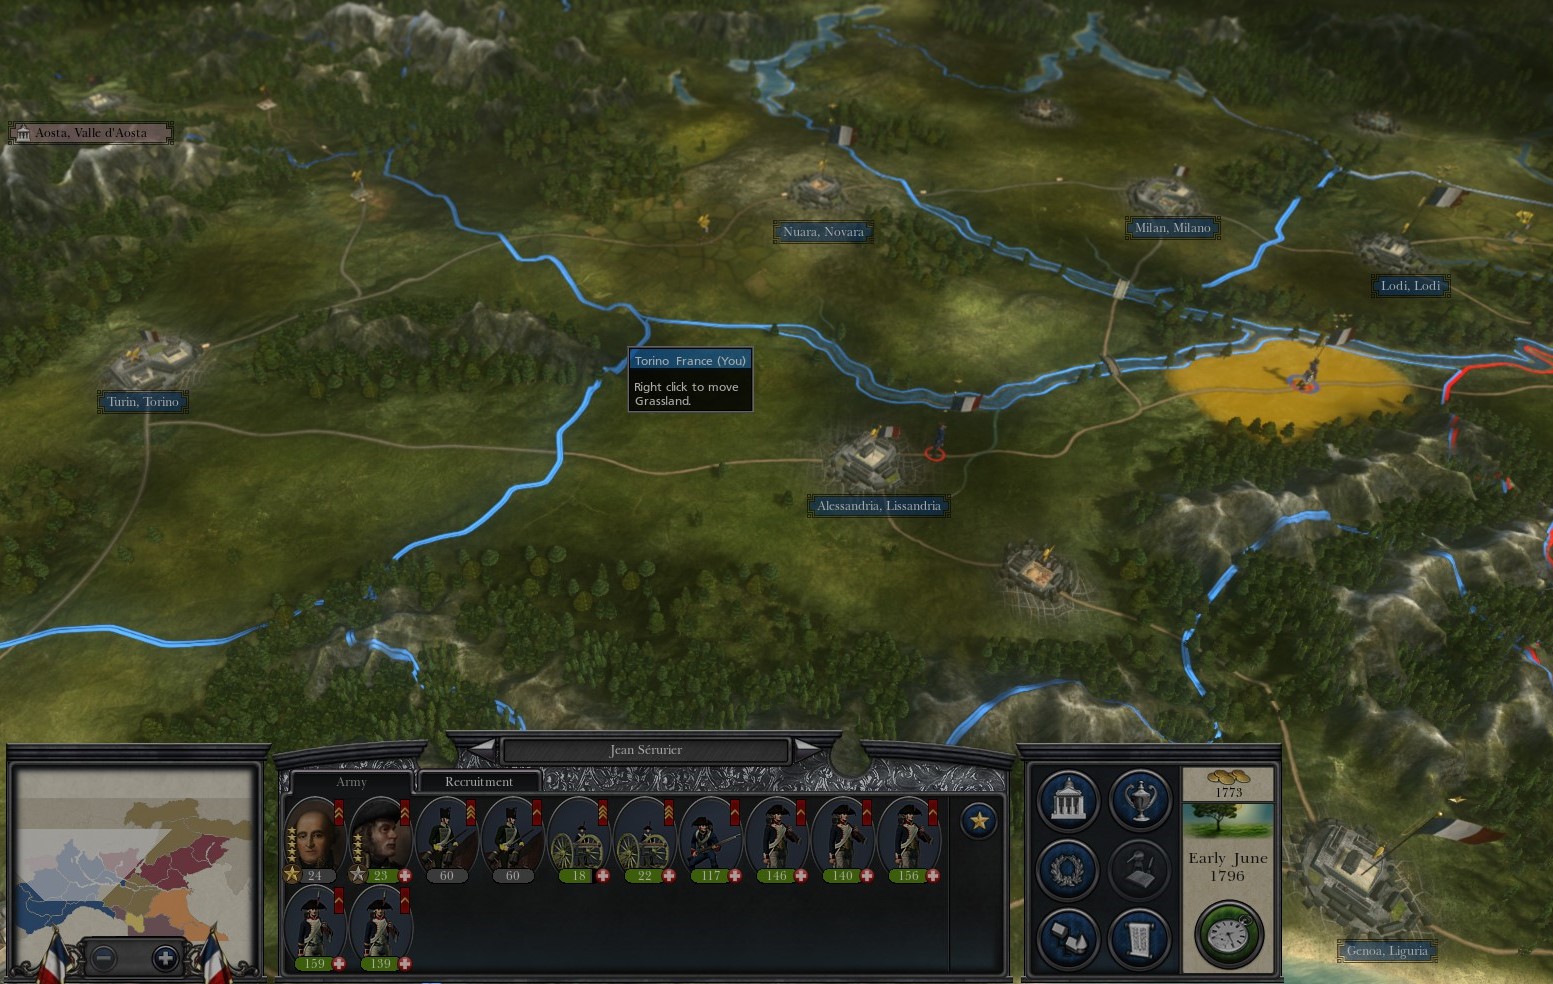
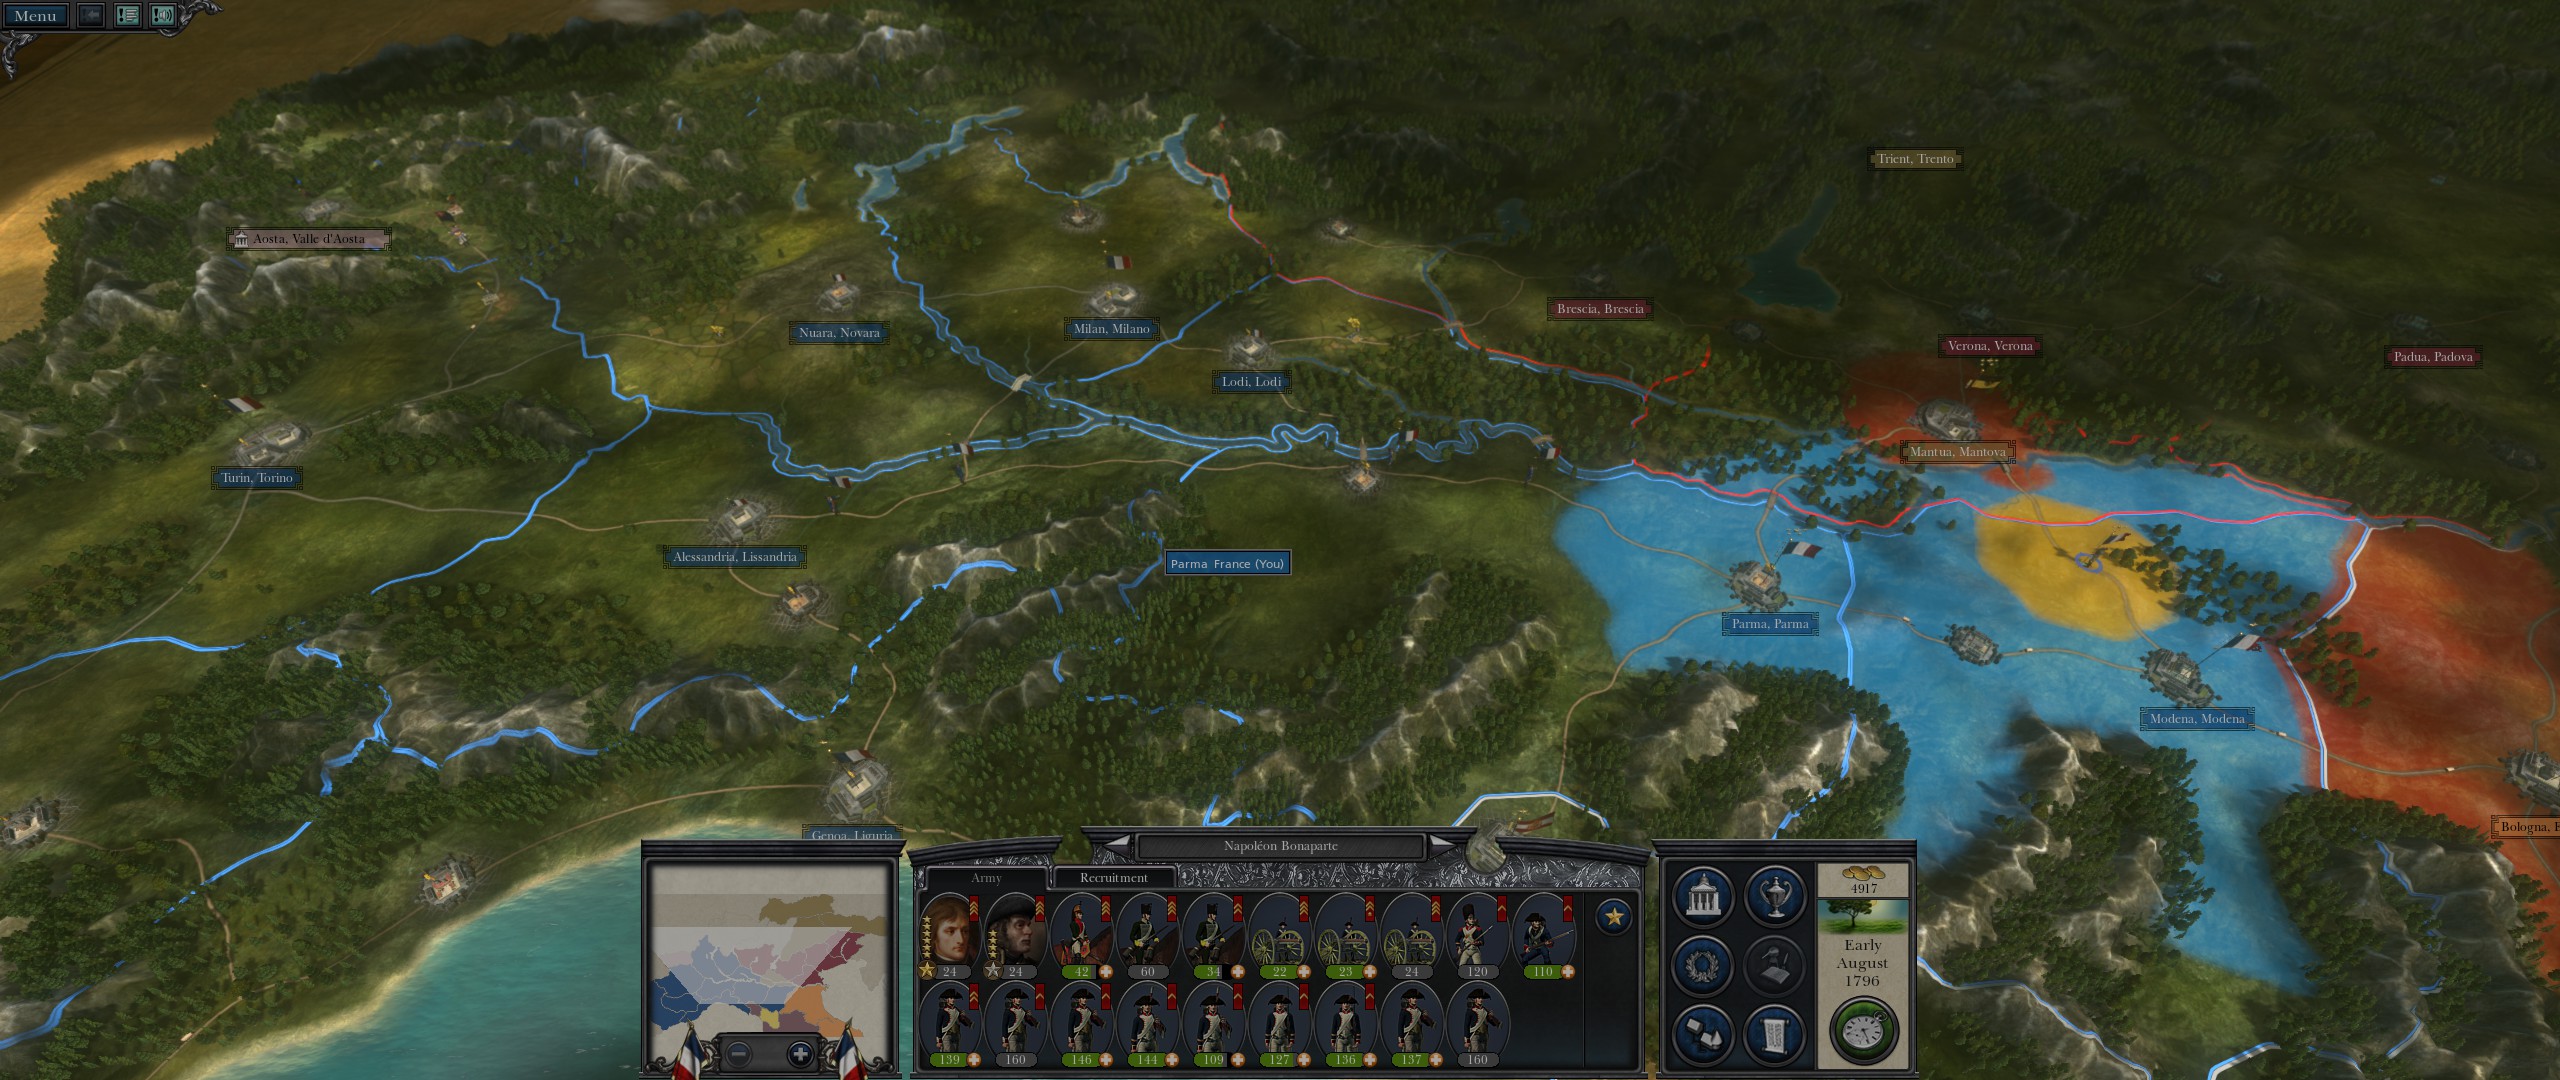
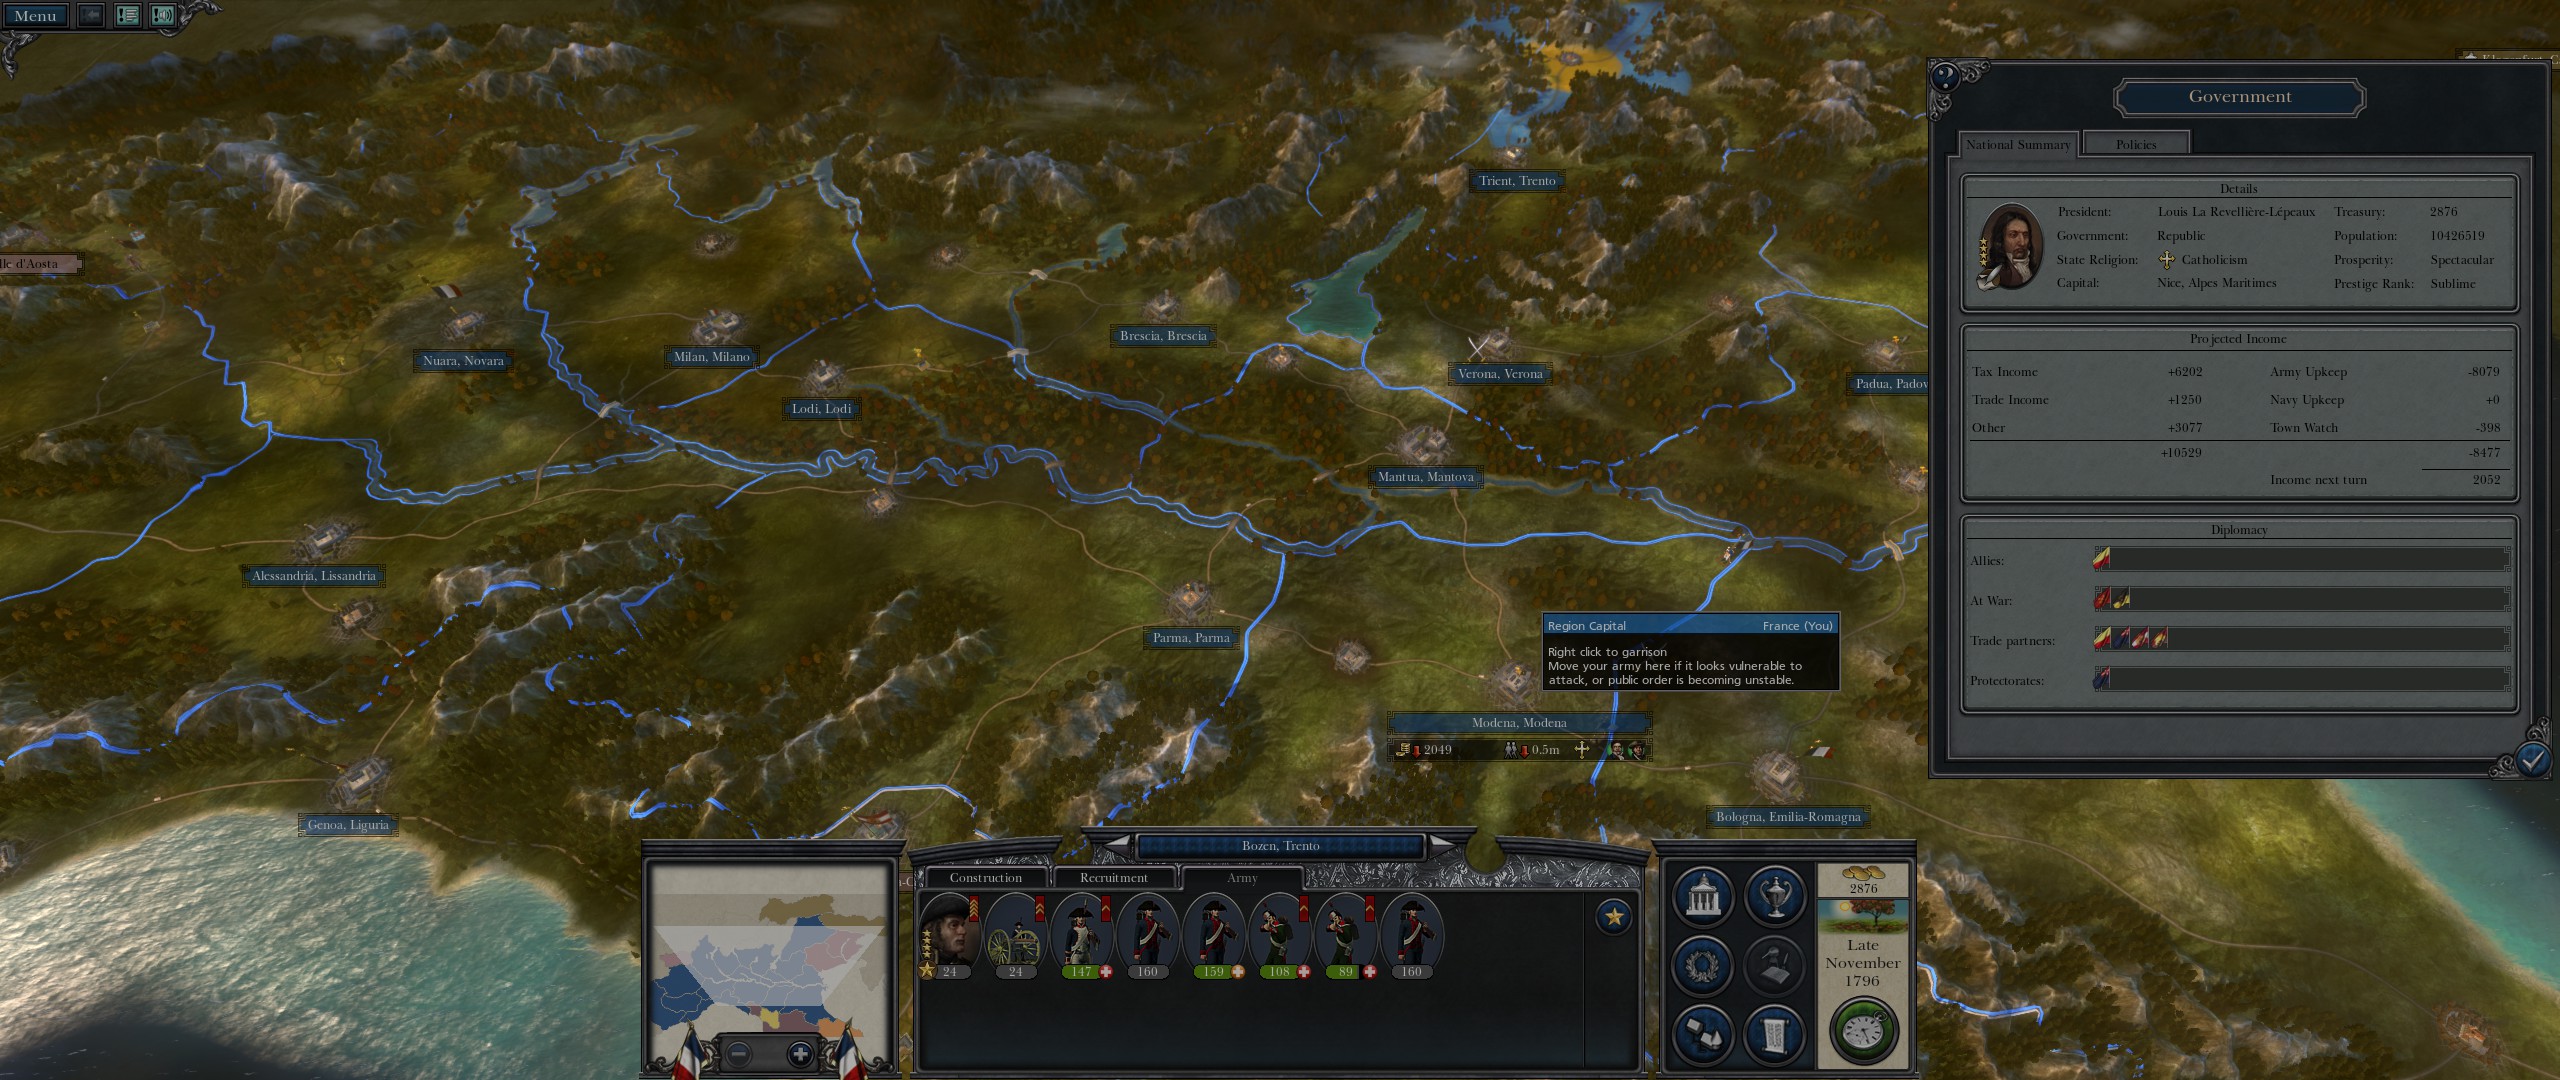
As you observe, manpower (rather than troop quality) is Nappy's bugaboo for the first few turns. I recommend the following troop build strategy:

Early April 1796
In Nice:
- 1 Chasseur du Cheval (advances through Coni toward Turin in Early and Late May)
- 2 National Guard (advance via Genoa & Novi to Milan and Lodi in Late May)
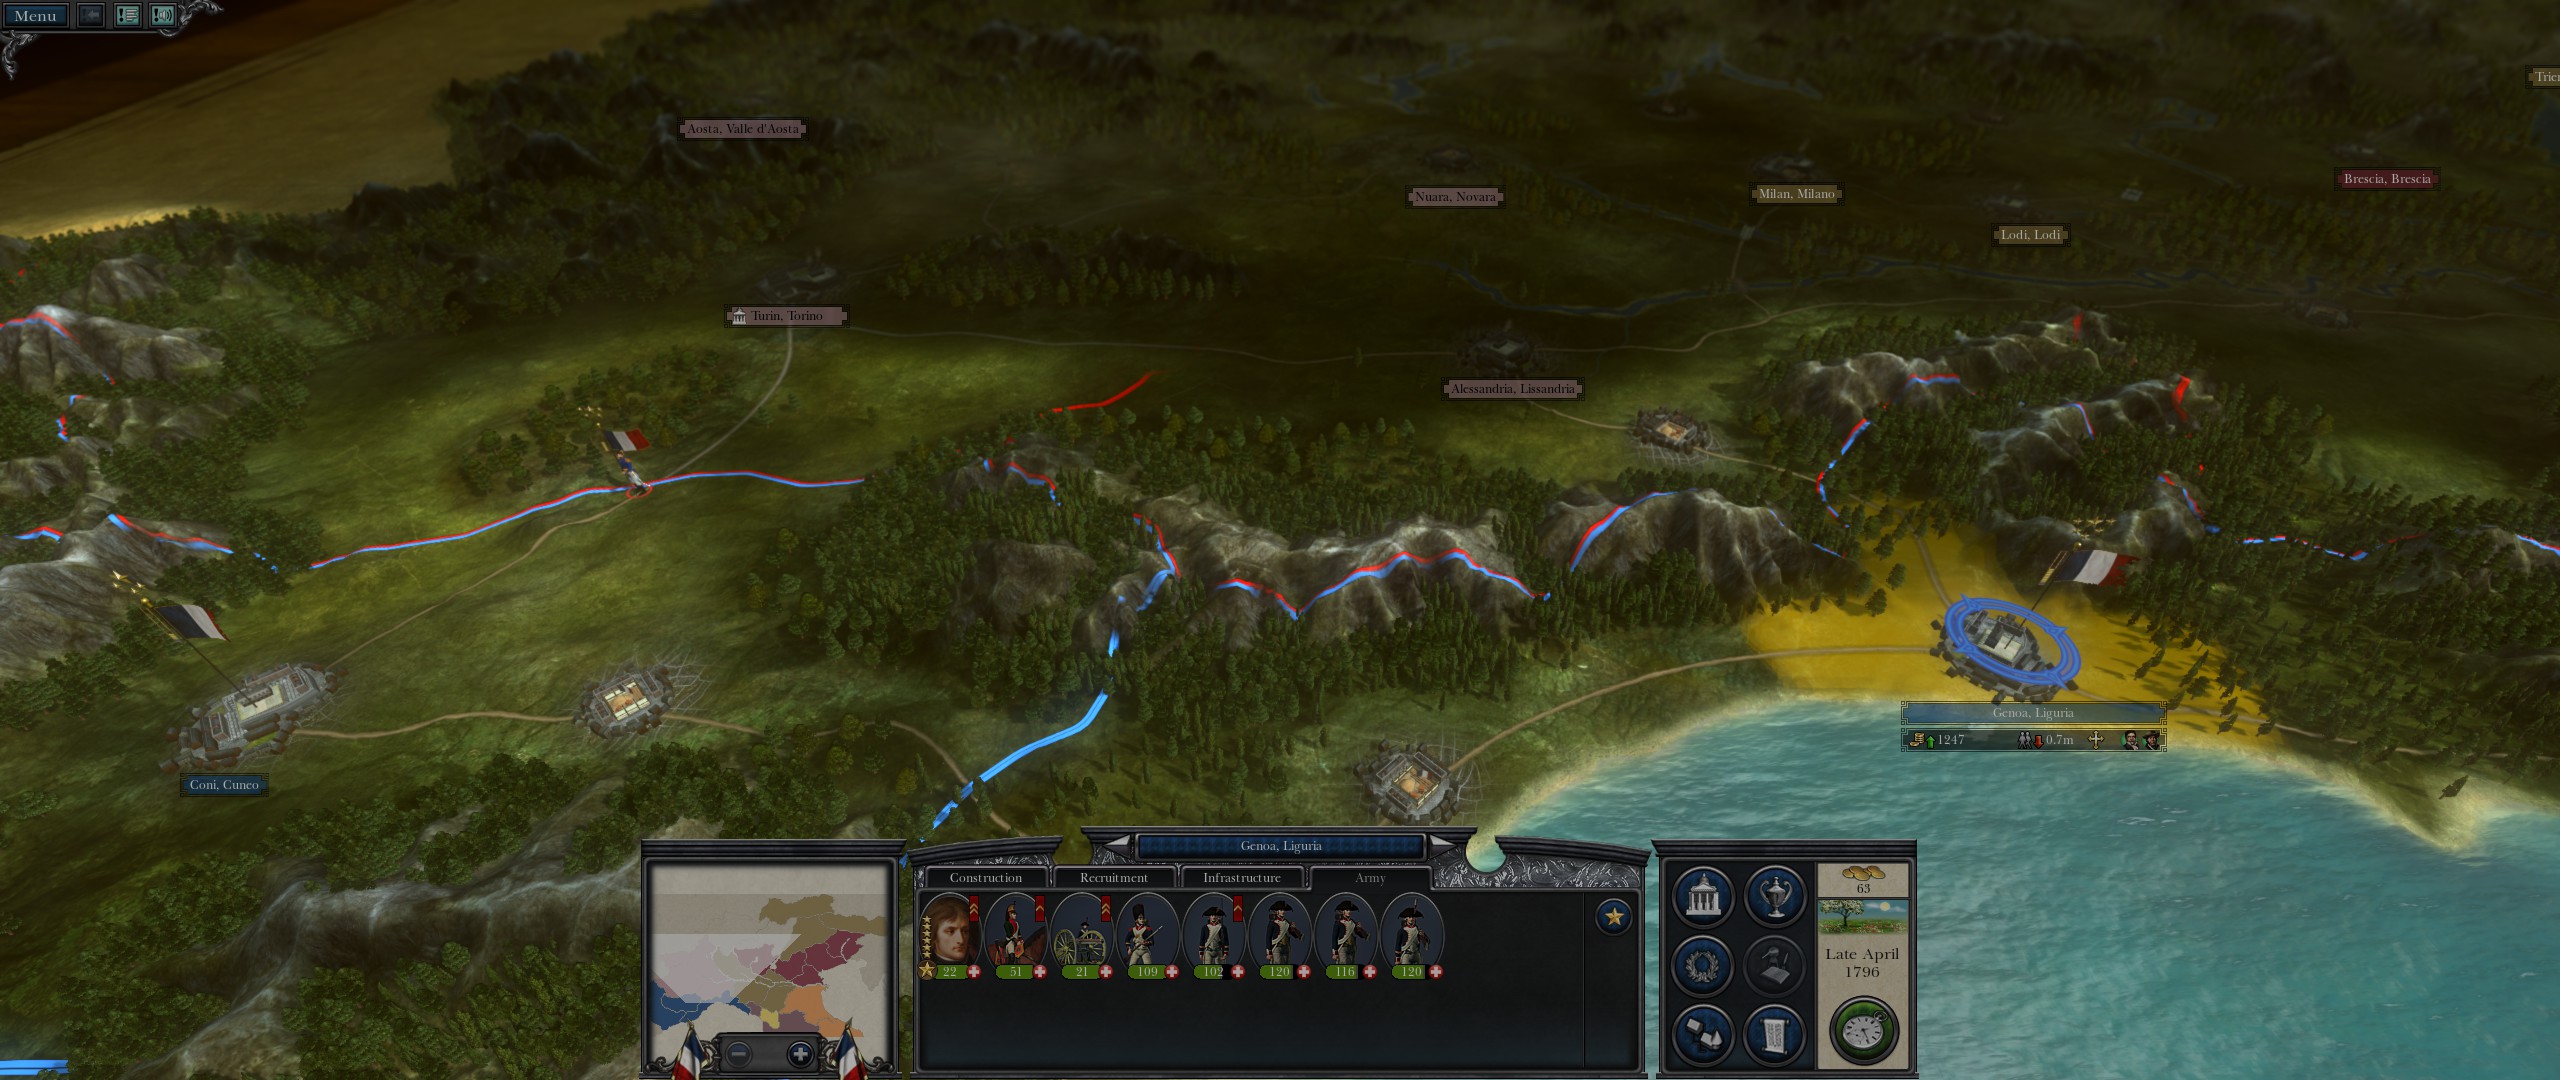
Late April 1796:
Genoa:
- 1 Militia (advances with Nappy in Early May)
Nice:
- 1 National Guard (advance via Genoa and Novi in May)
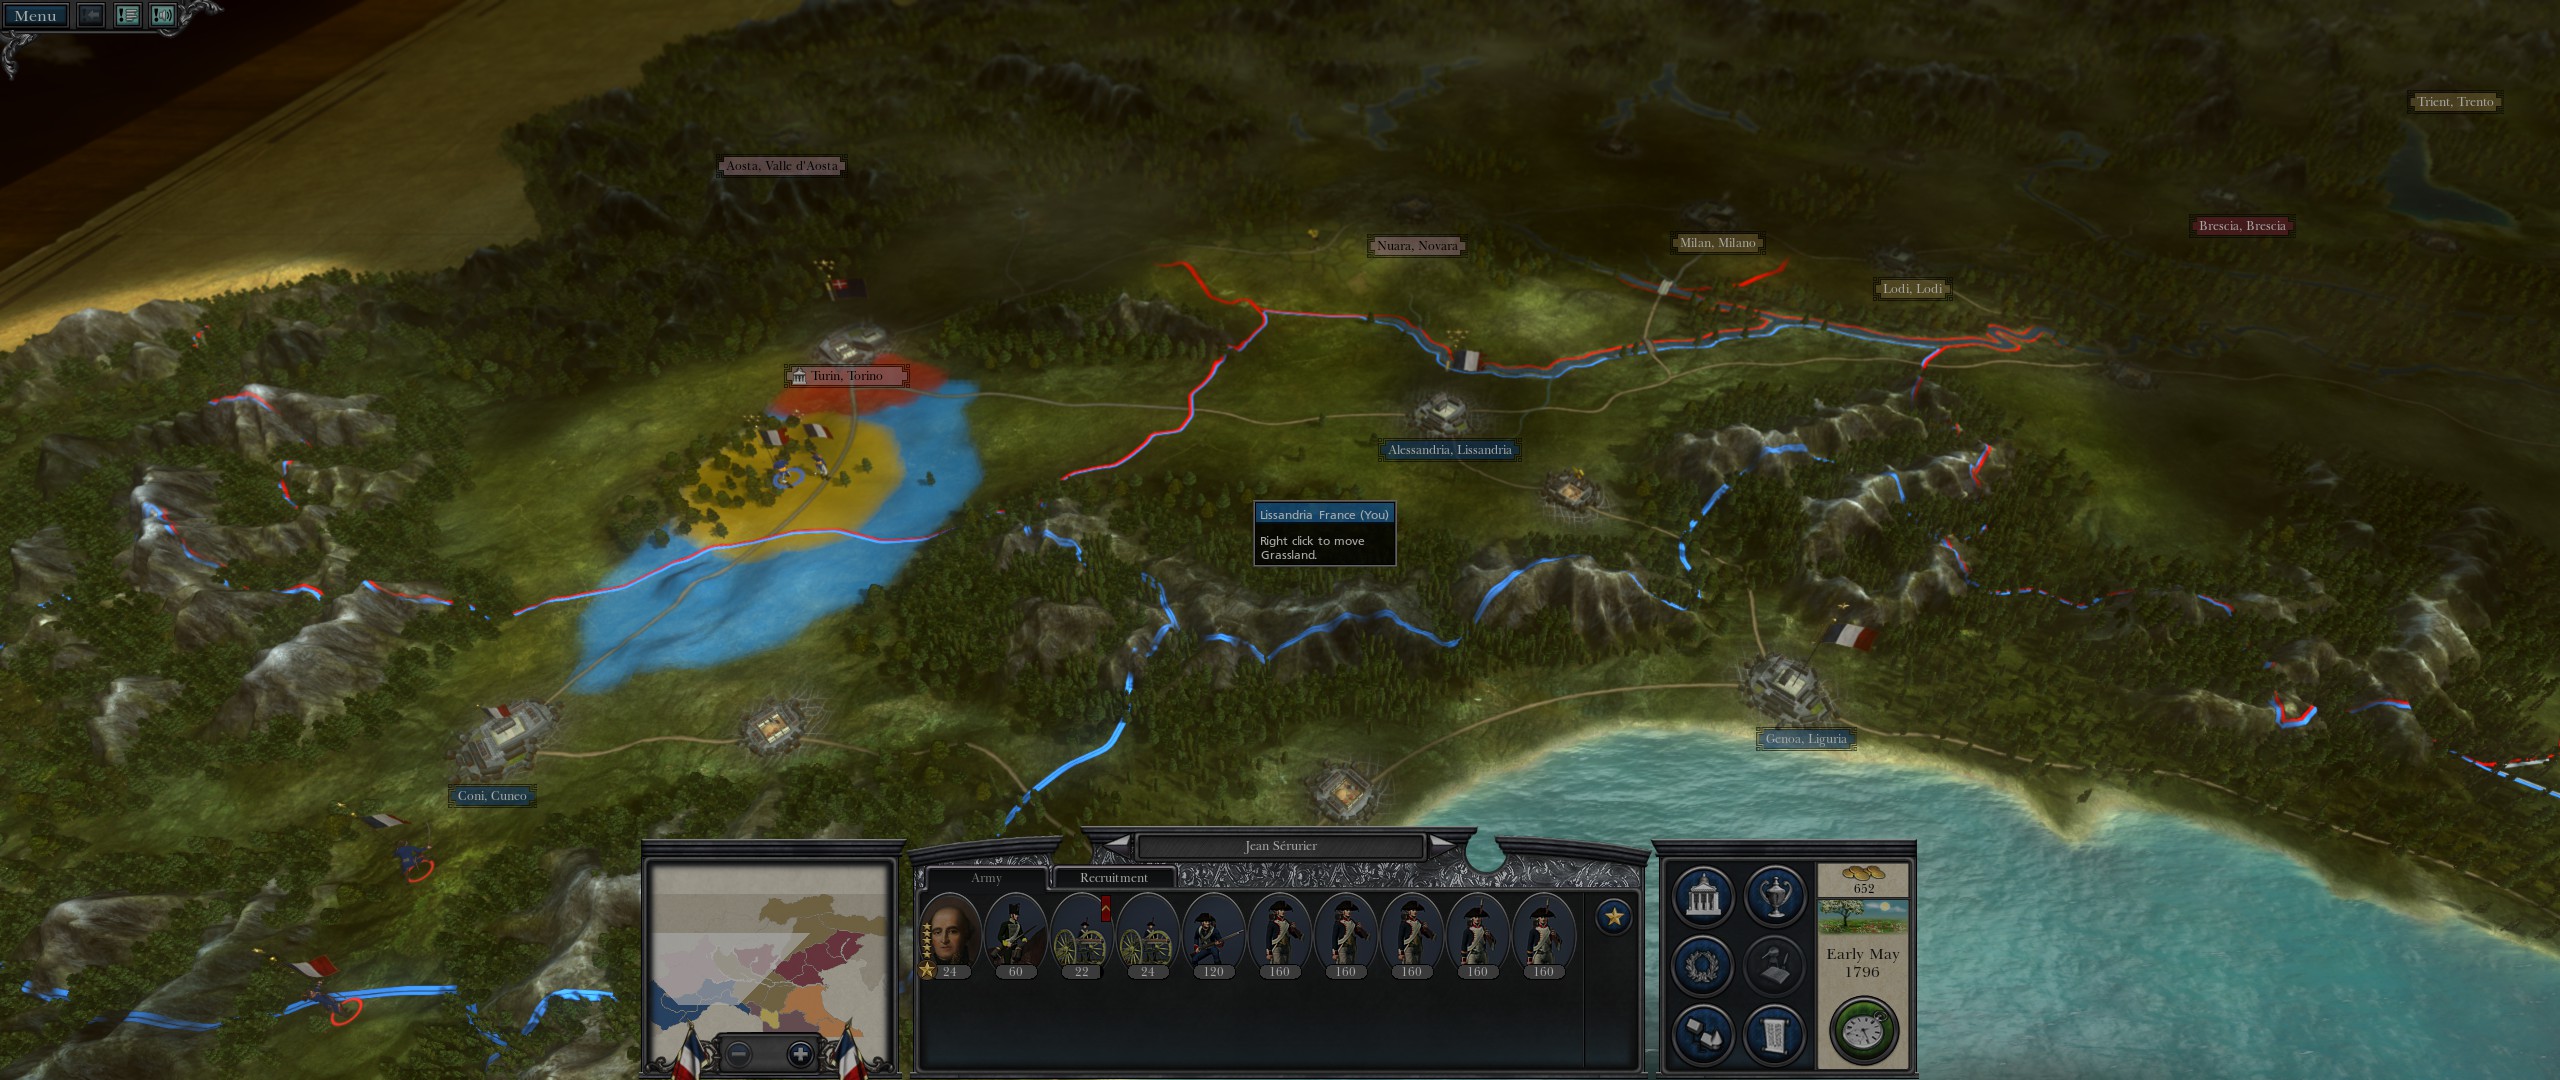
Early May 1796:
Alessandria:
- 1 Militia (advances with Napoleon in Late May)
Nice:
- 1 National Guard (advance via Genoa and Novi)

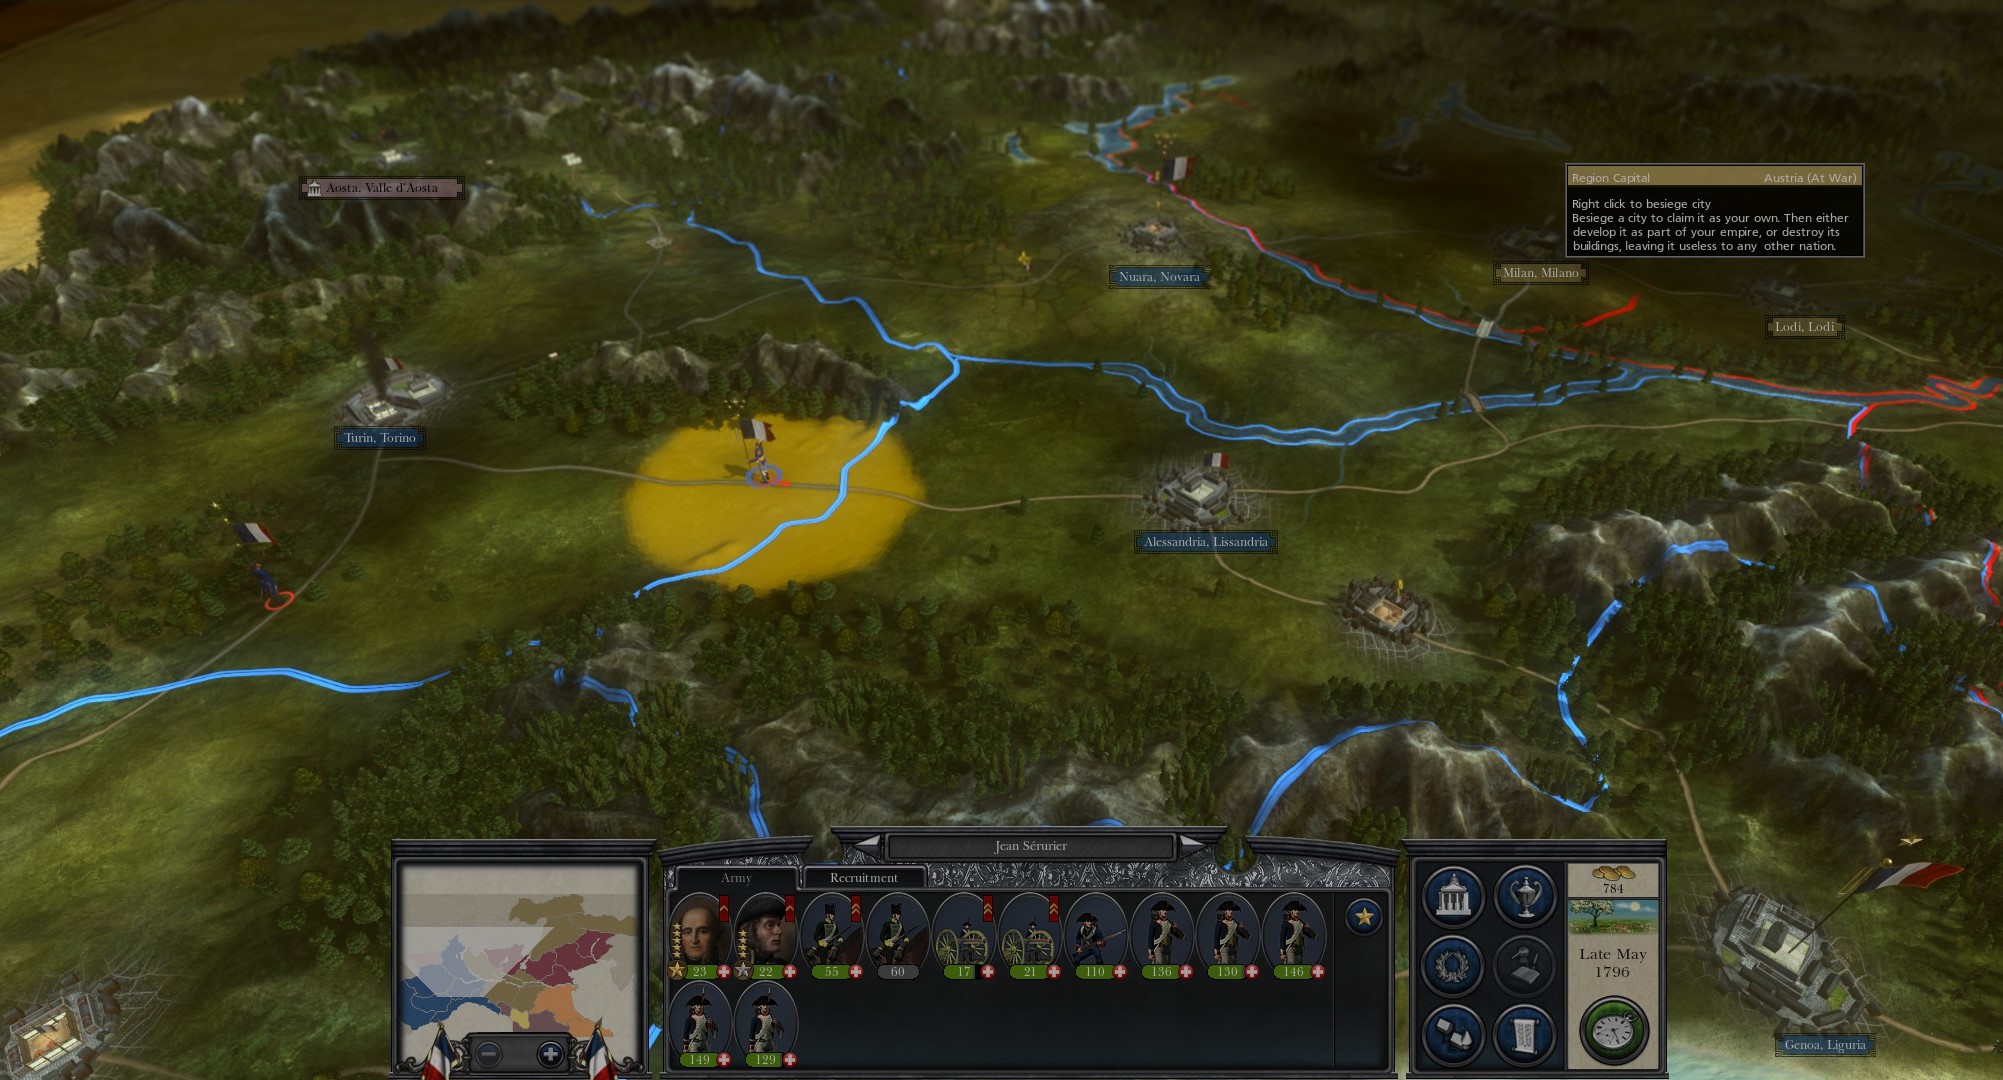
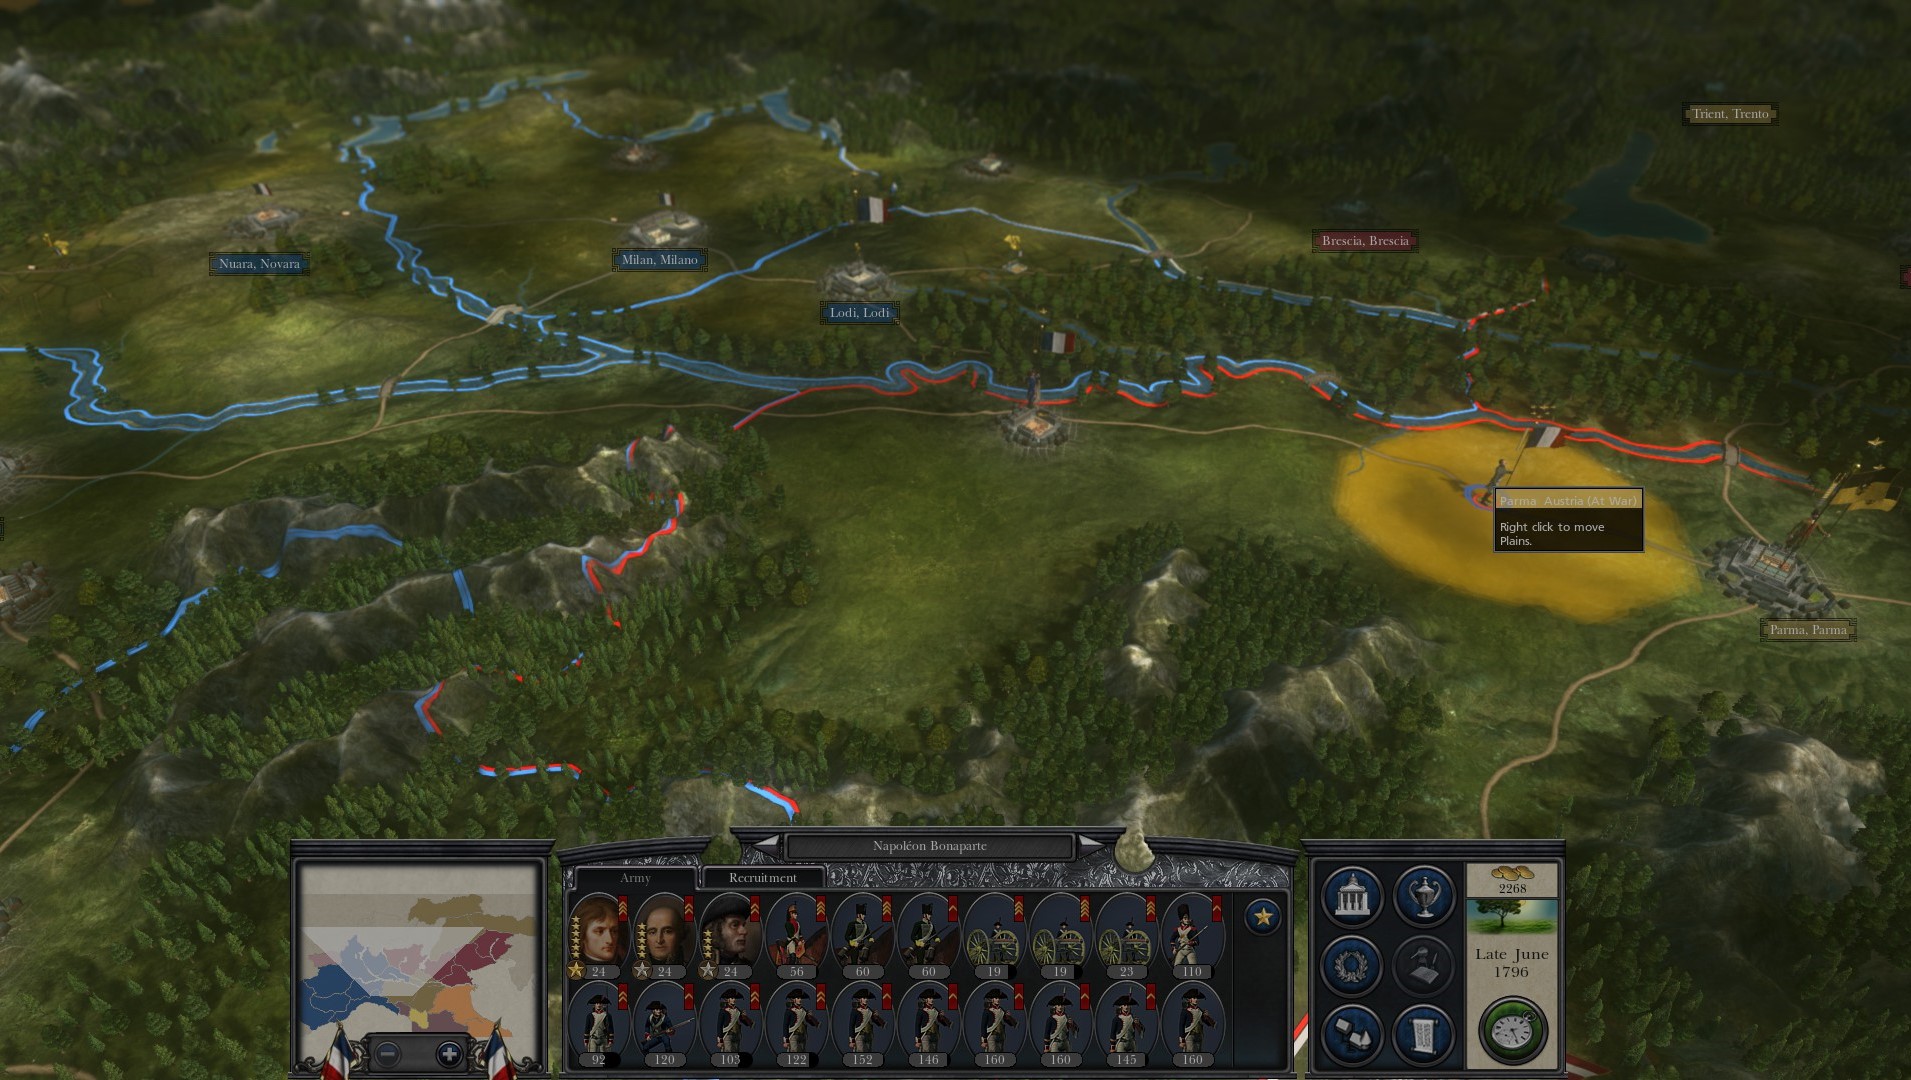
In Late May a division under Massena including one Chasseur du Cheval and the 2 Nat. Gd. recruited in Early April should advance through as far towards Milan as possible. Then in Early June this force can induce the surrender of Milan once Nappy's force is on the E-W road in position to support the siege. The combined force then has no difficulty inducing the surrender of Lodi as well.