Stronghold 2

Stronghold 2

116 ratings
Stronghold 2 units GUIDE
By steezy
Basic guide to units in: Stronghold 2

A guide that gives information about what units do in the game and some tactics you could use with them!
5
2
   
Award
Favorite
Favorited
Unfavorite
► Introduction


With the recent release of online multiplayer with the Steam edition, I created this guide for old players and newcomers alike.

► Use the guide index to jump to specific sections in the guide!

► If you liked this guide, make sure to leave a thumbs up 👍
► LORD UNITS
Armed Peasants


Type: Melee unit
Cost: 5 gold

Unit statistics
Health: Very low
Damage: Very low
Speed: Average

Description/Usage

Armed with only a pitchfork, this weak unit is good for finding traps set by the enemy and can be good for destroying wooden walls if not under heavy fire. They cost very little but are considered to be the weakest unit in the game, dying from only one arrow.

Armed peasants are best used in early harassments and defense (in 'Freeman' games), as well as they can serve as a last resort when under attack. They are cheap to use behind rock baskets, which way they deal far more damage than they normally could. They can also pull ladders off walls.


Archer


Type: Ranged unit
Cost: 12 gold, 1 bow, 2 Honor

Unit statistics
Health: Low
Damage: Low
Range: High
Speed: Fast

Description:

Archers are the player's basic missile unit, requiring very few resources to train. In battle, they are most effective in large groups against unarmored and lightly armored units, as their fire rate allows them to quickly drain their health. They are not particularly durable and deal little damage in close combat, consequently they suffer against heavily armored and other ranged units. They are also quite fast, able to maneuver quickly in the battlefield.

Usage:

The Archer has no armor and little health, making them one of the weakest units in the game, easily defeated in both missile and melee combat. They also have to be stationary to fire, making for a distinct disadvantage in the field. They are best used in defense atop a player's walls and towers, or in the offensive behind the main army lines, where their long range can be taken advantage of with less fear of reprisal. Archers can also harass worker lines to disrupt resource flow. In conjunction with cats/mantlets, their lifespan can be prolonged by a lot.

Note: When an archer is positioned near a brazier, they gain the ability to shoot flaming arrows. These arrows can be used to ignite pitch ditches and will also deal slightly more damage to armored units.
Crossbowmen


Type: Ranged unit
Cost: 20 gold, 1 crossbow, 1 leather, 2 Honor

Unit statistics
Health: Medium
Damage: High
Range: Medium
Speed: Slow

Description:

Crossbowmen are ranged units, wearing leather armor and equipped with a crossbow. They move somewhat slowly with their gear, but their shots are penetrative through all kinds of armour. They can also withstand several shots and hits thanks to their leather, but perform poorly in melee combat.

Crossbowmen possess slightly less range than archers and reload much slower. However, they can take out most unarmored units in one hit and ones in leather armor in a few hits more. Metal armour is fairly resistant against crossbow bolts though and requires squads of these troops to take down a soldier wearing it. Most siege engines and shields can absorb rains of bolts before they die.

Crossbowmen are fairly cheap to recruit and they need one piece of crossbows and leather armour from the armoury.

Usage:

Crossbowmen are best used in the castle's defense, effectively in picking off troops from a range. They are best used against armored troops and siege equipment close by. They are unable to use braziers, but their shot power greatly makes up for it.

They are also excellent at defending open positions and choke-points, especially when they are supported by mantlets. They can soften up rushes of horse archers and macemen, while they can repeatedly retreat and fire on slow troops in metal armour.

Crossbowmen are also good at besieging lightly defended castles, especially if the defense is made up mostly from archers. Even if the enemy uses towers and walls to gain them range and height advantage, the crossbowmen's high damage output can soften their ranks up considerably.


Knight


Type: Durable meele unit
Cost: 200 gold, 1 sword, 1 metal armour, 50 Honor

Unit statistics
Health: Very high
Damage: Very high
Range: Melee
Speed: Slow (Unmounted), Fast (mounted)

Description:

The knight is a noble soldier with heavy armament and armour, the best and most expensive soldier. Knights are an uncommon sight without a proper industry: a single one require lots of honour and gold to recruit, as well as he is very slow on foot. However, the knight is more than worth its price: his combat capabilities are unmatched, capable of dismantling even the measly swordsman in a matter of seconds. His health pool makes him not only much resistant to projectiles and blunt weapons, but two knights can defeat the lord if left undefended.

The knight can mount a warhorse, quickly changing from a struggling powerhouse to a thunderous charger: the mounted warrior has a very low base attack time and unmatched speed on horseback. The horse is not very durable though and is prone to be lost under fire.

Usage:

Knights are the very late-game 'epic' units that can decide the flow of the game. Their combat capabilities are unparalleled and often times having the superior numbers of knights means victory for the better player.

Knights are excellent defenders and attackers alike. When on the defensive, knights can protect the lord in the keep, but also they can charge and sally forth to conduct counterattacks on the sieging armies. When mounted, they can quickly reinforce positions and help control estates.

Although knights pack quite a punch by themselves, their movement capabilities can be crippled in a matter of seconds when their horse dies. Missile troops under protection are good killers, especially with catapult and ballista support. Catapults can send knights flying, possibly killing them, when they land in a river or the woods.


Macemen


Type: Melee unit
Cost: 20 gold, 1 mace, 1 leather armour, 1 Honor

Unit statistics
Health: Medium
Damage: Medium
Range: Melee
Speed: Very fast

Description:

Macemen, being medium troops, tend to make up the bulk of some armies. However, despite being strong in melee attacks, they have weak armor. An archer firing upon an enemy maceman may have a bit of trouble killing him due to leather armour, but crossbowmen can easily kill large numbers of them.

Usage:

Macemen are very fast, making them suitable the best harassment force. They can deal high damage in no time and they destroy buildings very fast. They can also absorb quite a number of arrows during the process and when moving, most units will miss sometimes.

Macemen experience difficulties when encountering units in metal armour. They have very high health and are unable to severely wound them (except for pikemen) when they are on their own. They can outnumber them nevertheless, and they can outrun them when in trouble, since armour slows their enemies down.

Macemen are vulnerable to large fires so burning carts, boiling oil and pitch ditches are great counters against maceman swarms.

Note: Their quick movement can, however give them a chance to evade those fires, hence having a lot of damage. This is especially the case in Sronghold 2, Stronghold Legends and the versions after those two first ones.


Pikemen


Type: Melee unit
Cost: 20 gold, pike, metal armour, 2 Honor

Unit statistics
Health: High
Damage: Low
Range: Melee
Speed: Slow

Description/Usage:

The Pikeman is a player's premier defensive unit.

Pikemen are heavily armored units with decent speed and high health. Their armor affords them good protection from arrows and crossbow bolts, and gives them high survival ability in melee combat. Compared to other troops, pikemen have relatively poor attack strength, but can match other troops in combat when amassed, making their primary use tying up large formations of enemy soldiers and blocking access to important parts of your castle and keep. They also perform well in the initial stages of a siege, filling in moats and pushing the enemy from the walls and gatehouses.
Spearmen


Type: Support melee unit
Cost: 8 gold, 1 spear

Unit statistics
Health: Low
Damage: Low
Range: Melee
Speed: Fast

Description:

Spearmen are light units that cost little gold and a spear, which means they can be trained in droves. A single spearman is weak, as he wears no armour and therefore can easily be eliminated with archer or crossbow fire. He is fast on foot, able to traverse the map and quickly reinforce positions.

Usage:

Spearmen are mainly used for harassment, having no special ability or trait. Their cheapness allows for sending swarms after one another, in an attempt to wear down adversaries' economies and provide distraction. As an alternative to the armed peasant, they can also be used to sweep an area littered with traps so that the way is cleared for the next wave.

Spearmen perform well in defensive tasks as well, as they can be used to push away enemy ladders or mount rock baskets to deal overwhelming damage to enemies drawing near.
Swordsman


Type: Melee unit
Cost: 40 gold, 1 sword, 1 metal armour, 8 Honor

Unit statistics
Health: High
Damage: High
Range: Melee
Speed: Slow

Description:

The swordsman is the most powerful melee unit in Stronghold. They have a very powerful attack and wear durable metal armor.

They make short work of almost all the units they encounter, even armored troops in close range. Capable of absorbing huge numbers of projectiles (crossbow bolts, in huge numbers), the swordsman can strike down ranged enemies without taking too much damage in open fields. Archers and especially crossbowmen take them out fairly easy when atop of a wall.

They can also destroy buildings and siege equipment with a few swings.

Their main weakness is that they are also the slowest unit in the game. Men-at-arms are units that can easily outmaneuver and/ or distract them while crossbowmen or fire ballistae take them down. Stones launched from magonels, catapults, or trebuchets can also soften up squads of swordsmen.

Usage:

The best use of swordsmen is to protect the head-keep/ headquarters, especially when you leave your castle with your Lord or to protect the estates close to your head-keep, due to their slow movement.

To protect estates farther away, you better use knights at the cost of relatively lesser durability atop the keep than swordsmen (if you have enough honor, you can still summon new horses to regain an extra health bar).

Swordsmen make up the bulk of an army. Their high defense allows them to soak up a lot of damage before succumbing and repel enemies from the walls, and their high attack allows them to easily punch through enemy units and fortifications.

As with other troops, swordsmen operate best in numbers, diverting enemy fire and covering a larger area to work on. Offensively, the best thing to do is to first decimate the archers or crossbowmen at the top of the keep to silence the enemy lord in one blow.

In short: with some preparation, they are slow but deadly troops as long that they have a strong, stable industry that can back them up.

► MERCENARY UNITS
Assassin


Type: Stealth infiltrator unit, Melee unit
Cost: 100 gold, 200 honor

Unit statistics
Health: High
Damage: High
Range: Melee
Speed: Very fast
Special Ability: Stealth: invisibility in close range

Description:

The assassin is a special utility unit recruited at the mercenary post

Assassins are mysterious foot soldiers equipped with a saber and a grapple. They are the most expensive unit to recruit in terms of gold and honour, even surpassing the knight. While this fact prevents hiring them en mass, the assassin can actually perform very well on its own due to his traits. His innate invisibility protects makes him the ultimate covert unit, which only breaks when the assassin engages in direct combat or a unit moves close. He can also use a grappling hook to quickly scale gatehouses and walls. Not to mention his extreme movement speed and very low detection range, the assassin finds its place in the army.

Usage/Tactics:

Assassins have the dedicated task of the stealth attacker unit. Their traits make them ideal for harassment far from the castle, where their actions are most likely to go unpunished. The ability to quickly strike, then retreat back to the shadows makes them almost invincible. Another utilization of the assassin is to infiltrate enemy compounds in a poorly guarded area, by using the grapple to scale walls and then land inside, destroying as many buildings as possible.

While assassins have the power of surprise, they themselves are not particularly durable. Laying man traps are very effective at killing or at least deterring them from unwanted areas.


Axe thrower


Type: Ranged unit
Cost: 100 gold

Unit statistics
Health: Low
Damage: High
Range: Low
Speed: Very fast

Description:

While the Axe Thrower has little health and is particularly weak against armored units and missile attacks, their fast attack speed and high attack allow them to easily rip through hordes of unarmored and lightly armored foes. Care should be used when deploying them, as their range is shorter than that of both Archers and Crossbowmen, requiring them to be quite close to the enemy to be effective.

Usage/Tactics:

Axe Throwers have the shortest range of any missile unit in SH2, but they have a high rate of fire and deal massive amounts of damage. Placing them atop of towers increases their range while protecting them from attacking siege equipment. From this position, a group of Axe Throwers can potentially eliminate an entire enemy's invading force.

In large numbers (around 20 or higher), Axe Throwers can easily decimate a group of armored units, even if those units are mounted knights. Their very fast attack speed and damage output can severely wound or kill any unit that runs into their path, as one Axe Thrower only needs to throw two pairs of axes to kill an enemy Archer. Like all ranged units, the Axe Thrower's melee damage is low and should avoid being put on Aggressive Mode as they usually tend to try and melee their targets

They do not make a good choice for invading, however, as their short range likely means they will be destroyed before they can begin to throw axes. They can serve as support units behind the battle line while friendly units hold up the advancing infantry. When defending with Axe Throwers, they should be placed in choke points and inside towers/keeps to make their damage output most effective.


Berserker


Type: Melee unit
Cost: 80 gold

Unit statistics
Health: High
Damage: High
Range: Melee
Speed: Very fast

Description:

Berserkers are Viking warriors armed with a labryc axe. They are very fast and deal a large amount of damage.

Usage/Tactics:

When in battle, these troops should be used carefully, as the cost of 80 gold makes them expensive to replace. Olaf especially likes to create large amounts of them and siege enemy with them. Even if they are strong, they are very weak to missile fire due to wearing almost no armour and cost a lot for a melee unit. But a lot of these can really change the outcome of the battle.

If you choose to use these troops, you should eliminate missile troops first before moving them in as by the time they get to the lord while being hammered by missile fire, they will be all but destroyed. They can take out most troops in melee combat but again, they don't have the world's best defense stat so just be careful. Berserkers are useful for harassing because of their powerful melee strikes that can cut down troops defending estates. They are also useful for damaging the economy of the enemy by destroying buildings and killing workers.

Remember though, do not use these troops until there are no missile troops left otherwise the berserkers won't last long.


Hobilar


Type: Melee unit
Cost: 40 gold. 2 honor

Unit statistics
Health: Average
Damage: Low
Range: Melee
Speed: Fastest

Description:

The Hobilar (or light cavalry) is a mercenary unit

These light cavalry units are very agile and move very fast. Hailing from Wales, they are ideal for making short work of siege camps and their weapons. Their attack strength matches that of a spearman, but their speed is nearly doubled and they can easily outrun any other foes.

Usage/Tactics:

A good strategy is to build a sally port in a convenient spot, then place a large group of Light Cavalry behind it. When the enemy siege force gets close, immediately send them out to take down siege equipment. With proper strategy and timing, you can easily flank siege equipment and overall sabotage the entire battle. They are also considerably a great unit to use early in a match considering they only cost gold, and are unlocked early.

However, they are quite weak because of their light armor. They are easily killed by long-ranged units such as archers. They are almost useless when sent to an enemy with archers guarding its walls and towers. They are easily shot and sometimes die instantly when they are idle and doing nothing.

In some cases, because of their great speed, archers firing at them become inaccurate and they only hit the ground. Light Cavalry is excellent for distracting the enemy's archers when you are attacking.

A tactic that is often used in games is that small groups of light cavalry will charge around attacking anything unprotected, usually farms and buildings, but mostly unprotected siege equipment. This means that any estate you control should be protected from light cavalry attack.

If you wish to raid using light cavalry, you should send in some other units such as horse archers and/or swordsmen/pikemen to clear up or distract troops guarding an estate and raid or capture it with light cavalry. Then retreat unless you capture the estate.


Horse Archer


Type: Ranged unit
Cost: 80 gold, 2 Honor

Unit statistics
Health: Low
Damage: Low (Melee), Average (Ranged)
Range: High
Speed: Very fast

Description:

The Horse Archer is a very versatile unit, with a high fire rate while not moving and very low reaction time, he can take on several unarmored troops without the need of retreat. Crossbowmen and outlaws can be menacing, but the horse archer can simply outrun and out-range them. In addition, they are given the ability to target enemies within range while moving. This eliminates the need to stop to focus fire on targets and provides an even easier micromanagement.

Usage/Tactics:

Marching armies are favorable targets, since it is very easy to weaken the advancing units. Siege Engines are also vulnerable to concentrated fire.

Horse archers may siege badly defended castles on their own, provided they always have reinforcements.

Horse archers are very good in combination with portable shields. If your opponent have a lot crossbows on towers, you will need a lot of horse archers to kill them which costs a lot of money and at the end it isn't effective. You can make some portable shields which costs only 5 gold + 30 gold for each engineer. With portable shields protecting your horse archers you will need just a 30-40 of them to kill all archers or crossbows your opponent have, that will save a lot of money instead buying hundreds of them.
Pictish Boat Warrior


Type: Melee unit
Cost: 40 gold

Unit statistics
Health: Low
Damage: Low
Range: Melee
Speed: Medium
Special Ability: Can travel across water.

Description:

The Pictish Boat Warrior is armed with a Labrys, which doubles as an oar, and has a Coracle on his back that he uses to cross water.

The boat warriors are not too fast and not too slow, lack of armor and their weak attack makes them only useful in ambushes from the sea. They speak Pictish, which is mostly composed of gibberish.

When used against enemies with castles constructed on islands or spurs of rock, surrounded by sea, a coordinated siege and attack by a large force of these soldiers can leave an enemy shattered, as they come under attack from all sides.

Usage/Tactics:

A tactic often used is that whilst an ally attacks from the front, a force of boat warriors assaults from the sea shore, unnoticed by the enemy as they are too busy fighting your ally. You make a small hole in the wall and sneak up and kill the lord while the enemy isn't looking.

One important rule is that boatmen should not go in range of enemy missile fire, even those from Outlaws. As they are extremely vulnerable to this. They can only make sieges work in larger groups than ordinary soldiers because their attack and defense aren't the best.

However, if one wishes to make a sneaky siege, without need for Assassins, use the boatmen.


Outlaw


Type: Melee/Ranged unit
Cost: 80 gold, 2 Honor

Unit statistics:
Health: Low
Damage: Low
Range: Ranged (With Javelin), Melee (With dagger)
Speed: Fast
Special ability: Throw Javelins, Appear as green dots on the minimap and turn invisible while in trees.

Description:

Outlaws are fast and expensive units suitable for ambush, because of their green camouflage. They can throw javelins at distant enemies, causing high damage on unarmored units. Javelins take time to "recharge" after thrown. When not having one, the outlaw equips his dagger, offering limited effectiveness in melee combat.

Outlaws appear as green dots on the minimap like trees and bushes to the enemy, making them useful to sneak up on an unsuspecting enemy and perform a hit-and-run attack.

Usage:

Outlaws are rarely seen on the battlefield. They are quite expensive to their capabilities and almost always need assistance, having similar attributes as a men-at-arms, but costlier. They also lack armor and damage output to fight successfully on their own. However, they are somewhat more durable than a spearman and also move faster. Multiple javelins thrown at a crossbowman or a maceman can also prove lethal.

Outlaws are favorably used in castle defenses due to their attributes. When they are placed on a gatehouse or a tower, they gain a huge benefit from height advantage. Moreover, they are quite a good counter to ladder attacks, as they can kill advancing laddermen with their javelins and push off any ladders set up.


Theif


Type: Melee, Weak pilliager unit
Cost: 50 gold, 10 Honor

Unit statistics:
Health: Low
Damage: High
Range: Melee
Speed: Fastest
Special Ability: Can steal from opponents treasury

Description:

Thieves are not made for combat but for stealing gold from the enemy's treasury. They have the appearance of a farmer to the other players. They can be ordered to 'attack' a player's treasury. When deployed, they steal 25 gold at regular intervals. Thieves can be uncovered by patrolling guards or manually by the player.

When uncovered, the thief gets into melee combat and behaves like a regular soldier. He performs very well with his short sword, but falls from a few arrow hits. Thieves cost much honor and should be used carefully.

Usage/Tactics:

In a siege situation, with lots of thieves, one can raid an opponents treasury and steal gold from them as the spoils of war. This is a costly process in terms of honour, but it brings in lots of gold.


► MONASTERY UNITS
Fighting Monk


Type: Fast melee strider
Cost: 25 gold, 1 honor

Unit statistics
Health: Low
Damage: Medium
Range: Melee
Speed: Very fast

Description:

"Armed with a staff, these monks protect his faith and church fanatically. They are recruited in a monastery for little gold and honor. They perform very well in close combat and in masses they steamroll over buildings and opposing units. Still, they are not that durable and armored units or missile units will dispatch them easily."

Usage/Tactics:

Fighting monks are a rare sighting because of the monastery's in-availability for most of the game. When the sufficient rank is reached, they can serve as a good defense for a reasonably low price. They move very fast and therefore they can be used to strike the enemy at their weakest point, however they will stand less chance than warrior monks. Still, their low honor requirement makes them more affordable and masses of fighting monks can be easily hired, if backed with a smooth-running economy.

Note: The AI lords do not use the monastery and therefore fighting monks do not appear in their ranks during Kingmaker games.
Warrior Monk


Type: Melee unit
Cost: 1 gold, 10 Honor

Unit statistics
Health: Medium
Damage: High
Range: Melee
Speed: Very fast

Description:

Warrior monks are zealous defenders of the church. They walk with pride and carry a short sword and a shield with their lord's crest on it. They are very fast and prove devastating in melee combat, capable of weakening even swordsmen. They can quickly close in on fleeing targets and make a formidable assault unit.

Warrior monks can be recruited at a monastery.

Usage/Tactics:

These monks are rare sighting in multiplayer due to their tech level and availability late in the game. However, in "Baron" and "Duke" games they are seen somewhat often.

Monks can be used to rush careless enemies without hurting your own economy too much. Although honor will be quickly depleted when amassing warrior monks, there will be plenty of gold left to develop and build your industry and military.

Monks can also serve as a special task force to intercept enemy workers and industry lines. They attack and move considerably fast so they can quickly cause enough damage the enemy economy and draw units off the battlefield.


► ENGINEER'S GUILD/SIEGE CAMP
Engineer


Type: Weak support/defense unit

Unit statistics
Health: Very low
Damage: Very low
Range: Melee
Speed: Fast

Descripition and Usage:

Engineers recruited at the Engineer's Guild can repair damaged wall segments or use the oil smelter to carry oil pots. Making them a very viable defense unit for your castle. However they are somewhat vunrable to missle and arrow fire, so use this units accordingly!

Note:
Engineers are automatically recruited when using an oil smelter, up to four at a time (one supplying the smelter with pitch and three other to defend). The game deducts gold with each engineer assigned to the smelter.
Ladderman


Type: Weak support unit
Cost: 4 gold

Unit statistics
Health: Very low
Damage: Very low
Range: Melee
Speed: Very fast

Description and Usage:

Laddermen have an almost useless melee attack in forms of punching, which barely do any damage. They have an ever worse attack with their ladders. Even an armed peasant is stronger than the ladderman. However they are harder to kill than in Stronghold Crusader.

Most AI lords in Kingmaker use laddermen, as walls cannot be destroyed by melee units in the game unlike in Stronghold Crusader.

Once a Ladderman puts up the ladder, he will run to the siege camp or engineer's guild to receive another one. Ladders can be pushed away by any troops and they can be destroyed by catapulted rocks and ballista bolts. In the latter way, they may also catch fire.

Battering Ram


Type: Demolishment siege engine
Cost: 200 gold

Unit statistics
Health: Very high
Damage: High (Structures), none (units)
Range: Melee
Speed: Slow

Description/Usage:

Rams are created in the siege camp and require no engineers to be recruited beforehand. However, they see limited usage since they can only target and demolish gatehouses. Still, the ram possesses very high durability and withstands repeated strikes from melee troops and catapults.

Cat


Type: Protective mobile cover
Cost: 200 gold

Unit statistics
Health: Very high
Damage: None
Range: None (Cannot attack)
Speed: Very slow

Description/Usage:

This big shield resembles the mantlet very much. It can absorb many projectiles from the front, but it also provides cover from aerial attacks of siege engines and ranged soldiers. This makes the cat useful in many situations, like covering moat diggers and small groups of marching units. Multiple cats can create an almost impenetrable barrier for a friendly army, limiting the enemy's options to effectively engage clusters it.

However, the cat falls very quickly to melee units and fire. Fast units or armored men can swiftly dispose of multiple cats, as well as burning carts can light up entire armies with their area attack, from which cats cannot escape due to their slow movement speed.


Catapult


Type: Offensive siege weapon
Cost: 200 gold

Unit statistics
Health: Medium
Damage: 3+1 splash
Range: Medium
Speed: Medium

Description/Usage:

catapults are instantly created in the engineer's guild or the siege camp and they are automatically supplied with engineers. They have an infinite supply of rocks and they have much better accuracy. They also move about twice as fast when not moving in open order.

Catapulted stones hitting a unit will cause it to fly rather than die, who suffers damage from the stone and an additional damage upon landing, determined by flying distance and height difference. Units near death may collapse from incoming stones rather than fly away. Soldiers landing in forests or rivers also die instantly.


Manlet (Portable shields)


Type: Mobile defense unit
Cost: 10 gold, 1 peasent

Unit statistics
Health: Average (Against melee), High (Against ranged)
Damage: None
Range: None (Cannot attack)
Speed: Very fast

Description:

Shields are very agile and cheap structures with an arrow slit. Fellow units can shoot through it, but hostile ones cannot. Mantlets can also absorb many shots before they become unusable, so it is very good at protecting troops.

Mantlets are however very vulnerable to melee attacks, as they fall apart in no time when they are sliced into pieces. Their very small size means they can only protect small clusters of units, therefore many of them are needed to effectively protect groups of soldiers.

Mantlets are created in the siege camp.

Usage/Tactics:

A very effective way to siege a heavily-defended castle is rushing in multiple mantlets and ranged units into enemy archer range. The enemy will always or most often hit the mantlets so your own troops have time to work. Shields can well protect moat-diggers or units that remove enemy walls and towers.

Shields can be abandoned in the middle of a battle to construct another one. This is useful if you are low on money and cannot afford a high number of engineers, but more importantly it can also be used to save an engineer from a badly damaged shield. Abandoned shields still function as they would, however they lose their mobility when the engineer quits it.

Trebuchet


Type: Long-range siege weapon
Cost: 200 gold

Unit statistics
Health: High
Damage: High
Range: Highest
Speed: Slow (Packed up), Inmobile (Deployed)

Description:

Mighty and powerful, the trebuchet is a decent device to destroy enemy castles and structures from a distance. It hurls stones just like a catapult, but it fires in a high arc, gaining the ability to cover higher distances in the air. Its stones are also much more powerful due to its construction.

The trebuchet can be moved on its own before it is stopped and the engineers assemble it to be fully operational, it cannot be repacked up again. They are created from the siege camp.

Usage/Tactics:

The trebuchet is primarily used to remove buildings and enemy defenses from long range. Since it fires in a high arc, it can operate in relative safety as it does not necessarily have to be within range of the enemy defenders. The trebuchet can bombard the towers, which may kill or severely wound units atop it.

It is also very effective in wiping out peasants assembling around the enemy campfire by carcasses. As the disease clouds deal very low damage to soldiers, it is useless to target them in attempting to whittle down their health.

While ineffective against single targets, the trebuchet can use its bad accuracy to kill enemy units in tight groups. Its stones would hit infantry with a high chance and multiple trebuchets can quickly thin out such groups.

Weakness:

The trebuchet hurls its projectiles with much worse accuracy than the catapult, which may be useful in bringing down huge building arrays, but will more than likely hit a different target than intended.

The trebuchet is immobile when deployed. Therefore it needs some sort of protection, as its extremely low rate of fire cannot maintain against advancing melee units. It can also be taken out from long range by another trebuchet or other siege engines. Fire can also quickly destroy it.


Siege tower


Type: Support/transport device
Cost: 150 (small), 250 (large) gold

Unit statistics
Health: Very high
Damage: None
Range: Melee
Speed: Very slow

Description:

The siege tower is a support siege device.

The siege tower is a wooden equipment that is operated by 4 engineers. It is equipped with a drawbridge that can be deployed onto enemy walls and gatehouses. When connected to them, any soldiers on foot may scale walls via the siege tower. Once docked, it remains docked and it cannot be moved away. Engineers may abandon the tower upon docking.

Two sizes of siege towers are available. The large tower costs more and moves even slower, but it also possesses higher health. When created, they need a small time to be constructed in the siege camp.

Usage

As stated above, the siege tower is used to quickly overwhelm a castle's weak spot by friendly units. The tower is fairly resistant to missile fire, but moves very slowly and melee units may quickly deplete its health. Therefore, it requires a good number of units for protection. Fire may also destroy them easily.
Fire ballista


Type: Ranged siege engine
Cost: 150 gold, 2 peasants

Unit statistics
Health: High
Damage: High-Very high
Range: Very high
Speed: Slow

Description:

Similar to the tower ballista, its bolt deals tremendous damage, taking out armored troops with only a few hits. Its flaming arrow also causes significant damage to buildings, which can be set on fire when damaged enough.

Fire ballistae track movement, so they are very reliable and fire with a high rate of fire.

Usage/Tactics:

The fire ballista fires flaming bolts, meaning that it can easily set fire to a whole fortress if it sets ablaze to a building inside it. Some players, before lighting up a castle, usually take care of the wells to be sure nothing will put out the fire.

Note: Stone buildings tend to not spread fire, instead buildings out of wood light up more easily.

Fire ballistae can be used as a efficient castle defense, when placed near the walls to take out any siege machines and advancing armored troops.

A large force of fire ballistae can be difficult to beat, the main thing that should be done is keeping out their visual range (hiding behind walls, large rocks) and attacking with fast infantry (macemen or knights are good). The best defense against fire ballistae are towers filled with crossbowmen, catapults, tower mounted ballista or another fire ballistae (fight fire with fire).


Burning Cart


Type: Suicide weapon
Cost: 100 gold, 1 peasent

Unit statistics
Health: Low
Damage: High
Range: Melee
Speed: Very fast

Description/Usage:

Loaded with flammable hay bales, the cart is a destructive weapon. It is operated by two engineers, who can move the cart to a desired location very quickly. With the 'attack' command, the hay is ignited and the cart is immediately located to the target area, lighting it up. The fire also spreads into every direction to cause even greater destruction. The cart is usable again once its target is lit up. Although the cart moves very fast, it is also very vulnerable to all kinds of attacks. Five or six arrows kill it and melee attackers also slash it into pieces in no time. If the cart is shot down when the hay is burning, it disassembles and burns the area up where it died.
► TOWER UNIT/DEFENSE ENGINES
Tower Ballista


Type: Defense engine
Cost: 200 gold, 2 peasents

Unit statistics
Health: Average
Damage: Medium
Range: Very high
Speed: Immobile

Description:

This engine is a huge crossbow, which hurls arrows at enemies and buildings. Mounted on the top of a tower, the ballista has a very long range. Arrows from the ballista cause great impact damage to most units and siege engines. They are also capable of setting buildings on fire on low health.

The ballista needs a tower with stable foundation to be placed on. This machine is operated by two engineers, who wind up the string, insert the bolt, then fire. These engineers automatically come upon siting.

Usage/Tactics:

Ballistae see an extended usage against lined-up and densely packed units, as their arrows knock back units in the same way as catapulted rocks do. They can knock units into a river or trees, killing units instantly and they are also useful at removing a knight's mount.

Ballistae are quite unreliable to an extent, as they can sometimes lose track on units that get out of range. Retargetting them manually can solve the problem.

Mangonel


Type: Defense engine
Cost: 200 gold, 2 peasents

Unit statistics
Health: Average
Damage: Medium
Range: High
Speed: Immobile

Description:

The mangonel is an all-round defense weapon that is placed atop of a tower and is operated by two engineers: one of them for reloading and the other to pull, then release the hurler. Catapulted rocks can incapacitate and knock back units with enormous force that they need to recover after a short time. Rocks can hit buildings, most of which can crumble from one hit. They are mildly effective against siege engines

Mangonels can be ordered to attack a specific target or circular area within range, but they fire with great inaccuracy. They can be sited on any tower except for the lookout tower.

Usage/Tactics:

Mangonels can be used to stall enemy attacks, since their rocks knock back and stun enemies, while dealing damage. This can be used with particular effectiveness in terrains full of trees and water, since units landing They are a good obstruction for groups of mounted knights, who can lose their mount to only a handful of rocks in spite of having great speed. They are also useful for destroying nearby enemy buildings such as siege camps and neighbouring hostile farms.

Weakness:

Mangonels are a threat to friend and foe both. The rocks can hurt either player's properties and units, meaning that a badly targeted mangonel can cause severe losses if one does not pay attention.

Other threat comes from its immobility and limited placement. Mangonels pretty much depend on their tower, since a severely damaged tower may cripple in no time, sending its engine and staff into destruction. Also, when a mangonel's health is in the red, it needs to be disbanded and replaced in order to "regain" its health.

The mangonel is so inaccurate that it has problems hitting targets being close. Archers and other missile units may shoot without much problem at the device, provided they are not in a big group. Melee units scaling the tower means doomsday for the mangonel without proper defense.
Brazier


Type: Defense engine, unit modifer
Cost: 50 gold

Unit statistics
- Igniting arrows -

Description/usage:

Braziers are torches that allow archers to shoot fire arrows.

Braziers can be placed on walls, towers, gatehouses, and the keep. When an archer or stands near it, he fires fiery arrows that can be used to ignite pitch ditches, frying units passing through the flames.

Crossbowmen, horse archers and ballistae are unable to ignite their arrows even if they stand near a brazier. Oppositely, fire ballistae carry their own supply of fire bolts and they do not require braziers.
Rock basket


Type: Defense engine, unit modifer
Cost: 100 gold

Unit statistics
- close defense tool -

Description

The rock basket is simply a holder for an infinite number of rocks, which is used for close-ranged defense. It is best to mount on the edge of a wall section, where nearby soldiers can take rocks out of it and throw them on advancing enemies. It is a cheap means of defense, although its effectiveness is limited.

Usage:

The basket is best used against enemy ladders, which may be set up directly against the wall, where the rocks can be thrown. Since ladders can be destroyed, several rocks can quickly bring an end to ladders and units climbing it. Rocks can be thrown on units underneath the wall, which can take away quite a bunch of health from them.

It is advised to use cheap units, such as armed peasants or spearmen to support ranged units.

Unfortunately, if operating units are clumped together when using the basket, they may throw rocks on their comrades standing in front of them, who may be clobbered to death unintentionally.

If the walls around the basket are damaged, it is rendered unusable and disappears.
► CONCLUSION

17 Comments
Dave Jul 27, 2023 @ 8:44pm 
how did you get the skeleton lord in thumbnail?
Overdrive Mar 5, 2022 @ 5:19am 
the big siege tower can not be fitted with soldiers on top of the actual tower. very depressing :(
Rana Dec 29, 2021 @ 10:22pm 
In Kingmaker, I place Trubuchets at my walls to target Siege spawn points, or outside out of range of archers. This knocks out Siege Camps quickly. Ballistas with long range also help if outside, as they can attack clumped armies around the camp, before they attack.

There is a glitch in game where destroyed castles with moats turn into estates with moats you can not remove. You must fill in moats before destroying the castle! Stupid glitch. Mass peasants to fix this, attacking moats, before killing the Lord.
MrGrape472 Dec 25, 2020 @ 12:23pm 
good work steezy


my cocks hard
steezy  [author] Dec 1, 2020 @ 12:30am 
Fair point but just calling the units what they’re called in game :P
PoppaHodge May 26, 2020 @ 12:40pm 
Good guide, but it seems kind of odd to insist on saying holibar instead of light cavalry, then still call the halberdier a "Pikeman"
Cryogenius333 Apr 15, 2020 @ 6:50pm 
Mangoa can be very effective if used in pairs, 3s.
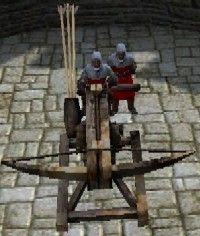
Be aware of what kind tower you place your engines on and how you build the castle. You have GREAT Towers, which are massive, and tall, but these towers are not always good to mount ballistae on, as mounting one here will likely result in it kabobbing any defenders on the tower with it when it fires. You've no idea how many of my own archers I've knocked off these monstrosities. Its effective to place mangos on these, as the enemy has a hard time firing up towards them, and with just two of these towers sporting mangos, you can turn the field into no-mans-land.
Place "Bastion Towers" under and in front of Great towers or out of the way (like historical bastions) in order to provide lateral support for the battle. Place ballistae on these towers, aside great towers at 45-70 degree angles at each corner so your enemy likely wont focus on them, but ballistae will use their great range to create a crossfire in the "bowl"
ThePursuer78 Apr 8, 2020 @ 6:32pm 
i have been playing this for years on disc before i got Steam addition and i learned new tricks for several units although ill still play with my prefered strat, Horse archers and trebuchats (this may sound like a weird strat but it works)
r.chaves2008 Jan 9, 2020 @ 6:51pm 
very good