Quadrilateral Cowboy

Quadrilateral Cowboy

103 evaluări
Quadrilateral Cowboy Mod Handbook
De către BlendoGames
The official handbook to creating mods for Quadrilateral Cowboy.
   
Premiază
Adaugă la preferate
Preferat
Elimină din preferate
Introduction
This handbook aims to give you a starting point for making mods for Quadrilateral Cowboy. Mods can be many things -- create or modify maps, characters, equipment, and almost anything else.

Quadrilateral Cowboy uses id Software's idTech4 game engine. This engine was previously used in games such as Doom 3, Quake 4, and Brink.

If you have any modding questions, please ask in the Modding discussion forum.

Ready to start? Here we go.

Modding: Folder Creation
To start, a mod needs a folder for all of its files. Let's create this folder.
  1. Enter Quadrilateral Cowboy's root folder.
    It will likely be something similar to:
    steam\steamapps\common\quadrilateralcowboy
  2. Create a new folder for your mod. Give it a distinctive name.
    • Keep the folder name less than 16 characters.
    • Do not use spaces in the folder name.
    • Your setup should now look like this:

Great, we now have a folder for your new mod. Now we need to set up some information files for this new mod.

Description file
This file determines the name of the mod.
  1. Enter your mod's folder.
  2. In the mod's folder, create a file called: description.txt
  3. In this file, enter the title of your mod.
    • This determines what appears in the main menu MODS list.
    • The file should consist of just one line.

PK4 file
Create a dummy PK4 file. This allows the game to find your mod.
  1. Enter your mod's folder.
  2. In the mod's folder, create an empty file called: pak000.pk4
    • I usually just create an empty text file and then rename it to pak000.pk4
    • Those are three zeroes.
    • Your setup should now look like this:

Test it
Time to test out your new mod.
  1. Run Quadrilateral Cowboy.
  2. In the main menu, select: Mods
  3. Your new mod should appear in the list. Select it and click: ACTIVATE MOD

Great! The mod doesn't do anything yet -- it's basically empty at the moment -- so let's add new content to it.
Mapping: Installation
To create and edit maps, Quadrilateral Cowboy uses a tool called DarkRadiant.

DarkRadiant was made for The Dark Mod, a great Doom 3 mod. The creators of DarkRadiant have graciously made their editor compatible with other games, for which I'm tremendously thankful.

Installation
We'll begin by downloading and installing DarkRadiant.
  1. Download DarkRadiant at: http://darkradiant.sourceforge.net
  2. Install DarkRadiant.
  3. Run DarkRadiant.

Initial setup
On initial startup, DarkRadiant will request setup information. Use these settings:
KEY
VALUE
Select a game:
Doom 3
Engine Path:
<Quadrilateral Cowboy's installation folder>
Mod (fs_game):
<the name of the mod folder you created in the Modding: Folder Creation section>
Mod Base (fs_game base):
base

Window layout
You should now see something like this:


Your window layout might look different. To use the same window layout as pictured above:
  1. In the top menu bar, select: View > Window Layout > Regular
  2. Exit DarkRadiant
  3. Start DarkRadiant

Terminology
In this walkthrough, I'm going to refer to the windows with these names:


ABBREVIATION
DESCRIPTION
LMB
Left Mouse Button
RMB
Right Mouse Button
MMB
Middle Mouse Button

Mapping: Your First Room
Let's make a map. Map architecture is made up of solid pieces of geometry, also known as brushes. A brush can be thought of as a building block - if you see a wall, or ceiling, or floor, it's probably made up of one or more brushes.

A Wall
Let's create a simple wall brush.
  1. On your keyboard, press the minus key until the status bar's grid size reads 256:

  2. In the 2D window, press and hold LMB to draw a wall brush. It should look similar to this:
    Dr redwall.png
  3. Press ESC to deselect the wall brush. Done!

More Walls
One wall is good, but four walls is better. Let's make more walls.
  1. In the 2D window, press and hold LMB to make another wall brush:

  2. Press ESC to deselect the wall brush.
  3. Repeat steps 1 and 2 until you have four wall brushes that look like this:

Make the Floor
We now have four walls. Let's add a floor brush.
  1. Press CTRL+TAB. This will change the 2D window's perspective. Notice the 2D window is now looking from a side view.
  2. Press and hold LMB to draw the floor brush:

  3. Press ESC to deselect the floor brush. Done!

Make the Ceiling
Let's finish this room with a ceiling brush.
  1. Press and hold LMB to draw the ceiling brush:

  2. Press ESC to deselect the ceiling brush. Done!

Your First Room: Review
Let's review some of the things we covered in this section:
  • BRUSH: a piece of architectural geometry. Create by holding down LMB.
  • DESELECTION: deselect everything by pressing ESC.
  • GRID: The plus and minus keys resize the grid.
  • 2D PERSPECTIVE: Pressing CTRL+TAB will cycle the 2D window's perspective.

We now have four walls, a floor, and a ceiling. There's your first room! In the next section, we'll paint the walls with some textures.

Mapping: Texturing Your First Room
Camera Control
Let's move the camera to a good spot.
  1. Move the mouse cursor into the 3D window.
  2. Press RMB to activate camera mode.
    • Move the mouse to rotate the camera.
    • Press the keyboard's arrow keys to move the camera.
  3. Press RMB again to exit camera mode.

Texture a Wall
The walls look a little naked. Let's give them some textures.
  1. In the 3D window, move the mouse cursor onto a wall brush.
  2. Press SHIFT+LMB to select that wall brush:

  3. Press S to open the Surface Inspector.
  4. Click the folder icon:

  5. Click blue64:

  6. Click OK:

  7. Click the X button to close the Surface Inspector:

  8. Press ESC to deselect the wall.

Great, the map now has one textured wall brush. Let's texture the rest of the brushes.

More Texturing
  1. Move and rotate the camera to face an untextured brush.
  2. In the 3D window, SHIFT+LMB select an untextured brush.
  3. In the Material Browser, click blue64:

  4. Press ESC to deselect the brush.
  5. Repeat steps 1-4 until all surfaces are textured.

Texturing Your First Room: Review
Let's review what we covered in this section.
  • CAMERA: press RMB in the 3D window to toggle camera mode.
  • BRUSH SELECTION: press SHIFT+LMB to select brushes.
  • SURFACE INSPECTOR: press S to choose textures.

Great, everything is now textured. In the next section, we'll give the map a start point and a light source.

Mapping: Adding Entities to Your First Room
If something moves, affects the world in some way, or can be interacted with, it's an entity. Examples of entities include doors, breakable windows, and soda cans.

We're going to place two entities into this map:
  • A player start point.
  • A light source.

Add the Player Start
  1. Press the keyboard's plus key until the grid size is 64. The current grid size can be found on the status bar:

  2. In the 2D window, move the mouse cursor inside the room:

  3. Press RMB.
  4. Click Create Entity:

  5. Click the + icon.

  6. Find info_player_start in the list and click it.
  7. Click Add.
  8. Press ESC to deselect the entity. Done!

If the placement of the entity does not look right, let's adjust it.
  1. SHIFT+LMB on the player start point to select it.
  2. Hold LMB on the player start point. Drag it. Release LMB when done.
  3. Press CTRL+TAB to look at the player start point from different perspectives.

Add a light
  1. Follow the steps in the above Add the Player Start section.
  2. In step 6, click on light (instead of info_player_start).

Adding Entities to Your First Map: Review
Let's review what we covered in this section:
  • PLACING ENTITIES: press RMB to add entities.
  • ENTITY SELECTION: press SHIFT+LMB to select entities.
  • MOVING ENTITIES: hold LMB on a selected entity.
  • DESELECTION: press ESC to deselect entities.

Great, the room now has a player start point and a light source. In the next section, we'll test the map.

Mapping: Testing Your First Room
It's time to play this map.

Save
  1. Click File > Save as...
  2. Enter the mod folder you created in the Modding: Folder Creation section.
  3. Click the Create Folder button. Name the folder: maps
    The folder structure should look like:
  4. Enter the maps folder.
  5. In the Name field, type: coolmap
  6. Click Save

Debug Console
To make testing easier, let's enable the console.
  1. Run Quadrilateral Cowboy.
  2. Click Options > Advanced Options
  3. Click Debug Console to YES
  4. Done!

Mod activation
Let's activate your mod.
  1. Run Quadrilateral Cowboy.
  2. Click on: Mods
  3. Select your mod from the list.
  4. Click on: ACTIVATE MOD

    Compile
    In order for the Quadrilateral Cowboy to understand the new map, we first have to compile it.
    1. Run Quadrilateral Cowboy.
    2. On the keyboard, press tilde (the key next to 1) to toggle the console.
    3. Type: dmap coolmap
    4. Done!

    Leaks
    If you receive this error message...

    ...then it means there's a leak in the map. Leaks must be fixed before the map can be run.

    What's a leak?

    • First, let's consider everything outside of rooms as a void.
    • Room interiors must be 100% airtight from the void.
      • If a room's interior has any line-of-sight into the void, then the map is considered to be leaking.
    • Entities must be placed inside rooms.
      • If an Entity is in the void or has line-of-sight into the void, then the map is considered to be leaking.

    Play the map
    1. Run Quadrilateral Cowboy.
    2. On the keyboard, press tilde (the key next to 1) to toggle the console.
    3. Type: map coolmap

    Done! Welcome to your first room.

Mapping: Standard Sizes
Ceilings
Normal ceiling height
128
Minimum standing-height ceiling
76
Minimum crouch-height ceiling
40

Clambering
Maximum clamber height
184
Maximum ultraclimb height
330

Clambering
Normal staircase step height
8
Maximum staircase step height
16

Common door
Height
104
Width
56
Depth
8

World elements
Railing height
48
Table height
48
Chair seat height
32
Lightswitch height above ground
64
Mapping: Debug Console
The console grants access to various developer tools and debug information.

To enable console access:
  1. In Quadrilateral Cowboy's main menu, click Options > Advanced Options
  2. Set Debug Console to YES
    • On your keyboard, you may now press tilde (next to the 1 key) to open the console.
    • Press tilde again to close the console.

Helpful map commands
Command
Description
map <mapname>
Load a map.
dmap <mapname>
Compile a map.
r_showlightcount
Displays lighting overlap.
0 = red
1 = green
2 = blue
3 = cyan
4 = pink
5+ = white
r_showportals
Displays visportals.
g_showcollisionmodels
Displays collision boxes.
g_showentityinfo
Displays entity names.
r_showtris
Renders wireframe.
0 = off
1 = on
2 = on, with backfaces
r_showprimitives
Show triangle count.
trigger <entityname>
Trigger an entity.
g_showmodelnames
Display filenames of all the models.

Helpful player commands
give all
Gives you all inventory items.
god
Makes you invincible.
noclip
Fly through walls.
notarget
Makes you invisible to cameras/turrets.

Live update commands
When you update any files, enter these commands to dynamically reload the asset while the game is running.
reloaddecls
Reload definition/material/particle files.
reloadguis
Reload gui files.
reloadguis
Reload gui files.
reloadimages
Reload image files.
reloadmodels
Reload model files.
reloadsounds
Reload audio files.
reloadanims
Reload animation files.

Helpful debug commands
bind <keyname> <command1;command2;command3;...>
Bind a keyboard/mouse button to console command(s).
com_showfps
Displays framerate
testgui <guiname>
Display a gui.
find <name>
Find a console command.

Scripting: Introduction
What are scripts? A script:
  • handles the logic in maps, weapons, and characters.
  • uses its own language, DoomScript.
  • is represented by text files.
  • are files are appended with a .script suffix.
For this introduction to scripting, we'll cover basic map scripting functionality.
Scripting: File creation
Let's make a map script file.
  1. Enter the folder you saved your map file in.
    It will likely be something similar to: steam\steamapps\common\quadrilateralcowboy\YOUR_MOD_NAME\maps
  2. In this folder, create a text file named: coolmap.script
    Ensure your map file and script file share the same name. For example, if your map file name is coolmap.map, then the script file should be named coolmap.script
  3. Open coolmap.script with a text editor.
    I use Notepad++[notepad-plus-plus.org] but any text editor will work fine.
  4. Copy and paste this into your newly-created script file:
    namespace coolmap { void main() { sys.println("hello coolmap world"); } }

Great, now we have a brand-new script file. Next, let's connect this script file to the map.
Scripting: Connecting to the map
Let's connect the script file to the map.
  1. Return to DarkRadiant. Open coolmap.map
  2. In the 3D window, move the mouse cursor onto a wall brush.
  3. Press SHIFT+LMB to select that wall brush:
  4. Press N to open the Entity Inspector:
  5. Enter into the two fields:
    • call
    • coolmap::main
  6. Press the enter key. The Entity Inspector should now look like this:

Done. Now, when you run the game, the map will activate the script file's main() function.

Let's verify that it works. Test it by running the game, loading coolmap, and then opening the debug console. Somewhere in the debug text, it should read:
hello coolmap world
Scripting: Equipping the player
Let's add some further functionality. When the map starts, we'll give the player some starting equipment.
  1. Use a text editor to open the coolmap.script file.
  2. Find the main() function. Between the curly brackets, add these lines:
    $player1.giveInventoryItem( "weapon_deck" ); $player1.giveInventoryItem( "weapon_cctv" ); $player1.giveInventoryItem( "weapon_weevil" );
  3. Save the file. The entire script file should now look like this:
    namespace coolmap { void main() { sys.println("hello coolmap world"); $player1.giveInventoryItem( "weapon_deck" ); $player1.giveInventoryItem( "weapon_cctv" ); $player1.giveInventoryItem( "weapon_weevil" ); } }

Run the game and load coolmap. The player should now auto-equip with the deck, the CCTV, and the weevil.

Now, what does all this mean? Let's break it down:
main()
is the name of the function. main() gets called automatically when the map is loaded.

$player1
is a reference to the player object.

giveInventoryItem
is a script command. Refer to the Appendix for all script commands.

"weapon_deck"
is the name of an inventory item. Refer to the Appendix for all inventory item names.

Assets: Custom Textures
Let's create a custom texture for your mod.

Creating a texture
  1. Enter your mod's folder.
  2. Create a new folder named: textures
  3. Use an image program (i.e. Photoshop, paint .net, GIMP) to create a texture.
    • Ensure each dimension of the texture size is a power of 2.
      • Examples: 128x128, 64x64, 512x64, 32x1024
      • An easy way to verify this is to see if the dimension is divisible by 16. If yes, then it's valid.
    • Do not have a texture dimension size exceed past 1024.
    • Use the TGA file format.
  4. Save the image inside the textures folder. For this example, let's name the file: cooltexture.tga

Creating the material
  1. Enter your mod's folder.
  2. Create a new folder named: materials
  3. Inside this materials folder, create a text file: coolmaterials.mtr
  4. Paste this into coolmaterials.mtr:
    textures/cooltexture { diffusemap textures/cooltexture }

We've just created a very basic texture. Restart DarkRadiant. Now when you browse the texture library, you should now see your new texture ready to use.
If you need a refresher on how to use textures in DarkRadiant, refer back to the Mapping: Texturing Your First Room section.
Steam Workshop: Publishing
Feel like sharing? Upload and share your mod on the Steam Workshop.


Tool installation
To share mods, first install the Quadrilateral Cowboy Workshop Uploader.
  1. In your Steam window, click LIBRARY.
  2. Click TOOLS.
  3. In the list, find Quadrilateral Cowboy Workshop Uploader. Double-click it to install.
  4. Done! Quadrilateral Cowboy Workshop Uploader will now appear in your Steam library (in the TOOLS section).

Uploading your mod
Now that the tool is installed, let's upload your mod to the Steam Workshop.
  1. Run Quadrilateral Cowboy Workshop Uploader.
  2. Click the Add new mod button.
    • Fill out all the fields.
    • For the Thumbnail field, point it to an image file. This image will be the preview image for your workshop item. I suggest using a 512x512 PNG file.
    • For the Data folder field, point it to the folder that contains your mod.
  3. Click the Add mod to Workshop button to start the upload. Done!

Updating your mod
Upload changes and updates to your mod is also done through this tool.
  1. Run Quadrilateral Cowboy Workshop Uploader.
  2. Your published mods will appear in the list. Select the mod you wish to update.
  3. Click the Update mod button.
    • If you wish to change the thumbnail, fill in the Thumbnail field. Or, leave the field empty if you don't want to change it.
    • If you wish to change any mod files, fill in the Mod folder field. Or, leave the field empty if you don't want to change it.
    • Optionally, fill in the Update note if you want to include notes for the update.
  4. Click the Upload changes button to commit the changes. Done!
Appendix: PK4 files
You can open any of Quadrilateral Cowboy's content files and examine how things were made. This is a great way to see how things work.

Here's how:
  1. Enter Quadrilateral Cowboy's base folder.
    It will likely be something similar to: steam\steamapps\common\quadrilateralcowboy\base
  2. Open the file: pak000.pk4
    A .pk4 file is identical to a .zip file. I personally use 7-zip[www.7-zip.org] but any file compression program will work fine.
  3. Extract or examine any file you like.

Notable files:
File
Description
script/doom_events.script
Lists out every script command.
def/props.def
Lists all props.
sound/player.sndshd
Lists all sound shaders.
Appendix: File locations
Folder locations of common Quadrilateral Cowboy files.

Taking a look into Downloaded workshop mods is a great way to see how mods are packaged up.

Description
Location
Quadrilateral Cowboy
steam\steamapps\common\quadrilateralcowboy
Configuration file
steam\steamapps\common\quadrilateralcowboy\base\doomconfig.cfg
Downloaded workshop mods
steam\steamapps\workshop\content\240440

Appendix: Item names
Name
Description

weapon_deck
Deck
weapon_cctv
CCTV
weapon_weevil
Weevil
weapon_magnet
Weevil magnet
weapon_sentry
Autocase
weapon_launcher
Launcher
weapon_lantern
Lantern
weapon_vinylplayer
Vinylman
weapon_stickynote
Stickynotes
weapon_unarmed
Unarmed
weapon_map
Map
weapon_racket
Badminton racket
weapon_vinylman
Vinylman (scripted)
weapon_gunarm
Gunarm (scripted)
weapon_photo
Photo (scripted)
weapon_soupbowl
Ramen (scripted)
Appendix: Further reading
Additional resources and further reading:

id Dev Net
id Software's official documentation for idTech4.
The Dark Wiki
Documentation for The Dark Mod, with many general tutorials.
Mod Wiki
Listing of idTech4 tutorials.
Modding discussion
Messageboard for Quadrilateral Cowboy modding

Mapping: Doors
Here's how to make doors.
  1. In the 2D window, make/arrange some brushes to create an opening for the door. The opening's dimensions should be: 104 units high x 56 units wide:

    When doing this, I suggest resizing the grid to grid size 8. The grid size indicator can be found on the status bar on the lower-right side of the screen.
  2. In the 2D window, press RMB near the door opening. Select: Create Model

  3. From the list, select: door/door.ase

  4. In the 2D window, press and hold LMB on the door to drag the door into the door opening.

    You may also need to press the Z-Axis Rotate button to rotate the door:
  5. With the door selected, press N to open the Entity Inspector.
  6. Click on classname func_static and then click on Choose entity class:
  7. From the list, select: func_door

  8. Click the Add button to confirm the selection.

  9. The final step is to tell the door which direction to open. In the 2D window, press ctrl+tab until it displays the top-down view. The move directions are as follows:
    • East = 0
    • North = 90
    • West = 180
    • South = 270
    • Up = -1
    • Down = -2

  10. With the door selected, press N to open the Entity Inspector. Enter movedir into the top field and enter the desired move direction in the bottom field.

  11. Press the enter key to confirm the selection.
17 comentarii
hoppity 15 mai 2017 la 10:12 
horse mod 2 confirmed?
Sunroses 27 ian. 2017 la 21:21 
Working on writing up some documentation for more advanced things as I figure them out
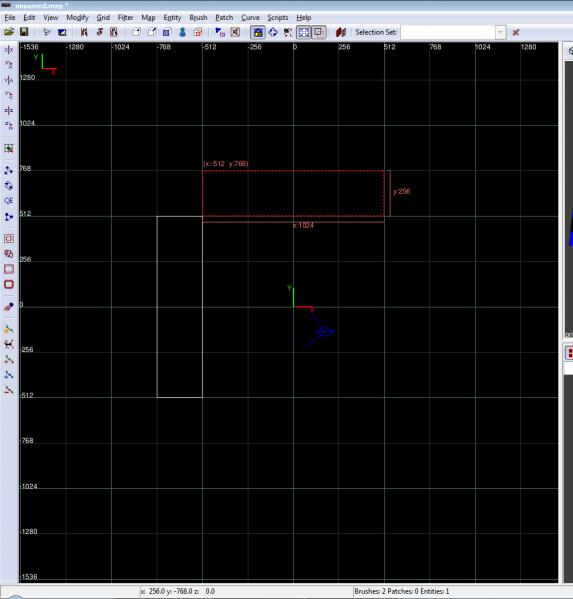
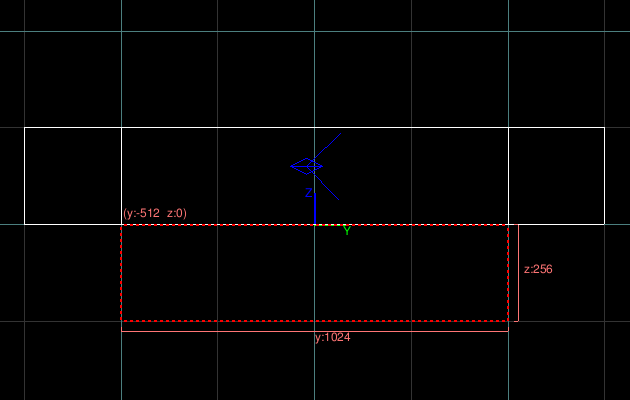
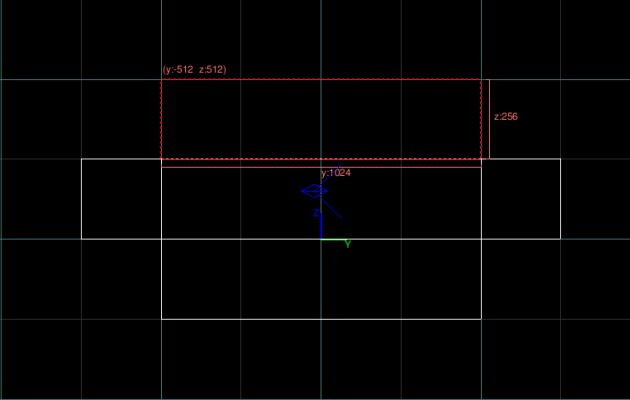
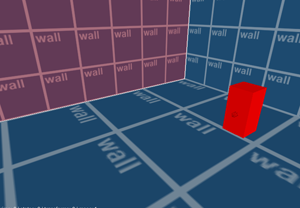
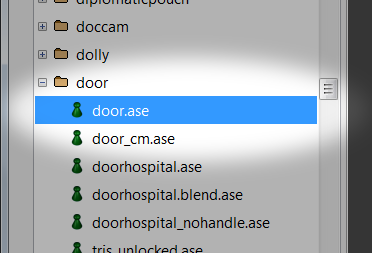
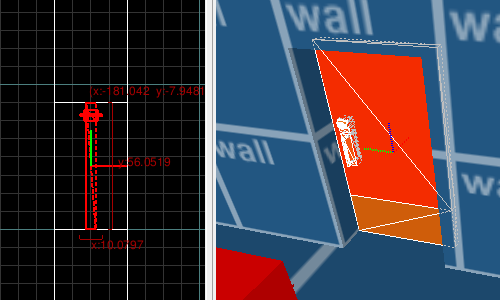
in the meantime, experimenting / looking at existing maps is super helpful!
Sunroses 22 ian. 2017 la 22:46 
umm is stashing the deck supposed to put a closed one in the middle of the room randomly?
Kayne West 23 sept. 2016 la 20:36 
@BlendoGames cool guide, but in the folder creation section, I can't seem to make a mod appear in the main menu. I think I've followed the steps correctly, I created a new folder called MY_MOD in the root folder, created a file called description.txt of which contains the name of my mod, and an empty text file called pak000.pk4. Thanks.
Rangewookie 19 sept. 2016 la 15:31 
@BlendoGames thanks for the guide, I'm really enjoying the game so far! I haven't looked too far into it yet, but are there any resources for modding the deck commands?
Beggar 7 aug. 2016 la 0:47 
Nice guide update! Very handy!
SumOfAllN00bs 4 aug. 2016 la 15:08 
Still not seeing Quadrilateral Cowboy Workshop Uploader.
Don't know if I followed basic instructions incorrectly.
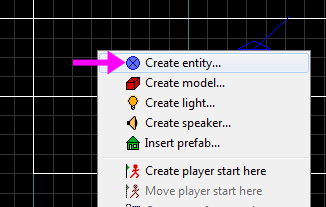
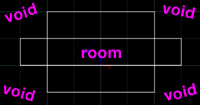
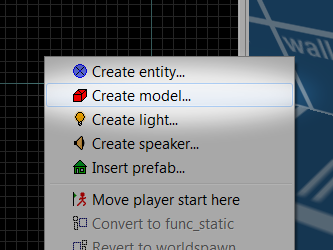
BlendoGames  [autor] 3 aug. 2016 la 17:38 
@Opotable: my mistake, I forgot to cover this in the guide.

You want to create:
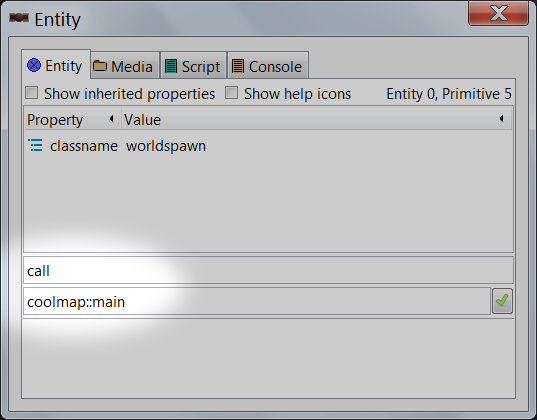
rootfolder/modname/maps/coolmap.map
rootfolder/modname/description.txt
Opotable 31 iul. 2016 la 3:43 
Hi @BlendoGames !
Awesome game, I love it :D

Just a quick question, when you talk about putting our custom map inside a folder (so we can create a mod with it after), you say "Go to the mod's folder." but I don't know where this folder is =/

I tried to create a rootfolder/mod/coolmod/coolmap.map (and coolmap.cm) but it's not working.
I also tried rootfolder/base/mod/coolmod/coolmap.map and it doesn't work either =/
(each time with the description.txt)

Can you enlight me on this, pretty please :) ?

Cheers !
Marf 31 iul. 2016 la 2:27 
im really hoping that the game gets a good modding scene. as i found the game a bit lacking in content and challenging levels. the game itself is amazing though! im gonna have a try at it to :P