Leviathan: Warships

Leviathan: Warships

50 평점
An Old Salt's Handbook
Kildar 님이 작성
Some comprehensive and weathered advice for all aspiring admirals, both new and old.
   
어워드
즐겨찾기
즐겨찾기됨
즐겨찾기 해제
Introduction
Hi everyone. I've been playing Leviathan Warships nearly nonstop since it's been released, and with over 300 versus matches under my belt, I'd like to say I've seen almost everything. Everyday I meet a few new players, and I try to provide them with tips for the future.

While I enjoy military strategy more than most, much of this just is apparent if you just think about it, but without a further ado, here is an Old Salt's Handbook.

Note: This guide is currently still being revised to be more comprehensive, so please do check back once in awhile for something new. A Changelog section has been added to help make this easier.
Your First Flag: The Basics
These tips are the mainsails of every fleet and admiral that wants to have a fighting chance at surviving unpredictable encounters on the high seas.

Scouts
The trusty ScoutYou can't shoot what you can't see. Well, technically you could, but then you'd just be playing a glorified game of Battleship. It is tempting to think that a Dreadnought or two sitting low in the water with a full arms and armor would be unstoppable, but without vision is a sitting bat, because at least ducks can see (a bat's 'radar' doesn't actually help you shoot). Scout bridges alone are not enough to compensate for having an actual scout (with a scout bridge).

So bring a scout. Better yet two, or three, and keep them alive, because a smart player will target his opponent's scouts and if you lose your scouts, you might as well have brought those useless guns along instead.

Broadsides
KMT Big TunaWelcome to a cross between WWI and the Age of Sail. Broadsides are how you will fight with your capital ships (C4 and up). For all intents and purposes, a broadside are all the weapons capable of firing in the same direction and distance.

While ships of history had cannons sticking out every which way, your navy cannot afford such extravagance. Having railguns or Pegasi sticking out both sides of your ship is nice, but 90 percent of your battles will be fought against an enemy in one direction, meaning the half of your weaponry and therefore points are being wasted at a given time. The other 10 percent of your battles means you have been flanked and have already lost. Therefore, keep all your guns to one side and make sure they're pointing the right way when the enemy is in range.

Point Defense
The rush will always get through. Railguns and Pegasi pack the punch needed to fight larger ships, but they have limited firing arcs and a large deadzone, respectively, but every once in a while, you'll find an enemy that enjoys spooning with your ships. Ships will get closer than you think, between weapons missing and more targets than your ships can shoot, and then you've got an itch that only Kausers and beams can scratch.

Armor
In the game's current state, neglecting armor on most of your ships is asking for a quick death. While Shortfins and Buzzers have enough acceleration and top speed to be able to weave through shells at range, anything larger will benefit more from the increased damage mitigation with armor than the increased maneuverability without.

Teamwork
In a 2v2, communicate with your partner to see how your fleets might complement each other. If you have a surplus of scouts, and your ally does not know enough to have brought one, send one over to spot for his likely improperly armed but potentially powerful capital ships.

When possible, good admirals will attempt to execute a simultaneous attack on one enemy in an effort to crush one player with an overwhelming concentration of firepower. This blitz strategy can be very effective as it can quickly turn a 2v2 into a 2v1, but beware of having the other player smash into your flank enroute or during the battle.

Game Etiquette
First of all, communicate everything. Greet the other players in the game, and initiate a conversation with your teammate to discuss strategy. Silence is not golden.

However, if there's anything worse than an unresponsive teammate, it's an absentee teammate. Besides the fact that they've left their buddy holding the bag, absentee teammates force all players to wait the full planning time each turn until his fleet is destroyed or the game is won. If the turn time is over a minute, make sure that you surrender to minimize the obtrusiveness of your exit. Even for shorter timers, consider surrendering anyways if your fleet is not in a position to help your ally.

Finally, there are those out there who will ragequit or disband the game when they see themselves losing. They are few and far in between, but true admirals worthy of the title will go down with his ship gracefully. Speaking of disbanding, hosts are given the option to disband games that they have created (matchmade games do not apply), and with great power comes great responsbility. Disbanding should be done in the lobby when you need to leave to prevent cluttering up the game listings, and with all present players' agreement, such as having someone go offline in a 5 minute game.
Advanced Techniques
Once you've taken the basics to heart, here are some more specific tips that can hopefully improve your game.
Setting Your Course
Making a fleet is only the beginning. How you control it on the seas will determine whether you will emerge victorious.

Testing the Waters
Early in a game, making contact with the enemy can be a touchy affair. You must find the enemy, yet risk being found yourself, as often as not with a 21-gun salute from the enemy fleet.

In open waters, first encounters can be made safer by traveling diagonal to the expected threat axis. This limits the amount of closure when contact is made, which can delay being fired upon or even being seen. The greater lateral movement also makes you a more difficult target to hit at extreme ranges, as enemy shots will lead you by a wide margin allowing you to dodge easily with course changes, at the cost of presenting side and rear armor if you do get hit. Moving sideways also gives you the option to either turn towards or away from the enemy as you see fit.

In tighter spaces, it may be better to simply travel bow on, as contact will be made in closer quarters and you may not have time or space to turn. The speed you travel at depends on whether you prefer to rush your enemy or pull back. Setting two waypoints to perform an S pattern can also be an option to reign in your speed for a quick reverse while preserving some momemtum for acceleration and still presenting a front profile. Upon reaching a blind corner, a vision probe is an excellent tool to get a peek at what lies around without exposing yourself to an ambush.

Forward Into the Valley of Death
The stalwart Bullycruiser, aka Poor Man's Spearhead
At some point, you will come under enemy fire, and when in doubt, turn towards it. This may seem counter intuitive, especially if your unit in question is a mere Scout, but by turning to fight you present your strongest armor, close the distance to the Pegasus dead zone, and unless you're one in one of those tail gun "here chase me" phases, earn the chance to at least ding the enemy before going down. Most people don't expect to be charged either, and may be completely unprepared for a close quarters brawl.

Of course, there are exceptions to this. If cover, be it a nice rock, land, or preferably an enemy ship, is close enough that you should be safe from the salvo next turn, it may be wiser to head for shelter instead. At extreme ranges, and with the proper momentum, a retreat may also be the wiser course of action, but be sure not to expose your rear to enemy fire.

The Road Less Traveled
Fanning outMany games feature Atlases and Overlords bashing heads against each other, and the winner of such a crude battle can simply be lucky. A cunning admiral will strike from several directions at once. Flanking attacks are super effective, allowing you to hit the enemy where he is weakest while presenting your strongest front, and a successful execution of a pincer attack can ensure a quick victory. Radar comes in handy in determining the routes and timings of your attacks. However, be wary of overextending your forces in such a way that you lose units piecemeal before the rest of your fleet can catch up because the enemy has local superiority.

The best defense against flank attacks is to see it coming, whether through radar or having eyes on the flanking routes. If you find yourself on the receiving end of a pincer attack before it happens while having a unified fleet yourself, you have 2 options to choose from depending on the situation, either to retreat far enough to put all enemy forces in front of you, or to charge forward and attempt to destroy half the pincer with the local superiority your entire fleet should have before the other half catches up. If you have a more flexible fleet, you should have been attempting to pull off a pincer attack yourself, and should be able to engage each half of the enemy fleet with your half.
Just Like Trafalgar
If the enemy is in range, so are you. The key to winning a firefight given equal firepower is to gain positional and/or informational advantage.

Positional Advantage
Positional advantage in one word means flanking. Attacking from as great an angle as possible off the bow of a hostile ship gives provides a boatload of bonuses for a turn or more. You have the ability to fire at the thinner midships and rear armor while presenting your own armored prow and a slimmer profile. Your enemy will have to spend precious time to turn to meet your assault, but you have already gotten in an alpha strike that has already given you the upper hand. It can be difficult to perfect this technique on the assault, but it can be used defensively as an ambush around a blind corner your enemy must turn into or pass.

Informational Advantage
Long range combat, where the heavier punches are traded, can be a one sided affair for the side with informational superiority. This means being able to see and fire upon your enemies without being seen or fired upon yourself. One way to achieve this is with scout superiority. If you can destroy any enemy units with vision range equal to or greater than your own scouts, you can then whittle down the opposing fleet from the safety of the fog of war.

If scout superiority cannot be won, smoke grenades can provide the necessary concealment, especially at longer ranges where your foe cannot deploy vision probes close enough to see through the haze. Both these strategies rely on having a strong forward skirmishing force able to destroy enemy scouts or at least prevent them from spotting your larger more powerful ships.

If all else fails and you simply cannot prevent the enemy from outseeing you by fleet composition alone, there is always terrain to conceal yourself behind, at least to the point where if he can see or shoot at you, you can see and shoot back.
Equipment
Fancy techniques and maneuvers are all good and well, but they are nothing without guns and gadgets.
Know Your Gundeck
Cannon in D
The only sounds more satisfying than the staccato reports of your autocannons firing are the solid explosions of the shells hitting enemy ships downrange. Relatively cheap and reliable, they are perfect for deal damage at all ranges. You can never have too many Kausers, whose quick reaction time and shell velocity will take down smaller ships with ease, and in great enough numbers chew down larger ships as well. Barbosas are a decent midrange compromise between the AC-L and its heavier brother the Pegasus, who packs a punch at range but has a large deadzone.

Capable of hands free death, autocannons just need you to point the ship in the right direction and are therefore great for time limited games where aiming railguns and rockets take too much time. However, manual targeting can help optmize your DPS and eliminate priority targets, such as your enemy's last scout or flagship in the chaos of battle.

The Taser
For those who have problems with touchy feely ships, the Beamgun with its practical lack of a minimum range can be a message to back off. Unfortunately, like the name of this section it is rather nonlethal against any semblance of armor and has a long reload, but ships in close quarters often remain in close quarters, and damage over time adds up.

Life on Rails
KMT Sixshooter unleashes its full fury upon a single scoutRail guns, the hardest hitting and farthest shooting direct-fire weapons, should always be taken neat, never mixed with Pegasi or anything beyond self defense weapons. A true captain of a rail gun equipped warship is a dark knight, the hero a fleet a needs but not one that should be seen, instead preferring to poke holes in enemy warships from the shadows of the fog of war beyond even a Scout's beacon of light.

Protecting your rail gun warship, especially the lighter classes, from enemy scouts is critical. Being exposed to enemy fire is one thing, but any impact whatsoever by even a stray Kauser shell may knock your ship around, disturbing its aim, with potentially devastating consequences.

Steel Squall
The sea wouldn't be the sea without a storm every once in a while, and Artillery allows you to make it rain armor piercing shells from afar. It is best used as a first strike on an unsuspecting enemy that thinks it is safe and sitting still, but good luck hitting anything that is remotely moving, even ships as large as an Atlas. Patch 1.1 should fix its current lack of splash damage, and will hopefully make it worth its current price of a Scout.

Rocket to the Moon
It doesn't take a rocket scientist to know that a gentle whooshing sound doesn't mean a breeze but instead is a signal to clear the decks, because somewhere a Rocket Battery is firing. These indirect fire area weapons are rather versatile. Besides being capable of rendering larger enemy ships helpless by disabling entire decks, they deal a fair amount of damage upon a direct hit, and a few can be a cheap way to flush an enemy out of a hiding spot. Be wary of investing too heavily in these weapons, however, as a fleet with multiple smaller ships will greatly reduce their effectiveness, and with only 5 salvoes can go dry sooner than you'd think.

Steel Rain
As of patch 1.1, artillery is now impressive even when it misses, causing a massive plume of water and dealing moderate damage to surrounding ships and equipment depending on proximity. A direct hit is of course preferred, and can knock off as much as a tenth of an Atlas' health. Assuming you can maintain the range, it is best used manualy against big and slow shipswith autofire turned off, and be sure to give it a good 15 second lead or so.

LIke railguns, aiming the gun can take quite a while, so rotate your ship to give get on target faster, especially since there is no charging period that will throw your aim off, and like rockets, beware of investing too heavily in artillery as every indirect weapon means less direct firepower to fend off closing enemy ships. Make no mistake, this weapon is not for the beginner, and requires as much luck as anything else, but there is no comparing the satisfaction of landing a direct hit with this weapon.
Smoke and Mirrors
While some say the best defense is a good offense, defensive utilities can drastically change the course of battle.

What's Mine is Yours
Damn the mines, full speed ahead!If you could care less about polluting the oceans, and wish to secure a flank, Stealth Mines can be an option. These contact mines deal severe damage on impact, and often disables quite a few systems on a ship to boot. Be sure to lay them early or under the cover of smoke, as mines lain in sight of an enemy will remain visible to him, and remember that radar will detect show their location for the turn and that they can be destroyed by fire or by getting run over before arming. And once armed, they are not your friends.

Do not rely on them to keep out scout ships however, as it will take a prohibitive number of mines to prevent small ships from slipping through, nor should you expect them to actually do anything killing for you. They are best used to prevent large ships from using a channel or on inside corners your enemy is likely to take. Minefields are also most effective when covered by observation and fire, as without the pressure of combat your enemy can simply take his time to systematically find and destroy your mines.

One of the best courses of action against a compulsive minelayer is moving forward, at least with small ships. Most people don't begin to lay mines until contact has been made, so you will be dealing with a sparser minefield and be able to see all mines he lays in the future. Enemy strategies that heavily rely on mines may also be unprepared for someone with the brass ballast to charge them anyways, and you can force them to ♥♥♥♥ where they eat, which may result in one of their ships on the bottom instead of yours.

Tomfoolery
Decoy Ships are supposed to attract fire, but usually do not fulfill their intended roles, as autotargetting does not seem to prioritize the adorable little boats, and manual targeting would render them useless regardless. That being said, they do tend to block shots, and if placed in front of your ships might serve as a rudimentary buffer (cheaper than a shield, as the developers commented), though their small size and questionable durability leave much to be desired. You can also run these over, but they're so cute!

Ocean Beautification
Do your duty for the oceans by destroying litter wherever you find it. Mines and possibly vision probes an be destroyed with gunfire, although landing a shot can be difficult using an autocannon, whose slight spread and ballistic trajectory can result in many misses. If you have a railgun on hand however, use it pick off your enemies' limited mines when you're not actively shooting at his ships. It can mean the difference in advancing into an overwatched or booby trapped choke point. Be aware however your enemies may be able to trace your weapons fire back to your ship.
Ships
[]
Maps
Know your terrain.
2 Player
High Seas (2P, Small)
"A small map with a large island in the middle."
Guranteed instant action, but with even fewer options for nuanced strategy than the next map, Passage.

The key to victory in any map is to be equally effective on both fronts, but more so on this small map than any other. Losing ground on one side will quickly allow your enemy to push that flank and fire upon the rear of the other half of your fleet. Mines can be useful if you can deploy enough within the first 3 turns, but the map is small enough that your enemy can control qutie a bit of your territory even sitting at your gates.

Passage (2P, Small)
"A small map in a narrow channel."
As in all small maps, be ready for instant action. Scouts will be able to see deep into the center lane, so beware of entering enemy lines of sight.

This map is rather asymmetrical, and slight nuances in terrain give the advantage to the northern spawn, who is able to fire and manuever directly into the central lane from the start and has easy access to the west lane. In contrast, the southern spawn has easy access to the west lane as well, but will have a very difficult time assaulting, as they will take fire moving out of the west or into the center.

Smoke launchers are very powerful here, as it only takes one or two to block off an entire channel from view, and can allow the south in particular to move into a better position to offset their starting disadvantage.

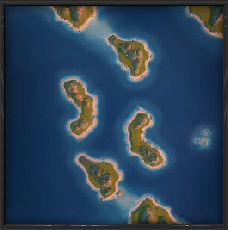
Shivering Sea (2P, Small)
"A small but intensive open sea map."

With only one obvious channel routed around a sharp point, this map favors the defending player, leading to potential stalemates. The small size of the map allows artillery and rockets to reach nearly anywhere however, so bringing some along may help discourage your enemy from camping. If you have quick ships, you may also be able to reach the open sea to the east, where you may attempt to open a new direction of attack.

A little less obvious is the shallow channel at the western edge of the map that a pair of Scouts and even a Spearhead can squeeze through. If you leave this unguarded, don't be surprised if you find attackers coming in through your back door.
4 Player
Lagoon (4P, Large)
"A large map with a center battleground focused on intesive ship battles."
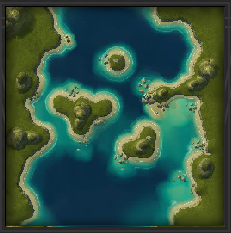
Perhaps the most commonly played map, likely thanks to being the default selection in game creation, the most striking feature is the large area of shallow water in the center that is its namesake, but beware of becoming a permanent fixture like the many half-submereged shipwrecks that pose a navigation hazard.

In a 2v2, the lack of flanking routes means you should expect head to head battles between capital ships trying to assault into each other's spawn through the deep water channels. Littoral units can use the lagoon to attempt to flank other fleets, but you will surely encounter other enemy light units, and despite the surrounding islands that can be used as cover, are vulnerable to fire from any quarter. the landmasses dividing each bay can provide decent cover for defensive ambushes, for some spawns better than others.

For 1v1s, Lagoon becomes much more interesting depending on the composition of your fleet. A mass of light ships can be quite fun to use as you weave between islands and can quickly strike anywhere on the map from all directions, if you do not get caught in a giant scout battle in the center first. Larger ships might have a hard time getting to the fight if you happen to choose the wrong direction, as you cannot simply cross the shallows to get to the other side, so radar may be helpful in this large map. Spawn pairs are usually NW+SW, NW+SE, and NE+SW.

There also happens to be a small river on the western landmass that a Scout can easily sail into, though for what reason I would not know. It could be a defendable spot for a flagship in Assassination, however, although good luck getting back out while under enemy fire.

Defense (4P, Medium)
"A large, open map with a few big islands."
An interesting semi-asymmetrical sized map, the northeast and southwest spawns are a little hard to get out of, but by the same nature, difficult to get into especially with large ships, making Defense a somewhat appropriate name.

In a team match, you will obviously want to attack the non-Defense positions if possible, and otherwise lay siege to the defendable ones. This map is full of sharp corners that makes blind ambushes a possiblity around every turn, so use it to your advantage while watching for enemies that will do the same.

In a 1v1, defense islands are relatively small, allowing a savvy admiral to perform relatively quick flanking manuevers on the spot. Spawn pairs are usually NE+SW or NE+SE.

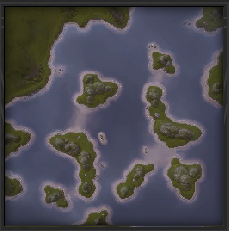
Sheltered Bay (4P, Large)
"A large symmetrical map for team battle."

Similar to Lagoon, expect similar head to head battles in the obvious routes to each spawn. There is some cover for smaller ships to be found in the center among the rocks, and wily admirals can attempt to navigate through them with Scouts.

Unlike Lagoon however, flanking options do exist around each of the small atolls in the corner of the maps, but be wary of committing too large a force through them as it can take quite awhile to get into position. The north and south spawns also have access to deep water channels to bays on either side of them that they might use as shelter for artillery platforms, but it can take awhile to setup as well.

In 1v1s, radar can be crucial as the large size of the map can allow an enemy to hide in any number of the bays. Searching can not only take awhile, but can stretch your formations and lead you into ambushes or minefields. Spawn pairs are N+W, N+E, or W+E.

Skarsgard (4P, Large)
"A large map with four massive islands."

The four islands in this map form three channels running north to south, with a shallow water flanking routes connecting the passages at each end. Control of the central channel will determine the victors in a team game, as losing it either means ceding the initiative or allowing an enemy to flank your ally.

In a 1v1, having a flexible fleet will allow you use multilpe routes to your advantage. Spawn pairs are NE+SE, NE+SW, or SW+SE.

Swarm (4P, Large)
"A large map surrounded with shallows and rock formations."

For such a large map, things can get heated really quickly depending on spawn locations, especially between the two northern start locations. The small passages lead to easily defendable choke points, but multiple flanking routes do exist, though access to them is awkward and can take precious time.

In 1v1s, flanking becomes easier and more effective as usual. Spawn pairs are NW+NE, NW+SW, and NE+SW.

Channel (4P, Large)
"A large map focused around a channel with the possibility of flanking."

With its relatively narrow passages, Channel is chock full of easily defendable choke points, which combined with the relatively large islands make this map a good candidate for artillery use if you can establish sight lines.

In 1v1s, flanking becomes much more viable, but the routes are long so be sure to take into account travel time.

Marstand (4P, Medium)
"A large symmetric map with narrow straits."

Despite being a large map, the island configurations cause heavy firefights to erupt. Stay out of the no man's land that is the central bay until you have established dominance, and even then be careful.

In most 2v2s, make sure the partner with access to the flanking route utilizes it while the other fights for control of the center. The person starting in the southeast corner unfortunately only has one exit and can easily be bottlenecked in, but by the same token has an easier time defending.

In 1v1s, common spawn pairs are NW+SW, NW+SE, and SW+SE.

Wolfpack (4P, Large)
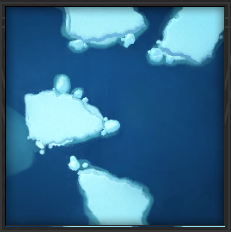
"A large map featuring open artic sea."

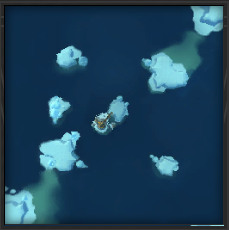
Wolfpack is one of the more enjoyable maps with its many smaller islands. Its name probably comes from how it can favor multiple light units that can make wide flanking maneuvers darting around the icebergs for cover. However, be wary of using a direct route as the open seas give long lines of fire for big guns.

For 1v1s, expect to start with you and your opponent in N+E, N+S, E+S. As usual, flanking becomes extremely useful as you do not have to worry about running into a second fleet.

Forgotten Archipelago (4P, Large)
"A large map with three massive islands."

Very similar to Skarsgard with its three north to south channels, many of the same tactics apply with the exception that the shallow lateral crossings at the top and bottom are now deep water. Control of the center will allow allies to support each other, or even make a mad dash to double team an enemy before the other can round the island in pursuit.

Spawn pairs are NE+SW, NE+SE, and SW+SE in 1v1.
DLC Maps
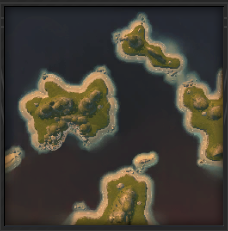
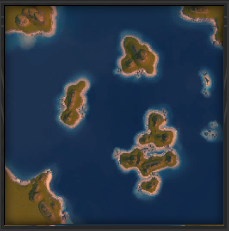
Delta* (4P, Large)
"A large map with lots of small islands."

A rather cramped map with some of the most awkward starting positions. As with all small island maps, small ships can rule the day with aggressive flanking, but avoid channels overwatched by larger warships as firepower is still firepower.

Ambush* (2P, Small)
"A small map with a focused battle area in the middle."

All of the open sea makes actually ambushing your opponent rather difficult. Expect head to head battles, and bring smoke and armor as cover is short in supply with the exception of a lonely iceberg in the center, although speedy ships may be able to circle around to strike from the flank.

Slender Islands* (4P, Large)
"A large map with plenty of pathways."

Similar to Delta, there are also many small islands and sand bars, but with the addition of relatively clear deep water channels along the edges of the map for capital ships to fight in. Accordingly, send your lighter units to the center to probe for unguarded flanks and skirmish with enemy units attempting to do the same.

*Requires a host with the Multiplayer Map Pack DLC
FAQ
My gun didn't fire!
Though most commonly heard by railgun users, guns take time to traverse. In general, the smaller the weapon, the faster it tracks. Defensive launchers are near instataneous, but as you go down the list from Kauser to Pegasus to Railgun to Artillery, it takes longer and longer.

Railguns can take the entire turn to move from centerline to its max traversal, which may or may not begin until it has finished reloading, before charging up and only then firing. You can decrease this aim time by rotating your ship to reduce the amount of turning your weapon needs, though be careful with any lateral movement when firing railguns at the same time.

My enemy didn't hit a single mine!
Mines lain in front of an enemy will remain visible to him after they arm, so either lay your mines before he gets there or conceal your minelaying operations with smoke. Radar will also show the location of mines and vision probes as small dots, and a smart opponent may memorize the locations for dodging or destruction.
Changelog
2014-01-06 Kildar
* Fixed some various typing errors.
* Clarified the difficulty of using Artillery.

2013-07-05 Kildar
* Added "Steel Rain" artillery entry to "Know Your Gundeck" weapons section.

2013-06-25 Kildar
* Added blurb about disbanding etiquette.
* Added blurb about exceptions to charging.

2013-06-23 Kildar
* Wrote Maps entries for Shivering Sea, Marstand, Wolfpack, and Forgotten Archipelago.
* Wrote brief entries for DLC Maps Delta, Ambush, and Slender Islands.
* Maps section tentatively complete.

2013-06-12 Kildar
* Created Equipment section to govern offensive and defensive subsections
* Reorganized Maps section due to character count limits
* Wrote Maps entry for Channel

2013-06-10 Kildar
* Wrote Maps entries for Skarsgard and Swarm.

2013-06-09 Kildar
* Added images and official descriptions for all maps.
* Wrote Maps entries for Passage and Sheltered Bay.

2013-06-07 Kildar
* Created Changelog section.
* Began Maps section.
* Wrote Maps entries for Lagoon, Defense, High Seas.
댓글 11
Mochnant 2014년 12월 13일 오전 9시 47분 
Good guide, thanks for the work.
Kildar  [작성자] 2014년 1월 6일 오전 11시 04분 
Finally, I regret to say that this guide will probably remain in its current state, as I have since moved on to other priorities. If you are willing to contribute, perhaps you can lay out the ground work by grabbing screenshots and writing out the stats, and I can write in what I remember of the ships.
Kildar  [작성자] 2014년 1월 6일 오전 11시 04분 
@Ubiliterator

Under ideal conditions (a stationary target), rockets are the most efficient way to disable systems because they are able to land direct hits on systems unobstructed because of their ballistic trajectory. The large area of effect and number of rockets is also useful for damaging multiple systems at once and mitigating misses. For direct fire weapons, even when lined up perfectly, the shell will just as often as not hit the hull in front of the target system.

As for arty, perhaps I did not state cleary enough the amount of skill and more importantly luck required to be effective. However, there is nothing more satisfying than actually being able to land a hit, and it is also the next level for those of us who have mastered every other weapon.
Ubliterator 2014년 1월 2일 오전 6시 40분 
Excellent guide. Although I do not fully agree on 'Rocket to the Moon' (They dont tend to disable systems so much, as you make it seem, in my experience) and 'Steel Rain' (Arty is IMO not so great as you make it look, but perhaps I misunderstood you)
When will you finish your guide with the ships section? Im really looking forward for your opinion about this.
FriendlyNeighborhoodStranger 2013년 11월 3일 오전 11시 14분 
Thank you, you are very good. But I want to get into the game, it say's I need to redeem a code, I have an account and I am using it, but I am not getting the Email. What should I do?
-M-Ronicx 2013년 6월 23일 오후 1시 38분 
Hey, thanks For link
Kildar  [작성자] 2013년 6월 9일 오전 1시 05분 
Began a Changelog section so you can see what's new more easily. Enjoy!
SpazmoRogue 2013년 6월 4일 오전 11시 34분 
Fantastic guide and a fantastic match against a worthy advisary.
Kildar  [작성자] 2013년 5월 28일 오후 8시 46분 
I'm glad you all found some use for this guide. Please do check back once in a while, as there may be some changes and additions on the way.
Hu-man 2013년 5월 28일 오후 3시 04분 
I just learned that mines can hit my own ships. I didn't know that, mostly because I wasn't stupid enough to test it, but thats good to know. Good guide, would read again.