Sword of the Stars II: Enhanced Edition

Sword of the Stars II: Enhanced Edition

96 人が評価
A Loa Guide to the Galaxy!
作者: Pink
This guide aims to help the new Loa player in understanding the mechanics of this odd species. It includes:
- First Turn Guide;
- Loa's Traits;
- Ship Design;
- Loa and Colonization.

Note that this is not an exhaustive guide, since the game is so unpredictable (in a good way, due to the random nature of the game), it is impossible to resume the game in one guide.

It is expected that the player knows the user interface, if this is not the case please watch the following guide:
http://www.kerberos-productions.com/forum/viewtopic.php?f=37&t=38253


アワード
お気に入り
お気に入り
お気に入りから削除
The Loa
This species is an artificial life form and it follows a very particular gameplay that is odd even to the more experienced SotS player. You can find more about them lore wise in the game manual. They have different rules for colonization, population growth and fleet management.

Their Cruisers are probably the most powerful ships in the early game; they are able to point every single weapon, except the engine Large Turret, forward making them deadly hunters.


Their ships are made of cubes able to shape into any configuration you desire, giving the player the ability to change a fleet’s composition at will before each combat.

The Loa favor energy weapons and that is seen by the low chances of getting ballistic weapons, it is not however, impossible to have them, but the supply in Loa ships is short so it is better to stick to energy weapons.

Since they are machines, Loa ships have no crew. This means that they are impossible to board and invulnerable to the Specter Menace. They are however, a very good target for Slavers since their Walkabouts (a humanoid form robot that the Loa use to walk) are so valuable.

They use a new FTL system called Neutrino Pulse Gates that accelerate the cube monolith towards the target, maximum 70000 cubes per fleet with the base tech. The cubes then travel at four light years per turn for 2 turns and then start to decelerate. When they cross a new gate, they accelerate again to the maximum speed.

Each gate costs cubes and upkeep, so it is best not to spawn gates everywhere. It will ruin your economy. More on this in the Invading with the Loa Section.

If you want to send one huge fleet there is the option to slow boat to the target that will travel at sub light speed 0.75 l.y. per turn.
Pros and Cons
The Loa are a mighty foe, but everyone has a weakness.
Strengths:
  • Basic Subversion (passive ability): The CnC is capable of subverting some missiles and drones to Loa's side;
  • Able to colonize almost every planet for the price of one Assimilator Ship;
  • Able to burn biosphere very fast with large amounts of cubes;
  • Transmutable fleets thanks to Wise Clay (Can change colony fleets to construction fleets or combat fleets);
  • Powerful 1 vs 1 Ships;
  • High Structure ships;
  • High Weapon counts with good firing arcs;
  • Accuracy Bonus;
  • High chances with:
    • Energy Weapon Tree;
    • Shields Tree;
    • Industrial Tree;
    • Energy Tree;
    • Torpedo Tree;
  • Immune to:
    • Specters;
    • Biowarfare;
    • Boarding;
  • Can repair ships in enemy and neutral territory without Repair and Salvage Ships;
  • Not affected by supply like the other races for endurance;
  • Boarding Pod Modules.
Weaknesses:
  • Low population growth - very affected by High Solar Activity + High Taxes + High Biosphere
  • Low income from colonies (- 50%);
  • Cost of cubes makes the ships very expensive;
  • Low armor;
  • The low Supply limit in Loa's ships will most likely affect ROF for Ballistics and Missiles;
  • Repairing ships without R&S ships in neutral or enemy territory will cost cubes which cost ships;
  • Susceptible to EMP weapons and subversion;
  • Subversion developed by the other races is more powerful;
  • No access to:
    • Psionics Tree;
    • Cybernetics Tree;
    • Most of the Biotechnology Tree - Only have one tech;
    • Biowarfare Tree;
  • Very low chances on Ballistics;
  • Limiting Gate System does not allow to field large fleets;
  • Slow FTL Speed even in late game;
  • No Police Cutters - can make piracy an issue;
  • If the Economy drops below 0 Research stops;
First Turn
Welcome to the first turn! There are some very important steps to be done in this turn, so do not just skip it!
The Loa start with four fleets of 70000 cubes each:
  • 1st Survey Fleet
  • 2nd Survey Fleet
  • Construction Fleet
  • Colonization Fleet
First thing to do is go to and design new ships, do not forget this since prototyping is free in the first turn!

Given the peculiarities of the Loa there are several aspects to bear in mind, one of the most important is Cube Cost. Each ship is composed of a few thousand cubes, so in the early game you might want to maximize your fleet’s potential by doing some low cube configurations for some “less important” roles. Check out Loa Ship Design for some hints.

Now that you have designed your new ships its time to select the first research, for a 10 tech start, I suggest “Expert Systems” – in the C3 Technology branch. This will lower the cube cost of each ship and increase Industrial Output, giving you more cubes to play with.


The next research depends on your starting techs, if you choose to start with 10 technologies then the second technology to look for should be some sort of Point Defense, especially if you happen to find a random menace like the Swarm or Morrigi Derelict that have many drones. If you choose a different start then you should look to improve colonization speeds (Biotech Tree) and ship cost efficiency (Industrial and Enginnering techs).

Next step is colonization, start with your home system and move outwards. Colonization with the Loa can be tricky; there are several important factors to consider. Check out the Colonizing with the Loa Section for some hints.

Depending on how you chose to play with your cubes, you might or not have some cubes left. In case you have decided to stick with the four fleets then here are some tips:

  • The construction fleet does not need all its cubes, you can split it in smaller fleets to aid survey or just use for colonization.
  • Survey requires as many ships as possible to be fast and if you run in to trouble.
  • Chain missions for maximum effect!
Ship Design
For the Loa this is a very important step. There is a limited amount of cubes to form ships so it is a good idea to minimize some costs.
What should I design you ask. Well one of the most important is the Low Cost CnC, or Light CnC as I call it.

This design can be used for every small task:
  • Deploy gates: One CnC
  • Construction Fleets: One CnC + Construction Ships
  • Assimilation Fleets: One CnC + One Assimilation Ship + Cubes
  • Idle Fleets: One CnC or just the cubes
  • Survey Fleets: One Cnc and all the cruisers you can form, the more ships you have the faster the survey is completed.
What is the big bonus of these configurations?
  • Low Upkeep because you have only a handful of ships formed
  • Extra Cubes for other missions

The same principle applies to the Assimilator, Supply, Repair and Salvage and Freighter class ships. They are not made for combat so keep them light. Even if you are attacked during a Colonizing mission, you can change the fleet composition in to a fighting force (as long as you keep one Assimilator in the fleet).

One other useful design is the Drone Carrier. They are excellent for Surveys because each drone helps in speeding the mission. The design showed in the right is able to even battle without losses, in most cases, versus the Swarm and Morrigi Relic. Your drones engage in dogfight vs the enemy drones and your missiles shoot them down. Beware that sometimes the Swarm Drones are equipped with Phaser PD and are able to kill all your drones. A full fleet of Drone Carriers will also be more than well equipped to deal with any confrontation the AI sends your way (or you send in theirs), at least until the point where the AI have some sort of point defense.

One excellent fighting cruiser is composed by the Strafe/Armor sections, this gives it lots of forward firepower and you can even fit some Boarding Pods modules in the Armor section allowing capturing enemy ships.


Other designs:
  • Combat CnC: Armored and with big guns, for the tough situations
  • Heavy Combat Cruiser: Same as before but with armor
  • Every other class of cruiser, even the Boarding Cruiser can be useful later.

You should explore different ship compositions and weapons to see what fits your play style.

Hint:
  • Always keep your fleets in either Cubes or One CnC ship; this way you only pay the upkeep for one ship and in case of an attack, they can change to any shape you wish by going to the Battle Manager screen before the combat.
  • Do designs with several weapon types. Later, after researching advanced weapons you can retrofit your ships. The bonus is that you only need to change the design and it will be available immediately without needing to retrofit each ship.
  • When you prototype a new ship, that design will be available to form in every fleet.
  • Since Loa don't have Police Cutters, Piracy can be an issue when trade is involved. But there is profit to be made here. Set a fleet of boarding cruisers in patrol of your trading systems. There is a bounty on destroyed pirates, but there is a even bigger one on captured ones.
[/i]
[/list]
Colonizing with the Loa
The Loa have a very short Biotech Tree with only one research in “Environmental Tailoring” that increases population growth and terraforming efficiency, it is a good idea to research this as fast as possible. They can colonize almost every world, except Barren and Gaseous planets giving them lots of room for expansion. The colonizer ship is called “Assimilator”.
Their population growth is dependent on three variables:
  • Solar activity
  • Taxes
  • Biosphere
All of these reduce the growth if they are too high. Solar activity varies with each star every turn; you can check this range of values selecting each system. Ideally, a system with activity ranging from 1 to 5 is fine.

The colonization mission reduces the biosphere of the planet. Each 50 cubes of the colonizing fleet will decrease the biosphere in 1 point in the first turn of the mission, and after that, the effect will be half until the end of the mission.
Each colonization mission will cost the player one Assimilator ship losing its value in cubes in the first turn. There seems to have no effect in having more than one Assimilator ship in the fleet.

Hint:
A 280000-cube fleet will remove around 5400 of biosphere in one turn. This means that most planets will be “terraformed” in one or two turns. Therefore, a good way to do a fast colonization of your home system is by merging your starting fleets in one blob leaving your fleets available for more missions in a few turns.
Chaining Missions
The Mission systems allows the player to chain missions in succession, this allows the player to order a new mission after the first is complete as long as the fleet has supply.

For the Loa this can and must be used for maximum effect, this means always getting the best bang for your cubes. If you decide to stick with the four fleets from the starting game, each has 70000 cubes and will have almost the same mission efficiency except for the admirals.

Look in your admiral pool for one that boosts colonization, if you find one dissolve the construction fleet and assemble it under the new admiral, if you dont have one then look for one that boosts surveys, either way, try to boost your early game - survey and colonization.

Now, for the chaining. Loa efficiency in both missions is dependant on cubes/ships, the more ships a fleet can have the faster it completes the survey and the more cubes it has the faster it kills of biosphere in a new colony.

It this in mind and the tips from Loa ship design section look for the most promising systems nearby (quantity of planets, asteroid belts, gas giants). Aim each of your fleets to a different system and start the chain. After each mission is complete the fleets are sent home (return mission), select them again and order a new mission in the system they are in. Chain the missions as follows:

  • First Mission: Survey;
  • Second Mission: Colonization - if there is a good planet in the system (Low biosphere, good size and resources) ;
  • Third Mission: If the fleet is able to, colonize a second planet and rebase the fleet to this system. Keep colonizing while you can and bring more cubes from the homeworld;
  • Fourth Mission: If there nothing more to be done here deploy a gate and return home. The fleet is better used elsewhere.

It is important to not build the gate early in this system so that you can keep the amount of cubes to the maximum possible in order to improve colonization. If the system doesn't have a planet worthy of early colonization, skip to the gate deployment and head back.

Repeat the procedure for the systems around you and don't forget to pump out cubes to cover for the spent ones so that you can keep the fleets at maximum efficiency.
Invading with the Loa
The Loa lack a significant part of the Bio Tech Tree, namely the bio-warfare section. So using Bio War to conquer new planets is a big no-no for the Loa. They must then rely on Assault Shuttles in order to wipe a planet clean.

If you plan on colonizing the planet after the invasion try using a weapon that kills of the population and the biosphere while leaving most of the infrastructure intact. This way you should need less time to make a new home out of it!

One other issue one must bear in mind when invading an enemy system is the gate system. If the target system is not going to fall in one attack it is probably better to avoid dropping a gate there, it will only result in its destruction and loss of cubes. One should however drop a gate in the closest position possible.

This way any retreating ships will in a few turns pass through the gate and accelerate instead of being stuck in sub light speed.


In addition, when invading and facing an enemy fleet it is advisable to have a repair fleet in the system. Loa ships when damaged can be “repaired” without repair ships or planets, by changing the fleet’s composition. However, this will cost cubes, and cubes are ships!
34 件のコメント
Elijah of Worldbuilding 2021年1月12日 11時12分 
*checks auto options* oh hey auto patrol. that sounds very useful, let me click that.
Elijah of Worldbuilding 2021年1月12日 11時06分 
okay how do i prevent the fleet from auto returning? i've given tem supply ships but they still auto return and thus i need another fleet to do anything other than survey
Trifler 2019年5月5日 21時33分 
For people concerned about the 70000 cube limit at the start:
If you go for Antimatter early, it will enable researching a gate upgrade, which increases the limit to 150000 cubes. There is then another gate upgrade after that, but I don't recall what the number is off-hand.

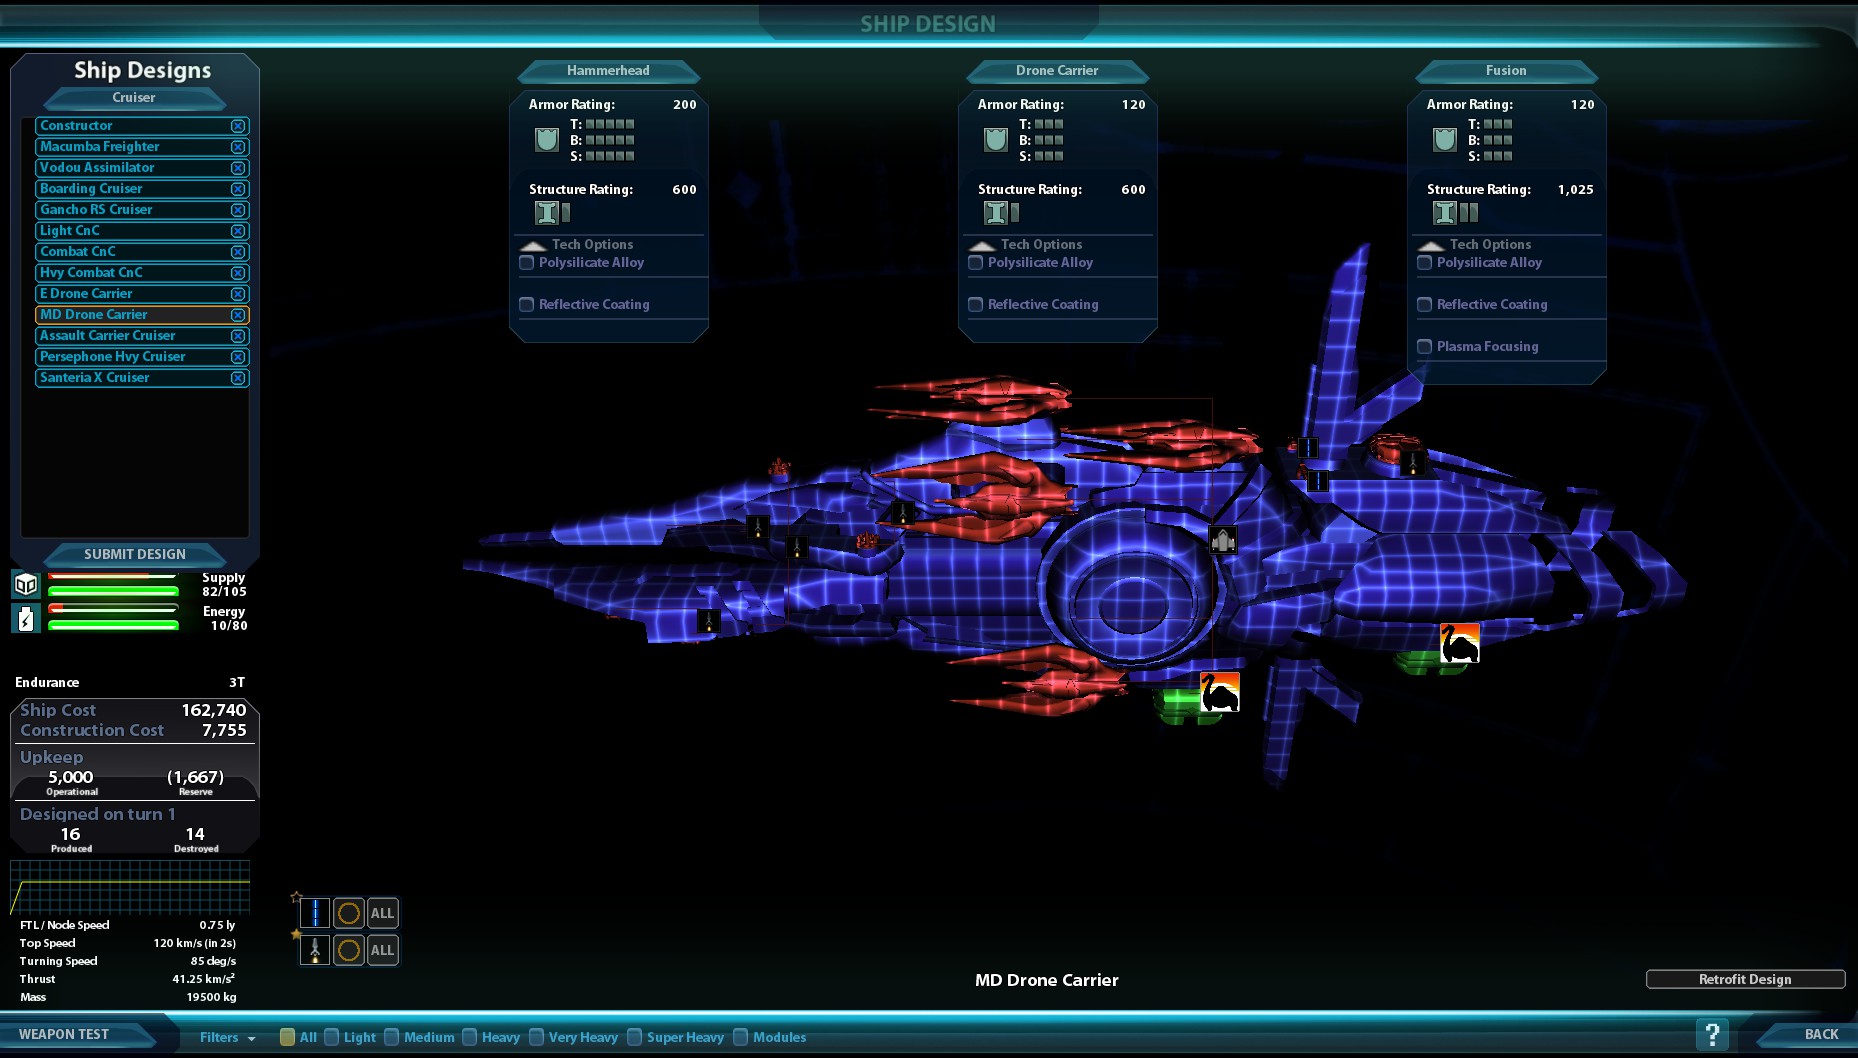
Also, even though the Loa's success chances with ballistics aren't great, the construction point costs are so much lower than energy weapons that I find they're worth at least investigating.
CatzRule81 2017年8月30日 13時14分 
@Certified Coolologist - Like, for example, we could set the max gates to say 99999?
PMBELL 2017年2月24日 8時32分 
My 2 cents:
You can have riders in fleets by creating a fleet profile with carriers and riders.
But for defense satellites you have to actually build them there, such as BR hangars.
You may compose a fleet with riders and then transfer them to the planet, though.
Diggz 2015年7月11日 1時48分 
If the gate max is mcfuckering you, in the game files go to assets/base/commonassets.xml.

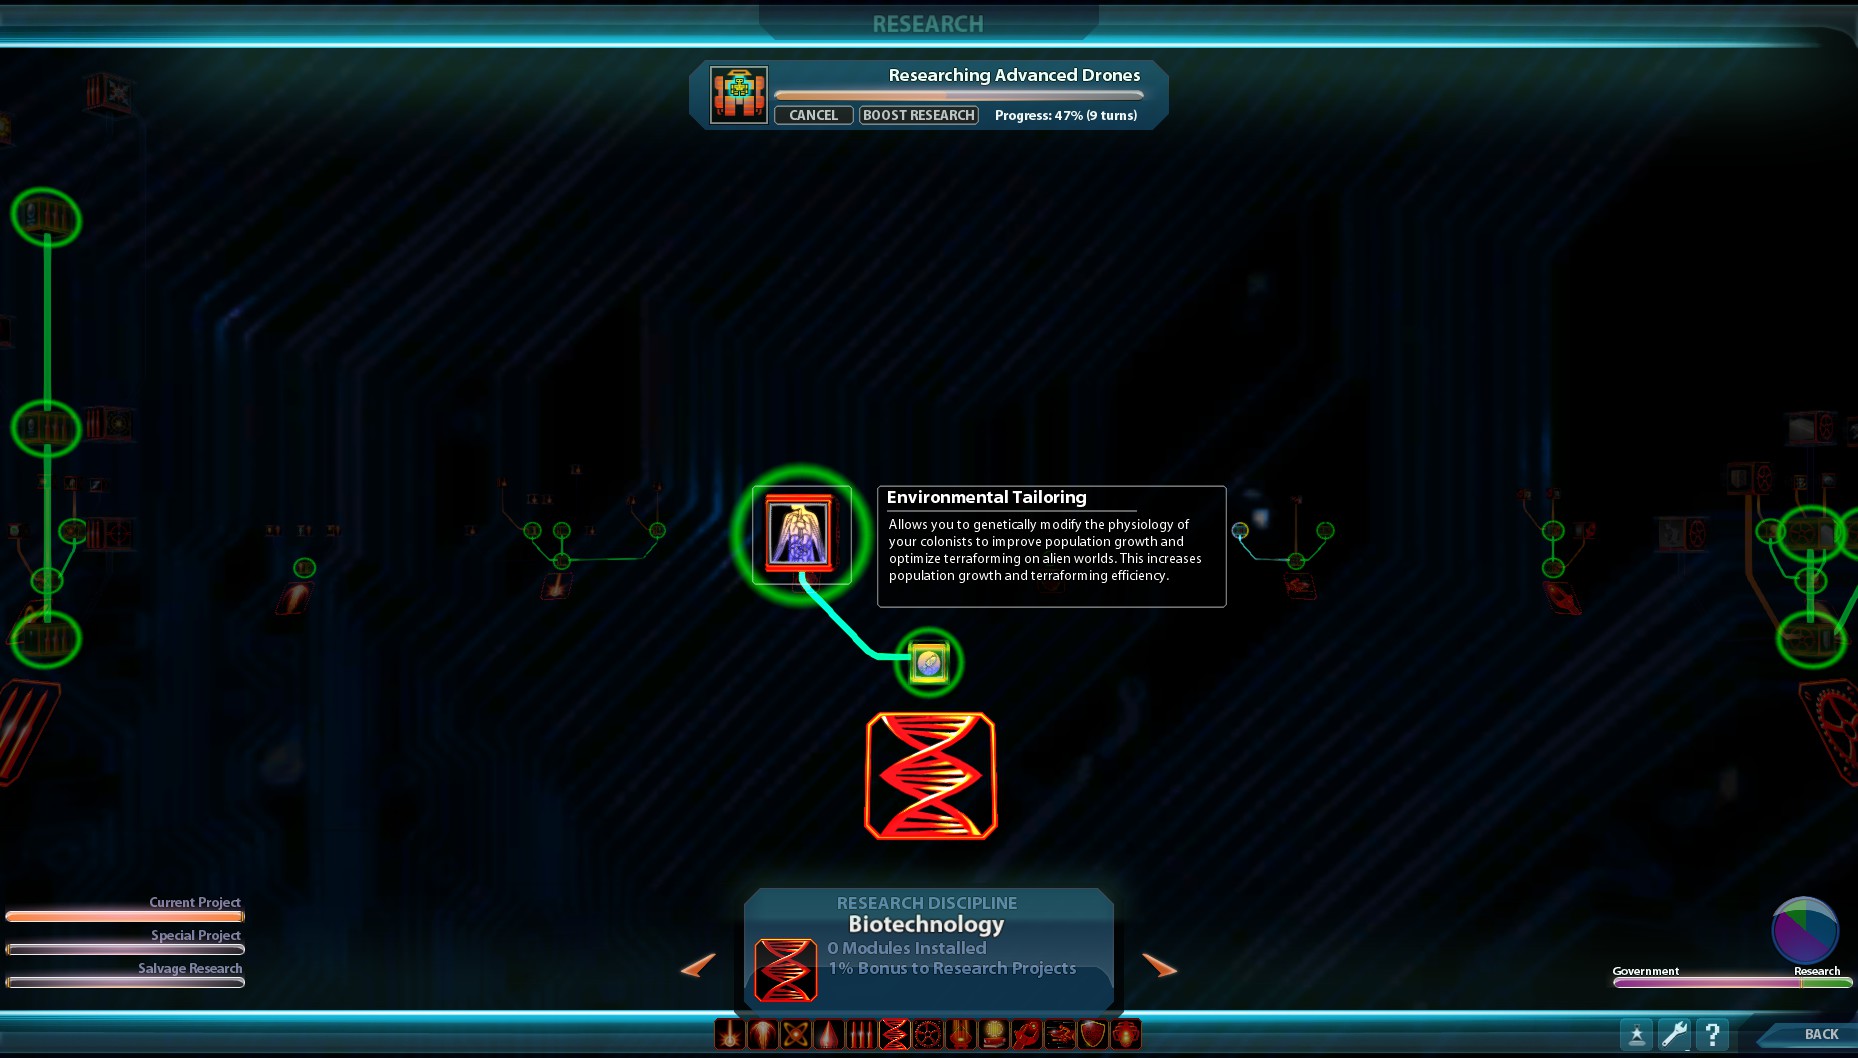
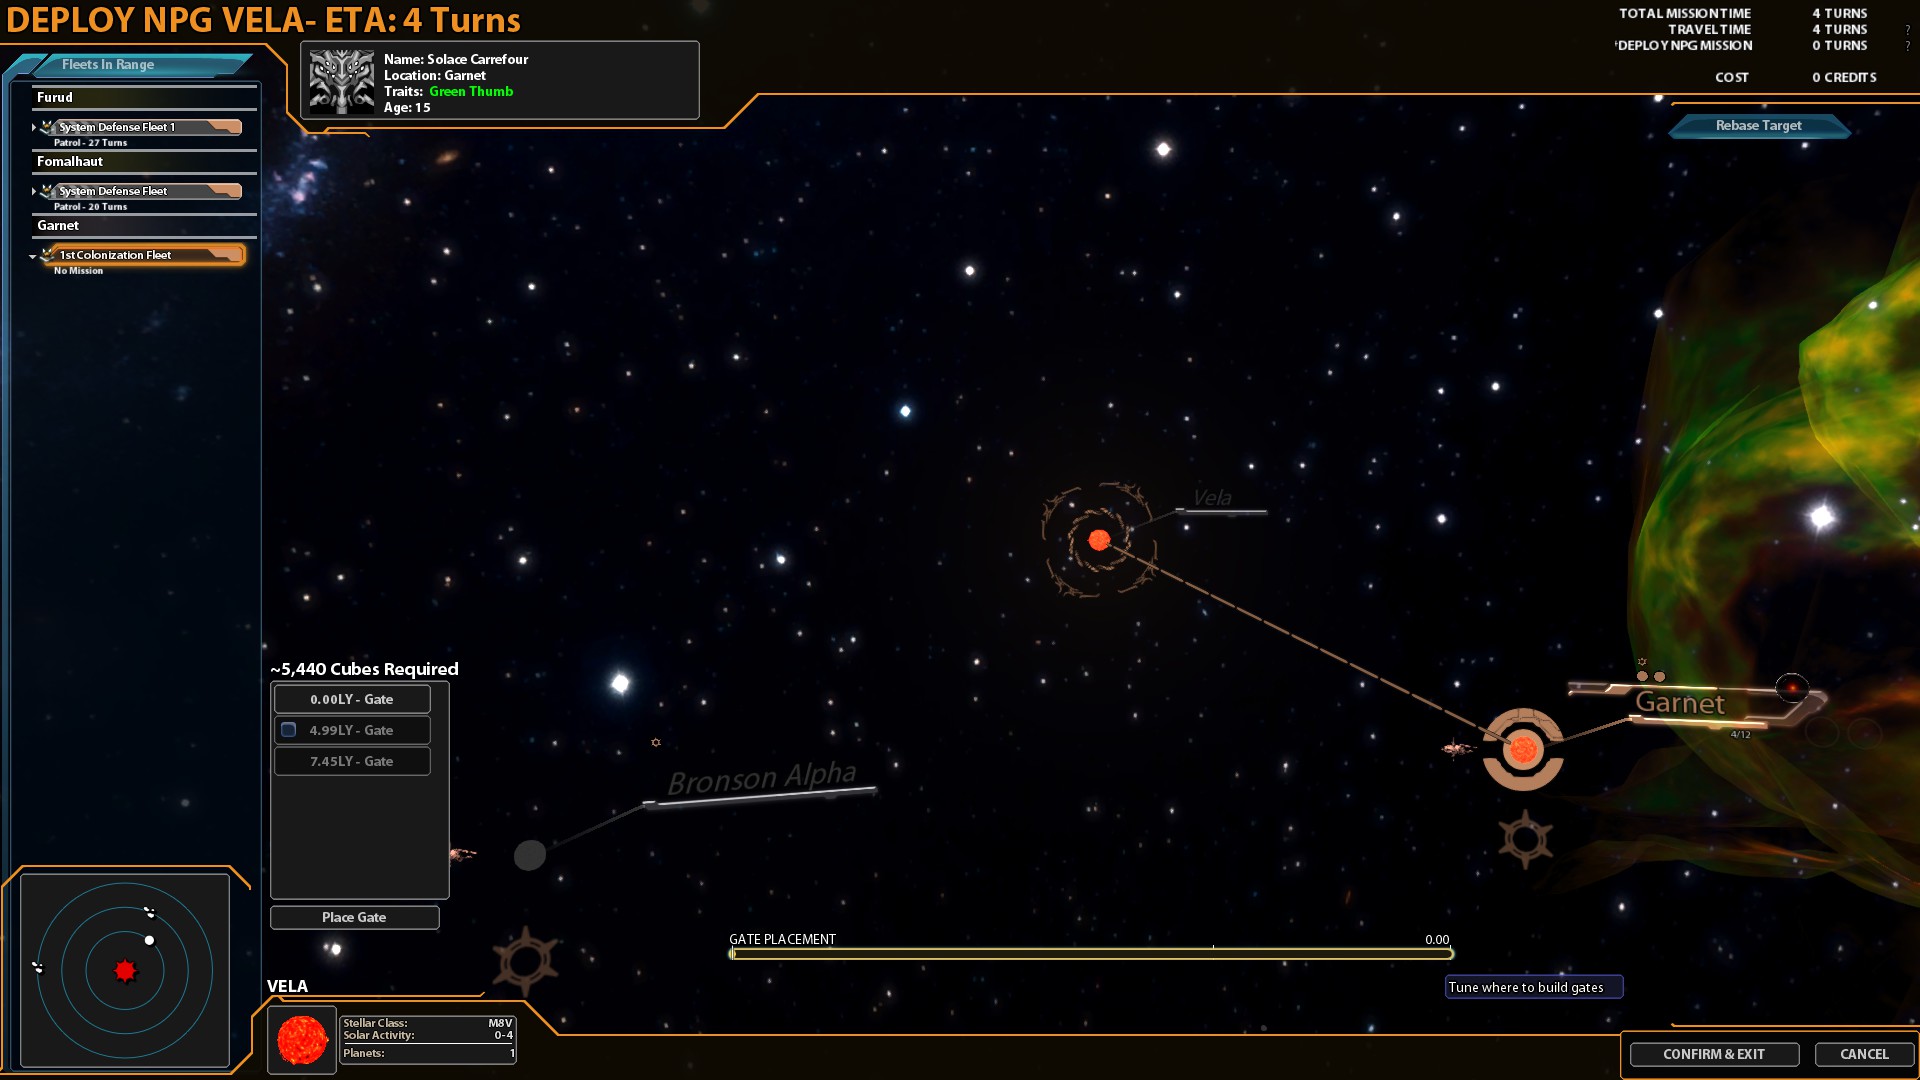
In there, find <LoaBaseMaxMass>, <LoaMassStandingPulseWavesMaxMass>, and <LoaMassInductionProjectorsMaxMass> and adjust to your own preferences. The three different tags correspond to the 3 different tech levels of gate tech.
Serafine 2015年3月23日 21時01分 
The Loa are the (un)living hell of micro-managment. I spend half my turn time pulling cubes around in the fleet manager.
Bees 2: The Beequel 2014年8月14日 21時38分 
very informative and useful thanks
Detech 2013年6月8日 16時36分 
1 command (25k cubes) fleet will burn 6000 biosphere planet around 25-30 turn, while only 12-15 burn ticks and 12-15 turn wasted...

If u use chain mission support - there are no any wasted turns and u got a full colony much early
Pink  [作成者] 2013年6月8日 6時23分 
I usually burn all the biosphere in one go, save time this way and the fleet is ready to colonize the next planet