Unexplored

Unexplored

161 ratings
Basics and tips for new players
By Misery
A guide for new players that goes over the basic mechanics of the game, and explains many of the common items, objects, and monsters that you can expect to run into. This guide is meant to help brand new players learn the game easier.
   
Award
Favorite
Favorited
Unfavorite
Introduction

Unexplored is a game that has quickly taken it's place as one of my favorite roguelikes of all time. As I've played it though, I've recognized that although it's accessible in it's way, it's still a very difficult game, and there's still a big learning curve to it. The game has so much content... monsters, items, objects... that it can be very overwhelming. There's just so much for a new player to take in! And all the while, the player is constantly bombarded by monsters and hazards, making things even more difficult.

While I cant really make the game easier for you (and I wouldnt want to anyway, what fun is that?) what I can do is at least offer up this guide, explaining some of the game's most important and common elements, as well as offering some basic tips and strategies to assist you in getting started on your way through the Dungeon of Doom.

Notice that I said "basics" there... this guide is not meant to teach you everything. Unexplored is partly about discovery and exploration, and I dont want to spoil any of the squillions of surprises that the game has in store for you. I am only going to show off the things that I think new players should know about... and then the rest is for you to find and/or get killed by.

Note that this is actually my first guide... dont expect perfection. Laziness, perhaps, but not perfection. Do feel free to make any suggestions you may have. I will do what I can to continue to improve this guide over time.

....And yes, I'm going to call this a "roguelike". Because I can. Deal with it.
Combat

Alright, firstly, let's go over a few things about combat in a general sense, before getting to other elements of the game.

I'm just gonna number these, because I can:

1. There are three basic types of attacks: swinging, thrusting, and stabbing. Stabbing is the simplest one: simply walk the point of your weapon into the enemy. Any weapon capable of a stab attack will be held directly in front of your character, and any weapon that cannot do it will be held to the side. As a rule, stabbing attacks always do less damage than other types, but in some situations they can be a bit safer and a better idea overall. When you think you can use the other methods though, do those instead.

2. Swinging is interesting in that it hits in a complete circle around your character. I've sometimes even hit enemies that were directly behind me by using this trick. This can be pretty useful, but the downside to swing attacks is that you are vulnerable from the front for a moment, and at the same time, your character sort of lunges forward, making for an attack that can be a bit difficult to control. I've often found that moving in the opposite direction as your swing can mitigate this a bit. Whatever you do though, dont just wildly flail around... you'll just get yourself destroyed, rather than destroying the bad guys.

3. Thrust attacks are easily the safest, and are typically done with weapons such as spears or tridents. Your character still lunges forward, however the weapon is held in front the whole time, and also extends forward a bit, giving a bit more range to what is usually a weapon that already has decent reach. The downside: thrust weapons tend to be pretty slow in terms of how often you can attack with them. These weapons are usually also capable of stab attacks, but are really terrible at it, to the point where it's a complete waste to do as you'll do hardly any damage yet still have to wait for the thing to be ready for your next attack.

4. Enemies can use all of the same weapons you can, and all of the same rules apply to them. This is important to keep in mind. Well... almost all of the rules. You may encounter some enemies who can do things such as hold four swords at the same time, which obviously presents a bit of a problem. When dealing with equipment-using enemies, be careful and watch their movements. Simply swinging at them at random times is often just going to give them an opening to hit you.

5. Is an enemy's shield getting in the way? Try hitting it with a ranged attack from up close, such as a dagger, knocking it aside for a moment to give you a chance to do some proper damage with your main weapon.

6. Many enemies have special abilities. All of these tend to be pretty nasty. The good thing is that almost all of these abilities require a sort of wind-up time, accompanied by a flare effect. When you see a monster do this, it means something bad is coming... now's the time to get away. Much of the time, monsters then need significant recharge time before they can use their special ability again.

7. Enemies can also use potions at times. Often, if you see an enemy walking around carrying a potion, chances are the first thing it's going to do is try to throw it at you, and it could be anything from poison gas to a potion of explosion. If you can defeat the enemy before they fling it, you can take it for yourself. Most enemies that hold potions can only carry one, so if they've already thrown it, you've lost the chance to get it for yourself.

8. Bosses are all pretty dangerous. You can tell when one is around as the game slows down for a moment, focuses on the boss, and displays it's name in the center of the screen. Bosses tend to have loads of HP, strong defenses, a variety of special abilities, and may have special unique equipment, and perhaps even the ability to carry multiple potions. Some bosses can even heal themselves. Approach these guys slowly, and dont be afraid to throw anything you've got at them. Since these guys are so dangerous, it's well worth using your only potion of explosion on them, or whatever. Dont take more risks with these guys than you absolutely have to. Books often warn you of the presence of a boss in a particular floor, and sometimes will be found next to specific items meant to help you deal with that specific boss. All the more reason to explore.

9. DONT USE YOUR HEALING OR LIFE POTIONS. Yes, I know that sounds kinda backwards, but just dont do it. One very useful feature of the game is that these potions will automatically fire off when your HP gets very low, and both of these potions refill your HP completely (if the related setting in the options menu is turned on, but it is on by default). Your life potions will usually fire off before healing potions do (which is good, as they increase your max HP). However, other types of healing will NOT work automatically, such as rations or healing water. You must use those manually.
Inventory management and related things

There's a few simple tricks to learn here, and I dont actually remember if the tutorial teaches you any of them. But looking at some videos, I've noticed players often very slowly dragging items around the screen, when much of the time you do not need to do this. Or sometimes using items when they actually want to move them. Let's go over some of the basics on how your inventory works:

1. Clicking on potions and scrolls USES them. However, clicking on other things will often swap them between your inventory slots, and your equipped items (try to get used to doing this, as it's a fantastic time saver). This can be a little confusing at times, but it's very important to make sure that you dont get this wrong, and accidentally click on a Potion of Explosion when you want to move it. For these items, you must DRAG them into slots, if you want to move them.

2. There is a huge, obvious SORT button that appears when your inventory is fully opened. As you continue to stuff your inventory full of wacky magical gizmos, be sure to simply click this frequently. It goes a long way to keeping things easier to deal with and less confusing.

3. If you want to drop items, simply pause the game, open your inventory, and shift-click each item that you want to drop, rather than dragging each one out of your inventory slowly. Each dropped item will appear in a heap beneath your character.

4. If you want to FLING an item... which I often do in order to toss things onto pressure plates... drag it out of your inventory, and sort of place it into the world in the direction relative to your character that you would like to throw it. Your character has a limited throwing distance (as in, pretty much exactly the same distance every time), so getting items to land just where you want them is a pain.

5. Flinging potions is important. However, you dont want to do this directly via your inventory. Instead, equip a given potion into either hand by dragging it. When you are ready to throw it... usually during combat... simply point, and click, as you would to swing a weapon or whatever. This will not cause your character to drink it, but instead to throw it.

The Minimap


One of the most important tools in any good explorer's arsenal is a good map. Paying attention to... and also fully understanding... your minimap is very important. For the most part, it's fairly self-explanitory... the minimap is very easy to read, with bright, obvious icons that stand out, representing everything important that you've seen so far on that floor. However, if you're not sure what a given thing is, simply hit TAB to enlarge the minimap. In that view, you can hover the cursor over any icon to see exactly what it is, and some icons will also become a bit more detailed there. Also, when dealing with teleporters that you have used at least once, hovering over one will show you the link between that teleporter, and it's destination.

But that's not all that happens when you zoom in with the minimap. You also get a view of the layout map, covered in the next section.
Dungeon Layout and Hub Floors


The Dungeon of Doom is a complicated place, and I dont just mean the structure of each individual floor. Even the overall layout of the dungeon as a whole can get complicated. Fortunately, the layout map... which appears when you zoom in on your minimap... makes it easy to figure out exactly where you are within the dungeon. The entrance floor is always at the very top, and the floor with the Amulet is always at the bottom, so your goal overall is to progress downward.

If only it were so simple though. As you can see in that image, the dungeon contains branching paths. Any floor that contains multiple exists is known as a Hub Floor. Each exit on a hub floor will lead to a seperate branch. Only one of these branches actually leads downwards towards your ultimate goal. Other branches will reach dead ends. However, it is very worth exploring everywhere you can, as "dead end" branches are often where some of the game's most valuable and powerful treasure awaits. As you continue playing the game, you'll learn over time how to recognize which branches are likely to hit a dead end, and which one is the "proper" path to take you onwards to the boss.

Also on this layout map are shown icons for particularly important objects found on a particular floor. These include crafting stations, altars, and shops. This helps you to know where the nearest of these objects is at any given time.

Lastly, when looking at this, if you hover over any of the green exit icons on the zoomed-in minimap, the corresponding floor on the layout map will start flashing, making it easy to see which exit goes to which floor.
Praying, and the Star Spinner
Notice on the screen, in the bottom left corner, there is a big red button marked "pray for help". This is one of the game's most important functions, and it exists to keep you from getting stuck within the dungeon. As a rule, the game always provides you with the tools that you need in order to proceed with your quest... it's up to you to find them and figure out how to use them properly in order to advance. However, if you just cant figure it out, if you feel like you're just plain stuck, this function can help you out. Most of the time, being "stuck" often involves a door of some sort that's in your way. Perhaps you're missing an important key, or perhaps it's a special door, and you just couldnt figure out how to deal with it. Or, on rare occaisions, even a genuine generator glitch may be in the way. Whatever the case, this function will help you. Simply stand near the offending door, and hit this button. After a moment, you should see an object that I call the Star Spinner.


Standing in this thing will fully activate the prayer effects, and is likely to either open the door, or teleport you to a spot that allows you to continue onward. However, it is important to only use this when you absolutely NEED to. The gods are not very patient, and really dont want to have to be constantly getting you out of hot water over and over again.... so if you do this too much, they will start to punish you for it.

Note that praying is not the only time the Star Spinner will appear. Every now and then, it might appear by itself, in unexpected places. Why does it do this? Well, I suggest you go stand on it and find out for yourself...
Grabbing and Stealing


Now here's a function that alot of people dont seem to realize exists: grabbing stuff, and stealing. Both of these require that you have at least one hand free (as in, not holding an item/weapon).

Grabbing allows you to latch onto some types of objects, and drag them around to wherever you want them to go. This is pretty simple to do. Again, having one hand free, walk up to the object you want to grab, and simply click the mouse button associated with that hand, and hold it. As long as you keep holding the button down, you can slowly pull the object along with you. But why, exactly, might you need to do this? Again, I said I wasnt going to spoil too much here... you'll have to find good use for this function on your own. You wont be using it particularly often, but it can be very important at times.

Stealing from enemies is the other half of this function. To do this, walk up to a sleeping foe... slowly... and once you're right next to them, click the button associated with your free hand while pointing at them, to attempt to steal something from them. Not every enemy will have anything for you to take, but when you see a chance to do this, it can be worth a shot. Note that stealing can not only fail, but can also sometimes wake up the enemy... use this function at your own risk. Again, you wont be doing this particularly often, but it can prove useful at times.
Item Identification
Alright, now we get into one of the more convoluted aspects of the game: identifying your items.

First let's have a look at the different states an item can be in:

Basic


Basic items have a grey background, and require no identification. They are simple things, and always fully revealed. You can see their full description at any time. They also contain no magical properties. Nice and simple to deal with.


Unidentified


If it has a purple background, this means that it's some sort of magical item... but you know absolutely nothing about it aside from the base type. In that image, we see a mystery sword. All we know, in fact, is that it's a sword. It clearly has some sort of effect, but it could be anything. Could be beneficial, could be horrible. It could even be cursed. Unidentified items can be extremely dangerous.


Partially identified


In this state, you now know that the item is either good, or bad. Beneficial magical items will have a blue background. Nasty (or just damaging) ones, like the potion in the image, will have a red background. However, you dont have more detail yet. We know that the potion in the image is a dangerous one, but we dont know WHICH one it is.


Fully Identified


Now, finally, you can see all the details about the item. You can see the full name, read the full description, and if it's a magical item with a charge, you can see a meter that shows how much charge it has. Needless to say, this is the ideal state.


So, how do we identify items? There are a few ways to do it:

1. Use them. For potions, this means drinking or throwing them. If you know a potion is good, gulp it down. If you know it's dangerous, equip it and throw it at an enemy, and you'll find out what it does when it hits. If it's a scroll or a staff, you must use them directly, no amount of flinging will cause them to give up their secrets.

2. Wear them. For equipment and weapons, you need to put them on, and after awhile, they wil reveal themselves. Armor typically reveals after you've had it on long enough, and weapons reveal after they've killed a certain number of enemies. Some specific weapons however have such obvious effects that they will reveal instantly.

3. Scrolls. This is the ideal way to identify anything. Simply using or wearing totally unidentified potions or equipment is very, very risky. It's a great way to get yourself killed. So this is where a couple of scrolls come into play. First is the scroll of identify, which will fully identify a single item in your inventory. Secondly is the scroll of Detect Magic, which will PARTIALLY identify EVERY item in your inventory, and also every item that's on that entire floor. Generally, this is the most important of all scrolls to look for. The good thing about scrolls is that there are only four "bad" ones, and the bad ones really arent all that bad (one is outright useful and even required at times). Unlike potions, which can be absolutely horrible. It is often safe to use unknown scrolls, however it is best to do this in open areas that are clear of enemies and traps, just in case you get a scroll of Darkness or Pain. Do whatever you can to find the Identify and Detect Magic scroll ASAP, as they'll make a huge difference in your run.

4. For staves, dont worry too much about being careful with them. Like scrolls they arent THAT dangerous... as long as you try them out in a safe area. Just point and shoot, and see what they do. Make sure the area you're in is big enough though... NEVER try out a new staff in a small, confined space. It's a mistake you only get to make once.

5. When you open your inventory, there is a button for discovered items. This gives you a full list of all potion and scroll types in the game, and shows you which ones you have identified, and which ones you havent. Looking at this can give you some potential hints as to what a new one is likely to be. Once you've identified a single potion or scroll, all others of that type will be identified for the rest of the run.
Doors
Alright, it's time to show one of the things you'll be interacting with the most often: doors. Recognizing the different types of doors is super important, and I may as well list some of them in my usual messy way.

These are NOT all of the different types of doors in the game. There are actually many types... but explaining or showing all of them would be spoileriffic. So I'm not going to do that. But lets have a look at some of the most common types:


Basic Door


Nice and simple, right? This is by far the most common type of door, and all you need to do to open it is just walk into it. Nothing special here, and you'll see these everywhere. Note that ENEMIES CAN OPEN THESE. This is really important. You're not safe from that wandering Troll simply because there is a basic door between you and him!


Barred Door


This door cannot be opened normally, and as it is not technically locked, you cannot use lockpicks on it either. If you see this door, this means that somewhere there is a switch, pressure plate, or globe that is associated with it. Activate the correct one, and the door will open for you. Note however that some doors operated by switches will promptly slam shut the moment you're on the other side! Suddenly, you may be trapped! Or maybe not: Remember what I said, the game always gives you the tools you need to continue... you just have to figure out how to use them. Most doors of this type, however, as long as they are not linked to a globe, will remain open once activated.


Locked Door


Pretty simple, right? Locked door, needs a key. Well the thing with locks and keys in this game is that each individual key only opens one very specific door, even though most of these keys tend to look exactly the same. If a key doesnt work on one door, try using it on a different one. Note that any given normal key will only work on a specific door on the same floor you found it on. You also have the option of using lockpicks here... but it's not always going to work. More on lockpicks later.


Blue Door


Now this is a door you want to see. Why? Because chances are, some sort of powerful and useful magical item awaits you in the chamber beyond. However, opening one of these isnt so simple. In most cases, blue doors are associated with a nearby puzzle of some sort. Solve the puzzle, and the door will open. However, if you should make a mistake of any sort, the door will become corrupted, spit out a bunch of smoke, and go dark. Once that has happened, you cannot ever get it open again. And no, praying wont work on this one. You either do the puzzle correctly, or you dont get through this door. Be certain that you know what you're doing before trying to deal with anything puzzle related. You dont want to miss out on some awesomely powerful sword of laser death simply because you grabbed the wrong cat statue.


Special Doors

Sorry, no image here. I dont want to spoil too much, remember? The four doors listed above are far from the only sorts you'll encounter in this place. Hidden within the depths of the dungeon may be a variety of special doors, each with it's own unique appearance. Each one has it's own way of being opened. Some special doors may need a special key (which also has a unique appearance). And that special key is often found on an entirely different floor, unlike normal keys. Other special doors may have their own unique mechanics or puzzle elements that need to be figured out in order to get them to open up. Regardless, if you see a special door, you can be assured that there is something important on the other side.
Chests and containers
More simple stuff, I know. But that's what this guide is about, right? The simple stuff. Who knows, you might learn something here. Let's look at the various types of containers in the game.


Basic chest


The most obvious of them all, basic chests are opened simply by walking into them and will always have something inside.


Trapped Chest


When you see this, be careful: opening this chest will cause something bad to happen. Trapped chests look like totally normal, average chests by default. When you get close though, there is a chance that they will be revealed for what they are. This chance is based on your Vision stat. For a better chance of spotting these things before it's too late, look for equipment that can raise your Vision stat.


Locked Chest


Pretty simple, yeah? Find the key, and you can open the chest. Just like with doors, locked chests always have one very specific key, found on the same floor, that will open them, and no other key will fit. Also like locked doors, you can try to use lockpicks to open these, if you have any.


Blue Chest


Like blue doors, you really want to find these. Unlike blue doors, they wont be so obvious. Most blue chests are completely hidden from you at first. Taking certain actions or solving certain puzzles is what makes a blue chest appear. These often contain very good rewards, so do what you can to find them.


Special Chests

That's right, like doors, there are special versions of chests that I wont be listing here, because spoilers. These chests tend to be pretty darned obvious when you spot them. Each has it's own unique properties and possible contents. Do what you can in order to open them, but be careful, some of them arent very safe.


Barrels


They're very much like chests really in that you simply open them, and they have something inside. Unlike chests though, they dont ALWAYS have something inside, and they may start out already opened (you can tell if an opened one has something inside if you see a small star in it). Barrels tend to contain smaller items like rations. They are though always safe to check, so always do so.

Vases


These are pretty much like barrels, except that you cant just directly open them: You need to smash them instead. Strike them with your weapon or fling a dagger at them. You can tell if a vase contains something (usually gold) if it has a little star in the opening.


Bookshelves


These are usually a great find, as they will contain either books or scrolls... both of which are super important. Bookshelves are often in "library" rooms, where there are many of them in one place, however they can appear in other odd spots sometimes. Always check these when you can. The books you find in there could lead you to puzzle solutions!


Tombs


Tombs are unique in that they require that you have at least 14 strength before you will be able to open them. With this requirement, you'd think they'd be filled with awesome stuff, but.... nope. Most tombs are empty. Those that arent, often contain gold. There's no risk to opening a tomb, so if you have enough strength, always do so.


Crafting stations
Crafting stations do pretty much what the name suggests: They allow you to take two items, and smash them together to produce some sort of result. As a rule, the result is always something that's very useful to you. Each of the three stations specializes in something different.

Forge


This is the one you'll be using the most often. Most of the time, you'll come here to use sigils, powerful items that can be stuck onto basic equipment (as in, non-magical, with a grey background) to add some sort of powerful magical property to them. These effects can be extremely good, so it's absolutely worth backtracking to use a forge, if you need to. There are also special recipes that you can discover by reading books, which can produce totally unique items.


Alchemy Lab

Oops, I didnt prepare an image of this yet.

Anyway, this is the station you'll be using the least. You need a special recipe to make anything with this; it's always one very specific item plus another very specific item to produce potions and other things. The problem is that getting both required items can be very tricky, and of course you need to know what the recipe is to begin with. Again, you can find these in books... I'm not about to list them here. Do your own research!


Magic Desk


Now, this one is unique. There are no recipes here: Magic desks, instead of crafting, allow you to COPY scrolls. You need a magical scroll of any type, and a blank scroll. Just put the magic scroll in with the blank one, hit the button, and the blank one becomes a copy of the magical one. This can be VERY useful to you... particularly if you're copying something like Identify or Detect Magic scrolls. Again, it can be well worth some backtracking to use one of these. Blank scrolls are actually fairly common to find.
Traps
Now we get into the nasty, dangerous stuff. There is never anything good about traps... they exist only to kill you. However, they are just as capable of wrecking your enemy... on rare occaisions you may find ways to use traps against the enemy, but still, be careful around them.

Let's go over the most common types:


Floor traps


These things are... invisible! You cannot see them until one of three things happens: 1, you step on them, at which point they will of course activate, or 2, your character "spots" them, which causes them to pop into view. This effect is based on your vision stat. There's also 3, using a Detect Magic scroll. This one wont FULLY reveal a trap... but it'll appear on your minimap as a red dot.


Turret


Immobile and indestructible, these guys simply watch you, and if you get within their range, they'll do something unpleasant. There are a variety of things they can launch at you.... all of them very bad. While you cannot destroy these, they often can be turned off by finding switches somewhere on the floor. There is one other way to deal with them though... but that's a spoiler!


Sentry


These are like turrets, however they do not attack you. Instead, if you get to close, they'll start flaring up, and if you dont get away in time, they'll let out a loud honking noise. Aside from alerting nearby foes to your presence and waking up anything sleeping nearby, these can sometimes activate a variety of unpleasant things that may be contained in the same room. Ignore these at your own peril.


Gas Vents


These dont hurt you directly, but they do periodically spray gas of various types into the air. They can put out quite alot of it... a vent contained in a closed room can fill the room with so much gas that it actually becomes very hard to see! Each gas type has a different property, and none of them are good. Most can be ignited, which.... also usually isnt good. Fortunately, vents can often be shut down with switches.


Teleport Pads


These are pretty simple things. When you want to use a teleport pad, simply stand on it for a couple of seconds, and it'll send you somewhere. Most teleport pads are 2-way, and will link up with another pad of the same color. When you've used one, you can view that link on your minimap when it's zoomed in, by hovering over one of the teleport pad icons. Remember that these pads take a moment to activate... trying to use them in the heat of battle, or while some nasty turrets are pointed at you, isnt likely to end well. Clear the area before using one.


Warp Pads


Warp pads are special: you will only find these on dead-end floors, at the end of a branching path. These exist for one simple reason: To take you back to the associated hub floor. Be warned though, these are one-way warps. If you are not finished with the floor you're on, DONT USE THE PAD. Otherwise, you'll have to walk aaaaallllllll the way back down if you want to continue exploring that floor to find whatever gizmos may be hiding there.


Destination Pads


These are usually found on hub floors, and are where the warp pads will drop you off. However, they are sometimes linked with normal teleport pads found on the same floor, making for a one-way teleport. Keep that in mind as you then continue to explore the floor.
Altars


Now here's something that can get a little confusing. In theory, these are simple objects: walk up to one so that it opens up, drop an item into it, and hit the button to offer it to the associated god. In practice though... not so simple. The key to making an altar work isnt offering just any old thing. Each of the three gods... Sophie, Density, and Grievous... wants different things. There are multiple types of items that you can give each one. However, dont just keep stuffing random things into these... the gods dont really like it if you waste their time with junk they dont want.

So how do you know what to give them? Well, you arent going to get that exact knowledge here. Instead, look for books, or consider buying some beers for that old guy at the beginning of the game. He just might have some things to tell you about each of the different gods.

When you've given the right items, there's a variety of things that can happen. Perhaps you might get a special effect going, or you might get a magical item as a prize (which will appear in the altar, so dont just close it after you've made an offering, you dont want to accidentally miss the reward). The responses differ between the three.

Unfortunately, they can be a bit cryptic at times... even I dont fully understand these guys. I'm hoping that their effects might become a bit more clear in future updates.
Other notable dungeon objects
Cauldron


Cauldrons can either be filled with fire (and acting as a light source), or they can be filled with liquid of pretty much any type. If you have empty flasks, try using them on a liquid-filled cauldron to fill the flask with that liquid. Could be water, blood, or any type of potion. You can fill 3 flasks before the cauldron is empty. If you find one that starts out empty, it can be lit with your torch or any other fire source. These can also be dragged around.


Glider Pads


These are typically found in areas with lots of horrible pits to fall into. Stepping on one gives you temporary levitation, however it doesnt work quite like a levitation potion. The effect doesnt last long, and will end prematurely if you stay over solid ground too long. When using these pads, step onto them and just keep moving smoothly out over the abyss. You can probably see the other side from wherever the pad was, so you shouldnt need to "explore" while levitating. Which is good, because you dont have time to. Go straight to the other side, dont dawdle, or you're taking a one-way trip into the abyss.


Pressure Plate


These can be used to activate things... usually doors... however they only work as long as something is on top of them. Stepping onto them yourself is pointless... they will simply deactivate the moment you step off. The correct way to use these is to toss an item onto them. Any item will do. Once you've got something on there, they'll stay active, and the related door will remain open. Something important though: These look EXACTLY the same as traps that have been spotted yet not activated. If you look at your minimap though, you can tell the difference, as pressure plates have yellow icons, while traps are red.


Signs


These hang on walls, and display a bit of text if you stand in front of them. Some signs just have gibberish on them, but many of these have hints related to nearby puzzles on them, and are often crucial for solving those puzzles at all, so if there's a puzzle nearby, there's a pretty good chance there's some signs around that floor as well. Signs can be kinda hard to see in some situations, so keep an eye out for them. They're always worth checking out.


Switch


Switches do pretty much what you'd expect. Flip them to turn on whatever gizmo they happen to be attached to. Or to turn the thing off. They are most commonly linked to barred doors in the level, however there is actually a large variety of things they can be linked to. They could raise bridges, shut off vents or turrets, or various other things. Chances are, if there's a switch nearby, you want to hit it. When you use a switch to open a barred door, and you go through that door and it slams shut on you, the switch that opened it will actually remain in the "on" position. If you go back to that same switch somehow, and turn it off, and then back on, the door will then stay open permanently. No, I dont know why.


Vendors


These guys can be found throughout the dungeon, and you can buy assorted things from them. Just walk up to their window and give them a chance to notice you. Each vendor sells a specific type of thing. Some may sell rings, others may sell scrolls, and so on. The nearby sign always tells you what exactly that vendor sells. Note that when you make any sort of purchase, the vendor will then disappear permanently (however, you can buy more than one thing at a time). However, if you DONT buy anything at all, the vendor will not vanish. They want at least SOME money from you, after all. So dont be afraid to glance at their wares. Note that this isnt the sort of roguelike where you can steal from or kill the vendors. You want their stuff, you better be ready to buy it. The items that these guys sell tend to be pretty darned useful, so always check them out when you have a chance.


Weird Rocks


These come in various colors, and tend to glow a bit. They tend to produce small amounts of gas of various sorts. They can be struck with pretty much any weapon, and destroyed as well. When destroyed, they'll put out ALOT of that specific type of gas, so be careful about that. The purple ones in the image for instance put out that pink gas, which can be ignited, so if there's a torch or other source of fire nearby, well... you do the math. There are sometimes treasure chests behind walls of weird rocks, so dig when you can... just be careful.
Basic Monster Examples
Rat


One of the first enemies you are likely to run into, rats are very common in earlier floors of the dungeon. Most rats are small, and very weak, with even a single stab attack from a mere dagger able to kill them in a single hit. However, they tend to appear in swarms. There are other varieties of rats that are a little more dangerous, but for the most part these guys are simple. Also, they have a fear of torches.


Spiders


Spiders are very common throughout the entire dungeon. There are many different types, each with different properties. The most basic of spiders wont attack you from the front... fearing your weapon... but will instead try to leap over you to attack you from behind. Other types of spiders though may have very different behaviors, and some have special powers and attributes. Some may even have "swords" attached to them. The jumping ones tend to appear in groups, so be careful that you dont get surrounded.


Goblin


These guys are one of the earliest types of equipment-users you will encounter. They tend to carry rather simple things like daggers and spears, and some have shields. Many wont have armor, and they tend to have very low HP. Consider these guys practice for the bigger, tougher, dramatically more unpleasant fighters that await you deeper into the dungeon. Oh, and consider taking their weapon if you kill them.


Rat Man


These big guys are one of those tougher fighters I've mentioned. The problem is that they can actually appear on early floors, albeit usually one at a time. However, early on, you probably dont have the means to deal with these guys too easily. They hit like freight trains, have quite a bit of HP, and can become enraged, making them even worse. Early on, your best bet is probably to simply hide or avoid them however you can. Sure, you could try to defeat them and take their weapon, but you probably wont be able to use it yet. Best to just keep your distance rather than risk getting smacked around.


Fish


I hate these blasted things. Fish are like rats: rather simple. However, they tend to attack you in very awkward places where you dont have much room to move (shallows), and trying to deal with a group of fish while swimming in deep water is a recipe for pain. Fish move quickly and are very aggressive, and not afraid of your weapons. What's more, if found in murky waters, they can be very hard to even spot. EVEN WORSE is when you're trying to deal with them in hot or freezing water. In that type of water, it's safe to stand in the shallows, but falling in the deep end will cause you to take constant damage. Naturally, this means that fish will be constantly trying to shove you into the deep stuff. They may seem like a simple enemy, but dont underestimate them. They come in various sizes. Oh, and your magical staves tend to not work on them because they're in the water.


Wolf


Tends to travel in packs, and is extremely aggressive. These guys will dash at you, and are very fast. While they are wary of your weapon and will tend to try to avoid any stabbing weapons you may be holding in front of you, you still need to be careful. One wrong move and they'll be up your nose, shoving you around and doing piles of damage. Wolves often wait on the other side of closed doors, ready to leap at you the moment you open them.


Beetles


Another unassuming enemy that can turn out to be more trouble than you expect. Beetles, for whatever reason, tend to have a variety of magical powers (except for the most basic version). Common blue beetles for instance can fire magic missiles at you. Bigger, more unpleasant versions can do other things. They also have resistance to magic damage, which just makes them worse. They tend to appear in large groups, coming at you from every angle. Beetles can also burrow into dirt, so they could jump out at you at any time in cavern areas. It's best to have your shield at hand when dealing with these, so you can block their magical attacks. Do NOT try to fight beetles of any type when there's Myst around (blue gas). Why? You'll find out, sooner rather than later.


Harpy


Ah, these things. These are one of the more unpleasant flying things you're likely to encounter, and they appear frequently at any point throughout the dungeon. While harpies look like they'll try to ram you, they actually use a swinging attack similar to your own. This attack tends to come very quickly, and can be difficult to block. Much worse though is their scream attack, a huge green shockwave which can stun you. Being stunned is bad... you'll be an easy target for absolutely anything that might be nearby. Like all monster abilities though, once a Harpy has used it's scream attack, it requires some time to recharge before it can fire it off again. They appear most often in floors with lots and lots of pits. Can you guess why that is?


Eggs


These things are very, very simple: They sit there, they dont move, but when you are nearby, they just might hatch into some sort of horrible thing. Eggs often tend to appear in very large groups, blocking your way or filling a room. Which is bad. The last thing you need is 40 spiders coming at you at once, so you want to be really, really careful when dealing with large numbers of eggs. The eggs in the image are spider eggs, but there are actually many types, each worse than the last, each hatching a totally different type of monster. Regardless of just which specific type it is, it's bad news for you.
General Tips
Now that I've shown all sorts of things that you can expect to encounter, I'll finish up this guide with some important advice. Numbered again, because I feel like it.


1. BOOKS. Always... always... always... look for them, always read them, and if they say something important, mark it into your journal, which you can look at whenever you want. Books are CRUCIAL to solving pretty much all of the game's puzzles, and the thing about those puzzles is that they are just as procedural as everything else; the solutions change from one run to the next, and a single screwup can prevent you from ever getting the reward. In addition, they can tell you about useful crafting recipes, hint at secrets that can be found on later floors, and give all sorts of very useful info.

2. NEVER DRINK AN UNIDENTIFIED POTION. Ever. Dont do it! I dont care what your reasons are: Dont drink any potion with a purple background. Or a red one, either.

3. For that matter, try to avoid using unidentified (purple) equipment. These can seriously screw you up, and can even bring about the end of your run entirely.

4. Find a Detect Magic scroll early? Dont use it right away. Wait until you've accumulated a variety of unidentified gizmos, and THEN use it so that you can get an idea as to wether each one is positive or negative. This way, you get the most bang for your buck.

5. Scrolls, however, are usually safe to read. The "negative" scrolls arent all that bad, with the Descent one actually being useful and even necessary. If you havent yet found the all-important Identify or Detect Magic scrolls, it's a good time to read random ones to see if you can find them. However, it's best to wait to do this until you have some other unidentified stuff, in case you do in fact find a Detect Magic scroll. That way, it isnt wasted in the process.

6. Negative potions are useful to you. Obviously, you dont want to drink them. But you still want these things. Throw them at your enemies! Of course, not all potions are directly useful in combat... but ALL of them do provide some sort of useful function. Some of these even can do unexpected things in some situations. There is a certain type of thing in the dungeon that tends to enhance (multiply) magical effects, for instance... what might happen if you throw a Drain Magic potion at this particular stuff? One way or another, negative potions are just as important as positive ones. Unlike negative staves and equipment, which all just suck.

7. Sigils are powerful things, and wonderful to find. They dont do anything at all by themselves, but you can take them to a forge and attach them to any piece of equipment, be it weapon, armor, shield, whatever... to give that equipment a powerful magical effect. Each type of sigil can produce a different effect depending on what type of equipment you use it on. Experiment alot with these to see what you can learn about them. What happens if you combine a Magic Missile staff with a sigil?

8. RIGHT CLICK THE HECK OUT OF EVERYTHING. When you find a new item? Right click it to see it's full description. No, I dont care WHAT it is, just freaking do it. Learning all you can about the game's many, many items is pretty much all-important.

9. You can pause the game at any time by hitting escape. While paused, you can still look around, hover over monsters and things to see their descriptions, and interact with your inventory (including moving stuff around and changing your equipment). Note though that quaffing a potion or using a scroll will instantly unpause the game. I strongly recommend making good use of the pause feature. This isnt a twitch game, after all... being tactical is a must.

10. Explore everywhere! The game gets exponentially harder the deeper you go. The best way to deal with this is to EXPLORE. The more you explore, the more floors (including optional ones) you clear, the more puzzles you solve, the more powerful stuff you'll find, and the better your odds will be of surviving to the final floor. Optional floor branches in particular tend to hold great rewards. Bosses also tend to guard useful things.

11. Strength potions. Use these the MOMENT you find them. This is perhaps the most important item in the entire game, as your strength stat determines wether or not you can use/wear equipment... and equipment is everything. These potions are another reason to explore and solve puzzles, as it's rare that they're just in plain sight, nice and easy to get. The upgrade to your strength stat is PERMANENT. So, again, use them immediately.

12. Dont fight absolutely everything. If you see an enemy that you think might be a bit too much for you? Try to sneak by, or otherwise avoid him. Of course, sometimes a difficult battle cannot be avoided... just remember that your weapon isnt the only thing you can use to your advantage during a fight. Pause the game and check your inventory to see if there is anything that might help you.

13. Many magical items, such as staves or even defensive items, have a charge meter. When they are activated in some way, it drains. Unlike in old traditional roguelikes, things like staves dont break when they run out of power; instead, they simply enter a drained state, and they need time to refill. Drained weapons and armor still function as basic weapons and armor, just minus the special effect until it recharges. A scroll of recharge will recharge EVERYTHING all at once. Since things like staves dont break, dont be afraid to use them! You can increase the power of magical items by using enchant scrolls on them. A staff of fireball is powerful by default. But a staff of fireball +4 is more like a nuclear weapon (yeah, be careful with that).

14. If something seems like a river, dont swim down it. If you're NOT finding solid ground to walk on.... you're going the wrong way, is the rule here. When you are in the shallows and hit deep water, *immediately* get back to the shallows or dry land, whichever is closest.

Now, there actually is a helmet that allows for water breathing, but I dont believe it's used as one of the game's special items (the sort that the dungeon will build itself around) since certain classes cant equip the thing. So you're not going to see floors that use deep water as a barrier.

15. The trick for dealing with murky water is a few things. Take it SLOW. Observe the hell out of the area you're going to try to wade through before doing it. The deep end isnt the threat: The things living in it are. Fish and Bog Worms are the problems here. Look very carefully for areas that seem to have more bubbles appearing than usual. When you are ready to head through the water, hold a sword of some sort in front of you. Because it means that if you crash directly into an enemy in the water, the enemy will take the damage instead of you, and you'll have plenty of time to backpedal or otherwise deal with it. Again, if you hit deep water, immediately backpedal. Dont keep going.

16. When it comes to fish, yeah, they can shove you into the deep end, and that's pretty much their entire function. So.... dont let them do it. Keep yourself with your back to dry land when dealing with fish. Use a sword or other solid stabbing weapon, and let the fish come to you, not the other way around. If you think you might get hit, backstep onto dry land and give the fish a moment to move away before resuming your attack. DONT use swinging attacks against them. Just dont. Stabbing or lunging only, for fish. Same for bog worms actually (though ideally you'll just avoid those, they take quite a beating to bring down). There is no time limit in this game, so dont be afraid to backpedal a bit when you encounter some fish, so you can lead them to an area that is advantageous to you instead of to them.
52 Comments
evage86 Jan 23, 2023 @ 8:26am 
Thanks for this, just picked it up on sale and it's surprisingly complex! YouTube was uncharacteristically unhelpful. xD I've made it to level 3 of a dungeon so far, woooo...
Misery  [author] Oct 13, 2020 @ 2:22am 
Nope. I thought about it, but I dont exactly have much Youtube presence, I figured nobody would bother watching it.
ScavengerOfSouls Oct 12, 2020 @ 10:39pm 
Good job Misery, just got the game on switch last week and I knew there was something to that game. Now after reading all that I'm really excited to play tomorrow.

Did you end up making any playthrough video? Links?
Misery  [author] Jul 23, 2020 @ 10:47am 
Stay in the shadowy sections near some walls and move carefully, basically. Stealth is never 100% effective in this. You're absolutely going to need alternatives for when something spots you.

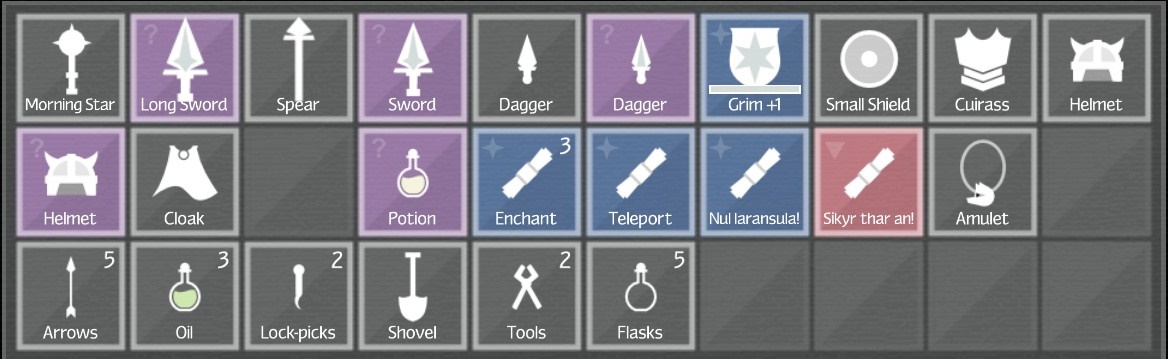
Overall, think of the character classes more like a light guideline. In reality, the items and such you have are what are going to determine what you can do, even if some of those items may not be as effective as they are for other characters. Change up your strategy if something isnt working in a run. As with most roguelikes, versatility is key.
AlternateEnding Jul 23, 2020 @ 2:58am 
If you're still active, do you have any tips on stealth and playing rouge? I'm having a real tricky time with that.
AJ, Lord of Chaos Apr 17, 2019 @ 9:30am 
The mithril run is pretty dark and the bottled sprite helped a lot. At least the white one is decently bright the others seem very dim.
Sly-Scale Apr 14, 2019 @ 10:45am 
Or release sprites, for that matter. You can't even release them, if at least to get them out of your inventory.
Sly-Scale Apr 14, 2019 @ 10:44am 
To the OP:
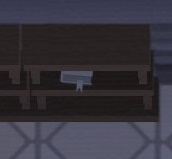
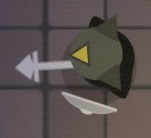
Sprites are plain annoying for trying to sneak around. They're the weakest-looking little things, and yet you can't just... catch them and crush them.
Misery  [author] Feb 26, 2019 @ 1:40pm 
Eh, but are the sprites even necessary for anything? In all my time with the game, I dont think I ever really used them for anything. Main reason being that they simply dont provide much light, so... feh. For light I use either torches, or a shield enchanted with fire (which I'll always try to get, every run).

If sprites actually do anything other than serve as a weak lightbulb, I've never noticed.
Sly-Scale Feb 26, 2019 @ 1:08pm 
To add: I know you can put them in a flask, and you can buy 6 of them at the start of any run, but I can't seem to release the sprite without breaking the flask. My flasks are typically dedicated to water, so I can douse fires on me. So that's really one flask for a sprite, five for water, and pray I never need more. Most of the time I can't find more, and elves aren't reliable.