Star Ruler 2

Star Ruler 2

116 ratings
Tips and Tricks
By Shurimoo
My plan for this guide is simply to assemble a page of tips and tricks that I come across as I play the game and find out more things. If you have a tip feel free to put it in the comments and I will probably edit it into the main page. Unfortunately at the start this will probably be very small, but I hope to have a large collection of tips by the time SR2 leaves early access!

Special Thanks :
Blind Mind Studios, SDSkinner2011, Drasca
   
Award
Favorite
Favorited
Unfavorite
Using that User Interface
Remember that opening image? Yeah, let's make sure you all know how to do that.

Pinning Items :
First off, find something you like. Hold left click on it and an info box should appear next to it and become permanently open on your display. (Alternatively, select something and hit Ctrl + p and it will appear in the lower left). Then you can simply left click and drag the top bar with the object's name and you can move it around! To remove it just right click that same top bar.

Planet GUI :
If you buy something to be produced on the top-right section to the GUI then it will be built based on the planet's labor/min production rate. After ordering the item for construction you can cancel it for a full return of your investment so long as you have not passed the budget cycle you bought it in (if you have, then you simply lose any money you spent on it- you are better off just letting it finish in that case). Should you decide something else on the list is more important, you can reorder the build queue by simply dragging items around.
For the planet's surface, there are many types of biomes but they only really apply if you choose to make an imperial building (under the "Buildings" tab on the right side). Imperial buildings are constructed slowly over time of their own accord, they generally do not use the production/min: though there are a couple exceptions. Imperial buildings are different from civilian ones in that you must specifically buy them and place them, and they also carry an upkeep cost for your budget. Civilian buildings on the other hand are essentially free and built based on need, where the need is itself based on what resources the planet has being imported to it.

Miscellaneous Notes :
The Planets tab is a vital part of your empire-wide awareness. Being able to quickly see what each planet is costing you, producing for you, and exporting or importing to can be very helpful. Using the planets tab you can also set up import/export chains by dragging planets around, as well as select multiple planets at once and shift their export target. Very useful for general empire management.

Useful Keys :
f : hotkey for FTL drives on ships
c: colonize planet (works for mono as well, allows you to quickly jump 1 Bil population)
From One Planet to a Galaxy
Terraforming :
Did you know you can terraform any planet to a Tier I resource? I sure didn't, for a while anyway. Grab any planet with production capacity and then right click a world -> Terraform and select whatever your heart desires. For reference : Chemicals are good for research, Plastics for Influence, Textiles for Money, Natural Gas for Energy, Titanium for Production, and Explosives for Defense. Turn your empire into a powerhouse! Watch out though, as since this costs 400k per planet it is definitely not viable early game. (though that 400k is universal, independent of the resource choice).

Asteroid Mining :
Asteroids are currently being changed and I have not messed with them too much yet. However, you need a few hundred ore currently to make a Space Tether imperial structure that boosts support ship production by 40%. While this is not an incredibly large boost, it can definitely do quite a lot on a planet with decent defense production imports.

Resource Dispersal :
Higher-tier planets are generated more often near the core of the galaxy, inciting competition and making whoever controls the core the most much more powerful. Due to this, all empires should try and make their way to the core as soon as possible. With the relatively recent additions of various new forms of colonization, including the Mono who can teleport at will, it also makes everyone have much different paths to this goal.

Pressure :
Resources produce varying amounts of pressure or otherwise have their own special effect. Now, what does pressure do, exactly? Pressure means that the planet receiving the resource will attempt to build civilian structures until all of the pressure is used up. For example, titanium gives 5 labor pressure so whichever planet you export the titanium to will build industry structures (those little 1x1 factories on the planet grid) until all 5 pressure is used up. Each basic civilian factory will use 1 pressure and produce 1 labor, excluding any effects. Though those will also upgrade into another factory-type structure that uses 2 labor pressure and gives 1.5 labor which is, unfortunately, less efficient (for the individual pressure used, though it is more efficient on planetary surface area). As of right now I am uncertain what causes the buildings to upgrade into their "level 2" variants.
There are currently 6 pressure types in the game and all have their own structures for the planet's surface : Money, Labor, Influence, Research, Energy, and Defense.

All structures follow a 1 pressure : 1 production for their first building and 2 pressure : 1.5 production for the second.

Money Pressure - Causes Markets and Bazaars to be constructed. Gives you a nice influx of money to your budget. Very useful if you can find an Electronics or Textiles world early on to boost your colonization budget, as debt causes a population growth penalty. (Outputs measured in 75k and 110k, depending on the civilian structure's level)

Labor Pressure - Causes Industry and Enterprises to be constructed. Both produce labor/min. You can also use 9 planet slots to build a factory but civilian structures are free and, until later game, give more production for the same space.

Influence - Causes Broadcast Towers and Media Centers to be constructed. Both produce influence/min. You always want to have at least one planet that is giving you some kind of influence, as there is no influence structure the government can construct and if you ever find yourself without influence stored for diplomacy you can end up being extremely vulnerable to any annexations or other diplomatic effects.

Research - Causes Universities and Tech Centers to be constructed. Research labs actually give 1 research pressure (on top of the research generation they provide themselves), so you get a little more for the initial investment and upkeep costs. Both produce research/min. As far as startups go I really like going Capitalist and using the extra starting 300k to build a research lab: gets my research going really early on. Whether or not it is actually a net gain I have no idea.

Energy - Solar panels that produce energy/min at a rate of 36/min.

Defense - Launch pads, which slowly produce free support ships around planets (or at points of defense export, which you can mark via right click -> Use Defense Here). If anyone is aware what the exact rate is for each of the structures (in, perhaps, ship scales/min or alike) I would much appreciate the info.


Economy and You
Star Ruler 2's economy system is probably fairly different from any system you are familiar with from other games. In SR2 you have five resources on your top bar - Money, Influence, Energy, FTL, and Research. For this section we will primarily focus on Money.

Money :
Money represents your empire's entire amount to spend. It lasts only three minutes: if you don't spend it all then the extra is put into a form of welfare which, depending on what you choose, will boost either Influence, Energy, or Research generation. There is also another option that gives you additional labor on your home planet. You don't necessarily need to spend it all due to the fact it gets put into different welfare systems as you choose- so don't get too worried about having leftover budget. However, early on it is best to make sure you do use it all, but in a different way than what would probably be considered conventional spending.

Planets! I should colonize them!
Wrong, sort of.
Planets cost money, lots of money. They also constantly cost that "lots" of money! Your budget will cry if you colonize things willy-nilly. Each Tier 0 planet you have costs you a solid 80k in funds in upkeep costs: that's pretty painful early on. So what should you do, then? Ensure you have a plan for any and all planets you aim to colonize! If you see a Tier I resource that could be useful go ahead and colonize it but (depending on what species you choose) make sure you also colonize a food and a water resource and have them set to export to that Tier I so it levels up. Better yet, set that T1 resource to export to somewhere that can use its pressure so the instant it gets its tier it will begin to export and doing work for you. Now that there are six tiers worth of possible planet levels and special upgradeable planet resources you should make sure to look out for those special resources and see if you can get a bonus on various normal resources you have by exporting them to the upgradeable ones. For example: oil exported to the energy-boosting resource will produce more energy for you as well as allow the energy-boosting planet to make artifacts for you every few minutes depending on what tier it is.

Small guide to Tiers :
NOTE : Food and Water requirements change based on the species being played. For example, the Mono do not have any need for either while the Terrakin have no specific bonuses/negatives regarding their needs.

Tier 0 - Initial level when you first colonize a planet; all of them cost you 80k in upkeep at this level

Tier 1 - 1 Food, 1 Water; Starts to pay for itself via taxes (~100k+)

Tier 2 - 2 Food, 1 Water, 1 T1; Really pays for itself, can unlock more powerful resources

Tier 3 - 3 Food, 1 Water, 1 T2, 2 T1 (? May be wrong on this one's cost); Pressure cap is getting pretty large, a decent spot to send resources for simply using them rather than just levelling

If you are having a hard time getting money, another thing you can do now is research some budgeting technologies if you have some spare research points. There is at least 1250k worth of free money for each budget cycle from technologies alone. (Each one provides an extra 250k for your budget cycle, ie free money that you will always have for all future budgets).

Any Textiles you see can be grabbed as well. They will definitely give you a return on the investment of colonizing due to them producing money pressure. (Roughly equal to a total of 500-600k in the build of posting, including the income from taxing the population).

Simply Tips :
Colonize only the planets you need and make a plan for them to export the instant they are colonized

Divide your next cycle budget by 80k, try and only colonize that many planets minus one or two to account for fluctuations / cost of the colony ships while they are in flight

Always level up planets: if you have a Tier I resource there is no reason to leave it unlevelled unless you simply don't have the planets to do so- in which case you shouldn't have colonized it!

With the removal of Wonders it is best to decide what type of world (production powerhouse, energy base, research capital, etc) you want your homeworld to become and then export just those resource types to it while looking out for a useful "Wonder" resource- like phosphorous or even FTL Crystals.

Foods all seem to be the same now so it doesn't really matter which one you colonize. This may change again in the future, we will have to see.
Diplomatic Exploitation
Diplomacy seems like it may be changing with some recent experimental build additions. If anyone notices something that no longer holds true in this section then please let me know.

Weight :
Weight is the amount of power a given card has. If a card, like negotiate, has a weight of 3 for example then, upon playing it, the side you play it for will gain +3.

Influence In General :
What I find to be one of the coolest additions to the game over SR1.
For any dealing, whichever side manages to have a greater total value for 3 minutes will succeed. Except in the case of ties, in which case the opposition will be the one winning.

Cultivation :
Cultivation cards cost 10 influence points but instantly give a target planet native fruits. Really helpful since, unlike the megafarm, they cost no money or upkeep and still give their special effect : 20% increase to pressure! I suggest using fruits on planets with high default pressure production- like Tier II resources or the special Tier 0s that give 10 pressure.

Negotiations :
Your general go-to card for diplomacy. Need to get a few more points on your side of the debate? Play one of these. They're readily available and can pack a decent punch if you use Enhance cards or get lucky with your influence peddling.

Energy Clash :
If you are having problems with influence generation but happen to have a lot (and I really do mean a lot if you plan on relying on these) of energy generation then you can use these for some extra "oomph". Their main downside is that the energy cost increases by 200 each time you play one in a given deal so I suggest carefully watching your energy if you don't want to run out.
Artifacts
Artifacts in General :
Artifacts are pretty neat: they are essentially left over blobs of technological magic from a long-extinct / gone civilization. They all provide some kind of bonus or effect and are activated via expending large quantities of Energy built up by any production you have in your empire. While energy may be infinite, each time you use an artifact the artifact itself is destroyed: they are not reuseable. However, there are methods of acquiring new artifacts (which actually lead to artifacts as a resource being entirely infinite).
If you are having a hard time producing energy and find yourself needing, there is a specific Energy zeitgeist that allows all empires to build Solar Generator orbitals that produce power based on the temperature of the star they orbit. These orbitals have an extremely low upkeep (~20k) cost and can produce quite a lot of power when built en-masse.

Seed Ships :
The more energy you produce inside your empire the more of these "little" guys will flock to your borders. They'll fly around putting down artifacts here and there for you to enjoy. Careful of accidentally killing them, later game if they fly over a fleet they could die before they get to the other side of said fleet. Though if you do kill them (you monster) then they will drop a few artifacts at their location of destruction, out of their cargo hold.
While the existence of these ships means artifacts are not finite, there is another possible producer : one of the special resources produces artifacts at certain intervals based on its tier (every 3 minutes at maximum). However, this resource is incapable of producing artifacts that allow the creation of star systems or planets.
Ship Design Musings
This section will probably become more useful as they add more ship components, as there will be more complex contraptions to be built. Experimentation is key so try new things whenever you can, especially now that we have the Design Sandbox available to us!

Supply :
Everything from ammo to fuel to food: your ships need it to operate at their maximum. Less than 50% starts taking a toll on damage output, though even at 0 your ships still manage 25% damage. Make sure to include enough supplies for your support ships, since they take them from the flagship.
As far as storage goes, cargo bays give you more storage but reactors are the primary way of getting a higher resupply/s rate. Antimatter reactors are the best, give an extremely high resupply/s along with very high energy output, the best of both worlds. One thing to watch out for though, is that any damage the ships take will take supplies to repair. If your fleet is out of supplies then repairs will just take longer. If you need to repair and are out of supplies, use of of the support station artifacts and get your fleet near it or bring your fleet to friendly space to get the resupply boost.

Support Ships :
A flagship's support capacity is the number of ships (measured in scales) it can support. To elaborate, a default beamship is a scale 4 support which means a single one will take up 4 slots in any flagship's support capacity. Keeping this in mind along with the fact that the support ship's designs are able to be scaled up to any value above their minimum, you can have flagships with support ships that are essentially flagships themselves.
However, support ship weapons are not quite as powerful as flagship weapons. The railguns for instance have a 2 second reload instead of a 0.2 second reload.

28 Comments
Marianojoey Aug 3, 2019 @ 5:56am 
Man, I had no idea about resources. I just colonized everything colonizable around and sent the resources to my homeworld (or tier 2 worlds) in order to upgrade and that's it. Now, I'm going to pay attention to what the resource is and build specialized worlds. :D
Bloom_23 May 17, 2016 @ 9:14am 
I just bought SR2 on GOG in the sale and I am trying to get my head around it. Thanks for the guide, it should help me make some headway! :steamhappy:
Dalo Lorn Sep 7, 2015 @ 4:20am 
Ships can repair without supplies if they're not in combat.

Anyway, I'd like to note that, as far as I understand it, a new seed ship will spawn every time X energy is collected in a game. There is a theoretically infinite amount of artifacts (and seed ships) that can exist in a game - it's just that you'll probably experience a shortage of one type or another.
FourGreenFields Apr 19, 2015 @ 9:49am 
PS: also, it might be importand to note that repairing ships needs supplies. No supplies -> no repairs. Which can be a pain if your engine is gone.
FourGreenFields Apr 19, 2015 @ 9:17am 
Left-over budget can also be spend on defence

Energy clash energy costs are increased by 100 or 200, not sure, per card played, and their weight increases by 2 as well (which makes them VERY powerfull if you have the energy to play them).
Horagen81 Jan 28, 2015 @ 12:13am 
the is a thing that could be useful to read about as well.

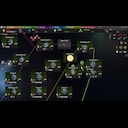
If you right click on a system star and activate Defence plan (I think it is call). using that planets of tier 1 and upwards begins to keep a small defence force surrounding the planet and keep enemies at bay.
The cost though should be keept in mind as it will cost some money to supplie and built them however this will keep enemies occupied until your fleet arrived :)
Drew77 Dec 28, 2014 @ 7:28am 
this deff helps thanks looking forword to more
Shurimoo  [author] Nov 14, 2014 @ 3:24pm 
Updated, hopefully I didn't mess anything up. If you have any other questions feel free to ask.
Raistron Nov 13, 2014 @ 7:11pm 
Hey I need an economic ection or someone to make a economics guide I can't get out of debt once I'm in it and the smaller trade stations don't help anyone who is able to do so please make a eco guide thanks!
ArtofWar Nov 4, 2014 @ 9:05am 
I did a bit of testing and found that a heavy carrier without supports performed overall better than the heavy carrier with a full compliment of support ships. However, the damage the carrier with support did was greater than the modified one and lasted longer, but after making fleets consisting of the same units and cost the ships without supports won the battle almost 80% of the time. All in all, I think its just a matter of personal preference as most games wont get too far into it to allow huge ships exceeding 1000, where the flagships' growth of firepower is exponential and far superior to ships of the same size with supports.