Resident Evil 6

Resident Evil 6

951 ratings
Resident Evil 6 Ultimate Survival Guide
By M1SF0RTUNE and 2 collaborators
Resident Evil 6 is a complex game. There are many aspects to it that even people who have finished it aren't aware of, ranging from "Quick Shots" to slides, animation canceling, marking targets for your partner, tips on how to succeed in The Mercenaries, Agent Hunt, the multiplayer modes, and much more.

This guide is meant to turn novices into masters with the many basic and advanced techniques available in the game, making your zombie-slaying experience much more in-depth and varied than you might have ever imagined. Everything you'll read has been acquired from over 300 hours of play on both the console and PC versions of the game. These tactics will make surviving a lot less of a hassle in all modes. There are also some tips on how to make your experience more enjoyable throughout the guide, including unlocks, easter eggs, a couple of achievements, special mechanics, and best ways to play the game. Hopefully, once you read what I have to offer in this guide, you'll be flying through the game and looking like a pro in the process.
3
2
4
2
   
Award
Favorite
Favorited
Unfavorite
Introduction
Greetings, fellow agents, survivors, soldiers and mercenaries!

Name's M1SF0RTUNE; game addict, novice writer, music madman, lazy bum, brony, furry, and all that other dumb jazz, but most importantly, massive, MASSIVE Resident Evil fan.

I'm proud to present the results of spending too much time playing Resident Evil 6 combined with having too much time on my hands, and wanting to share my knowledge of the game with the world.

I've been a long-time Resident Evil fan, though not as old as others. I started with the legendary Resident Evil 4, and 5 took a big slice of my life, but nowhere near the amount 6 has. I've been going back to play the classic Resident Evil games, which feel like completely different beasts, but I'm enjoying them! It's quite a fun experience, going back into the series history. So far though, I have only completed 4, 5, 6, and the Chronicles games for the Wii. I haven't played any of the spin-offs save for the aforementioned Wii games, and I've only briefly played 1, 2, and Code Veronica X (which I recently acquired the HD version of).

I've put over 300 hours into the Xbox 360 version of Resi-6, complete with all of the DLC's (which means all of the Mercenaries Maps added later to the game that were made free for the PC, and the four Multiplayer Competitive modes, Onslaught, Survivors, Predator, and Siege), and perhaps another 50 or so on the PC version, which I've felt compelled to get thanks to the pre-order extras, Steam support, and PC exclusives. I just really wish any ONE of my friends would've gotten the damn game like I did so they could play it with me, but sadly, no such luck, so I've been playing it by my lonesome.

So what brought me to write this guide? Welp, two reasons: The first was because I played with a lot of people, and I told them about the dozens of various tricks, exploits, easter eggs, and abilities I've discovered in my crazy amount of time spent on the game, but I got a bit tired of retelling the same tricks over and over again, so I thought I'd write this extensive guide to do all that explaining for me without ever having to type it again. The second was because I was honestly really bored one day and had nothing better to do, and felt like sharing the knowledge I'd obtained with everyone, so I sat down and wrote (for 8 hours on the first day) until my wrist got sore from typing so much.

Anyway, the only thing I can hope is that you guys can find this useful, since I sat down and took so much time to write it, and it contains a lot of useful game information, tips, and tactics for the game.

Oh, and fair warning, if you think this Introduction was long, weeeeeeeelp, there's a lot more where that came from in the rest of this guide. It's not all for the faint of heart (and light/casual readers).

So that's all I have to say in this silly intro. Enjoy the guide!

-M.
Getting Started - Knowing your Controls
Perhaps at first, Resident Evil 6 may seem simple to pick up and play for any third-person shooter or RE4/5 veteran, but you'll quickly realize that there's quite a lot more to the game than in previous iterations.

The most important thing you need to know before you even think of starting is studying your controls.

Did you know there are buttons to do rolls and dives? What about auto-combining and filling your pill case? How about signalling your intentions to your co-op partner in-game?

There's a lot to know to the game, so the first thing you should consider doing is looking at your controls. You may even consider reconfiguring them.


As a basic start, here is Capcom's official online manual for RE6's controls

360/PS3/PC Controls Manual[game.capcom.com]

---

Something you may notice when studying the controls is that there are button combinations (for example, right click + space bar + D = Dive to the right, or right click + D + space bar = Dive to the right(without "right click + space bar" action)). These controls were originally implemented this way to accomodate for the console controls since there are only so many buttons. In fact, you might find the game may play a bit more smoothly on a gamepad than you would with the mouse and keyboard controls because of this.

Exclusive to the PC though (thanks to the hundred or so keys on the keyboard) are Shortcut buttons. These basically take all the work of doing the complex combinations in the game. You may find them to be a little quirky. For example, if you hit the default shortcut key to dive to the right (C), you'll have to hold it for a split second before the move will register, since normally how it works is you aim (hold right click), press crouch/dodge (spacebar), then strafe right (D).

This takes getting used to if you don't want to practice using the combination controls, but it will make you end up playing a bit of Twister with your fingers, so it may not be a bad idea practicing the advanced combination controls.

---

That all said, let's take a look at everything in your move set.

WASD are your basic move controls.

The mouse controls your camera, right click makes you draw your weapon to attack, while left click does all the actual attacking.

Space bar is your universal dodge and player-oriented action button.

2, 3, Z, C, and X are your shortcut keys for your various dodges when you don't want to use the Space bar with the advanced button combinations.

R is your Action button, allowing you to pick up ammo, key items, and supplies, interact with things and reload.

Not at a good angle to see your enemy? Left-handed instead of right, or vice versa? Then hit Caps Lock. That button switches which side of your character the camera will be on. This is also a good button to rely on when you need to peek around corners or just get a better angle.

E is used to bring up your Inventory, letting you check or discard your items, or combine herbs. You won't be using this unless you plan on learning how to quickly combine and store herbs, which I'll cover later in this guide.

Q is your button that tells you where to go in case you get lost, or at least shows you what your current objective is if it doesn't display where you need to go.

Your Mouse Wheel by default is what allows you to switch between your weapons, and holding Shift while using the Mouse Wheel lets you cycle through your items (first aid sprays and grenades).

When you have herbs in your Pill Box (indicated with the number on your HUD by your health squares), 1 is the button to push when you're using them. You'd hit this button the amount of times for the amount of pills you want to take, so if you hit it once, you take 1 pill, hit it 3 times, you take 3 pills.

When you need to refill your pill box and don't want to scroll through your inventory screen to do this, H is your button to hit, which will autocombine any herbs you have in your inventory and put them in your pill case. I'll discuss how the autocombining works in a later section, but keep this in mind when you want a simple way to do it and don't have the time to mix and store herbs manually.

Lastly, there's your Partner Actions button, V, which helps you with anything that has to do with your partner, from giving them orders, thanking or praising them for a job well done, telling you where they are, or helping them when they're in a pinch. Shortcut keys for callouts are also mapped to your arrow keys on your keyboard if you don't want to go through the Partner Menu. We'll also discuss how this operates further in the guide.

-----

So that covers all your main controls. Before we get to the actual game though, let's discuss how to better prepare your suvival experience to be much more smooth and a lot more fun. Head on over to Getting Started - Configuring your Game to begin.
Getting Started - Configuring your Game
Alright! So hopefully you've taken some time to study and maybe remap your controls to be more comfortable. Now let's get to an important part of making sure your Resident Evil 6 experience is smooth sailing, and that's configuring the game.

--Controls--

-Aiming Reticle

This is not the same thing as your Keyboard or Gamepad bindings in the lower part of the settings. This is what will determine how the visual aiming sight will operate, so it's important to swing by here.

First thing's first. You'll need to decide on whether to use RE6's default reticle (more akin to typical shooters), or if you'd rather use an actual laser sight (RE4, 5, Revelations 3DS). This is down to personal preference, as it's a visual effect. Keep in mind, though, that the laser sight option will not show spread or recoil when you fire a weapon.

Both of these aiming styles have different behaviors. The reticle's "laser" will sometimes skew out from the center while you're shooting, so even if you have the crosshair over your target, you may not always hit them. The classic laser sight on the other hand is simply a dot, which can be hard to see but it's far more precise.

If I were to make a recommendation, I'd say use the classic Laser Sight with the Gamepad (which I strongly recommend using when playing the game anyway), and use the new RE6 Default aiming reticle with the Keyboard and Mouse controls, which have the game play more reminiscent of most shooters.

However, in the end, this is entirely up to you.

-Dominant Hand

This is a configuration designed for when you're getting in and out of cover.

If set on Auto, you'll keep the camera oriented on the same side you left cover. So if, for example, you take cover against a wall with the camera set to the right-hand side, then move left along cover the camera will stay on the left-hand side when you leave cover.

Manual, on the other hand, is meant to keep your camera position on the same side, regardless of how you leave cover. It's similar to the example above where you take cover with the camera oriented to your right, except this time, moving to the left and exiting cover will not automatically orient your view to the character's left-hand side.

Once again, this is personal preference, and I usually stick to Auto since I switch hands often anyway, but if you try to stick to a particular side of the camera when you play, definitely switch this to Manual.

-Reload

This is fairly self explanatory. Once your gun runs empty, and you try to shoot again while the setting is set to Auto, the game will automatically reload for you. However, if you prefer always to do manual reloading, switch the setting to Manual.

---

Okay, so now that we have your control behavior set up, let's set up your Camera.

---Camera---

For you first-time PC players, you may not know this, but some time after RE6 was released on the consoles, it was given a free patch to include Camera Adjustment settings to make it easier to see and aim, since some players believe that the camera was too close to the characters. This is something you should definitely start with. Unfortunately, there's no in-game options to adjust the camera, so you'll have to exit to the menu, fiddle with them, and go back in to make sure it's at a comfortable distance.

There are three main options to fiddle with concerning the camera distance, and they'll be at the bottom, labeled the following:

Default Camera Field of View

Field of View When Aiming

Position When Aiming


The max number each of these adjustment settings be set to is 15.

Default Camera Field of View is for when you're not aiming and just running around. The higher the number, the farther the camera will be from the character by default.

Field of View When Aiming is just that; the higher the number, the farther back the camera will be while you're aiming your weapon.

Position When Aiming is a bit more advanced, but this is for if you'd like to offset the camera from the character so they don't take up most of the screen while you're aiming.

I normally play with Default Camera and Aiming Camera at 15, so I can be able to see around me fairly easily when in combat, but experiment with these to find out which is best for you. Here are examples of before and after images:


--

Next, let's get to your other Camera options. You'll want to adjust the sensitivity, which is obviously how quick you'll be able to turn, changing any axis inversions to suit your playstyle. Play with these a bit 'til you find a comfortable level.

Next, there's Aiming Direction. You have two options:

-Camera

-Player

Camera means you'll aim in whatever direction the Camera is facing, and Player means you'll aim in whichever direction the Character is facing. Camera is the most recommended way to go, unless you'd prefer to rely on which way your character is facing to do the aiming.

Lastly, there's Dash Camera Reset. This determines how the camera behaves when you're sprinting, whether it'll resey vertically or not. It largely doesn't matter, but if you don't want your camera to reset if you're, say, looking at the sky when you're about to sprint, then set the Dash Camera Reset option to Centered.

--

That covers all of the basic Camera set-ups.

--Game Settings--

This is another useful set of options you'll want to visit for a bit of fine tuning with your HUD and gameplay options. Below are the options:

-Subtitles, for the hearing impaired

-Player Name Display (to see your partner's name when playing online)

-HUD Position

This is somewhat important. By default, the HUD likes to switch sides depending on which hand you're aiming from, so right-handed aiming, it'll be on the right, left-handed aiming, it'll be on the left. This option is designed for you to lock the HUD in one place even if you switch hands. Personally, I like having default, but by all means, pick how you'd prefer to have the HUD operate.

-Laser Color (Pimp out your aiming laser)

-Icon Display, which basically hides your HUD and icons in the world. If you want to play without the game telling you where to go (unless you decide to hold Q which shows you which way to go and pulls up your HUD), turn this option on.

-Auto Action Button

This option was something also added later to the game on the console versions. Normally, if you play on the Amateur difficulty, the game takes care of the majority of Quick Time Events (QTE's) for you, even if you hit the wrong key or miss the prompt. This option allows you to enable it for all difficulties. This does make the game easier and it's a good option for those who are not fond of QTE's, but it does take out some of the challenge and even a bit of the immersion. Choose this option wisely.

------

You may need to spend a while tinkering with these, and even go into the game to adjust these on the fly, but take the time to do this before decide to start playing, so you can make Resident Evil 6 play exactly like you want it to, and therefore make it a much smoother, and more personalized experience.

Now you should be completely ready to get started with the game. Let's begin the Basics.

We'll start with your HUD.
The Basics - Starting the Game; Difficulty, Settings, and "No Hope"
Once you finish the Prelude, you are given the option of one of Four campaigns to choose from. Once you select your campaign, you get to choose the Difficulty and Screen Type.

--Difficulty--

There are 5 difficulties in the game, and 2 of them have special properties to them.

-Amateur

-Normal

-Veteran

-Professional

-No Hope

Amateur difficulty is the first of these two difficulties with special rules. In Amateur mode, the game automatically performs most cinematic QTEs for you even if you fail to execute them within the proper time window.

No Hope on the other hand is called that with good reason. Unlike the other four difficulties, No Hope disables Skills and Infinite Ammo. If you die in No Hope, you go back to the last checkpoint with the health you had when you got to that checkpoint. Normally, you'd start at a checkpoint with full health. As a tradeoff for this extreme mode, all Skill points you collect are worth twice as much in value. They'll show like normal, but they'll actually be doubled when you finish the chapter.

Feel free to choose the difficulty that best suits you, perhaps Normal or Amateur for your blind run (especially since there's a lot to the game and learning it on harder difficulties can be a bit of a headache), but if you plan on getting lots of Skill points and want to challenge yourself, play No Hope as soon as possible to maximize your Skill point acquisition.

--Screen Setting--

If you would like to play with a friend in split-screen, you have that option with the Screen Setting. For those of you with a Gamepad, you're able to let your friend play with the controller while you play with the keyboard controls.

-------------

After this, you're asked to pick which character to play as (with the exception of Ada's campaign). Once you select your character, you're given a list of settings/variables for your game.

-Network Selection
-Partner Join
-Location Settings
-Objective Settings
-Attack Reaction
-Infinite Ammo
-Agent Hunt

--Network Selection--

This is where you choose to play Online or Offline. Playing Online lets you do Intersections, play with co-op partners, and participate in Agent Hunt. Offline is the only option that allows you to pause the game and disables any online-related features.

--Partner Join--

-Allow: Lets other players join as your campaign partner.

-Don't Allow: Prevents players from being able to join as your campaign partner, but you are still able to do Intersections.

-Private: Disables Agent Hunt, Intersections, and Public Joining so you and a friend can play alone.

--Location Settings--

Lets you pick whether or not players from anywhere in the world, or just players from your home region, can join you.

--Objective Settings--

This is for anyone who's going to join your game. This lets them see what your intent is when playing the game, if you're trying to play a serious game, play around for fun, there for the story, playing for events, or searching for emblems.

--Attack Reaction--

This is something like Friendly Fire, minus the damage (except if it's by an explosive). You can shoot, punch, knife, or generally be able to hit your partner and cause them to react/stagger from your actions..

--Infinite Ammo--

This is easily confused as making your game Infinite Ammo only, when that's not actually the case. This only determines whether or not players with the Infinite Ammo skill are able to use it or not.

--Agent Hunt--

This allows players to join your game as the infected in the Agent Hunt mode seen in the Extra Content section (see my section of the guide that talks about the benefits of having Agent Hunt enabled).

------------------

Once you're all set, hit Start Game, and if you're playing Online with Allow/Private settings set up, this is where you're taken to a Lobby where you'll invite friends to come join the game, or wait for someone to join. After a player joins the game, it will begin automatically and you'll be able to start on your survival experience.

{Note: You'll always want to invite your friend in via the Lobby because if they're trying to get credit for a chapter, you'll both need to start together from the lobby. Otherwise, if they join mid-game, they won't get credit for the chapter. You are able to resume a game you guys stopped though, just be sure to start it via the lobby}
The Basics - The Heads-Up Display (HUD)
Okay, so by now you've set your game up to your preferences, but now we need to discuss how to actually play and what you need to know.

Every character has different HUDs, in appearance, but they all work the exact same way.

There are Four main elements to track on your HUD.


-Health (The 6 Blocks)

-Stamina (The small segmented meter under the health)

-Pills/Herbs (The counter on the right side of the health blocks)

-Ammo (The bottom of the HUD)


---

-Health

This is obviously the most important thing to keep track of in the game. Regardless of what character you play, you will always have a total of 6 Blocks of health.

As you take damage, you will start losing a block of your health. If you stop taking damage before the block is completely empty, it will eventually regenerate, especially if you're laying on the ground or taking cover. Once the block is empty, you will be knocked to the ground and that block will not regenerate unless you use a health item, die (unless you're playing on the No Hope Difficulty, but we'll discuss that later), or finish the chapter.

Once you lose all your blocks of health, you will be Incapacitated. While you're on the ground, you'll only be able to use whatever weapon or item you had in your hand at the time you were knocked down to defend yourself before an enemy tries to finish you. Only holding out for long enough (until the meter that shows up in the middle of the screen fills all the way to the end), or having your Partner revive you, will allow you to continue fighting.

Your partner has the choice of either Reviving you or Healing you while you're down. They can use some of their own herbs to heal you or use a First Aid Spray, but if they don't have any available or any to spare, they'll only have the option to Revive you.

When you're Revived, your HUD will be a blinking red. If you take any damage, you won't be incapacitated again, you will die, and get a game over screen. Enemies are now also able to perform context finishers on you if you let them get too close. So try to find a health item as soon as you can and refill one or more of your Blocks of Health to get out of this vulnerable state.

-Stamina

This is a largely and easily overlooked part of the game. As you perform special actions, namely Melee or context-sensitive attacks (maneuvers where you can stun an enemy, run up to them, and have a button prompt), it will use Stamina.

Stamina is shown as a little meter just under your 6 blocks of health. When the meter is empty, your character becomes tired and can't perform any special melee's, quick shots, sprinting, or context sensitive actions until the bar refills itself. This is indicated if your character is holding his or her side and panting like they're tired, and the only move they can do is a wimpy, tired, and low-damaging kick.

When you're out of Stamina, a red meter will start to build up. Once it's full, it'll show the normal stamina meter start to build up and you'll be able to perform your actions again.

To regain stamina quickly, what you'll want to do is lay on the ground or take cover. This will exponentially increase the rate your stamina regenerates so that you can perform all your melee actions again. You can also use one of your Herbs from your Pill Case to refill your stamina as well, and it doesn't matter if you're missing any health or not, taking a single pill refills it.

Be sure to keep an eye on this meter, because it will really ruin your day if you let it go empty in the middle of a firefight, especially if you're out of ammo.

-Pills/Herbs

Next to your Blocks of Health will be a tiny Leaf symbol next to a number indicator.

These are your Pills, or Herbs, that are currently in your Pill Case.

When you hit 1, you will take one (or more, depending on how many times you hit the button) of the Herbs that are in your Pill Case. To put more Herbs in your Pill Case, you'll need to find herbs, and depending on which ones you have, determine how many you can put in the case.

Note: There can be a max total of 17 Pills in your case, and you will not be able to refill your case again unless you have less than 12 inside of it. If you have 12 or more, you will not be able to put any more herbs in the case.

-Ammo

This is quite self explanatory. This simply shows how much ammo is in your gun and how much extra ammo you have in your inventory, if any.

------

Alright! That should cover every important detail about the HUD, and how it works. Let's move onto Basic Gameplay.
The Basics - Basic Gameplay
Resident Evil is a game about survival and finding supplies to keep fighting, and the 6th entry in the franchise, despite its' shift to an action focus, is no different. It's about resource management, careful bullet placement, and knowing when NOT to shoot. It's a game about playing smart and being thorough, careful, and observant. Quick reaction times will not be enough to get you through the game.

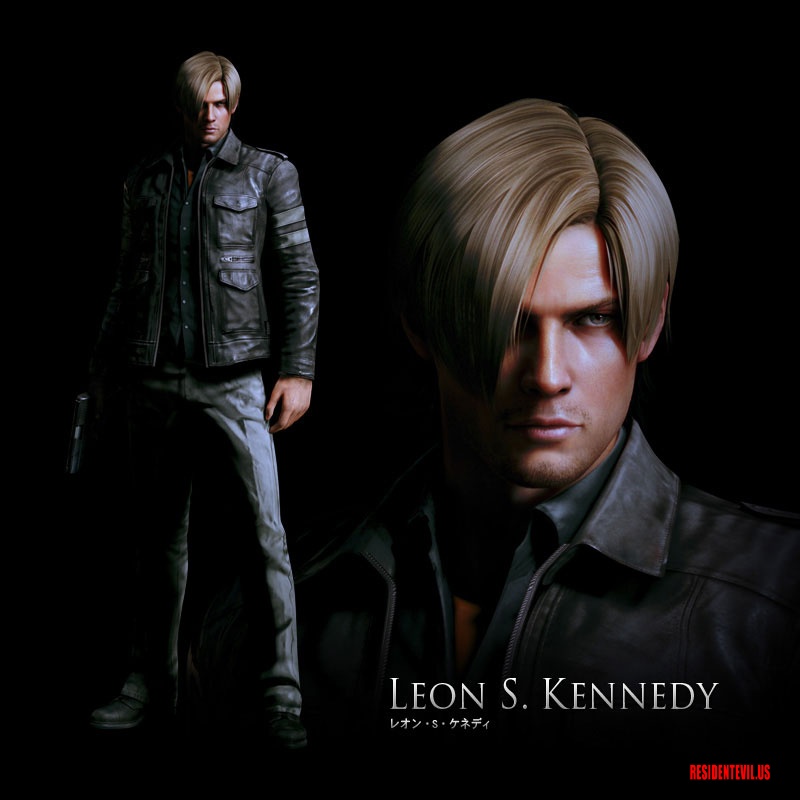
When you get started, the game will put you through a type of Tutorial section known as the Prelude where you play as series' favorite Leon S. Kennedy in the middle of a bioterror attack on China. This will show you the basic controls of the game; how to move, shoot, identify what herbs are, and use your inventory, as well as an introduction to the different kinds of Quick Time Events (QTE's). However, when you get to the street part of the prelude to tackle a fight with a handful of zombies, you're given very brief glimpses at extra controls you have at your disposal and therefore you will miss out on a lot of useful information.

Hopefully this guide will be able to supply you this information in a non-rushed, easy-to-read environment.

Let's go ahead and skip the moving and shooting bits since the tutorial has probably given you a good idea how to do that. Let's move on to what makes Resident Evil... well... Resident Evil.

---

-Resources and Resource Management

This is the key feature behind the Resident Evil franchise and what makes it so much fun to come back to. As you play and replay, the game drops different resources and you have to figure out how to make it all work in the grand scheme of the game with what you find and are given.

You have Two Types of Resources at your disposal.

  • Weapons/Ammo

  • Healing Items

--Weapons/Ammo--

There's multiple Types of Ammo, Grenades, and Explosives you can find throughout the game or dropped from enemies you kill.

Here's a list of all the different ammo types in the game:

  • Handgun Ammo

  • Shotgun Ammo

  • Assault Rifle Ammo

  • Sniper Rifle Ammo

  • Grenade Launcher Ammo (3 Types; Explosive, Acid, and Nitrogen)

  • Magnum Ammo

Some characters have special weapons that have specific ammo only they can use.

  • Helena (Leon's Partner) carries a Hydra Shotgun, which uses its own type of ammo

  • Piers (Chris' partner) carries an Anti-Material Rifle, which uses its own type of ammo

  • Ada carries a Crossbow, which has two different types of unique ammo.

Each of these ammo types have different max amounts they can have in a "stack." For example, Handgun bullets go up to 150 bullets per "stack," Assault Rifle ammo goes up to 60 rounds per "stack," and Shotgun shells go up to 30 shells per "stack." Each stack takes up one block of Inventory space.

Grenades work the same way. Below are the different types of grenades and explosives:

  • Explosive Grenades

  • Incendiary Grenades

  • Flash Grenades

  • Remote Bombs

These are all of the equipment and ammo-related items you will be managing throughout Resident Evil 6.

--Healing Items--

This is just as important as ammo, because you will need these items in order to keep you alive in the game.

Below are the different types of Healing Items:

  • Green Herbs


  • Red Herbs


  • First Aid Sprays


Here's a breakdown of how these work:

Green Herbs are the most basic healing item. Normally, on their own, they only give a small amount of health. In Resident Evil 6, you're given the option to combine Green Herbs with either other Green Herbs, or Red Herbs. Concerning Green Herbs, however, you're able to mix a total of 3 Green Herbs together to make a max total of 6 pills.

Likewise, you can mix 1 Green Herb with 1 rare Red Herb, which is a very potent combination that gives you 6 pills.

Here's the basic breakdown chart of the pills:

G = Green Herb, R = Red Herb

  • G = 1 Pill

  • G + G = 3 Pills

  • G + G + G = 6 Pills

  • G + R = 6 Pills
Then there's the First Aid Sprays, you can carry up to 3 per "stack" and use them to fully heal you and/or your partner.

It's strongly recommended that when you find herbs, you wait until you find more to get the most out of them.

The Pill Case is extremely important, since that's where your herbs go and are the items you'll need in order to heal yourself or your partner if you don't have any First Aid Sprays. You can store your herbs manually as the Tutorial has taught you (by opening your inventory, selecting an herb, and combining it with another), or by pressing H, which will mix your herbs together automatically and store them in your case.

-------------------------------------------------------------------------------------------------------------------------
A quick word about the Auto-Combine/Fill. You can use it as much as you want as long as you have Herbs in your inventory, but if you get too trigger-happy with it, you can end up putting, say, 1 or 3 pills in at a time instead of waiting to get 3 Green's or a Green and a Red and then hitting the Auto-Fill button. The game is smart though when doing this.

Let's say you have 4 Green Herbs, and 1 Red Herb. The game is smart enough to automatically combine 1 Green and 1 Red, and combine the 3 Greens as seperate refills, so you don't need to worry about it using only one or two Greens at a time. If you notice it not filling the case again when you try to autofill, you're either out of Herbs or you hit the 12 Pill Maximum.
-------------------------------------------------------------------------------------------------------------------------

That covers just about all of the main items you'll be managing throughout Resident Evil 6. In the end, you'll have to figure out which items to take and which items to get rid of when you run out of room. It's all about planning ahead for what you think you'll need, and if all goes well, you'll always have the right items for the right situations. That may not be enough though, because you'll need to know when best to use your items and conserve your ammo as much as you can, so make every single bullet and item you acquire count, and take what you need; delete what you don't.

-Melee

One of the new features added to Resident Evil 6 is the inclusion of a stamina system. Whenever you hit left click without aiming, you'll do a Melee attack. Every character has their own unique moves and combinations.

Leon, for example, does a series of kicks, while Sherry does slower, but more deliberate strikes. The weapon you have equipped also determines melee behavior. Most two-handed weapons let you gun-bunt things, while a certain weapon Leon can acquire has an bayonet attached to it that can be used to stab enemies.

You'll need to use this a lot in order to get through the game and avoid unecessary ammo use. The only thing you'll need to be careful of when using Melee is watching your Stamina meter just under you health, as meleeing can drain it pretty fast. However, if you have good timing and careful use of when and where you melee, you can use it to get out of nearly any situation.

-------------------------------------------------------------------------------------------------------------------------

That should cover some of the basic gameplay elements outside of what you've learned in the Prelude. Let's move onto a bit more advanced stuff.
The Basics - Partner Actions
Resident Evil 6 is a co-op focused game, much like its predecessor Resident Evil 5. To survive, you'll need to work together with your partner by helping them when they get grabbed, healing them, and assisting in taking down tougher enemies alongside you. One thing that will make playing the game much easier is your various Partner Actions and Commands. Let's cover a few of the basics.

--Rescuing and Reviving--

If your partner gets grabbed, their "partner symbol" will flash red. This indicates they're in trouble. You'll see this indicator throughout your time in RE6.

If you're close to your partner when they get grabbed, run up to them and hit your Partner Action key (V by default). This will melee your partner's assailant off of them and free them. Sometimes they may get stuck in other partner-related situations which you'll need to use the same action to help them with (keep in mind that not all enemy grabs can be disrupted by another player, such as the Rasklapanje's hands).

Then there's when your partner gets put into Dying. Your camera will flash white and briefly cut to your partner, indicating they've been downed and they need your help. You can run over to them and either offer them some of your herbs or give them a quick revive to get them back into the fight immediately. If they're able to take care of themselves, you can let them self-recover or cover them while they're doing so, so that an enemy doesn't run along and finish them off and cause you two to get a game over.

--Partner Finder and Callouts--

One useful function in RE6 is the inclusion of the Partner Finder and Callouts, used simply by holding the Partner Action key (V by default).

When holding the key, the camera will show you where your partner is and how far away they are from you. If you're waiting at a door (or other co-op action prompt) for your partner to come and join you, you can hold the key to make the camera view what your partner is doing from their camera. This is a neat, but useful feature.

Next comes the Callouts, which are good in relaying your intent to your partner or giving them an order in case you don't have a mic.

When holding your Partner Action key (V), you'll see a list of callouts at the bottom of the screen along with accompanying buttons. You have four "Command" callouts, "Move In," "Follow," "Fall Back," and "Wait," a "Praise" callout to let your partner of a job well done, and "Thanks" to show them your gratitude. If your partner gives you a command, you can hold the Partner Action key to show a prompt for saying "Ok" or "No" to let them know if you accept or deny the command. If waiting at a door, you can also hit the Partner Action key to tell them to hurry (while waiting at a door, you cannot issue commands beyond this).

Just press the appropriate key while holding V to issue the callout you want, or you can use your Shortcut keys (Arrow Keys by default) to give commands without using the menu, or to respond "yes" or "no" to commands if they're given.

Be sure to use this, even if playing offline, so you can work together with your partner and communicate with them!

--------------

Now that you know all of the simple basics, let's move onto much more advanced Gameplay Mechanics and Tricks that can make zombie-slaying much easier and much more understandable.
The Basics - Healing
As explained in the previous Basics section, herbs and healing items are an important part of the game, but I bet you'd like to know how to use them (effectively), and that you might not know you can heal your teammate when you take a pill next to them. Some of you may not even know you can take more than one pill at a time.

First off, let's break this down a bit.

--Using Herbs--

It's easy. If you have any Herbs in your Pill Case, you just push 1 to pop a pill and there you go, one block healed.

What if you need to heal more than 1 block of health at once though? Not to fret. All you have to do is hit 1 the amount of times for the number of pills you'd like to chow down, so for example, if you want to heal three blocks, you just hit 1 three times consecutively and in a short period of time and there you go, your character will pop three pills into their hand and swallow them in one gulp.

What if you were doing a lot of melee, had plenty of herbs to spare, but kept running out of stamina? Herbs have you covered! If you used up any stamina, you can eat a pill to fully regenerate your stamina and get back to punching and kicking your way out of a tight spot! You can do this regardless of whether or not you have full health, so if you have a block to heal and out of stamina, taking a pill refills that block of health and your stamina, or have full health and want to just take a pill for your stamina, that works too.

--Eating Pills Heals Nearby Teammates--

This is something not many players will notice, but is a crucial part of surviving the game in co-op. If you were to eat one of your pills, whether you were regenerating stamina and/or healing up, while standing next to your online partner, the pill also gives them half a block of health that will eventually regenerate itself.

If you play this system smart, you can heal up your wounded partner completely instead of only healing half blocks of health at a time. So for example, let's say you and your partner are missing 3 blocks of health.

You take 1 pill to heal one of your blocks

Your partner is healed half a block.

Wait a moment for their half-block to fill up to full, so you both will have 1 re-healed block each.

After that, take another pill, rinse, repeat.

Otherwise you could gobble up two pills in one go and only heal one block of health for your partner. Keep this in mind next time you start nomming on your precious pill count.

--Reviving--

So your friend got knocked down and you need to help them get back on their feet and back into the fight before something comes along and finishes them off. You have two methods of doing so, depending on whether or not you have pills.

The first is Reviving, or Resuscitating, your teammate by giving them a quick jab in the chest with an injection. This won't heal them, and they're vulnerable to an enemy running up to them and finishing them, or only taking a few hits before they die and you both get a game over, but at least that can get them out of immediate danger, especially if you don't have any pills or first aid sprays to help your teammate with.

However, if you do have pills you can spare, it's recommended you Heal your partner so they won't be more likely to be instantly killed the second they get revived. All you need to do is run up to them and press 1 the number of times for the amount of pills you want to give them. For example, if you're shoving some "tic-tacs" down your partner's throat and want to give them four blocks of health, you hit 1 four times while your character is holding the Pill Case over their mouth. You have to hit the button at a certain time during the animation to give more than one pill to your partner, so you'll need to do this a few times to get a feel for it, but keep it in mind so you don't leave your partner in trouble and keep him or her alive.

--First Aid Sprays--

As explained in the previous sections, First Aid Sprays are very useful items because they can heal both you and your partner at the same time to full health, but they're extremely difficult to find since they're in rare areas throughout the game or can be dropped by Agent Hunt players. You can only carry 3 per stack, and are consumed each time you use them.

A good idea with Sprays is you want to save them for harder moments in the game and/or moments when your partner is downed, since you can give them a quick spray to get them back on their feet instead of reviving them while giving yourself a small health boost in the process.

Just be sure to hold onto them though, they are as precious and hard to acquire as (red) herbs and can save you and your partners' lives in a pinch.

----

So that covers all you need to know about Herbs, let's move onto Skills!
The Basics - Skills
Resident Evil 4 had a unique weapon upgrade system where the player collects money and buys specific upgrades to their weapons, and RE5 follows up on this. RE6 ditches this system for a more streamlined and interchangable system known as Skills.

--What are Skills?--

As you play the game, you'll pick up Skill Points, which you spend on the various Skills in the game. There's a huge list, and each of them have properties that can help you in a myriad of ways in the game, like increasing damage of your Firearms, to Item Drops, and other abilities. You'll have to pick skills that best suit your playstyle to pick up as you play, but on the bright side, you're able to experiment with different Skill Sets.

You start the game with only 1 Skill Set that can hold up to 3 Skills, but once you finish a Campaign, you can switch between 8 different Skill Sets at any time in during the game, so you can switch according to the occasion.

--What Skills Should You Start With?--

You don't need to go with my selection, but if I were to recommend the first skills you should pick up, I'd advise on these:

Firearm Lvl. 1 (And eventually level it up to 3)

Defense Lvl. 1 (And eventually level it up to 3)

Item Pickup Increase

There are lots of other useful skills you can try to utilize, such as Breakout, or Eagle Eye if you're a major sniper type, Melee for your Melee-ing, and team-oriented skills, among other useful ones, but these are just ones I recommend starting with until you can get a lot and start experimenting with your different Skill Sets.

--How Should You Set Up Your Skill Sets?--

This is, again, tied to personal preference. You can set each of your Skills up according to specific situations or different styles of play, or whatever other mad scheme you deem fit for you.

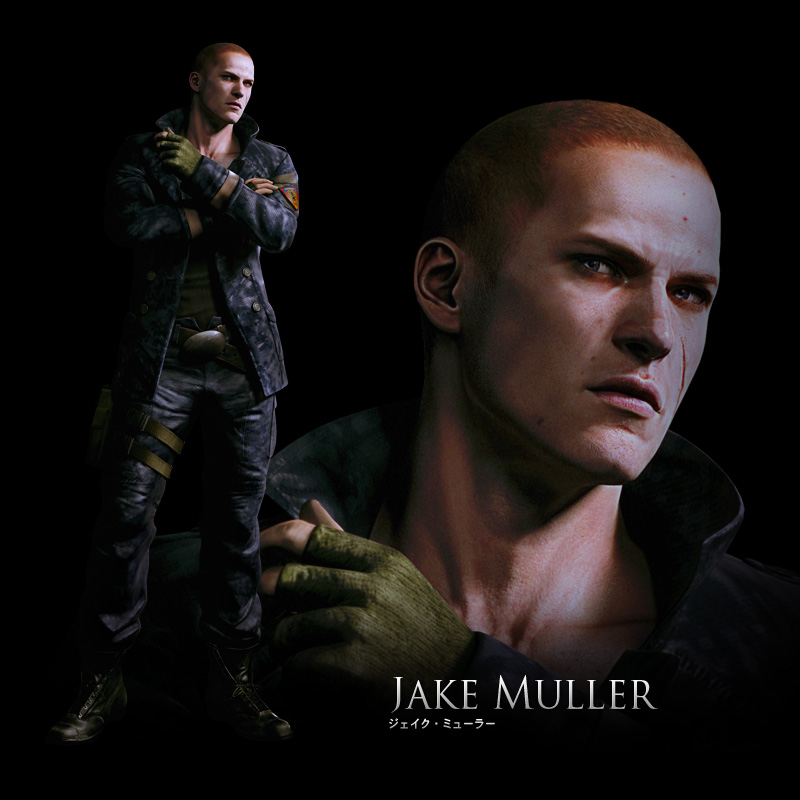
In my case, I like to assign each Skill Set to each Character in the game, so I use Melee, Combat Guage Boost, and Defense when playing as Jake, Firearm, Infinite Assault Rifle and Infinite Shotgun with Chris (you can get the Infinite Ammo skills after you complete all 4 campaigns), and so on.

It's all completely up to you, just be sure to make your Skill Points count because you can't get refunds or sell skills.
Advanced Game Mechanics - QTE's, Context-Sensitive Actions, and Counters
Throughout the game, you'll notice prompts pop up on your screen. You'll first see them in the tutorial, ranging from hitting the same key really quickly, to hitting the right button or button combination at the right time. You'll notice this when you are grabbed or during little "cutscene moments" in the game.

These are the various Quick-Time Events (QTE's), Context-Sensitive Actions, and Counters that you will need to master as you play the game.

Let's start with QTE's.

--QTE's--

The Quick-Time Events are cinematic moments in the game that require you to perform a certain action, like hitting a button at the right time, in order to progress or even kill an enemy.

There are three types you'll notice:

-A QTE where a dial spins around a circle and you'll have to push the button shown when the dial lands on a highlighted section of the circle. A different version of this is a half-circle where there's only 1 highlighted section near the end of the semi-circle, but it works the same way.

-A QTE where you have a short amount of time to hit the button shown (a flashing semi-circle with a dial indicating how much time you have to push it).

-A QTE where you have to hit the same button(s) (or swirl the sticks repeatedly for you gamepad users out there) to "fill up" a half-circle before the dial reaches the end of said semi-circle.

These will pop up frequently, and it's safe to expect them any time you see an "in-game cutscene" (where black borders don't show up on the top or bottom of the screen). However, some of these are hard to predict and are easy to miss the first time you're playing. Don't feel bad if you miss them the first time, to be honest, they are cheap, but that's why you will never forget it next time you're given the prompt, and trust me, you'll want to replay RE6 for some more enjoyable moments in the game.

--Context-Sensitive Actions--

These are things that will happen *during* the normal gameplay. When you get grabbed by an enemy, most of the time you'll be given something similar to QTE's where you have to perform the right action to get out of the grab, otherwise you'll get chomped. However, this isn't quite the same as "Context-Sensitive Actions."

As you attack enemies, especially if you're meleeing them, you'll notice they stumble or get stunned, and if you're close enough, you'll see a symbol pop up in the middle of the screen followed by a prompt to Left Click.

Basically, Context-Sensitive Actions means when enemies are in a certain condition, you can run up to them and perform an action depending on what condition they're in. This can range from a minor stun where they stumble a bit letting you kick them with a small amount of damage, or daze them to perform a type of finisher move. If they're on the ground and still alive when you run up to them, you'll be given another Context-Sensitive Action to stomp them. You can also sneak up on enemies who don't know you're there, and you'll get a prompt for a stealth kill.

There's many moments this will happen throughout the game and it's important to watch for them and observe how they work. The action you do will entirely depend on what type of stunned, stumbled, or dazed state your enemy is in; some actions being far more lethal than others. A good way to get at least some idea what you'll do is by seeing what picture pops up in the prompt.

Taking note of these will help you greatly throughout RE6, and if you definitely know how to use them, you can take advantage of animations from certain actions making you temporarily invulnerable to damage.

--Counters--

This is perhaps the hardest part of the game to master, but the most effective overall, and that's the art of Countering.

You may not notice it for a while, but when enemies are about to grab you, hit you, or even lunge at you, you'll notice a Context-Sensitive prompt for a split second indicating a Counter move.

To master Countering, you have to have a good sense of timing. Every enemy has different moves that require different precise timings in order to effectively counter them, and thankfully you only need to Left Click to perform the action, just make sure you're doing it at the exact right time.

Counters are an extremely effective tactic for saving ammo, doing a lot of damage if not instantly killing enemies, and can rack up incredibly high scores in The Mercenaries. You'll want to practice Countering as much as you can. A tip, by the way, is if the enemy is not a zombie with some sort of pipe, stick, or some other weapon they'll swing at you, try to wound them first with a few shots or melee hits, and then perform the counter, which should kill them.

As I said though, practice practice practice! Countering will save your life more than once, and make you feel like a pro.

-----

Below is a video showing off Leon's contextual actions and counters, to give you some examples. Throughout the video, you'll catch glimpses of the "Quick Shots" and "Quick Shot Combos" which you'll see in the next segment of this guide.

For now though, let's take a look at Leon in action!

Advanced Game Mechanics - Quick Shots and Combos
Perhaps one of the most underused, underutilized, least-known, and most effective abilities in the game come in the form of "Quick Shots."

Quick Shots are an ability that give you a 100% chance at hitting an enemy at the cost of a bit of stamina, and with certain characters can allow you to do unique combinations that can wipe out whole groups of enemies in style.

--How to Perform the Quick Shot--

This is simple. All you have to do is right click and left click at the same time (or for those of you who changed your controls, your Aim button and Fire button).

Your character will shoot the nearest enemy and put them in a "minor stun" state which can be followed up with a Standard Melee Context. Hitting a zombie that is holding some kind of weapon/tool will stun them for a Takedown.

It's pretty easy to do, and you can do this with any weapon you're carrying, though certain weapons have different behaviors when it comes to Quick Shots. For example, Sherry's Stun Rod has a maneuver where she lunges forward and swings her rod, Chris, with his knife, does a couple swipes, and Ada pulls a fancy dodge maneuver and pins enemies with her Crossbow. Firing automatics at enemies also fires a burst of shots versus a single one with shotguns, sniper rifles, magnums, and pistols.

But as for other weapons, that's where we get into a special mechanic in the game called Quick Shot Combos.

--Quick Shot Combos--

Below are the characters and weapons where these special combos can be performed:

  • Leon's Dual "Wing Shooter" Pistols

  • Helena's Hydra

  • Jake's Hand-to-Hand

Performing these combo's is about as simple as the normal Quick Shots, you just need to do an extra step.

Have one of the listed weapons equipped, and hit both buttons like you'd normally do, but this time, keep the right click (aim button) held down, don't let go of it, and keep left clicking (the fire button). If you do this right, and depending on your character, of course, you'll be doing Quick Shot Combos (Leon rapidly quick-shots targets with his pistols, Helena performs fancy rolls and dives with her Hydra shots, and Jake shows off his martial arts prowess in a flurry of punches and attacks).

These can really help clear out rooms and make you look like a bad-ass in the process, just as long as you have stamina and the ammo to do these actions.

Be sure to take advantage of these maneuvers, because they can really help you out in a pinch!
Advanced Game Mechanics - The Grenade Launcher, Flash Grenades, "Slide Planting" and the Stun Rod
--The Grenade Launcher--

The Grenade Launcher has gone through many variations and received many different ammo types throughout the series' life span, and its' function changes from game to game. For example, in the classic games, you could put all of the same ammo type into it, and there was no "clip." The only reloading you had to do was just changing different types of ammo or putting more of the same ammo type into the thing.

5 changed it again where there's lots of different ammo types but there was a max clip size to the weapon.

6 is a different case yet again, and it can be a bit confusing, but basically what I have to tell you is what will help you keep empty space in your inventory when using the weapon.

There are Three types of ammo; Explosive, Acid, and Nitrogen. Unlike previous games where you have to combine the ammo with the gun to swap the ammo out, this time, switching ammo functions is like switching Modes on various weapons, like Leon's pistols, Piers' machine pistol and sniper rifle, Ada's crossbow, Sherry's burst-pistol, the Bear Commander, and so on. So all you need to do to change ammo is aim the weapon and press E, that, or just open up the inventory, switch to the Weapon screen, and change it manually.

However, there's one little "glitch" of sorts about the grenade launcher, and it's how it stores ammo. Let's say for example you have 12 Explosive rounds, 6 Acid rounds, and 6 Nitrogen rounds in your inventory, and your Grenade Launcher is currently empty.

First, you reload 6 of your Explosive rounds, and you'll have 6 left over.

Switch the mode.

You'll notice you can reload the Acid rounds, so go ahead and do that. The 6 rounds you had go into the gun, and they stay in there even as you switch modes.

So say you switch to Nitrogen after reloading your Acid rounds, then reload those. Those go into the gun too.

Now switch back to Explosive.

All you'll have left is those 6 explosive rounds in your inventory, and you can still use the Acid and Nitrogren rounds by switching modes, the ammo for those two no longer in your inventory since they're in the weapon.

It's important to know this because you may quickly run out of room, and this is a good way to clear up space if you have an empty grenade launcher and all of the modes are "empty."

Be sure to keep this in mind next time you use the launcher!

--Flash Grenades--

Flash Grenades are back in Resi-6, although they're a bit more support-oriented now than being able to kill mutated enemies, but don't fret, the grenades still have their use, and can even kill things. We're going to talk about Flash Grenades and Chrysalid enemies.

As you fight the J'avo, you'll notice some enemies mutate into a type of caccoon before they turn into a creature of some sort.

Here's where the flash grenades come in. One useful option is just before an enemy finishes climbing out of a caccoon, throw the flash grenade before they finish. This can sometimes either stun or even kill certain enemies. Napads I'm not too sure about (the big armored, hulking guys), but it can stun Strelats (the giant lizards that shoot spikes and spew acid everywhere), and it kills Mesets (the big flying bird things). These apply outside of the caccoons too.

Be sure to give them a try, as well as using them during groups of enemies! Considering they can stun enemies for an Heavy Melee/Assassinate maneuver, they're worth using.

--Remote Bomb "Slide Planting"--

Another technique not widely known but probably one of the most useful tricks in the book is what I like to call "slide planting" remote bombs.

It's quite simple. If you've got a Remote Bomb, equip it, and slide into a group of enemies. The second your character hits the ground with Remote Bomb in hand, they'll plant it right where you started the slide, essentially.

After that, just keep sliding or break back into a run. Once you're clear, "boom goes the dynamite."

Give it a try sometime you want to clear out a group of enemies and need to get in and out in a hurry!

--The Stun Rod--

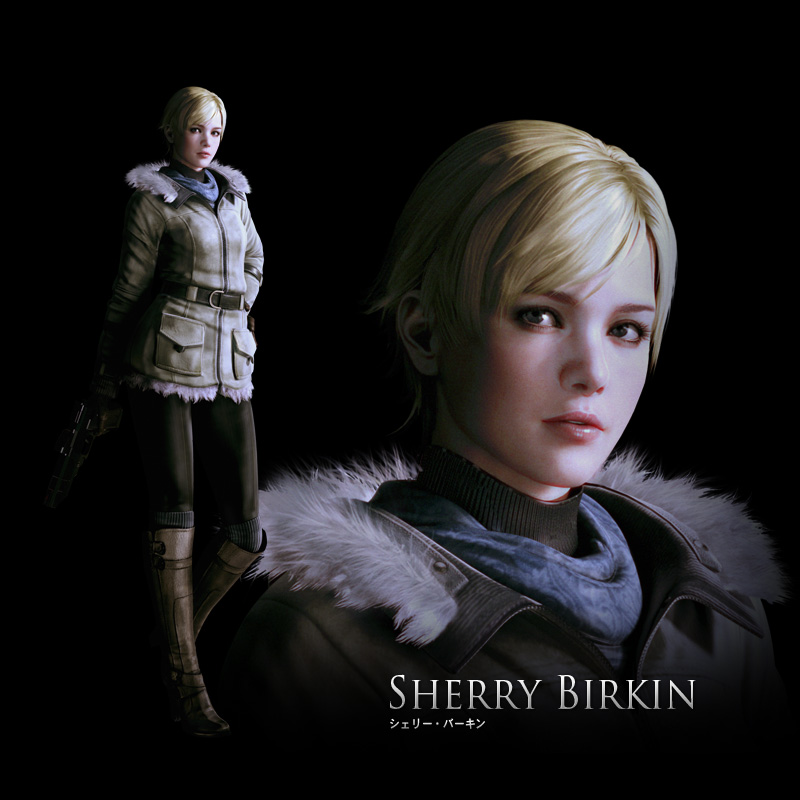
A very useful weapon and a brilliant companion for Sherry Birkin, the Stun Rod is something that should be utilized as much as possible, especially when you're out of ammo.

Two reasons the weapon is unique and very useful is because you're able to charge up your attack (after an already useful sweep attack that can hit multiple enemies) and deliver a massive, repeated shock to a single enemy, and the second reason is because it's the most efficient weapon for killing downed enemies. The fact it has a Quick Shot attack, a backpedal, and sidesteping doesn't hurt either.

To use the charge attack, hold the Attack button while you're aiming (hold right click + left click), you'll do a sweep attack, but then Sherry will get ready to swing it again while her Stun Rod charges. The longer you hold it, the higher the voltage. Once you've got an enemy ready for zapping in front of you, release the left click and Sherry will thrust the weapon at the enemy, shocking them repeatedly for a lot of damage.

As for downed enemies, this makes a brilliant alternate to stomping them (since you have to align your character with their heads for a gauranteed kill). Just have the stun rod equipped, run up to them while they're laying around and catching their breath, and hit your Attack key (left click) when you have the prompt, and Sherry will stab her Stun Rod into the creature and finish them off. Be sure to try using the stun rod to finish a downed enemy instead of trying to stomp them so you don't waste time trying to line up your character with their head!

So yes, the Stun Rod is a very useful melee weapon and it's more powerful than knives, so try to use it as much as you can, and be sure to practice with the Sidestep and Backpedal maneuvers that replace your Siderolls and Dodge Backwards moves, respectively, and use the Quick Shot to get a good group zap in.
Advanced Game Mechanics - Dodging, Cover, and Quick Recovery
We're going to cover some of the more obscure maneuvers in this section, but can be very helpful in the right circumstances.

--Dodging--

This is the very first skill you'll want to master in the game, Countering being a strongly recommended follow-up. You'll get into many situations where you're a split second away from getting hit, and a quick dodge will be the difference between life or death.

There's two ways you can perform the dodge maneuvers, either by using the Combination of Buttons, or the Shortcut Keys.

You've got 4 dodges you can do; "Crouch" Dodges, Forward Rolls, Backward Jumps, and Siderolls.

Personally since I use a Gamepad, I have to use the combination keys in order to perform the action, but thanks to some ingenuity on Capcom's part, they've given you guys Shortcut keys to do the various dodges, although they do require dexterous and flexible fingers to do, especially in the heat of a firefight.

How to do these, with default controls:

To "Crouch" Dodge:

-Combo: Aim (Right Click) and press Space

-Shortcut Key: 2

To Forward Roll:

-Combo: Aim (Right Click), Press Space, then Forward (W)

-Shortcut Key: 3

To Jump Backwards:

-Combo: Aim, Press Space, then Backward (S)

-Shortcut Key: X

To Roll Sideways:

-Combo: Aim, Press Space, then Left or Right (A or D, respectively)

-Shortcut Key: Left = Z, Right = C

---

You'll need to hold the Shortcut keys for an extra split second to perform to dodge. However, there's one more more complex maneuver you can do that's actually extremely handy in putting a bit of distance between you and an enemy before you fire at them, and that's the Forward Roll/Slide, and Flip.

--

It's a somewhat tricky maneuver because it requires some coordination. What it does though is while you're rolling or sliding forward, you can flip your character onto his back and immediately look behind you.

Here's how this is done:

Start your Roll or Slide forward like you'd normally do.

However, just before the animation finishes (or part-way through the slide or roll), immediately press and hold your Backwards (S) key. If you do it right, your character will flip onto their back partway through the roll or slide and look behind them.

You can also delay when to hit Backwards and do the "flip" when sliding in order to give yourself extra distance along the ground. It's particularly useful when you need to move through a crowd of zombies.

Practice these maneuvers frequently, they'll do wonders at getting you out of a pinch.
-------------------------------------------------------------------------------------------------------------------------

--Cover--

Capcom has given Resident Evil 6 a cover system. Now while not the best cover system in the world, and it does tend to be a bit finnicky, it does its' job decently enough. Learning how to use it, in general, is a very good idea since using it helps you regenerate your stamina or refill a partially empty health block 5x quicker.

Since we talked about dodging a moment ago, here's a fun fact. Part of the "cover system" is when you're laying on your back and aiming after performing any rolling or sliding type of dodge. You can refill stamina or your health the same way you would when hiding behind a wall, which makes this trick especially useful when playing as Jake (despite how silly it may seem). Just make absolutely sure you don't start throwing yourself like a hot, tasty meal before a pack of zombies, nor stay on the ground for too long. While laying has its' advantages of getting a good angle of shots and making yourself a smaller target, you're not as maneuverable as when you're standing. Thankfully you do get a couple little unique maneuvers when you're on your back that come in handy in a pinch.

While on the ground, you can roll side to side or crawl backwards to get away from danger. While you're laying on your back, just hit your Strafe Left or Strafe Right (A or D, respectively if you're using default controls) to roll along the ground. To crawl back away from danger, just tap Backwards (S) while laying on your back. You can also roll continuously side to side, and crawling backwards can be done consecutively if you time hitting your Backwards (S) key right.

Tip: You'll spend some time in the game crawling through vents or crawling up slopes. Normally, the game suggests you keep tapping the Space Bar while crawling forward to get through these sections quicker, but the problem is it uses stamina. If you actually Roll Sideways while on your back or Crawl Backwards while on your back, you're able to move through them much quicker without using any stamina. This is definitely useful for speed runs.
--

The other half to the Cover system apart from laying and crawling around is taking cover behind things, such as walls or low cover like sandbags or broken walls.

To take cover behind a wall, run up to it and hold your Aim button (right click). You'll have to walk to the edge in order to aim from around cover.

To take cover behind low/broken walls, you'll need to stand behind them and Aim (hold right click), then press the Space Bar. To peek out of cover, you just push Forward (W) or the general direction of the cover you're behind from your camera angle. Make sure you're aiming when you want to take cover, otherwise you'll hop over the low wall, and don't let go of the Aim button, otherwise, you'll get off that cover.

You can also dodge/slide into cover too, and while you're taking cover against a Wall, you can press the Space bar to switch between Standing and Ducking. If you press backwards while crouched and in cover, you'll lay down on your back. It's a handy tactic for enemies sneaking up on you and you want to stay behind something or you're shooting something that just came on top of you.

Another thing about cover. If you're against a wall next to a door, you can open the door while staying behind cover. Just get up against a wall next to any door, press your Action key to open it while you have the prompt, and you can keep holding the cover button to stay behind cover as the door opens itself. It's quite handy if you're cautious or about to go into a room where a firefight can happen.

--Quick Recovery--

A small bit of info but a useful one. Basically if you take a big hit of damage that sends your character falling backwards, you can hold the Space Bar (or Solo Action key) to roll instead of landing flat on your back. Simple, easy, awesome.

-------------------------------------------------------------------------------------------------------------------------

Now that we've covered Dodging and Cover, let's get to a few more obscure, minor, but useful mechanics in the next section.
Advanced Game Mechanics - Dashing, Sliding, Quick Stabs, Target Marking, and Animation Cancelling
So we've talked about a bunch of the big, main mechanics to the game, let's discuss a few more obscure ones after we discuss an extremely useful technique in the game; Sliding. But first, Dashing.

--Dashing--

Easy. Simple. While you're going forward, hold the Space Bar and you'll start Dashing, which is quicker than just running everywhere.

One of the things you can do while Dashing is Left Clicking to do what's called a "Running Attack." Depending on your character you'll either do a Shoulder Bash or a Running Kick. This can do a fair medium/high-damage attack to enemies, respectively, and is useful when you're closing the distance.

However, that's not one of the more important skills you'll be utilizing when Dashing. The other, that may save your life and is practically required to learn and use throughout the game is the art of Sliding.

--Sliding--

Another simple technique to do, but its use is highly understated. Plus, there are points in the game where you need to master it in order to progress.

In order to Slide, start Dashing forward. Once you start your dash and the camera shifts, when ready to slide, hold your Aim button (right click) to slide.

But wait! There's more! More options are possible during a slide as well!

The first is just a "Slide 'n' Stop." Just do your slide, like usual, but you can let go of the Dash button (Space bar) and just hold your Aim button (right click) to lay there on your back and pop some heads from a tricky angle.

The second is the "Slide and Run." Basically, you run and do a slide like normal, but to break back into a run, just release the Aim button before you lose your momentum and end up laying on your back at a dead stop.

Lastly, there's a combination of the two, which was mentioned in the last section. Like the Roll forward and Flip onto your back maneuver, you can also do this with Sliding. Just slide forward, then let go of the Dash button (Space Bar) and hold down your Backwards key (S). If you wait too late to do it though, you'll just come to a stop (the Slide 'n' Stop), but you can wait an extra second and a half during the slide to really increase your distance you slide. So you can do a super-short slide then flip to your back, or a long slide and then flip onto your back.

There's one more technique though, but it's for far more advanced users who need to do a slide but don't have the time to get up to speed for a Dash. This lets you slide-kick an enemy or quickly break into a slide through a vent, or any other reason you'd need to do it, on demand without a run-up. It's a maneuver I call "Stationary Sliding."

Stationary Sliding is a tricky maneuver because it requires basically hitting three keys at basically the exact same time, but in the right order. To do it, stand still, and in this order, hit these keys as quick as you can:

Forward (W)

Dash Key (Space)

Aim Key (Right Click)

If you do this correctly, you'll do an instant slide from standing without dashing or dodging. You can employ this technique while just doing normal running too (not to be confused with dashing). The timing has to be very precise, but it's worth learning. I've found it to be very handy when skipping scripted "stumbles" throughout the campaign or getting a quick kick in after a Quick Shot stun to get enemies into a Heavy Stun for a finishing Takedown.

Oh yes, and while you're Sliding, I should mention you can steer your slide. I've done semi-circles with the Slide + Flip onto Back maneuver which sometimes helped at getting me through doors or around corners.

--Quick Stabs--

This is definitely the least-known trick in the game, and only characters with Knives can do it (sorry Sherry, your Stun rod doesn't count). It's quirky, but a fun and sometimes handy technique known as "Quick Stabbing."

To perform the technique, hold the knife out with your Aim button (hold Right click), and start swinging with your Attack key (left click). Just before or after a knife swing, start hitting the Backwards key (S) repeatedly. If you time this right, you'll notice the character start quickly stabbing their knife.

The only problem with the technique is you can't steer it while you're doing it, just aim it up and down. If you feel like rotating the camera and continue stabbing though, just keep hitting your movement key in the opposite direction your camera is facing (so if you have the camera left of the character so that they're facing left, repeatedly tap right instead; in the direction of their back).
Try this out sometime, it's a fun technique especially for you folks interested in Knife-only runs!

--Target Marking--

Ever play without a mic and want to tell your co-op buddy where to shoot? Just Aim at an enemy, and press V, or your "Partner Action" button.

This should make your character say something like "Move in!" and highlight the target for you and your partner.

Be sure to add this to your strategy between you and your friend, or if you need your AI partner to attack a specific target!

--Weapon Animation Cancelling--

This is a bit of a game-breaking technique, but it can be used to go effect in tight situations, especially if you're sniping with bolt-action sniper rifles.

Basically, you're able to cancel a firing animation or "reloading" animation to get rapid shots in. With most non-sniper weapons you want to do this (like Shotguns or Magnums), just hold your Fire button while you're aiming, and keep repeatedly tapping the Caps Lock to switch shoulder perspectives, but it'll basically let you take weapons that take a second or two in between shots and be able to empty your entire clip in less than half the time it takes to do just two shots.

Now you could do this with sniping, but the problem is the same key you use to switch shoulders is the one used to zoom in. This is where the second technique comes in using Weapon Switching.
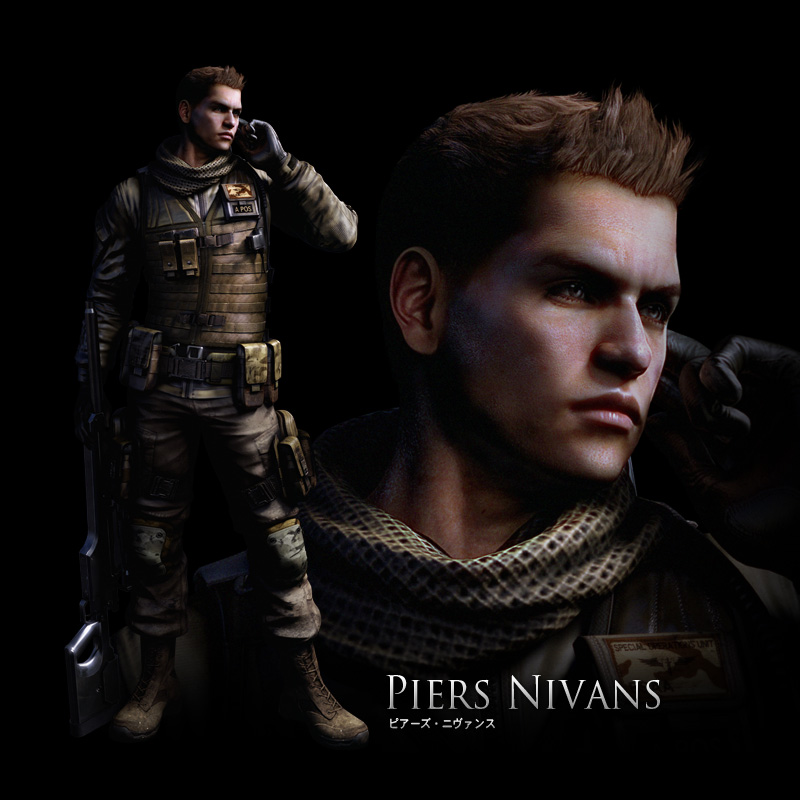
Take Piers for example with his Anti-Material Rifle. The second right after you fire your shot, switch to another weapon (scroll your mouse wheel), then switch back to the Anti-Material rifle. If you're quick enough with this, you can get shots off extremely quick in much the same way you could with the previous technique. You Piers players might find this extremely useful when fighting bosses or you're trying to cover your buddy playing as Chris when they're in a tight pinch and surrounded from all sides.

There's other forms of animation cancelling as well. For example, if you were to open a door, or even kick open a door, hold the Aim button (right click) to cancel the opening animation. This can make it a split-second quicker to get through doors, especially in Leon's early first chapter, and is very useful for speed runs.

There's also reloading animation cancels. If you wanted to interrupt your reloading or cut a bit of the animation time down, all you have to do is switch shoulder views with the Caps Lock key. This can make it a little bit quicker to get firing again when you wanna get to shooting in a real hurry. You can also perform a dodge to cancel animations sometime too in case you're about to take a hit, or even take cover behind something.

Be sure to give some of these a try when you find yourself needing to get through a door, reload a weapon, or various other cases where you need to cancel the animation to get running or shooting a split second faster, since those split seconds can sometimes make the difference!

--------------------------------------------------------------------------------------------------------------------------

Alright! That pretty much covers most of, if not all of, the major mechanics to the game. So let's take a break from talking about how to play, and let's talk about some Tips and Tricks on how to play your favorite characters.
Character Tips and Tricks - Leon S. Kennedy


Everyone's favorite blonde pretty boy is back for his third major entry in the Resident Evil franchise, and he's learned a lot of useful techniques over the years, especially since his last mission in Europe.

The first, and most notable, is Leon's ability to dual-wield pistols, and perhaps is one of his most useful skills he's gained in the last few years. Leon is one of the few characters with the ability to do Quick Shot Combos which can only be done with his pair of Wing Shooters. Thanks to this, he's able to get himself a lot of breathing room fairly quickly with his deadly accuracy. When not doing his quick shots though, he's got a massive Pistol capacity, but the only drawback is they can be fairly inaccurate on their own, especially when using Classic Aim, since both pistols have their own individual reticles.

Don't be surprised if you do decide to use his Wing Shooters throughout most of Leon's adventure through Tall Oaks and beyond though, because they've got a fair bit of power and a good critical chance as well.

Leon is also given a Survival Knife to accompany his signature shooters. He may not be able to do any fancy Quick Shots or backpedals, but at least he can sidestep to replace his dodge maneuver when he has it equipped. When armed with the ability to do Quick Stabs however, he can be fairly deadly to his zombie foes.

----

Leon's campaign and arsenal highlight his effectiveness against the Undead, since his weapons are great for crowd control, but apart from his sniper rifle he obtains later in his campaign, his arsenal doesn't have much "umph" that don't do as much good against the J'avo. He's not a combat specialist like Jake or Chris, but he's able to get out of dicey situations in a pinch. Like Jake, Sherry and his partner Helena though, he's better at close quarters combat than the survivors from Chris' and Ada's campaigns. This is noticable in both Campaign, and the Mercenaries.

----

Campaign Weapons:

-Survival Knife

-Wing Shooter(s)

-Pump-Action Shotgun (Chapter 1)

-Semi-Automatic Sniper Rifle (Chapter 2)

-Assault Rifle RN [AR with Bayonet] (Chapter 3)

{Note: This weapon can be easily missed. During the start of the 3rd Chapter, there will be closed coffins Leon and Helena can open. One of the earliest ones just after the first map transition and before the spinning blade trap contains this weapon}

-Lightning Hawk [Magnum] (Chapter 4)
Character Tips and Tricks - Helena Harper


Joining Leon for her Resident Evil debut is newcomer Helena Harper, a Secret Service Agent with a bossy attitude and a mysterious backstory. She joins Leon after he kills the zombified President and claims to know answers to the attack, provided Leon follow her to Tall Oaks Cathedral. The woman carries a lot of personal demons and regrets, but doesn't let that stop her from fighting for what's right, making her partnership with Leon a very mutual one.

Helena is a strong-willed woman with strong firepower, as evident with her unique weapons, the Picador and the Hydra. The Picador is a powerful handgun with a resounding "pop" of each shot, accompanied with the satisfying pop of her target's heads. In my experience, her Picador is perhaps the most powerful Handgun out of the 4 present in the game, even being extremely accurate as well, only complemented by her handy Hydra, a three-barelled sawed off shotgun that can blow an enemy away from close range.

Helena is also another one of the very few characters with Quick Shot Combos, thanks to her Hydra and her acrobatics. She's able to get around extremely quick and clear out small groups of enemies with both style and agility with the sawed-off, triple-barelled shotgun. While the weapon has a huge spread and is only good at point blank, her Quick Shots definitely help her close the distance and make the most of her limited supply of Hydra-specific Shotgun shells.

Thanks to the firepower she carries, she makes for a terrific partner to complement the blonde ex-cop.

---

Like Jake, Sherry, and even Leon, Helena's specialty is to get up close and personal. Her Picador is suited for most general situations but fighting from long range isn't her strong suit. The best tactic with Helena is to gradually close the distance on her enemies using her other weapons, then deliver the final blow with her devastating shotgun(s). Melee isn't strongly advised, as her attacks are generally slow and clunky, save for her very useful back kick for knocking down enemies. These strategies also carry over to her Mercenaries load-outs, in which she carries the Hydra and a weapon specifically for long or medium distances, making it challenging to handle distances more than a few meters away, so keeping short distances between your enemies is generally your best bet to make the best use of her weapons and abilities.

---

Weapons in Campaign:

-Picador

-Hydra (Shotgun)

-Pump-Action Shotgun (Chapter 1)

-Semi-Auto Sniper Rifle (Chapter 2)

-Assault Rifle RN [AR with Bayonet] (Chapter 3)

{Note: This weapon can be easily missed. During the start of the 3rd Chapter, there will be closed coffins Leon and Helena can open. One of the earliest ones just after the first map transition and before the spinning blade trap contains this weapon}

-Lightning Hawk [Magnum] (Chapter 4)
Character Tips and Tricks - Chris Redfield


One of our oldest and most favorite survivors from the Resident Evil universe is back just a few short years after his mission in Africa that put an end to the series villian Albert Wesker. Chris Redfield now faces a new outbreak in China after suffering from a strange case of amnesia. His journey takes him through the darkest parts of the war against bioterrorism, and spirals out of control into a story of revenge, redemption, and questioning his duty of what it means to be a soldier.

The BSAA soldier encounters a new breed of enemy, known as the J'avo, but thankfully he's ready and able to handle the vast numbers of mutating enemies thanks to his large and powerful arsenal. Unique to Chris is his Combat Knife and his Assault Rifle, and also shares the same sidearm, the Nine-Oh-Nine, as newcomer Jake Muller.

Chris is the most experienced veteran in bioterrorism and it shows in his combat prowess. He's built like a tank and stocked like one, able to last long fights and handle just about any situation. Unlike Leon's limited moveset, Chris is a very capable melee fighter with a blade, being able to sidestep, take a couple swings with his Quick Shots, do swings as he backpedals (to replace dodging backwards), and since he has a knife, can do Quick Stabs. Thanks to J'avo not being as menacing up close as they can be from a distance (depending on if they're mutated or not anyway), and the fact Chris has a lot of moves with a knife, he's perhaps the most effective with a blade compared to Leon.

His Assault Rifle on the other hand is an all-round powerful weapon with great accuracy, but it can eat up ammo extremely quick. Chris really relies on it in the early chapters of the game and it's a great fallback weapon when a crowd appears.

Lastly, he comes packed with a Nine-Oh-Nine; jack-of-all-trades kind of pistol. It's not the most powerful handgun or has the most capacity, but it does the job well enough and makes a great fallback for Chris' more powerful weapons.

---

Chris is a jack of all trades, and should be played in the same manner. He's got the weapons to deal with just about any situation, and his Assault Rifle is a terrific weapon for dealing with J'avo. The boulder-punching brawler can handle close range thanks to his knife and shotgun and powerful melee attacks, and his other weapons can help him handle longer-range situations. The real strategy to Chris is knowing what ammo to take and what not, since he can run out of ammo extremely quick thanks to the large number of enemies in the game. He packs a lot of firepower but not enough room to carry it all, so you need to make sure you choose what to bring carefully.

---

Weapons in Campaign:

-Combat Knife

-Nine-Oh-Nine [Pistol]

-Assault Rifle

-Assault Shotgun (Chapter 2)

{Note: This weapon can be easily missed earlier in the second chapter. Just as you start and you come to the first two-person door, you'll encounter a large enemy and eventually send it running. When you do this, run back to the door the two of you haven't kicked down yet, and do just that, to acquire the Combat Shotgun and a First Aid Spray}

-Grenade Launcher (Chapter 3)

-Semi-Auto Sniper Rifle (Chapter 4)
Character Tips and Tricks - Piers Nivans


Resident Evil 6 features another newcomer to the war on bioterrorism in the form of Piers Nivans, young but loyal member of the North American BSAA branch. Piers is a character that is brash, uncompromising, and even a little hot-headed, but his loyalty to Chris and the BSAA cannot be understated and is a very endearing quality, which makes him a perfect match with the veteran from S.T.A.R.S as he struggles with his past.

Piers is a character specialized in long-range thanks to his skills as a sniper. He has two unique weapons exclusive to him, the MP-AF, a machine pistol that uses Handgun ammo and can switch between semi-auto and automatic firing modes, and one of the most powerful weapons in the game, the Anti-Material Sniper Rifle, complete with a toggle-able Thermal Scope.

He isn't a very adept close-quarters fighter due the lack of any melee weapons, as well as a weak and slow set of melee moves, but where he lacks in handling close quarters, he makes up for in how much insane damage he can bring from a long way away. Chris's campaign highlights several good opportunities to show off Piers' sniping talent and his devastating Anti-Material Sniper Rifle. This weapon comes with a Thermal Scope to make spotting enemies extremely easy, and players that enjoy sniping will have a blast playing with it. The only real drawback is the long times in between shots (since the weapon is bolt-action) and reloading, as well as how scarce the weapon-specific ammo is.

His MP-AF meanwhile is a machine pistol that can change between semi-auto to automatic. The only problem is that it eats up pistol ammo when going full auto and finding large quantities of ammo is nigh-impossible. It may not sound like a useful weapon when fired, but it's still a useful weapon thanks to its' super-precise accuracy and decent level of damage.

---

The key strategy to Piers is to keep your distance as much as possible, since he's not a great character for handling up-close situations, and this is far more obvious with his Mercenaries load-outs. When playing the campaign, you definitely want to take every opportunity you can to cover your partner while they take the brunt of the fighting. One way to make him easily more useful is to take advantage of the animation-cancelling trick with his sniper rifle (switch to another weapon and back right after firing), so you can deliver punishing amounts of damage from any distance to many enemies in mere seconds. Just don't start relying on his MP-AF. It's an accurate fall-back weapon but it's not very powerful and going full auto is usually a really bad idea unless you're overstocked or surrounded. In the case you do get surrounded though, using Quick Shots with the Anti-Material Rifle is a good way to get rid of enemies near you in a jiffy.

---

Weapons in Campaign:

-MP-AF [Machine Pistol]

-Anti-Material Rifle [Sniper Rifle]

-Combat Shotgun (Chapter 2)

{Note: This weapon can be easily missed earlier in the second chapter. Just as you start and you come to the first two-person door, you'll encounter a large enemy and eventually send it running. When you do this, run back to the door the two of you haven't kicked down yet, and do just that, to acquire the Combat Shotgun and a First Aid Spray}

-Grenade Launcher (Chapter 3)

-Semi-Auto Sniper Rifle (Chapter 4)
Character Tips and Tricks - Jake Muller


Rounding out in a third campaign to complement fan favorites Leon and Chris is newcomer Jake Muller, a martial arts master with a bad family tree, and in his blood contains the only thing that can stop the war against the C-Virus. While his character is seen as cold and jaded, it's his partnership with Resident Evil alumni Sherry Birkin as they flee the Nemesis-like Ustanak makes his adventure a memorable one as the two of them have gone through personal struggles that makes them a closer couple than one could ever imagine.

Jake is a melee master, specializing in hand-to-hand combat much like a familiar antagonist from series history. Even though he frowns on his lineage, he has a lot of useful moves up his sleeve not unlike his shady father, and has more variety than every other character in the game combined. He carries a pistol, sure, the Nine-Oh-Nine (which Chris has as well), but the immediate attraction in his arsenal, to those who are willing to master all its' intricacies, is his Hand-to-Hand.

Jake's Hand-to-Hand is one of the few weapons that feature Quick Shot Combos. He also has a unique ability to his Hand-to-Hand called the "Palm Strike," where he can target an enemy and charge toward them (and can even sidestep in the process) and slam them with an attack, then follow it up with his Quick Shot Combo to take out multiple enemies in style. Normal melee's include kicks while his Hand-to-Hand does all the punching (if used in the same manner as Chris and Leon's knives). While in his Palm Strike stance, he's able to jump from side to side and get right back into the stance, as well as backflip to put some distance between him in his target before he goes in for the kill. He can even take cover behind cover and target an enemy for the Palm Strike before he rushes around the corner and charges the enemy.

Even though Jake doesn't really need to use any bullets, he comes packed with a Nine-Oh-Nine which is an all-around decent gun to handle most situations but not the most reliable. It may not be a great weapon, but it suits Jake just fine.

---

Jake is a force to be reckoned with in close quarters. This is largely in part to his wide array of melee maneuvers and attacks. Mastering these is one of the greatest thrills of RE6, but should also be one of your highest priorities when playing as Jake, as he can pack a series of whopping punches very quickly and with style. It's highly recommended you use Jake with the Melee and Combat Stamina Boost Skills to make his melee far more efficient and for longer stretches of time, especially if ammo is a bit scarce. While he does have weapons to help him handle most other longer-range situations, these don't come close to the amount of flexibility he has with his Hand-to-Hand combat since he can sidestep when charging targets, has a handy array of dodge maneuvers, and he has a lot of different attacks with his Hand-to-Hand alone, so focus on closing the distance to unleash devastating amounts of damage. The only caveat to using Jake's powerful melee, however, is that it drains stamina extremely quickly. You'll want to learn to conserve your stamina as you would bullets, and deploy punches carefully and sparingly to make the most of your attacks. Taking cover frequently is a good way to get you punching again when you run out of stamina.

---

Weapons in Campaign:

-Hand-to-Hand

-Nine-Oh-Nine

-Elephant Killer [Magnum] (Chapter 1)

-Bolt-Action Sniper Rifle (Chapter 2)

-Bear Commander [Assault Rifle w/ Grenade Launcher Attachment] (Chapter 3)

{Note: This is a weapon that can be easily missed in this chapter. During the chapter when you go on a scavenger hunt for ID medallions, you can find a max total of 16. Putting all of them into the statue will open a gated off area behind it containing the Bear Commander and some Skill Points. However, even if you can't find all the medallions or don't want to, you can live without it 'til the end of the Chapter when the game gives it to you}

-Pump-Action Shotgun (Chapter 4)

{Note: This is another weapon that can easily be missed for the impatient and unobservant. There will be a point where you go through a back alley then climb a flight of stairs to a tiny room with boxes and a locker you can hide in. The shotgun will be in another set of lockers here. If you go straight up the ladder and hop across where you and your partner get seperated, you won't be able to go back and get it.}
Character Tips and Tricks - Sherry Birkin


Like Leon and Chris' campaign have a veteran from previous games, Jake's campaign is no exception thanks to the inclusion of hulky hearthrob Sherry Birkin, who most older RE fans will remember as the little girl Leon and Claire rescued in Resident Evil 2 from Raccoon City. She's back as a member of the Secret Service, and her mission is to find and bring Jake back to the States in order to create the cure to the C-Virus, and protect him at all costs from the fearsome Ustanak.

Sherry is a girl more than capable of holding her own, but she's at her best when playing a support role, which is what makes her a terrific companion to Jake. She comes with two unique weapons to compliment her support role; the Triple-Shot, and the Stun Rod.

The Triple-Shot is a weapon that is capable fo firing in bursts. While accurate (even with the offset laser sight), it can deliver a lot of bullets to an enemy pretty quick and has the highest capacity for a single pistol compared to every other handgun in the game. It can switch between semi-auto and burst-fire firing modes, making it a pretty handy pistol for most situations.

Complementing Jake's martial arts abilities is Sherry's Stun Rod, rounding out the melee-focused duo. Her Stun Rod is the most powerful melee weapon (not counting her partner's Hand-to-Hand) in the game, and can electrocute enemies. After her first swing, the Stun Rod can be charged to deliver a shocking payload to an enemy. It's a fantastic weapon for taking out downed enemies as well, and Sherry has a few moves up her sleeve, since she can swing as she backpedals (to replace her ability to jump on her back while it's equipped), and perform a Quick Shot that can sweep and hit multiple targets.

---

Sherry's loudout puts her into a support role position, as she doesn't carry the strongest guns, has the slowest melee, and her unique weapons are awkward to use and don't do a lot of damage. However, she's good at dealing damage for other players who would serve more of a "tank" role. But keep her at a distance from enemies and don't rely on the stun rod or the Triple Shot unless you have to. Similar strategies apply to The Mercenaries.

---

Weapons in Campaign:

-Stun Rod

-Triple-Shot

-Elephant Killer [Magnum] (Chapter 1)

-Bolt-Action Sniper Rifle (Chapter 2)

-Bear Commander [Assault Rifle w/ Grenade Launcher Attachment] (Chapter 3)

{Note: This is a weapon that can be easily missed in this chapter. During the chapter when you go on a scavenger hunt for ID medallions, you can find a max total of 16. Putting all of them into the statue will open a gated off area behind it containing the Bear Commander and some Skill Points. However, even if you can't find all the medallions or don't want to, you can live without it 'til the end of the Chapter when the game gives it to you}

-Pump-Action Shotgun (Chapter 4)

{Note: This is another weapon that can easily be missed for the impatient and unobservant. There will be a point where you go through a back alley then climb a flight of stairs to a tiny room with boxes and a locker you can hide in. The shotgun will be in another set of lockers here. If you go straight up the ladder and hop across where you and your partner get seperated, you won't be able to go back and get it.}
Character Tips and Tricks - Ada Wong


The beautiful super spy is back for her third entry in the Resident Evil series, complete with her own campaign and mysteries to solve. Ada has always been a character that works in the shadows, and that's no different in RE6 as she takes her stealthy steps around the other three duos for her solo outing (unless accompanied by the unofficial player-controlled sidekick, Agent) in the war against the C-Virus as she uncovers the truth to the outbreak and assists her old acquaintence Leon.

Ada is a one-woman army, which is understandable since her adventure is suited to be undertaken by herself. She carries a lot of firepower and can handle every situation with relative ease thanks to her diverse loadout, her incredibly powerful Crossbow and her massive-clip machine pistol, the Ammo Box.

Her Crossbow is easily her most effective weapon. It does a lot of damage and it's extremely accurate, plus it can pin enemies to the walls or floors and Ada can show off her grace with her Quick Shots and Dodges with the weapon. It also serves a secondary purpose; carrying exposive-tipped crossbow bolts that can stick to enemies and blow them to bits. The Crossbow is perhaps the hardest weapon to master due to its' unique aiming reticle and requires a slow reload in between shots, but it's a task worth doing since it gives Ada a fantastic mid-range and long range effectiveness. What's more, it's silent as well, making stealth missions a breeze.

But in case Ada gets boxed in by a swarm of enemies, she comes packed with the Ammo Box, a machine pistol with a massive 50-clip capacity. It's a weak weapon, but it has a high fire rate on top of the high capacity. It may eat up ammo extremely quick and ammo is hard to get, but it's great for getting her out of a tough spot when the Crossbow just isn't enough.

---

Ada's campaign was meant to be played solo, and her powerful arsenal is evidence of this. It's safe to say she sports the most difficult campaign in the game, being solo in a co-op-focused game. In her campaign, she's got every tool she needs to tackle any situation (seeing as she's borrowing Chris' shotgun along with Jake's Bear Commander and Bolt-Action Sniper Rifle). However, there are two main problems with Ada.

The first is that if played solo (the intended method of play for her campaign), there are no ways to really get out of that situation besides luck and generous enemy AI. The second problem is that her crossbow is a very difficult weapon to use, even though it has high power and piercing potential if used well. Part of the focus on Ada's campaign is stealth and playing carefully, so the crossbow is meant to enforce this style of play since it's a silent weapon. I strongly recommend to do well in Ada's campaign, play smart and be patient, don't rely on her melee too much as she poses a lot of the same problems Helena does (save for her back kick), learn to master the crossbow (and the extremely useful Explosive Bolts), and you'll make it through most battles with a lot less trouble.

---

-Crossbow

-Ammo Box [Machine Pistol]

-Assault Shotgun (Chapter 1)

-Bolt-Action Sniper Rifle (Chapter 2)

-Bear Commander [Assault Rifle w/ Grenade Launcher Attachment] (Chapter 4)

{Note: This is one of those weapons that can be missed if you're not thorough. There will be two officer suites while you're searching for three items in this level. One of the suites contains the weapon.}
Special Infected and Mini-Bosses - Zombies
-Shriekers


These are generally pesky enemies, since when they shout, they do damage, stun you for a moment, and summon the undead to come and try to kill you. The quickest way to deal with these guys is by shooting their giant glowing red throats when they fill up with air. If you're quick, and you take it out without killing the Shrieker himself, he'll do a little "death scream," which in turn, pops up all the heads of nearby zombies and kills them.

Try to think of them as mobile, infected booby traps.

Also, small tip. If you do enough damage to them when they're throat's not full of air, it'll actually instantly refill their lungs and you can get a chance to shoot at it without waiting for them to fill up on air on their own.

-Bloodshots


These are nasty guys with two heavy-hitting attacks; an Uppercut and a Lunge. They also have a lot of health too, and any enemies with Red Skin and glowing Red Eyes can be shot and turned into a Bloodshot.

These guys can be dispatched the old fashioned way by pumping lead into them and maybe performing a contextual Heavy Attack while they're on their knees, or you can Counter them. Countering their leaps is a bit of tricky business, since it requires very precise timing, but doing so rewards you with a satisfying insta-kill. This is the best way to dispatch these guys, and good practice for countering, so be sure to try it on them sometime.

-Whoppers


Whoppers come in two variants; Whoppers and Whopper Supremes (larger versions of Whoppers). These are fat guys that take a lot of damage to put down and tend to run at you with reckless abandon and try to eat you for dinner. They're simple to take down but take a lot of time and bullets, but they have one major weakness; their legs. Shooting them out can put them into a Daze position for you to run up and perform a Heavy Melee on them.

-Zombie Dogs


Zombie Dogs are fairly easy to kill but they're agile and hard to hit. Melee-ing them isn't a good idea but Quick Shots can do a fair bit of damage (practically insta-kills them in Mercenaries, even just with the handgun). Best thing to do would generally be avoid them if you can, but a good shotgun blast or two can take them out pretty quick, depending on the difficulty you're on.

-Lepotitsa


The Lepotitsa is a monster that spews gas whenever you shoot its' "pores", and they can kill you extremely quick if you get too close. The best way to deal with them is to pick them off from as far away as you can and only approach it when it's on its' knees, dazed, and open to a Contextual attack. After that, book it and get away from it to start hitting it again. Lepotitsas also vary in their behavior in different parts of the game, spewing a lot of gas in Leon's first encounter in his campaign, and in the second encounter trying to get close and grab you. They act like the latter encounter in The Mercenaries.
Special Infected and Mini-Bosses - J'avo
-Ogromans


Ogromans are easily the largest enemy in Resident Evil history, and they can be quite a challenge to take down. They can kill you really easily if you aren't careful and you're in their walking path, so being on the ground is usually never a good idea.

You'll want to try and stay up in buildings the bulk of the time when fighting these things. You'll need to get them near your building and either lure them toward an electrical wire or shoot their exposed organs on their backs or their mouths. They'll stumble about and collapse on a building or scaffold if they're nearby one, and that'll give you an opportunity to climb on them, pull out one of their spikes, and jam it into the exposed organ.

You may need to do this several times before it dies, or you can just keep shooting the organ until that happens. If the organ isn't exposed, you'll need to get it near a building, shoot the Ogroman's mouth and make it collapse on a building, then climb up and rip the organ out.

These guys are worth a lot of Skill Points, and in their section in Jake and Chris's early campaign, if you want those points, you'll need to kill them before destroying the final objective.

-Napads


These guys are large, armored, and can pack one heck of a punch. They *can* be hard to kill, but thankfully they're easy to put down since they're slow, and provided you have some heavy ordanance. You can shoot them up with conventinal firearms to make them stumble after destroying their armor, then run up to them and give 'em a hefty punch or kick, back out and repeat the process.

You're able to shoot off their armored body to expose their vulnerable fleshy bits underneath, and exposing their back reveals their weak spot, a white fleshy area on their spine. Nitrogen rounds aren't a bad way to deal with these guys either, since they can freeze 'em in place to set them up for a slide kick, punch, or a bullet.

-Strelats


Strelats are giant lizards that are really agile and can really tear you up if you're not careful, but they're weak against melee attacks. They're able to shoot spikes and spew acid which both dish a lot of damage, and they can put up a smoke screen to hide themselves and can play dead.

The best way to dispatch these foes is by using melee. You'll be able to get them into a stunned state where you can perform a context-sensitive action on them and repeatedly hit them. Otherwise, you'll want to blast them away with grenade launcher or magnum rounds. These are not the kind of enemies you want to screw around with because they will murder you in a heartbeat if you let them.

-Mesets


Mesets aren't particularly deadly but they are nasty-looking enemies with some tricks that can make them quite a bit of trouble. They basically look like crows or ravens with claws on their chest, which they use to grab you and left you into the air, doing extra damage. They're also able to land and peck at you on the ground. Thankfully, if you have Flash Grenades handy these adversaries are quick and easy to kill. If you don't have any handy though, try hard to keep them in your sights; it only takes one of them to stealthily fly in and grab you and potentially ruin your day.

-Gznedo


Definitely one of the strangest enemies in Resident Evil history, the Gznedo's are creatures that consist of a swarm of insects and take a female human shape when they're not dispersed. These are enemies you want to try and stay away from because getting caught in their insect swarm can potentially kill you, since they can do quite a bit of damage and your partner can't help you, unless they are able to kill the big yellow insect that pops out as you shoot the Gznedo.

You'll want to use heavy weapons on these things because you want to kill the big bugs as quickly as possible. They can cover a lot of ground with their swarm and they're not something you want to be in the same small room with. If you can help it, avoiding these would be your best bet, but if you can't, kill it quickly and with prejudice.

-Rasklapanje


These nasty, ugly, and downright creepy suckers are reoccuring enemies in all four campaigns, known as the Rasklapanje, or regenerators. These guys are able to be shot up into four different pieces, can put themselves back together, and if "killed," they eventually come back to life to try and kill you again.

They're usually a pain to kill and can cost you a lot of ammo, but they're slow and weak against Fire. Incendiary grenades are the key to victory against these things, and a good backup is explosives. If you're looking to tickle your funny bone while dispatching the detachable hands, lead one of them toward certain objects such as microwaves, boiling pots, disentegrators, and a number of other things, run up to the hands while they're close to these objects and hit the Attack key when you get the context-sensitive prompt. You'll be treated to some delightfully satisfying hand deaths.

However though, it's in your best interest to avoid them at all costs. Run around them, slide past them, and steer as clear as you can from them as you complete your objectives.
Gameplay Tips - Advanced Melee [Part 1]
I want to teach you a few techniques that allowed me to do finishers with as less fuss as possible, and these are ample tips in The Mercenaries.

-Quick-Shot+Slide+Assassinate


This is a technique I picked up in The Mercenaries and is a great way to kill an enemy using a melee, even though it costs a fair bit of stamina and some coordination, it at least keeps you moving and is one of the quicker ways to make sure an enemy is dead.

First off, use the Quick Shot on an enemy, this should put him into a "minor stumble" that lets you do a very weak melee move, but we don't want to do this.

Once he's in this stumble, use your Slide maneuver to kick him while he's stumbled. This should put him in a "dazed" state.

You have two options here, the first being a very heavy Melee attack from the front, but note, this doesn't always kill them. Want the more reliable approach? Run behind them while they're dazed and do your "assassination" maneuver (i.e. Leon's bulldog, Chris's necksnap, Helena's elbow-drop, etc.).

This trick has helped me a lot in the Mercenaries because I can put an enemy in a Dazed state, and they'll stay like that for a few seconds, so just as my Combo is about to run out of time, they'll be right there for a free and fast melee kill, and the few seconds I take before I kill him will give me time to regenerate some of my stamina.

It's a complex trick, but try it out in the Mercenaries sometime, especially if you're trying to make your combo last with the slowly building enemies in the early stages of a match. You'll thank me later.

-Quick-Shot+Melee+Assassinate


This is the same as the last tip, except with one twist but it's a lot harder to do. Instead of sliding into an enemy after the Quick Shot, you *could* try doing a regular melee on them. This eliminates the tricky bit of trying to slide into an enemy, but there's one major issue.

You have to be *just* far away enough to hit them, but not close enough to trigger the Context-Sensitive Action (the weaker melee move.)

This is more of a luck-oriented trick than skill, but this can save a bit of your precious stamina if you're able to pull the move off.

-Headshot (with certain weapons)+Finisher


This is something I just picked up on from various games and I haven't thoroughly tested, but this was something I noticed primarily with Handguns and Machine Pistols.

If you were to shoot an enemy in the head, they'll do a type of stumble. For zombies, they are basically somewhat knocked backwards with their head thrown back and they stagger a little. With J'avo, they hold their heads and stagger backwards.

Here's the tricky part. The *second* you shoot the enemy in the head and they do this stumble, you need to run up to them and perform the Context-Sensitive Action, which will do a type of finisher maneuver. This only works on normal zombies and J'avo, so don't expect this to work on mutated J'avo or special zombie types. Doing this though should result in a high chance of killing an enemy. There will only be rare occasions where this might not successfully kill them, but it should most of the time. Chris's is especially useful since his has him throwing his enemy at others and doing a lot of damage to them.

Be sure to do this in The Mercenaries, it's fantastic for adding time via Melee's.

-Zombies with Weapons = Insta-kills.


You'll notice throughout RE6 zombies will carry weapons or have weapons sticking out of them, such as axes or poles. These should be your first targets because these are enemies you can kill in a heartbeat, and here's why:

Any zombie with some sort of weapon equipped or embedded in them are able to be killed by a Context-Sensitive Action. All you need to do is stumble them, and you can do this by doing a Shoulder Bash (almost all male characters), Quick Shot, or one or two melee attacks.

As long as they have a weapon on them, and you stumble them, you run up to them and hit your Attack button (left-click), and you'll kill them with their own weapon. Enemies with poles sticking out of them are especially useful since the character will pull them out and throw them at other enemies.

Counters also do wonders with enemies that are swinging weapons at you, because if you land a counter with these kinds of zombies, it will almost always kill them no matter what (as long as they're not what I call "super zombies" who have more health than almost every normal zombies do).

These are enemies you want to prioritize first, especially in the Mercenaries when you're trying to get melee and counter kills to stall the clock for more time, so keep that in mind.

-Elbowing/Back-kicking Enemies


This is a situational trick but it works wonders. I say situational because enemies might be in front of you and your character will feel like attacking on front of them instead of the enemy you're trying to hit behind your character with this attack.

Anyway, here's the maneuver. If you turn your camera to face behind you and an enemy is sneaking up on you, hit the Attack button (left click) to perform either an elbow or a back-kick (depending on if you're a male or female character, respectively).

Elbow-ing enemies behind you puts them instantly into a Dazed state, where you can pull a Heavy Front Melee or an Assassination. Back-kicking enemies will knock them to the ground, setting them up for a good ol' fashioned Curb Stomp to the head.

--Jake's Hand to Hand--


Of course, we can't have a section about melee without talking about Jake and his rather diverse moveset using his Hand to Hand "weapon."

For starters though, here's a video displaying some of his moves, then we'll break down how to actually perform them as well as utilize them to the best extent:


Now that you've seen some of his moves, let's discuss how and when to use them.

Let's start with his punching. This is used like any other weapon in the game; hold the Aim button (right click) and Attack (left click). You can do a three-punch combo, provided you have stamina for the third punch.

Kicking is like when using melee with everyone else in the game; without aiming, hit your Attack button (left click). You're able to do up to two hits with the kicking maneuvers.

Next is the Palm Strike. Hold your Aim button while looking at an enemy and hold your Attack button, and you'll see an icon form over their head while Jake takes an attack stance. Once the icon above the enemy's head flashes white, release the Attack button and Jake will charge at the enemy. You can side step while he's running toward them by hitting your Strafe keys (A and D by default) to dodge incoming fire, and you can interrupt the attack by hitting Backwards + Space Bar (the Solo Action Key) to do a backflip. When you charge at a downed enemy, by the way, instead of doing a palm strike, Jake will perform a dolphin (backflip) kick.

While in the Palm Strike stance, you're able to backflip (by hitting backwards plus the Space bar/Solo Action key), and be able to jump to the sides and resume the Palm Strike position (hit one of your strafe keys [A or D] plus the Space bar). This is good for getting out of a position you can get hit before preparing to charge at an enemy.

Now we get to the tricky bits, his Quick Shot Combos, (if you haven't seen the section about Quick Shots and Quick Shot combos earlier in the guide, you may want to do that now). All you have to do is hit both the Aim (right click) and Attack (left click) buttons at the same time, then keep holding your Aim button while repeatedly hit your Attack key. If you're doing this right, Jake should be able to perform up to 5 hits to nearby enemies in his combo.

Other than that, there's all his contextual actions which I won't cover here. We're going to talk about how to best utilize his moveset now that you should know how to be able to do them all.
Gameplay Tips - Advanced Melee [Part 2]
--Jake's Hand to Hand (cont.)--

Alright, now that you should have no excuse on how to do all of Jake's moves since there are two sections of this guide that tell you how to do all of them, let's talk about how to best utilize them.

The first bit we want to discuss is how to best use his combo attacks. Obviously, you're going to need quite a bit of stamina in order to do this, and several enemies nearby to chain hits in. One big thing I want to tell you is that you don't have to do every move rapidly in very quick succession; you're able to wait a second after each hit in the Combo before doing the next one. This is something you'll want to do when you don't have an immediate enemy nearby you to attack or is just out of range.

Let's take this example:

You have three guys nearby you and a fourth guy is running toward you. Do your first 3 attacks in your Combo to hit the three nearby you, but the fourth guy still isn't in range for your fourth combo attack yet, so if you were to do it right after the third, you'll miss. If you wait just a split second longer, or you do short delays in between your combo punches, but not long enough to make Jake return to his normal stance, the enemy should be in range now. Now do your fourth attack, which should hit him since you gave him time to get in range, then you can go ahead and finish your Combo with your fifth move to ground pound one of the enemies you downed. There's a boss fight against the Ustanak later in Jake's campaign where that slight delay in between hits can be the difference between missing an attack and leaving yourself vulnerable (since hitting him makes him stumble back and doing the combo attack too soon will miss as since he'll be out of range or moving out of it mid-punch) and getting making every punch count.

Another example is backflipping out of a combo to start it again. You can only do this up to the 3rd attack in the combo, but not after the 4th. Here's a scenario to try:

Target an enemy in a group to charge at them with a Palm Strike to start your Combo. After your third punch in the Combo, hit Backwards + Space Bar to do a backflip while holding your Aim key the whole time to get back into the Palm Strike stance and start your Combo again. A good idea would be to do one or two extra back flips so you give yourself plenty of room and distance to perform another Palm Strike or Dolphin Kick.

This can really let you utilize every attack you can while also doing it in style. It's also a tactic I highly recommend in that aforementioned melee boss battle with the Ustanak, so you can get 3 hits in, backflip away, then charge and get another 3 hits in, then rinse and repeat.


Another advanced tactic with Jake is to slide into an enemy with "hand-to-hand" equipped and wait for Jake to come to a stop after moving, press the right trigger while continuing to hold the left trigger and you'll do a kick. If this kick manages to connect with the stunned enemy, you'll be able to setup for an instant Coup De Grace or Rear Takedown.

One other thing you can do with the Palm Strike is you're able to take cover at a corner and target an enemy with it. Jake will run around the corner he's taking cover at and charge at the enemy like a normal Palm Strike, but with the benefit of selecting your target from behind cover without having to worry about getting hit in the open.

The last bit of advice concerning using the attacks I have to give is learn to use your sidestepping ability during Palm Strikes, because you'll get shot at repeatedly while you're charging at an enemy, so dodging those attacks is generally a good idea.

Finally, if you plan on using Jake's melee a lot, which you should, then I strongly, strongly recommend you use the following skills:

Melee Lvl. 3
Defense Lvl. 3
Combat Guage Boost Lvl. 2

Having that Guage Boost is critical to doing large combos and chains of melee attacks for a long period of time, and if you couple this with using pills or smartly using cover/laying on the ground to regenerate your stamina, you'll be able wipe out whole groups of enemies using just your bare hands.

If you plan on using Hand to Hand in the Mercenaries and the other Multiplayer modes however, then start utilizing the Taunt button a lot, because that regenerates your stamina instantly (as long as you don't get hit).

---------

That pretty much covers most, if not all of, the essential tips to mastering Melee in RE6.
Gameplay Tips - Animation Exploits and Invulnerabilities
One constant through the Resident Evil games is animation cycles, and that you'll need to wait for some to finish before you can actually act or hit anything, thanks to "invulneraby frames." Inversely, there are moments where enemies are vulnerable and can be killed before they get so much as a chance to fight back.

Resident Evil 6 is also prone to these, so for this section, I'd like to tell you about some of the various animation exploits and invulnerabilities between you and your enemies, in order to save yourself some ammo, attack during those vulnerable moments, and give yourself lifesaving invulnerability frames as well. We'll also brush up on boss's operating under these same conditions and go from "take damage 'til health hits 0 to move onto the next cutscene" mode to "wait for about 5 minutes 'til something happens before damage matters again."

--Invulnerabilities - Creatures--


This can be present mostly during scripted events where creatures are coming out, being flashy and stuff, just before they move onto their normal animation routines. Such examples are in Leon's chapter 1 with a zombie grabbing a civilian from under a grate or when zombies are chowing down on something in the middle of the street, and another in Ada's 3rd chapter with a couple of J'avo jumping on top of one another and pulling some fancy lunge attack maneuver. These are points where you can try to shoot at them and do damage, but it won't actually put any stopping power on them and sometimes won't damage them at all.

The best way to spot instances like these is, once again, when they're doing some special animation in a scripted sequence, you usually don't want to shoot these guys until they do normal everyday running around and attacking animations. Spotting these is important as to not waste any bullets, not to mention very helpful for timing for you speedrunners out there. The invulnerability frames are especially prevelant during the many boss fights in the game, so keep that in mind.

More invulnerabilities include non-scripted or cinematic cutscenes, namely with J'avo and their Mutation animations. I know I dumped a lot of bullets into an enemy that were going through this big fancy mutation animation and it didn't technically scratch them, let alone made them stumble or anything (unless I ran up to them and kicked them if I had the prompt, but there were times I wasn't in the position to do so). Basically, if you see a J'avo mutating, it might be a bit better to wait until they finish mutating before you open fire on them (this was definitely noticible during the giant "club armed" J'avo or J'avo with tentacles and the shield arms unless you snipe them in the head mid-animation.

Lastly, there's the caccoon animations, where an enemy slowly turns into a caccoon before they turn into a special infected. You can't damage enemies as they're climbing out at least until right before then when they're pretty much "out" of the caccoon. A good way to test when they're vulnerable is by aiming at them and trying to mark them as a target (press the partner action button, V, while aiming at them). Keep trying to mark them until the game actually lets you do it, then you'll know you can open fire on them and do damage.

It'll take some time and several playthroughs to recognize some of the animation routines where you can do damage or stumble an enemy, and not being able to faze them, but be sure to take them into account during combat in just about any scenario, whether it be Campaign or Mercenaries.

--Invulnerabilities - Player--


There's few instances you'll be invulnerable from damage, and this is only during certain melee attacks and when you're downed.

The melee attacks you're invulnerable from damage involve Finisher maneuvers or the Heavy Melee. During normal melee or the "Light Attack," you're prone to any damage, but say for example, in cases where you shoot an enemy in the head and run up to them, doing one of your execution moves, or if you have a dazed enemy and you run up behind them or in front of them and perform the context-sensitive action, those are cases you're invulnerable.

In cases involving when you're downed, you're only invulnerable until you see the meter on your screen and you're able to crawl around and aim. You're also invulnerable while your partner is reviving you.

Try to take note of these, since they can keep you alive in case you're in a pinch in some cases in terms of the melee invulnerabilities, and there's some minor strategy you can account for with the downed invulnerabilities.

--Exploits--


Bad guys attack through animation routines and cycles, and they have to play out start to finish unless some gung-ho survivor blasts them away with their magnum revolver. The intent was to add immersion to the untrained eye, but after the 20th time you see a Bloodshot crouch down, drool, and snarl all mean-like, you can quickly figure out the 4 seconds of time the animators gave you (intentionally or unintentionally) to blast them before they chomp your face off. Study enemy behaviors on their various factors; distance from you, direction they face, whether they've been wounded or stumbled, or whether they're alone or in a group. Finding these patterns gives you mastery over your undead enemies, and especially over the multiple bosses throughout the game that hinge on these kinds of exploits and telegraphed attacks.

Watch, learn, THEN give them a swift kick in the face!

--Time-Based Fights vs Damage/Kill-Based Fights--


The last big tip I have has to do with something you'll encounter at several points in the game, especially in boss fights.

What this section talks about is when certain parts of battles are set up so that enemies will be invincible until something happens and you just simply need to survive until then, or that you have to do damage to them and actually fight them. The game tries to give you the illusion that every fight is damage-driven but unfortunately that's not the actual case. The Ustanak intersection boss fight with Jake and Leon is a perfect example of this.

Throughout that particular boss fight, there's various "phases" in the battle. The first part is damage-based until Ustanak runs off and the survivors get split up, Leon and Sherry having to fix a bus to rejoin Jake and Helena. While the two teams are split up, don't shoot the Ustanak, because damage isn't actually a factor until all four characters are reunited after the bus crash. Once this happens, Ustanak can take damage again, at least until he runs off to swap his shotgun for his claw, so don't shoot him when he's running off because it's a waste of ammo that doesn't contribute to the part when he's got his claw back.

There's various cases of things like this throughout the game, where there's moments you just have to stay alive and other moments where you have to actually try and kill the boss to move on.

A good example of regular moments during the game, to differentiate time-based versus kill-based, is Leon and Chris's chapter 1.

In Leon's chapter 1, there's a hold-out section where you're in a hall fighting zombies for a door to open, and another example is the gun shop near the end of the chapter.

In Chris's Chapter 1, there's a hold-out section on a rooftop where you're waiting for backup to arrive.

Leon's hold-out scenarios are Time-based, Chris's is Kill-based.

In the Leon scenario, it doesn't matter how many kills you get, as long as you stay alive and wait for the door to open and the game to progress. In Chris's, you have to actually kill all enemies before the backup actually shows up.

Trying to spot these is a challenge and takes multiple playthroughs, but if you can identify which is which, and you can save ammo by knowing when to shoot, and when not to shoot, especially during boss fights.
Gameplay Tips - Boss Fights [Leon's Campaign Part 1]
We're going to dive into some spoiler territory, so unless you've played the fight before or you're willing to risk spoilers, you may want to steer clear of this section for now.

That said, let's take a look at some strategies dispatching boss fights in the game, starting with Leon's campaign. We'll break it down by Chapters and bosses featured in them, and some tips on how to fight them.

--[Chapter 2]--


-Deborah


Deborah is a multi-part boss fight, though there are only four sections you have to fight her, two of them being script-oriented. This is also an Intersection point, where you can be able to fight alongside Ada players should you let them join.

The first part is right away, Deborah attacks Helena and tries to kill her, so you will either have to shoot her off, or Helena has to be able to escape from her grasp. Right after Deborah gets off Helena, don't shoot her, she'll go through a song and dance before she triggers a cutscene, sending you to the next section of the battle.

Follow the path, regardless of which character you are, until you come to a circular area at the bottom, where you'll be fighting Deborah again. You'll need to shoot her to make her fall down, which triggers a cutscene, after that, it's a straight-up boss fight.

Two ways to go about fighting her are by either shooting out her glowing yellow tentacles as they appear, or by knocking her down (usually from above) by filling her full of lead where she'll sprout a tentacle. You'll be able to run up her and perform a contextual action to punch out the glowing yellow bit. Note though, when your partner is doing this, you can try and shoot the yellow tentacles that sprout out of the sides, but they won't really break, so it's best to wait until after the punching is done.

After all 3 of the yellow glowy bits are gone, you don't need to attack her anymore. She'll go through an animation routine, then she'll destroy the ground under you and send you all to the next section. Continue along the path (as Leon) or cover Leon (as Helena or even Ada) until you're all inside the mine cart.

During this, you'll want to lay on your back, so just hit and hold one of your dodge shortcut keys or do the combination to lay in the cart and avoid all of the barriers that whip past your head. Deborah will eventually reappear again, and you have two choices at this point: Shoot her glowy bits to make her stop attacking you (or shoot specific ones out to disable specific attacks), or wait until she leaves. Either choice you make, you'll need to shoot out a dynamite barrel afterwards, and Deborah won't reappear again until a little while later and after dodging some more barriers. Once she shows up again, you'll only be putting up with her for a few more seconds so it's best not to waste any more ammo until the cutscene.

At this point you're at the final phase, and you'll just need to shoot at her to kill her once and for all. As Leon, you can help Ada if you want and you have a chance to collect a bit of ammo before you kill Deborah.

--[Chapter 3]--


-Brzak


This giant shark monster is a multi-phase boss but the actual battle isn't until the large "slide," and all things considered, he's one of the easiest, if not the easiest, boss in the game.

The encounter with Brzak is split into three parts: A swimming sequence followed by some Quick Time Events, a moment where Leon and Helena are split up with Leon still stuck in the water as Helena covers him, and the boss battle down the "slide."

The swimming sequence is easy, as long as you get air (and be sure to grab a thing of skill points right by the 3rd air pocket), and don't get strangled to death by the zombies floating in the water. Once you get to the end of it though is when you go through a series of QTE's. Perform the actions shown, which shouldn't be too hard, and you'll get through it in no time.

Slightly harder is when Leon and Helena are split up and Helena has to cover the ex-cop as he swims to safety with the Brzak trying to hunt him down. As Helena, be sure to grab all of the assault rifle ammo you can and move along with Leon as he swims. After you get past the gate is when you have to start worrying about Brzak again. Once it shows up, shoot it in the glowing orange/yellow tongue before it gobbles up Leon as he tries to paddle away. After this, rinse and repeat at the second bridge. Once you get to the third bridge and after the second Brzak attack, Leon will get grabbed by a zombie. Shoot him off, and the Brzak will appear again. Shoot him like the last two attacks, and you'll have finished that section of the battle.

Once Leon and Helena hit the door, the Brzak will attack once more and you all will travel down a massive water slide while trying to fight him off. All you need to do is make sure you shoot his tongue until he goes through an animation routine. He'll do this once or twice before Leon shouts "Here he comes!" or something along the lines. This is where you need to hit a QTE (should be the Solo Action + Reload/Pickup buttons [Space + R by default]) before you commence the fight again. He'll appear to play dead for a moment, which you can stop shooting at this point, before an explosive barrel will fly over your head that you'll have to shoot.

After that, boss battle's done and the Brzak is dead.

--[Chapter 4]--


-Ustanak


Your reunion with Resident Evil alumni Sherry Birkin will be cut short by their Nemesis-like...well...nemesis, the Ustanak, who will initiate a lengthy and epic boss fight. The key strategy is to try and save ammo as much as you can and avoid using your Magnum rounds (unless you have Infinite Ammo for it), while also knowing when not to shoot for time-based scripted sequences.

What you'll want to do is climb on top of the nearby containers and smash open every box you see, collecting everything you can because you won't be able to get them after the fight's over. While you're at it, push down the big containers holding explosive barrels so they are spread all over the ground as traps. Once you've collected everything you can find, start leading the Ustanak to these barrels and shoot them when they're close. There should be 3 in this first section.

After Ustanak takes a certain amount of damage, the music will die down and he'll run off. Stop shooting at him when this happens. Go to the partner action where Sherry and Leon get split up from Jake and Helena.

As Jake and Helena during this point, don't shoot Ustanak. He won't officially start taking damage again until they're reunited with Leon and Sherry. You'll just be wasting ammo you could be using after the four of you are back together.

Once you're all reunited and the bus smashes through the battlefield, more of the map will open up. You'll immediately want to run to the new area where there will be a big red container with ladders on either side of it near a wall. All four of you can run up to it and push it up against the wall, climb up, bust open some boxes, hop across some gaps, and collect a precious First Aid Spray and four Remote Bombs. After that, smash open any crates you find in the new zone and find a second forklift, lower it, then climb up and bust open more boxes and push barrel-filled containers. Continue with the boss fight 'til Ustanak runs away again to swap his Shotgun for his Claw arm, then start attacking him again when he comes back. Use the explosive barrels you knocked over as he runs toward them until you eventually defeat him.

As for all of the boxes you've collected, you're going to need every bullet you've acquired for what's ahead.
Gameplay Tips - Boss Fights [Leon's Campaign Part 2]
--[Chapter 4 cont.]--


-Chris & Piers (Competitive Intersection)


This is worth mentioning as a "boss fight" because this is a competitive intersection, and there's lots of skill points to be acquired from winning.

This intersection is a race, and it's split up into two parts. The first part is the laser hallway, the second part is the room with the exploding "hockey pucks." As soon as you get to this point, you'll want to really hurry if you want to obtain a lot of skill points.

The first part is a race to the elevator past a couple of laser traps. The first one to make it to the elevator is awarded with a bunch of skill points. Run down the stairs and open the door to the hallway. The quickest way through this is to run along the right side of the hallway and wait for the cutscene followed by the laser trap. Keep running toward the elevator and slide through the open section in the trap. Once you get to the end, SHOOT the small laser circuits next to the doorway, don't punch them. This will save you precious seconds if you want to win this first section, after that, run through the room and hopefully you were the first to get on the elevator. If you lose, you'll have to take the stairs, and you'll miss out on a good chunk of Skill Points.

If you win the Race, you'll be in Room 01, if you lose, you'll be in Room 00.

This is the hard part.

Once both pairs try to break down their doors, Ada will release the exploding "hockey pucks," or prototypes. They'll slide around the room and blow up if you stand too close to them.

To win this section, the first pair to hack their door open will be awarded with over 10,000 Skill Points. If you're playing Solo, the bot will handle the hacking will you cover them, and if playing with another player, one of you has to shoot while the other does a QTE to hack the door open. You'll need to decide right away which of you two is a better shot, and namely, with a shotgun, and that will be the person covering the person hacking the door open.

A big tip for this is you need to shoot the pucks advancing toward your partner. Shooting them will make them go to Chris and Piers' side of the room where it could potentially screw up their attempts to open the door. You could also run over the pucks to make them detonate, and if you don't stop on top of them or anything, you can do it without getting any damage. You may have to do a combination of both if you're not reloading your Shotgun every other second of this battle, which you should be doing to keep the prototypes at bay.

One of the pairs should eventually be the first to unlock the doors. Whoever wins is treated to three chests full of skill points, while the losers will be trapped in their room fighting faster hockey pucks until the winning pair advances.

Whether you win or lose the second race, continue along the path to advance the plot. It doesn't matter who gets to the end first, the same cutscene happens the same way.

-Simmons 1st Form (Cheetah Simmons)

This is thankfully a very simple boss battle, save for one part that has Leon and Helena split up, and that's just to pump as much ammo as you can into Simmons. Be sure to grab the Red Herb before the boss fight though, there'll be a Green Herb for it later. You'll also want to try, if you can, to save your Magnum ammo again, because you'll need it later in Chapter 5.

The first part will have you shoot Simmons and have the duo run past him, before they hop down into the train. Shoot at him again until eventually he turns human. You can shoot him or melee him until he's on his knees, which gives you a chance to punch the living daylights out of him. You're able to go from the inside and the roof of the train by going to either end and boosting your partner up, or if Simmons busts open one of the windows/doors, you can climb up from there.

You'll want to grab a First Aid Spray that will be on the roof between a couple of the cars and any ammo you can carry. You'll want to use your Remote Bombs (if you have any) for this fight since Simmons tends to walk right on top of them.

Keep doing damage until he drops over and triggers a cutscene that splits the two of you up. As Helena, shoot at Simmons with whatever you got, and as Leon, run away and don't stop. Once Leon reaches a certain point, a cutscene will trigger followed by an easy-to-miss Quick Time Event (it'll be a rapid-button-pushing one with the Space Bar). Once you're past this, start shooting Simmons again and grab the Green Herb while you're inside the train car. When you do enough damage to him, he'll run toward the back of the car and pull the door out, which at this point you can stop shooting him because that's the end of that part of the fight.

Do the QTE (which you hit Space + R by default) and you'll get up on the roof. Shoot at him with whatever you have (hopefully Assault Rifle ammo or Sniper Rifle ammo preferebly). This should eventually put him down and lead you both to the end of the Chapter.

--[Chapter 5]--


-Simmons 2nd Form (Dino/Tyrannosaurus Simmons)


This is another straightforward fight but you can easily get yourself killed if you're not careful. There's also a couple First Aid Sprays hidden under certain vehicles, a Machine Gun you can man, and a gas truck that you can make explode. Ada also intersects with you at this point to help out in the fight using a Helicopter.

You'll want to collect as much ammo as you can from boxes around the map and start drilling Simmons full of it, but you'll want to save your Sniper Rifle and Magnum ammo because you'll need that later on in the Chapter. If you run low, smash open more boxes.

There is a pick-up truck near the giant column in the middle of the room with a First Aid Spray under it that you can lure Simmons near to knock it away, and there will be three Humvees on top of and near each other with another Spray at one side of the room. Another pair of Humvees also has a Machine Gun in another side of the room, but getting on it will make Simmons come straight after you so you can't spend very long on it. There's multiple exploding barrels you can use to fight him off, but there's also a Fuel Truck Simmons can bite down on, making it leak fuel. If you shoot at the gas puddle leaking on the ground, it'll make the gas truck explode in a massive fireball. Wait too long though and he'll smash the Fuel Truck.

The only strategy is to keep your distance, don't stay too long near the vehicles, grab the Sprays, and use the barrels and any Remote Bombs you have. Whenever he's human, hit him 'til he drops to his knees and start punching him.

Keep shooting him, blowing him up, and punching him until he eventually goes down.

-Simmons 1st Form (Cheetah Simmons)

In another Crossover with Ada, you'll go through a multipart battle against Simmons' first form again. Once again, save your Magnum ammo and Sniper Rifle ammo. You'll need the Magnum ammo later but the Sniper Rifle is for later in this fight, and you'll definitely need it as Helena.

Ada will start fighting Simmons until Leon and Helena reach a certain part during the cable climb. If you're playing as Leon playing with a player-controlled Helena, try not to climb too fast or you'll make Helena fall. Once you've hit a certain point, Ada will grapple away, then Leon and Helena will hop onto a broken glass crosswalk. There, you'll be on the opposite side of the building from Ada who's fighting Simmons. You and your partner can cover her, but as Helena, you'll want to save your Sniper Rifle ammo.
Gameplay Tips - Boss Fights [Leon's Campaign Part 3]
--[Chapter 5 cont.]--


-Simmons 1st Form (Cheetah Simmons) cont.

Shoot at Simmons (or just wait for Ada) until the next cable climb. Continue climbing again until you and your partner reach the top. Simmons will try to come after you both and Ada will try and cover you. If you're playing as Leon and Simmons gets too close to you, you'll be given a dodge QTE and a chance to kick him, but it requires some quick reflexes to nail it.

Once you and your partner reach the top, Leon will split up to help Ada. If you're playing as Leon, you don't need to shoot Simmons while you're covering her. This is a timed scripted event. Just wait until it finishes and Ada recovers, then you're free to shoot at him. As Helena, same rule applies; wait 'til Ada and Leon are back on their feet, then all three of you can open fire on him. This is where Helena will need all of her accumulated Sniper Rifle rounds to try and cover Leon and Ada. There will be a few boxes she can bust open to get a bit more ammo if she needs it.

Keep shooting at Simmons until you see him turn human and start laughing maniacally. This tells you that the fight's almost over. You can't damage him while he's laughing so keep this in mind. Resume fire until the next scripted event.

When Leon's hanging from the ledge, Helena *could* shoot at Simmons, but the scripted sequence involves having a certain amount of damage done to him so Ada gets a prompt to stab Simmons with one of her crossbow arrows and send the two tumbling off the catwalk. As Helena, you don't *have* to shoot Simmons, because Ada should take care of that herself.

-Simmons 3rd Form (Fly Simmons)


During this final part of the campaign, Simmons will go through multiple stages throughout this final form. Save your Magnum Ammo again until the final "fight" with Simmons.

The first part is stationary Simmons. Just shoot him until the cutscene, all there is to it. Be sure to grab the nearby boxes though, once you trigger the cutscene you can't go back and get them.

Advance through the map and collect any box you all find until you reach a crane. Leon and Helena will be split up thanks to Simmons spitting stuff at them. As Leon, you don't need to shoot Simmons, because this is a timed event (in which if Helena takes too long, Leon will die). You can buy yourself a little bit of time by shooting Simmons, but it won't really do much good. Just wait for Helena. As Helena, try to be quick and do the Quick Time with the crane controls as fast as possible. You'll need to do it twice, the first to get him moving and the 2nd when the crane stops (where you'll have 2 QTE prompts). Wait too long, Leon dies, and you'll have to hit the checkpoint.

Now here's where all of your hopefully large pile of Magnum Ammo will come into play, and any Incendiary Grenades can help you out here. This is also probably one of the more confusing boss fights in the game for first timers.

Simmons will come up in a giant fly form with a bunch of glowing yellow weak spots. There's also a Lightning Rod sticking out of a nearby zombie. You'll need that rod to kill him.

First, you and Helena need to shoot at the glowing limbs. Even if you shoot one of them off, keep shooting at them and try to take off as many limbs as you can before they turn black. When the glowing bits turn black, they're invulnerable from damage.

If you shot a lot of limbs off, Simmons will try to grab zombies with his tentacles in order to regenerate them. One of them should be the zombie with the Lightning Rod sticking out of him. If you shoot off only one or two limbs and there's stray zombies walking around and are closer, Simmons will try to grab them first over the zombie with the Rod in him. Basically the more limbs you shoot off, the higher the chance he picks up the Rod and takes a swift zap to the head.

After he's zapped, the rod will land somewhere on the ground. If Simmons isn't slouched against the ground with his unprotected head, you'll need to stick it into another Zombie until he is keeled over. Once he is, and he's momentarily dazed, you have two options:

Shoot his eyes out, or stick the rod into his head. If you haven't stuck the rod into any zombies, jam the thing into his head and that'll finish him off. If you stuck it into a zombie before that point, that's fine, but you'll just need to shoot his eyes out. He'll pick up every zombie in the viscinity when you do, including the zombie with the lightning rod.

That should finish him off.

But wait!

He's not dead yet!

When you get to the chopper, you'll be told to pick up a Rocket Launcher and finish him off in classic Resident Evil style. Just pick up the Launcher, point, and shoot.

Bam. Dead.

Officially dead.

Actually dead.

He's not going to come back again. I promise.

He's really, really dead.

Seriously.

Welp, that's Leon's campaign. Onto Chris's now!
Gameplay Tips - Boss Fights [Chris' Campaign Part 1]
Like Leon's campaign, we're going to get into some spoiler territory, so just a fair warning. If you want to avoid these, best not continue with this portion of the guide. However, if you've finished the game or don't mind spoilers, then feel free to press on to Chris' boss battles!

--[Chapter 2]--


-Ogromans


These aren't technically bosses in the traditional sense, although they do cause quite a bit of ruckus and killing them gets you a lot of skill points. You'd fight these in two different instances in Chris's campaign, the first time you don't need to try very hard to kill it since just stabbing its' organ once will trigger the cutscene, or you can just wait it out. The real instance where you can kill them is during Chris' first intersection with Jake and Sherry.

During this section, you have two options: Just head straight for the objectives and deal with them, and if you've intersected with other players, hope that they'll kill off the Ogromans instead, or try to kill the Ogromans before tackling the objectives. The latter will give you more skill points but the former can cost a bunch of time, ammo, and potentially health.

Defeating them is simple enough, thankfully. There will be one Ogroman at the start, and you just need to shoot the exposed organ on its' back while it's standing by a building or scaffold to make it collapse and lean against it. Once this happens, you can run up to it and jump onto it, perform a QTE, and stab it in the organ with one of its' own spikes. You may need to do this several times but you can keep it from attacking you if you keep hitting the organ. You can also dish a lot of damage to it at any time by shooting at it. If you make it stumble, you can shoot at it a bunch, and you'll have to apply an extra bullet or two after you've basically nearly killed it to, well, kill it.

When it dies though, it melts into a big puddle that can slowly whittle your health down if you stand in or near it, so be careful about that when you're going to collect the skill points.

A second Ogroman will show up before you all go through the sewers, and I highly advise going through there first since there will be a green and red herb down there before you fight the second one. When you come back up, you'll want to try and kill it as quickly as possible before having Finn complete the final objective, otherwise planes will bomb it and you won't get your chance to get the skill points.

One small tactic you can employ while fighting these is by looking for electrical wires, which there will be 3 of them, and have the Ogroman walk into them for a shock and a quick down that doesn't cost any bullets.

--[Chapter 3]--


-The Gunship


You'll fight this thing twice in this chapter and both fights are equally a pain.

The first time will be an intersection with Jake and Sherry, and if you're really lucky, you'll crossover with players playing as Jake who know how to climb the rope of the chopper and take it out the easy way. If not, and/or you're playing with bots, then you'll have to do it the hard way.

In the first half of the intersection, you can damage the chopper but the event centers around killing the enemies in the area, so it'd be a bit of a waste. The second half is when you want to be utilizing all of your grenade launcher rounds you've accumulated to try and destroy it. In both this fight and the one later in the chapter, you need to keep moving and don't stop, and you also need to try to avoid walls if you can. The chopper will sometimes shoot explosive rounds at you and that can kill you extremely quick along with the machine gun fire.

As long as you're moving a lot and keep sticking around cover, you should be able to kill it with enough grenade launcher rounds. Just be sure during the second encounter you grab every herb you can get your hands on inside of the restaurant.

-Iluzija


Derived from the Serbian word of "illusion," the Iluzija is one of most unique boss battles in the game but has some exploits you can take advantage of, plus a place to nab a few herbs and skill points.

The main weapon of choice for fighting this guy is the shotgun, so you'll want to have plenty of ammo on hand before fighting this thing. Once you get to the actual boss battle, the first thing you should do is duck into a side alley where a couple boxes will be. Be careful though, the serpent may ambush you in there. After that, duck straight into the vent and crawl down it, while also keeping an eye out for it to try and grab and attack you.

Make your way to the next room after smashing the boxes in the room open and you'll come upon a pantry or kitchen of sorts. There should be several boxes of shotgun shells in the corners and sides of the room and a vent with red lights outside of it you can duck into. Crawl through this vent and you'll eventually come up to another room full of more boxes, 2 Green Herbs, and a crate with 5,000 skill points. Make your way back but beware an ambush from the snake.

This is where the actual fight begins.

You'll need to keep a sharp eye out for the snake and it can be easy to miss, so try to listen and even point your gun around, see if it refracts the laser (if you're using classic aim). He likes to come out of the corners of the room and even slink through the roof to try and catch you off guard. Other times, he'll slink out in the middle of the room and try to bite you. When this happens and the camera tries to pan on him, you'll want to jump out of the way with a sideroll *immediately* to avoid the attack, then keep moving to avoid another hit.

Just keep shooting him until he goes to the next section.

As soon as you regain control after being knocked down by the snake, make a B-line for the lever that controls the electric current and throw it the second you get there. Even if the snake is there, it'll always be scripted that the first one fails and the plug comes undone from the machine. It'll only work for real after it goes through the cutscene. Have your partner try to lure it into position and throw the switch to kill it, just be sure to do it about a second before it actually hits the water cuz there's a small delay between pulling the lever and the electrical current activating.

Grab the two green herbs by the switch and off you go.
Gameplay Tips - Boss Fights [Chris' Campaign Part 2]
--[Chapter 3 cont.]--


-Leon and Helena (Competitive Intersection)


For those of you who read Leon's Boss tips regarding this same intersection, it works basically the exact same way but with very minor twists.

This section is a 2-part race, and winning each of the two sections rewards you with Skill Points. The first half involves sprinting down a laser-filled hallway where you need to dodge the lasers and destroy the laser generating fuses at the end. Shoot them to break them quickly, then jump into the elevator. If you were quick enough, you'll be treated to a few boxes of ammo and two crates full of skill points. If not, you'll have to take the stairs and miss out on a bunch of skill points.

The second half of the race is inside the two prototype testing labs. To win this, you need to be the first pair to open the door, and the winner will receive over 10,000 Skill Points.

Unlike Leon and Helena, where you have to activate a Terminal after Hunnigan says so, you need to open up a fusebox the second the exploding "hockey pucks" show up, then start trying to bypass the door. If you're playing Solo, after you open the box, your bot partner will automatically start working on this, whereas if you're with another player, you'll both quickly need to decide who will do the QTE with the fusebox and who will do the shooting and covering their teammate.

The player doing the shooting has two options; run over the prototypes to make them detonate, or shoot them (preferebly with the shotgun) to make them roll over to Leon and Helena's side and try to interrupt their attempt to hack the door. If you go with this approach though, you'll need to keep your shotgun reloaded constantly or you can get your partner not only killed, but make you both lose the race.

Whoever wins gets to go into the next room and loot the skill points, while the loser has to stay in their room for a few more seconds with sped-up prototypes until the winners advance. Once the door opens, go after Ada. It doesn't matter who gets to her first, the cutscene's always the same.

--[Chapter 5]--


-HAOS


The final boss "war" against HAOS is an epic struggle, but a tough one. The fight is broken up into multiple sections: the chase, the fight in the flooded atrium, the second chase through the walkways, and the final battle in the flooded storage room.

The first chase is simple enough as long as you don't stop for any reason and you don't screw around for anything, as well as have a good sense of timing with a part where you'll need to slide. Messing up at any point or taking a second too long will get you killed. You're also going to need whatever shotgun ammo you have left to best deter the giant BOW when he stops you a couple times throughout the chase. As long as you just move quick and shoot him quickly when you need to, you should come out relatively unscathed.

The flooded atrium battle is actually fairly easy, the only advice I have is that you just stay as far away as you can from HAOS so he doesn't hit you with his sweep attack. If you find yourself out of ammo... well... you can do what I did as Piers once, and just run up to him, stay behind him, and keep melee-ing him until he drops dead.

Don't believe me? Give it a try sometime, I pulled it off on No Hope when I ran out of ammo to fight him with.

The chase through the catwalks is simple too. Like the first chase, you need to be quick, shoot when you need to, and advance the second you have the chance. If you screw around or wait too long for any reason, you'll die.

The final battle is the hardest and most complicated part, but accurate aim and conservation of bullets (as Chris) will see you through the fight. There will be two glowing spots on HAOS's sides that you'll need to shoot, and you can hit them as either Chris or Piers (if you just do a click and not charge up a shot to do accurate, singular lightning bolts). Just make sure when you take both of them out, that HAOS is on the ground with you, otherwise he'll be in a position where Piers can't break his caccoon with a charged attack nor will you be able to stab HAOS's hearts.

Repeat the process of shooting the bulges at the sides, Piers destroying the caccoon, and either of you running up to stab him up until the 3rd heart. The game will trigger a cutscene by knocking away Chris, who will have to crawl up to and kill HAOS, while Piers holds up the bioweapon with a lightning storm. It's easy as pie, provided if a player playing as Chris knows they need to crawl forward to kill HAOS.
Gameplay Tips - Boss Fights [Jake's Campaign]
This section will be discussing Boss fights in Jake's campaign, but fair warning, there will be spoilers ahead, so unless you completed the game or don't care much for the story, I'd advise coming back here later. That said, let's tackle the newcomer's boss fights.

--[Chapter 1]--


-Ustanak


Your encounter with the Ustanak will be the first of many battles throughout Jake's campaign against the Nemesis-like enemy. Your first battle begins shortly after the start of the first Chapter, in a large room filled with explosive barrels.

This is a damage-based affair. My immediate recommendation is spend time prepping yourself for the boss fight, by placing a remote bomb trap, grabbing ammo, kicking down ladders on the catwalks, and getting the Magnum from upstairs if you don't have it already, and you don't have Infinite Ammo magnum equipped. Once you're prepped, just head to the door and begin the battle, just be sure to keep your distance and try to lead him into any remote bomb traps or explosive barrels you can, and try to stick to the upper floor where you'll have a few less enemies to worry about than down on the ground floor, and more linearly placed barrel traps.

-Ogromans


In the intersection with Chris and Piers, you'll encounter giants known as Ogromans. Unlike Chris and Piers' mission though, you don't need to focus on the main objective with the anti-aircraft guns, especially if you're playing alongside bot-controlled Chris and Piers. They'll focus on the objective, leaving you to focus on the Ogroman. Thankfully since you have the Magnum, you can be able to make short work of them provided you've got the ammo and good aim.

Stick to the buildings and shoot the Ogroman's organs when he's close enough. You can keep shooting it with your magnum when he's stumbled and/or jump onto him and stab him with one of his own spikes until he eventually drops dead, leaving you free to grab its' skill points and take out other enemies around the map or help out Chris and Piers.

When the second Ogroman shows up though, it's best to duck into the tunnels with Chris, Piers, and Finn to grab a Green and Red Herb, so that when you eventually make it back to the surface at one of the other buildings, you'll be able to take on the Ogroman. You'll need to be quick though, because Chris and Piers will be trying to destroy the last gun and if you take too long, a jet will bomb the Ogroman and you won't be able to get the Skill Points.

--[Chapter 4]--


-Ubistvo


The Ubistvo is perhaps one of the toughest smaller BOWs the C-Virus has ever produced, seeing as you encounter him multiple times and he doesn't go down easily. There's two encounters against the Ubistvo as Jake and Sherry, and they're before and after the Ustanak encounter on this chapter.

The first encounter is as easy as it gets; pump him with lead until he keels over. One notable weak point to try shooting for is the Ubistvo's "heart" inside the base of his chainsaw. Shoot this, and it'll do a good chunk of extra damage.

The second encounter's not as simple, but at least you'll have help from a mysterious sniper. The first "fight" with him again is damage based, and you'll want to kill him quickly to get away from the endless spawning J'avo and away from the tight space you'd be fighting him at. Do enough damage to him, and you can move on.

Ubistvo will eventually hop on top of the boat with you and try to kill you. This part is damage based, at least up to a certain amount. Your mysterious helper will be able to finish off the BOW with a well-placed round into the crane that'd drop heavy metal beams on it, but only after you do a set amount of damage to him. Once you've done that amount, you can stop shooting, but the only way to really tell when you can stop is by looking up at your shadowy sniper to see if they're standing still at all or about to shoot something down at the crane.

The last mini-fight with the BOW is when Jake is split up from Sherry. As Sherry, you just need to keep your distance from it, and Jake doesn't need to really shoot at it. This is one of those time-based moments, where you just have to wait and the mysterious stranger will swoop in to save the day, so you don't need to fire another bullet after the beams are dropped on it.

-Ustanak


In your 3rd encounter with the behemoth, you'll be joined by Leon and Helena at a plane crash to try and take him down. This battle consists of time and damage-based mini-fights and you'll have to stop shooting him at some points to save ammo when he can't technically be damaged.

Early in the fight, you'll want to break open every box on top of the containers, and you'll want to push over the containers carrying explosive barrels. You'll want to use those to hurt the Ustanak using your pistol rounds instead of precious Magnum rounds if you don't have Infinite Ammo for it. After he takes a certain amount of damage, he'll run off and the music will die down, leaving you, your partner, and the other duo to climb over a nearby fence. Once this happens, Sherry will be split with Leon and Jake with Helena. As Jake, it's in your best interest not to shoot Ustanak until Sherry comes through with the bus, only then can Ustanak be damaged.

The bus will also open up a new area that has more explosive canisters you can knock over, and a giant red container with two ladders on either side all four of you can push to access more boxes, four remote bombs, and a First Aid Spray.

Once you've collected every box you can find, resume fighting Ustanak, and use every bunch of explosive barrels you've knocked over to hurt him until he eventually runs off to swap his shotgun back for his claw arm. You won't be able to damage him when he's running away so don't shoot him when this happens, but do resume trying to kill him when he comes back until he eventually is defeated.

Just be sure to save your heavier ordanance you have and stick to using smaller ammunition like pistol rounds on explosive barrels. You can save a lot of ammo and explosives this way.

--[Chapter 5]--


-Ustanak


In this final encounter with the Ustanak, hopefully you've saved every Magnum bullet you've acquired during Chapter 4 and 5 for this final battle, as well as grenade launcher ammo and a bunch of other ammo you'll need in order to take him down. Depending on the difficulty, you may need to dump a lot into him before he'll go down.

Just be sure to keep moving in order to avoid his attacks with his lava ball of death, and during the second part of the fight on the lava rock, when Ustanak does an overhead swing, you'll want to sideroll *just* before the hit lands. If you keep your distance from him and have stockpiled your ammo, taking care of him should be a cakewalk.

In the final fistfight, one of my personal tactics as Jake is to do Two Quick Shot Combo attacks, wait just a half second for Ustanak to stop stumbling, do your Third Quick Shot attack, Backflip away once or twice, and repeat. Feel free to try it or beat him up your own way, just be sure to watch for the dodge prompt and you'll kick his sorry ass in no time.
Gameplay Tips - Boss Fights [Ada's Campaign]
Welcome to Ada's Boss Fight section, where there will be some spoilers abound, so if you have not played her campaign already and want to avoid spoilers, best not check this section out yet. If you're still sticking around, then let's get rolling with Ada's bosses.

We're also going to assume you've actually played through the other three capaigns, which you should have done, so this section will be fairly short and vague in details when discussing crossover bosses with Ada, since you should have already gone through them before. We're also going to assume you're playing by yourself (which you should also be doing on your first run, since Ada's campaign is designed to be played that way).

--[Chapter 2]--


-Deborah


Deborah is a multi-part boss fight where the main strategy is precise aim, debating on how you want to tackle a specific part of the fight, and knowing when not to shoot.

In the first section right at the beginning, Helena will be attacked by Deborah. You don't need to shoot her, because Helena will be doing a Quick Time. Once she does it, Deborah will hop off Helena and trigger a cutscene to send you all to the lower levels. Proceed until you come to the fight at the bottom.

You have two options of dealing with Deborah, after the first time you knock her down and Helena goes through a cutscene with her. The first is you either shoot her glowing yellow pores (weak spots), or shoot her down so she's on her back and her tentacle comes out of her face where you can run up and punch it. Either option you choose, once you take out all 3 glowing spots, you're done, and you don't need to shoot her again. Just wait for Deborah to go through a little animation routine and you'll be moved onto the next section. Unless Leon is an intersected player, you don't need to use ammo to cover him for this part, he can take care of himself.

In the mine cart ride, lay down to avoid the barricades, and you can choose to either shoot Deborah's glowing pores again to make her stop attacking you, or just ride the cart out and avoid her downward attack.

Finish up the boss encounter and proceed to the next area.

--[Chapter 3]--


-Ubistvo


In Jake and Sherry's campaign, you witness the chainsaw-wielding BOW flying out of the sky and crashing in front of them, which happens after a bit of a brutal war between it and Ada.

You'll start your encounter with this monster by running away along catwalks and signposts. Slide and sprint your way through it and perform QTE's when necessary and you should be able to get through it with relative ease. The next part is the hard part.

You'll enter a courtyard filled with zombies (after a certain Lepotitsa from Leon's campaign landed there) that you'll need to either kill or evade to get to some keys to head out to the next section, only to be interrupted by the Ubistvo. The best tactic for dealing with him is trying to stay away from him and stick to higher ground, because you'll be trying to avoid zombies from grabbing you and putting you in a vulnerable position with the Ubistvo. You won't have much of a choice but to use whatever ammo you have on him, because the last thing you want to do is try to get up close and melee him.

After you beat him, you'll get on a bus where he'll come back for Round 3. This is a time-based encounter and you don't need to attack him, just do your best to avoid him. To do so, run to either end of the bus and you'll get a prompt, which will let you swing to the opposite end of the bus where hopefully you'll evade his attack.

(If you're playing as Agent during this section, since he can't use a grappling hook, the only thing you can really do is slide past him but that takes just as much luck as it does skill)

Try to survive until the cutscene.

After that, you'll be in a regular boss fight where you'll have to try and kill him. Smash open all of the nearby boxes and use whatever you have left to try and kill him. Just be ready for the 3-prompt QTE to come halfway through the fight. The only way you'll know when you're done is when you get a radio transmission saying Ada's been spotted at the harbor. You can quit shooting at the Ubistvo once you hear this, because after the bit of dialogue, the game will go into another QTE and then a cutscene where you'll move onto the next area where you'll have to cover Jake and Sherry after you've thrown the Ubistvo to them.

At the intersection point, there will be multiple boxes and vases that *should* carry Sniper Rifle ammo that you'll need to use to cover Jake and Sherry, especially if they're controlled by players. If they're controlled by bots, you can technically leave them to their own devices to fight the Ubistvo but they'll take a long time to do it. Sniping it is just a quicker way to get it done.

Proceed to the crane, where you'll need to help shoot the Ubistvo again until a cutscene is triggered with Ada and you're able to hit a button to shoot the beams down and crush the BOW. After that, just wait for the boat to start drifting toward the helicopter and the button prompt, and swoop in Spider-Man style to save Sherry and finish up the chapter.

--[Chapter 5]--


-The Gunship


This guy's actually easy to take out, provided you're careful and you fly the chopper behind the building when he shoots at you (especially with the missles). Just make sure you saved your missles up until this point, then unload all of them at the chopper. Don't worry, you'll get 6 more when you fight Simmons and 6 more on the last chopper section.

-Simmons 2nd Form (Dino/Tyrannosaurus Simmons)


You'll be able to freely move the chopper during this boss fight, and you'll be intersecting with Leon and Helena to help them fight it off. The fight is relatively easy thanks to the ease of the chopper, just the quickest way to take Simmons down is to shoot a piece of armor of his back where some eyeballs are hiding and shoot that 'til he turns human for Leon and Helena to beat up. Save your missles for after the jeep ride Leon and Helena take and only use them when Simmons is in his Dino form. Other than that, just avoid the cars he chucks at you and you should be fine.

-Simmons 1st Form (Cheetah Simmons)

This fight's fairly simple as long as you have the ammo, which you can freely use since this is the last boss battle in the game. The only advice is that you need to know when to shoot and when not to shoot.

At the beginning, after Ada gets off the elevator and onto the first skywalk, don't shoot at Simmons. This is a timed event where you'll be waiting for Leon and Helena to climb up to a certain height, before Ada will swing away to a broken skyline. Once here, unload on Simmons. Hopefully Leon and Helena will be making it easier for you by sniping at him.

Once Leon and Helena start climbing again, you'll need to cover them from Simmons or the duo will end up taking a long time to get up top. You can choose not to shoot Simmons (especially if the duo are controlled by bots) without worrying too much, but it may take them a while, perhaps less if it's a skilled player-controlled Leon who can dodge and kick Simmons with the QTE's.

After the touching cutscene with Leon and Ada, finish the battle by unloading everything you have into him to kill him. When Leon is knocked off the ledge and Simmons is about to kick off, the game will be waiting for you to do a set amount of damage to Simmons before you can hit the button prompt and take him down once and for all.
Misc. Info - Recommended Campaign Order
This section is honestly subject to opinion, but there is a way the campaigns are designed to make experiencing the story more enjoyable.

One way you could play the game is in this order:

Leon > Chris > Jake > Ada

This is basically how they are listed, and there's nothing wrong with playing this way.

However, I do strongly recommend if you want to experience the story in a better way, make sure no matter which order you play, you play Ada's campaign last. The other three are designed to be "questions" while hers' is meant to be "answers." If you play her campaign first, it practically spoils the entire story for you, and that would be terrible for your first time experience.

I do have a recommended play order though, not because of gameplay, but because of how the narrative is broken up and when certain events take place. It's hard to explain without going into spoiler territory.

Here's my recommended order to play the campaigns:

Jake > Chris > Leon > Ada

By all means though, play the campaigns in any order you'd like. Heck, if you want to, you can mix it up by switching in between campaigns. You don't have to play one at a time if you don't want to. There are other guides out there that tell you the chronological order to play the game (since not all campaigns are happening at the exact same time), and that's totally a great way to play the game.

But once again, play whichever order you like, just be sure to save Ada's campaign for last.
Misc. Info - Intersections - What Are They, and Why You Should Experience Them
Resident Evil 6 has one major, very interesting gameplay twist that makes the game unique, and contains some of the best moments in the game.

Enter Intersections.

-------

Intersections are moments throughout Resident Evil 6 where characters from one campaign will cross over with characters from another and can help each other out. Basically, if there are players in one campaign in the same point of the game you're in, you'll be able to Intersect with them and help each other out through a part of the game, going up to potentially 4-player co-op in these sections of the game.

Now if you don't cross over, you can still play with bots just fine and be able to advance the plot. However, that doesn't mean nearly enough as it does to play with other people. It instills a sense of comradarie and karma, that you helped another person on their journey as they helped you with yours.

You'll definitely want to experience these every opportunity you can, and it may even be worth it just to restart a game just so you can cross over with another player.

--How to do Intersections--


It's really easy. You just need to have the right settings enabled when you start the game and just play like normal.

You need to make sure you have the game set to play Online and not Offline, and you need to have Partner Join set to Allow or Don't Allow, and not Private. The Partner join setting is only restricting whether or not you have someone play as your partner for your campaign, and will not stop you from playing in the Intersections unless you have it set to Private.

After that, just play the game like you normally would. How do you know you're at an intersection? Well, you'll notice it when you get a big black screen that says "Searching for partner." with a countdown timer and a cancel option. This means the game will try to find people playing on the same section of the game you are. If it runs out and doesn't find anyone, then the game will set you up with bots.

Want to try again? Awesome! You may end up doing this several times, but it's worth it once you succeed. Basically, exit your game and return to the menu, then just Continue the campaign, and it'll re-initiate the counter.

Lastly, if you do actually manage to get into an intersection you don't have to worry about your game being interrupted in case the other players you're crossed over with die. It'll show that they "left" the game if one of them died and you'll be able to continue on uninterrupted, just minus the help (and comradarie) of having other human beings participate in the crossover.

----------------------------

That's all there is to intersections, so get out there and give them a try!

Or if you're like me, you can go back and replay the game specifically on the Intersection parts of the chapters thanks to the Chapter Select feature and help people out as your favorite character. You might even find me doing that as Ada someday.

Want to see the Intersections in action? Below are videos by other players taken straight from intersections in the game (warning, minor spoilers ahead, watch at your own risk):

Misc. Info - Why You Should Play with Agent Hunt Enabled
--What is Agent Hunt?--


Agent Hunt is another unique addition to the game. For veterans of the cult favorite Dark Souls (or its' predecessor Demon's Souls), they might be familiar with how the aspect works.

Like intersections, there are certain sections of the game that can open up to four players, but unlike intersections, this is a more competitive mode. Agent Hunt allows players be able to invade your campaign as creatures, and try to kill you.

Here's the official trailer from Capcom of the mode in action, from the creatures' perspective (Agent Hunt mode):


It's not too farfetched from being a "troll" mode, and it may be something that could ruin your experience. However, let me give you two reasons why you want to play with this mode enabled:

--First Aid Spray Drops--


In my experience, you can only find First Aid Sprays in specific parts of the game and not on enemies. Even with Item Drop Increase equipped, I have never found First Aid Sprays drop from creatures, that is, until I played with Agent Hunt enabled.

Basically, as you kill zombies (some of whom are potentially players), the players you kill may drop First Aid Sprays.

This hopefully should be reason enough for you to consider leaving the mode enabled, but if you need more incentive...

--Competitive Play--


It's a really unique experience, just playing through your game and having someone suddenly come in as one of the drones of undead or infected, knowing any one of them could be a player out to get you. It adds an extra level of tension and suspense, which does great wonders to make the game feel more immersive and even scary at times, because you're trying not to die and someone's out there to get you.

Apart from that though, it's also fun seeing this as a way to compete against people trying to stop your progress and can fuel adrenaline in that inner competitive player in you.

-----------------------

So that's Agent Hunt in a nutshell, at least from the perspective of playing through the campaign.

All of this, in other words though, all of you, let people invade your game, profit.

Want some tips on how to spot and kill Agent Hunt players? Visit the Agent Hunt - Fighting Agent Hunters section later in the guide for more info!
Misc. Info - Co-op In Ada's Campaign
Fun fact. On the console version of RE6, a patch was added a few months after the game's release to allow Ada's campaign, previously a singleplayer-only campaign, to be played co-operatively. This patch was released with the No Hope difficulty as well, probably for a good reason considering the difficulty of No Hope.

--Joining--


Here's why there's a section of this guide dedicated to playing Ada's campaign in co-op. It's set up completely different compared to the other 3 campaigns because it was originally designed, and intended, to be played Singleplayer. Trying to set up a game is different as well. Normally, in the other 3 campaigns, players can join in at any time.

However, in Ada's campaign, the only way you're able to join is if the player hosting the game is in a lobby. If they start playing, players are not able to join her game. Be sure to keep this in mind if you plan on playing this campaign with someone.

--Playing as Agent--

Players joining Ada's game takes on the role of "Agent," a character not unlike fan-favorite HUNK. As Agent, you can't interact with any of the puzzles, open chests, open doors, pick up key items, or interact with anything else, and you can't advance the story; only Ada can. He's not part of Ada's story, since Ada's campaign is designed to be played solo and her story reflects this.

What this will mean is if the player playing as Ada advances the story or goes to an area that requires Ada's grappling hook, Agent will teleport around the map. If Ada goes to a door to transition to the next level, she doesn't need to wait for Agent to come to the door, the two of you will transition to the next area.

It's safe to say first-time Agent players will feel like they're being yanked around by the person playing as Ada, but once again, her campaign was designed for one player in mind. Agent is mainly in the game to assist in combat on Ada's campaign, and can be monumental in No Hope (so it's best to play as him after you've played Ada's campaign by yourself or if a player who did that joins your game as Agent).

---------------------------------------------------

Hopefully this gives you information you need to know in order to play Ada's campaign co-op, and once again, I'll remind you to save Ada's campaign for last, and if you want to join, play through the game by yourself first or with a partner who played through it already.
Misc. Info - The Many Benefits of ResidentEvil.Net
So now hopefully you've spent some time playing Resident Evil 6, now let me show you something that may potentially enhance your experience in more ways than one.

Enter Resident Evil.Net:

(Video brought to you by Capcom)

Okay, so you watched the trailer. Still not convinced?

Alright, let me tell you why it's crucial you get on RE.NET, and get on every day. I know many of you out there are the completionist type, others of you are highly competitive, looking for ways to be better than your fellow survivors in some way, shape, or form. RE.NET can get your fix on that.

Three main reasons why you want to use it is for Stat-Tracking, Costumes, and Events, but there are other fun distractions you can fiddle with such as reading documents you collect from Emblems you find in the game, or build a Diorama. But let's be honest, you're here for the good stuff, so let's talk about those three points.

--Stat-Tracking--

First off is the Stat-Tracking aspect. This allows you to track everything you do in the game and you collect experience (and RE.NET points) in the process, so you can level up on the site, show off your skills with your many stats including weapon kills, accuracy, melee kill types, and so on. It can be a bit of fun to compare with your friends who also have the game to see which of you two are the far more skilled survivor. Some people care about their stats, so RE.NET is a great place to check outside of the game.

--Costumes--

Looking for more sustenance? Want to know what to spend those points on? Are you a fashion fanatic and completionist? Look no more than the Costume Unlocks on the site. In the game, you're able to collect what's called EX1's, provided you do well in The Mercenaries (I'll cover this in a later section). EX2's are costumes you spend your points on (it costs 60,000 points for each costume) on RE.NET. They are basically glorified recolors of the EX1 costumes but they're still fun to collect. However, the real prize you want to set your eye on, and I'll mention it again in the tidbits about events, are the EX3's.


These are throwbacks to the classic Resident Evil characters from the Playstation 1 era. Chris, Leon, Ada, and Sherry to some degree get their classic look from their older games, while the new characters Helena, Piers, and Jake all get the pixel treatment. These are costumes that can only be obtained during specific, community-driven Events, which is explained in the next segment.

--Events--

The third and final reason you want to visit the site is because of Events. These are competitions that will pop up every few days to challenge players in a number of ways, ranging from killing a specific enemy the most times in a certain timeframe, or getting the most Onslaught wins, or even as diverse as Speedrunning chapters as quick as you can, killing with specific weapons, and even events that require you to work together with a Team. You're able to win great prizes (apart from bragging rights) such as massive amounts of RE.NET points to spend on costumes, pimping out your RE.NET profile, dioramas and so on, but more importantly, the coveted EX3 costumes.

EX3 costumes are acquired through large-scale cooperative community events that require all members to kill specific enemies, and a massive number of said enemies, in order for all participants to receive a ticket to claim an EX3 costume. In fact, if you've read this far, hopefully you might be compelled enough to collect the EX3's and be ready to participate in any EX3 events to help your fellow community members get their own.

-----------

That just about covers all of the major bullet points, and reasons, to sign up for RE.NET, so if you haven't done so already, hop to it and take advantage of collecting those points and costumes as well as the fun-tacular events!

A quick note though. To get the most points, you'll want to play the game a lot since actually playing awards you with points, and you'll want to log on every day because there are Login points and Consecutive Login Bonus points as well.

So what are you waiting for? Click the link below to sign up with ResidentEvil.Net now!

http://www.residentevil.net
Misc. Info - Some Achievements and Easter Eggs
Let's take a break from skill-oriented things and talk about some obscure achievements and some silly Easter Eggs.

Let's start with some Achievements!

---Achievements---

--Heirlooms--

There's 80 Emblems to be found in Resident Evil 6, and while I'd love to show you each of their locations, I'm too lazy to make my own video or hundreds of screen shots to point them out, and there's not enough space to describe where they all are, so I'll let this fella show you where to find them all in this video:


--Hard Choice--

Hard Choice is an achievement that's also a partial Easter Egg in Jake's Campaign on Chapter 4 and can only be performed by Jake. This is done during the Intersection between Jake and Chris during a helicopter battle, and you'll need your Revolver (and some ammo) in order to do it.

After the first section, you and Sherry will head to another area of the map, where Chris meanwhile is climbing to the roof of a building the two of you will be just underneath. Around here is the time you'll be able to get the achievement, but you'll have to be quick, because Chris and Piers will be trying to destroy the chopper and you need to do this before then.

There will be a few places to climb up to a higher section, and there will be poles Jake can be able to swing across to one of two rooftops. You'll need to go to either one of these rooftop points and wait.

What will happen is that the Chopper is going to be carrying enemies on a rope and dropping them off on these two rooftops. It's random when and where this will happen, so patience is key. When the time comes the Chopper brings a group of enemies to your rooftop, this is where you'll have to be fast. You can shoot off the enemies from the rope once they're over your head, but you'll want to have a Remote Bomb planted or Flash Grenade handy there on the roof with you to kill or stun the J'avo once they touch down.

What you're going to be doing is climbing the rope, and if the J'avo are still alive, they'll try to shoot you off. Take too long to kill them and the chopper will fly away.

So use your bomb or flash grenade to stun them at just the right time (when they're not being protected by the animation of sliding off), then quickly run up to the rope, hit Space, and start tapping the R button.

You could try climbing without having to shoot the J'avo, but you'll have to hope they don't shoot you off. Best reason to do this is if you're playing on Amateur difficulty.

Here's a video guide (not by me) to getting the achievement:


--Sneaking Around--

This is a bit of a hard achievement, but basically there's a section in Ada's Chapter 4 where you'll be relying on stealth. You'll want to have your Crossbow handy and some non-explosive bolts to get this one, and you'll want to have mastered your sliding ability to get this too, because you'll need it to get to cover at certain points when the camera changes on you.

It's best you get this after you've played this section a few times to get used to the camera angle changes. If you screw up, don't fret. Just open up your Menu, restart the last checkpoint (the Pin symbol) and start again.

Here's another video guide on how to get the achievement:


---Easter Eggs---

--The Playground--

This is an area accessible in Chris and Ada's Chapter 3. You'll cut through an alley and come up to a courtyard where there will be a Playground nearby.

How about taking a load off from zombie killing and relax a little?

As Chris, run up to the Panda, and you'll get a magnifying glass icon. Hit the Space Bar and go for a little ride on it!

Next up, there'll be a couple slides (a blue and yellow one) on top of a Jungle Gym. Hop up there, go to the Yellow slide to get another magnifying glass prompt. All 3 characters, Chris, Piers, and Ada, have their own unique slide animation, so be sure to give all 3 of them a try on it!

Below is a video of the trio having some fun on the playground:


--Cooking/Grinding Zombie Limbs--

There are several regenerator (Rasklapanje) sections throughout the game. You can be able to shoot their torsos from their legs, as well as their hands from their body.

Want to know something fun you can do with the hands?

Get one of them to come by boiling pots, microwaves, grinders, furnaces, or even a toilet, and you'll get a prompt to pick them up and throw them, but instead the character will treat you to a hilarious way to kill those pesky hands.

Check out these videos of funny hand-killing action!


Here are some locations and examples of things you can throw the hands into:

Leon's Chapter 4: Microwaves, Furnaces, and Boiling Pots

Chris's Chapter 4: Microwaves, Boiling Pots, and Toilets

Jake's Chapter 5: Disentegration Machines (Left of the 2nd Battery levers) and Grinders (in the middle of the room with the 3rd Battery levers)

Be sure to give them a try sometime!

--Lounging Sherry--

At the very start of Jake's Chapter 3 when playing as Sherry, there's some fun little context-sensitive actions you can perform while you're waiting for Jake to break out of jail.

The first is that Sherry has a TV and a Radio she can turn on and listen to while she waits, and the second is that she can relax and lounge out on her comfy bed. Just approach each of these and hit the Space Bar when you see a prompt, and you'll be treated to a bit of eye candy with your fun tunes.

Kinda silly that she complains later about her "crappy room" when she has all kinds of things to play with compared to Jake, eh?

-----------

That covers all of the major and minor easter eggs, apart from the Stagla Gas Stations as seen in prior Resident Evil's, as well as some of the more obscure and harder to obtain Achievements.

Happy hunting!
Agent Hunt - An Introduction
So by now, you've probably played the campaign a lot, or perhaps you just wanted to know what Agent Hunt is and what it's all about.

In short, a "troll" mode.


Basically, there are segments throughout Leon's, Chris', and Jake's campaigns that people can be able to "invade" as a creature and try to kill the player(s), or at least hinder their progress.

---------------------------------------------------------------------------------------------------------------------------
An Important Note about Agent Hunt: This isn't a mode designed for players to be a super-empowered zombie. The first thing you need to understand is you're invading another player's game who are trying to progress in the campaign or even the story for the first time. It'd be unbalanced, and frustrating, among many other reasons, if players could control overpowered zombies. They're overpowered enough as is by being able to control them.

Basically, that means you're not supposed to be an all-powerful zombie or creature, so don't diss the game for feeling underpowered or if you die a lot, because, once again, you're invading some person's campaign and they are trying to progress through the game as if there were normal zombies in it, so you should be no different.
---------------------------------------------------------------------------------------------------------------------------

Now with that out of the way, let's dive into Agent Hunt mode proper!
Agent Hunt - Tips and Strategies
Hopefully you've read the Introduction section to Agent Hunt, so we'll just assume you did. If not, I'll say this one more time:

Agent Hunt is designed to make you as powerful as any other enemy in the player you're invading's campaign. Making you more powerful than that is gamebreaking and unfair to the player who is trying to progress through the game.

So, in short, you're handicapped so it's fair to the player being invaded. If you don't like that, then don't play Agent Hunt. Anyway, moving on.

-------------------------------------------------------------------------------------------------------------------------

--Know your Monster--

The real trick behind Agent Hunt is knowing how to use each of the different creatures you can control. It can be as simple as the slow, lumbering zombie that can spit, chuck things, whack the survivor with weapons, or grabbing them, or it can be as complex as playing as the mutating J'avo. Each of them operate differently and require some practice to fully master.

For example, zombie dogs are usually hard to steer when they're sprinting and even harder to line up with a target, but Z and C (default controls on the keyboard), while sprinting, allow you to do quarter-turns, so if you miss, you can tap one of those buttons twice to do a full 180 and try it again.

You'll need to really experiment with each creature since they all operate under different rules, control differently, use different amoutns of stamina, and so on. Not all of their controls tend to show either, such as sidestepping (Z and C, again) for every creature. Once you've spent a lot of time practicing with each, hopefully you'll know how to use them once the killing starts.

--The Element of Surprise/Hit and Runs--

You're weak, the sooner you accept that, the sooner you start relying on strategy, cunning, and the more tactical approach in order to successfully kill your target. Always running after a survivor with reckless abandon is a good way to get yourself killed and not even get a hit in.

The real trick is to always try and sneak up behind them, and try to perform hit and runs if you can't get them in a position to keep doing attacks on them, at least as a J'avo. A zombie on the other hand is basically spawn fodder; you need to be aggressive and leap at them (using the Space Bar to dash, then click to Lunge at them). Very rarely as a zombie will you be able to get a punch or a weapon hit on a survivor and even more rarely are you able to hit them with a thrown weapon or a spear.

These are just normal enemy types though.

When it comes to special infected, they need to be utilized according to their abilities. Shriekers for instance need to be at a distance and keep screaming, while they fill up their lungs away from the survivors. Strelats, the big lizards, on the other hand, use up a lot of stamina with their attacks, so you may need to perform hits, run away, then try to rebuild your stamina before attacking again. You may also want to try using your smog as a trap in the instance they come chasing after you.

Once again, learn how each creature operates, then figure out how to use them smartly. If you have that mastered and you learn to work within the shadows, you'll be able to do a great deal of damage.

--Respawning--

You'll get into bad positions from time to time, and in the case of the regenerators (the Rasklapanje), you'll be manually respawning often. You'd want to do this if in the regenerator's case, both of your body parts are dead, or in other creatures' cases, to save from chasing a player down and just get to one of the upcoming spawn positions if they're moving to a new area with different spawn points in it.

Using the manual respawn is going to become crucial in order to not only get a better angle, but get in the fight quicker than running everywhere.

--Time your Attacks--

This has more to do with when to attack in animation cycles more than actually attacking a player. Basically, when a player is being revived, or dying, they'll go through an animation routine before they can be hit again. You can attack and attack all you want the second they're knocked down but you won't actually hit them right until a certain time in their animation is done (namely the second right before they're able to aim their weapon). If you've gone down a lot in the campaign, you'll know when this moment is, and you'll be able to exploit that.

If you're really good with your timing during the animation cycles, you can finish a player the split second they're able to be attacked and won't give them a chance to kill you, but once again, it requires precise timing and a little luck their partner doesn't kill you first.

--J'avo Fast Attack Trick--

The last thing I have to offer is something many J'avo-players aren't exactly aware of. Their normal attacks are usually extremely slow, and it requires more luck than skill and tactics to make those work.

That's why there's a much quicker attack up the J'avo's arsenal, and it's what I like to call a "Quick Swing."

To do it, hold the default Aim button (which should be right click by default), then attack with the left click. Your J'avo character will to a little defend himself pose, but this is how you'll be using his much quicker swing attack as compared to his other maneuvers.

This'll work wonders, trust me on this.

----------------------

So that's pretty much all of my Agent Hunt tips, so fire up a game and ruin some poor survivor's day!
Agent Hunt - Fighting Agent Hunters
So you've gotten some tips on how to play as creatures in Agent Hunt, and hopefully you've read the reasons why you want the mode enabled. Assuming that's the case, now let's talk about some tips and strategies for fighting against players trying to kill you as the undead.

--Identifying Agent Hunters--


The game will tell you that someone has joined your game as a creature, but however, it will not show you which of the creatures you're fighting is, in fact, a player. The only way you can be able to tell is by careful observation and watching how certain creatures attack and move.

Four easy ways to tell is by their weapon, latency, placement, and specific behavior.

-Weapon

Agent Hunters can't ever use firearms, not as J'avo, and not as zombies, so if they have a gun, you can quickly rule them out as a player.

-Latency

The quickest way to tell that one of the creatures you're fighting is a player is if they tend to "lag" a little bit as you fight them, like as if their responses from attacks are delayed. This is usually the easiest way to tell but it's only as you're fighting them can you really notice this.

-Placement

If you played Offline at first, or at least with Agent Hunt disabled, almost all enemies are preset and scripted save for ones that come out of "spawn closets." There are some cases there should only be a small number of a certain creature (for example in Leon's chapter 2, Shriekers, during the maze section in the crypts), but there are more of them than there should be.

So if you can memorize placement and spawns of where creatures are supposed to be and notice there's one extra that are there when they shouldn't be, that's a player.

-Behavior

There are two kinds of Agent Hunt players; Aggressive, and Strategic.

Aggressive Agent Hunt players will usually try to attack you regardless of what is in their way and try to get to you and do damage as quickly as possible. They'll almost usually run straight for you without any running around, and they'll always be moving. They'll also be willing to die a lot just to get a hit in so they'll attack you frequently and without remorse. NPC's usually don't do this, because they'll try to flank you at times or go through animation routines and taunts, so if you see enemies charging at you when most enemies are holding a line of sorts, that's a player.

Strategic Agent Hunters are more focused on playing smart and performing "hit and runs," trying to get in at a good time and out at bad ones. If you and your partner are in a good position with no enemies around, these kinds of players will try to wait outside to ambush you, or even try to lead you or your partner away to pick you off. They may also wait for you to get swamped so they can come in and attack you while you're not noticing them. Lastly, they may also try to sneak up behind you when you think you're in the clear. The easiest way to spot them is really just to see if they're not directly attacking you and even running away, since NPC's usually come after you or hold their ground.

----

These are just the major ways you can be able to spot an Agent Hunter in a crowd, but most of the time I'm willing to bet you'll be gunning down everything in sight so it may not matter. However, it doesn't hurt to be able to tell which is a player, since there are chances they can drop First Aid Sprays.

Oh yes, and the absolute way to tell if a creature was a player or not, is after you killed them, if they dropped a First Aid Spray.

--Fighting Agent Hunters--


Okay, so now you should be able to spot them, so what do you do if you're fighting them?

It's actually fairly easy. They can be killed just like any enemy as long as they don't get the drop on you and you don't give them a chance to run away.

The main tactic though when you're going toe to toe with them is try to stun them with melee's, quick shots, and so on, and don't give them a chance to run away or fight back.

You need to kill Agent Hunters quick, otherwise they'll try to get into position for another attack. You also want to make sure that you don't put yourself in the middle of a lot of enemies since pointing them out could be a challenge and you're the most vulnerable when you're split up from your partner and being attacked at all sides. In these situations where you have a lot of enemies around, you need to make enemies with knives and melee weapons a higher priority and deal with them first, since they can be potential Agent Hunters.

-------

That should just about cover how to take on Agent Hunters, so now you should be ready to start playing Agent Hunt in every game and collect their First Aid Sprays to help you on your campaign!
The Mercenaries - An Introduction
So, let's assume you've completed the campaign and you're looking for something else to do. Maybe you're actually a returning veteran from Resident Evil's 4 and 5, where the Mercenaries exploded in popularity since the battlegame's entry in Leon's legendary European Escapade in 4. Long-time fans know the mode has undergone many different variations, but wasn't called the Mercenaries 'til the reboot back in '04.

Anywho, point is, The Mercenaries is back once again in Resident Evil 6 and it's undergone some drastic changes since 5.

Let's start with explaining the mode to the uninitiated.

The Mercenaries is a time-based score mode where you have to rack up as many kills as you can in a short time, which can be extended by finding Time throughout a section of the map. You also have to maintain Combos to get even higher scores, as well as find Combo Bonus items that multiply your points per kill. The mode can be played Solo or with a friend for some added carnage and high score hijinks.

Those are the basics to The Mercenaries, now let's discuss what's changed since 5:

There's now a max of 150 enemies that can be killed (while it wasn't obvious in prior entries to the enemy kill cap, 150 is the number here in 6), and hitting that number ends the match. Bonus Time items are now called Combo Times, and they are usually in unreachable areas and need to be shot in order to activate them. Time Crystals still work like they do in 5, so you can either run up to them and hit them or even slide into them to add time. Another big change that's been added, different enemy types appear as time ticks down. 5 only threw a few mini-bosses at you at certain intervals and more enemies appear at once as you kill them, not the case here. One moment you'll be dealing with slow, shambling zombies, the next you'll be fighting dogs, then before you know it you'll be tackling the big fat Whoppers and the skinless and leaping Bloodshots at the same time!

One other major change from 5 is the inclusion of Mercenaries-specific Skills to complement 6's new Skill system. Almost every ability is specific to The Mercenaries and not in the Campaign, save for a small few that cross over in both modes, such as Eagle Eye and Item Drop Increase. There are ones that benefit you and/or your partner such as Medic to heal yourself and your ally regardless of where they are, or Time Bonus+ to get more time out of Time Crystals you smash. You'll be able to use only one skill at a time, but you can make 8 skill sets like in the campaign to switch depending on what your partner is using or what strategy you feel like using for whichever map you play on.

----

That covers the main aspects to The Mercenaries, now let's get to some actual strategies, yes?
The Mercenaries - Survey the Map and Know Your Enemy
Here's a fact. You will not be any good the first time you play The Mercenaries, or even just the first time on any given map.

Why?

Because you don't know what to expect in terms of special enemies, you won't know where time and Combo Bonus crystals are, as well as ammo and equipment and herbs scavenged around the map, on top of booby traps. You also won't know what enemies to expect at which time and how to deal with them.

Here's where your first Mercenaries Tips begin:

--Survey the Map--


The first thing you want to do in ANY first time playing a Mercenaries match is not to compete for a score, but to study your surroundings and learn the map.

You need to figure out where all of the choke points are, general idea of where the spawns are so you can have less directions enemies can come from, know any escape routes for tight spots, take note of where all booby traps are so you can lure groups of enemies to it or make a stand, and find out where all of the Time Crystals are, the Combo Time Bonus Crystals as well as where Herbs and First Aid Sprays are.

This should be your first priority so you can learn Routes through a map, and be able to acquire all the items you need, collect every time crystal, and get into a suitable fighting position as quickly as you can. Time is precious so you need to know how to get everything and where to get it all in a very short period of time. Your partner's knowledge (if playing in Duo mode) of the map is also paramount to succeeding in The Mercenaries.

So first thing's first, Learn the Map.

--Know Your Enemy--


The second most important tip is you need to know which enemy you're dealing with (between Zombies and J'avo), and you need to know how to deal with them. In fact, you'll need to account for which "set" of creatures you'll be fighting (like between the zombified citizens of Urban Chaos to the armor-wearing undead from The Catacombs) and figure out the best strategy for dealing with them as well.

Every map has different enemies in them. A couple maps contain Neo-Umbrella soldiers, one of them being assisted by a regenerating Rasklapanje and flying Mesets (Liquid Fire), while the other (Creature Workshop) deals with larger numbers and less emphasis on special infected. Another example is Mining the Depths versus Rooftop Mission's zombie compilations, where the former contains Shriekers while the latter has the chainsaw-wielding Ubistvo.

You'll want to play a map several times just for the sake of learning the map, yes, but also to keep track of what enemies come out on which map, when they come out, and even where they may come from. Enemies usually come out in a specific order, so you'll need to change to a different strategy to accomodate for enemies that are about to come out (for example, get a Time Bonus when dogs come out after the first minute of Urban Chaos, prepare to start countering Bloodshots after the first couple minutes, and bust out your heavy weapons and use exploding barrels when Whoppers and/or armored Napads come around later in the map).

----------

Do both of these things for at least your first 5 or 6 sessions on a map. Hopefully by then you'll know what to expect, and that's where the real strategizing starts to come into play.

Head to my next section to discuss Strategies.
The Mercenaries - Strategies
What you're going to be learning here are some general strategies that can work with almost any map and any enemy combination, but their effectiveness can vary depending on which enemies are coming out, how skilled you are at the game up to this point, and if you're playing with a partner.

Let's cover some general things you'll want to employ into your strategy before we get into actual tactics and battle plans of playing.

--For Beginner Players, Collect Time First, Then Start Combo--


The title says it all. The last thing you want to do while playing in your early games is trying to collect time while trying to fight enemies (and maintain your combo) at the same time, because it gives you far much to juggle at the same time, plus enemies usually don't keep up with you unless you're slowly letting them follow you from Time Crystal to Time Crystal.

You want to do this so you can also let enemies start gathering up and you can focus on collecting what you need first, then be able to divert all your attention to the combo. You'll also want to get to your "battle position" as well and let the enemies gather so you can start killing them without having to waste time hunting them down.

Only once you're very skilled, only then can you try collecting time and doing the combo at the same time but that'll take a lot of coordination and practice. For now, just make it easier on yourself and start with Time/Equipment First, Combo Second.

--Counters and Melee Kills are Key--


Easily the most important tip I can give you. The reason why Melee kills and Countering are so important is because performing them gives you Time bonuses. Most Melee Mills will give you an extra 5 seconds on the clock while Counter Kills can give you a whopping 10 seconds. This may not sound like much time, but when you start racking up multiple counter and melee kills can really add time to your clock, giving you more time to try and complete your Combo.

The Mercenaries is perhaps where you'll want to learn to master Countering, especially when you deal with certain enemies that are instant kills upon countering them, those being the melee-weapon-wielding Zombies, Zombies that leap at you, Bloodshots (skinless zombies that like to leap a lot), and specific J'avo enemies (namely the ones with the tiny bug-head mutations that run at you and swing their melee weapon a lot with reckless abandon). It's usually not a good idea to counter other enemies unless you have a partner helping you and maintaining the Combo and/or if you had the Power Counter skill equipped to do more damage when you perform counters.

If you can master countering, you can almost hold a combo, and the time, indefinitely, at least until special enemies come around. The alternative if you don't have Power Counter/backup from a teammate, or are dealing with enemies that aren't easily countered, is by doing Melee's. These only add 5 seconds at a time, but if you can learn to get enemies into a position for insta-kills (for example, shooting enemies in the face with a pistol can set them up for an insta-kill context-sensitive maneuver), it can work wonders to keep the combo going.

So yes, learn to use Countering and Melees to keep your time extended, and be sure to have your partner do the same.

--Kill Enemies Slowly--


This is derived off the previous section about counters and combos. The main reason why I suggest this is because enemies take far too long to spawn, and then get to where you are. I've often made the mistake of clearing the first group of enemies all at once, then have no enemies to shoot until the combo runs out and therefore wasting a potential really high score (which can only be achieved by a good strategy + the full 150 Combo).

J'avo are the biggest offender of this by far because they only come few at a time and even then they take forever to spawn and get to you.

This is why you want to finish your item collection then hunker down and wait for enemies to come to you. Be patient with your first kill, then try to work on getting Melee and Counter Kills. You may have to also risk waiting on a kill for a few seconds just to stretch it out. If you wait too long though, of course, you'll lose your combo.

Whatever you do, if you want a steady stream of enemies and be able to maintain your combo (especially solo), then kill enemies 1 at a time as slowly as possible, the only excepton being if you get swamped or overrun.

--Improvisation is Also Key--


One major tip I have for you is learning how to improvise. I cannot stress this enough, because every single game will be different than the last, but depending on how quick and well you're able to adapt will determine survival or a game over.

Obviously, enemy drops are random, and where you spawn is sometimes random too. Where items are placed around the map aren't ever random though, but you'll need to account for what equipment you collect from enemy drops.

For example, you may get a lot of grenades and less bullets, so you'll have to figure out how to make the grenades work with your strategy, or likewise, figure out how to make your bullets work with the enemies that are coming at you.

Adapting quickly is the key to winning and even getting a high score, because you'll have to change tactics according to different situations, enemies coming at you, time left, how many time crystals there are, what your partner is doing, and so on, and you'll have to work with what equipment and ammo you get.

--Experiment with Different Characters--


Not too much to tell other than what the title already suggests. You'll need to play around with each of the different "mercenaries" to find out which one best suits your playstyle and has a load-out that works best for you, assuming you're not the type of player who wants to get high scores or S ranks with every character and costume.

This'll take several rounds and different maps with each to figure out what you think is best for what map, and figure out specific strategies with each mercenary according to their loadouts. I can't exactly give you tips since there's so many variants and that'll be a whole other guide to fill out, so the best I can tell you is practice with each and find which works best for you.

--Taunting Regenerates Stamina--


A lot of people won't notice this, since they think taunting is just there for the sake of taunting or being silly, but it actually has some strategic use as well. Pressing the Q key to taunt while your stamina is out, and as long as you don't get hit, will fully regenerate your Stamina.

Be sure to take advantage of this if you're going all melee in a Mercenaries match, because you'll run out quick but using the taunt and being in a position where you won't get hit can get you swinging again in no time.

--------

Now that we covered a bunch of general strategies that can get you through most things, let's get to Tactical bits where we discuss various ways to go about playing a match.
The Mercenaries - Tactics and Tips
In the last section, we went into detail about skills you'll need and general tips on what you'll need to do just to survive in general, but let's talk about some ways to work together with your partner and how to react to certain situations.

Let's start with Early Game strategies:

--Early Game--


Solo:

The first thing you'll want to do is smash all of the Time Crystals, collect all of the ammo, healing items, and equipment, then find an open area where all enemies can easily congregate and start killing. If you counter zombie enemies that are carrying weapons, melee enemies, and shoot enemies/hit enemies in specific ways/places (such as shooting enemies in the head to make them stumble a bit, then run up to them and finish them, or melee them to get them set up for a coup de gras [twirling zombies or dazed/kneeling J'avo], or even just knock them down and stomp their head), you can get through the first while without having to shoot very much, giving you plenty of time to collect supplies for the fights later on in the match.

Duo:

There's two ways you can choose to kick off a Duo match of The Mercenaries:

1. Both players run around and collect all the time and equipment, maybe even have players equipped with Time Bonus+ go after the times while the other just grabs what they need and meet up with his partner at the battle zone.

2. One player grabs all of the times while the other goes ahead and starts the combo. This is situational but it can take advantage of the time the quickest since the combo can be going while all of the time is collected, instead of spending the first minute of the match collecting all of the time. I say situational though because all enemies have to go and attack the player maintaining the combo, and that player needs to be in a situation where all of them will congregate quickly (for example, on the map Rooftop Mission, at the bottom of the stairs to the helipad by the control panel where an explosive barrel is located).

Either method you choose, you'll both need to regroup so all enemies will come to you guys instead of trying to split up their numbers and you both will have to take turns killing and hoping the other has enemies near them. Only time you should split is if each player is by major spawn areas and they keep a few enemies around them in case they have to "save" the Combo.

--Mid-Game--


Solo:

By now you should be well stocked but also swamped by enemies, and staying in one place won't cut it, nor will counters since all of your insta-counter-kill enemies probably are all dead by now, this is around the time where you'll have to stop doing melees and start using your ammo and supplies. However, you'll still need to try and continue killing enemies slowly unless you can spare to chop 5-7 down at a single time with enemies still to spare, especially if Mini-Bosses start appearing in the map.

You'll need to start using whatever heavy firepower you have to kill the mini-bosses quickly, because they can royally jack you and your game up if you let them get too close, plus they take up a lot of extra time just to kill. You should still hopefully have enemies running around that you can use to save the combo while you're trying to kill the Mini-Bosses, but this means you'll need to fight both parties at the same time until the Mini-boss drops dead, then you can hopefully resume your Early-Game strategy.

Duo:

This is roughly the same as the Solo strategy. You both can split up since there should be a lot more enemies now, but to keep them in the same area, try to stay in a nearby proximity, especially if your partner gets hit, and you can collect ammo from enemies they kill. You'll need to work together though once Mini-Bosses start appearing though so you can kill them quickly, and hopefully half or even negate using any special ammo to take them down.

Duo is generally speeding up what you'd normally do in Solo so it makes sense if enemies drop like flies around this stage in the game.

--

(In either Solo or Duo, now's around a good time to use any and all booby traps in a map. If you also still have your First Aid Spray here, then you're doing very well, since that'll be more important in the Late-Game. You should also definitely be using your Combo Bonuses at this time too.)

--Late-Game--


Solo:

A lot of enemies should be on you by now, including perhaps multiple Mini-Bosses. This is where you need to take all of the gloves off and use every grenade you have, and use any ammo you have left. Any bullet not used by the time the clock is almost out (by about 1-2 minutes) is considered wasted ammo/loss of points. Go to town, shoot every enemy in sight, and don't hold back. Be quick about killing them and if you haven't used any traps yet, start using them immediately. Transmitters are paramount at survival at this point as well as any herbs you have left, and your objective is just to try and survive by keeping your enemies off of you (which hopefully will let you maintain your combo).

Make absolutely sure you've used all of the Combo Bonus Crystals too, because that'll also be potentially wasted points. If you're down to the last minute then you'll probably never get to them and you'll be forced to focus on killing enemies.

Duo:

Stay together. This is the roughest point of the match and you're going to have to keep each other healed in order to survive this stage of the game. Hopefully you both managed to save your heavy artillary, this is where you should be using it with prejudice. As long as you're near each other to keep each other alive in case something goes wrong, you both should not only survive but clean up the rest of the hoard.

Once again, make sure you've used all your Booby Traps and Combo Bonus Crystals up to this point or you'll both be missing out on a lot of points, though one player *can* be able to get them while the other holds the combo, but it's all purely dependant on how many enemies break off to chase down the Combo Crystal-hunting player.

-----------

Those are some general tactics you can try to do in The Mercenaries, but feel free to deviate or try some of your own. These are just some of the ones that have worked best for me, personally.

The Mercenaries No Mercy on the other hand... We'll discuss in the next section.
The Mercenaries - Hidden Bosses
One of the major additions to the Mercenaries in RE6 is the inclusion of Hidden Bosses. These special creatures are enemies that can appear in a stage if certain conditions are met. Successfully summoning these creatures and slaying them will net you with additional points towards your high score and there are medals surrounding these Hidden Bosses and when you kill them as well (such as killing them last before the end of a match).

Here are the requirements for each stage to unlock the Hidden Bosses:

Urban Chaos


Napad - Kill 15 enemies with counters before killing 80 enemies.

Steel Beast


Gnezdo - Defeat 25 enemies with "Coup de Grace" attacks before killing 80 enemies.

Mining the Depths


Strelats - Kill 70 enemies before 600 seconds have passed.

Rail Yard


Ubistvo - Get 25 Quick Shot kills before 80 kills.

High Seas Fortress


Gnezdo - Get 40 melee kills before 80 kills (counter kills and "Coup de Grace" kills are considered melee kills).

Catacombs


Strelats - Get 20 Quick Shot kills before 80 kills.

Requiem for War


Gnezdo - Kill 70 enemies before 600 seconds have passed.

Liquid Fire


Napad - Defeat 25 enemies with "Coup de Grace" attacks before killing 80 enemies.

Rooftop Mission


Napad - Kill 20 enemies with counters before killing 80 enemies.

Creature Workshop


Ubistvo - Get 40 melee kills before 80 kills (counter kills and "Coup de Grace" kills are considered melee kills).
The Mercenaries - No Mercy Tips
Hopefully you've read what I've had to say about the normal Mercenaries mode, so let's get onto something a lot more fast, furious, and chaotic; The Mercenaries No Mercy.

I don't have many tips, since you'll generally want to employ the same strategies and tactics as the regular mode, but this time, you'll want to focus more on just killing enemies far more quickly. You won't get many opportunities to counter or melee enemies, so you'll just want to grab equipment, grab the times before you get overwhelmed, then start shooting and lobbing grenades.

Part of the reason for this is you'll be killing a lot of enemies, plus it'll be more difficult to actually lose the combo due to this. This means you'll also be picking up a lot of ammo. In fact, far more than you can carry. You'll be picking it up faster than you can unload it into the infected, so you'll need to get rid of it, especially grenades, as quickly as you can. Don't be afraid to use your Mini-Boss-killing ammo too, at least if it involves explosives, to clear out groups of enemies. You'll be picking up plenty of it before the mini-bosses actually come around, but at least try to save some rounds just in case.

You won't have many opportunities to manage your equipment either, so collecting and mixing herbs will be a challenge. If you have a partner though, you should be able to buy yourself at least a small amount of time to delete one or two items to make room for the herbs, which are far more needed in this version of The Mercenaries than in the normal one.

That's really all there is to say about tips regarding No Mercy. Hopefully this will help you do well there, because you'll need it with that massive zombie count!
The Mercenaries - Unlocks
In classic Resident Evil tradition, to get access to everything the game has to offer, you'll have to work for it by unlocking things. I've stated in an earlier section that Ada's used to be a campaign you had to unlock, and the Mercenaries and Agent Hunt were the same way (unless with Mercenaries, you had a pre-order map, and Agent Hunt you had to complete at least one of the campaigns), until they were changed in a couple patches a little later in the game's life on the console.

A quick note. You'll definitely want to unlock all of the characters, costumes, and maps, because that's the only way you'll be able to access them in the other Multiplayer modes, or even join players playing on maps you haven't unlocked yet.

--Maps--


In the console version, you had to complete Chris's Campaign to unlock the map "Steel Beast," and Jake's to unlock "Mining the Depths," while the other 7 maps were DLC's. Thankfully, PC owners get access to all 10 maps, they just need to unlock them.

Here's what you need to do!

To unlock the map "Rail Yard," complete Mining the Depths with an A Rank.

To unlock the map "High Seas Fortress," complete Rail Yard with an A Rank.

To unlock the map "The Catacombs," complete High Seas Fortress with an A Rank.

To unlock the map "Requiem for War," complete The Catacombs with an A Rank.

To unlock the map "Liquid Fire," complete Requiem for War with an A Rank.

To unlock the map "Rooftop Mission," complete Liquid Fire with an A Rank.

To unlock the map "Creature Workshop," complete Rooftop Mission with an A Rank.

--Costumes--


Each character (save for 2) has an unlockable costume (known as EX1's) that contain different loadouts than their normal "Default" costume, and are well worth unlocking. Some characters you also have to unlock by getting a certain rank with certain other characters.

Here's what you need to do to unlock every costume and character:

-Characters-

To unlock Helena Harper, complete Urban Chaos with a B Rank or Higher.

To unlock Piers Nivans, complete Steel Beast with a B Rank or Higher.

To unlock Sherry Birkin, complete Mining the Depths with a B Rank or Higher.

To unlock Ada Wong, complete Ada's Campaign.

To unlock Carla Radames, unlock every character and their costumes.

-Costumes-

To unlock Leon's EX1, complete any map with an A Rank or Higher as Leon.

To unlock Helena's EX1, complete any map with an A Rank or Higher as Helena.

To unlock Chris' EX1, complete any map with an A Rank or Higher as Chris.

To unlock Piers' EX1, complete any map with an A Rank or Higher as Piers.

To unlock Jake's EX1, complete any map with an A Rank or Higher as Jake.

To unlock Sherry's EX1, complete any map with an A Rank or Higher as Sherry.

To unlock Ada's EX1, complete any map with an A Rank or Higher as Ada.

--EX2's and EX3's--


There are two more extra costumes the characters can get (which share the same loadout as EX1 and count as the same character), but they can only be obtained in the following ways:

EX2: Can only be obtained by using RE.NET points (see The Many Benefits of ResidentEvil.NET section).

EX3: Can only be obtained by the community completing an EX3 Event on RE.NET (see The Many Benefits of ResidentEvil.NET section).

-----------

Those are all of the unlocks to the Mercenaries! Better hop to doing them, especially if you want to play every map on all of the upcoming Multiplayer modes or just The Mercenaries, and be able to play with all of the characters and their costumes with each of their unique loadouts.
Survivors - An Introduction

No multiplayer game is complete without a form of classic Deathmatch and/or Team Deathmatch, and Resident Evil 6 is no exception. However, Survivors is Deathmatch and Team Deathmatch with a twist.

Check out the trailer provided by Capcom below:

Survivors is one of the first 3 Multiplayer modes to ship alongside Onslaught and Predator in a Three-Pack for RE6, and is a mode inspired from RE5's DLC Versus Mode, and is an all-around fun mode to prove who are the better survivors.

--How to Play--

Survivors can be played in one of two ways; Deathmatch and Team Deathmatch, and can go up to a total of six players. The objective is simple; kill the other Agents, and the last player or team standing is the winner.

However, as seen in the trailer, there's a twist to the mode. When you die, you come back as one of the legion of infected. If you successfully kill another player (or even a teammate to deny the opposing team from finishing them off and keeping your team in the match), you'll be able to return in the fight as an Agent (minus some of your supplies).

Throughout the map there will be hidden, powerful weapons, such as the Elephant Killer magnum, the Grenade Launcher, and the Rocket Launcher, that will spawn in a different location every match. Acquiring these can quickly turn the tide of a match in your or your team's favor, provided you can get to them before the enemy does. However, you can only hold one of these special weapons at a time, so make them count before nabbing the next one.

The match ends when either the timer runs out or there's only one player or team left in the match. In the event time runs out, the player (or team) with the most points wins the match. You can get points by staying alive and helping your team, or by damaging, incapacitating, or killing the opposition.

-----

So that covers the basics of Survivors, let's move onto some tips and tactics!
Survivors - Tips and Strategies
We're going to break this section down into two parts; Deathmatch and Team Deathmatch, because both of them play very differently from one another. However, the strategies in Deathmatch can be applied to Team Deathmatch as well.

Let's start with Deathmatch.

--Deathmatch--


-Never Engage in Direct Firefights-

The quickest way to get yourself killed in this mode is by getting into the middle of a battle between you and other players. You could try to see if you can kill them all and try to come out on top, but the chances of that are slim at best, especially if you don't have any of the hidden weapons on the map.

The key to winning is by playing smart and by focusing on survival rather than racking up the most kills. This means you'll want to spend your time scavenging the map, let other players kill each other pick off survivors one by one, and try to play stealthfully. Unless you have the VERY useful "Stealth Movement" skill, attacking players can light you up for all to see, and everyone who isn't in their own fight will come running to kill you, so you'll need to pick your battlegrounds wisely and try to fight as less frequently as possible.

However, once you succeed or fail in killing your target, either way you're going to need to book it or find a choke point to hold your ground because other players will be coming after you and you need to be ready for them, at least for a minute until your marker wears off, then you can try to plan traps or find a new vantage point to take out your opponents.

Either way though, I also strongly recommend you never stop moving to help avoid these conflicts.

-Remember Weapon Placement-

This is another crucial part to winning the mode. The first thing *every* player in the match will focus on is running to all of the different weapon spawns around the map to get their hands on the power weapons. There will always be the three weapons in the match, the Revolver, the Grenade Launcher, and the Rocket Launcher. You'll want to make it your job to get to them first if you decide you want the extra firepower.

However, remember, other players are going to race to these points, so those will almost always be "hot zones" and can be a good way to get into a conflict and perhaps getting yourself killed.

This tip, however, doesn't tell you to always go after the weapons, but instead remember where they are, because that tells you where players will go at the start, and if you pay attention to the bottom of your screen, the game will tell you when players pick up the weapons. When you see all 3 picked up, you know they're no longer in the map and you'll have to do without (if you didn't pick up any yourself).

To round this tip out, you have both options to go after the weapons and give yourself a major advantage in the match, or you can play smart instead, and ambush players that go for them, or even steer clear of the spawn points so you can only pick off whoever's left after the other players kill each other.

-Executions and Animation Invulnerabilities-

The last major tip I have for you is Executions. After you do enough damage to incapacitate other players, you'll need to finish them off with a few extra bullets or a finishing move to kill them.

Like every mode in the game, you'll need to account for animation exploits and invulnerabilities, because you'll need to know when to finish off other players. I strongly recommend reading my section "Gameplay Tips - Animation Invulnerabilities and Exploits" to get a strong understanding of this. When players are downed, they'll be invunlerable for a brief period of time, except this time you don't need to wait until the point they can shoot in order to finish them off. In Survivors, you can be able to attack a full couple seconds before that point to finish off a player.

The best way to finish off a player and not be a deer in the headlights or a vulnerable standing target, is that you'll need to Slide into them. This helps keep you moving and is a much more reliable and quicker way to kill them instead of shooting them (and wasting precious limited ammo) or doing a context-sensitive finisher which locks you in place to be attacked by other players.

So remember, once you down a player, slide-kick into them after a couple seconds to finish them off. After that, get the hell out of there before another player finds you and tries to kill you.

-Quick Recovery-

One of my Advanced Game Mechanics sections briefly covered something called "Quick Recovery." If you haven't been using it in the Campaign, then you'll be abusing it in Survivors. What can determine the outcome of a fight straight away is whoever gets the first shot in, but there are times you'll be able to get away if you're lucky and something else distracts the other player.

Something that can help you get away and not put yourself in a vulnerable situation is by remembering the "quick recovery" maneuver, done simply by holding your Solo Action key (Space Bar by default) while you're being knocked down. This gets you on your feet again and sometimes can help you dodge follow-up shots.

------------

--Team Deathmatch--

-Stay With Your Team-

This is easily the most important tip I have for you in Team Deathmatch, because this is the only way you'll be able to win. You're much stronger as a team and can help each other out by working together. If you're alone and you come against the other players, you won't stand a chance no matter how good you are.

The trick though is the Opener of the match. You and your team have two main options; regroup immediately, or acquire the hidden weapons and then meet up with each other. Both have their share of pros and cons.

If you decide to regroup immediately at the start of the match, you won't be able to get any of the powerful weapons unless all of you travel to one of the spawn locations together and the weapon hasn't been picked up yet, so you'll be at a disadvantage in terms of firepower. However, you'll be at a great advantage because you'll have the combined firepower of you and your teammates, which is essential in the mode. It can make encounters with players on the opposing team who split off from their group to find the weapons a breeze and if you get downed, your teammate(s) can help you.

On the flip side, there's going for the weapons. The disadvantage here is that if the other team goes for the former tactic, and you bump into them while you're quickly trying to get a weapon to help your team, you'll be killed off extremely quick. Even if you're fighting only one other player, if you don't get the first hit and nobody's around to help you, you could be in serious trouble. However, if fortune plays in your favor, you can grab at least one of the weapons and regroup with your team, making you a very powerful force on the map.

My strongest recommendation is the former tactic, however, there's a middle ground with both of them that I also strongly recommend, and that's only going to one weapon spawn point that you know of (making sure you choose a different one every match), and whether or not you get the weapon, regroup immediately with your team afterward.

Playing as a team is the key to victory in this mode, and staying together, healing and helping each other out, are ultimately how you will win the match. Just be sure not to bunch up though; if the enemy team gets the rocket launcher, it's only gonna take one good hit to take you all down.

-Deny Kills-

A minor tip but a helpful one for the team. When you die and come back as a zombie, if you can't hit the enemy player in time to save a teammate or they're in a position where they won't be able to recover, then a good alternative, even if your teammate doesn't like it, is to finish them before the enemy does. This can get you back in the fight and your team still playing the match.
Onslaught - An Introduction

Onslaught is a multiplayer mode unique to Resident Evil 6. It originally came out on consoles as part of a three-mode "pack" containing the other modes Predator and Survivor (well before the Siege mode was released), and is the first multiplayer DLC available for the PC version of the game.

This is Capcom's official trailer for the Onslaught mode prior to its' release with the three-pack:


The premise is simple, especially if you've played The Mercenaries. The idea is to try and achieve the highest score you can within a limited time, but you'll be competing against another player who's in a seperate instance of the map from yours.

--How to Play--

Onslaught is a 1-on-1 multiplayer mode and you play a limited section of the maps from The Mercenaries (which you'll need to play to unlock all of the maps). You have to kill enemies and send them over to your Opponent's instance of the map to try and kill them.

To win, you must either get the most points by the end of the round unless the opposing player is killed. If they die, you win the match.

The game plays almost just like The Mercenaries with the exception that you can only have max combo of 30 and the new addition in the form of Offense+. Otherwise, just like The Mercenaries, you'll have to find supplies around the map to help you survive, hold out as long as you can, and rack up the highest score possible with endless waves of enemies.

--Sending Enemies--

As you kill enemies, you'll see a counter at the top of your screen start to build, and can go up to a total of 30 enemies before that group is sent over. Those enemies building up in your current Combo will be the ones you'll be sending over to the opposing player, and they'll be sent to your opponent when your Combo runs out of time, you Taunt, or as soon as you hit the 30 combo cap.

An important note about sending enemies:

In this mode, what creatures you kill aren't exactly the creatures your opponent will receive. What determines what your opponent gets and how much they get is dependant on the number of enemies you send.

For example, playing on Urban Chaos, if you get 10 kills or less, you'll just send armored zombies, and depending on the number determines some of the quantity. If you send about 16 enemies, you'll send a mix of zombies and Dogs to your Opponent. Sending a full 30 will send a Whopper and a pack of Bloodshots.

--Receiving Enemies--

When you receive enemies from your opponent, they'll appear very different from the rest of the creatures in your map.

On the top-right of the screen in purple shows your Opponent's current combo and what enemies they'll be sending over. As you receive enemies from your Opponent, a number will start to build up under the timer indicating how many enemies are left that have been sent over and need to be killed.

The number will continue to build as your Opponent sends creatures to you and if you don't keep up with killing them all. If the number builds up to 50 and over, the game will enter No Hope mode where the game will become a bit more difficult until you can whittle them down.

Trying to keep up with the creatures your Opponent sends over is paramount to victory.

--Offense+--

One major addition is seen on the left side of the screen during a match shown as Offense+ followed by 100%.

This is your Offensive Bonus.

You can build up your Offensive Bonus, which increases the damage of all attacks, by performing the following actions:

  • Performing Melee Kills - 20%

  • Performing Counters - 30%

  • Taunting - 50%

This can highly benefit your killing capabilities during a match and make it easier to take out groups of zombies with less ammo and effort. The max Offense+ you can get is 300%.

You can lose your Offensive Bonus, however, if you hit the 30-combo max and by taking damage. The more damage you take, the quicker you'll lose your attack bonus until you reach the default 100%.

Be sure to carefully consider your Offense+ when playing Onslaught, since it could make the difference between winning or losing a match.

----------

That covers the Onslaught mode, how to play it, and what everything means, so head to the next section for Tips and Strategies.
Onslaught - Tips and Strategies
Knowing how to play the mode and how to keep track of all your various numbers on the screen is extremely important in winning Onslaught matches, so if you haven't seen the Introduction section, you best do that now.

So, assuming you read the Introduction and you know what the Offense+ is and how to read the enemies being sent and received, let's move onto how to employ these in order to win a game.

--Memorize Item Placement--

Every map has 3 Green Herbs and a First Aid Spray, and I mean *every* map. The very first thing you want to do is collect all 3 green herbs and fill your pill case with them, and get your First Aid Spray to help you if you get into trouble. You'll want to do this every time you start a match before you even think of actually sending enemies over to your Opponant.

Once you've gathered your healing items and any ammo you can scavenge, then you've completed your preparations and it's time to start the fight.

--Tactical Enemy Sending (Manual)--

One of the keys to success in this mode is to know what kills result in what creatures the opposing player will receive. This will take many games and paying careful attention to the kinds of enemies your opponent will send to you via the number of kills they get.

You also don't want to be sending only 30 enemies over at a time, every time, because sending specific amounts can add a wide array of enemies to really cause extra trouble in smaller forms. Plus it can be difficult trying to get repeated 30's.

As mentioned in the introduction, around 16+ enemies (up til about 20-25 or so) will send in dogs to your opponent on Urban Chaos, and these enemies are really good at sneaking up on players and can quickly make them lose their Offense+ bonus since their grab attack does a lot of damage very quickly. If mixed in with Whoppers and Bloodshots from a full 30-combo on the same map, they can cause a lot of trouble for the opposing player in a hurry.

Obviously, every map has different compositions of creatures and it's hard to know what you send over since the game doesn't tell you. The only way to tell is to try and remember how many creatures your enemy sends to you and try to take note of what you get. It's the only real way to tell, and even I couldn't tell you what all sends what. You'll just have to play the mode frequently, play on every map, and be observant. After that, use the knowledge you gain as strategies for enemies to send.

If you want to send a certain amount over at the push of a button without waiting for the Combo to die down, by the way, just hit the Taunt button (Q by default for keyboard players, and LB for controller users).

--Kiting Creatures--

This is a tactic that could be employed on the Mercenaries so you can kill on the move, but it's a lot more critical to do in Onslaught. However, it's harder than it sounds, especially when you start running low on supplies and ammo.

"Kiting" is a term used for staying out of your enemies' reach and making them follow you. In Onslaught, as long as you can keep moving, you'll be ahead of where enemies from your opponent are dropped in and be out of reach from getting grabbed or hit since you don't have any backup or a lot of health at your disposal. This can also let them gather up so you can use traps to kill them in bulk, or be able to keep track of all of them in the map so nothing gets behind you.

You'll want to try kiting often in order to stay ahead of and gather enemies, especially with the Zombie variety of infected, since it doesn't work as well with J'avo since they'll shoot at you and use their mutations to make running away a challenge (plus it's a lot harder to maintain an Offensive Bonus when being riddled with bullets).

At various points throughout your kiting process, you'll need to circle around to where you killed enemies and pick up ammo. You'll only want to do this if you can collect them without any major danger of getting grabbed or attacked, so if you make your enemies get a fair distance away from ammo, be sure to run back and collect it. If enemies are cluttered by the supplies, you can use the slide kick and flip mechanics to push through them and continue your sprint.

Be sure to try this technique in most, if not all of, your matches, because this is the key to actually surviving, but not necessarily the key to getting a high score if your opponent might be using the same tactic.

This is where Offense+ comes in.

--Offense+ Is Key--

This is easily overlooked and even more easily underutilized, but can be crucial to killing a lot of enemies really quickly, most ESPECIALLY if you're playing in Zombie stages and using the Target Master skill.

One of the most useful strategies I've found is by taking advantage of the Offense Bonus, and it works wonders with the Kiting strategy.

Here's the list again that determines what builds up and even takes down your Offense Bonus:

  • Melee Kills = 20% Bonus
  • Counter Kills = 30% Bonus
  • Taunting = 50% Bonus
  • Taking Damage Reduces the Bonus (10% per "hit")
  • Getting the Max Combo of 30 Resets the Bonus back to 100%.

One tactic I've heavily employed is equipping the Target Master skill, get 1 single kill (or more if I needed to), then Taunted, giving myself a big 50% boost. I would do this until I reach the max cap of 300%, which dishes out an insane amount of damage to enemies, practically making headshots with Leon's pistol, for example, pop an enemy's head in one hit. I would also deliberately Taunt when my Combo hits 29 so I can avoid the reset.

Be sure to try this sometime. It may not send the most powerful enemies in a 30-combo, but you're able to send huge quantities of enemies with this trick in zombie maps.

J'avo maps, meanwhile, are near impossible to maintain the Offense+, mostly because they shoot at you and each bullet knocks down 10% of your Offense+ power, and you'll be hit repeatedly. Zombies with guns also make managing your Offense Bonus a pain since they can shoot at you too and knock down a lot of your Bonus (so it's best to kill them as quickly as possible). Back to J'avo though, they're hard to kite and can almost always hit you from a distance with something, plus they're quick to catch up so it almost completely rules out Taunting to build it up. I wouldn't recommend worrying too much about the Offense Bonus in J'avo maps, if I were you.

Oh yes, and the Combo Time crystals? You'll want to shoot those, because those maintain your Combo for a longer period of time when they're active, so if you're trying to maintain a combo with no enemies around, popping these is one of your best solutions.

--Don't Get Cornered--

Regardless of whatever tactic you use, the most important in anything you employ is not to get cornered. A lot of enemies will bear down on you really quick if you let them, and it's even worse if you back yourself into a place you can't get out of. You want to keep moving and stay out in the open. Don't put yourself in any situation you can't escape from or situations where enemies can block your exits.

--Stay Fully Healed--

The last major tip I have is you need to keep your health full at almost all times. Reason why is you could get into situations where you won't be able to heal (if you're wounded) at *any* point throughout the match and not having that extra block or two of health can be the difference between staying alive or getting knocked down and finished off. Just be sure to try and save your First Aid Spray as a last resort, because you'll need it as the game heats up.

-------

Those are all of my major tips I have for you in Onslaught, and by now you should be an expert, so what are you waiting for? Get out there and start playing now!
Predator - An Introduction

Ustanak makes a comeback in a big way in the Predator mode, one of the more unique multiplayer modes to grace Resident Evil 6 and it's one that's well worth playing for truckloads of fun. This is a mode unique to RE6 and has not been seen in the prior entries or most other games, much like Onslaught and Siege, and came bundled with the Three-Pack DLC with Onslaught and Survivors to round out the package.

Check out Capcom's trailer for the Predator mode:

The goal is simple. Rack up the highest amount of points you can between you and up to six players online as you each take turns as the fearsome Ustanak from Jake's campaign.

--How to Play--

Players meet up in a lobby to prepare for the match, choose their preferred skills and character, select one of the The Mercenaries maps the host (and all of the players in the game) unlocked in that mode, then begin the game, with one of the players randomly chosen to play as the Ustanak.

The player controlling the Ustanak has a limited amount of time to kill the Survivors, or at least do as much damage as possible before the time runs out. Ustanak can also be killed to give the Agents a bonus, so playing recklessly is not the best option, and Agents can only be incapacitated, and cannot be killed. The Ustanak player has to try and incapacitate every Agent at the same time to get a big bonus to his score, and the player controlling Ustanak will get more points than the Agents.

The Agents on the other hand have to try and survive as long as they can and help each other out to take down the Ustanak. They're not given much ammo and it's rare to find more, so they have to make every single bullet count. There are crates scattered throughout the map that can be smashed open to find ammo or grenades (or skill points) to aid you in the fight. Agents can get points by damaging the Ustanak or helping and healing their teammates.

Throughout the match, weapons will randomly appear for the Ustanak (such as his Shotgun he can be able to switch to and from once collected) and the Agents (including the Elephant Killer magnum, Rocket Launcher and Grenade Launcher) to collect, and they can destroy each other's weapons for points and to put the other at a crippling disadvantage.
A round ends when the Ustanak is defeated, all agents are defeated, or the time runs out. After that, a new round begins with another player taking a turn as the Ustanak to rack up as many points as they can.

Once everyone has gone through their turn, the game ends, and the player with the most points wins the match.

-------

Now that you know how the mode works, let's talk about how to win in the next section.
Predator - Tips and Strategies
Predator is a simple mode at it's core but it requires playing smart, having a heightened reaction time to notice when weapons spawn and react immediately, and especially playing as a team member as the Agents in order to win.

--Ustanak Tips--


When it comes to your turn to play as the Ustanak, you'll have to go to great lengths not to waste it. Being good as the Ustanak revolves around knowing how to use his abilities in the right situations, and not getting yourself caught in the middle of a bunch of agents. Nabbing his shotgun is also a top priority as soon as it appears in the map.

Here's a quick rundown of his controls:

Solo Action button/Space Bar = Charge

Attack/Left click = Grab

Aim/Right click = Extends the Arm (When holding an Agent in your claw, this throws them [and can damage other Agents])

C = 180-degree sweep attack.

Z = Kick

Inventory Button/E = Grenade Cluster

TAB = Roar (Temporarily shows Agent locations)

Mouse scrolling - Change weapon

Learning how to utilize all of his moves and use them in the right situations is the key to defeating the Agents. You'll also need to account for your attacks changing a little when carrying an Agent, since every attack changes and the Aim/Extend-Arm key (Right-click) is the only way to throw an Agent and use your normal grabs and attacks.

Your opener is your defining moment through the game, you can either charge in and have a high chance of getting yourself killed if you don't land some lucky hits and downs, or you can play a more hit and run/tactical approach where you can try to pick off the Agents one by one, or even use them as bait to try and split them up, or use your grenades to try and break up a group of Agents in the early game.

The only chance you have is by not getting into the middle of every Agent unless they're in a position where you can hit them and not get stunned, and not grab players only to be shot up during the animations and be forced to drop the Agents when they come and melee you. Anytime you want to try and attack groups, you should only be using your Charge attack and grenades (from a distance), and use your Claw if you only have one or two Agents to worry about.

What can change the game in your favor or the Agents' is by watching for the Weapon spawns and reacting accordingly. When an Agent Weapon spawns (white icon), you'll want to destroy it immediately, or they will use that weapon to tear you apart. If they do manage to get it though, you need to make the wielder of the weapon your top priority to take down, or they'll ruin your day. As for the Ustanak's shotgun, players will immediately book it to try and destroy the weapon so you don't get it, but you need to beat them to it, because once you have it, it can almost gaurantee your victory as long as you're quick.

One other thing you'll have to be aware of is animation invincibilities and exploits. The reason you don't want to keep trying to grab enemies in groups is because you'll be a sitting duck as targets shoot at you and melee you in the time it takes to grab people. You only want to Grab them if you have a chance of getting away and throwing them at your opponents (which you can be able to do *immediately* after grabbing them to prevent the Agents from freeing their comrade). You'll also need to time your attacks when Agents are helping each other out so you can hit them the second you can instead of swinging too early when the animation is still going, or too late when they'll be able to get away. Knowing the timing of the animations is the key to victory, and knowing when and where to use your abilities to prevent being a standing target for everyone will go a long way in helping you win the match.

The last tip I can give involves the very important Roar, which may seem minor but it can literally save your match if used in the right situation. You'll want to use this at the point players split up, or preferebly in the late-game of the round so you can track down and take out stragglers. Be cautious though, you can only use it once during a match, so make it count.

Keep all of these tips in mind and play smart and not recklessly, and you'll at least stand a chance as the Ustanak.

--Agent Tips--


Let's flip the script and discuss tactics for the Agents.

The key to victory as the Agents and getting lots of points is by playing as a team player, which may be a bit awkward considering it's a competitive mode where you're competing against your fellow Agents, but doing this can net you lots of points, perhaps more so than you would as a good Ustanak.

The first tip is you have to learn to be evasive, so if you haven't spent a lot of your time learning the art of dodging and sliding, then expect to get grabbed and hit often. You need to be agile and mobile because you'll be dodging the Ustanak and his attacks a lot.

Secondly comes the team bits. If you've read my Gameplay Tips section about invulnerabilities in animations, you should seriously do that now, because you'll be abusing the protection when picking up your teammates (which you should be doing the bulk of the match). Breaking your teammates free from the Ustanak's grasp, reviving or healing your teammates can award you with lots and lots of points used to help you win the game. You'll want to help anyone and everyone knocked down for those points, or even just to help you kill the Ustanak for the bonus, or be moving targets while you get around the battlefield helping other teammates.

Be a "selfish team player" in Predator, and that will do wonders for you.

Now apart from revives, your group works *loads* better when you stick together, so you can quickly revive one another and do a lot of damage to the Ustanak. He's not very good at taking out groups of Agents, so exploit that to its' fullest. It's only when you all split up that he can take all of you down. You don't want to bunch up either, because one good charge could kill all of you.

Lastly, you need to pay sharp attention to weapon spawns, because you'll run out of ammo extremely quick, so grabbing those weapons is not only the quickest way of getting back into the fight, but it's the quickest way of killing the Ustanak as well. You'll also want to make damn sure you take out the Ustanak's shotgun when it spawns as well, because he can tear your entire team up with it if you let him. If that isn't enough incentive to destroy it, there's points involved too.

Oh yes, and the last big tip as Agents is you need to be mobile. Don't ever stay in one place. That goes for you and your entire team, and you'll want to make sure you're all moving together in case the Ustanak shows up to try and kill the lot of you.

----------

Master these tips, and hopefully you just might succeed in the Predator mode. But more importantly, have fun!
Siege - An Introduction

Siege mode is another unique game type to Resident Evil 6 that has not been seen in prior entries, nor any other multiplayer game for that matter. This mode was released several months after the Predator-Onslaught-Survivors Three-Pack as a seperate DLC on the consoles and is one of the modes that plays to the game's strengths.

This is Capcom's trailer for the Siege mode:

--How to Play--

One team is randomly selected to play as the Creatures while the other team plays as the Agents. Agents need to protect the Rookie BSAA Agent, while the Creatures need to try and kill him. Every game consists of two rounds. Once a round is complete, the teams switch, so Agents become Creatures, and Creatures become Agents.

Victory is achieved in one of two ways:

  • The team who kills the Rookie in the fastest time wins.
  • The team whose Rookie has the most health (and hasn't been killed) wins.

The Agents are able to tell the Rookie to Follow them or have the Rookie hunker down and Wait using the Partner commands (Arrow Keys/Hold V + Button). When the Rookie is in Wait mode, he'll slowly regenerate health over time. The Rookie can follow any Agent that tells him to follow them, but he can only follow one Agent at a time. Agents also can find weapons that spawn in the map, and there are Time Reduction crystals (which are only available for a very brief period of time) to reduce the match time.

Creatures operate like they do in Survivors, where they're much faster and do more damage. Exclusively in Siege, you can play as certain creatures you can't in even the Agent Hunt mode, such as Whoppers for example. Creature players are also able to summon reinforcements by breaking Enemy Objects scattered around the map that contain other creatures to aid them in the fight.

The game ends once both rounds are complete, and a round ends when the Rookie dies or the time runs out.

------

So that's the Siege Mode in a nutshell, let's discuss some tips and strategies about the mode now.
Siege - Tips and Strategies
We're going to break this down by discussing how to play as Agents, then as Creatures.

--Agents--


As Agents, your sole job is to protect the Rookie, and you'll have to do that by any means necessary. Thankfully, if killed, you respawn a few seconds later to get back into the fight. That doesn't make the task of protecting the Rookie any easier though.

There are two major strategies you can encorporate with the Rookie:

-Keep moving around the map with the Rookie.

-Find a good position to have the Rookie hunker down and hold it.

Both tactics are viable but each of them have their own faults to them, and therefore, why it may be best to employ both strategies in a game, though circumstance will vary from game to game.

In the tactic about staying Mobile, the idea is that you and your team want to have the Rookie moving randomly through the map to stay ahead of spawn points and creatures trying to chase the Rookie. Two things that can help the player leading the rookie is by having the rest of the team not aiding the Rookie pick a spot and fight off the zombies to keep the attention off the Rookie, or by having them follow the Rookie to try and kite the enemies and keep the Rookie out of danger. Any number of players can do either of those two jobs, but one player has to at least be leading the Rookie through the map and not in a predictable pattern in order for this tactic to work.

The strategy involving holding a position is much harder, but still do-able if you pick a good spot to defend yourself. You'll have to look for choke points where enemies can come from a single direction and be funneled to the point where you can gun them down fairly easily, or it can be a bit of an open area where you and your team can watch all sides and kill any enemies coming toward you. Finding that point in a map is difficult but if you can find it and put the Rookie down in a place that's hard to get to, have him Wait, and he'll start healing up. As long as he's not following a player he'll continue to heal up, and if there's a barricade nearby, he'll hide behind it to avoid other damage.

The effectiveness of these tactics varies from map to map as well as team to team, and sometimes you may need to encorporate both in case the Rookie gets injured and your team really needs the extra health with him to win the match. Just knowing when and where to use these tactics is part of the challenge of the mode, and working together with your team is the only way to keep the Rookie alive. The only thing with both strategies is at least one dedicated player has to be able to run out and grab weapons and time crystals when they spawn, can get to them in time, and not put the Rookie and the team in a position where they can't defend themselves without that player. You also need to make sure your teammates don't fight for control over the Rookie, because that can get him cornered as you all try to fuss with whoever leads him and get him killed.

So study each map, figure out stronghold points, and coordinate with your team, and hopefully you'll succeed at keeping the Rookie in one piece.

--Creatures--


Now we move onto the fun, but very tricky part, playing as the Creatures.

If you read the Agents tactics, then you'll need to be able to counter them as the Creatures with the appropriate response, and you'll also need to make it a priority to shatter all of the Enemy Objects to add numbers to your assault on the Rookie.

Unlike every other mode that involves playing as the creatures where you have to rely on playing smart, stealthily, and doing ambushes in order to get the kill, Siege requires you to be extremely aggressive in your attacks in order to claim victory.

The first thing you should do is shatter the Enemy Objects to make the fight a bit easier by building your numbers. Afterward, you need to observe which of the two tactics the Agents will employ, and try to respond accordingly.

If the Agents are playing the Mobile strategy, you're going to need to have a good knowledge of the map because you need to be able to cut off the player with the Rookie at a moment's notice. Trying to chase them is rarely a strategy that ever works, so you'll need to focus on trying to get ahead of him and getting as many hits in on the Rookie as you can. You need to also have your teammates focus on this too, because hopefully the Agents will be more pre-occupied with the NPC creatures and giving you free reign to hunt down the Rookie. You'll have to do whatever it takes to get a hit in, leaping being one of the best options, and try to stop the Agent leading the Rookie. Remember, the Agent is the one keeping the Rookie moving, so if you stop him, you stop the Rookie and leave him vulnerable to attack. Coordinating this attack with your team to have one hit the Agent and the other(s) hit the Rookie is the only way you can counter this strategy.

The Defense strategy is a bit of a tougher one to counter, because depending on the position can determine how well you can be able to get to the Rookie. Choosing your spawn point is one good way to deal with this because sometimes you can find a spot that lets you spawn behind enemy lines. If you can't do this, then you're going to need to try and worm your way through the defense line to get to the Rookie; this means ignoring the Agents, or distracting them while another teammate sneaks in and goes for the Rookie. You'll need to be aggressive, and you'll have to accept the fact you will die a lot before you might be able to budge an inch. You'll die at least knowing the Agents have less ammo and/or health thanks to your efforts or that you might have bought one of your teammates time to get in and hit the Rookie. Ranged attacks are also a good idea as well if you're playing as a creature that can throw or spit items for this strategy.

---------

These are all of the tips I have to offer as either side for this mode, so I hope that they prove beneficial. Just remember, playing as a coordinated team is the best way to win, regardless of playing as a Creature or an Agent.
103 Comments
ConfusedRicky Aug 2, 2023 @ 6:39pm 
Cant wait to read with some warm chocolate and a lamp to my side
Captain Lag May 10, 2023 @ 5:58am 
For jake:
Aim and *hold* attack to charge a palm strike, which locks on and charges at an enemy close enough. Just tap A or D to dodge, no action needed.
Коржик Apr 29, 2023 @ 12:41am 
Great guide, amazing work!🙂👍
COVID-1984 Apr 20, 2023 @ 5:58am 
My goodness! Thank you so much for writing this. You have done what the game developers failed to do. The game doesn't even bother to teach players to get used to the controls. The dodging mechanic wasn't even mentioned in the game's opening tutorial. The in-game inventory is hard to read. The interface consists of confusing symbols. I don't know what the developers were thinking, making the game so unnecessarily complex.

I once accidentally pressed something that set the camera behind Leon's left shoulder in the middle of a battle, and I didn't know how to change it back. It was extremely annoying. According to this epic guide, I must have accidentally pressed CAPSLOCK. No game should be this annoying.:steamfacepalm:

RE6 is definitely harder to pick up than RE4.
SunpireNZ Feb 13, 2023 @ 12:52pm 
"Rescuing and Reviving" doesn't include first aid revives but it's mentioned in "healing". YES! You can revive your partner with a first aid which cancels out the animation of you helping them.
Birb Bobson Feb 2, 2023 @ 12:23am 
Very detailed guide! Though one thing I have to note since it happened to me before. I got Ustanak stuck between the bus and the fence it crashed into. He couldn't get out at all, and yes he hasn't triggered the weapon swapping yet. I was afraid I was stuck until me and my friend decided to keep pumping lead. I forgot what happened next, either the fight ended, skipping him the weapon swap or it skipped to that segment anyway without him moving towards it. Either way, I was quite fortunate since the fight wouldn't progress either till I did damage.
Frizst Dec 27, 2021 @ 8:18am 
awesome :steamthumbsup:
dimenfer Aug 9, 2021 @ 11:37pm 
maybe this can save me from thinking that my money was lost after buying this game, after playing RE5 for hours play this one feels like a waste of time, but lets see if I can learn something from this guide, thank you in advance.
frostdiamond Jan 23, 2021 @ 11:12am 
Article is convoluted and confusing as fuck. The part you tried to explain about the "glitch" for the grenade launcher totally lost me.
M1SF0RTUNE  [author] Nov 22, 2020 @ 3:11pm 
I'm glad to hear this guide makes the game more enjoyable! I personally find RE6 pretty fun once you learn all its mechanics. It's one of the most in-depth and nimble third-person shooters I've played in years, that's for sure, even with all the warts.