The Isle
100 oy
How to: Host your own Dedicated Server (Legacy)
StolidSnow0 tarafından
I decided to create this guide for those of you who wish to host a dedicated server. This is a server you can host on your computer and not have to rent a server.

Results may vary depending on your computer specs.
2
   
Ödül
Favorilere Ekle
Favorilere Eklendi
Favorilerden Çıkar
For EVRIMA
I have created a new guide for Evrima hosting! You can check that out here if you are trying to host on Evrima: https://steamcommunity.com/sharedfiles/filedetails/?id=2952501611
If you are hosting your server in Legacy then continue on below.
Step 1: Setting Up A Static IP
The first step to hosting your dedicated server is setting up your host computer (the one that is going to be hosting the server) to have a Static IP. This will make it so your computer does not change its IPV4 address and keeps the IP connected to the ports.

So start off by going to the search bar on the bottom left (Windows 10) and typing Command Prompt or CMD and open it as administrator. Then, once it is open, type ipconfig and press enter. The following should appear.
For this you will need to take note of YOUR IPv4 Address, Subnet Mask and Default Gateway.

Now, with these numbers in mind, hop on over to the Control Panel and go to Network and Internet. Then go to Network and Sharing Centre and press Change Adaptor Settings, right click your current network connection (Ethernet or Wifi), and select Properties. You will then be greeted by this window.
In this window select the one called Internet Protocol Version 4 (TCP/IPv4) and go to Properties. Select Use the following IP address and type in the IPv4 address and subnet mask you found earlier in the Command Prompt followed by the default gateway.

Next we will do similar for the DNS. Select Use the following DNS addresses and enter in either your a DNS you want to use, or just the simple Google DNS. If using Googles DNS then in the Preferred DNS Server enter in 8.8.8.8 and the Alternative DNS server will be 8.8.4.4 and then after that click OK & Close on both windows. And we're done with this step.
Step 2: Port Forwarding
Network Port Forwarding
The first thing you need to do is login to your modem/router. You can do this by typing your modem/routers login page in the address bar of your preferred browser and pressing enter. (You can find this information usually on your modem/router or under the command prompt from earlier named "Default Gateway" and might look like this: 192.168.0.0) Then enter your user and password and proceed.

Now find the Port Forwarding tab. May also be under the name Forwarding or Virtual Servers etc.

The ports or port ranges you will need to forward are 7777-7779 and make sure they are selected as TCP/UDP in the Protocol section. Both text boxes that require a port range must be the same.

Make sure that the machine that you set the Static IP on is selected under the Destination IP option (or your device name equivalent), or type in the details of it manually. This is the machine that will be using these ports to host the server.

Port Forwarding Windows PC
After forwarding the ports on your modem/router, the next thing to do is to port forward those same ports, through the Windows Defender Firewall with Advanced Security. To get there, press start and begin typing "Windows Defender" and it should be one of the options listed, for me it was first.


Click this and then you will be greeted with this window.

Once here, click on "Inbound Rules" and then select "New Rule" in the "Actions" tab on the right of the window.

Once here, select Port and then click Next. It will then ask you TCP or UDP, you will be doing both but just do TCP first and enter in the same ports you entered to port forward (e.g. 7777-7779) in the "Specific Remote Ports" section, making sure it is selected. Once you have done this, press Next.

Select "Allow The Connection" and then Next. In profile just leave them all ticked then click Next. Then give it a name (e.g. IsleServerTCP) and then Finish. Repeat this for UDP and then that's the Port Forwarding done!
Step 3: Setting Up SteamCMD
Now with all the boring and worrying stuff out of the way, time for some slightly less stressful stuff. Remember how I mentioned earlier about SteamCMD? Well now is the time to download it to begin this step.

Once you have downloaded SteamCMD extract the .zip file to somewhere easy to find. Once the files have been extracted to your chosen location launch SteamCMD and it will begin updating, leave it to update, and once its finished, type quit. Then relaunch the program.

Time to login to SteamCMD so that we can do things to begin setting up the server. Type login anonymous and then you should be logged into steam anonymously through SteamCMD.
Now we can set the install directory. This is where our server files are going to be placed. Before we do this you need to create a folder in the place for where you are going to set the directory in the first place, somewhere easy to find.

Create the folder in the location of choice (ours being the C:\ drive) and name it TheIsleServer or whatever you want to call it. Then head back to SteamCMD and type the following: Force_Install_Dir C:\TheIsleServer (This will be whatever location you chose to put it though, you can find the directory in the address bar when pressed.)
Now, you may not see anything happen in the program, but if it says nothing then your good. This means it has set that folder as the install directory and you can continue.

Now you can type in app_update 412680 and this will install all the files necessary to setup your server. This is also how you update the normal/public branch. Each time the game updates you will need to repeat these steps to manually update your server.

NOTE: If you are having the issue below, try running SteamCMD as Administrator before attempting to install again. If the issue still persists, install into another drive and this should resolve the issue.


We have now finished installing the files needed to setup our server, and we are just moments away from starting our brand new server!
Step 4: Server Setup!
WHEW! Finally. Now to the fun stuff. Actually being able to setup our server. At last!
MOTD
Head on over to your TheIsleServer folder and head into TheIsle>Saved and create a text file in here called MOTD. If you leave this text file empty, no Message Of The Day will pop up when players log into the server, if you put text into it however, it will show up when players join.

Server Configuration
With that being done head over to Config>WindowsServer and here is where all the files needed to configure your server. Well, kinda. We only really need to edit Game.ini.

Note: If you don't see these files straight away, execute the TheIsleServer.exe program and then end the task in task manager. This should install the files needed to continue. Or if that fails startup the .bat and once the server begins, after 1 minute hit CTRL C and that should close the window and save the files.

Now lets edit our Game.ini. Right click Game.ini and select Edit and then copy the following settings and paste them in. If Game.ini is still missing at this point, you can create it yourself and add these in.
[/script/theisle.igamesession] ServerName=My Amazing Server bServerGlobalChat=true bServerNameTags=true bServerGrowth=true bServerFallDamage=true bServerAllowReplayRecording=true ServerRespawnTime=30 ServerLogoutTime=60 ServerDiscord= ServerAdmins= [/script/theisle.igamemode] DisabledDinosaurs= ServerStartingTime=1350 bServerDynamicTimeOfDay=1 ServerDayLength=60

Change the options to however you would like them to be, then save the file.

Batch File Command line/Launch
Next we can head onto the final step. We need to create a .bat file not only so we can have easy access to starting our server, but we are also going to need to be able to set which map we want, how many player slots the server has and most importantly, putting those ports to use.

That's right, we are not quite done with those ports. First things first, make sure you can see the file extensions, this way we can change the .txt file we are going to create into a .bat file.

To do this, press the windows icon and type folder and select the one that says Show Hidden Files And Folders. Alternatively you can find this setting in the Control Panel as well.
Once in here, uncheck Hide extensions for known file types, then click Apply and exit the window.

Now we can move on to creating our file. Head to somewhere easy for you to access and create a Text File named Server_Start, but at the end you should see it says .txt now, change that to .bat and press enter.

Then edit this file with notepad and enter the following:

@echo off cls echo Protecting isle server from crashes... title The Isle Server - My Amazing Server :TheIsle echo (%time%) Checking for updates... start /wait C:\steamcmd\steamcmd.exe +login anonymous +force_install_dir C:\TheIsleServer +app_update 412680 +quit echo (%time%) isle server started. start /wait C:\TheIsleServer\TheIsleServer.exe /Game/TheIsle/Maps/Landscape3/Isle_V3?MultiHome=12.345.67.890?Port=7777?QueryPort=7778?MaxPlayers=100?game=Survival -log | set /P "=" echo (%time%) WARNING: isle server closed or crashed, restarting in 1 minute. timeout /t 60 goto TheIsle
Be sure to change the above C:\ etc. to YOUR servers filepath. This is where you installed it initially.

Then press save. Making sure beforehand to adjust the MultiHome= to your public ip, which can be found here: https://whatsmyip.com/ and also changing the map to which one you prefer, setting the gamemode and max players that can join, and also making sure the ports you opened, go into the Port and QueryPort, if you followed along exactly then you don't need to change this.

Current maps ingame are:
/Game/TheIsle/Maps/Landscape3/Isle_V3
/Game/TheIsle/Maps/Developer/DV_TestLevel
/Game/TheIsle/Maps/Thenyaw_Island/Thenyaw_Island

What does this do?
The | set /P "=" sets the batch so you don't have to be there when it asks for confirmation, it wont even ask for confirmation. It will automatically restart on close OR crash within a minute. Just make sure to keep the batch file open at all times. If you are somehow having issues with your server, try removing the Multihome part of the line. This .bat also will automatically update/check for updates on the server each time the server is started up.

Ready for launch!
And that is pretty much it! Save your changes, close out of the notepad and start that bad boy up by double clicking the Server_Start.bat file of course. This will load the settings you gave it and load up the server. Then you and everyone else can play. And the best part is, you didn't have to pay a single cent, AND you can play on the same machine. If it mentions a steam subsystem error it either means just restart you PC or you entered something wrong, or the ports are likely still blocked if you scroll up and see errors about them.

Optional: Shortcut Launch
A much simpler way to launch and set the command line is by using the shortcut target.

To begin, head to where your TheIsleServer.exe file is located. Right click it and select "Create Shortcut" or "Send To: Desktop (Create Shortcut)". Once the shortcut is created, right click it and go to it's properties.

You should see "Target:" this is where we will put the command line. Insert this after the location portion in that textbox with a space:
/Game/TheIsle/Maps/Landscape3/Isle_V3?MultiHome=12.345.67.890?Port=7777?QueryPort=7778?MaxPlayers=100?game=Survival -log | set /P "="

Making sure you change the IP and ports, you can click Ok and double click the shortcut. The server will instantly launch, with the only downside being it will not auto update on launch, and will not restart after a crash automatically. But this is the simplest way to start your server, if the .bat is too much.

Log Spam
Legacy servers tend to have "errors" spammed in the logs, you can ignore this, as this is just game engine errors/warnings, not anything related to your server.
Info: Game.ini Settings
Setting
Setting {Value} & Description
ServerName=
{My Amazing Server} This will be the name of your server that will show up in the server list.
bServerGlobalChat=
{true/false} When enabled, this will allow players to communicate with everyone in the server. When disabled, players will only be able to speak in Local Chat and Group Chat to Dinos of the same species.
bServerNameTags=
{true/false} With this setting set to true, all players will have their name tags and profile pictures above their head. When disabled, only players in a group can see each others name tags.
bServerGrowth=
{true/false} When enabled, this allows players to grow from Hatchling/Juvie to Adult. When false, players will choose their character and spawn in fully grown without needing to passively grow.
bServerFallDamage=
{true/false} When set to true, players will take fall damage from certain heights.
bServerAllowReplayRecording=
{true/false} When set to true, players will be allowed to record replays in your server.
ServerRespawnTime=
{Default Value: 30} This setting determines how long before a player is allowed to respawn. (Sandbox Only)
ServerLogoutTime=
{Default Value: 60} This setting determines how long before a player can safelog. If a player logs out before this timer completes, their dinosaur will stay in the server for some time.
ServerDiscord=
{invitecode} Entering in a discord invite code here will allow players to join your discord server when they click the Discord button on the server list. Note: This setting only requires the invite code, not the whole discord.gg link.
ServerAdmins=
{steamID64} Entering in a players Steam ID into this will give them access to admin commands, and a yellow name. Multiple admins can be added by adding multiple of this setting under each other.
DisabledDinosaurs=
{DinoCode} Entering in the code of a dinosaur here will disable them from the playable characters list. (Example: Entering "UtahAdultS" will disable the Adult Utah from being selected.) Multiple dinosaurs can be disabled by entering multiple of this setting under each other.
ServerStartingTime=
{Default Value: 1350} This setting will determine what time of day in the day/night cycle it will be when the server first starts. (Time=24 Hour Format.)
bServerDynamicTimeOfDay=
{0-1} This setting allows you to turn on and off the Dynamic Time of Day. Setting this to 0 will turn it off, and 1 will turn it on.
ServerDayLength=
{Default Value: 60} This setting determines how long an in-game day takes. (Duration=Minutes)
Optional: Set Players Dinosaurs
Refer to my other guide in the "Dedicated Server" portion to switch people's dinos disable specific ones etc.: https://steamcommunity.com/sharedfiles/filedetails/?id=1231855950
And finally...
You have now gone through all the trouble there is to setup your Dedicated Server. Now you know where it gets its name from, the fact that you have to be super dedicated to go through the whole process. That's not the real origin of the name but that is what it feels like. You can now go and enjoy your server with your friends and new people who may or may not enjoy your server/cause trouble. Thanks for reading and I hope I somewhat helped.

I could not have done this without the very few discussions on steam and the people from The Official Isle Discord. I made this so you could have easy access to a guide and not have to look far and wide. Now go forth and enjoy. The Island awaits...
Troubleshooting
If you have followed ALL of the above and are still having issues, this is the place to find out what the issue might be...

Server not showing up?
Possible Solution 1: Try removing the Multihome portion of the .bat file. This for some reason causes issues for some people and may solve this.

Possible Solution 2: Check that you have indeed forwarded the ports necessary as this is key in order for the server to show up on the lists.

Possible Solution 3: Don't skip any steps! In order for this to work, unless told otherwise, most steps are required to host the server, skipping a step could lead to issues.

Possible Solution 4:
İlk olarak Steam User From The Comments, Hawk tarafından gönderildi:
Another reason people might not being seeing their server in the list is that the batch file is missing a very important command in it. In order for a server to be listening to accept connections, it needs to be told to listen with "?listen" (minus the quotes) So right before the -log add ?listen and your server should now show up in the list. I just tested across two different machines and now mine shows up after about 2 hours of pulling my hair out haha.
Hawk's Steam

Possible Solution 5: Try changing ports, something could already be using the current one you're trying to use.

Possible Solution 6: Check your Windows Defender Firewall. On Windows 10, type in the search "Windows Defender Advanced Security" and go into the application. Check your Inbound Rules and make sure that all applications under the name TheIsle have a green tick next to them, if they have a cross, double click the application name and click Allow The Connection. This is the same as if you were to open a game for the first time that required you to use the internet, it would pop up a window asking which network type do you want to allow it to use.

If they are all allowed and that doesn't work, create 2 new inbound rules, 1 for TCP, the other for UDP. Set the ports of these to the ports you are using for your server.

Possible Solution 7: If both Port and QueryPort have the same port number, try moving QueryPort up one, for example: Port=7777?QueryPort=7777 try this instead Port=7777?QueryPort=7778.

Server is up and people can join, but I can't?

Possible Solution 1: Check your filters in the server list, sometimes this can be what causes you to not be able to see it but others can.

Possible Solution 2: Try changing server ports from the defaults in the .bat file, there could be a possibility that the default ports are in use elsewhere or not available to use. Make sure if you do use different ports from defaults, that you forward said different ports as well.

Possible Solution 3: Make sure you're logging into SteamCMD as anonymous before launching the server. It could be possible you missed this step and almost every step is vital.

I don't see any config/other files?

Possible Solution: Start the server via. the .bat and once the server has been up for a minute, shut it down with CTRL C (not the x on top of the window) and that should ensure the server closes safely and generates the files necessary to continue. (Credit to @Tengri in the steam comments.)

If none of the following solutions work, restart from the beginning and make sure you followed EVERY STEP to the T.

For any other questions or issues you may have, either head to The Official Isle Discord[discord.com] and head to #server-hosting, head to the Steam Discussions, ask in the comments or ask me on Discord[discord.gg]. I'm also in The Isle's discord.
Additional
This video could help if you don't know where exactly to look.
152 Yorum
CrackerToes 14 Eki 2023 @ 22:53 
i'm going insane by how unresponsive the devs are with server support
make the god damn quick start document public
StolidSnow0  [yaratıcı] 14 Eki 2023 @ 22:12 
@Tengri Thanks for sharing! I see people with that issue constantly and never knew why the files didn't show up for them.
Tengri 14 Eki 2023 @ 1:22 
Hello , i found why some people don't reach to get WindowsServer folder with all .ini files inside and it was logic.

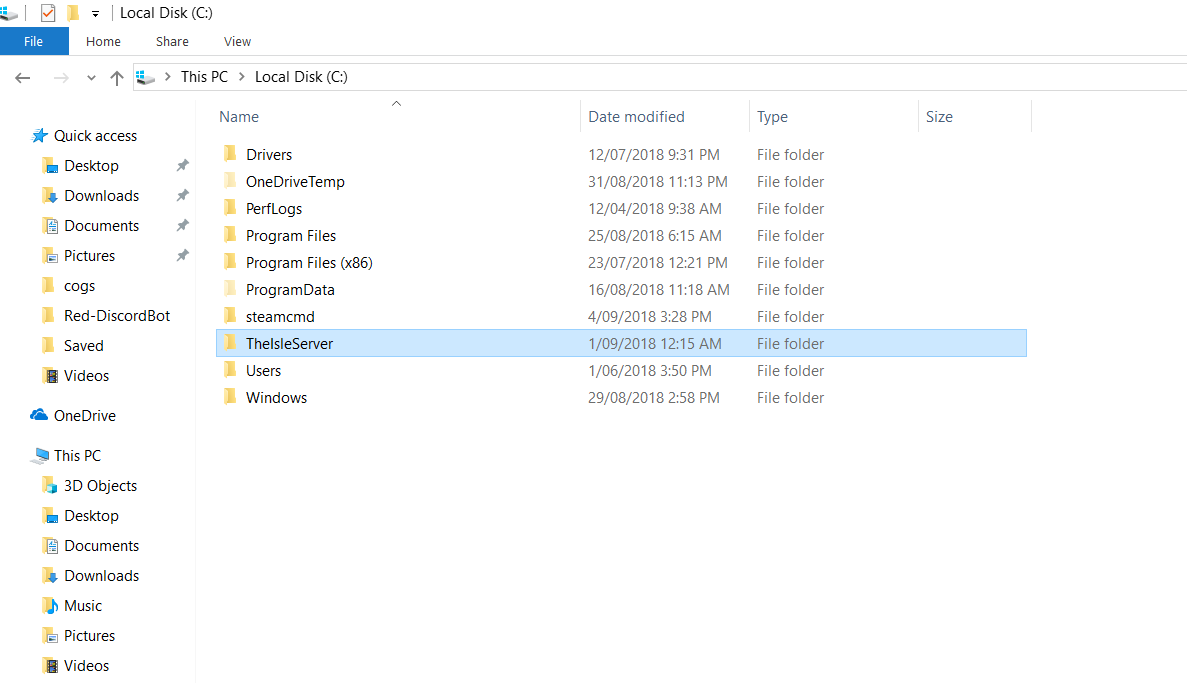
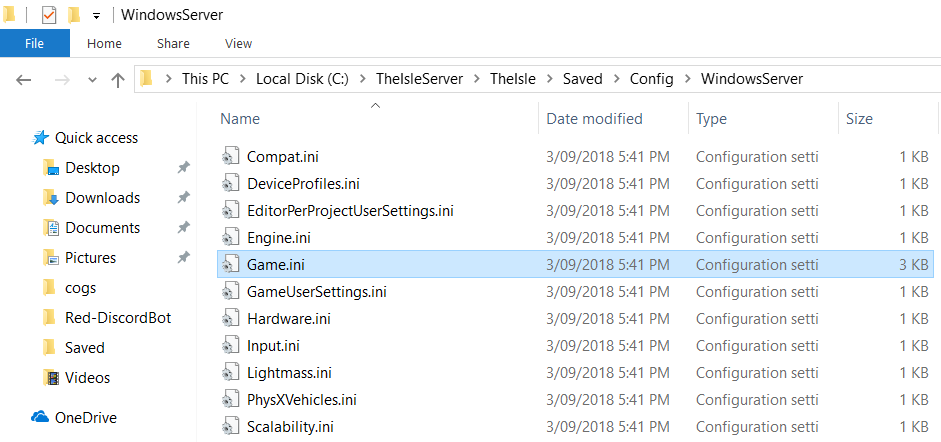
When you start first time your server to create config files , do it with a .bat file like this one :
"
@echo off
cls
echo Protecting isle server from crashes...
title The Isle Server - Awesome dyno server
:TheIsle
start /wait C:\TheIsleServer\TheIsleServer.exe MultiHome=0.0.0.0?Port=7777?QueryPort=7778 -log
echo (%time%) WARNING: isle server closed or crashed, restarting in 1 minute.
timeout /t 60
goto TheIsle
"
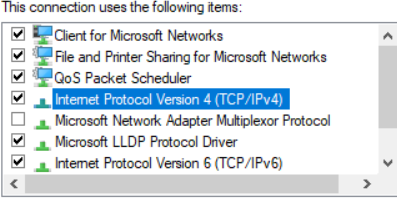
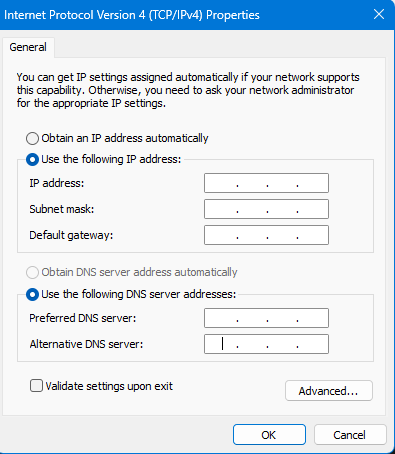
(note : replace 0.0.0.0 by tour server IPV4)

Then wait 1 minute and SHUTDOWN THE SERVER WITH CTRL+C

If you just close the console by clic on the cross like a savage , the server will not do the save properly and generate/update config files :D

I hope it will help some people , i spent all the night to get it fixed hehe
StolidSnow0  [yaratıcı] 28 Eyl 2023 @ 8:58 
@CrackerToes If you've tried the official link and it doesn't work, you may have been banned/temp banned or maybe another issue occurred.
CrackerToes 27 Eyl 2023 @ 20:27 
Speaking of invitation, I was on The Isle's discord server, didn't say one thing, left, and then when I try to rejoin I'm completely unable to. Am I banned? It says 'Whoops - Unable to accept invite'. Any idea whats happening here?
StolidSnow0  [yaratıcı] 25 Eyl 2023 @ 16:18 
@Sir1usss Thanks for pointing that out! I updated it the official link [discord.com].
Sir1usss 25 Eyl 2023 @ 2:17 
The official invitation has expired. Can you send me another one?
StolidSnow0  [yaratıcı] 13 Haz 2023 @ 7:30 
@Yeet Almighty The only reason for the server not showing up if you have everything else setup correctly in my mind can only be the ports not forwarding correctly.
StolidSnow0  [yaratıcı] 13 Haz 2023 @ 7:29 
@Yeet Almighty Nowhere that I know of. Pretty sure they're usually empty anyway. Game.ini is the only important one.
Yeet Almighty 12 Haz 2023 @ 20:27 
is there somewhere i could get the rest of the .ini files to see if that fixes the issue?