
Установить Steam
войти
|
язык
简体中文 (упрощенный китайский)
繁體中文 (традиционный китайский)
日本語 (японский)
한국어 (корейский)
ไทย (тайский)
Български (болгарский)
Čeština (чешский)
Dansk (датский)
Deutsch (немецкий)
English (английский)
Español - España (испанский)
Español - Latinoamérica (испанский Лат. Ам.)
Ελληνικά (греческий)
Français (французский)
Italiano (итальянский)
Bahasa Indonesia (индонезийский)
Magyar (венгерский)
Nederlands (нидерландский)
Norsk (норвежский)
Polski (польский)
Português (португальский)
Português-Brasil (бразильский португальский)
Română (румынский)
Suomi (финский)
Svenska (шведский)
Türkçe (турецкий)
Tiếng Việt (вьетнамский)
Українська (украинский)
Сообщить о проблеме с переводом


http://steamcommunity.com/sharedfiles/filedetails/?id=596388120
"http://steamcommunity.com/app/226980/discussions/0/666827315349070543/"
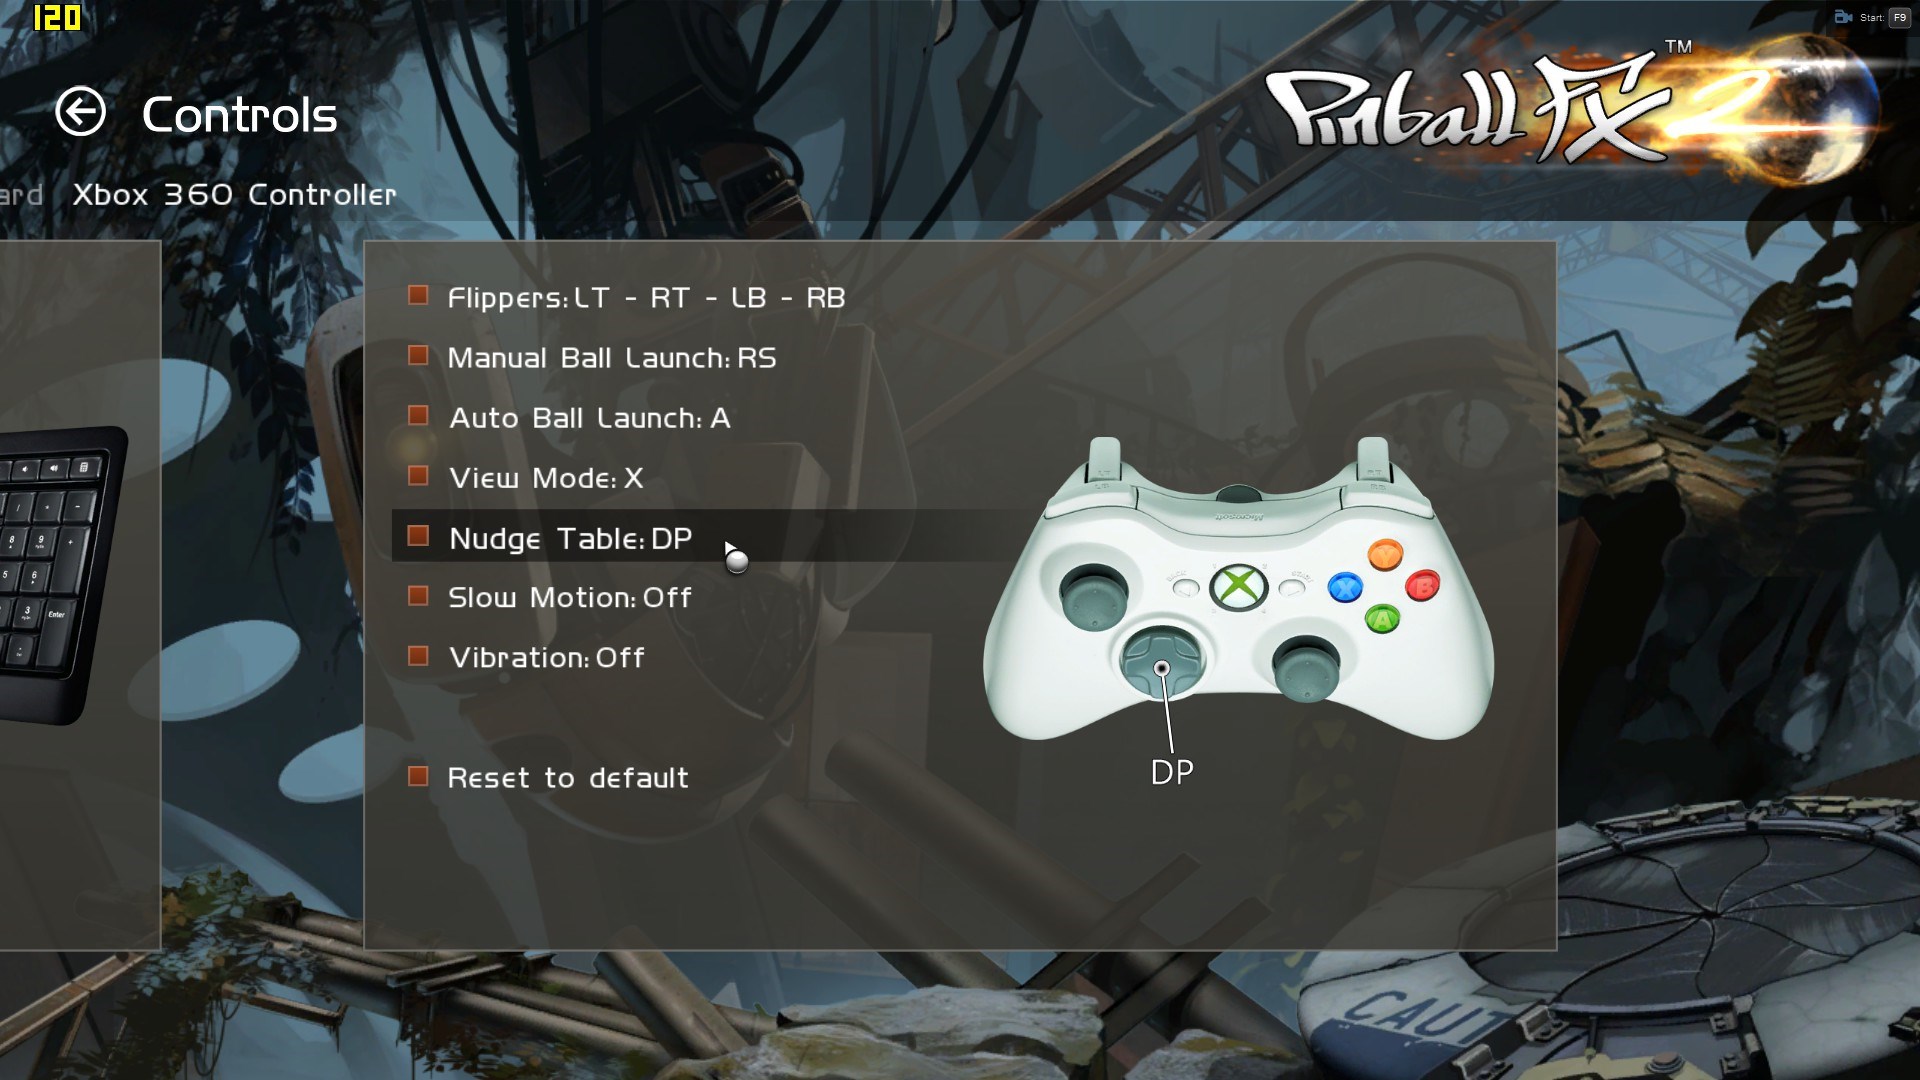
* Separated nudging controls section into new section and largely rewrote it:
+ New video showing various nudge techniques
+ Explained differences (strength and responsiveness) between analog and digital nudging (with video and images)
+ Mentioned nudging frequency limitation
+ Mentioned ability to remap nudge controls via third party apps
* Added Slingshot Nudge technique and video to Survivability - Advanced
* Added workaround note for analog stick launching behaving like a button launch the first time (Controls - Part 1).
* Explained pausing and the countdown upon resuming (Controls - Part 1)
* Explained super skill shots and hidden skill shots (Controls - Part 1)
* Mentioned automatic ball reset if a ball is stuck (Controls - Part 2)