Don't Escape: 4 Days to Survive

Don't Escape: 4 Days to Survive

Оценок: 220
How to Escape the Wasteland
От Anthem
A full walk-through on how to get every day perfect, get every achievement, and find some fun secrets along the way.
3
22
2
   
Наградить
В избранное
В избранном
Удалить
Introduction
Welcome to my guide. This guide will be a walk-through, teaching you how to perfect every day, complete the game with the true ending, unlock achievements and reveal some secrets about the game.

Do note that I write this guide from the perspective that you have done several things already on previous days. For example, my guide builds the bridge and fixes the car on Day 1. However, this shouldn't be an issue, as my guide leaves a lot of spare time on each day to complete these.

Also note that my guide will skip lore documents and unnecessary items. Feel free to pick these up if you want.

If you think something that should be in this guide that isn't already, or if I've screwed up something, or if you're just pointing out a grammar error, or even if you want something clarified, leave a comment.

Do also note that the game has been renamed to 'Don't Escape: 4 Days to Survive' instead of 'Don't Escape: 4 Days in a Wasteland'. This (while ruining my perfect title) doesn't affect anything in-game.

Without further ado, let's jump right in.

This guide is up to date with the in-game version of 1.2.1
Changelog
Version 1.08 - Current Version:
Updated guide to game version 1.2.1. Nothing should have happened in-game however, just some bug fixes.

Version 1.07:
Updated guide to game version 1.1.1. Added section related to Custom Game mode added.

Version 1.06:
Thanks to a comment, changed the power pin puzzle image on Day 3 to be different images.

Version 1.05:
Re-wrote any part of the guide that referred to Barry or Cody's death to make it ambiguous.

Version 1.04:
Added a few more secrets.

Version 1.03:
Added how to get the "Tour Guide" achievement, now that I have it myself.

Version 1.02:
Added hints on how to find the username and password for Sidereal Plexus's website. Also renamed the section to include easter eggs and added a few references.

Version 1.01:
Some quick post-publish fixes. Grammar issues, spelling mistakes, and also completely forgetting the Day 4 air section.

Version 1:
Initial version. There might be some inaccuracies, but all in all, I think this is enough for a first version. Still need to add more information to make the guide complete.
Controls and Mechanics
The game does a great job of this already, but I'll include it here for completeness sake.

This is a point and click adventure game, so using the mouse is recommended.

Left clicking will move our character, interact with items and people, or navigate menus. If you are moving your character, you can double left click to run.


If your arrow looks like this, then you will move to a different screen. If you have already been to that screen, double-clicking will warp you to that screen instantly.

Right clicking will examine the object if anything is there. This can provide new info, so be sure to use it frequently.


The bag in the top left corner is your inventory. All the items you collect are stored here. You have a weight limit, shown in the inventory screen. You will be unable to pick up anything that exceeds your weight limit. There is also a drop arrow. Dragging items onto this arrow will make our character drop it. Items dropped on the ground will not disappear.

There's a journal next to the inventory as well. This is the main character's diary, and a way to remember what the threat is and what you have done in that day. Very useful if you quit in the middle of a day.

There is an options menu at the top right corner of the screen. Use it to change various options about the game.

Don't Escape has a time mechanic where doing certain actions will use up time. The game will tell you when the time will pass due to one of your actions. You can end the day prematurely by clicking the clock icon in the top right corner.

Prologue
The game starts in a dream sequence. Examine the window and something will burst through. Take note of what it is. It will either be a giant spider, toxic gas, or a swarm of locusts.

Your character will wake up. After some dialogue, you'll have control. Our character won't go anywhere without his backpack, so pick it up off the ground.

Click over to the right and our character will start walking over. Halfway, he'll stop and look at the horizon...

Looks like his nightmare is coming to pass. You have to find a place to secure from the threat and make sure you...

DON'T ESCAPE

Continue walking to the right. You'll eventually come to a cracked wall. It'll take too long to walk around so we'll need to break through.


There are some sticks coming out of the ground. Clicking on them will bring up the tutorial of how time works in this game. Pull the stick out.

With the stick out, there's a shed here. Opening the shed reveals a sledgehammer head. Pick it up and then open your inventory. Combine the stick and the sledgehammer head to create a sledgehammer. Use the sledgehammer on the wall to break it down.

Protip: When you use an item on something, you have to click once for it to work. If you double click to run, it will stop the usage of the item.

Climb through the hole and continue right. Your character will sink in the sand and say that it's quicksand and you'll have to drop the sledgehammer. Once you've dropped the sledgehammer, keep walking right, coming to a large desert. Walk across it, it'll take 50 in-game minutes, but there's nothing else you can do.

After the title sequence, you'll be at the bottom of a small hill, a house perched atop it.


Head up the hill and to the front door. The front and back doors are locked on the house, but there's a window here. There's nothing we can do about it now, so head around to the back.

There's a greenhouse here and a small water sprayer. Continue heading right and you'll be in front of a barn. Enter the barn and pick up the small pipe near the door. Interact with the haystack near the pipe a few times to reveal a few holes in the water pipe. We'll come back to these. Head back around to the front of the house and use the small pipe on the window.

After entering, the main character will mention how safe the house feels and mention checking out the gas station.

This ends the prologue.
Day 1: Spiders
So you have spiders? Sorry for the arachnophobes out there.

Head towards the giant chest. There's a broken hammer here. Take it and continue right into the kitchen. On the right hand side of the kitchen is something sparkly. Take it, and you'll realize that they are keys to your house. Exit the house by either unlocking the door or climbing out the window.

Go back down the hill and go to the left. Head towards the destroyed bridge. At the bridge, click on the shovel on the back of the truck. You'll break off the handle, but this is still good for us. Fix the hammer in your inventory by combining the handle and the broken hammer. After that, cross the ravine and head towards the gas station.

Enter the door on the right. Immediately regret this decision as there's a spider here. Lucky it hasn't noticed you... There's a few things you need from this room, but you can't grab some until that spider is gone. Leave the room and go around the back towards the gas truck. There's a small rock here. Pick it up and head back to the front of the gas station, this time entering the left side.

There's a stack of plates here. Use the rock on the plates and it'll cause a loud noise. Your character will automatically leave as the spider walks in. Head back to the right side of the gas station. Pick up the gas can, the hunting rifle, and the scattered cash on the floor. Click on the trinket display next to the register to find a lighter. Use your hammer on the cash register with the crowbar to get it. There's a charcoal bag next to the gas can, but it's too heavy. We'll come back for it.

Now that you've gotten everything useful here, exit the store. The spider will be here waiting for you, but use the hunting rifle on it to shoot it. Re-enter the left side of the store and pick up two iron bars. You need three, but we can't hold that much. Leave and head back to your house.

Now that we've got a few items, it's time to use them. Go to your storage chest and put the iron bars, the lighter, the cash, the short pipe, and the rifle inside. Head out to the back of your house to where the greenhouse is. Use the crowbar on the greenhouse four times to get four sets of nails and four sets of planks. Pick up all the nails and planks and head back inside.

Store 3 sets of nails, and all of the planks in the storage chest. It's time to leave again. Make sure you have the house keys, crowbar, hammer, a handful of nails and gas can with you. Head down the hill and head right this time towards the roadblock.

A few poor souls are here. Don't worry, prepare right and you won't join them. Check both corpses. One corpse will have a bite mark. It's randomized, but remember the pattern. You can come back here to check if you forget. The other corpse will have a note, referring to a repellent for giant spiders. How interesting!

There's a red wrench on the ground, so pick it up and then examine the car. Turns out that the ignition coil is still usable, so use the wrench on it to remove it. We're done here, so click on the upper right corner of the screen to go to a car wreck.

There's a pest control van here. Open the back with the crowbar and head inside. Pick up the two bear traps. Open all the lockers here, using the crowbar on the locked one. Pick up the duct tape from the second locker and the yellow sticky note from the fourth, then right click on the sticky note in your inventory.


Time to put your brain to use. There's a bunch of illustrations here. Remember the bite mark from earlier? Match the bite mark to the illustration of the spider and then pick up the correct repellent ID number from the first locker.

Head back to the bridge and use the hammer on the stack of planks near the truck. This will build a gangway, meaning that you won't have to cross the ravine and waste time. Use the wrench on the truck to remove a wheel and head across to the gas station. Go around the back and use the gas can on the truck's valve's and then use the wrench of the same valves. You'll get a full can of gas. Head back to the house.

Head to the front door and set up two bear traps by dropping them out of your inventory. Head around to the barn and use duct tape on the hole in the pipe you found earlier. Fill the generator, examine it and switch the setting to 'Water Pump' and start it. Place the spider repellent into the pesticide inlet. Examine the pump itself.

<add pump screen>
You'll need to select "Overnight Mist Spray Irrigation' and then light up all of the lights on the "Active Sprinklers" section. The easiest way to it is shown above. Just click the four centre buttons once.

Examine the pickup truck. It needs an ignition coil and wheel, which you have. Fix the car. The car has limited use the in spider scenario, due to the bridge not being fully constructed. We'll come back to it later. Using the storage chest again, store the hammer, crowbar, and duct tape. Go to the gas station again.

We're now going to loot the rest of the gas station. Fill up another gas can and take the last iron bars from the left side of the gas station. Once you're back at the house, fill up the car with the gas can, and store the iron bars.

Head back to the gas station one last time. Fill up the gas can once more, and take the bag of charcoal. Leave the plastic wrap and nets; it is completely useless.

Time to start fortifying this place. Don't worry about the chimney, it's blocked and you can't do anything about it. Use the iron bars on the windows of the house. There's one window on the bottom floor and two on the first floor. The bars will just hang there, so use the hammer on them when you have a handful of nails in your inventory to nail them to the window.

And that should be it. You should have around 3 hours to spare and you will have done everything needed. You will have even built the gangway across the ravine and fixed your car.

Perfect night checklist:
  • You are inside the house
  • Both doors closed and locked
  • All windows barred and nailed
  • Two bear traps set outside of the house
  • The generator is running and powering the water pump
  • The water pump's pipe has been fixed with duct tape
  • The water pump has the correct repellent inserted
  • The water pump is set to 'Overnight Mist Spray Irrigation'
  • The water pump 'Active Sprinkler' lights are all lit
  • OPTIONAL: Arm yourself with a rifle. It's not needed, but it'll make you feel safer

Optional items:
  • Examining the stack of papers next to the computer upstairs in your house will give you papers and a paperclip. The papers are useful on Day 2 Cold, and the paperclip can be used to pick doors which will take 15 minutes in-game time. Too bad all the things it can pick can just be opened with the crowbar instantly.
  • There are two small rocks at the gas station. The small rocks only have one purpose, and that is to lure the spider away at the start. They are useless for the rest of the game.
  • The water sprayer is useless, only needed for an achievement.
  • The plastic wrap is only useful on Day 1 Gas. Since you have spiders, it is completely worthless.
  • The nets are only useful on Day 1 Locusts. Since you have spiders, it is useless.

When you're sure you are ready, hit the clock button at the top.

If you followed everything correctly, you should have stopped all of the spiders before they even entered the house! Hooray! You go to sleep early, and as a bonus for perfecting the level, get a 5 kg carrying bonus! Everything is fine. This house is impenetrable!

...What's that helicopter doing?
Day 1: Gas
So you have toxic gas? Well, can't be too hard to stop air, right?

...right?

Head towards the giant chest. There's a broken hammer here. Take it and continue right into the kitchen. On the right hand side of the kitchen is something sparkly. Take it, and you'll realize that they are keys to your house. There's a red towel next to the keys. Take that as well. Go upstairs and head left into the bathroom. Pick up the blue towel hanging here. Store the blue and red towel in the chest and exit the house by either unlocking the door or climbing out the window.

Go back down the hill and go to the left. Head towards the destroyed bridge. At the bridge, click on the shovel on the back of the truck. You'll break off the handle, but this is still good for us. Fix the hammer in your inventory by combining the handle and the broken hammer. Look at the bottom middle of the screen to see something that looks like a skull and crossbones. Picking it up reveals it's a weather drone. We'll need this later.

After that, cross the ravine and head towards the gas station.

Enter the door on the right. Pick up the gas can, the hunting rifle, and the scattered cash on the floor. Click on the trinket display next to the register to find a lighter. Use your hammer on the cash register with the crowbar to get it. There's a charcoal bag next to the gas can, but it's too heavy. We'll come back for it.

Head to the other side of the store and pick up all three rolls of plastic wrap. Leave and head back to your house.

Now that we've got a few items, it's time to use them. Go to your storage chest and put the plastic wrap, the lighter, the cash, the short pipe, and the rifle inside. Head out to the back of your house to where the greenhouse is. Use the crowbar on the greenhouse four times to get four sets of nails and four sets of planks. Pick up all the nails and planks and head back inside.

Store two sets of nails, and all of the planks in the storage chest. It's time to leave again. Make sure you have the house keys, crowbar, hammer, the weather drone, two handful of nails and gas can with you. Head down the hill and head right this time towards the roadblock.

A few poor souls are here. Don't worry, prepare right and you won't join them. Check both corpses. One corpse will have an air filter. The other corpse will have a note, referring to hiding on either the upper or lower floors depending on the toxic gas's density. How interesting! Our main character will make a note of this in his journal.

There's a red wrench on the ground, so pick it up. Examine the car. Turns out that the ignition coil is still usable, so use the wrench on it to remove it. We're done here, so click on the upper right corner of the screen to go to a car wreck.

There's a Chemical Emergency Response van here. Open the back with the crowbar and head inside. Open all the lockers here, using the crowbar on the locked one. Pick up the hazmat suit from the first lockers, the duct tape from the second locker, and the sticky note and the chemical flask from the last locker. Right click the note in your inventory.


Time to put your brain to use. Remember the weather drone you picked up from earlier? Examine it as well by right-clicking it.


Look at the pH value. The pH value corresponds to the note. For example, in my play-through here, I have a pH of 2. We need to match the note with the pH from the weather drone. Using the note, we can see that A + B will give us a pH value of 0 - 2. Using the chemical flask, fill it with chemical A and chemical B. We'll use the density value later.

IMPORTANT!
Your game WILL have different stats, so don't copy from the screenshots above.

Use the air filter and the duct tape on the hazmat suit to repair it.

Head back to the bridge and use the hammer on the stack of planks near the truck. This will build a gangway, meaning that you won't have to cross the ravine and waste time. Do it again, and you'll create a bridge, which allows your car to go through. Use the wrench on the truck to remove a wheel and head across to the gas station. Go around the back and use the gas can on the truck's valve's and then use the wrench of the same valves. You'll get a full can of gas.

Head back to the house. Go around to the barn and use duct tape on the hole in the pipe you found earlier. Fill the generator, examine it and switch the setting to 'Water Pump' and start it. Place the filled chemistry flask into the pesticide inlets. Examine the pump itself.

<add pump screen>
You'll need to select "Overnight Mist Spray Irrigation' and then light up all of the lights on the "Active Sprinklers" section. The easiest way to it is shown above. Just click the four centre buttons once.

Examine the pickup truck. It needs an ignition coil and wheel, which you have. Fix the car.

Going back inside and using the storage chest again, store everything apart from the wrench and gas can. Go to the gas station again.

We're now going to loot the rest of the gas station. Fill up the gas can and take one iron bar from the left side of the gas station and the bag of charcoal from the right side. Head back to the house and fill up the car with gas and store the bag of charcoal and the iron bar.

Head back to the gas station one last time. Fill up the gas can once more and then go back to the house.

Time to start fortifying this place. Don't worry about the chimney, it's blocked and you can't do anything about it. Use the plastic wrap on the windows of the house. There's one window on the bottom floor and two on the first floor. The wrap will just hang there, so use the duct tape on them to fix them to the window. Use the towels on the front and back doors to make them airtight and stop the gas from coming in.

Finally, examine the weather drone again. Look at the density value. If the density value is higher than 1.61kg/m3, then head upstairs, otherwise stay downstairs.

And that should be it. You should have around 50 minutes to spare and you will have done everything needed. You will have even built the bridge across the ravine and fixed your car.

Perfect night checklist:
  • You are inside the house
  • You are on the correct floor
  • Both doors closed and locked
  • Towels are used on both doors
  • All windows have plastic wrap and are taped.
  • The generator is running and powering the water pump
  • The water pump's pipe has been fixed with duct tape
  • The water pump has the flask inserted with the correct chemicals
  • The water pump is set to 'Overnight Mist Spray Irrigation'
  • The water pump 'Active Sprinkler' lights are all lit
  • Optional: Wear the hazmat suit when you finish the day.

Optional items:
  • Examining the stack of papers next to the computer upstairs in your house will give you papers and a paperclip. The papers are useful on Day 2 Cold, and the paperclip can be used to pick doors which will take 15 minutes in-game time. Too bad all the things it can pick can just be opened with the crowbar instantly.
  • There are two small rocks at the gas station. They are useless.
  • The water sprayer is useless, only needed for an achievement.
  • The window net is only useful on Day 1 Locusts. Since you have gas, it is completely worthless.
  • The iron bars are useful on Day 1 Spiders and Day 3 Bandits. However you only need 1 iron bar on Day 3 Bandits so the other two are useless.

When you're sure you are ready, hit the clock button at the top.

If you followed everything correctly, you should have avoided the gas. Hooray! You go to sleep early, and as a bonus for perfecting the level, get a 5 kg carrying bonus! Everything is fine. This house is impenetrable!

...What's that helicopter doing?
Day 1: Locusts
So you have locusts? I hate the sound they make; creeps me out.

Head towards the giant chest. There's a broken hammer here. Take it and continue right into the kitchen. On the right hand side of the kitchen is something sparkly. Take it, and you'll realize that they are keys to your house. Exit the house by either unlocking the door or climbing out the window.

Go back down the hill and go to the left. Head towards the destroyed bridge. At the bridge, click on the shovel on the back of the truck. You'll break off the handle, but this is still good for us. Fix the hammer in your inventory by combining the handle and the broken hammer. After that, cross the ravine and head towards the gas station.

Enter the door on the right. Pick up the gas can, the hunting rifle, and the scattered cash on the floor. Click on the trinket display next to the register to find a lighter. Use your hammer on the cash register with the crowbar to get it. There's a charcoal bag next to the gas can, but it's too heavy. We'll come back for it.

Head to the left side of the store and pick up all three window nets. Leave and head back to your house.

Now that we've got a few items, it's time to use them. Go to your storage chest and put the window nets, the lighter, the cash, the short pipe, and the rifle inside. Head out to the back of your house to where the greenhouse is. Use the crowbar on the greenhouse four times to get four sets of nails and four sets of planks. Pick up all the nails and planks and head back inside.

Store two sets of nails, and all of the planks in the storage chest. It's time to leave again. Make sure you have the house keys, crowbar, hammer, two handful of nails and gas can with you. Head down the hill and head right this time towards the roadblock.

A few poor souls are here. Don't worry, prepare right and you won't join them. Check both corpses. One corpse will have a remote controller. The other corpse will have a note, referring to a Sonic Repellent Device for fighting off insects. How interesting!

There's a red wrench on the ground, so pick it up. There's a bug near one of the corpses that you can pick up. We'll need this later. Examine the car. Turns out that the ignition coil is still usable, so use the wrench on it to remove it. We're done here, so click on the upper right corner of the screen to go to a car wreck.

There's a pest control van here. Open the back with the crowbar and head inside. Open all the lockers here, using the crowbar on the locked one. Pick up the cans of pesticide from the first two lockers, the duct tape from the second locker, and the sticky note and the weird device from the last locker. Right click the note in your inventory.


Time to put your brain to use. There's a bunch of illustrations here. Remember the insect you picked up from earlier? Match the insect you have to the illustration of the insect on the paper. Once you have a match, remember the kHz value next to it. We'll need it later.

Head back to the bridge and use the hammer on the stack of planks near the truck. This will build a gangway, meaning that you won't have to cross the ravine and waste time. Do it again, and you'll create a bridge, which allows your car to go through. Use the wrench on the truck to remove a wheel and head across to the gas station. Go around the back and use the gas can on the truck's valve's and then use the wrench of the same valves. You'll get a full can of gas.

Head back to the house. Go around to the barn and use duct tape on the hole in the pipe you found earlier. Fill the generator, examine it and switch the setting to 'Water Pump' and start it. Place both cans of pesticide into the pesticide inlets. Examine the pump itself.

<add pump screen>
You'll need to select "Overnight Mist Spray Irrigation' and then light up all of the lights on the "Active Sprinklers" section. The easiest way to it is shown above. Just click the four centre buttons once.

Examine the pickup truck. It needs an ignition coil and wheel, which you have. Fix the car. Go to the back door of the house and drop the Sonic Repellent Device (long spear like thing) to set it up. Use the remote controller on it and set the frequency shown to the frequency of the insect from earlier. If you forgot, you still have the insect and note in your inventory to examine.

Going back inside and using the storage chest again, store everything apart from the wrench and gas can. Go to the gas station again.

We're now going to loot the rest of the gas station. Fill up the gas can and take one iron bar from the left side of the gas station and the bag of charcoal from the right side. Head back to the house and fill up the car with gas and store the bag of charcoal and the iron bar.

Head back to the gas station one last time. Fill up the gas can once more and then go back to the house.

Time to start fortifying this place. Don't worry about the chimney, it's blocked and you can't do anything about it. Use the window nets on the windows of the house. There's one window on the bottom floor and two on the first floor. The nets will just hang there, so use the duct tape on them to fix them to the window

And that should be it. You should have around 50 minutes to spare and you will have done everything needed. You will have even built the bridge across the ravine and fixed your car.

Perfect night checklist:
  • You are inside the house
  • Both doors closed and locked
  • All windows have window nets and are taped to the window
  • The generator is running and powering the water pump
  • The water pump's pipe has been fixed with duct tape
  • The water pump has two pesticide cans inserted
  • The water pump is set to 'Overnight Mist Spray Irrigation'
  • The water pump 'Active Sprinkler' lights are all lit
  • The Sonic Repellent Device is installed outside your house and set to the correct frequency.

Optional items:
  • Examining the stack of papers next to the computer upstairs in your house will give you papers and a paperclip. The papers are useful on Day 2 Cold, and the paperclip can be used to pick doors which will take 15 minutes in-game time. Too bad all the things it can pick can just be opened with the crowbar instantly.
  • There are two small rocks at the gas station. They are useless.
  • The water sprayer is useless, only needed for an achievement.
  • The plastic wrap is only useful on Day 1 Gas. Since you have locusts, it is completely worthless.
  • The iron bars are useful on Day 1 Spiders and Day 3 Bandits. However you only need 1 iron bar on Day 3 Bandits so the other two are useless.

When you're sure you are ready, hit the clock button at the top.

If you followed everything correctly, you should have stopped all of the locusts before they even entered the house! Hooray! You go to sleep early, and as a bonus for perfecting the level, get a 5 kg carrying bonus! Everything is fine. This house is impenetrable!

...What's that helicopter doing?
Day 2: Heat
So, you're going to be burnt to a crisp? Better crank that AC.

You'll wake up from the helicopter crashing into your house. The attic hatch will fall out from the impact. Climb up to the attic. Take the extension cord and head left.

There's someone here. They'll point a gun at you but lower it shortly afterwards. The pilot's name is Cate and we learn our protagonist's name is David. You'll enter the game's chat interface after this. Talk to her about everything if you want, but make sure to talk about 'An Outpost' and 'Show my map' so you get more locations to visit. After you have talked to her about everything, pick up the screwdriver on top of some boxes and leave.

Important!
Whenever you recruit characters, they will help out with any action that requires time to pass. More characters = less time spent.

Note: If you had Day 1 Spiders and had to nail the bars to the window, after you recruit Cate, use the crowbar to remove one of the barricades and take the nails that drop from it and take a hammer with you. You'll need it to create the bridge.

Go back down to the storage chest and take the following items with you.
  • Adjustable Wrench
  • House Keys
  • Screwdriver
  • Extension Cord
  • Short Pipe
  • Duct Tape
  • Gas Can
  • Crowbar
  • Nails (optional, see note above)
  • Hammer (optional, see note above)

Go out to the car in the barn and put the gas can in the cargo box. Enter the car and drive to the broken bridge. Create the bridge if you haven't already and drive to the restaurant. Enter the restaurant.

Turns out there's another survivor here. A young kid called Cody. He's trying to enter the kitchen and he's pretty agitated. You can talk to him about a few things. Leave the restaurant and head around the back by clicking the side of the building.

There's a pole here with a release clamp mechanism. Use the short pipe on the release clamp mechanism and then click the short pipe and then the rope. The flag and a rope will drop to the ground. Pick up the rope and flag.

Examine the window above the back door and then try to move the green garbage bin. It's too heavy for you, so ask Cate for some help. Now you can enter the window and enter the kitchen.

There's a lot of useful things here and you need to get all of them. In front of David is a portable air conditioning unit. Behind him is a white shelf with a tin of food on it. There are a few kitchen drawers here; one is locked so break it open with a crowbar to find a kitchen knife. There's a freezer next to the cabinets, opening it will give you three Sidereal Plexus heat absorber tiles. Interesting... Finally, open the fridge next to the freezer using the crowbar, and get two water bottles. That's all here, so exit the kitchen by using the door to the right.

You'll surprise Cody. He asks for food, so use the knife you found on the tin and give it to him. He'll join you and follow you around. That's all for the restaurant so get into the car and head for the ruined house.

There's another survivor here. His name is Barry. Talking to him reveals he's lost his wife, and subsequently, his will to live. Trying to enter his house will make him let you to leave. Talk to Cate and get her to distract him. You can now enter the house.

The corpse of Barry's wife is in the centre of the room. Examine the corpse and you'll find a locket. Examine the locket in your inventory. Turns out Barry's wife left some last words for him. Go and give him the locket.

After a rather tense moment, you can offer to bury Barry's wife. Barry will unlock the garage door next to him and you'll have to bury Maggie. Grab the shovel in the garage and enter the house again.

Grab the bed sheet off of the couch and use it on Maggie. Click on her to move around to the back. Use the shovel on the ground to dig a grave. Go back around to Barry and tell him about the burial. After this, Barry will be recruited.

Note: If you don't recruit Barry, he'll die when the day ends. Coming back to the ruined house will allow you to pick up his key and unlock the garage, obtaining the shovel this way.

Go back inside the house again. Pick up the fan and leave. Talk to Barry again. There's a dialogue option where he can look at the car and make it use less fuel. Do so and then drive the car to the roadblock.

There's some new tire tracks here. Examine them and then drive the car to the new location shown on the map; an RV.

Enter the RV and click on the front seat to examine the RV's usability. It can't move but it can turn on and provide electricity. There are two bottles of water on the table. Take them and then open the first aid kit, also on the table. Inside is a bandage and a thermal blanket. Exit the RV.

Use the gas can on the RV to fill it. Use the screwdriver on the fan to fix the fan. Use the wrench on the hook on the back of the RV to detach it. Combine the hook and rope to create a grappling hook... sort of. Use it on the rock formation over to the right side of the screen. Use the thermal blanket on the cave.

Go back inside and turn on the RV by clicking on the front seat. Exit the RV and use the extension cord on the power socket on the RV. Pick up the extension cord sockets and move them over the hole.

Plug the fan into the sockets. Use the portable air conditioning unit on the cave entrance at the top of the screen. Plug in the AC unit. Give Cody, Barry and Cate a water bottle each.

Open your inventory and use the wrench on each Heat Absorber tile. Drop each tile when they glow.

And that's that. You can also decide to hold out in the house, but the cave is easier and takes less time to set up. You have around 7 hours left. You can go refill the gas can and car if you want.

Perfect night checklist:
  • You are inside the cave
  • The cave has a thermal blanket on the entrance
  • The RV is filled with gas and powered
  • The extension cord is down in the cave and plugged into the RV
  • The fan is repaired and plugged in
  • The AC unit is plugged in
  • All three Sidereal Plexus tiles have been activated and dropped in the cave
  • Optional: Give a water bottle to each person and use one yourself.

Optional items:
  • Back at the house is a blocked chimney. Using the hook on the chimney will unblock it and reveal a dead bird. The dead bird is useless, it only purpose is for an achievement.
  • All coats and blankets apart from the thermal blanket are useless. We take the flag in case you get Day 3 Thunderstorm.
  • The propane tank and hose are useless

When you're sure you are ready, hit the clock button at the top.

If you followed everything correctly, you should have avoided the heat and gained another 5 kg weight bonus due to perfecting the day.
Day 2: Cold
So, you're going to be become a popcicle? Better wrap up warm..

You'll wake up from the helicopter crashing into your house. The attic hatch will fall out from the impact. Climb up to the attic. Take the extension cord and head left.

There's someone here. They'll point a gun at you but lower it shortly afterwards. The pilot's name is Cate and we learn our protagonist's name is David. You'll enter the game's chat interface after this. Talk to her about everything if you want, but make sure to talk about 'An Outpost' and 'Show my map' so you get more locations to visit. After you have talked to her about everything, pick up the screwdriver on top of some boxes and leave.

Important!
Whenever you recruit characters, they will help out with any action that requires time to pass. More characters = less time spent.

Note: If you had Day 1 Spiders and had to nail the bars to the window, after you recruit Cate, use the crowbar to remove one of the barricades and take the nails that drop from it and take a hammer with you. You'll need it to create the bridge.

On the second floor, grab the papers next to the computer. Go back down to the storage chest and take the following items with you.
  • Wood planks
  • Anything paper-based. Notes, documents, cash, etc.
  • Bag of charcoal
Use the bag of charcoal on the fireplace. Use cash on the fireplace. Place everything else into the kindling bin next to the fire. Do note that the empty bag of charcoal is also kindling.

Go back to the chest and grab these items.
  • Adjustable Wrench
  • House Keys
  • Screwdriver
  • Extension Cord
  • Short Pipe
  • Duct Tape
  • Gas Can
  • Crowbar
  • Nails (optional, see note above)
  • Hammer (optional, see note above)

Go into the kitchen and plug the extension cord into the socket. Move the extension cord sockets into the room on the left.

Go out to the car in the barn and put the gas can in the cargo box. Enter the car and drive to the broken bridge. Create the bridge if you haven't already and drive to the restaurant. Enter the restaurant.

Turns out there's another survivor here. A young kid called Cody. He's trying to enter the kitchen and he's pretty agitated. You can talk to him about a few things. Leave the restaurant and head around the back by clicking the side of the building.

There's a pole here with a release clamp mechanism. Use the short pipe on the release clamp mechanism and then click the short pipe and then the rope. The flag and a rope will drop to the ground. Pick up both.

Examine the window above the back door and then try to move the green garbage bin. It's too heavy for you, so ask Cate for some help. Now you can enter the window and enter the kitchen.

There's a lot of useful things here and you need to get all of them. In front of David is a empty gas heater. Behind him is a white shelf with a tin of food on it. There are a few kitchen drawers here; one is locked so break it open with a crowbar to find a kitchen knife. Finally, open the fridge next to the freezer using the crowbar, and get two water bottles. That's all here, so exit the kitchen by using the door to the right.

You'll surprise Cody. He asks for food, so use the knife you found on the tin and give it to him. He'll join you and follow you around. That's all for the restaurant so get into the car and head for the ruined house.

There's another survivor here. His name is Barry. Talking to him reveals he's lost his wife, and subsequently, his will to live. Trying to enter his house will make him let you to leave. Talk to Cate and get her to distract him. You can now enter the house.

The corpse of Barry's wife is in the centre of the room. Examine the corpse and you'll find a locket. Examine the locket in your inventory. Turns out Barry's wife left some last words for him. Go and give him the locket.

After a rather tense moment, you can offer to bury Barry's wife. Barry will unlock the garage door next to him and you'll have to bury Maggie. Grab the shovel in the garage and enter the house again.

Grab the bed sheet off of the couch and use it on Maggie. Click on her to move around to the back. Use the shovel on the ground to dig a grave. Go back around to Barry and tell him about the burial. After this, Barry will be recruited.

Note: If you don't recruit Barry, he'll die when the day ends. Coming back to the ruined house will allow you to pick up his key and unlock the garage, obtaining the shovel this way.

Use the wrench on the propane tank and pick it up. Go back inside the house again. Pick up the electric heater and the blanket on the couch. Open the closet and take the coats and leave. Talk to Barry again. There's a dialogue option where he can look at the car and make it use less fuel. Do so and then drive the car to the roadblock.

There's some new tire tracks here. Examine them and then drive the car to the new location shown on the map; an RV.


Enter the RV. There are a few things here and we'll need them all. If you run out of space or weight, put items in the cargo box on the car. Grab the green blanket and the bottles of water. Open the two closets above the table and take the jackets inside. Open the first aid kit. Inside is a bandage and a thermal blanket. Exit the RV.

Use the wrench on the hook on the back of the RV to detach it. Combine the hook and rope to create a grappling hook... sort of.

Return home and use the gas can on the generator. Switch the setting to 'House' and start it up. Go back into the house's kitchen. Open the oven and then go into the left room. Use the screwdriver to fix the electrical heater and plug it into the extension cord sockets. Combine the propane tank with gas heater and drop it.

Replace all of the barricades over the windows with the flags, and the green and blue blankets, and tape them to the window. Go up to the attic and place the thermal blanket over the ceiling hatch.

Go out onto the roof by opening the hatch in the attic and go left. Use the hook on the chimney to clear it of the blockage. Go back inside and close the hatch and head back down into the room with the storage chest. Light the fire with a lighter.

Note: If you got Gas Day 1, use the towels on the doors to keep the cold out.

And that's that. You have around 6 hours left. You can go refill the gas can and car if you want.

Note: You can also not use the extension cord on the kitchen socket and set everything up in the kitchen to gain an extra 7% heat from being closer to the open over. Either strategy will give you a perfect night.

Perfect night checklist:
  • You are inside the house
  • You are inside the room with the fireplace
  • The generator is running and powering the house
  • The oven is open
  • The extension cord sockets are in the room with the storage chest
  • The electrical heater is repaired and plugged in
  • The gas heater is filled with propane and dropped in the room with the storage chest
  • All doors are closed and locked
  • The windows are blocked with blankets/flags and taped
  • The ceiling hatch is blocked with a thermal blanket
  • The attic hatch leading to the roof is closed
  • The fireplace is lit
  • The kindling box is full of everything you can put into it
  • Optional: Give a jacket to each person and wear one yourself

Optional items:
  • The dead bird you retrieved is useless. It unlocks an achievement.
  • The propane hose is useless

When you're sure you are ready, hit the clock button at the top.

If you followed everything correctly, you should have avoided the cold and gained another 5 kg weight bonus due to perfecting the day.
Day 3: Bandits
A raid by some bandits, huh?

After a dialogue about going to Sidereal Plexus, you're given control of David once more. Take the hook and rope if you used it on the cave. Go back to the house if you're not already there. Remove all of the barricades. Head to the chest and make sure you have the following.
  • Gas Can (Full)
  • Crowbar
  • Wrench
  • House Keys
  • Iron bars (1) (Only if you have them, aka, you didn't have Spiders on Day 1)
  • Hammer (Only if you have bars)
  • Handful of nails (1) (Only if you have bars)
  • Water bottle (if you don't have a water bottle, that's okay.)
  • Optional: Hunting Rifle

Use the Iron Bars on the downstairs window and hammer it into the window with nails. Put the hammer back into the chest.

Head back to the car and head off to the Sidereal Plexus office.

The whole city is a ghost town. Head towards the building and head up the sand dune. After getting to the top of the building, head right towards the hole.

Suddenly, one of the letters falls over and breaks the glass. Cody and Barry are hanging over a four story drop. You can only save one. You can save either. Cody seems to be the 'right choice' but you can still save Barry unlock the True Ending.

Talk to whoever you saved after the experience and head inside. Head right through the doorway and go down the stairs. Head left through the open door. Examine the corpse to get an ID badge, then right click the ID badge in your inventory to get a key. Head back right and open the locked door with a key.

There's a generator here. Clicking on it will open a small mini-game where you have to start the power using by making sure the Pin A and Pin B have the correct voltage. Below is a solution.


Once you have started the power, go back into the left room. There's a silencer on the ground here so pick it up. Use the lit up computer. Feel free to read all of these, but the most important ones are:
  • Visit... (go to Page 3)
  • Hunt... (download the map)
  • PINS (go to Page 2)
  • ESCAPE (download the map)

Once you've got everything, go back to the generator and re-pin the generator to have Pin A use 15v and Pin B use 40v. A solution is below.


Once that's done, head downstairs. Open the elevator on the right and then use a wrench on the fire hose box. Click on the fire hose and then click on the elevator to put the fire hose down the elevator shaft.

If you saved Barry, click on the pipe on the left side of the room and ask Barry to move it. If you saved Cody, click on the vent near the left side of the screen and then talk to Cody to unlock the door. Each room has a floppy disk, but you can only get one for now.

Go down the fire hose and keep heading left. Cody/Barry is still alive, but barely. After a few last words, he'll pass away. Keep heading left until you get to a blocked off passage and a door. Open the door and you can reunite with Cate. You can question her about her involvment with Sidereal Plexus if you wish. You can also head back to their body and create a small grave for him, unlocking an achievement.

When your done, take the car and head to the gas station. You can hear some muffled speaking. Enter the left side of the gas station and look at the window. A small scene will happen, with the bandits talking to some military guy. They'll leave. Go out and talk to the guy. He'll pull his gun on you but lower it after a while. This is Sarge. He leads a small team who have joined forces with the bandits for survival. Seems like he doesn't really like Razor and his gang, but he has no choice.

Talk to him about everything you can. Then say goodbye. He seems to be struggling with the valves on the truck, so use the wrench on him to give him a hand. Talk to him again. Three more options open up. Talk to him about the moon and the spaceship first. After those two options, finally pick 'Help'. You'll have to answer a few dialogue options correctly. You can try multiple times.

What do I choose?
  • Help.
  • You were a soldier.
  • Time to rethink your life.
  • You should go.
  • You don't like working for Razor.

Say goodbye to him. Sarge will leave, and promise to talk to his men. Head back to the car and head to the restaurant. Enter and go left to the restroom. Open the supply closest and take the kitchen oil. Leave and head to the hunting lodge.

Head inside the lodge and click on the scratches next to the couch. Hard to see, so here's a picture.


After clicking on the scratches you can click the couch to move it, revealing a floor safe. Neat. To open it, use the wrench on the mounted head on the wall. Inside the safe is three things, a revolver, rifle ammo, and revolver ammo. Head to the door on the right. Take everything in here; the whiskey, the rifle scope, and any bear traps.

Exit the lodge and head around the back. Pick up all of the bear traps. A corpse of an animal might be trapped in one so you have to clear it.

Note: If you got Spiders on Day 1, you will find less bear traps here. You can reuse the bear traps back at the house by using the crowbar on them.

Head back to the car and drive to the construction site.

At the construction site, click the right side of the blue fence to head to the construction parking space. There's a hole in the fence on the right side but the path is guarded. Examine the corpse to pick up a maggot. Use the maggot on the shelf to the left of the guard. Wait until he gets distracted and then run past to the fence hole and enter.

You're around the back of the camp. There's some ammo boxes and some food supplies. Use the kitchen oil and/or water on the ammo. You only need one. Use the whiskey on the food supplies.

Note: If you got Spiders on Day 1, you can find some iron bars here. Pick one up. You'll need it for defending.

Leave by going through the hole and running past the guard, who is checking his magazine and get back to car. Drive to the gas station to fill up on gas and return home.

Time to protect ourselves. Get your hunting rifle and combine it with the silencer and the scope. Head around to the front of your house and drop all the bear traps at the front door. Enter your house and close and lock the doors.

Make sure that the downstairs window has iron bars on it and it is nailed to the window. Go to the attic and go out onto the roof.

And that's it. You're ready to defend yourself. Be sure to arm yourself with the rifle, load it and have an extra box of rifle ammo in your inventory before you finish the day.

Perfect night checklist:
  • You are on the roof
  • Doors are closed and locked
  • The rifle has a silencer and a scope and is loaded
  • You have an extra box of rifle ammo on you
  • The window downstairs has iron bars on the window and is nailed to it.
  • All bear traps are set around the house
  • The bandit's food supply has whiskey next to it and it not poisoned
  • The bandit's ammo supply has been tampered with, using oil or water
  • You have reasoned with Sarge peacefully

Optional items:
  • All the documents found in the Sidereal Plexus office are only for lore reasons.
  • You can kill Sarge and poison the food. These are considered 'evil endings' and will still get you a perfect night... though could you really live with yourself?
  • You can also kill the guard around the side of the construction site. Simple use the silenced rifle on him when he's distracted. You can still get the perfect night with or without doing this.

When you're sure you are ready, hit the clock button at the top.

If you followed everything correctly, you should have killed all of the bandits and gained another 5 kg weight bonus due to perfecting the day.
Day 3: Thunderstorm
A thunderstorm with burning acid, huh?

After a dialogue about going to Sidereal Plexus, you're given control of David once more. If at the RV, pick up the extension cord and the hook and rope.. Go back to the house if you're not already there. Remove all of the barricades. Pick up the extension cord if you didn't start at the RV. Head to the chest and make sure you have the following.
  • Gas Can (Full)
  • Shovel
  • Wrench
  • Bandage
  • House Keys
  • Extension cord

Head back to the car and head off to the Sidereal Plexus office.

The whole city is a ghost town. Head towards the building and head up the sand dune. After getting to the top of the building, head right towards the building.

Suddenly, one of the letters falls over and breaks the glass. Cody and Barry are hanging over a four story drop. You can only save one. You can save either and unlock the True Ending. Saving Cody seems to be the 'right' choice, but it doesn't matter.

Talk to whoever you saved after the experience and head inside. Head right through the doorway and go down the stairs. Head left through the open door. Examine the corpse to get an ID badge, then right click the ID badge in your inventory to get a key. Head back right and open the locked door with a key.

There's a generator here. Clicking on it will open a small mini-game where you have to start the power using by making sure the Pin A and Pin B have the correct voltage. Below is a solution.


Once you have started the power, go back into the left room and use the lit up computer. Feel free to read all of these, but the most important ones are:
  • Visit... (go to Page 3)
  • Hunt... (download the map)
  • PINS (go to Page 2)
  • ESCAPE (download the map)

Once you've got everything, go back to the generator and re-pin the generator to have Pin A use 15v and Pin B use 40v. A solution is below.


Once that's done, head downstairs. Open the elevator on the right and then use a wrench on the fire hose box. Click on the fire hose and then click on the elevator to put the fire hose down the elevator shaft.

If you saved Barry, click on the pipe on the left side of the room and ask Barry to move it. If you saved Cody, click on the vent near the left side of the screen and then talk to Cody to unlock the door. Each room has a floppy disk, but you can only get one for now.

Go down the fire hose and keep heading left. Cody/Barry is still alive, but barely. After a few last words, he'll pass away. Keep heading left until you get to a blocked off passage and a door. Open the door and you can reunite with Cate. You can question her about her involvment with Sidereal Plexus if you wish. You can also head back to the deceased body and create a small grave for him, unlocking an achievement.

When your done, take the car and head to the restaurant. Turns out some military types have taken it over and are pointing some guns at you. You have to go with them. Eventually they're lower their guns and you can talk with the leader, Sarge. Talk to him about everything. You'll learn they need some bandages and something to disinfect the wounds and that one of the soldiers has something to help you survive the coming storm. You also learn of a construction site, which we'll go to soon.

You can't get their help yet, so head back to the car and head the the hunting lodge near the top middle of the map. Head inside the lodge and click on the scratches next to the couch. Hard to see, so here's a picture.


After clicking on the scratches you can click the couch to move it, revealing a floor safe. Neat. To open it, use the wrench on the mounted head on the wall. Inside the safe is three things, a revolver, rifle ammo, and revolver ammo. Head to the door on the right. Take everything in here; the broom, whiskey, and all the wooden boards. Plug the extension cord into the socket and then move the sockets out the broken window.

Head back outside and use the broom on the roof of the lodge (shiny spot). You'll reveal some solar panels. Go back to the car and drive to the restaurant again.

Go inside and give the bandage and whiskey to the injured man. Leave the interior and head around the back and talk to the soldier here. Talk to him about surviving the storm and then about the 'things to survive the storm." He'll give you three Storm Catchers. You'll need to set these up and power them in a triangle shape around your base. Mention the giant burger pylon. He'll say to ask Sarge for help. Head back inside.

Talk to Sarge and ask if his team can install the storm catcher. He'll agree but you'll need to trade something in return. A gun and some ammo. Give him the revolver and the revolver ammo and then the storm catcher. He'll mention that he and his team will do it and remind you need to power two more. Go back to the car and head to the construction site.

At the construction site, click the right side of the blue fence to head to the construction parking space. There's a hole in the fence on the right side so crawl through it. There's a generator, a crane and a large pile of bricks here, on top of a large spool of wire, which we need. Fill the generator and turn it on before climbing the crane.

On top of the crane, use the controller. Move the crane up, left, open the hook, down, close the hook, and up. If done correctly, the pile of bricks will be lifted up, noted by the crane hook rising slowly. Head down the crane and turn the generator off. Grab the spool of wire. Now climb back up the crane again.

There's a box of wires on the left side of the crane compartment. Open it and use the Storm Catcher on it. Climb back down and turn the generator on again. That's the second catcher ready to go. Head to the front side of the construction site where you can see a large green tarp. Pick it up and head back to the car.

Stop by the gas station to refill the car and the gas can.

Drive to the lodge. Head to the back and pick up the extension cord and then use it on the tree. You'll climb up the tree with the extension cord. Use the last storm catcher on the extension cord sockets. If you've done everything right, it'll start glowing blue. Head back to the car and go back to your safe house.

Time to fortify this place. Head around to the front of the house (near the dead tree, not right outside the front door) and use the shovel on the ground to the left. You'll dig some ditches. Head inside now and lock the doors. Grab a hammer and two sets of nails, some duct tape, and a flag/blanket/thermal blanket from the chest. Nail two boards to the windows and tape the last one. Head up to the attic.

Place the flag/blanket/thermal blanket onto the hatch if you haven't got something there already. Head onto the roof and head to the left. Use the tarp on the helicopter and then the duct tape on the tarp to fully seal the hole. Use the wire spool on the chimney to create a makeshift lightning rod. Head back inside and close the hatch.

Note: If you got Gas Day 1, you can use the towels on the doors to stop the water from entering.

And that's that. You have around 4 hours left. You can go refill the gas can and car if you want.
Day 3: Thunderstorm (cont.)
Perfect night checklist:
  • You are inside the house
  • Doors are closed and locked
  • The hatch on the roof is closed
  • All windows have been blocked by boards and affixed to the window securely.
  • The ditches outside have been dug
  • The tarp is over the helicopter and has been taped down
  • Copper wire lightning rod installed on chimney
  • All storm catchers are in place and powered

Optional items:
  • All the documents found in the Sidereal Plexus office are only for lore reasons.

When you're sure you are ready, hit the clock button at the top.

If you followed everything correctly, you should have avoided all the rain (though the house isn't looking too good) and gained another 5 kg weight bonus due to perfecting the day.

Author's Note: Due to the character limit on guide sections, I had to split the Day 3 Thunderstorm into two sections.
Day 4: Air or Fuel
Author's Note: Due to the very low difference in Day 4 compared to other days, I'll be writing this day in one section and covering the minor changes in notes like this one.

So... the world's ending?

Dammit...

(Side note: Go watch Edgar Wright's 'The World's End')

Note: If you got bandits, either spare or kill Razor, it has a minor change in the ending if you spare.
Also if you got bandits, there will be a crashed motorbike to your right after you make your choice. Examining it will get you some protective gloves. If you got Thunderstorm, we'll get the gloves later.

Head to the chest and grab the following items.
  • Gas Can (Full)
  • Crowbar
  • Hook and rope
  • Screwdriver
  • Shovel
  • ID Badge
  • The floppy disk you got from Sidereal Plexus
  • Protective gloves (if obtained)

Head to the car and drive to the spaceship outpost. A dialog box will ask you if you want to stop. Click no. Enter the outpost and step onto the blue doormat. Quickly use the ID Badge on the door and enter the building.

Interact with the fuse box for another mini-game. You have to deactivate the doormat and activate the elevator without passing the electricity through one of the blown wires. A solution is below if you're interested.


Go down the elevator and enter the first door and pick up the chemical formula, access card, and the remote. Use the screwdriver on the remote to get batteries. Go to the left where you can see the spaceship. Use the red access card on the card scanner and enter the room.

Control Room Diagram

Enter the control room below you. Examine the bottom part of the mainframe computer next to you to get a duplexer. Examine the hatch control to open the hatch. Enter the diagnostic screen and check to see if you need fuel or air. This will change what items you get and what you need to repair.

Hatch Note: If the hatch won't open, make sure that the transmission belt is on the upper engine near the fuse puzzle.

Examine the Fuel/Air Comp monitor to enter another mini-game where you have to increase all of the bars to the green line. This is very simple to do. Just keep clicking the + icon's to fill each bar to green and move to the next. Shouldn't take you long.

Head back up the elevator and use the screwdriver on the engine to get a transmission belt. Go outside and up to the shiny thing on top of the building. Use the screwdriver on the shiny thing and use a duplexer on the hole. Pick up the plate off the ground and head back down the elevator.

Enter the control room and look at the radar screen. Looks like a crashed plane is near here. Go down further to the launchpad and attach the transmission belt to the engine of the elevator. Click the up button and go inside the spaceship.

Go down to the bottom of the spaceship and open the toolbox. Grab the glue gun that is inside. Combine the batteries with the glue gun. That's all we need to do for now so leave the spaceship and get back to the car.

Time to investigate that crashed bus. Enter the bus and pick up the key at the back of the bus. Examine the smudge on the window near the key and use the glue gun on it. After that, use the screwdriver on the glue on the window to get a fingerprint. Leave and take the car to the crashed plane.

There's a bunch of sand in front of the plane. Use the shovel to clear it and enter the plane. Head to the front of the plane by heading right and examine the body. If he is alive, Cody might interrupt you a few times. You'll get a cargo manifest. Examine the cargo manifest.

What should I get?
In the fuel scenario, you need to replace a nav chip, so use the crowbar on the nav chip box and take a nav chip.
In the air scenario, you need to replace the air tanks, so use the crowbar on the air tank box and take them.

We're all done here.

If you got Thunderstorm on Day 3, the gloves will be lying on the floor of the restaurant, so drive there now and get them.

Head to the construction site and enter through the front entrance. Use the gloves on the scaffold and climb up. Attach your rope and hook to the buckle and climb down, allowing you to pick up a welding kit. Climb back up the rope and use the gloves on the scaffold again to climb back down. Go back to the car and head to the Sidereal Office again.

Head towards the building and click on the far right this time. You'll go around the sand dune toward the door you opened earlier. Head right until you get to Lab 13. Open it with the key you found.

Looks like a normal lab. Grab the vials of liquid from the top shelf in front of you and the table to the far right. Place them both into the chemical mixer to the far left and then examine it.

What should I mix?
You picked up a paper of a chemical formula earlier. This will either be pills to make you use less air or a fuel catalyst to make the reaction of the fuel more powerful.

Note: I am unsure if the formula's swap. If you follow the screenshots shown below and they are incorrect, PLEASE leave a comment so I can correct this.

In the fuel scenario, use this formula to create the catalyst and put it in the bottle.

In the air scenario, use this formula to create the powder it put it in pill capsules.

If you're in the air scenario, give the pills to your friends.

Get back to the car and head to the spaceship. It's time to blow this popsicle stand!

Take the elevator down and use the fingerprint on the second door. Take both items here and enter your inventory. If you're in the fuel scenario, drop the LiOH Filter. If you're in the air scenario, drop the calibrator.

Time to fix the spaceship!

How to fix spaceship?
In the fuel scenario:
  • Put the catalyst into the machine next to the elevator.
  • There's a dangerous crack on the outside of the ship on it's fin. Plug the welding kit into the socket on the elevator and put the metal plate on the crack.
  • Put the nav chip into the red light on the top floor of the spaceship
  • Put the engine calibrator into the red light on the bottom floor of the spaceship.

In the air scenario:
  • Put the LiOH Filter into the red light on the top floor of the spaceship
  • Put the air tanks into the red light on the bottom floor of the spaceship.
  • There's a dangerous crack on the inside of the ship's walls on the bottom level. Plug the welding kit into the socket inside the ship and put the metal plate on the crack. Pick up the welding kit after this.

Finally the last thing to do is to drop everything you have on the ground at the bottom of the elevator. You can only take 1 kg of stuff with you. You should take any floppy disk you have found. Take anything else at your leisure.

And you're good! Get in the spaceship and examine the launch controls at the top of the ship when ready to launch.

Perfect launch checklist:
  • You have opened the hatch
  • You have repaired the crack by welding it
  • The fuel mixture or the air comp is perfect (green)
  • You have fixed all the missing systems
  • Fuel only: You have added the catalyst and the formula is correct
  • Air only: You have given your friends pills and the formula is correct. You have also equipped yourself with pills when you started the launch

Optional items:
  • You can chop off the dead guy's finger at Sidereal Plexus's office with the kitchen knife and use that instead of the glue gun.
  • The other cargo boxes seem to have useless items in them.

If you followed everything correctly, you should make it to the moon without any problems.
Epilogue
You're on the moon. Hell yeah!

If you didn't perfect Day 4, Cate will die here, stabbed through the chest with a metal bar.

Talk to Cate and Cody/Barry and then open the door at the back of the spaceship to reveal some spacesuits. Take them and then leave the spaceship. Walk towards the moon base. There's an airlock override mini-game here. It's very simple. Just turn the outer ring until the line matches up and then repeat with the next ring in until the lines are all connected.

Once you've entered the moon base, head left. There's a bunch of spoiler stuff here that I won't get into. Pick up the black card and head right until you get to a large desk-like thing with a card reader. Scan the card reader and examine the screen that lights up. Click 'Do It' and then head back to the left.

Examine the diagnostic console here. More spoiler talk.

Now for the moment of truth. If you have a floppy disk, insert it now, into the console. This is important for unlocking a way to the true ending.

Talk to Cody/Barry and Cate. There's a new dialogue option for each of them. Click it.

Now enter one of the pods yourself. The lights will turn off! Quickly! Run back to the control room on the right. Examine the screen again and reroute the power. Run back and click on the open pod. Click 'Yes'.

And there you go. You have finished Don't Escape 4 with the 'Okay' ending. To get the true ending, you have to start a new game in Awakening mode. Check the section for more information..
Awakening Mode and True Ending
Note: This entire section is a spoiler. Do not read this section until you have finished the game once.

Awakening Mode is activated once you've completed the game once and put a floppy disk into the Sleeper Pod console before getting into it.

Awakening Mode is very similar to the normal game. A few more lines of dialogue are most of the changes.

To get the True Ending, you have to recruit Barry and Cody and keep everyone alive to the end.

This is made possible on Day 3. In the dream sequence, stairs will appear. Depending on who you let die, someone will be waiting for you upstairs. They'll tell you to make Cody/Barry wait when you go to the Sidereal Plexus Office.

From here, it's very simple. Go to the Sidereal Office and talk to Cody/Barry. Tell them to wait near the car. Complete the office like normal. The glass will still break, but you can just pull them up. Make sure you get the floppy disk. Keep going as normal until you get to the part where you reunite with Cate. Whoever you asked to stay will be there as well.

What you have to do after this is to climb back up the fire hose you put down the elevator shaft. You can now open the other locked door.

From here it's a simple process of perfecting Day 3 and perfecting Day 4. Follow the guides above, and make sure you give everyone pills if doing the Day 4 Air Scenario.

Go through the Epilogue and insert both floppy disks into the console and sleep. Enjoy your ending and you have unlocked the 'Custom Game' mode.
Custom Game
Added in Update 1.1.1, Custom Game Mode allows you to customize your survival experience with specific parameters. You can choose exactly what every day's threat will be and if any floppy disks were used.

This can help you get achievements which require certain days, or allow you to do specific days for perfect achievements.
Achievements
Game completion achievements
These achievements are awarded when you complete the game.

Don't Escape
Complete the game.

This is super easy. Just beat all four days.

Awakening
Unlock the Awakening mode.

This is also rather easy. Beat all four days and insert at least one floppy disk into the machine next to the Sleeper Pods.

Escape
Unlock the True Ending

This is a little more difficult. Refer to 'Awakening Mode and True Ending' in this guide to find out more.

Day Survive/Perfect Achievements
The following achievements are achievements for given for beating the day and beating the day perfectly. Refer to their respective days for more information.

Day 1
Survive the first day


Day 2
Survive the second day


Day 3
Survive the third day


Day 4
Survive the fourth day


Disinfestation
Get the perfect result on night one (locust)


Chemistry Major
Get the perfect result on night one (gas)


Arachnophobia
Get the perfect result on night one (spiders)


Stay cool
Get the perfect result on night two (cold)


No sweat
Get the perfect result on night two (heat)


Bloodbath
Get the perfect result on night three (bandits)


Not so shocking
Get the perfect result on night three (thunderstorm)


Breathe
Get the perfect result on night four (air)


Cooking with gas
Get the perfect result on night four (fuel)


Specific Action Achievements
These achievements are for doing certain things within the game.

Don't Forget
You didn't forget to say goodbye.

On Day 3, at the Sidreal Plexus HQ, after you find the body of Barry or Cody, return to the body with Cate and click on the body. You'll create a grave for them.

Dead Bird Space
It would never go this high on its own...

Unclog the chimney using the hook and rope and pick up the dead bird. Then, take the dead bird with you when you use the space shuttle on Day 4.

Treasure Hunters
At least you tried!

On Day 2 (you can do it later, but Day 2 is the earliest), get the shovel and bring Cody to the RV site. Talk to him about what he thinks about the place and he'll mention treasure. After that conversation, click the shovel in your inventory.


Let's Build a Snowman
Witness the last snowman in the world

Only possible on Day 3 if Day 2's danger was Cold. Talk to Cody on Day 2 about the day. He'll mention that he wants to build a snowman. After surviving Day 2, head around the back of the house next to the barn.

Tour Guide
Learn this and that about your neighbourhood

You have to recruit Barry. On Day 2, talk to Barry and select 'About this place' at this following places:
  • Safe House (You only need to talk about the people who lived here)
  • The road below your safe house
  • Gas Station
  • Broken Bridge
  • Restaurant
  • Barry's house

The Family
Make sure everybody survives.

Only possible in the 'Awakening' mode. See that section for more details.

The Lone Wolf
Be the sole survivor

There are multiple ways to achieve this, so I'm going to list the easiest way.
Instead of recruiting Barry and Cody on Day 2, ignore them and survive until Day 4. Complete Day 4 but if doing fuel, do not add the catalyst. If doing air, do not create the pills. Cate will die on landing, and you'll get the achievement after finishing the game.

Mostly Walking
Don't use the car.

Simply put, don't repair your car in the barn.

Pyromaniac
So that's what this item is for!

Get the small water sprayer and combine it with a lighter and a full can of gas to create a makeshift flamethrower. Neat. Don't worry, you can still light the fire on Day 2 Cold with a flamethrower.
Secrets / Easter Eggs
    Sidereal Plexus website
  • Sidereal Plexus has a website. http://siderealplexus.com/
  • There's a log-on screen here. Do we know the username and password?
  • Hint 1: The username and password is found in game somewhere.
  • Hint 2: The username and password can first found on Day 3.
  • Hint 3: There's only one working computer on Day 3. Maybe you can find the credentials there?

    References to other scriptwelder games.
  • On the bottom floor of the safe house is a picture of a shack. This is the house from Don't Escape 1.
  • In Barry's house, there is a picture of a lighthouse, most likely referring to the Deep Sleep series.
  • The storm catches glow the same colour as the crystals from other scriptwelder games, most notably Don't Escape 3.
  • Cody has a dream on Day 3 where there are multiple zombies coming towards a house. This is most likely a reference to Don't Escape 2.
  • There's a document in the floppy disk room from where Cody has to go through the vent to unlock the door. On the last page is one of the shadow monsters from the Deep Sleep series.
  • One of the shadow monsters actually attacks you in the Day 3 dream sequence, making the connection more overt.

    References to other games.
  • On the side of the rifle ammo box that you can pick up is a lambda, referring to the Half Life series. Yes, this is kind of a stretch. Decide for yourself.
Thanks
  • To scriptwelder for creating this game
  • To my friend Phi.
  • To you, the reader.

    Additional Thanks
  • EZPiig (confirming Tour Guide requirements)
  • kekkiedoop (confirming that you can unlock Awakening Mode by letting Cody or Barry die.)
  • ThatOneGuy (pointing out several errors over multiple days)
  • serialzero (pointing out the most obvious flaw in Thunderstorm, Day 3)
  • OwlJarvis (pointing out a few potential easter eggs)
  • Nanashi (indirectly reminding me to add a few more instructions to the Sidereal Plexus website secret)


Once again, if you think something should be added to this guide, don't hesitate to leave a comment.
Комментариев: 88
Anthem  [создатель] 12 дек. 2023 г. в 13:59 
@Ghost Hardware
Thanks, and be excited, Scriptwelder is coming out with the fourth game in his 'Deep Sleep' series; "Deep Sleep: Labyrinth of the Forsaken".

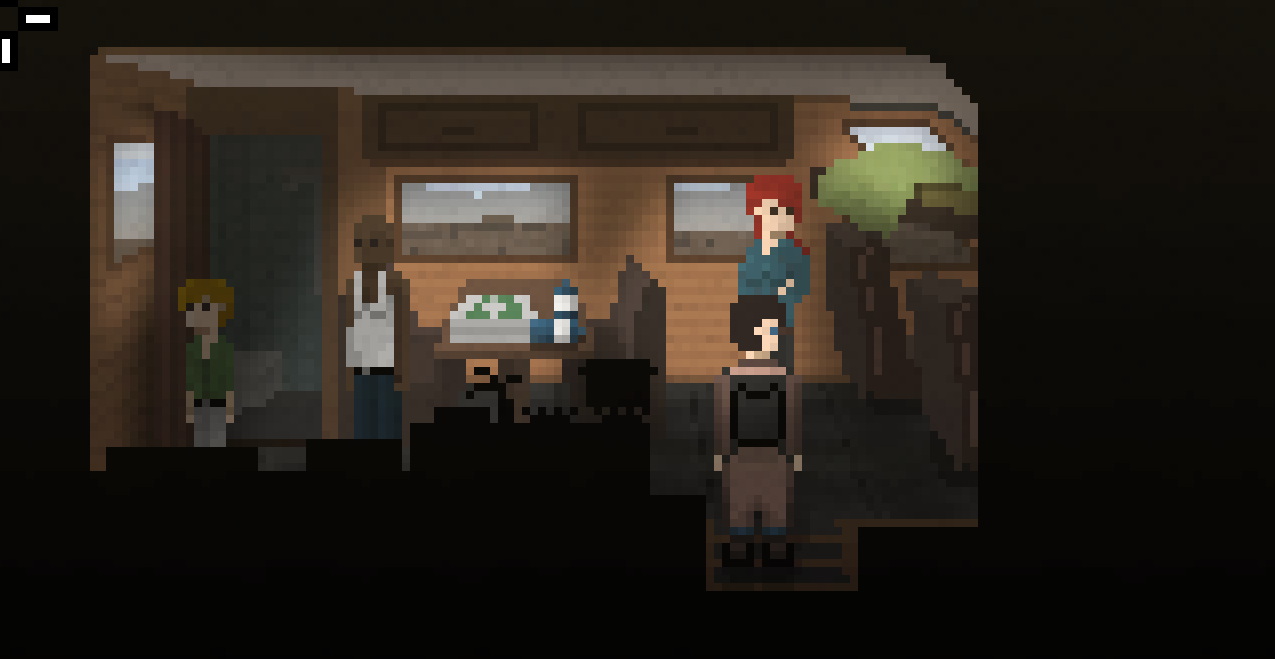
Deep Sleep is more of a traditional point and click adventure, but I really like it.
Ghost Hardware 12 дек. 2023 г. в 12:46 
Thank you. I've had this game in my backlog for ages, and when I finally got around to playing it I got stuck a lot - But your guide really helped me out. Hopefully the dev isn't done and comes out with another game, because I've enjoyed the other Don't Escape games a lot too.
Reid75 18 ноя. 2023 г. в 18:30 
There's apparently a thing with Day 3 Thunderstorm where if you don't use wooden boards to board up all 3 windows, it doesn't count towards a perfect night.

I'm pretty sure I reduced the risk below 0% too, yet it didn't count it because one of the windows only had a blanket over it.
Anthem  [создатель] 8 сен. 2023 г. в 18:50 
@Scarran
Wish I could help more. Best thing would be for you to take a video or something for me to view the ending and your day setup
Scarran 7 сен. 2023 г. в 7:53 
@anthem I went through the whole thing again and I had everything set up properly. I guess I'll have to start over no biggie. Thank you
Anthem  [создатель] 6 сен. 2023 г. в 22:45 
@Scarran
You should go through the Perfect Night checklist at the end of the section to make sure that you have done literally everything.
Additionally, go back to an auto-save and end the day again. Read what the message say and you may be able to figure out where you went wrong.
Scarran 6 сен. 2023 г. в 15:35 
I did everything correctly for Day 2 Cold and Cody died and not even close to perfect...
Anthem  [создатель] 2 сен. 2023 г. в 13:10 
@tunafries
Looking at it again I write:
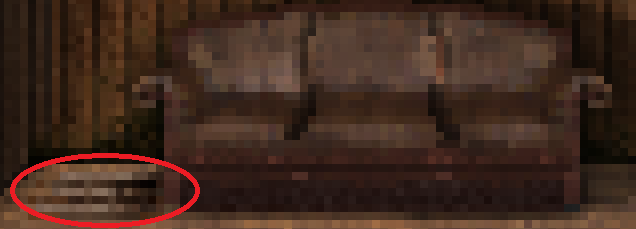
"There's one window on the bottom floor and two on the first floor."
I don't see how this is the 'other way around'.
tunafries 2 сен. 2023 г. в 10:07 
In the Day 1: Spiders section you say there are two windows on the bottom floor and one on the second, but it's the other way around
Slayrius 11 авг. 2023 г. в 19:40 
If you recruit all the characters before taking down the barricades you use less time