Total War: EMPIRE - Definitive Edition

Total War: EMPIRE - Definitive Edition

480 оценки
In-depth guide to naval battles
От LSD
A guide to naval combat, featuring ship statistics and tips on how to use them; how to use morale to your advantage; naval strategies to get the best out of your ships in combat; shot types, and how/when to use them; and general tips and tricks to get the best out of your ships in battle.
4
8
4
2
   
Награда
Добавяне към любими
В любими
Премахване от любими
Ships of the Line
Ships of the line are typically the core of Western nations' fleets. Their rating is indicative of their power, with First Rates being the heaviest, most powerful -- but also most cumbersome -- ships; 6th rates are the opposite, being relatively weak, but fast and manoeuvreable.

Sixth Rate

The Sixth Rate is the smallest Ship of the Line. Slower and less agile than the Brig and Sloop, it makes up for this with better combat stats: a stronger hull and a better array of guns.

Men
Guns
Firepower
Range
Accuracy
Reload skill
Hull strength
Speed
Manoeuvrability
92
32
56
500
60
55
2198
18
High

Tips
During the early stages of the game, skilled players will find use for these ships due to their agility: if the wind is caught correctly, you can easily fire a broadside, and then use the wind to swing around and fire off the other side of guns in quick succession.
Less skilled players will find more use for Sixth Rates in chasing down routing ships -- a role which is quickly replaced by other, less flimsy ships.
I don't recommend using Sixth Rates often, and only then during the very early stages of the campaign. Their small crew and light hull means that any prolonged battle will easily see them damaged beyond use, routed, or worse -- sunk. The Fifth Rate is a far better choice.

Fifth Rate

The Fifth Rate is a well-balanced ship for the early stages of the campaign. It's fast enough to catch most ships during this period, agile enough to easily out-manoeuvre all the larger ships, and has enough guns to hold its own in battle.

Men
Guns
Firepower
Range
Accuracy
Reload skill
Hull strength
Speed
Manoeuvrability
130
48
92
500
60
55
2856
17
Quite-high

Tips
My favourite ship for the early period (up to around 1725). They're cheap, as well as well-rounded. Almost as fast and agile as the Sixth Rate, once you get used to their quirks you can pull the double-broadside trick very easily with a Fifth Rate, and out-manoeuvre almost all other ships -- especially annoying Pirate Galleons. 2 Fifth Rates can easily capture you a powerful Galleon.
Against lighter ships, use the Fifth Rate to cripple the sails, and then close in with a few round shot broadsides if they haven't already routed.
Against heavier ships, keep your distance and try to, again, cripple the sails. Your round shot won't be as effective against larger ships such as Fourth Rates, but your chain shot most definitely will. Once the sails are down, you can close in from the bow or stern (front/back) of the ship, where they have only chase guns (few, light guns) to stand up to you with. Typically this causes a rout.
Against anything larger than a 3rd rate, you should think twice. Light hull, light guns, small crew -- all bad against larger ships.

Fourth Rate

The Fourth Rate is heavier in all ways than the Fifth Rate, but the positives don't necessarily outweigh the negatives of choosing this ship. It's vastly slower and more cumbersome for very little gain power-wise.

Men
Guns
Firepower
Range
Accuracy
Reload skill
Hull strength
Speed
Manoeuvrability
152
58
297
400
40
30
4152
14
Average

Tips
Noticeably less agile than lighter ships, it makes up for this with a much stronger hull -- and that's about it really. It has 100 less range the the Fifth and Sixth rate frigates, which puts it at a disadvantage. I typically use this ship as a means of protecting my lighter ships during the earlier stages of the campaign. Once the Third Rate can be recruited, however, this ship becomes almost completely redundant.

Third Rate

The most well-balanced of ships. Widely used by the British Navy, the 3rd rate is powerful, agile and strong, and can travel at the same speed as the lighter Fourth Rate. It also reloads faster than the previous ships.

Men
Guns
Firepower
Range
Accuracy
Reload skill
Hull strength
Speed
Manoeuvrability
196
74
221
400
40
30
4818
14
Average

Tips
My favourite ship for the mid- and late-game. It's absolutely perfect. Build plenty of these. They can stand up well (if properly manoeuvred) against Second Rates, and with 2 or more, can easily take down even a First Rate Ship of the Line!

Second Rate

A natural progression from the Third Rate, it has a heavier hull and a slightly larger number of guns; however the guns it carries are weaker than the Third Rate, and the ship's weight means it can be easily out-manouevred, crippled, and subsequently destroyed.

Men
Guns
Firepower
Range
Accuracy
Reload skill
Hull strength
Speed
Manoeuvrability
224
86
249
400
30
25
6796
12
Low

Tips
I'd suggest sticking to Third Rates. It can prove useful as a tank, similar to the Fourth Rate in respect to the Fifth Rate in the early game, but that's about all the use i've found for this monster.

First Rate

Incredibly powerful, and incredibly expensive. The tech requirement, cost, upkeep, and recruitment time all contribute to the general rarity of seeing these until the very late-game; which is, of course, good, because they're a nightmare to fight.

Men
Guns
Firepower
Range
Accuracy
Reload skill
Hull strength
Speed
Manoeuvrability
264
106
478
400
30
25
8772
12
Very low

Tips
Manoeuvrability doesn't mean much versus one of these, since the the inevitable broadside you catch from this beast will obliterate your light skirmi-ships. Your best bet for fighting one of these is to catch it from all sides after crippling its sails. Since it's so slow, this allows you to choose when and where you'll fight it -- and you will have to at some point.

Heavy First Rate

The behemoth of the sea. The most powerful ship in the game. Incredibly expensive to maintain, at over 1000 gold upkeep per turn.

Men
Guns
Firepower
Range
Accuracy
Reload skill
Hull strength
Speed
Manoeuvrability
300
122
270
400
20
20
10042
11
Very (very) low

Tips
Not really much to say here. It's incredibly powerful and, as you'd expect, about as agile as a hippo.
As far as countering one of these things go, just bring along an artillery ship -- Rocket Ships are absolutely devastating.
Auxiliary Ships
Auxiliary ships compliment your fleet with support in the form of light skirmishing ships to harrass the enemy.

Light Galley

Only recruitable by Eastern factions, or by factions with access to the Mediterranean Sea, Galleys are incredibly light ships powered by boath oar and wind -- granting them them some form of immunity to poor wind speed -- and feature incredibly powerful cannons, though few in number.

Men
Guns
Firepower
Range
Accuracy
Reload skill
Hull strength
Speed
Manoeuvrability
16
4
200
400
50
30
578
12
High

Tips
I don't have much love for Galleys -- though powerful, a broadside from even a weak Sloop can knock out their front-mounted guns, leaving the ship defenceless -- especially in the case of the Light Galley, with just 16 crew members.

Galley

Again, recruitable only by Eastern factions, or by factions with access to the Mediterranean Sea. Better in every way in comparison to the Light Galley, but slightly more expensive.

Men
Guns
Firepower
Range
Accuracy
Reload skill
Hull strength
Speed
Manoeuvrability
74
4
200
400
50
30
1032
12
High

Tips
Still not really all that useful. The larger crew size and hull strength make it better in every way in comparison to the Light Galley; however, it's still prone to losing its guns and subsequently sitting around doing nothing.

Brig

The Brig is a light ship that all factions get, regardless of culture, location or port technology -- if you have a port, you can build a Brig.

Men
Guns
Firepower
Range
Accuracy
Reload skill
Hull strength
Speed
Manoeuvrability
78
26
48
500
70
75
1258
22
Very high

Tips
It's fast and has a good number of guns, making it great for speeding into position to take out an enemy ship's sails. With such incredible accuracy and reload speed, this ship can quickly and easily decimate sails to allow bigger ships to close in. The downside, however, is the lack of crew protection: the Brig has a low-profile, meaning the crew is largely exposed, making round shot -- and even stray musket fire from enemy marines -- rather devastating against Brigs. If another ship gets in close enough for a grape shot broadside, consider your Brig finished.

Sloop

The Sloop, like the Brig, is a light ship that all factions get, regardless of culture, location or port technology -- if you have a port, you can build a Sloop.

Men
Guns
Firepower
Range
Accuracy
Reload skill
Hull strength
Speed
Manoeuvrability
62
18
52
500
70
75
1396
23
Very (very) high

Tips
Faster and more agile than the Brig, the Sloop also has a slightly stronger hull and better crew protection than the Brig; however, this comes at the cost of fewer, weaker guns. I personally prefer Brigs over Sloops, and rarely build this ship. It's incredibly agile, and can easily perform a 180 degree turn (if the wind conditions are in your favour), but the reduced firepower is too much of a penalty for me.

Carronade Frigate

Features incredibly powerful, but shorter-ranged guns than other frigates, all mounted on an agile Sixth Rate's hull. Requires the Carronade technology to be built (which ONLY affects this ship, sadly).

Men
Guns
Firepower
Range
Accuracy
Reload skill
Hull strength
Speed
Manoeuvrability
76
24
62
400
60
55
2856
22
High

Tips
I'm not a fan of this ship, mostly because of the tech requirement to recruit it. The Carronade tech is awful in that it only grants you the ability to recruit this ship, despite the false description implying all ships receive some form of Carronade re-armament. You're better off teching in other areas.
It's a good ship otherwise (for the very early period, at least). Almost as agile as a Sixth Rate, but with more powerful guns -- if you decide to get it, get it very early, as once Fourth Rates roll out, you'll be massively out-matched and out-gunned.

Razee

Essentially a Third Rate with one of the three gun decks "sawn off", it's a mixture between a "proper" Ship of the Line (i.e., a Third Rate), and a frigate. It has hull strength and a medium sized, powerful gun array -- and it's manoeuvrable as well.

Men
Guns
Firepower
Range
Accuracy
Reload skill
Hull strength
Speed
Manoeuvrability
134
48
123
400
60
40
4654
17
Above-average

Tips
There's a lot of good i've heard about Razees, but i rarely actually use them. By the time you have the technology to recruit them, you also have the tech to recruit heavy First Rate ships -- and so does your enemy. A Razee can't stand up to that kind of punishment; the time of the frigate is far gone. My sole use for Razees is for chasing down enemy ships, as they will absolutely destroy all other frigates in combat.

Steamship

Ahistorical, but a fun idea, it's basically a frigate powered by steam. Looks nice, and that's about it.

Men
Guns
Firepower
Range
Accuracy
Reload skill
Hull strength
Speed
Manoeuvrability
114
34
204
400
60
55
3134
18
Quite-high

Tips
It features some rather powerful guns, but they're, in the most literal sense of the phrase, "few and far between" -- the centre of the hull is filled with a gigantic steam-paddle, meaning there are no guns on either side in this area -- quite a disadvantage. On top of this, they aren't really all that reliable -- being steam engines, they're prone to explode when under fire, which isn't really the kind of thing one looks for in a battle ship...
Still, being a steamship makes it entirely independent of the wind, which is something at least. I don't advise building these ships.
Artillery ships
Bomb Ketch

The first artillery ship you'll have access to in the campaign, it looks like a Sloop with a mortar armament, firing a pair of explosive mortar shots in an arcing motion at enemy ships, from the front of the boat. Huge range, and huge damage potential -- just keep out of reach of the enemy, and try to avoid blowing yourself up...

Men
Guns
Firepower
Range
Accuracy
Reload skill
Hull strength
Speed
Manoeuvrability
42
14
134
750
60
35
1176
15
Very low

Tips
Bomb ketches have a huge 750 range -- more than the typical Rated ship's 400, and light ship's 500. Their explosive shot has the potential to obliterate enemy crews, guns, and hulls, and can sometimes even cause fires -- fires which cause a huge morale drop, and can quickly lead to the enemy abandoning their ship, or simply exploding (which is hilarious).
Support them well, however, as their front-firing mechanic and awful manoeuvrability mean they're difficult to turn around to facilitate escape. A light broadside will quickly and easily destroy the mortar on this ship, rendering it useless; a heavy broadside will just as quickly destroy the ship itself!

Rocket ship

The second and final artillery ship you'll have access to in the campaign, it looks like a Brig with a rocket armament mounted on the front, which fires a flurry of flaming, explosive rockets at enemy ships (again, from the front of the boat). Huge range, and even bigger damage potential, this ship sets the sea aflame. Just as fragile as the bomb ketch, however.

Men
Guns
Firepower
Range
Accuracy
Reload skill
Hull strength
Speed
Manoeuvrability
42
14
134
750
60
35
1176
15
Very low

Tips
Rocket ships are overpowered. Incredibly overpowered. One barrage will very likely destroy a ship, and will at the very least cause massive damage to enemy sails, often burning the sails entirely, rendering the ship motionless.
Trade Ships
Trade ships are special in that they're the only ships to be able to make use of trade nodes -- yellow markers found in Trade Theatres which grant the faction controlling them access to special trade goods.
Empire: Total War features 4 trade ships, all mutually exclusive.

Indiamen

This is the typical Western trade ship of ETW. It features 3 masts, 12 guns, and a small, poorly-armed crew. It's also the cheapest trade ship to produce.

Men
Guns
Firepower
Range
Accuracy
Reload skill
Hull strength
Speed
Manoeuvrability
54
12
26
400
40
30
1938
14
Average

Tips
The Indiaman is perhaps the most useless combat ship in the game. It features just 6 guns on each side, none of which are particularly powerful, accurate, or fast at reloading. The crew consists entirely of merchant sailors, meaning there are no musket-armed marines on board to take potshots at the enemy crew. They have an average hull strength, but their low morale makes them prone to routing if you decide to use them to take the brunt of the enemy fire. They feature 3 masts, making them decent at out-manoeuvring other ships to escape their fire. Try not to let these ships get into melee range, as their merchant crew obviously isn't suited to fighting enemy marines, and they'll often rout as soon as they realise they're losing the boarding action.

Fluyt

This ship is exclusive to the Dutch United Provinces, and is both a capable fighting vessel and a trade ship. It's also quite fast, though not especially manoeuvrable. Of the trade ships, it features the strongest hull.

Men
Guns
Firepower
Range
Accuracy
Reload skill
Hull strength
Speed
Manoeuvrability
142
42
58
400
40
15
4458
15
Average

Tips
Though primarily a merchant ship. the Fluyt can most certainly defend itself in battle. It features a strong hull, some moderately sized crew and gun array, and can out-manoeuvre larger enemy ships in battle. If you're playing a Dutch faction, Fluyts generally negate the responsibility of protecting your trading fleets with proper battleships, as they're more than capable of dealing with pirates, and can usually defend themselves against other nations too.

Galleon

The Galleon is Spain's trading vessel, and is an incredibly powerful (and rather expensive) merchant ship. Its drawbacks are that it's a rather cumbersome to manoeuvre ship, and that it's rather expensive to build.

Men
Guns
Firepower
Range
Accuracy
Reload skill
Hull strength
Speed
Manoeuvrability
176
58
370
400
40
40
4683
14
Low

Tips
Galleons make amazing trade vessels in that you needn't worry about them when they're off-shore. They're that powerful you can use them to hunt enemy trade vessels, or even include them in your battle fleets. Their large crew of marines make them excellent at closing in with enemy ships, and their large array of powerful guns make them perfect battle ships. Pirates have a habit of using these ships, and they use them to great effect.
Galleons have an annoying bug in that a number of their crew often die before commences. As far as i can tell, this is because the size of the ship is too small for the amount of crew on board: you can often see the units on deck getting stuck to one another as they huddle around the bridge. This often results in 10-20 men getting knocked overboard (you can see them in the water), and you often begin the battle with a number of guns which can't be used. There's no workaround to this, sadly.

Dhow

The Dhow is the trade ship of the Eastern factions (such as the Maratha Confederacy and the Ottomans). It's comparable to the Galley, though a little smaller. These are very delicate, though they can cause some damage with their powerful guns. They're also incredibly cheap to produce and maintain.

Men
Guns
Firepower
Range
Accuracy
Reload skill
Hull strength
Speed
Manoeuvrability
7
2
204
400
40
30
904
16
Average

Tips
These are the cheapest, but also most fragile trade ships. You can quickly and easily produce a trade fleet with these, but they constantly require protection. There is some use for them in combat, however: if you have a large number of them, you can sometimes cripple the enemy's hull before they come into combat range due to the power of the guns on the Dhow. You can also keep an enemy ship occupied by sending a single Dhow into range, then fire from relative safety using the rest of your Dhows.
Shot types & when to use them
There are 3 shot types: round, chain and grape shot.

Round Shot

Causes damage to the ship's hull and to its guns, and inadvertently kills the ship's crew as well.
Round shot is best used against the sides of ships for eliminating their guns (reducing the risk their ships pose to your fleet), and for destroying the wooden hull so as to either close in for grapeshot blasts against the crew, or to simply sink the ship. A weakened hull will also affect the crew's morale, potentially forcing them to rout. In a prolonged battle, having a severely weakened hull will often cause the ship to begin sinking.

Chain-shot

Causes damage to the ship's sails and masts. Damaged sails reduce a ship's speed and its ability to manoeuvre, and significant damage leads to reduced morale, and can subsequently bring a ship almost to a complete standstill.
Never use your chain shot unless the enemy sails are up, and even then, it's far more effective if you attack from the bow or stern (front/back) of their ships -- known as crossing the T for the shape it resembles. Usually one broadside against fully unfurled (which is to say, out and catching the wind) sails can bring down at least one mast, or cause considerable damage to slow them down at least.
Interestingly, ship captains are often hyperactive during battle, and can sometimes be seen climbing the rigging to the top of a mast -- stray chain-shot will often kill them while they're up there, and bringing down the mast they're on will certainly kill them.

Grapeshot

This form of shot is used specifically to kill crew members aboard enemy ships, either to weaken their offensive power by killing gun crews and musket-armed marines, or to simply rout them due to fear caused by casualties.
Grapeshot should never be used unless the enemy ship has taken enough damage to have an exposed hull (indicated by missing wooden planks on the hull). Use round shot to soften the hull before closing in with grapeshot, or the effects won't be noticeable. The one exception is when you're facing much lighter ships, such as Galleys and Brigs, whose crews are all exposed on the deck, rather than being below on the gun decks (protected by the hull).
It's worth noting that unlike in real life, "crossing the T" with grapeshot is largely ineffective -- perhaps the Captain's glass windows are bullet proof...
Maintaining morale & reducing your enemies'
Much like in land battles, navies also have morale, which, when strained, can lead to a rout -- a disorderly retreat from the battle.
  • A routing ship will simply flee, and will not return fire to pursuers.
  • Ships rout independently of the rest of the navy (though a cluster of routing ships will cause mass-panic, and lead to a full-on retreat.
  • A routing ship can still "rally", and rejoin the fight; a shattered ship will under no circumstances return to the battle, raising a white flag in surrender.
  • Routing ships should be pursued until they're shattered, so as to ensure you maintain your prize and to reduce the chance of them returning to fight.

Morale shocks

Morale shocks are status effects which reduce the crew's morale. They are (incomplete -- will add more as i remember them):
  • Being on-board a ship with severe damage to the sails
  • Being on-board a ship with severe damage to the hull
  • Being on board a ship that's on fire
  • Being in a fleet whose admiral has fled the battle
  • Being in a fleet whose admiral has been killed
  • Being attacked in the stern (the rear of the ship)
  • Having lost the majority of the ships guns (or not having enough crew to man the majority of the guns)
  • Having lost the majority of the crew
  • Being on a ship that's taking on water (caused by having severe enough hull damage to begin sinking -- the crew will eventually either rout or abandon the ship)

Morale boosts

Morale boosts are status effects which positively influence a crew's morale. They are (also incomplete):
  • Being close to the flagship (the ship the admiral is aboard)
  • Winning the current engagement (occurs during duels with other ships; doesn't last long)
  • Seeing enemy ships routing
  • Attempting a boarding action
Battle strategies (To be completed...)
Tips & tricks
Dealing with fire

Fire is massively imbalanced in E:TW, and is still pretty ridiculous in N:TW.
When facing a potential fire, remember to:
  • Listen for a ringing sound, and pay attention to your unit cards for a fire symbol.
    A burning ship will begin ringing its bell in alarm; this is your cue to take action
  • Move the burning ship away from the rest of the fleet
    A burning ship has a high chance of exploding, which increases the longer the ship burns; an exploding ship has a high chance of spreading burning shrapnel to nearby ships.
  • Tell the ship to hold fire (default: T)
    This frees the crew of the obligation to man the guns, allowing them to deal with the fire; however, i believe they will only tackle the fire once all guns are fully loaded.
Remember that if all else fails, or if an oppurtunity presents itself, a fire-ship can be used offensively: charge the ship into your enemy, or better yet, attempt a boarding action -- when the ship explodes, it'll take your enemy down with it!

Boarding actions

An incredibly buggy feature, boarding actions have a huge chance of leading to crewicide, wherein your crew all attempt to "leap" onto the enemy ship, and subsequently break their legs in the process. Absolutely ♥♥♥♥♥♥♥ hilarious, but at the same time rage-inducing.
Boarding actions also have the habbit of causing ships to defy the laws of physics, causing them to leap around, instantly perform 360/180 degree turns against oncoming winds, or end up smashing together with the targetted ship, and bringing all the sails on both ships down with it. Again, hilarious.
Finally, even if your crew does somehow manage to get aboard, you're left with scripted battle sequences which play out so slowly and poorly that you'll often see 2-3 crew men "fighting" a cluster of 40 men, with the 40 men randomly collapsing dead in different spots of the ship.

In short, do not use this button.

Capturing ships


Remember when i said not to use the Boarding button? That was a lie. The one use it has is for instantly causing a routing ship to surrender. If you can catch up to them (usually by crippling their sails), they can be grapneled via the Boarding button; however, no fight will actually occur. Instead, the ships will be brought against each other with the grapnels, but with surrender as soon as they're close enough for the crews to begin boarding one another. It's much faster than simply shooting at them until they surrender, and also reduces the damage to your prize.

Dodging chain-shot


Chain-shot causes incredible damage to your sails when they're unfurled (open); however, it's possible to reduce the damage by furling (lowering) your sails.
This requires awareness, some knowledge of the AI, and a bit of luck.
Generally, the AI will use chain-shot when it's crossing your T while you're at full-sail -- this is the time to either spam-click the "Lower Sails" button, or to simply hit the Drop Anchor (backspace) button.

(hopefully more to be added, as soon as i can remember something decent...)
107 коментара
GunnyErmy 3 дек. 2023 в 2:52 
I've always just used 5th rates. Usually just one. 500 range plus chain shot, the first good volley against the lead ships' sails and you command the rest of the fight. I regularly use a single 5th rate to rout entire fleets of heavies.
LooseLeaf 11 ноем. 2023 в 8:06 
also I think you missed mentioning the glass cannon xebec
LooseLeaf 11 ноем. 2023 в 8:04 
regular galleys are actually really useful in the early game Mediterranean! l usually will keep them just behind or on the flanks of the fleet until they have an opportunity to pounce and can quickly charge up and board lighter vessels- knocking them out of the fight! Especially useful in maneuvering through chaotic situations since wind isn't an issue for them. They are fragile if hit, and can't do much of a cannon barrage, but are great for chasing any straggling enemy ships! Or have them all charge out from behind your fleet shield at the opportune moment and doing a boarding rush! though I don't have anything positive to say for light galleys
Aywatt 5 септ. 2023 в 14:30 
The best use for brigs is to close in on enemy ships of the line and blow up next to them, setting them on fire. Because brigs blow up all the goshdarn' time. This is (IMO) also another good use for the boarding button. (That and the fact that a ship that's been grappled can't move at all, even if it's a first-rate being grappled by a brig. Of course in that case the brig won't last long, but sometimes it doesn't have to, particularly if it explodes.)

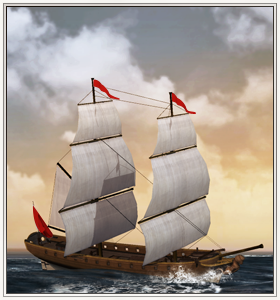
For actual fighting with small ships, use sloops all the way. A sloop can take out two brigs before breakfast.
Lt_Alpaca 20 апр. 2023 в 16:47 
i like using light, Manoeuvrable ships to just circle enemy ships untill they die
jnewkirkteach 2 окт. 2022 в 3:30 
I use 5th rates even into the late period. I can have 1 5th rate take out a whole fleet of 1st rates. They have 500 range while everything over the 4th rate has 400 range. So I use my range to hit their sails till they are down. Then I sit off the bow or stern and just stay out of their guns range. 5th rates are the best shit in the game. The only time that I am not able to do this is when they have the artillery ships. If they have those then I have to try other strategies. 5th rates are the best!
Steeltrap 2 юни 2022 в 7:52 
Doesn't exactly help, does it? I really dislike game designers who hide things from their players, or can't present data in clear, consistent ways.
Cheers
LSD  [автор] 1 юни 2022 в 13:05 
Firepower ratings are a mishmash. I remember figuring out halfway throigh getting the stats how messed up the numbers are.
On the campaign map (where i took the stats from) the numbers seem to represent damage per gun. In battle the stat changes to be in the thousands.

Galleon guns, for example, seem to do more damage than their counterpart ships. A few galleon chaser shots can sink a brig with ease.

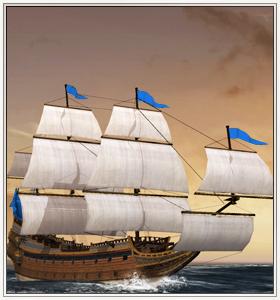
The stats are then messed with further depending on faction. So it's kind of meaningless. Carronade frigates definitely do much more damage than brigs, yet only have a +10 advantage on the campaign map unit cards.
Steeltrap 1 юни 2022 в 8:16 
I assume the firepower value of 270 for a Heavy 1st Rate is a typo, and it ought to be something like 570?
Robin Pike 21 апр. 2022 в 14:03 
Amazing guide!
but... regarding the Heavy First Rate... have you have seen a hippo attacking something? They are really fast man...