Battlefleet Gothic: Armada 2

Battlefleet Gothic: Armada 2

358 avaliações
The Battlefleet Gothic Armada 2 Guide
Por Big-Daddy-J
An overview of Gothic Armada 2 along with an in-depth look at every faction and strategies used by players.
8
4
3
10
2
3
4
   
Premiar
+ favoritos
Nos favoritos
- favoritos
Update Log
April 29th, 2019

  • Hello everyone, I know I haven't updated the guide in a while and my content lately has been nonexistent, but I feel like you all deserve an explanation. So firstly, the guide will undergo updates as I have time (it should be obvious by now, but I have far less of that now than when I started writing) not only due to the patches to the game but also picking up where I left off. I still love Warhammer 40K and this game and will continue to push forward with it when I can.
    The reason for me not writing as frequently anymore is due to many reasons. Me and my fiance' are looking at wedding venues and potential honeymoon spots and school has picked up as well with me doubling my classes for my business degree.

February 5th, 2019

  • Update coming to guide, had to go on short hiatus due to college work/job hunting/life in general stuff.

February 1st, 2019

  • Updated guide with new information from Patch 1

  • Finishing Asuryani Guide

  • Starting Tau Protector Fleet Playtesting

January 27th-31st, 2019

  • Asuryani Guide

January 24th-26th, 2019

  • Necrons Guide

January 21st-23rd 2019

  • Imperial Navy Guide

January 20th, 2019

  • Guide is created.
Music
Want to listen to appropriate music while reading through this guide? I present to you music that is epic enough to be heard while dealing with anything Warhammer. These are some of my favorite pieces that have been composed for something as grand and to the scale of what Warhammer really is, endless war. Enjoy.


If you would like to make a recommendation for this list please leave a note in the comments with a youtube link.
Introduction

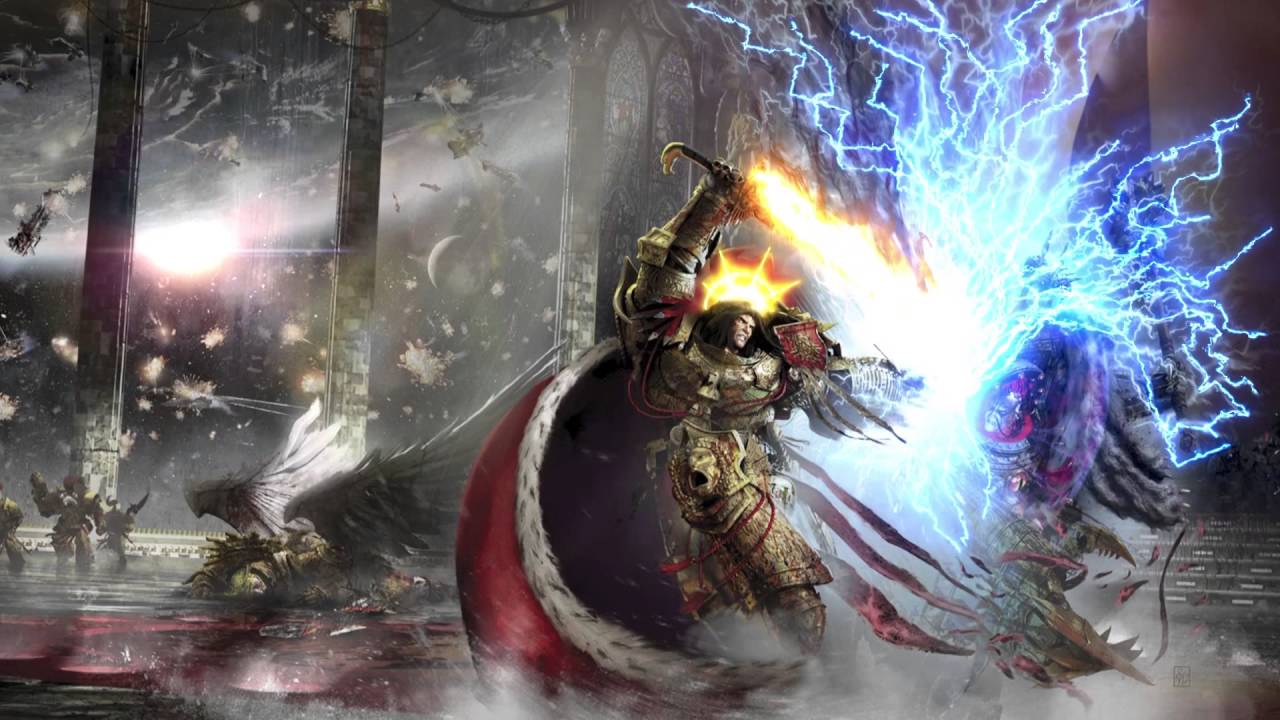
The final battle between the Emperor of Mankind and Horus Lupercal aboard the Vengeful Spirit in orbit above Terra at the conclusion of the Horus Heresy.

"Sometimes the only victory possible is to keep your opponent from winning."
- The Emperor of Mankind before the Battle of Terra


Thank you for taking the time to look at this guide. It is my hope and intention that from this you will not only learn how to play Battlefleet Gothic Armada 2 to its greatest potential, but also learn and facilitate strategic thought when playing. I've loved Warhammer all my life and I played the first Battlefleet Armada a lot. I enjoyed the mechanics and how we finally had a game in which we can take our spaceships and smash them into each other. It is good to see a new launch of the game and continued support not only from the developers, but also from a excellent fanbase.

A little about me before we continue on. In the pre-release beta I was placing around the top 10 for Imperial Navy on the leaderboards, hopefully after launch I'll be moving up even further. I'm still unsure what faction fits my playstyle best because this game is quite different from the last Gothic Armada where I did main the Imperial Navy. I enjoy seeing everything the game has to offer from all factions and love seeing how players play and react to all kinds of unique situations. It is my hope that whatever faction I decide to main, or whichever one I enjoy playing most, I'll be able to give my own personal insights and tips to all of you.

I simply wish to bring my knowledge and experiences to all of you. This guide will provide an overview of subfactions, skills and upgrades in the game. Next we will begin to focus on specific factions and I'll add in strategies that are common from these factions and what you can bring to combat them. Within each of these factions we will also be examining some standout ships that are available. As this is essentially a tabletop game getting the most out of your points is extremely important.

As a sidenote, I'm well aware of the name that I have. I choose it long ago when I first got Steam in honor of my favorite character from any fantasy universe: The Emperor of Mankind. The very fact that I write this guide is a testament to how much I love Warhammer games and to do a service to a community. So troll down in the comments if you like you heretics, I will still enjoy reading what you wrote because I love every player who is apart of this community.
Subfactions

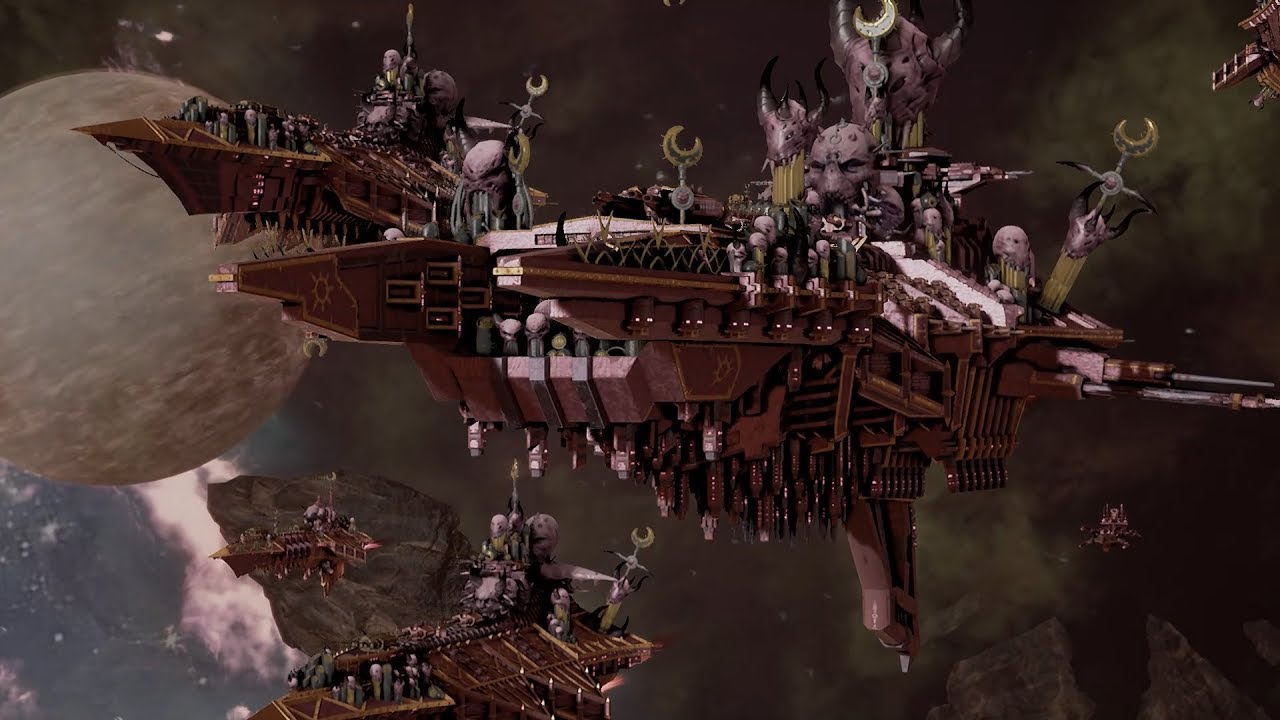
Emperor's Children battlegroup of the 13th Black Crusade featuring inconography and insignia of the Chaos God Slaanesh.

"Embrace your hunger, your lust, your desire. The universe is ours for the taking!"
- Sanctifer LeVay, Cult of the Sacred Union


Subfactions are a category that can be selected to provide your fleet with a different asthetic. I encourage all of you to simply make your own fleet of your favorite factions and filter through the subfactions category while in the ship-viewer. This will allow close inspection of details and pick out which one fits the theme of your fleet.

Please note: There is no statistical advantage when it comes to choosing a subfaction, so simply choose what you think looks best and what will intimidate your enemies. The four Chaos subfactions dedicated to the worship of the Chaos gods each recieve an additional skill and upgrade to choose from. Each of the Orc subfactions also recieve an additional upgrade. Because this applies to all Orc factions, I will not list them but I will list the specific Chaos ones below.

  • The Death Guard, the horrifying followers of the Plague-Father Nurgle

  • The Emperor's Children, the seekers of perfection who answer to Slaanesh

  • The Thousand Sons, those who desire knowledge and favored servants of Tzeentch

  • The World Eaters, the murderous and bloodthirsty agents of Khorne
Skills

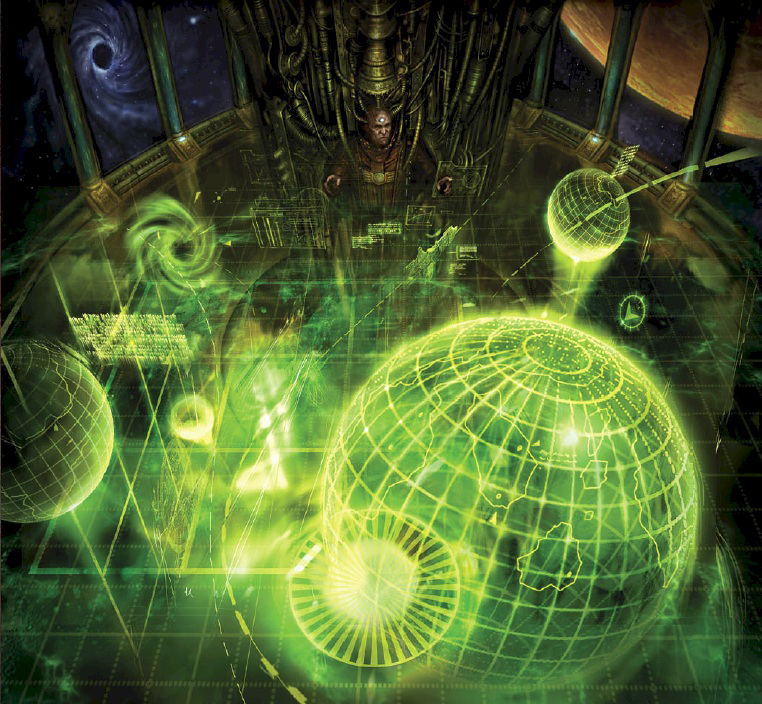
A navigator of the Navis Nobilite charting a course for the Imperial warship he is stationed on.

"To gaze into the Warp is to look into the abyss. To understand insanity itself is to become insane. Worst of all is the knowledge that while you are gazing upon it, the Warp is looking back at you and laughing."
- Kartr Hollis, Nobilite Emissary


Skills are unique cooldowns exclusive to the flagship of your fleet. These abilities range drasticly between factions and can support a multitude of playstyles. The overall concept when picking these skills is to choose things that either augment your fleet in some capacity or make up for some inherent weakness. These abilities can be offensive in nature focusing on dealing direct damage to a area-of-effect within the battlezone to depleting the shields of all ships (friend or foe) within a large radius, to pulling micro-warp jumps. There is no skill that is inherently better than any other. All of these skills are subjective and there are far to many variables that go into situations and personal playstyles for me to recommend specfic ones. There are certain skills which may work for some factions better than others, but again players don't always play to their factions strengths and can bring suprising compositions and strategies.

The best skills are the ones that you find to work best for you, the faction, your playstyle and fleet. If you like doing damage, take an offensive skill. Scared of your flagship being destroyed? Take skills that focus on defense and maneuverability. Need more vision of the battlezone? Look at getting probes or some sort or a secondary scouting skill related to your faction.

Please be aware that skills can only be used by the flagship of your fleet, meaning that in order to capitalize on getting the most of your abilities, you must keep your flagship alive. These skills are not available to you if your flagship is destroyed or incapacitated in any way. Play wisely.
Upgrades

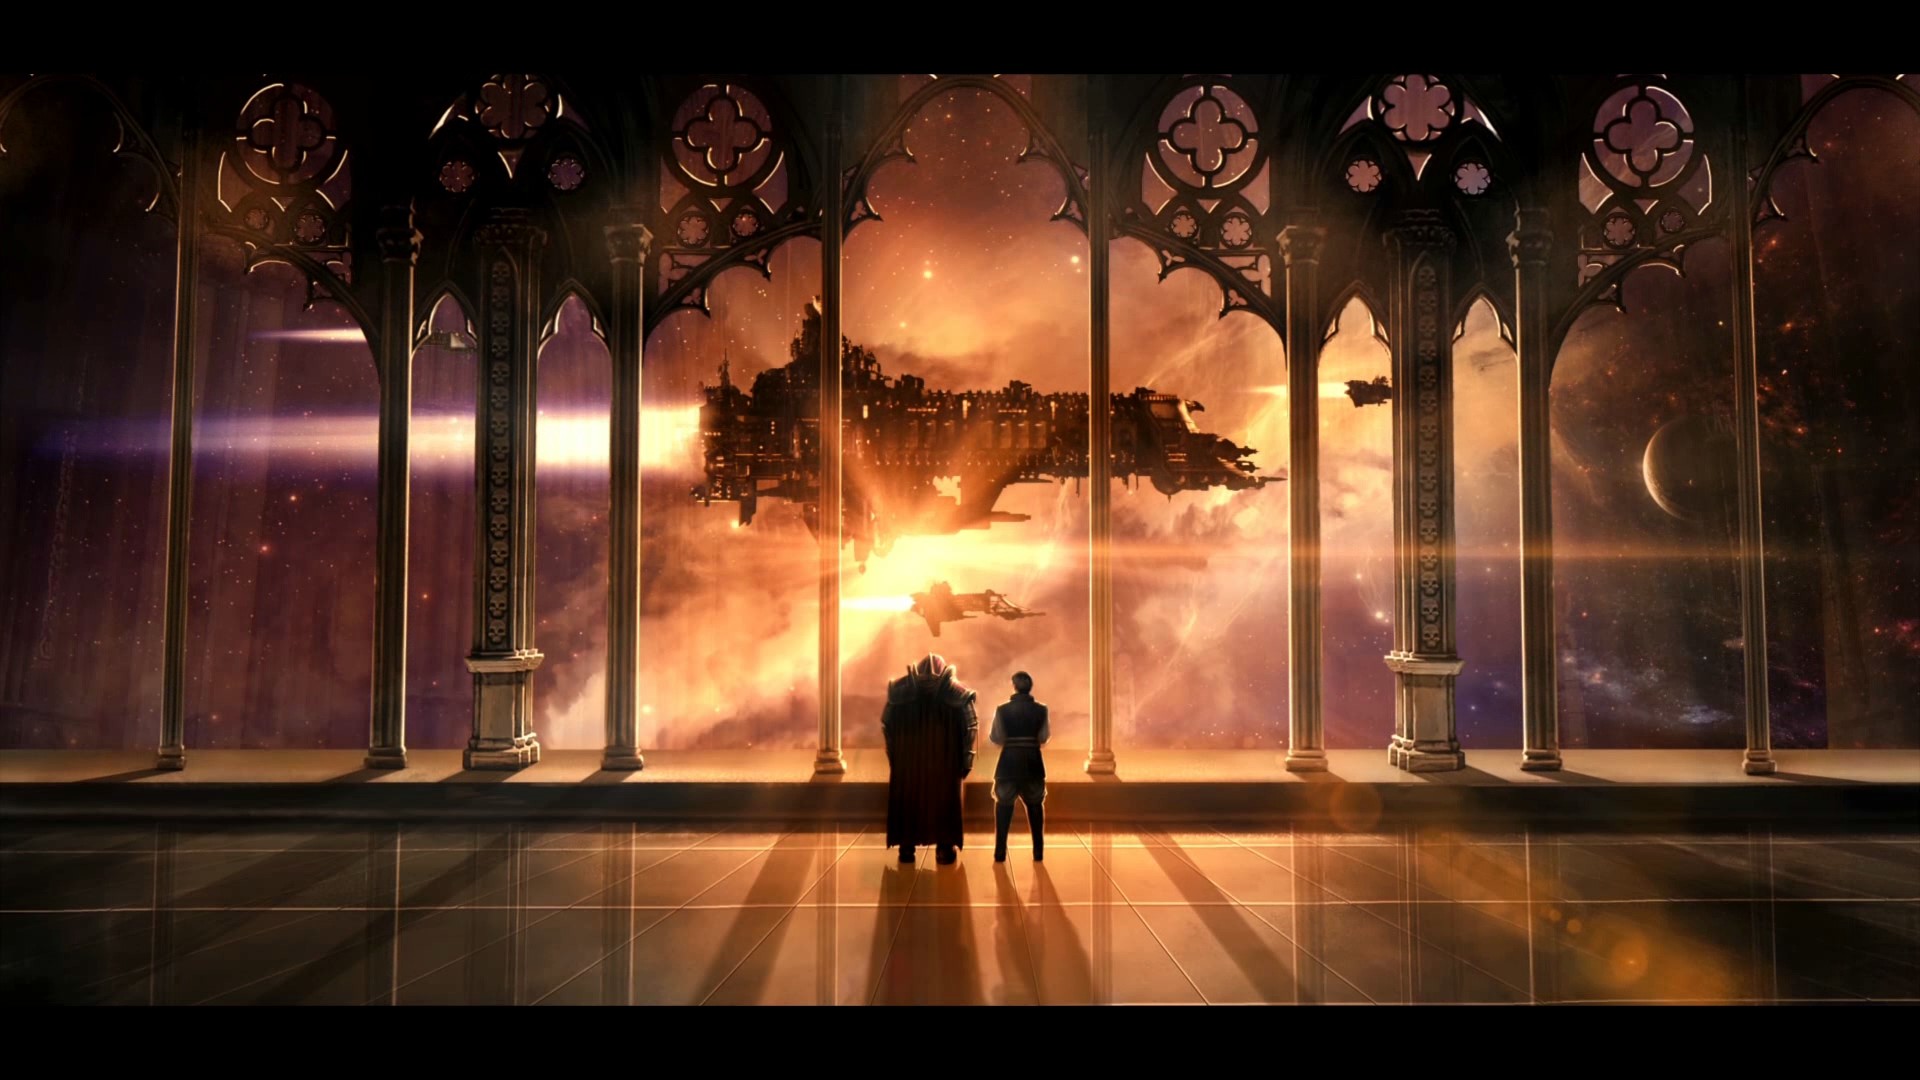
Inquisitor Phadaeus Falconet Horst of the Ordo Malleus (left) stands with the newly promoted Admiral Spire (right) observing a battlegroup passing by during the onset of the 12th Black Crusade, what would later be known as the Gothic War.

"One cannot consider the fate of a single man, nor ten, nor a hundred, nor a thousand. Billions will live and die by our actions here, and we have not the luxury to count the cost."
- Inquisitor Kryptman


Upgrades differ from skills both in their application but also in terms of use. While skills are single use abilities that operate on cooldowns, upgrades are passive abilities that enhance your fleet in unique ways. This is another layer of customization to further add to your fleet and is supposed to replace the upgrade system from the previous Gothic Armada where every ship could be customized from top to bottom with stat boosts, bonuses and passives. There is one last layer of differentiation between skills and upgrades, while one can easily argue that all skills are useful in their own ways, upgrades... not so much. Let me explain.

First we must understand that upgrades focus on different aspects of your fleet. They either apply to just the flagship, the fleet as a whole, or some specific category of ships. When comparing these upgrades to one another we must weigh the different values that come from boosting specific areas or singular ships of the fleet versus things that benefit every ship under our command. For new players I recommend that you look at fleet-wide bonuses as these don't force you to play in a particular way (generally) and are easier to get effective use out of. When looking at upgrades that focus on the flagship, they had better be GOOD in order to justify boosting one ship up more than an entire fleet, espeically considering the flagship is a prime target for your adversary. Upgrades which focus on boosting specific categories of ships or something similiar usually lead people to building fleets which only consist of that specific category in order to maximize the bonuses that are to be had. This min-maxing strategy is common in gaming but can be jarring for new players who are simply looking to understand game mechanics first, this is not an easy game to learn. Gothic Armada 2 has a steep learning curve and is punishing for new players in the multiplayer environment, look at what is easy first then specialize.

Please experiment for your faction and see what you like and what works best for you, you are the master of your own strategy and the person whose enjoyment matters most.
.
Imperial Navy Summary

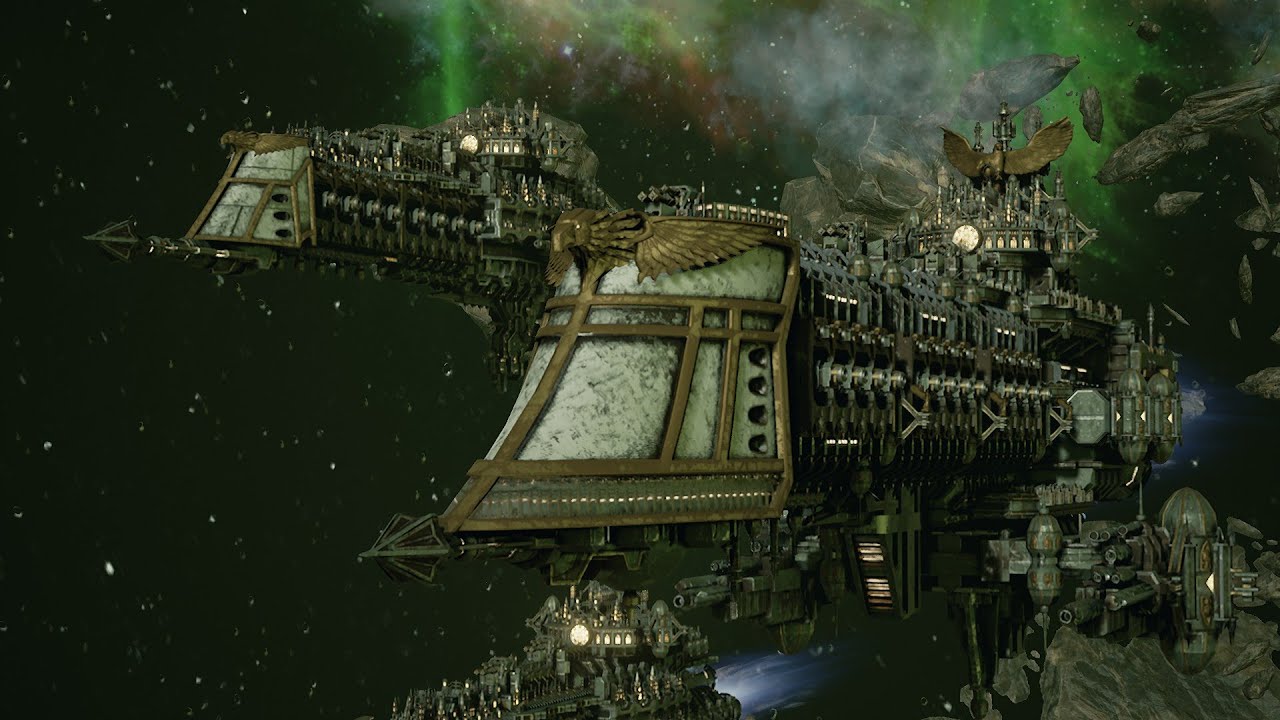
Gothic Battlegroup patrolling a sector of space.

"If the Adeptus Astartes are the Emperor's wrath, and the Imperial Guard His hammer, then His Holy Navy is His mighty shield."
- Cardinal Kregory Hestor


The Imperial Navy is arguably the most iconic and most powerful navy in Warhammer 40k lore. It is the shield that defends Imperial worlds from alien and heretical incursion while also being the sword that strikes at the enemies of mankind. In game, the Imperial Navy functions as the games "balanced" faction, being that it does everything decently and is a good place for beginners to start. The reason for this is that while no strategy may be "optimal" when comparing the Imperial Navy to its counterparts, it also doesn't fail at anything either. Want torpedos? Done. Want to use carriers? Sure. Wanna get in close to the enemy and blast them to pieces with broadsides? Easy.

Another benefit the Imperial Navy has is a filled out roster of ships to choose from in multiple tonnages. Featuring several ships across the classifications of cruisers (all variants), escorts and heavier vessels a fleet can be designed almost in any way. Weapons available to this faction vary as well as you will see more specialized vessels focusing on macro-batteries, to mixed weapons platforms featuring lances and hangar bays. A simple strategy for new players is to find what aspect of the Imperial Navy they like and what areas of gameplay they enjoy most, then transfer over to a faction that does that particular thing better.

One particular design of the Imperial Navy is that their ships are on the slower side. In order to compensate for this weakness, nearly all vessels are armed with torpedos or in some cases Nova Cannons. These weapons are to be used to encourage an opponent to either engage with you if they are trying to run away, or to disengage with you should you need to keep your distance. Mastering this aspect of Imperial strategy is essential to playing this faction effectively. Without these weapons most opponents will simply charge at you if they wish to close or kite you as you try to catch up to their faster ships. Even if you don't cause any damage at all with these weapons, they can be used to cut off escape routes or force an opponent to manuever in a way that gives you an advantage. Going further you might even force your enemy to burn an activated ability that they may have wished to save for later, such as a displacement/movement ability or something to counter mass-ordinance volleys.
Imperial Navy Skills

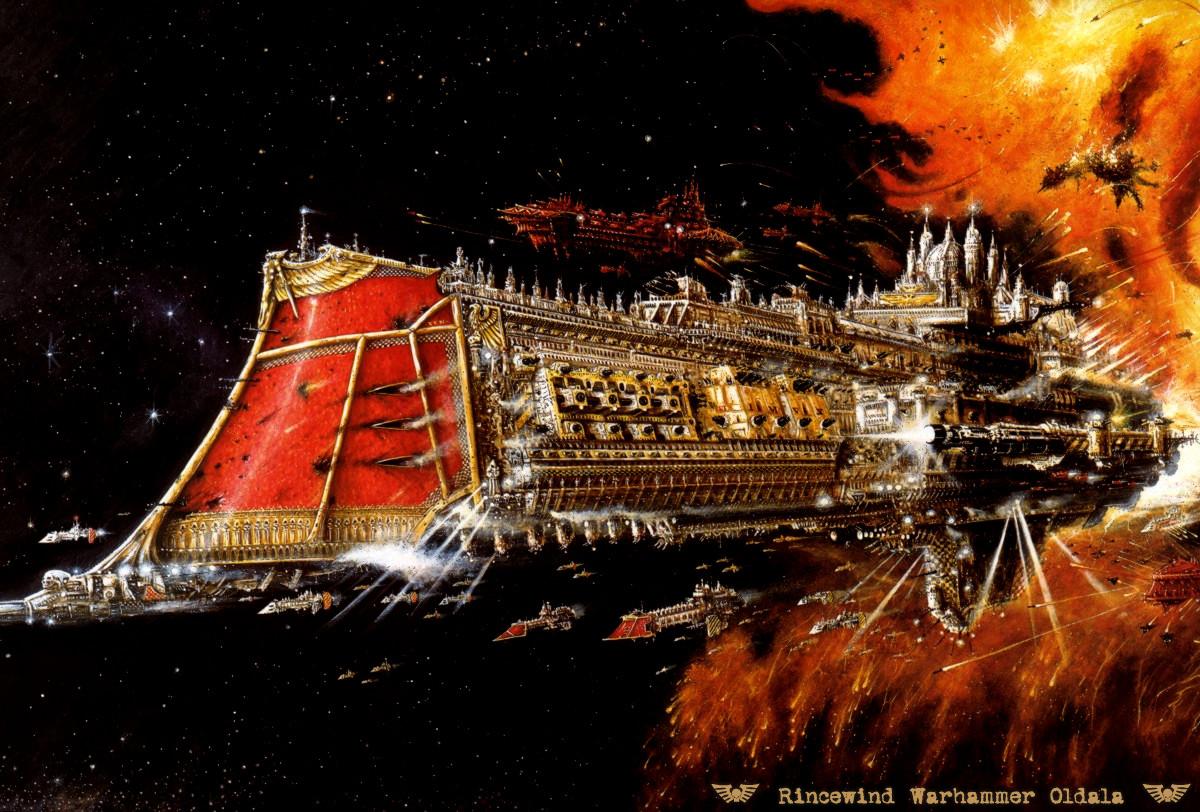
An Imperial Fleet engaged in combat with the forces of Chaos.

"The universe has many horrors yet to throw at us. This is not the end of our struggle. This is just the beginning of our crusade to save Humanity. Be faithful! Be strong! Be vigilant!"
- The last words of The Emperor of Mankind before being put onto The Golden Throne


Supercharged Void Shield
  • Makes the ship's shields invulnerable (except to Disruption Bomb) and multiplies shield regeneration by 10 for 10 seconds.
This skill is very useful for keeping your flagship alive and completely negating enemy abilities such as plasma bombs or high damage abilities that don't bypass the shields. It is powerful in the aspect that if you need to pull your flagship away from the fight or it is the target for focus fire by the enemy fleet, it will buy you time to readjust to the situation at hand. This skill is very new player friendly as it is a simple activation that stops the enemy from doing what they want.

Plasma Bomb
  • Teleports a bomb to a maximum distance of 10,000 units. The bomb explodes after 10 seconds and deals 200 to 400 damage, ignoring armur, to all ships within a 1,500 unit radius.
A very simple skill to use, more difficult to master however. This is because of the 10 second delay which allows enemy ships to move out of the blast radius. The bomb is best used on ships that have already used up their movement guages or special movement based abilities (Eldar's Wraithbone Shift/Vauls Manuever and Necron's Inertialess Drive as examples) or ships that have had their engines either disabled or destroyed.

While a bomb providing a nice boost in damage output is always a plus for a fight, the most important ability of this bomb isn't the damage it causes but the fact that it ignores armor. This means that factions such as the Space Marines and the Necrons will be very vulnerable to this ability as they have high armor values which can cancel out a significant amount of damage from non-armor-piercing weapons.

Augur Probe
  • Launches a probe to a designateed location. The probe moves in a straight line and detects enemy ships within a 4,500 unit radius. Once it has reached its destination, it is deployed after 10 seconds. The deployed probe detects enemy ships within a 9,000 unit radius. Once activated, it lasts for 120 seconds.

  • If it collides with an enemy ship, it sticks to it and automatically deploys itself.
This probe is an essential utility skill used for scouting and detecting enemy vessels. If you are also lucky enough to have it hit an enemy ship (it is very easy to dodge, so don't expect this) then you have free mobile intelligence of the enemy fleet. This effect may force the opponent to split this ship from the primary fleet in order to not give away its current posistion, use this to your advantage but beware of clever players who may use this as a bait to get you to commit to going after one ship.

Mastering this skill doesn't take quick reactions, but more calculated thought. It is important to aim the probe in an area where you don't want your enemy to stay, such as gas clouds or asteroid clusters. By doing this you deny the enemy an ambush posistion and force them into the open. You may also aim this at a capture point so that an opponent has to reveal a ship in order to capture the zone. This is especially useful for countering or at least forcing redeployment of fleets which specialize in ambushes or stealth based warfare, such as the Eldar (all variants) and the Tau.

Disruption Bomb
  • Teleports a bomb to a maximum distance of 10,000 units. The bomb explodes after 15 seconds and nulifies all ships shields/holofields/shadowfields within a 4,500 unit radius. Their regeneration as well as the Necron Hull Cauterisation effect are interupted for 20 seconds.
This bomb is excellent at destroying the shields of your opponents ships and negating the racial bonuses that the Eldar and Necrons receive. This skill while still effective vs Necrons as it does cancel out their innate "regeneration ability" doesn't have as satisfying of an effect versus them as they don't have shields of any kind.

It should be noted that this bomb does have the largest radius of effect compared to any other bomb, meaning that its viability is generally limited to pre/post engagement of fights. You don't want to use this in the center of a fight between your vessels and your opponents because the bomb will disrupt your shields as well. Considering that Imperial ships are slower overall compared to most factions, this can end up hurting you more than them if you are unable to escape the blast radius. Also, due to the size of the radius this bomb is more effective against battleships that are in the fight considering the have the slowest speed of all ship classes and don't have access to many manuevers that smaller ships have (this does not apply to Eldar or Necrons).

Stasis Bomb
  • Teleports a bomb to a maximum distance of 13,500 units. The bomb explodes after 15 seconds. The speed of all ships, squadrons and projectiles within a 2,500 unit radius is reduced by 90% for 20 seconds.
The most utility based of all bombs on this list, this is simply a "nope" bubble which you can deploy on the battlefield. This sphere changes the battlefield more than any other bomb because of the duration of the effect, once ordinance/squadrons/ships are trapped in it, they are going to be staying there for a significant duration unless they are on the outer periphery of the zone where they might escape sooner.

This skill has an odd synergy with the Imperial Navy, it doesn't work well with most of our weapon systems because they are projectile based and what lance ships we have don't usually work in large numbers. This means the only real use for this skill is to be used in conjuction with Nova Cannons or simply as an area denial ability to shape the combat zone.

Augur Disruption Bomb
  • The flagship launches an augur disruption which affects all enemy ships on the battlefield. Every affected ship's detection range is removed for 45 seconds.
A very situation skill which compliments stealth-based or lance-focused fleets nicely, however unless you are runing either of these, I wouldn't bother with using this skill. Imperial ships are slow and easy to detect regardless.

Emperor's Tarot
  • Reveals and marks the targeted detected enemy ship for 90 seconds.
This is a secondary scouting skill similar to the Augur Probe. It works and does reveal ships nicely, however new players may not be able to spot what ships they should reveal. When you click on an enemy "blip" if the targeting priority for sub-systems comes up in the lower left of the screen, you have selected a line ship. Don't do this on ships that don't have this option as this means it is an escort.

As a side note, this skill is useless versus Tyranids becaues they start the game stealthed meaning that you can't select enemy radar "blips".

Micro Warp Jump
  • Allows the ship to teleport itself within any ally ship's scanning range at a minimum distance of any other ship. The processs requires a 2.5 second delay during which the ship can neither move nor use skills nor perform any manuevers.
Want to have your flagship teleport around the conflict zone? Perfect. The offensive and defensive utility this ability offers is quite high and is very valuable for suprising opponents and setting up to ram an enemy ship. If you are going to be taking a battleship, please take this skill. Battleships are very slow and easily picked off when isolated making this skill essential. For any other category of ship, this is optional.
Imperial Navy Upgrades: Part 1

Battlefleet Gothic Armada Artwork (unknown artist).

"Do not waste your tears. I was not born to watch the world grow dim. Life is not measured in years, but by the deeds of men."
- Warhammer 40,000: Rogue Trader (pg 113)


Navigational Shields
  • Damage caused by asteroid fields, minefields and spore fields is nullified.

  • Applies to all fleet's ships
This passive ability is a decent upgrade for the fleet that simply removes enviornmental damage. This ability is more useful for kiting/ambushing/harassing types of fleets as these battlegroups tend to hug the outer edges of the map. It also allows players to more easily put their ships into asteroid clusters as being stationary within them allows ships to be stealthed. For the Imperial Navy this skill has little value unless you plan on using any of the strategies previously mentioned. Most Imperial vessels aren't fast enough to catch enemy ships by suprise, but this may have more merit with a massed Nova Cannon strategy.

Improved Augur Array
  • The indentification range of the ship is increased by 9,000 units.

  • Applies to fleet's escort ships and light cruisers
An excellent ability for improving the scouting potential of your fleet, this upgrade gets better with the more ships you have under the escort/light cruiser classification within your fleet. If you are only taking this upgrade to simply improve around 2-3 ships in your fleet, I would pass on it. There are better upgrades available to you. If however you build a fleet consisting of only light cruisers and escorts, this is a must.

Power Ram
  • Ramming damage is increased by 50%

  • Applies to fleet's Imperial Navy ships with spurs.
Do you want to smash your ships into your opponents? This is the perfect upgrade for you. This upgrade has also been made more viable due to the update from patch 1 increasing ramming damage by an additional 50%. Aside from the coolness factor that this ability brings it is at times questionably viable. Here are the reasons why:

  1. First, if we look at what "spurs" are for the Imperial Navy, they increase ramming damage on ships that have them equipped by 300% to escort class ships and 50% to line ships (everything else that isn't an escort). This ability would stack with these passives to bring it to 350% damage versus escorts and 100% damage bonus versus line ships. Due to patch 1's increase of base ramming damage as well, these all will stack together to make this tactic more viable. This is still however a minor increase in damage on vessels that already do well at ramming.

  2. You have to remember that Imperial ships are slower than most other factions, so if you take this against Eldar and go against a good Eldar player who doesn't let you get close to their ships, this upgrade is wasted.

  3. There are some factions that the Imperial Navy doesn't want to get into close combat with. The Tyranids and Space Marines are prime examples of this. Both of these factions want to get close so that they can board you with their superior troop efficiency. Why would you allow what these factions want to do and play into their hands?

Auxiliary Shield Capacitors
  • Increases shield regeneration speed by 25%

  • Applies to all ships
This upgrade is the first amazing one of the list. In no way is this upgrade ever wasted or useless unless someone destroys the generator system on your ships. The fact that you have your shields recharging faster means that they are up more and absorbing more damage. Over the course of an engagement this can mean that your shields were up 1 to several more times than they would have been without this upgrade. Understand that the amount of damage mitigation in the long term of a fight can counter an opponent quite well and can mean the difference between you outlasting your opponent and just falling short of victory. Even if your ships are hit by something like a disruption bomb, the fact that your shields will be up sooner means that you recover faster and are better able to disrupt future attacks.

Aurent-Pattern Weaponries
  • The range of macro-weapons is increased by 4,500 units, and by 4,500 units for lances.

  • Applies to the Flagship
This upgrade is questionable at best. That doesn't mean I discourage players attempting to make it work or by trying new strategies, but considering that this upgrade applies to only one ship and simply increases range, it falls quite short. If it improved accuracy or had other sort of effect, it might make this good, but consider the following:

  1. The fact that it improves the range of macro weaons isn't really a buff. Considering the accuracy drop off for macro-based weapons is 20% per 4,500 units of increased range, this means that your weapons will become less efficient.

  2. It works well with a ship whose primary armarment is lances, as lances do not suffer an accuracy penalty. However, there are only two lance-focused ships in the Imperial Navy, the Gothic Cruiser and the Apocalypse Battleship. Unless you plan on runing either of these ships as your flagship what is the point?

  3. One of the ship stances you can select in game is called "Lock On" which increases the effective range of that ships weapons by 4,500 units AND increases accuracy by 20%. There is a stance on your ships that is better than this upgrade...
Imperial Navy Upgrades: Part 2

Imperial Battlegroup performing an Exterminatus via low orbit bombardment.

"It is said that heresy is like a tree, its roots lie in darkness while its leaves wave in the sun. You can prune away its branches, even cut the tree to the ground but it will grow again ever stronger. Such is the nature of heresy and why it is so difficult to destroy. Some may question my right, to destroy a world of ten-billion souls, but those who truly understand realize that I have no right to let them live. No sacrifice is to great, no treachery to small."
- Inquisitor Phadaeus Falconet Horst of the Ordo Malleus speaking to Admiral Spire in reference to conducting an Exterminatus on an Imperial world (Battlfleet Gothic Armada)


Short-Burn Torpedoes
  • The speed of torpedoes is increased by 50%
What a simple and beautiful upgrade all in one. This one shouldn't be that hard to understand and see the value of. Considering nearly every ship that doesn't have a Nova Cannon has access to torpedoes makes this upgrade very tempting. The fact that these weapons fly faster demands that your opponent be cautious and very reactive to mass volleys.

Emission Dissipater
  • The ship can use maneuvers while in the "Running Silent" stance without being revealed

  • Applies to fleet's escort ships and light cruisers.
This ability allows you to basicly move across the battle zone undetected while going at max speed. Obviously, this upgrade gets better with the more ships you have under the escort/light cruiser classification within your fleet. If you are only taking this upgrade to simply improve around 2-3 ships in your fleet, please pass on it. There are better upgrades available to you. If however you build a fleet consisting of only light cruisers and escorts, this is a must.

Culexus Assassin
  • Lightning Strikes inflict a 500 morale loss in addition to other effects

  • Applies to the flagship
An upgrade that makes your flagship's lightning strikes incredible effective at breaking enemy ships morale and maybe even causing a mutiny. This upgrade is a lot of fun as it simply allows you to click on an enemy warship that is somewhere around 50% morale and instanly make it abandon the battle. It is interesting and sits on a pendulum when it comes to effectiveness:

  1. Completely useless versus Space Marines as they don't suffer from morale based effects.

  2. Highly effective versus the Orks as the primary way to beat them has never been by destroying them but by making them flee the field.

  3. Will force a "Rally" ability from the opponents flagship which will make ships with the "mutiny" effect rejoin the battle.

  4. If used on the opponents flagship however, they will lose it unless there is another way that a faction can get it back (of which I'm aware of none). Very useful for removing flagships from fights if you are able to get their morale down.

  5. Some factions have inherently high morale values, such as the Necrons, because they field fewer ships. This ability loses potential against factions like this.

Armor Piercing Ammunition
  • At short range (4,500 units), the armor of the target is reduced by 50 against macro-weapons.

  • Applies to ships with macro-weapons
This upgrade is very strong as it is a very potent buff for the Imperial Navy's most used weapon, the macro battery. This gives the Imperial Navy an effective way of dealing with heavily armored factions since access to lances is limited. However, this ability does suffer from the same negative effect as the ram does, in that there are some factions the Imperial Navy simply will not do well against up close. Again this upgrade doesn't do anything outside of short range so against enemies that will kite or harass you from afar (Chaos/Eldar) this does nothing. This upgrade however is incredibly powerful and will devestate your opponents in close range broadside-based combat. The choice is yours.

Agripinaa-Pattern Void Shield
  • Gives a 25 armor value to shields

  • Applies to all ships
Another shield based upgrade and no suprise its good. This upgrade essentially makes your shields more durable and resist more oncoming fire before they deplete. While this upgrade is not as effective as regeneration, it does make the shields of your ships stronger and more of a headache for your opponent. The reason why it is not as good as regeneration comes down to the fact that this has no effect on things which bypass shields or simply nulify them, whereas regeneration will make sure they come back online faster from said abilities.
Imperial Navy Ships: Part 1

An Imperial Battlefleet traversing space towards its destination.

"The Imperium! How mighty its aspect! How far-reaching its boundaries! As one world dies ten more are brought into the fold. Fear us, for we count the lives of planets, not men!"
- Apocalypse Expansion Book for Warhammer 40k (pg 21)


In this section I will outline all ships of the Imperial Navy at the disposal to the players. I will not be including pictures of these vessels as that would be far to time consuming and I will only be giving very brief descriptions of them, not a list of every stat they have. As players you can look more into these stats by creating your own fleet and looking at the information provided for every ship.

I will not be organizing ships I list here by their classification or class. While this is an efficient way to list them for a game, I think a better way to visualize these will be to catagorize them by their weapons arrangements and their perspective roles within your fleet. Ships will be listed from this category further from top to bottom by point values.

If you wish to take a look at Imperial ship stats and see their pictures I recommend that you look at "The Imperial Navy by The Lord Admiral" guide. This individual put a lot of work capturing these images and recording these stats so please give some support. Also, I've had the pleasure of playing against this person a couple of times throughout the Beta and I can tell you that they know what they are doing.

Carriers

Dedicated Carriers are ships that primarily carry squadrons of fighters/bombers/troop transports into battle for offensive and defensive purposes. Please be aware that these are not the only ships which carry these craft, simply that these are actual dedicated carriers. Ships that do have launch bays as augments to their weapon arrays will be listed in the "Multi-Purpose" section.

Defiant
  • Class: Light Cruiser
  • Cost: 153 points
  • Role: Long-Range Carrier
  • Launch Bays: 2
This is the smallest and cheapest carrier available to the faction. It should be be kept away from the primary engagement zone as being a Light Cruiser means the ship is fragile. It also comes armed with 2 lance turrets but these are almost negligible. You use this ship if you want a small carrier to stay on the outskirts of the fighting.

Exorcist
  • Class: Grand Cruiser
  • Cost: 308 points
  • Role: Long-Range Carrier and or Mid Range Support Ship
  • Launch Bays: 4
This Grand Cruiser is a formidible opponent and has the ability to pack a decent punch while being armed with macro-batteries. Because of the increased durability that comes from being in a higher class, you can use this ship more offensively than the Defiant and use it support your engagements.

It should also be considered that 2 Defiants bring the same number of squadrons as an Exoricist for 2 points cheaper. So while you do gain a more durable package, you lose the flexibility of having squadrons deployed to other areas of the map and if you lose this ship you lose your squadron capabilities.

Emperor
  • Class: Battleship
  • Cost: 367 points
  • Role: Long-Range Carrier and Heavy Support Ship
  • Launch Bays: 4
  • Special: Advanced Detection Radius
The Emperor Battleship is an incredible ship worthy of its title in the lore, it provides several squadrons while being very durable. This is also one of three ships in the Imperial Navy which has an advanced detection radius, meaning you will see enemy radar blips from farther out. This is very useful for a carrier-oriented ship as it can send fighters out for scouting and harrasment duty.

This ship is good but not optimal, the reason being its point value. You can get an Exorcist for 59 points cheeper and still get the same number of squadrons out onto the field. The only real trade off is durability. Considering that battleships that don't have mobility based skills are easy prey for opponents I wouldn't recommend this vessel. The advanced detection range can also be accounted for by using scout ships or scout orriented skills/upgrades.

Escorts

Escorts serve the purpose of being viable scouts and ships to capture zones with. They also serve as "filler" points within a fleet in the case that points are leftover but there are not enough to purchase another line ship. These vessels simply augment the fleet by providing additional firepower, high speed, and scouting potential.

Cobra
  • Class: Destroyer
  • Cost: 34 points
  • Role: Torpedo Patrol Craft
An easy ship to understand, the cobra is akin to a small patrol boat. It has a macro-turret and can launch torpedoes. Outside of this, the destroyer is extremely fast and mobile.

Widowmaker
  • Class: Destroyer
  • Cost: 37 points
  • Role: Torpedo Scout Craft
  • Special: Advanced Detection Radius
This ship is the most advanced scout available to the faction. The increased detection range makes this an excellent ship for surveying enemy posistions and marking enemy ships. If you are having problems versus stealthed or kiting strategies, bring one of these and you will know where the enemy is.

Firestorm
  • Class: Frigate
  • Cost: 41 points
  • Role: Lance Patrol Craft
This escort ship features a forward fixed lance weapon and a macro-turret. This is a good option to take over the cobra if your fleet doesn't focus on torpedoes. The lance weapon makes it useful if you lack armor-piercing weapons in your fleet.

Sword
  • Class: Frigate
  • Cost: 41 points
  • Role: Macro Patrol Craft
The Sword escort focuses on doubling up its firepower with an additional macro-turret instead of introducing a new weapon system like the previous two. If you just want more firepower, take this.

Falchion
  • Class: Frigate
  • Cost: 41 points
  • Role: Heavy Torpedo Patrol Craft
This ship is the heavier version of the Cobra Destroyer, featuring an additional 2 macro-turrets and increased survivability. If you want to take an escort that brings torpedoes but don't care about the scouting function of the ship, pay the extra points and get this one over the Cobra.
Imperial Navy Ships: Part 2

An Imperial Cruiser traveling through the depths of space.

"Between the stars the ancient unseen enemies of mankind wait and hunger. Every voyage into the nothing is a confrontation with horror, with the implacable things of the warp, and with man's own innermost fear."
- Unknown


Lances

Ships which focus on using lances as their primary way of dealing damage are excellent at getting through the tough armor of some factions and being able to sit at any range and be effective. The Imperial Navy has access to many lance based weapons but it mainly uses them to augment their current weapons. Please be aware that lance-based weaponry is not affected by the "Reload" stance on your ships, they will only benefit from using "Lock On" which simply increases their range. Due to the update from patch 1 doubling the standard critical percentages of lances, they are a bit more viable now. However, I still don't think that many Imperial Navy "lance-focused" ships are worthwhile because of their limited range and lower dps output compared to macro-weapons but at least now they might be more viable.

Endurance
  • Class: Light Cruiser
  • Cost: 105 points
  • Role: Mid-Range Lance Cruiser
This ship is BAD... Not because lances are not useful or that the dps is unacceptable, its because of the range. Lances are good weapons, the fact that they don't miss and generally have lower dps output means that you want them to be as far away as possible. The fact that this ships lances are only useable at 9,000 units or less (13,500 units or less if using "Lock On" stance) means that this ship is easy for your enemy to engage. Also the fact that you have to use a stance to make a ship viable is not good. I would skip this ship when building your fleets.

Gothic
  • Class: Cruiser
  • Cost: 162 points
  • Role: Mid-Range Lance Cruiser
This ship has all the same characteristics as the Endurance, except that the Gothic comes in a more sturdy package as a result from being in a higher class. Is the Gothic better in the sense that when enemies engage it, it will take more time to kill? Yes. Is it still a waste of points? More than likely.

Apocalypse
  • Class: Battleship
  • Cost: 284 points
  • Role: Heavy Lance Support Ship
  • Special: Nova Cannon, Overload Lances
So first let me explain why this ship is catagorized in "Lances" and not in "Nova Cannons", this comes down to cost. If you want to spam Nova Cannons or simply use them, there are far cheaper options available to you as a player. You take this ship to have lances in your fleet, the Nova Cannon is just a bonus.

The second bonus to this ship is that while it suffers the same problem as the Gothic Cruiser and Endurance Light Cruiser in that its lance weapons can only be used at 9,000 units or less, the "Lock On" stance boosts that to 18,000 units. Since patch 1's update, this is probably the most viable Imperial Lance vessel. It stays out of combat and can deliver criticals from afar at 18,000 units with its critical chances up to 12%.

Nova Cannons

The space nukes of Gothic Armada, these weapons are devestating to enemies caught in the blast radius. The weapons do take time to charge and will give your opponents time to flee from the area-of-effect, but if you can predict movement or simply target enemies whose movement has been impaired, the damage will be immense. As a bonus to the large amounts of burst damage Nova Cannons cause, they also deal morale damage to enemy crews.

Dominator
  • Class: Cruiser
  • Cost: 188 points
  • Role: Mid-Range Attack Cruiser
The Dominator has a very appropriate name, if you manage to land Nova Cannon shots you will be dominating your opponent. This ship is also good at being a standard ship-of-the-line and engaging with other vessels due to its macro-battery armament. If engaging at medium range, it can also use its Nova Cannon mid fight if oriented in the direction you want to use it.

Mars
  • Class: Battle Cruiser
  • Cost: 260 points
  • Role: Multi-Purpose Attack Cruiser
The Mars is in many ways a direct improvement to the Dominator. By paying an extra 72 points you get an increased range out of you macro-batteries, 2 lance turrets, and switch a pair of macro-batteries for launch bays. The only downside many people will see with this vessel is that instead of having such a heavy armament of macro-batteries it does integrate fighters and bombers. You as a player will have to decide if paying these extra 72 points is worth it for your specific fleet.
Imperial Navy Ships: Part 3

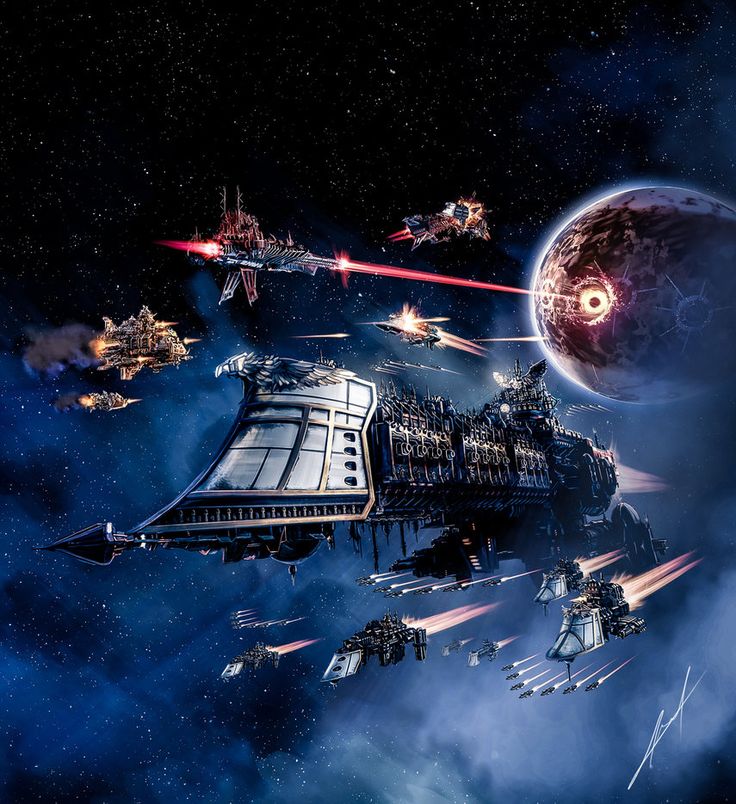
An Imperial ship using its many weapon systems to destroy the enemies of the Imperium.

"What fear of death have we who know there is immortality in the great and noble deeds of men?"
- Warhammer 40,000 5th Edition Rule Book (pg 110)


Macro-Batteries

The absolute and final word dispensed by the vessels of the Imperial Navy via the broadsides and turrets of its many ships. These projectile weapons are the primary weapon that this faction uses and they come in many varieties across their ships. The following are ships that use these weapons to brawl with the enemy at short to medium ranges, making them excellent ships-of-the-line.


Endeavour
  • Class: Light Cruiser
  • Cost: 107 points
  • Role: Light Attack Cruiser
The cheapest ship amongst the vessels meant for "brawling" with the enemy fleet. This ship comes loaded with macro-batteries and macro-turrets. It also has access to torpedoes. An effective and cheap ship.

Dauntless MK2
  • Class: Light Cruiser
  • Cost: 116 points
  • Role: Light Attack Cruiser
This light cruiser is simply an improved Endeavour. It features higher frontal armor along with a similar armament which has a slightly higher dps output. Also has the access to torpedoes.

Dauntless
  • Class: Light Cruiser
  • Cost: 128 points
  • Role: Light Attack Cruiser
This ship takes that Dauntless MK2 design and simply replaces the torpedo tubes with a forward fixed lance weapon. If you want to utilize torpedoes, go for the MK2, otherwise this is arguably an upgrade. The reason for this is that the lance provides a more consistant source of damage. It is also useful when pursuing fleeing craft as it can forward fire. For best results with the lance, the ship should be enganging the enemy at short range so it will rotate more and fire on as many targets as possible.

Tyrant
  • Class: Cruiser
  • Cost: 178 points
  • Role: Mid-Range Attack Cruiser
This is a mid-tier ship that has access to two different versions of macro-batteries: plasma, and regular. The plasma variation simply has a longer range than the standard. This means the ship is still effective if it is forced to disengage or if "brawling" with the opponent is not the correct course of action. This vessel also has access to torpedoes.

Avenger
  • Class: Battle Cruiser
  • Cost: 199 points
  • Role: Short-Range Heavy Attack Cruiser
This is the easiest ship to understand and use for the Imperial Navy. It is a wrecking ball that pounds the enemy with relentless macro-battery fire. Because of its higher ship class, it is very durable with a high hull value and shield rating. Beyond that this ship has no other funtion, drive it at the enemy and watch it work. Due to this ships lack of flexibility however, it will usually end up being "amazing" or "useless". Since it doesn't have any forward facing weaponry, it is not good for pursuing fleeing enemies.

Overlord
  • Class: Battle Cruiser
  • Cost: 216 points
  • Role: Heavy Attack Cruiser
This ship is a beast in combat. Featuring two plasma macro-batteries on either side of the ship along with a compiment of two lance turrets, we finallly have a ship that can do well in close, medium and even long range. The fact that the ship also has lance based weaponry is a nice bonus because it means the ship can effectively do damage at very long range and deal with high armor values. To top it all off, this ship has access to torpedoes.

Retribution
  • Class: Battleship
  • Cost: 306 points
  • Role: Heavy Attack Vessel
The might and fury of the Imperial Navy incarnate. This ship has three plasma macro-batteries on either side of it, a compliment of 3 lance turrets, and a heavy torpedo launcher. This ship is a nightmare for opponents to deal with at close range or to attempt to take a strategic point from. This vessel is very vulnerable to long range attacks however as it can't return fire effectively and doesn't have the speed to close the gap. You take this as the anchor of your fleet or not at all.

This ship has varying degrees of effectiveness as mentioned above. Its lack of mobility and sheer inability to react to the field around it make it a cumbersome choice. Unless you are taking a movement based skill/upgrade I would suggest you save points and pick something like an Overlord to fill this role instead. It is faster, has a higher turn speed and has around two-thirds the weapons at a 90 point discount.
Imperial Navy Ships: Part 4

Imperial vessels patrolling and providing security for an Imperial world and orbiting space station.

"The Emperor is master of the galaxy, but the captain is master of his ship."
- Battlefleet Gothic Rulebook (pg 10)


Multi-Purpose

This last selection of ships fill multiple roles or have several different weapon systems to fill gaps within your fleet. They take the roll of being "in the middle" compared to the earlier mentioned specialized ships.

Lunar
  • Class: Cruiser
  • Cost: 165 points
  • Role: Lance/Attack Cruiser
The Lunar, like the Dictator, trades a set of macro-batteries for a set of lance batteries. Ok if you are desperate for more armor-piercing weapons but lances at short range do not compare to micro-weapons in terms of dps. Comparable to the Tyrant Cruiser at a decreased cost of 13 points.

Dictator
  • Class: Cruiser
  • Cost: 206 points
  • Role: Carrier/Attack Cruiser
This ship trades offensive firepower for the ability to use have access to launch bays and the squadrons that come with them. Comparable to the Tyrant Cruiser at an increased cost of 28 points.

Armageddon
  • Class: Battle Cruiser
  • Cost: 210 points
  • Role: Heavy Lance/Heavy Attack Cruiser
This battle cruiser trades micro-batteries in exchange for lance weapons. This one is a more resonable trade compared to the Lunar Cruiser above as it also has two lance turrets to augment a more long range playstyle. This ship is comparable to the Overlord Battle cruiser at a decreased cost of 6 points.

Vengeance
  • Class: Grand Cruiser
  • Cost: 260 points
  • Role: Heavy Lance/Heavy Attack Cruiser
Again this ship trades micro-batteries for lance based weapons. The macro-batteries on this ship also get upgraded to plasma macros which increase their range. This is not a ship I would suggest trading up to from the Avenger considering the massive point increase. This ship is comparable to the Avenger Grand Cruiser at a increased cost of 61 points.

Oberon
  • Class: Battleship
  • Cost: 334 points
  • Role: Heavy Mixed Weapons Platform
  • Special: Advanced Detection Radius
Imagine a ship that uses all weapon systems available to the Imperial Navy, that is the Oberon Battleship. It has access to launch bays, macro cannons, lance weapons, and turrets. Overall I don't think this ship is a reasonable choice to make your fleet more "balanced". Because of its lack of a dedication to any particular weapon system, it makes it ineffective and hard to see the promise of. This heavy vessel is similar to the Emperor Battleship in that it loses a pair of launch bays to pick up a pair of heavy lance-batteries. This ship is comparable to the Emperor Battleship at a decreased cost of 23 points.
Imperial Navy Strategies & Videos

An Imperial fleet gathers on the periphery on an Imperial Space Station, awaiting deployment.

"You are expected at all times and in all situations to conduct yourself in a manner appropriate to, and mindful of, the great duties and traditions of the Emperor's Most Glorious and Honourable Navy."
- Battlefleet Gothic Rulebook (pg 5)


After a lengthy look at this faction as a whole we come down to basic strategies and tips available to players who wish to bring the Emperor's wrath upon the enemies of mankind.

Synergistic Skills/Upgrades
  1. Supercharged Void Shield (skill)
    +
    Auxilary Shield Capacitors (upgrade)
    +
    Agripinaa-Pattern Void Shield (upgrade)
    =
    This allows your entire fleet to have a 25% faster recharge on shields, stronger shields due to them no having an armor value and your flagship being able to become semi-invulnerable and recharging its shields very quickly when using its Void Shield skill.

  2. Stasis Bomb (skill)
    +
    Plasma Bomb/Disruption Bomb (skills)
    +
    Any ship with a Nova Cannon
    =
    If an opponent's ships get caught in this, they will feel the hurt. A Stasis bomb followed by the detonation of the Plasma Bomb will do more damage while a Disruption Bomb will eliminate shields and hurt Eldar and Necrons in its own ways. Couple this with Novas and you have yourself one satisfying explosion.

  3. Augur Disruption Bomb (skill)
    +
    Improved Augur Array (upgrade)
    +
    Emission Dissipater (upgrade)
    +
    A fleet consisting only of Light Cruisers or Escorts
    =
    You now have a fleet which can be all stealthed, have advanced detection ranges, use manuevers without revealing itself, and reduce the enemies detection range to zero. Very effective for ambushing your opponent and catching them off guard as this is not what the Imperial Navy is known for doing.

  4. Power Ram (upgrade)
    +
    Short-Burn Torpedoes (upgrade)
    =
    Every ship in the Imerial Navy above the class of Light Cruiser that carries torpedoes also has a "spur" equipped onto the ship which increases ramming damage. This combination simply applies buffs to both.

  5. Armor Piercing Ammunition (upgrade)
    =
    This is a fantastic upgrade which allows you to deal with heavily armored opponents. You have to be close to the opponent though so make sure you can deal with that.

  6. Micro-Warp Jump (skill)
    +
    Any Battleship
    =
    A playable battleship. This class of ships is way to immobile to not have this skill equipped.

Helpful tips for Constructing your Fleet
  1. Include some form of launch bays into your fleet, not having any screening fighters of any kind will hurt you when going against any player that spams carriers or mass ordinance. The "Brace for Impact" stance on your ships is not enough to counter this. Players who are interested in this faction far to eagerly take a fleet without squadrons and lose.

  2. Take escorts with you, they are essential in capturing zones and scouting for the enemy. Running a massed battlegroup is fun, but leaves you vulnerable to several strategies.

  3. Try to get around 4-6 line ships in your fleet, this provides enough mass that your fleet will be powerful. Any more than this and you really can't take enough escorts, any less and you may not have the staying power you need for longer fights.

  4. The Imperial Navy has a deep enough roster of ships to make almost any strategy playable or viable. Experiment and see what works best for you, there is no "right" way to play this faction unlike some of the others in the game who rely on gimmicks or singular ways to win.

In Battle Tips
  1. Target the engines of factions that you don't want to get close to (Orks, Space Marines) and of factions that want to get away from you (All Eldar variants, Chaos).

  2. Target the generators of factions with strong shields (Imperial Navy, Tau).

  3. Against carrier spam or specific carrier ships, target their decks. Also use the "Brace for Impact" stance to decrease hull damage and increase defense turret efficieny.

  4. Put all of your escorts on the "Running Silent" stance, there is no reason to have them not stealthed.

  5. The "Brace for Impact" stance is generally the correct stance to use across your entire fleet. Only when you need to snipe particular systems on enemy ships (an Eldar ships engines), should you rotate to "Lock On".

  6. Use the "Lock On" stance against factions you need distance against (Space Marines) and can't risk getting close to so your macro weapons are still effective.

  7. The "Reload" stance is really only useful on carriers and ships equipped with Nova Cannons before the primary engagement.

Personal Tips
  1. If you are getting beaten by a specific strategy and getting frustrated, try to relax and think calmly. A good admiral will never allow emotions to toy with tactical decisions. More than likely you are getting beaten by a specific thing because you aren't countering it effectively or aren't prepared to fight it. Either look at this guide for more information or go to the community for help. The Warhammer community is generally friendly and willing to help out its own.

  2. In the off chance that something is broken, report it with what you have seen and evidence of it to the developers. There is a fine line however between "broken" and "I don't like that" or "that seems unfair".

Videos

The following are videos available on Youtube that I think are good representations of the Imperial Navy and strategies found by other members of the community. All credit to the content creaters of said videos.


Imperial Navy Counters

After securing Void Supremacy above a planet, the Imperial Battlegroup will move into low orbit to provide orbital support for advancing forces.

"He who seizes the moment, he is the right man."
- Battlefleet Gothic Rulebook (pg 11)


Considering the wide array of ships the Imperial Navy has access to and the fact that it is defined as being a balanced faction means that finding hard counters is relatively difficult. This more will depend on what faction you are playing, how your opponent is playing the Imperial Navy and what the current situation is on the battlefield. General tips to follow are:
  1. If you are a faction which has faster ships then target the engines of Imperial ships. This will prevent them from giving chase.

  2. If you are playing a faction which has higher-than-average troop efficiency, try to board Imperial ships and see if you can get some critical hits off.

  3. Dogdging Nova Cannon shots and Torpedo volleys will greatly limit the Imperial ships effectiveness at longer ranges.

  4. If you are not worried about out-running Imperial ships, target their generators. The Imperial Navy has access to excellent shield boosting upgrades that will make them incredibly durable and take a lot more punishment than they should be able to.

  5. Try not to let Imperial ships ram you, this is something they excel at in closer ranges because many of their ships are equipped with "spurs" which makes them very potent.

.
Asuryani Summary

The Aeldari Craftworld of the Biel-Tan traveling through space with several fleets around it ensuring its security.

"A craftworld is a sentient being, with a hundred-thousand minds."
- Inquisitor Czevak


The Asuryani are the primary depiction of the Aeldari races in Warhammer 40k. They are the remnants and dying population of a long forgotten and fallen empire whose own downfall was perpetrated by excess and arrogance. Despite this fall however, the Aeldari are still a proud and powerful people not willing to go quietly into the void. In game, this faction focuses on using guerilla warfare through hit-and-run tactics. Their accurate and powerful weapons combined with their extremely powerful torpedo salvos make this faction a force to be reckoned with on the field. They also have the benefit of being more durable than some of the other Aeldari factions in the game. As a result, this faction is able to play a far more "bully" oriented hit-and-run style being able to even get close before turning away again to choose the next engagement.

The Asuryani roster is well filled out focusing on ships of lighter classes focusing on 4 different weapon types: launch bays, pulsar beams, lascannons, and torpedoes. While having a limited arrangement of weapons, these are all effective in their own ways and can be utilized effectively on the field versus an enemy. These ships are still fragile compared to other xenos races and should be used with care as the primary defense of all Aeldari warfare is focused on dodging attacks rather than enduring them. Considering these ships also come at premium costs compared to other factions, this means that you must use your vessels carefully and understand when it is best to press the attack or when to retreat. The advantage of this though is that you enjoy the single greatest manueverability of any faction in the game. You have the ability to move at great speeds, a boost to get away or close distances and the ability to reorient your ships instantaneously in battle.

One of the greatest advantages fielded by the Asuryani, on top of their incredible manueverability across the field of battle, is their torpedoes. Because these torpedoes ignore all armor, unlike most factions which simply ignore a small part of it, they can deal tremendous damage. A full salvo of these hitting a light cruiser has a chance to destroy it completely, while two or three full salvos can reduce a battleship to debris in a matter of seconds. However, to balance these incredible weapons, they are slow and easy to intercept. This means the optimum place to launch from is near point-blank range, a dangerous place for any Aeldari vessel to be against a xenos ship. Thus the "dance of battle" will begin and a good admiral will know just where to move next.
Asuryani Skills

The interior of the Craftworld Lugganath. Craftworlds are massive vessels housing the remaining populations of the Aeldari and feature everything they need to continue their way of life.

"The stars themselves once lived and died at our command, yet you still dare to oppose our will."
- Farseer Mirehn Bielann


Wraithbone Probe
  • Launches a probe to a designateed location. The probe moves in a straight line and detects enemy ships within a 4,500 unit radius. Once it has reached its destination, it is deployed after 10 seconds. The deployed probe detects enemy ships within a 9,000 unit radius. Once activated, it lasts for 120 seconds.

  • If it collides with an enemy ship, it sticks to it and automatically deploys itself.
This probe is an essential utility skill used for scouting and detecting enemy vessels. If you are also lucky enough to have it hit an enemy ship (it is very easy to dodge, so don't expect this) then you have free mobile intelligence of the enemy fleet. This effect may force the opponent to split this ship from the primary fleet in order to not give away its current posistion, use this to your advantage but beware of clever players who may use this as a bait to get you to commit to going after one ship.

Mastering this skill doesn't take quick reactions, but more calculated thought. It is important to aim the probe in an area where you don't want your enemy to stay, such as gas clouds or asteroid clusters. By doing this you deny the enemy an ambush posistion and force them into the open. You may also aim this at a capture point so that an opponent has to reveal a ship in order to capture the zone. This is especially useful for countering or at least forcing redeployment of fleets which specialize in ambushes or stealth based warfare, such as the Eldar (all variants) and the Tau.

Disruption Bomb
  • Teleports a bomb to a maximum distance of 10,000 units. The bomb explodes after 15 seconds and ulifies all ships shields/holofields/shadowfields within a 4,500 unit radius. Their regeneration as well as the Necron Hull Cauterisation effect are interupted for 20 seconds.
This bomb is excellent at destroying the shields of your opponents ships and negating the racial bonuses that the Eldar and Necrons receive. This skill while still effective vs Necrons as it does cancel out their innate "regeneration ability", doesn't have as satisfying of an effect versus them as they don't have shields of any kind.

It should be noted that this bomb does have the largest radius of effect compared to any other bomb, meaning that its viability is generally limited to pre/post engagement of fights. You don't want to use this in the center of a fight between your vessels and your opponents because the bomb will disrupt your shields as well. However, considering that Ausryani ships are faster overall compared to most factions you can place the bomb in the middle of an engagement and speed away so that they are only effected. Also, due to the size of the radius this bomb is more effective against battleships that are in the fight considering the have the slowest speed of all ship classes and don't have access to many manuevers that smaller ships have (this does not apply to Eldar or Necrons).

Stasis Bomb
  • Teleports a bomb to a maximum distance of 13,500 units. The bomb explodes after 15 seconds. The speed of all ships, squadrons and projectiles within a 2,500 unit radius is reduced by 90% for 20 seconds.
The most utility based of all bombs on this list, this is simply a "nope" bubble which you can deploy on the battlefield. This sphere changes the battlefield more than any other bomb because of the duration of the effect, once ordinance/squadrons/ships are trapped in it, they are going to be staying there for a significant duration unless they are on the outer periphery of the zone where they might escape sooner.

This skill is an odd one to use with the Asuryani as the only weapon that benefits from this "stasis bubble" is the pulsar beam. Outside of that it doesn't work for the purposes of simply shooting at the enemy. This bomb should be used to disrupt enemy formations or to split fleets so you can focus on one half while the other tries to reconnect.

Augur Disruption Bomb
  • The flagship launches an augur disruption which affects all enemy ships on the battlefield. Every affected ship's detection range is removed for 45 seconds.
A very situation skill which compliments stealth-based or lance-focused fleets nicely, however unless you are runing either of these, I wouldn't bother with using this skill. Asuryani ships generally don't rely on stealth unless you are running a fleet of only light cruisers or something smaller.

Micro Warp Jump
  • Allows the ship to teleport itself within any ally ship's scanning range at a minimum distance of any other ship. The processs requires a 2.5 second delay during which the ship can neither move nor use skills nor perform any manuevers.
Want to have your flagship teleport around the conflict zone? Perfect. The offensive and defensive utility this ability offers is quite high and is very valuable for suprising opponents and setting up to torpedo salvo an enemy ship. This skill simply takes Aeldari movement to the next level, it also makes chasing your flagship an absolute waste of time.

Holofield Overload
  • Fully restores the holofield of the ship and keeps it at its maximum for 10 seconds.

  • Can't be used while the ship is under the effedcts of Disruption Bomb.
This skill is interesting to say the least. The fact that it restores the holofields of a ship is pretty reasonable and can be the difference between that vessel taking critical damage or simply brushing it off. The skill however lacks impact. If it affected a group of ships or had a longer duration then it might be worth it, but considering that you should never stop moving while using an Aeldari ship (thus recharing the holofields to begin with), I find this skill to be very lacking.

Wraithbone Reinforcements
  • The front armor of ally Aeldari ships within a 9,000 unit radius around the ship is considered as 75 for 15 seconds.

  • This effect doesn't applly during collisions.
This skill is very situational and bad. The fact that it only boosts front armor for such a small duration means that it can only be used for one targeted fly-by of an enemy fleet. It also doesn't stop criticals from happening, prevent boarding damage, or apply during collisions so I would pass on it.

Maelstrom
  • Creates a maelstrom of psychic energy in a 2,500 unit radius at a maximum distance of 13,500 units. Any shieldless ship caught in the zone suffers 20 damage per second ignoring armor. The maelstrom lasts fro 45 seconds.
This is an awesome AOE ability that simply does extra damage during a fight and changes the landscape of the battlefield. This is my personal favorite skill of the faction and the one that I would label as a must take. As a bonus it works against Necrons very well because they don't have shields of any kind, just be sure to only target a ship that has already used its teleport ability so it can't simply jump away.
Asuryani Upgrades: Part 1

Aeldari forces of the Craftworld Iyanden move against a Tyranid host. The Craftwold would later be decimated by such forces and left to be a former shell of its past glory.

"The dead must join our ranks, lest we be forced to join theirs."
- Prince Yriel, Autarch of Iyanden


Polarised Field
  • Damage caused by asteroid fields, minefields and spore fields is nullified.

  • Applies to all fleet's ships
This passive ability is a decent upgrade for the fleet that simply removes enviornmental damage. This ability is more useful for kiting/ambushing/harassing types of fleets as these battlegroups tend to hug the outer edges of the map. It also allows players to more easily put their ships into asteroid clusters as being stationary within them allows ships to be stealthed. For the Asuryani this upgrade has merit since it allows you to simply ignore negative terrain on the field. This is also useful in using for escape paths since the enemy will have to go around them or suffer damage, thus giving you more time and distance.

Void Predator
  • If the ship is in a gas cloud or an asteroid field, enemy macro-weapons suffer a 20 point accuracy penalty.

  • Applies to fleet's line ships.
This upgrade is interesting, but I would avoid taking it. While it is useful and synergizes well with the effects of holofields, it promotes a stationary playstyle. This is something the Asuryani simply can't afford to do, as soon as you are marked by a scout the gas cloud becomes a poor place to continue hiding because it has lost its primary advantage: stealth. The minus 20 point accuracy can also be made up for by enemies ships using the "Lock On" stance.

Kin-Crewed Batteries
  • While in Reload stance, the fire rate of lascannons is increaed by 1% every second, to a maximum of 25%.

  • This bonus is lost if the ship stops firing for 1 second(s), or fires at another target.
This upgrade is terrible. It is an absolute waste and you should never use it. First is the fact that while the reload stance is useful for lascannons as it cuts down their reload speed from 4 seconds down to around 2.4, this upgrade makes no sense with it. The fact you only gain a 1% increase in fire rate for each second capping at 25% means you would have to fire at the same target for 25 seconds straight going head on, that is awful. The fact you lose this bonus if you target another ship is laughable. Lastly 1% of 2.4 is nothing, this bonus is so miniscule it is never worth taking. PASS ON THIS.

Accelerated Batteries
  • The ship's weapons range is increased by 4,500 units.

  • Applies to the flagship.
This is an ok upgrade as it keeps the flagship farther away from harm but it is not useful. The only reason to take this would be if you had a large carrier as your flagship and didn't want it to be fighting, but even then this upgrade is week. Skip this.

Spirit Stone Targeting Node
  • Whie in the "Runic Targeting Node" stance, the range of lascannons is increased by 4,500 units.

  • Applies to the flagship.
This upgrade used to be amazing because it applied to all ships in the fleet rather than just the flagship, this was changed in patch 1. There still are reasons to take it for the flagship that are listed below, however it has lost a lot of its power now that it no longer applies to all of your ships. Because of this, I would suggest you find an upgrade to replace this one. Here are the effects on your flagship:

  1. The fact you have increased range would normally be a detriment for weapons like this as their accuracy drops off the farther they are from the target. However, given that the Aeldari are more accurate with their weapons, this is not so much of a concern.

  2. The "Runic Targeting Node" stance changes the firing arc of lascannons from a forward facing 90* to 270*. This means you can effectively strafe enemy ships while going either parallel to their intended destination, or running away from them. It simply increases the amount of dps you are able to dispense and makes the enemy hurt a lot more.

  3. The "Runic Targeting Node" stance also increases the critical chance of lascannons by 100%, bringing it up to 14%. At such a high rate of fire with it being an accurate weapon overall, this weapon can not only cause serious damage but also destroy enemy sub-systems effectively as well.
Asuryani Upgrades: Part 2

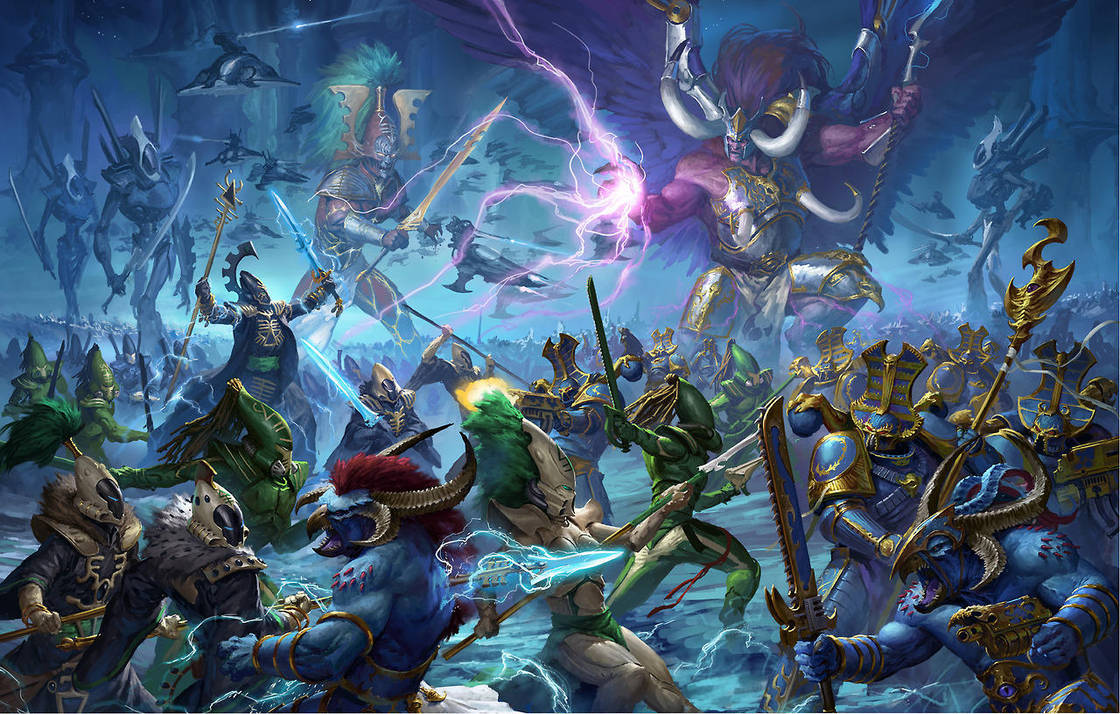
A large-scale battle between Aeldari forces and those of the Thousand Sons of Chaos. Magnus the Red and an avatar of Kaela Mensha Khaine can be spotted in the background.

"The portents are good, the Warp flows strong and pure here. Our sorcery will undo the foul slaves of the dark powers."
- Iraelun, Alaitoc Farseer


Dire Avenger Honor Guard
  • Critical assault chance of the ship is increased by 10%.

  • Applies to fleet's line ships.
This upgrade is interesting and I can see it being useful, however I don't think it is wise to take. Considering that it only boosts the critical chances up to 40% (from 30%), it seems like such a minor boost. If it guarenteed something like a fire (dot) on an enemy ship or something else it might make it worth it but this one really lacks anything to grab anyones attention.

Spirit Crystal Lenses
  • The ship's weapons damage to enemy shields is raised by 10%. The "Hull Cauterisation" activation delay of hit Necron ships is raised by 10 second(s).

  • Applies to fleet's line ships.
This upgrade is always useful, it simply increases damage output versus shields of factions that have them an delays the regeneration abilities of Necron ships. Simple and straightfoward but good.

Shrine to Asuryan
  • Friendly Aeldari ships within the identification range of the ship benefit from a +25 bravery bonus.

  • Applies to the flagship.
This creastes a "be brave" bubble around your flagship that will hopefully prevent other vessels from fleeing or being put under the "mutiny" state. I personally don't find this ability to be all that useful as you can simply use the "Rally" command or the specific ability for each ship which will boost its morale. Not all that useful.

Blessing of Vaul
  • At short range (4,500 units), the target's armor is reduced to 50 against lascannons.

  • Applies to all fleet's ships.
This is not a useful upgrade, and I would suggest you pass on it because it is a trap. Remember that Aeldari vessels are weaker than other factions ships so while you may benefit from using this upgrade at times, the fact that it encourages you to stay close is the problem. It is one thing to come close to line up a torpedo salvo and then fly away, its another trying to make a faction do something it is not supposed to. Also the fact it reduces armor to 50 instead of by 50 makes it lackluster as well.

Ship of the Dead
  • Grants 3 additional troops to the "Rally" command effect. This skill can be used to recover control over drifting hulks but has no effect on ships in the "No Casualties" troop state.

  • Applies to flagship.
A unique upgrade focused on replenishing the troops of the fleet. While this effect does sound useful, it is odd. The fact you already have access to an ability which allows you to replenish troops means that this upgrade simply gets you a two-for-one. However, if you are in a situation where you are low on morale and your ship's troops are getting destroyed, you are probably already losing. I'm not sure how much merit this upgrade has unless boarding-heavy factions like the Space Marines or Tyranids start taking over the meta.
Asuryani Ships: Part 1

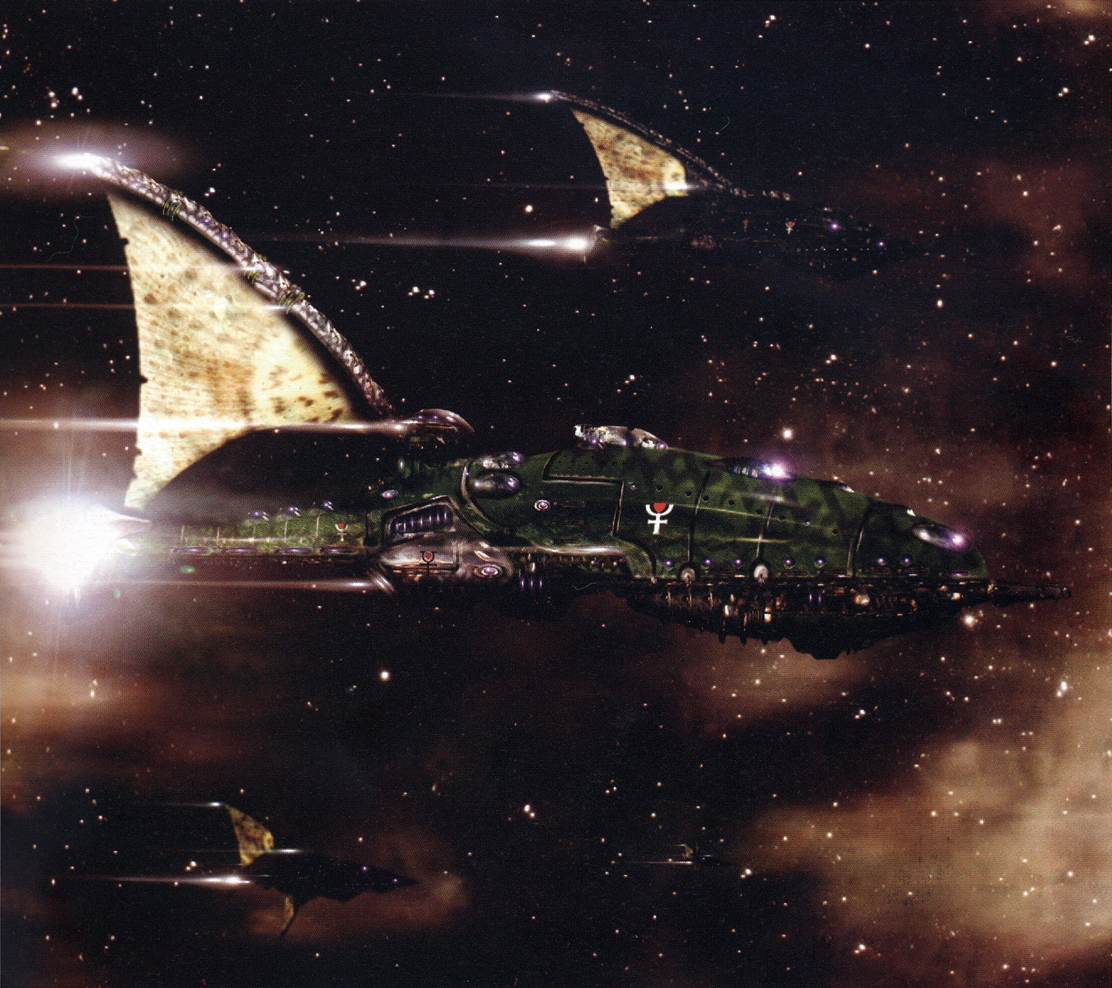
Battlegroup of the Craftworld Biel-Tan crossing the empty void of space.

"My only remaining pleasure is to bring death to the enemies of my Craftworld."
- Lord-Phoenix Ironstorm, Spirit-Warrior of the Biel-Tan Craftworld


In this section I will outline all ships of the Asuryani at the disposal to the players. I will not be including pictures of these vessels as that would be far to time consuming and I will only be giving very brief descriptions of them, not a list of every stat they have. As players you can look more into these stats by creating your own fleet and looking at the information provided for every ship.

I will not be organizing ships I list here by their classification or class. While this is an efficient way to list them for a game, I think a better way to visualize these will be to catagorize them by their weapons arrangements and their perspective roles within your fleet. Ships will be listed from this category further from top to bottom by point values.

To further demonstrate this point, due to the prevelance of how good torpedoes are within this faction, I will be organizing ships by their secondary armaments rather than their primaries as this is now more preference based. The secondary weapons will also determine the playstyle used for a ship more so than its primary weapons, a carrier will not behave the same way a ship carrying torpedoes will. Whereas lascannons and pulsars will all have to be shot at the enemy while facing them.

The ships in this faction used to be more one sided in their selection due to the synergy between "Spirit Stone Targeting Node" (which used to apply to all ships) and the "Runic Targeting Node" stance. Because of the nerf to this faction, all ships now have a role and fleet building/theory crafting now have a place again. Before, players would simply spam lascannons because it was so much more effective.

Escorts

Escorts serve the purpose of being viable scouts and ships to capture zones with. They also serve as "filler" points within a fleet in the case that points are leftover but there are not enough to purchase another line ship. These vessels simply augment the fleet by providing additional firepower, high speed, and scouting potential.

Shadowhunter
  • Class: Destroyer
  • Cost: 79 points
  • Role: Lance Patrol Craft
An easy ship to understand, this ship is very fast and light. The holofields that the Asuryani have also make it very durable for scouting roles.

Shard Shadowhunter
  • Class: Destroyer
  • Cost: 85 points
  • Role: Lascannon Patrol Craft
This ship is exactly the same in every way to the Shadowhunter, except for its weapon array. Instead of having a lance it has 3 lascannons. Given that escorts don't really contribute high amounts of damage to engagements, I would simply say get whichever one of the two escorts your fleet has points for.

Carriers

The ships in this role have traded away their torpedoes for launch bays to house fighters, bombers, and boarding craft. Because of the utility offered by carriers they generally should be kept away from the primary engagement as much as possible to get the most use out of them. However, given the premium cost that is usually associated with Aeldari vessels and the short ranged nature of their weapons, they still must contribute to the fight in order to achieve victory. Be very careful about puting these ships in harms way.

Ghost Wraithship
  • Class: Light Cruiser
  • Cost: 206 points
  • Role: Mid-Range Light Carrier
  • Launch Bays: 2
This is the smallest and cheapest carrier available to the faction. If you compare the cost of this ship to the cheapest carriers from other factions you will see that there is a literal price you pay simply for playing the Aeldari. The ships weapons (lascannons) and launch bays both work with the "Reload" stance very well.

Moonray Wraithship
  • Class: Light Cruiser
  • Cost: 210 points
  • Role: Mid-Range Light Carrier
  • Launch Bays: 2
The Moonray is a clone copy of the cheaper Ghost Wraithship except it changes out its lascannons for pulsars. These weapons will deliver their damage in a shorter burst but will not be affected by the "Reload" stance which most carriers want to use.

Ghost Dragonship
  • Class: Cruiser
  • Cost: 295 points
  • Role: Mid-Range Carrier
  • Launch Bays: 2
The Dragonships are simply the bigger versions of Wraithships by moving up in ship tonnage. These ships are more durable and carry more firepower at the expense of speed and manuverability. Due to a lack of having a second solar sail, this ship doesn't suffer a reduction in speed like the Wraithships if its sails are destroyed.

Moonray Dragonship
  • Class: Cruiser
  • Cost: 285 points
  • Role: Mid-Range Carrier
  • Launch Bays: 2
This ship is a clone of the Ghost Dragonship but trades its lascannons for pulsars. Curiously this ship recieves a decrease in points while doing this compared to the Moonray Wraithship which recieves an increase in cost. Again, pulsars are not affected by the "Reload" stance. Due to a lack of having a second solar sail, this ship doesn't suffer a reduction in speed like the Wraithships if its sails are destroyed.

Phoenix Ship
  • Class: Battle Cruiser
  • Cost: 420 points
  • Role: Mid-Range Heavy Carrier
  • Launch Bays: 2
This is the largest ship available to the Asuryani and features a larger weapons compliment while moving at the expectedly slower speeds that comes from being a bigger ship. Due to the ship not increasing the amount of launch bays it has and the lowered speed of the ship, I would suggest you pass on this vessel. It will be a slower target that your opponents will eagerly exploit and be far easier to catch up to. The point cost is also a concern as you can effectively take two Wraithships for almost the same price and get more fighters out onto the field and have them be far harder for the enemy to catch.
Asuryani Ships: Part 2

A Hemlock Wraithfighter, one of the greatest and most terrifying weapons within the Aeldari arsenal, performing a strafing run on its target.

"I bring only death and leave only corpses."
- Phoenix Lord of the Howling Banshees Jain Zar


Torpedo Craft

The following vessels feature the ability to use torpedoes, arguably the strongest weapon in the Asuryani arsenal. The reason for this is that these torpedoes completely ignore armor, a full salvo can easily cripple or outright destroy destroy smaller ships while larger ones will be devestated by the amount of damage they can bring.

Prismatic Wraithship
  • Class: Light Cruiser
  • Cost: 172 points
  • Role: Mid-Range Light Cruiser
This ship is armed with torpedoes and a compliment of lascannons. This is a light and very effective ship, just be careful when using it as it is very fragile, especially given its point cost.

Firestorm Wraithship
  • Class: Light Cruiser
  • Cost: 176 points
  • Role: Mid-Range Light Cruiser
This ship is exactly the same as the Prismatic Wraithship, except that it switches lascannons for pulsars.

Starfall Dragonship
  • Class: Cruiser
  • Cost: 228 points
  • Role: Mid-Range Cruiser
What once was the pinnacle of Asuryani fleet design and makeup, the Starfall Dragonship was able to strafe and deliver large amounts of damage before patch 1. Now being a former shell of itself it is unknown if it will play such a pivotal role again.

Firestorm Dragonship
  • Class: Cruiser
  • Cost: 220 points
  • Role: Mid-Range Cruiser
While being a clone to the Starfall Dragonship but having pulsars instead of lascannons, this ship may well take over where the Starfall stood dominant. The reason being that it has good damage output that wasn't nerfed but actually buffed in patch 1 due to lance type weapons getting there critical chances doubled.
Asuryani Strategies and Videos

Aeldari guardians of the Craftworld Ulthwe' advancing on their objective.

"He who sees his own doom can better avoid its path. He who sees the doom of others can deliver it."
- Eldrad Ulthran, Farseer of Ulthwé


After a lengthy look at this faction as a whole we come down to basic strategies and tips available to players who wish to bring the might and fury of the Aeldari people down upon the inferior races.

Synergistic Skills/Upgrades
  1. Stasis Bomb (skill)
    +
    Maelstrom (skill) or Disruption Bomb (skill)
    =
    This combination will allow you to hold a fleet/ships still while they either take damage or have their shields reduced to nothing. This combination also works well with pulsar weaponry as these beam weapons ignore the stasis bomb effect. Don't use your torpedoes on the ships caught in this bubble however, they will be very easy to intercept as they have their speed reduced to nothing.

  2. Micro Warp Jump (skill)
    +
    Phoenix Ship (Battle Cruiser)
    =
    Due to the slower nature of the ship it needs some additional ability to move around the battle zone. Without this, even though it is an Aeldari ship, dedicated enemies will still track it down and destroy it. Using micro warp jump may even draw enemy forces out of position as you can teleport across the map with this.

  3. Augur Disruption Bomb (skill)
    +
    A fleet consisting only of Light Cruisers or Escorts
    =
    You now have a fleet which can be all stealthed, have advanced detection ranges, use manuevers without revealing itself, and reduce the enemies detection range to zero. Very effective for ambushing your opponent and catching them off guard.

  4. Runic Targeting Node (Stance)
    +
    A fleet consisting uses lascannons
    =
    This will allow you to effectively kite the enemy as the stance will not only double the critical chance of lascannons but upgrade the firing arc from 90* front to 270* front. This allows you to pretty much shoot any enemy except for those directly behind you.

Helpful tips for Constructing your Fleet
  1. Include some form of launch bays into your fleet, not having any screening fighters of any kind will hurt you when going against any player that spams carriers or mass ordinance. The "Brace for Impact" stance on your ships is not enough to counter this. Players who are interested in this faction far to eagerly take a fleet without squadrons and lose.

  2. Take escorts with you, they are essential in capturing zones and scouting for the enemy. Running a massed battlegroup is fun, but leaves you vulnerable to several strategies.

  3. Your ships come at a premium cost within this faction, be sure to get the same amount of points out of your opponent from before you lose your own. Take this into consideration when building your fleet.

  4. Because this faction's ships are simply "bigger" versions of one another through the classes, find which style you like most. Do you like using a larger amount of smaller ships, a few larger vessels, or a mixed battlegroup? While the larger ships are more durable for those torpedo runs on enemy ships, they are also slower at getting away.

In Battle Tips


  1. Remember, that while torpedoes are central to this factions play style, don't become overzealous when using them. A good Aeldari commander knows when to pull back and when to press the attack, don't waste your ships for a "maybe" hit.

Personal Tips

Videos

The following are videos available on Youtube that I think are good representations of the Imperial Navy and strategies found by other members of the community. All credit to the content creaters of said videos.

Asuryani Counters

Aeldari Craftworld under assault by Chaos forces being led by a Death Guard battlegroup.

"Against the Great Enemy the Eldar have no hope of victory. They hang on to existence, yet their grip upon the universe is slipping, their hold becomes more precarious with every passing year."
- Inquisitor Czevak
.
Necrons Summary

A Necron Lord giving the command to commence a planetary attack with several squadrons of Night Scythes.

"Cast off the shackles of your slumber! The galaxy shall be ours once again!"
- Anrakyr the Traveller


The Necrons are the most technologically advanced faction in all of the Warhammer universe. No other faction comes close to having the prowess they enjoy on the battlefield when it comes to their weapons, armor, teleportation abilities, and regeneration. Because of this, Necron ships come at a premier cost. A Necron fleet will likely consist of 2-4 primary ships-of-the-line and maybe 2-4 escorts at most. This makes the loss of a single ship an incredible setback due to their limited numbers. Where they make up for it is that these ships are able to achieve arguably more than any other factions ships on a one-to-one basis in the entire game. A single Necron cruiser will likely take two to three from an opposing faction to take down while their battleship, the Cairn, will need to be focused down by an entire fleet.

One of the greatest faults of the Necron faction is their limited roster, featuring only eight ships you will not find a lot of diversity. What's worse is that some of the ships are only direct improvements of another version at the cost of additional points. Many of the weapons and firing arcs are similar across these eight vessels along with the strategy of playing them. What does this mean for an aspiring Necron commander? It means you have limited options and you have to use what you have to the utmost potential while keeping your loses to a minimum, if taking any at all. You don't have the luxury of making mistakes and losing a couple of ships to your opponent because of strategic miscaluculation.

One of most key traits that the Necrons have is that they are agonizingly slow. Every faction in the game can run from a Necron fleet, but they would be hard pressed to ignore them because every weapon system the Necrons have always hits. The fact that their weapons have very high damage ratings on top of being 100% accurate makes them deadly. The Necrons fit the undead theme well too, they have inherent hull regeneration effects on their ships which makes them take large amounts of damage which is already heavily negated by their high armor values. The last and most important thing to understand about the Necrons is that while they are slow, that doesn't mean they aren't agile. Necrons ships can teleport around the battlefield on a cooldown timer, they can use this to: ambush, reposistion, escape, secure objectives and flank opponents.
Necrons Skills

Warhammer Fan Concept Art for Necron Tomb World Ship (artist Adam Burn? Can't confirm)

"We are less than cattle to these beings, chattel to be cast aside, consumed or made sport with for their pleasure. There is not one amongst them that would pay heed to a world of Man as I would to an ant on my boot."
- Inquisitor Kessel


Pyramidal Reconstruction
  • Instantly cancels all light critical and heavy critical effects on ally Necron ships within 9,000 units aroud the ship.
While the Necrons do have a passive ability which removes all light critical effects every 60 seconds from their ships, the ability to eliminate heavy critical effects is amazing. Are your engines destroyed? Not anymore. Are some of your weapons and your deck destroyed? Don't think so. The amazing use for this ability is to keep the engines of your ships online so that you can use the "Inertialess Drive" (Necron teleport ability) whenever you need to. The fact that this ability also does it for every ship within a medium range of the flagship makes this skill very good.

Transdimensioinal Thunderbolt
  • Launches an energy orb that hits all ships on its trajectory and inflicts 200 damage, ignoring shield/holofield and armor.
This is simply a damage ability which can be used against any targets within 4,500 units of the flagship. While bonus damage is nice, the fact that this is such short range means it has limited use unless you can teleport towards an enemy. The fact that it also ignores shields/armor/holofields makes it good, hitting multiple ships is a plus.

Canoptek Probe
  • Launches a probe to a designateed location. The probe moves in a straight line and detects enemy ships within a 4,500 unit radius. Once it has reached its destination, it is deployed after 10 seconds. The deployed probe detects enemy ships within a 9,000 unit radius. Once activated, it lasts for 120 seconds.

  • If it collides with an enemy ship, it sticks to it and automatically deploys itself.
This probe is an essential utility skill used for scouting and detecting enemy vessels. If you are also lucky enough to have it hit an enemy ship (it is very easy to dodge, so don't expect this) then you have free mobile intelligence of the enemy fleet. This effect may force the opponent to split this ship from the primary fleet in order to not give away its current posistion, use this to your advantage but beware of clever players who may use this as a bait to get you to commit to going after one ship.

Mastering this skill doesn't take quick reactions, but more calculated thought. It is important to aim the probe in an area where you don't want your enemy to stay, such as gas clouds or asteroid clusters. By doing this you deny the enemy an ambush posistion and force them into the open. You may also aim this at a capture point so that an opponent has to reveal a ship in order to capture the zone. This is especially useful for countering or at least forcing redeployment of fleets which specialize in ambushes or stealth based warfare, such as the Eldar (all variants) and the Tau.

Resurrection Orb
  • Resurrects 3 troops on ally Necron ships in light or heavy casualty steps and ally drifting hulks.

  • Effective Zone is 360 degrees around the flagship at a range of 9,000 units.
This skill simply reinforces your troop numbers on your ships and has the benefit of bringing drifting hulks back under your command. With patch 1's update increasing the troop amount from 1 to 3, this skill is now more viable. This skill is useful against forces that want to board you and it will synergize well with the ability on your ships to reinforce your troops. The real use of this is the convenience to get a ship that is drifting back into the fight, however all an enemy has to do (more than likely) is lightning strike that ship and it goes back to drifting. This skill is more useful now and can be taken, but I still believe their might be better skills.

Stasis Bomb
  • Teleports a bomb to a maximum distance of 13,500 units. The bomb explodes after 15 seconds. The speed of all ships, squadrons and projectiles within a 2,500 unit radius is reduced by 90% for 20 seconds.
The most utility based of all bombs, this is simply a "nope" bubble which you can deploy on the battlefield. This sphere changes the battlefield more than any other bomb because of the duration of the effect, once ordinance/squadrons/ships are trapped in it, they are going to be staying there for a significant duration unless they are on the outer periphery of the zone where they might escape sooner.

This skill has an odd synergy with the Necrons, it doesn't work well with most of the weapon systems because they aren't lances, meaning the shots are delayed as well. This means the only real use for this skill is to be used as an area denial ability to shape the combat zone.

Scarab Swarm
  • Enemy ships within a 4,500 unit radius around the flagship suffer 10 damage per second, ignoring armor.

  • Ally Necron ships within the same radius regain 2 hull points per second.

  • This effect lasts for 45 seconds. A ship can't be affected by more than one Scarab Swarm at the same time.
This skill is incredible for a number of reasons. The fact that it discourages your opponent from staying close to you is a huge bonus and can do a considerable amount of damage. If you have your other ships close to the flagship, they all will be healed by a nice amount and this stacks with other effects. This means that you can have "Scarab Swarm" (2 hull) + "Hull Cauterization" (1 hull) + "Reactive Hull Shift" (2 hull) all going at the same time. This translates to your ships regenerating 5 hull per second against your opponent losing 10 per second. This is a massive tempo swing and will keep your ships in the game for a long time.

Lightning Link
  • Creates a lightning link between the flagship and any all Necron ship at a maximum distance of 9,000 units. Enemy ships caught in the lightning suffer 60 damage per second, ignoring armor.

  • The link lasts for 20 seconds unless the linked ships are seperated by more than 10,000 units.
This is probably one of the most unique and coolest skills in the entire game. The fact that you create a space lightning tether that does immense damage to ships that pass through it can put a lot of pressure on the enemy. It is however quite difficult to use and fairly easy for an enemy to dodge unless you are trying to destroy a ship that has its engines knocked out or is wedged between the two ships creating the tether. It is very effective vs larger captial ships but considering how most factions can just run away this ability leaves something to be desired.

Mass Recal
  • All ships of the leader's fleeet are teleported within it''s flagship's detection range. Their targeting and move orders are cancelled and they are identified by all enemies.
This is a movement based skill which allows for even more mobility for the fleet. It also allows you to play mind games with enemies because of this increased agility. You can teleport several ships into an enemy formation, commence boarding and use your Star-Pulse to cause then damage, then recal them back to safety next to your flagship. You can also isolate your flagship and send your fleet in another direction and when the enemy splits their fleet, you can recall all of your ships to fight half of the enemies fleet.
Necrons Upgrades: Part 1

Necrons waging a ground campaign against their longest known and most hated rivals, the Aeldari.

"Order. Unity. Obedience. We taught the galaxy these things long ago, and we will do so again."
- Imotekh the Stormlord, Phaeron of the Sautekh Dynasty


Phase Shifter
  • Damage caused by asteroid fields, minefields and spore fields is nullified.

  • Applies to all fleet's ships
This passive ability is a decent upgrade for the fleet that simply removes enviornmental damage. This ability is more useful for kiting/ambushing/harassing types of fleets as these battlegroups tend to hug the outer edges of the map. It also allows players to more easily put their ships into asteroid clusters as being stationary within them allows ships to be stealthed. For the Necrons this upgrade is absolutely useless. Considering you regen your hull points this damage doesn't apply over time like with other fleets. Pass on this upgrade.

Tesseract Crypt
  • Stances can be used even when the deck is destroyed.

  • Applies to line ships.
This is a brilliant upgrade which allows you to have the passive upgrades from stances on during the entire engagement. You can have increased hull regeneration if you ships are low, increased firing rate from your weapons or apply splash damage from certain weapon profiles even if your deck is destroyed. One of the better upgrades in the game despite its simplicity.

Shards of Nyadra'zatha
  • Each assault action applies a "Fire" effect to the target.

  • Applies to the flagship.
Absolute garbage upgrade. The fact that you only apply a single dot (damage-over-time) to an enemey once every 60 seconds or so is bad. If this upgrade applied to the entire fleet or applied multiple fire effects to one target it might be worth it. The only good thing about this upgrade is the cool name.

Unstable Pulse Core
  • Damage inflicted by the Star Pulse Generator is increased by 50%.

  • Applies to all ships with a Star Pulse Generator.
Star Pulse Waves are an ability that the Necrons have access to in every ship above the classification of Light Cruiser. This Pulse destroyes all ordinance and enemy fighters around the ship instantly and causes 250 damage ignoring armor. This is one of the best abilities possibly in the game and increasing its damage to 375 is very good. I would only take this upgrade however if you have 2-3 ships above the classification of Light Cruiser, otherwise you won't get enough value out of it.

Residual Absorption
  • While the ship is located in a gas cloud, the Hull Cauterization effects provide 1 additional hull points per second.

  • Applies to all fleet's ships.
An absolutely terrible upgrade. Any skill or upgrade which is dependent on terrain features is inherently questionable because you are depending on said terrain to be present (if it is at all) and to be in a good tactical posistion. There is also the fact that this upgrade gives you only 1 extra hull point when healing, that is not good enough to warrant this. This can be useful sometimes, but there are far better upgrades you have access to. Pass on this one.
Necrons Upgrades: Part 2

Necron reconstruction and regeneration technologies being utilized.

"The Machine is strong. We must purge the weak, hated flesh and replace it with the blessed purity of metal. Only through permanence can we truly triumph, only through the Machine can we find victory. Punish the flesh. Iron in mind and body. Hail the Machine!"
- Paullian Blantar, Iron-Father of the Kaargul Clan, Iron Hands Chapter


Nightmare Shroud
  • While in the "Reload" stance, the ship inflicts 3 morale loss per second to every enemy ship within its identification range.

  • Applies to the flagship.
This is an interesting upgrade as inflicting morale damage is almost always good as you can get opposing ships to mutiny or flee. However there are three fundamental flaws with this upgrade.
  1. The flagship has to be using the "Reload" stance, sometimes this is not optimal and you may need another stance to fit the situation.

  2. The enemy needs to be within identification range, which is 4,500 units. This short range means that enemy ships can simply boost or fly away from this small radius.

  3. This upgrade is comletely useless versus Space Marines since they don't suffer morale damage. An upgrade which is not useful in all games is one that is not optimal.

Living Metal Substructure
  • Escort ships hull points are increased by 25%.

  • Applies to escort ships.
This one made me laugh honestly. If you are spamming escorts this may be useful but outside of that there is no point to this. Escorts are meant to augment the fleet by providing additonal firepower, scouting and capturing zones. They are not your primary concern nor should they be. Possibly the most pointless upgrade in the game unless doing escort spam.

Eldritch Bridge
  • Lightning Strike range is increased by 4,500 units.

  • Applies to all ships with portals.
This upgrade is very questionable in viability. While increased range for a boarding strike is always a plus, it isn't necessary. The fact that you can teleport around the field makes this upgrade quite silly, on top of that you can usually get in range for a boarding action which does a lot more damage and has the higher potential to cause a critical. Not an impressive upgrade by any means but can still be useful.

Structural Analyser
  • Increases Lightning Arcs' critical chances by 100% against enemy ships which have been marked using the "Scanner" skill.

  • Applies to ships with lightning arc weaponry.
I think this upgrade is useful and it increases the critical chance of the lightning arcs from 7.5% to 15%, that is not something to laugh at. The problem comes from having to mark enemies with the "scanner" ability from escorts. While this is an easy thing to do, the problem comes from limited ship numbers, you may not always have your escorts in the right posistion and they may get destroyed. I like this upgrade, but I think it requires to much effort on the players part and it is still dependent on RNG (random number generator) to swing in your favor. Try it and see if it works for you, I believe there are better upgrades however.

Arc Propagator
  • Each particle whip hit spreads to the closest enemy target within 4,500 units.

  • A partical whip can only spread once and damage inflicted to the second target is reduced by 50%.

  • Applies to the flagship.
This upgrade is similar to "Structural Analyser" but requires far less effort on the controlling player. The fact that it just happens makes this strong. Of course this upgrade loses its granduer when fighting isolated ships, but that rarely happens in this game. The only downside is that this ability only applies to the flagship, not the fleet. So this upgrade, just like an skill, requires your flagship to be kept alive as long as possible to get as much value out of it.
Necrons Ships

Necron Fleet forming around a Cairn Battleship preparing for battle.

"They will seek to harvest us at first, for they will be hungry after their long sleep. Then they will turn their efforts to enslaving the survivors. The galaxy will bleed the stench of death into the void, and it will attract the others of their kind. We must choose unity or death."
- Maechu, Farseer of Ulthwé


In this section I will outline all ships of the Necron Fleet at the disposal to the players. I will not be including pictures of these vessels as that would be far to time consuming and I will only be giving very brief descriptions of them, not a list of every stat they have. As players you can look more into these stats by creating your own fleet and looking at the information provided for every ship.

I will not be organizing ships I list here by their classification or class. While this is an efficient way to list them for a game, I think a better way to visualize these will be to catagorize them by their weapons arrangements and their perspective roles within your fleet. Ships will be listed from this category further from top to bottom by point values.

Escorts

Escorts serve the purpose of being viable scouts and ships to capture zones with. They also serve as "filler" points within a fleet in the case that points are leftover but there are not enough to purchase another line ship. These vessels simply augment the fleet by providing additional firepower, high speed, and scouting potential.

Dirge
  • Class: Destroyer
  • Cost: 54 points
  • Role: Light Patrol Craft
This is the fastest ship in the fleet an the cheapest option available to the player. The speed of this ship makes it excellent for capturing zones and scouting enemy posistions.

Jackal
  • Class: Frigate
  • Cost: 59 points
  • Role: Heavy Patrol Craft
This ship is simply a heavier version of the Dirge at an increased cost of 5 points. What do you get for these 5 points? Twice the hull points, an extra weapon and double the defence turrets. This comes with a price of a loss of speed and rotation ability.

Skirmishing Craft

These vessels serve as ships that are meant to stay on the outskirts of the primary engagement and provide support to the larger ships of your fleet. The reason being for this is that these ships have short range weapons and while being durable, they are still very easy to focus down with enough concentrated fire, ordinance or raming. Use these ships to help support your fleet and keep them away from the enemy.

Cartouche
  • Class: Light Cruiser
  • Cost: 155 points
  • Role: Light Skirmish Craft
  • Special: Launch Bays
The Cartouche is the cheapest of the Light Cruisers available to the player and is a simple ship to utilize for the skirmishing role. Just keep it away from your opponenets as mentioned above to use it. Considering the speed of this vessel it also makes a nice pursuit craft. Has access to fighters.

Khopesh
  • Class: Light Cruiser
  • Cost: 194 points
  • Role: Heavy Skirmish Craft
  • Special: Launch Bays
This ship is simply a heavier version of the Cartouche at an increased cost of 39 points. With this you get a major increase to the hull, an additional weapon and greater durability in combat. While this does make the ship more reliable, it loses the speed that is necessary for the role it intends to fill. Since points are at such a premium with this faction I'm not sure whether you should choose this over the Cartouche. Has access to fighters.

Stealth Warfare

Though there is only one vessel on this list, it does fill a particular niche of playstyle. Stealth based ships simply will regain stealth from whatever allows them to: gas clouds, asteroid clusters, the "Running Silent" stance, exe... The advantage to this is to use stealth as a weapon and to have it on your side.

Shroud
  • Class: Light Cruiser
  • Cost: 189 points
  • Role: Stealth Skirmish Craft
  • Special: Advanced Detection Radius, Launch Bays
This is the most interesting of the light cruisers available to the Necrons. It fills a role that no other ship in the fleet does and it is very strong. While similar in playstyle to the other light cruisers, the benefit of having stealth adds to this ships survivability. It compares to the Cartouche at an increased cost of 34 points and gets two more weapons added to it. It compares to the Cartouche and not the Kopesh because it is a lighter craft and has all the same stats. Perhaps one of the biggest benefits of this ship is that it has an increased detection radius, so while skirmishing it will reveal enemy radar blips that may be hidden behind the primary engagement zone. Has access to fighters.

Heavy Enforcers

These vessels serve as primary will of the Necron fleet and the sole embodiment of all of their strategems. These craft are tough to kill, have extremely dangerous weapons, have access to potent abilities and compose the center of your fleet. If you lose any of these ships before you have done anything short of devestating amounts of damage to your opponent, you have played them wrong and will lose the game.

Scythe Harvester
  • Class: Cruiser
  • Cost: 291 points
  • Role: Light Attack Cruiser
  • Special: Star Pulse Wave Ability, Launch Bays
This cruiser serves as the lightest and fastest of all the heavy vessels the Necrons have access to. It is a solid ship with an impressive array of weapons, decent speed for the Necrons, and can stand up to punishment. Has access to fighters.

Scythe Reaper
  • Class: Battle Cruiser
  • Cost: 367 points
  • Role: Heavy Attack Cruiser
  • Special: Star Pulse Wave Ability, Launch Bays
This ship is simply a heavier version of the Scythe Harvester at an increased cost of 76 points. While this is a major point increase, you get a major increase to the hull, an increased and more potent weapon array and greater durability in combat. This ship is going to be exposed to all the punishment the enemy has to offer you so the investment is worth it. Since points are at such a premium with this faction you will have to budget when fitting this craft into your fleet. Note that if you don't have any escorts in your fleet for any reason, downgrade this to a Scythe Harvester and please take an escort. Has access to fighters.

Cairn
  • Class: Battleship
  • Cost: 492 points
  • Role: Heavy Attack Vessel
  • Special: Ancestral Terror Ability, Star Pulse Wave Ability, Launch Bays
This is a massive and incredibly slow moving ship that brings the wrath of the Necrons to bear on their enemies. With a massive weapons array and the ability to reposistion itself, this is one of the most dangerous capital ships in the game. It also has access to a unique ability that does a significant amount of morale damage while increasing friendly morale of ships. The biggest thing to understand about this vessel is not all that it can achieve, but what it costs. At nearly 500 points, it is a massive investment for your fleet and you have to at least destroy or eliminate that same amount of points from your enemies fleet before you lose this vessel. If you can't do that, it will more than likely be a loss for you. Has access to fighters.
Necrons Strategies & Videos

Necron Jackal Escort-Class vessels ambush an Imperial supply convoy.

"That man is beset at all quarters by traitors, mutants and fiends is self-evident. But in truth none of these evils shall be our undoing. When the end comes it will be not at the hand of any mortal being of this or any other realm: death will come at the hands of the ancients, those who determined our fate aeons before we stood erect upon the holy ground of Terra and gazed up into the starry night."
- Inquisitor Hoth


After a lengthy look at this faction as a whole we come down to basic strategies and tips available to players who wish to bring the death in all of its glory to all the sentient species of the galaxy.

Important Skills/Upgrades

Unlike some other factions there are far fewer options when it comes to what is good with the Necrons in the skills and upgrades department. I will outline what I think are the best and most important in the following. If there is a skill or upgrade that you like that doesn't make it to this list, I encourage you to try it and find what works best for you.
  1. Pyramidal Reconstruction (skill)

  2. Scarab Swarm (skill)

  3. Lightning Link (skill)

  4. Mass Recal (skill)
Out of all the skills, these are the four to choose from. Among these four, Pyramidal Reconstruction is a must have in every fleet. While Necron ships do repair light critical effects over time, if your engines are completely destroyed you will lose access to your teleport ability. The Necron fleet relies on this ability heavily, without it all their ships are paper weight. Still dangerous but they will not achieve anything. The closest comparison to this is thinking of an Aeldari ship that has had its engines destroyed... Those are dead Eldar. That same logic applies here.

Scarab Swarm I think is the second best skill by far on this list, though this is preferential. I believe that the ability to do mass repairs on your ships and keep them in the fight longer is worth more than the extra mobility and damage the other skills offer. However, I leave this choice up to you. But please take Pyramidal Reconstruction, I can't overstate this enough.
  1. Tesseract Crypt (upgrade)

  2. Unstable Pulse Core (upgrade)

  3. Nightmare Shroud (upgrade)

  4. Arc Propagator (upgrade)
These are the best upgrades of the list to choose from available to the Necrons. They are the most useful in nearly all situation and have an impact on gameplay. The best of the ones listed is Tesseract Crypt, the utility this offers by allowing you to still use stances even when your deck in destroyed or damaged is amazing. All those passive buffs your ship has access to will still be there when opponents destroy the deck sub system of the ship.

Unstable Pulse Core is very good if you are running at least three heavy ships that have accesss to the Star Pulse Wave ability. The other two upgrades listed do either bonus damage or damage to morale, both are useful in nearly every game against every opponent.

Personal Note

Now for those of you reading the past few sections you may realize that the combination of using Pyramidal Reconstruction and Tesseract Crypt seems a like a bit of an overlap. The reason why I recommend both of these together is because the Necrons lack shielding, they are vulnerable to critical hits from the very beginning of the fight. You need stances on your ships to boost the dps output of your vessels and to help regenerate those that are getting focused down. You need your engines up as much as possible in order to use the only access to viable movement you have. Without these two things, your ships will fail, and your fleet will fail. It is not impossible to win without either of these, it is simply much harder.

Helpful tips for Constructing your Fleet
  1. Necron fleet building is all about the choice of whether to have a heavier or lighter version of a ship or not. You need to get the most out of your points wtih this faction and make sure your opponent pays dearly for every ship they eliminate.

  2. Take escorts with you, they are essential in capturing zones and scouting for the enemy. Running a massed battlegroup is fun, but leaves you vulnerable to several strategies.

  3. The Star Pulse Wave ability is among one of the most powerful abilities in the game and it is available to the three heaviest ships on the roster. You need at least one of these ships or a fleet composing of at least 3 three of them. The utility and raw damage this ability offers is amazing.

  4. It might be tempting to take a double Cairn list, but I advise against it. While it is and amazing and very powerful ship. Its extremely slow speed and turn rate make it very vulnerable against certain strategies.

In Battle Tips
  1. Target the engines of nearly every faction you come across is probably a good idea.

  2. Target the generators of factions with strong shields (Imperial Navy, Tau).

  3. The Star Pulse Wave ability is one of the best abilities in the game. Use this to cause significant damage to enemy ships and clustered formations.

  4. Against carrier or torpedo spam, use your Star Pulse Wave ability. This will destroy all oncoming ordinance and fighters instantly.

  5. Use your teleport ability (Intertialess Drive) wisely. It is the most important ability available to the Necrons hands down, everything else pales compared to the importance of this ability. The difference between good and bad Necron players will come down to the judgement of how and when to use this.

  6. Put all of your escorts on the "Running Silent" stance, there is no reason to have them not stealthed.

  7. The "Dispersed Lightning Arc" stance is what all line ships should be put on default and using throughout the fight. The bonus damage dispersed between clumped enemy formations will increase dps output by a significant margain.

  8. Use the "Reactive Hull Shift" stance when one of your ships is being focused down so that it can focus on regenerating hull points. This extra regeneration will make it harder for your opponent to kill said ship and buy you time to do damage with your other vessels.

Personal Tips
  1. If you are getting beaten by a specific strategy and getting frustrated, try to relax and think calmly. A good admiral will never allow emotions to toy with tactical decisions. More than likely you are getting beaten by a specific thing because you aren't countering it effectively or aren't prepared to fight it. Either look at this guide for more information or go to the community for help. The Warhammer community is generally friendly and willing to help out its own.

  2. In the off chance that something is broken, report it with what you have seen and evidence of it to the developers. There is a fine line however between "broken" and "I don't like that" or "that seems unfair".

Videos

The following are videos available on Youtube that I think are good representations of the Imperial Navy and strategies found by other members of the community. All credit to the content creaters of said videos.


Necrons Counters

Necron planetary assault being supported by a Monolith and Destroyers with aerial support from Night Scythes.

"The secrets of the universe are within my grasp. You cannot stop me now."
- Illuminor Szeras


Considering the extremely small roster available to the Necrons, fleet building and theorycrafting are very limited. They are also a faction which needs to get the most out of their vessels. They are an easy faction to play due to their limited numbers, but a hard faction to master. General tips to follow are:
  1. ALWAYS target the Necron's engines. By doing this you limit their potential to teleport and make them more predictable.

  2. Because of their limited ship counts, focus fire on one ship and target all boarding attacks on another. This will keep damage on one ship will whittling down another.

  3. Don't clump up against them, their initiation potential combined with several Star Pulse Waves will devestate most fleets and kill escorts outright.

  4. Playing scenario is key to beating Necrons, it forces them to spread out and keep extra pressure on them to move around the map.

  5. If going against the Cairn battleship, it is very easy to manuever a ship into its rear arc and hammer it with weapons. It's weapons are focused in a 270 degree foward arc which doesn't cover its engines.

  6. Ramming a Necron ship is extremely effective. Don't pull away the ship though, let it keep running into it with its engines on max. This will drain the Necron's ships hull points rapidly, especially if you play as the Imperial Navy.
.
Tau Protector Summary
Tau Protector Skills
Tau Protector Upgrades: Part 1
Tau Protector Upgrades: Part 2
Tau Protector Ships
Tau Protector Strategies and Videos
Tau Protector Counters
.
Credit and References
Please note that I don't own any of the images or videos shown on this guide, I simply used them from what I found was available across google and youtube. All credit to the amazing people who are responsible to the videos, pictures and music used and referenced in this guide.

The Lord Admiral's "The Imperial Navy" Guide
- Useful for all players wishing to have an in depth look at Imperial ships and stats out of game.

Youtube
- All Music Videos
- AirsickHydra
- Chapter Master Valrak
- Oathmaster
- Yukitsu Times

Warhammer40kWikia "Quotes"
- Cardinal Kregory Hestor
- Cult of the Sacred Union
- Emperor of Mankind
- Imperial Navigator
- Inquisitor Kryptman

WH40k.Lexicanum "Quotes"
- Emperor of Mankind's final words
- "Don't waste Tears"
- "Between the stars"
- "Fear of death"
- "Captain master of his ship"
- "He is the right man"
- "Caste of the shackles"
- "Secrets of the universe"
- "We are less than cattle"
- "Unity. Order. Obedience"
- "The machine is strong"
- "That man is beset"
- "Harvest us at first"
- "Against the Great Enemy"
- "My only remaining pleasure"
- "The portents are good"
- "The dead must join our ranks"
- "The stars themselves once lived"
72 comentário(s)
M311D0WN 16 de abr. às 12:54 
The guide is helpful, but where are the 'nids?
Mr Cool Kid 5 de jan. às 4:08 
Hi there, I was just wondering if this guide will be updated at all as I've this so helpful to learn the game and what each ship does and i really want to learn some more factions.
lockesdoc 19/jul./2020 às 14:15 
is the guide ever going to be finished? Because I am looking for a Tyranid and Chaos section
DoubleG 14/ago./2019 às 17:43 
I just got the game yesterday and I can't tell you how helpful this is!! Thank you so much for your time and effort!
TamTam2204 5/jul./2019 às 11:22 
Very useful guide, but you should put it into Ms world and search for world like ‘there’ ‘their’ and ‘will’ ‘while’ and other words, because (most likely) your autocorretc, or speech to text f*-ed them up. I’m really hyped for t’au guide.
[BRE] Alaric 18/mai./2019 às 11:32 
Just the amount you wrote till now is already quite a comprehensive little guide.
I've already learned a couple of things that I somehow "sorta" figured out by playing the game,
but wasn't entirely sure and you've explained the specifics.
Cheers bro.
Madness 30/abr./2019 às 4:20 
Thanks for the update, and good luck with your job & wedding :steamhappy:
Big-Daddy-J  [autor(a)] 29/abr./2019 às 14:39 
April 29th continued...

The reason for me not writing as frequently anymore is due to many reasons. Me and my fiance' are looking at wedding venues and potential honeymoon spots and school has picked up as well with me doubling my classes for my criminology degree.

To top this all off, I'm in the middle of the application process to become a police officer within my city. Should I succeed in this endeavor my time will become even more limited as I will be training at the academy, but I hope I can still give as much effort to people who read this as protecting my city. I will hopefully begin updating at least one faction this week and will continue to post. Check the comments, this update log or even PM me should you have any concerns/questions.
Big-Daddy-J  [autor(a)] 29/abr./2019 às 14:39 
April 29th...

Hello everyone, I know I haven't updated the guide in a while and my content lately has been nonexistent, but I feel like you all deserve an explanation. So firstly, the guide will undergo updates as I have time (it should be obvious by now, but I have far less of that now than when I started writing) not only due to the patches to the game but also picking up where I left off. I still love Warhammer 40K and this game and will continue to push forward with it when I can.
Madness 16/abr./2019 às 14:38 
Why is this no longer being updated?