
728 ratings

Basic Gameplay and In-Depth Mechanics Guide
By HGH
This guide will explain the game's mechanics and basic gameplay to anyone new to the franchise, as well as explaining some aspects that aren't mentioned within the game.
 2
2

 3
3

Favorite
Favorited
Unfavorite


| 16,536 | Unique Visitors |
| 748 | Current Favorites |
Guide Index

Overview
Introduction:
Overworld:
Dungeons:
Battle:
Stats:
Character Types:
Turn Order:
Basic Attacks:
EXE Gauge:
Partners and Lily Ranks:
Items:
Equipment:
Disks:
Plan Development:
Guild, Quests and Shares:
Enemy Types and Affinities/Elements:
Useful Tips:
Hidden Multipliers:
Comments
Introduction:
Hyperdimension Neptunia Re;Birth 1 is a remake/reboot of the first title in the series, significantly changing many things from gameplay to plot. It serves as an excellent entry point for anyone starting with the franchise. This guide is dedicated to explaining mechanics and some of the basic gameplay.
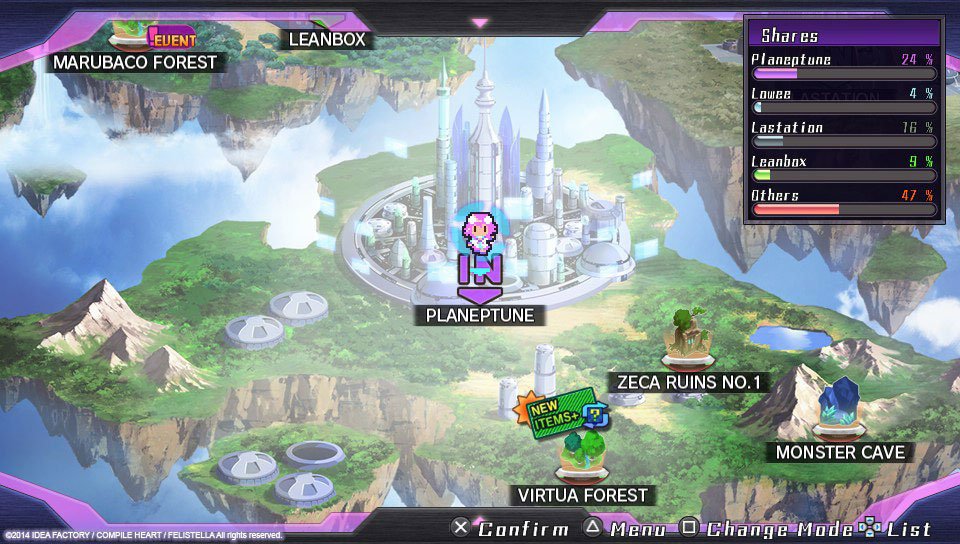
Overworld:
At the start of the game, you'll enter the Overworld, or Gamindustri. From there, you can view various NPC messages, get items, enter shops, access quests, and many other essential functions. Make sure to check it for NPCs often, represented by speech bubbles scattered around the world.
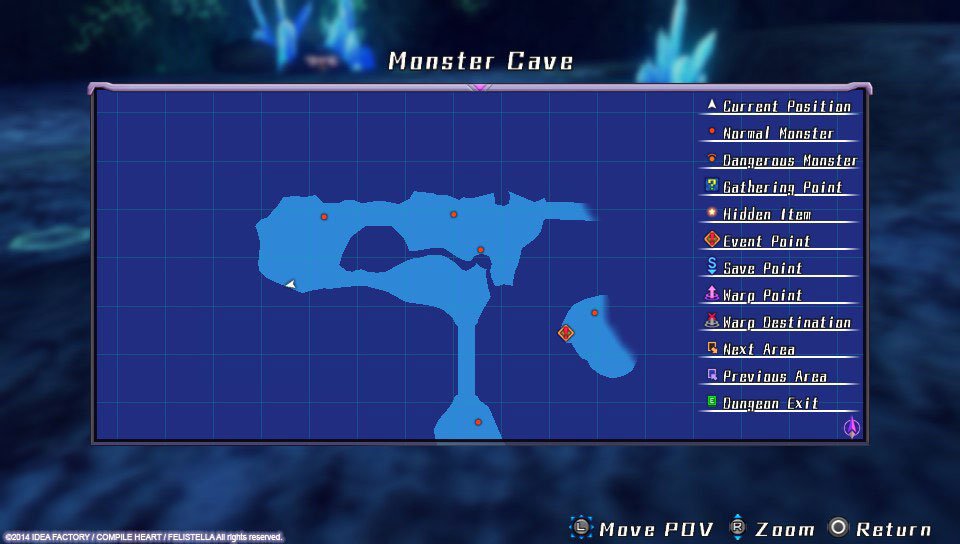
Dungeons:
The main meat of the game takes place in dungeons. In there, you can move around a 3D environment with enemies running around the field. There are also various floating cubes and speech bubbles, these are treasures containing different items and equipment.
You can emit a pulse using a button you assign in the Options menu to find secret treasures. There are usually one or two per dungeon, and they often contain rare or unique items. You can also jump around to get up some locations later on.
Coming into contact with an enemy will start a battle. If they touch you from behind, they will get the initiative. If you attack them first instead, you will. If you are touched in the middle of attacking or after missing though, the enemy will still get the jump on you.
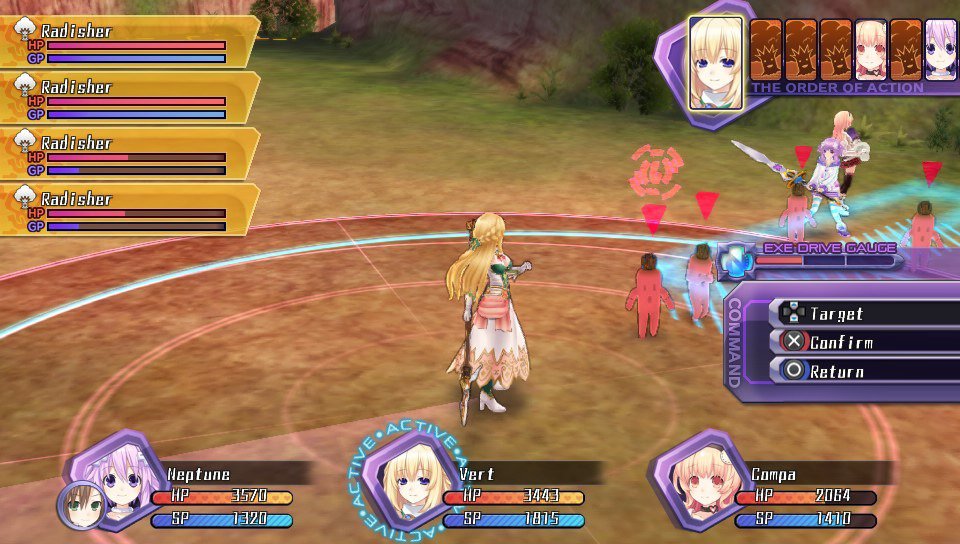
Battle:
Combat takes places in a circular arena with invisible borders. Here, you can take control of your characters and move around a specific radius each turn. In front of your character, there will be a blue box or rectangle. This delimits the area they can attack, and depends on the character and their weapons. You can use this to attack multiple enemies at once, so try and fit in as many enemies as possible.
There are 2 action menus. The first contains the Attack command for basic attacks and SP Skills to consume SP for special actions, buffs, and so on. You can also skip your turn by defending. Later on you will unlock the EXE Drive, a special type of super attack with its own resource.
The second menu contains the Switch option, which can switch one party member for another partner in reserve; the Item option to use various items; Escape, to attempt to run away from current battles; and finally, HDD On/Off for some party members, a togglable state that boosts stats.
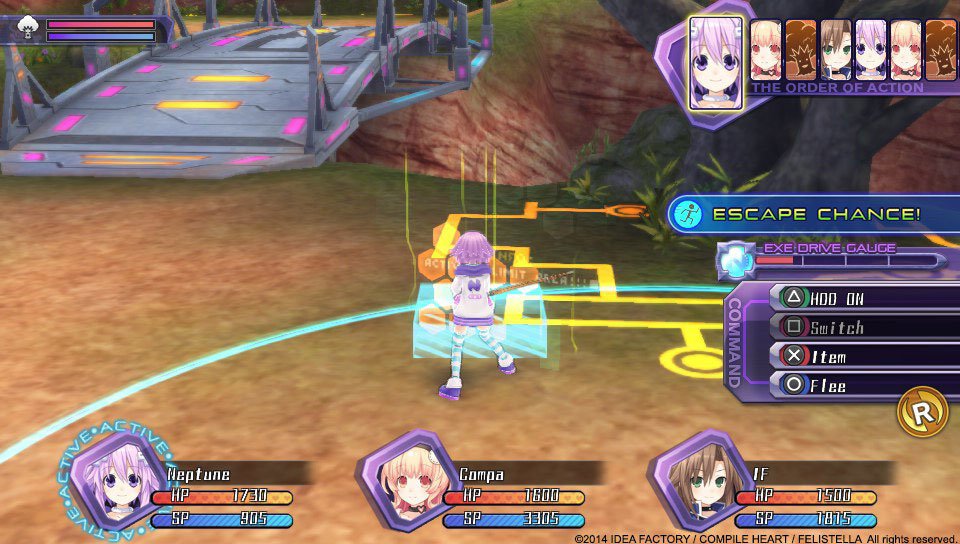
Enemies have two gauges: their HP, which you deplete to defeat them, and Guard. Guard takes damage separately, and, when depleted, the enemy will enter Guard Break, taking a lot more damage from all sources. Note that some enemies regenerate and will not remain Guard Broken.
You can escape combat by running towards the edge and using the Escape command. This may take multiple attempts.
There are 2 action menus. The first contains the Attack command for basic attacks and SP Skills to consume SP for special actions, buffs, and so on. You can also skip your turn by defending. Later on you will unlock the EXE Drive, a special type of super attack with its own resource.
The second menu contains the Switch option, which can switch one party member for another partner in reserve; the Item option to use various items; Escape, to attempt to run away from current battles; and finally, HDD On/Off for some party members, a togglable state that boosts stats.
Enemies have two gauges: their HP, which you deplete to defeat them, and Guard. Guard takes damage separately, and, when depleted, the enemy will enter Guard Break, taking a lot more damage from all sources. Note that some enemies regenerate and will not remain Guard Broken.
You can escape combat by running towards the edge and using the Escape command. This may take multiple attempts.
Stats:
STR determines physical damage
INT determines magical damage
VIT determines physical defense
MEN determines magical defense
AGI determines speed and evasion
TEC determines accuracy
LCK determines mainly for crit rate, but also a minor boost to accuracy, evasion and escape chance from battles
MOV determines the radius you can move around during fights
Character Types:
There are 2 types of characters in the game: CPUs and Makers.
CPUs are console representative characters. Their unique defining feature is HDD. It is essentially a large stat boost you can use in combat at a onetime cost of 20%SP. There's generally no reason not to always be in HDD during boss fights. Less so during exploration and random battles as the SP cost/usage will likely get too expensive.
Makers cannot transform, and as such must compete by virtue of their arsenal of attacks, unique skills, and raw stats.
Both character types have unique passives skills, such as breaking the damage cap of 9999, getting more EXP, acting faster in battles, and so on.
Turn Order:
The way turn order is determined can be a bit confusing. It is displayed in the top right during battle and is determined by AGI.
Basically there's an invisible value to every action you take, and what you do on a turn determines when that character's next turn will be up. The turn order displayed in the top right corner only corresponds to what would happen if you used very short combos or skills with low delays, so at times it can change drastically if you use a powerful move or a full combo. So, for example, Defending has a small value and usually will get that character another turn pretty quickly. Full combos or using items however will take a bit longer, and so on.
Basically there's an invisible value to every action you take, and what you do on a turn determines when that character's next turn will be up. The turn order displayed in the top right corner only corresponds to what would happen if you used very short combos or skills with low delays, so at times it can change drastically if you use a powerful move or a full combo. So, for example, Defending has a small value and usually will get that character another turn pretty quickly. Full combos or using items however will take a bit longer, and so on.
Basic Attacks:
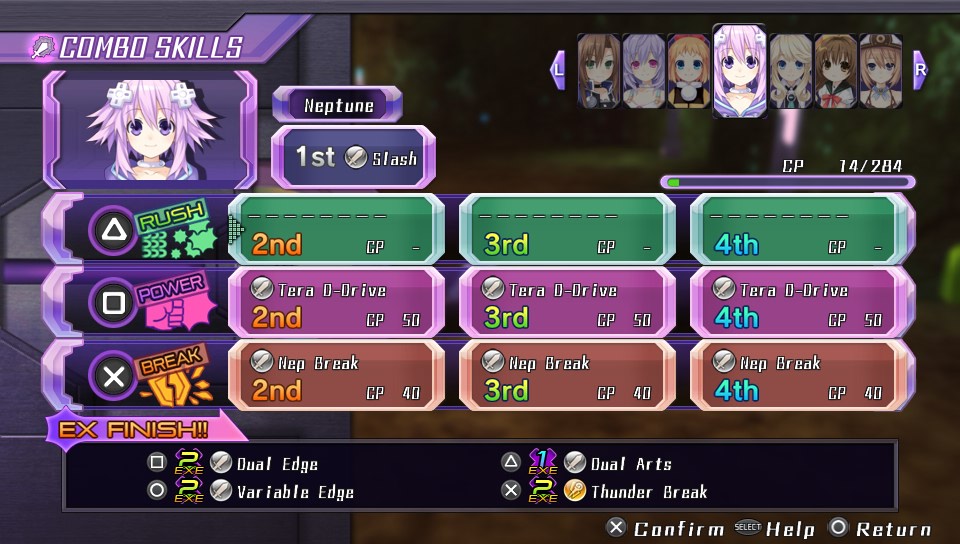
Your basic attack can deal an up to 5 hits combo. The first attack is always a simple hit. The rest are customized from a selection unique to each character. Each attack has a cost, called CP, and you must distribute them without exceeding the CP Total for a particular character. CP increases as you level up.
Basic Attacks come in three types: Rush, Power and Break. Rush have the most amount of hits. Power hit HP harder. Break focus on Guard damage to break the enemy's defences.
All attacks will add to and build up a meter displayed in the bottom left corner during battle called the EXE Gauge. The more hits, the faster this meter builds up. Thus Rush attacks are the best to build up EXE.
There are three important stats to each attack: Hit Count, Power and Guard Damage. Hit Count is the number of hits the attack performs. Power is used to damage enemy HP, and Guard Damage to damage their Guard Gauges.
The numeric value shown for Power displays the total power for an attack, and is not affected by Hit Count. However, Guard Damage is multiplied by Hit Count. So, to use a loose example, an attack that hits 3 times for 150 Power and 50 Guard Damage will do 150HP damage but will also do 150 Guard Damage. Keep this in mind when building your Combo moves.
EXE Gauge:
At the start of the game, you mostly want to fill it up so you can use EXE Finishers. These are basically free extra attacks at the end of a combo. Make sure you've got them assigned at the bottom of the Combo menu.
Later on, you'll be able to consume the gauge(like SP) to perform powerful attacks called EXE Drives. These are your most powerful moves and will generally be your finishers.
Later on, you'll be able to consume the gauge(like SP) to perform powerful attacks called EXE Drives. These are your most powerful moves and will generally be your finishers.
Partners and Lily Ranks:
While you can only have 3 characters out at once, each character can also have an additional one as their partner. This partner shares various passives and attacks, and can be switched in mid-battle using the Switch command.
Two characters partnered together have a Lily Rank. This represents how good the relationship between the two is, and will improve the more battles you enter with two characters partnered together (number of battles matters, not the length). It is used to unlock various passives and active commands to share between characters, and can go from 0 to 10.
Note that it takes longer for DLC character to increase their Lily Ranks.
Items:
There are various healing, reviving and buffing items.
Some items are percentage based, and others have more flat numbers. For most of the game you'll generally favor the latter, until you have enough HP/SP that the percentage based items become better. For example, early on, the item Hero Drink is particularly good for SP as it replenishes 2500SP along with 30% HP.
Buffing items, named Boosters for the most parts, will give you a temporary stat buff. Buffs shouldn't be underestimated so it can sometimes be worthwhile to use these in a tough fight.
Finally, some items are single target, while others are AoEs. Make sure to pay close attention to the radius when using the latter.
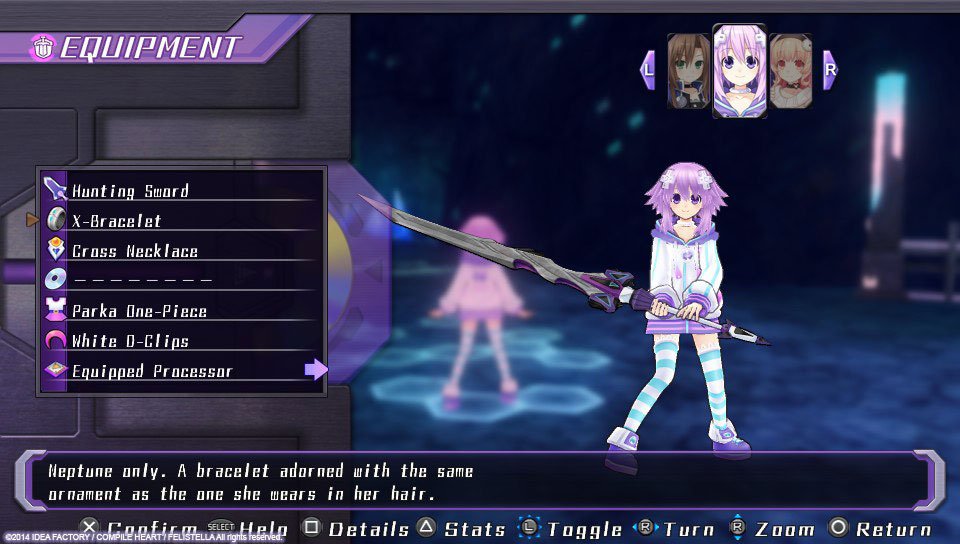
Equipment:
Everyone gets a weapon, defensive item, accessory slot and a disk slot. For the most part you'll just want to stay up to date with what's available at the shop or what you find in dungeons. Occasionally you'll get a piece of equipment that has a couple different trade-offs. Exercise your own judgement and see if lowering one stat in favor of another is worthwhile.
Additionally, weapons come with different AoEs and ranges, so make sure to pay close attention what style a weapon is.
Early on, the Life Ring accessories are invaluable, as they considerably boost your HP by 2500 (and thus the amount healed by percentage based healing).
Additionally, weapons come with different AoEs and ranges, so make sure to pay close attention what style a weapon is.
Early on, the Life Ring accessories are invaluable, as they considerably boost your HP by 2500 (and thus the amount healed by percentage based healing).
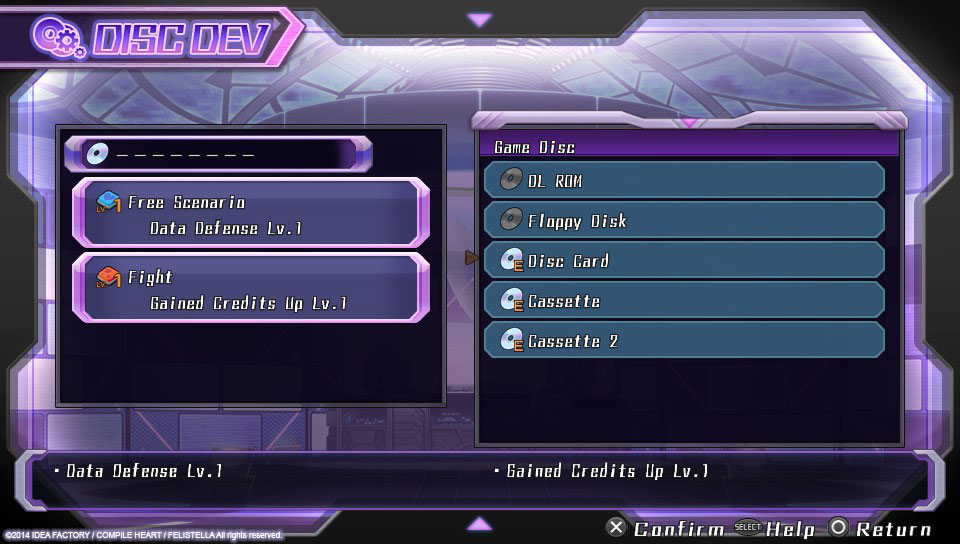
Disks:
Disks are basically a special customizable accessory. You will find various chips from fights, chests and exploration. You will find disks from plot progression, bosses and beating special enemies.
Now here's how chips work: there are three classes of chips, with different types of buffs and powerups, and there are 5 levels of power for each chip class. Disks can only contain specific types of chips though.
So, a disk with a blue 3 slot and a red 4 slot can contain blue chips from levels 1 to 3, and red slots from level 1 to 4, but cannot contain yellow chips, or level 5 red chips for example. You'll want to customize disks to fit whatever current situation you're facing. You can format a disk at any time, losing the chips that were in it, but getting a blank disc again. It's free and easy to use.
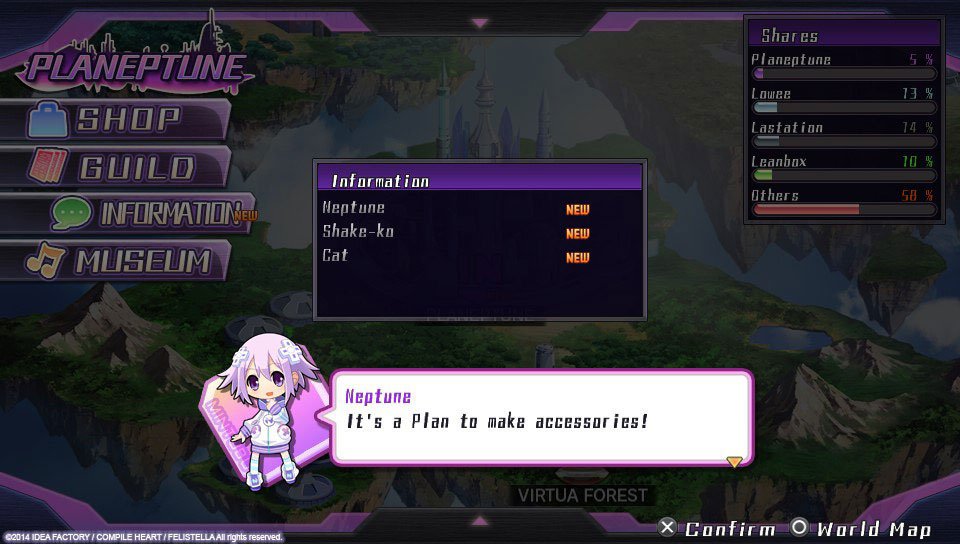
Plan Development:
You have a limited amount of space called MBs, that expand as you go through the game. Using the plan system, you basically permanently expend these MBs for various purposes. In addition, each plan requires materials, found in dungeons or from fighting monsters and specific bosses. There are plans for items and equipments; once crafted, you can buy these items/equipment from shops. There are plans for game features, such as changing enemy difficulty and such, which you can then turn on and off at will. And there are dungeon plans.
Dungeon plans can flat out create a new bonus dungeon, change the contents of treasures in dungeons(which you'll sometimes need for materials), or spawn special new enemies/bosses. These new bosses are what usually drop different types of disks for you(or rather Medals, that you can exchange for disks at Planeptune with the Mysterious Stranger).
Dungeon plans can flat out create a new bonus dungeon, change the contents of treasures in dungeons(which you'll sometimes need for materials), or spawn special new enemies/bosses. These new bosses are what usually drop different types of disks for you(or rather Medals, that you can exchange for disks at Planeptune with the Mysterious Stranger).
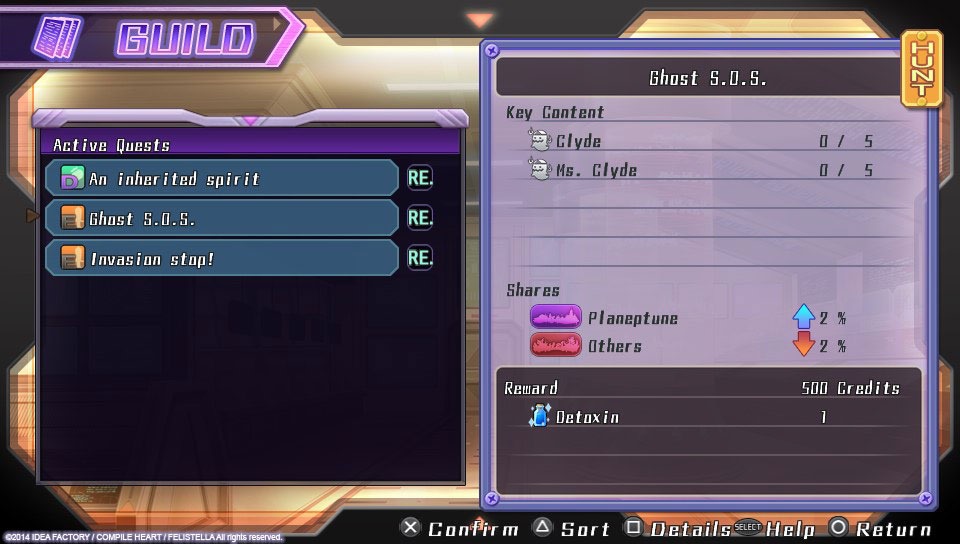
Guild, Quests and Shares:
The Guild menu option allows you take on Quests. These either require beating specific enemies or delivering materials that drop from certain enemies. Early on they'll provide more Credits than can be gotten from simple fighting and are useful in that way.
Quests also manipulate Shares. Shares provide a minor passive boost to CPU characters in battle, with each nation corresponding to a CPU. So for example, if Noire of Lastation has 50% of all Shares, she'll recieve a better boost than the other CPUs.
Shares are also used to determine which of 2 endings you can get.
Enemy Types and Affinities/Elements:
Sadly this section will be a bit sparse as there is no real documentation on this.
There are 4 elements in the game: Wind, Fire, Ice and Thunder. They... aren't used too often.
Enemies come in various families. These usually determine their skillsets, types of attacks, stats and such. However, some come with special passives and resistances. You'll have to experiment to see what is weak to physical or magical damage, or different types of elements.
So for example, mechs and robots are weak to Thunder attacks, and take extra damage from magical damage, but are highly resistant to physical damage. You'll be encountering quite a bit of these so keep that in mind.
Otherwise, you'll have to use a bit of logic. Enemies in a volcano area will usually resist fire and be weak to ice, and so on.
Overall this is not a very important part of gameplay in the base game but may help you deal with some fights.
Useful Tips:
Hopefully that wasn't too confusing and will help you on your adventure. Here are some personal suggestions:
-Do not be ashamed to use the Easier/Weaker Enemies plan. There's no penalty for this, and you can switch the difficulty at any time for no cost. Chapter 2 is a notorious difficulty jump that stumps quite a few people.
-Life Rings are very strong early game accessories. The HP boost is quite considerable at that points in the game.
-Always have a stock of Life Fragments; these revive KO'd party members and are essential. Similarly, keep healing items handy, as you won't always have healers in your party.
-Customize your disks often. Don't just horde chips.
-Buffs and Debuffs are very useful in battle. Don't underestimate their ability to impact the difficulty of a fight. An enemy missing several attacks due to a TEC debuff can be a lifesaver.
-Grinding is not always the solution, however, good usage of strategy can sometimes lead you to entering an area a bit underleveled. Balance things out but don't overdo it!
-Save and save often! You lose all progress from your last save upon Game Over.
-Most importantly, have fun!
(Images are courtesy of IFI and the Vita version)
Hidden Multipliers:
This info is something I only found recently as someone had dug through the game's programming, but there are some hidden multipliers that affect damage done and recieved in the game.
They are as follows:
-Damage from sides has a 1.2x multiplier. Damage from behind is 1.4x. This applies to you too.
-Damage from moves increases as the amount of hits increase.
-If only one party member is alive (alternatively if you have a 1 person party) their damage will be multiplied by 1.1x.
-Shares affect damage but also defense. However they do not change your stats in a visible way. Tests reveal that a 35% share increase for someone's nation will give about 100 more damage to their attacks, and cut enemy damage by nearly 400.


Actually, it can be up to six, and each move can hit a lot, too.
Thank you :)