
Brigador Killers

Brigador Killers

33 ratings
BRIGADOR KILLERS GUIDE
By dudeglove
This guide intends to serve as a game manual to cover the basics of gameplay in Brigador Killers that may not seem obvious from the start. Details are subject to change as Early Access progresses.

- Stellar Jockeys
7
   
Award
Favorite
Favorited
Unfavorite
Changelog
04/09/2026 - Updated Settings, added mention of how to unload weapons in Inventory screen, updated Merchants section.
15/08/2026 - Initial version published.
Installing the game
Please try to meet the following minimum system requirements before installation:

  • OPERATING SYSTEM – Windows 10 or later*
  • PROCESSOR – 2.6 GHz or faster
  • MEMORY – 4 GB RAM
  • GRAPHICS CARD – AMD RADEON 5770 / NVIDIA GTX 460 or better
  • STORAGE – 4 GB available space

*Linux is possible but the game has not been tested for Linux (though it is developed in a Linux environment) – your mileage may vary depending on distro.

Note that using the bare minimum you may encounter performance issues. Please try to use hardware that is less than ten years old.

Installation of Brigador Killers will vary depending on storefront:

Steam
The game will be downloaded to your library and can be launched from the Library tab of the Steam client.

GOG
The game will be available either through the GOG Galaxy client, or via an offline installer provided by GOG. If using the offline installer, unzip the game to a dedicated folder in a location of your choosing. Once the files are extracted, double click brigadorkillers.exe to launch the game.

Itch
The game is available by downloading the latest zip file. Unzip the game to a dedicated folder in a location of your choosing. Once the files are extracted, double click brigadorkillers.exe to launch the game.

Brigador Killers is best played on mouse and keyboard. Playing with a controller or Steam Deck is possible but is not recommended for the intended experience. Please note that prompts for controller binds will not appear correctly, instead displaying the default keyboard prompts.
Starting the game
To play Brigador Killers for the first time:
  1. Launch the game from your client or .exe.
  2. When the main menu screen loads, click NEW GAME.
  3. You are now playing the game.

Note: Brigador Killers does not have multiple save slots, nor is the game split up into multiple campaigns like in the demo – there is only one save for the entirety of the campaign. Resetting your campaign progress from the main screen means resetting all progress made.
Settings pt. 1
The SETTINGS menu can be accessed from the main menu or by pressing Escape almost any time during play. SETTINGS is split up into four tabs: GENERAL, DISPLAY, BINDS and CONTROLLER.

GENERAL contains the settings for movement, controller sensitivity, volume controls, toggles for various in-game actions, game speed and other features. Here is the full list.

Setting
Description
TANK MOVEMENT
Configure the movement when controlling tank-like vehicles
MECH MOVEMENT
Configure the movement when controlling mech-like vehicles
AGRAV MOVEMENT
Configure the movement when controlling agrav-like vehicles
SUIT MOVEMENT
Configure the movement when controlling infantry
NEAR SENSITIVITY
Controller aiming sensitivity when reticle is near the player
FAR SENSITIVITY
Controller aiming sensitivity when reticle is far from the player
COARSE SENSITIVITY
Controller aiming sensitivity while COARSE AIMING is held
SENSITIVITY SCALE
Multiplier applied to the base sensitivity, increase to make analogue aiming more responsive
REVERSING WITH ABSOLUTE
If enabled, vehicle can reverse while using absolute movement schemes
LEFT STICK DEADZONE
Deadzone for controller's left stick
RIGHT STICK DEADZONE
Deadzone for controller's right stick
VOLUME
Master volume control slider
MUSIC
Slider for volume of music
EFFECTS
Slider for volume of non-weapon sound effects
WEAPONS
Slider for volume of weapon sound effects
VOICES
Slider for volume of voices
AMBIENT
Slider for volume of ambient sounds
UI
Slider for volume of UI noises
SOFT AIM LOCK
Assists aiming at enemies when mouse cursor is nearby
CURSOR LOCKON RADIUS
Radius of how close cursor needs to be before soft aim locking onto enemy
CIVILIAN LOCKON
Allows target lockon for civilian-tagged units (disabled by default)
AUTO-RELOAD
Automatically reload the equipped weapon when magazine is empty
ALLOW GUN AUTO-EQUIP
Quick moving a gun to the player's inventory will attempt to equip it into a slot (enabled by default)
ALLOW RELOAD INTERRUPTION
Firing a weapon while reloading cancels the reload
TOGGLED CROUCH
If enabled, crouch is toggled on press rather than holding down the button
TOGGLED SPRINT
If enabled, sprint is toggled on press, rather than holding down the button
TOGGLE WEAPON READY
If enabled, weapon is "aimed" on press, rather than holding down the button
TOGGLE LEVEL AIM
If enabled, weapon aim is leveled horizontally on press, rather than holding down the button
ALLOW ZOOM DEFAULT
If enabled, when entering a vehicle, the camera zoom will be set to that vehicle's default
ZOOM STEP
How much the camera zooms each step when using ZOOM IN/ZOOM OUT
LOW DETAIL TRAMPLE
Reduces the computational overhead of calculating trample damage – enabling may increase performance
DISABLE GRAPHIC CONTENT
Disables blood and gore particle effects from showing
DISABLE DAMAGE EFFECTS
Disables damage effects like cratering
GAME SPEED
Adjust gameplay speed (minimum of 50, maximum of 100)
Settings pt. 2
DISPLAY contains the settings for various on screen visual elements that may affect performance. Here is the full list.

Setting
Description
DISPLAY MODE
Choose between WINDOWED, FULLSCREEN and FULLSCREEN WINDOWED
RESOLUTION
Choose display resolution, AUTO attempts to use the display's
INITIAL DISPLAY
The display on which to launch the game
VSYNC
If enabled, may reduce screen tearing
LOCK MOUSE TO WINDOW
Prevent mouse cursor from leaving game window if enabled
DIRECTIONAL SHADOWS
Render shadows from directional light – disabling may increase performance
POINT SHADOWS
Render shadows from point lights – disabling may increase performance
LOW DETAIL NORMALS
Use reduced quality normals for lighting – enabling may increase performance
PARTICLE EFFECTS
OFF – No particle effects
LOW – Some particle effects
HIGH – All particle effects
CULL OFFSCREEN PARTICLES
Culls any particle effects as soon as they leave the screen
PARTICLE FADE TIME
Configure show long particles stay around for; 0 = no fade
HIDE TOOLTIPS
Hides the action tooltips in the inventory and armory screens
STATIC INTERACT POPUP
Interaction information is drawn in a fixed place on the screen rather than floating near an interactable object
USE SYSTEM CURSOR
Use the underlying operating system cursor, instead of the software-mode cursor (disabled by default)
HIDE HUD & RETICLES
Hides the HUD and aiming reticles
SHOW AIM CONE
Displays a reticle that shows the player's firing cone for the current gun
HIGHLIGHT AIM
Highlights aimed-at enemies when player aim would hit them
HIDE BATTERIES
Hides off screen HUD indicators for this element
HIDE BOSSES
Hides off screen HUD indicators for this element
HIDE SUPPLY DEPOTS
Hides off screen HUD indicators for this element
HIDE POWER SUBSTATIONS
Hides off screen HUD indicators for this element
HIDE COMM SUBSTATIONS
Hides off screen HUD indicators for this element
HIDE EXITS
Hides off screen HUD indicators for this element
HIDE THREAT INDICATOR
Hides off screen HUD indicators for this element (disabled by default)
HIDE STAMINA RING
Hides the dark border indicating current stamina
HIDE LOW HEALTH RING
Hides the red border indicating low health
SHOW PLAYER ORIENTATION
Displays an orientation indicator for the player unit
SHOW BLOCKED TILES
Displays an overlay marking traversable tiles

BINDS is for setting keyboard and mouse binds. To change a bind:
  1. Left click the action.
  2. The field will change to [...].
  3. Press the keybind you want this action to be assigned to.

To add a bind to an action that already has a bind:
  1. Hold Shift and left click the bind.
  2. The field will continue to show the bind and add [...] next to it.
  3. Press the keybind you want this action to also be assigned to (e.g. CROUCH is bound to both Left Ctrl and C).

To clear the binds from an action:
  1. Hold down Left Alt and left click the bind.
  2. The field will be cleared of binds.

Please note that some BINDS may not be assigned by default, such as HIGHLIGHT INTERACTABLES (in addition this specific bind cannot be shared with Interact or Examine) – the user will have to assign those themselves.

CONTROLLER is the same as BINDS but for setting controller binds.
Basic movement & navigation
Movement is split across five types:

  • TANK MOVEMENT e.g. Betka, Rounder, Rolston
  • MECH MOVEMENT e.g. Coffin, Fork
  • AGRAV MOVEMENT e.g. Sledge, Skate
  • SUIT MOVEMENT e.g. Loyalist Kit, Carmine rig, Mongoose powersuit
  • WHEELED VEHICLES e.g. Varlet, Rennpappe, Panel Van, Motorcycle

The player can configure the first four types via SETTINGS > GENERAL. Wheeled vehicle movement cannot be configured and is always relative to the player's position in the game. BINDS are universal across all movement types.

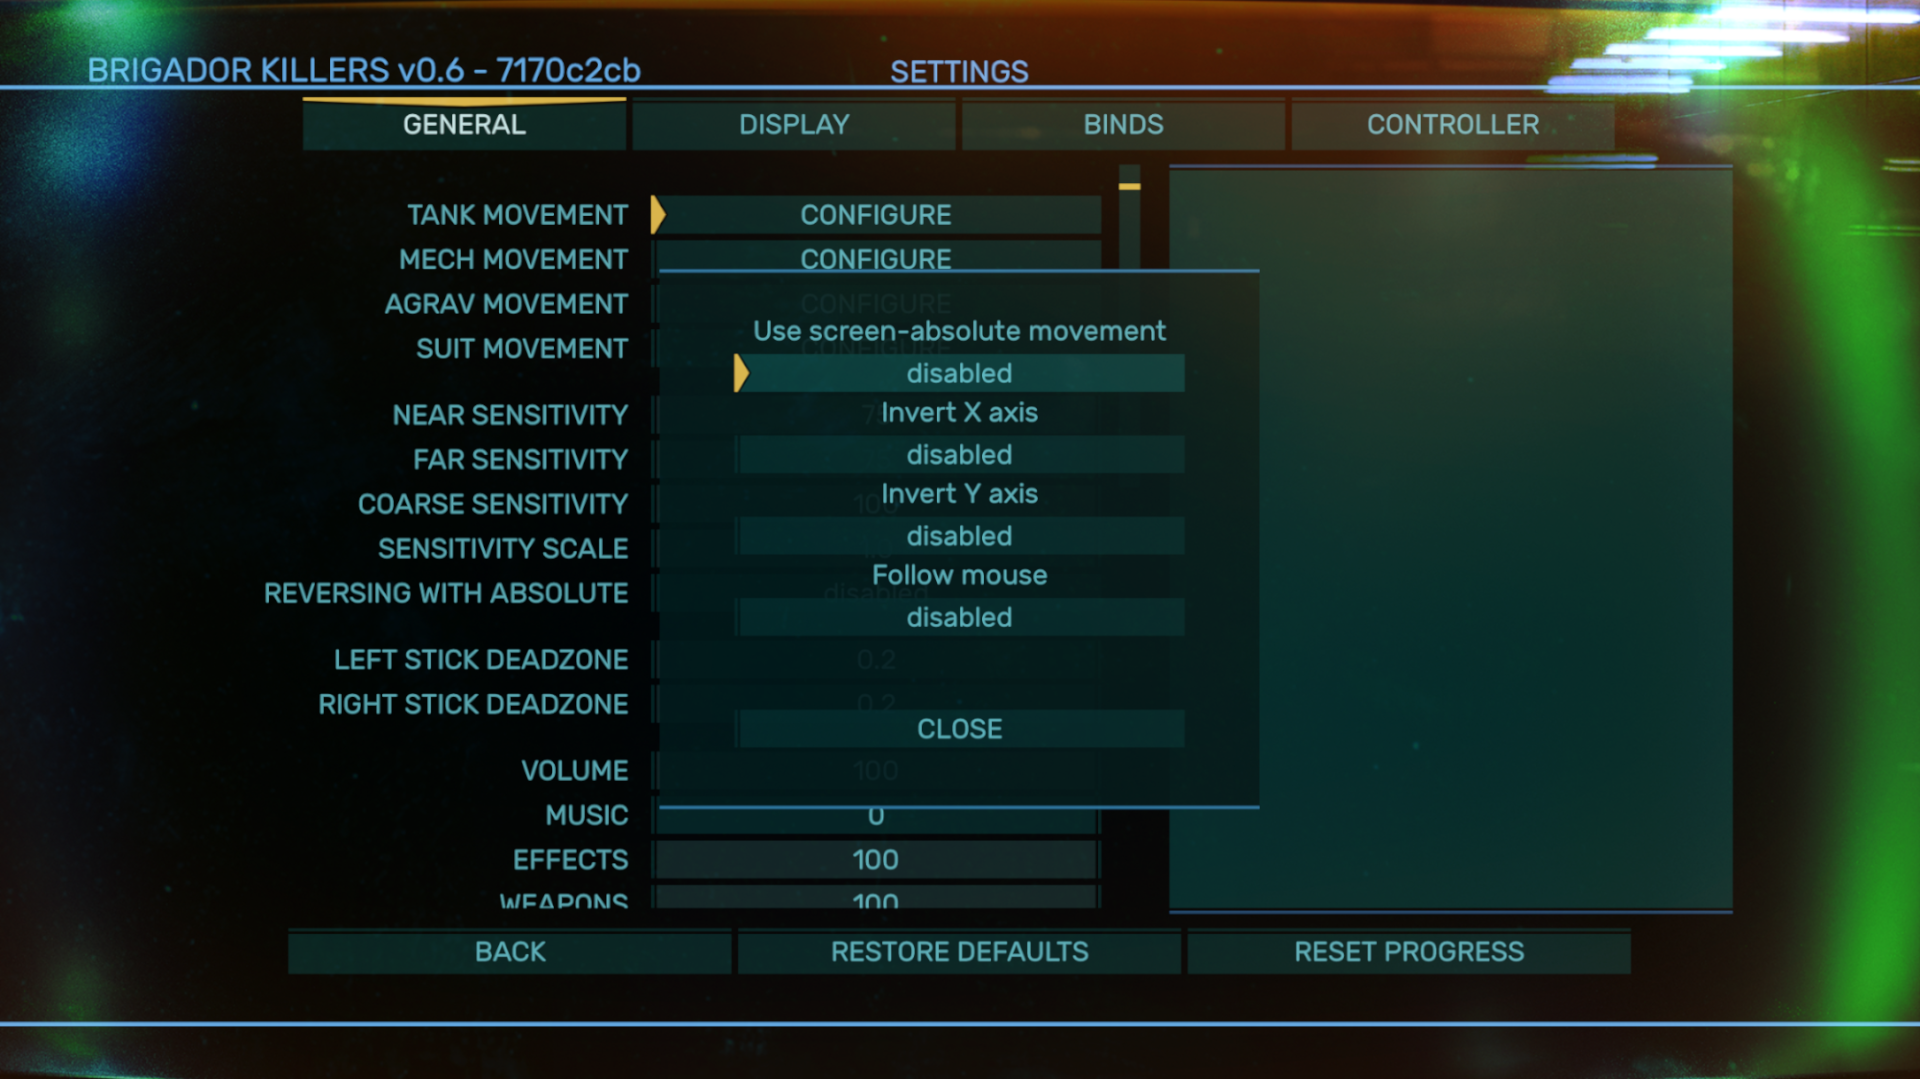
The player may want to enable or disable the use of screen-absolute movement by clicking CONFIGURE on one of the movement types.


Screen absolute movement is equivalent to arcade twin stick style, where pressing forward on the keyboard always moves the player towards the top of the screen. The opposite of screen-absolute is relative movement, or "tank controls", where pressing forward on the keyboard moves the character the direction the player is currently facing.

In most cases to move, the player uses WASD on their keyboard and the mouse to change direction. When driving wheeled vehicles, the player uses A and D to turn left and right respectively. The mouse has utility in wheeled vehicles armed with weapons, as it is used for aiming.

The player can sprint by holding the Shift key. Pressing this key while in a vehicle may boost the vehicle forward, though not every vehicle can boost. How fast something can sprint or boost can also vary. When sprinting or boosting in a vehicle, the player cannot fire any weapons until they stop.

The camera view can be zoomed in and out with the mousewheel up and down respectively.
Inventory screen
[Note: accessing the inventory may not be possible during certain missions or moments.]

Press Tab during play to bring up the inventory screen. What is shown on the inventory screen depends both on what the player is currently controlling as well as what is in the nearby vicinity to the player. The game does not pause when accessing the inventory and player actions like movement and combat are not possible while the inventory screen is open.

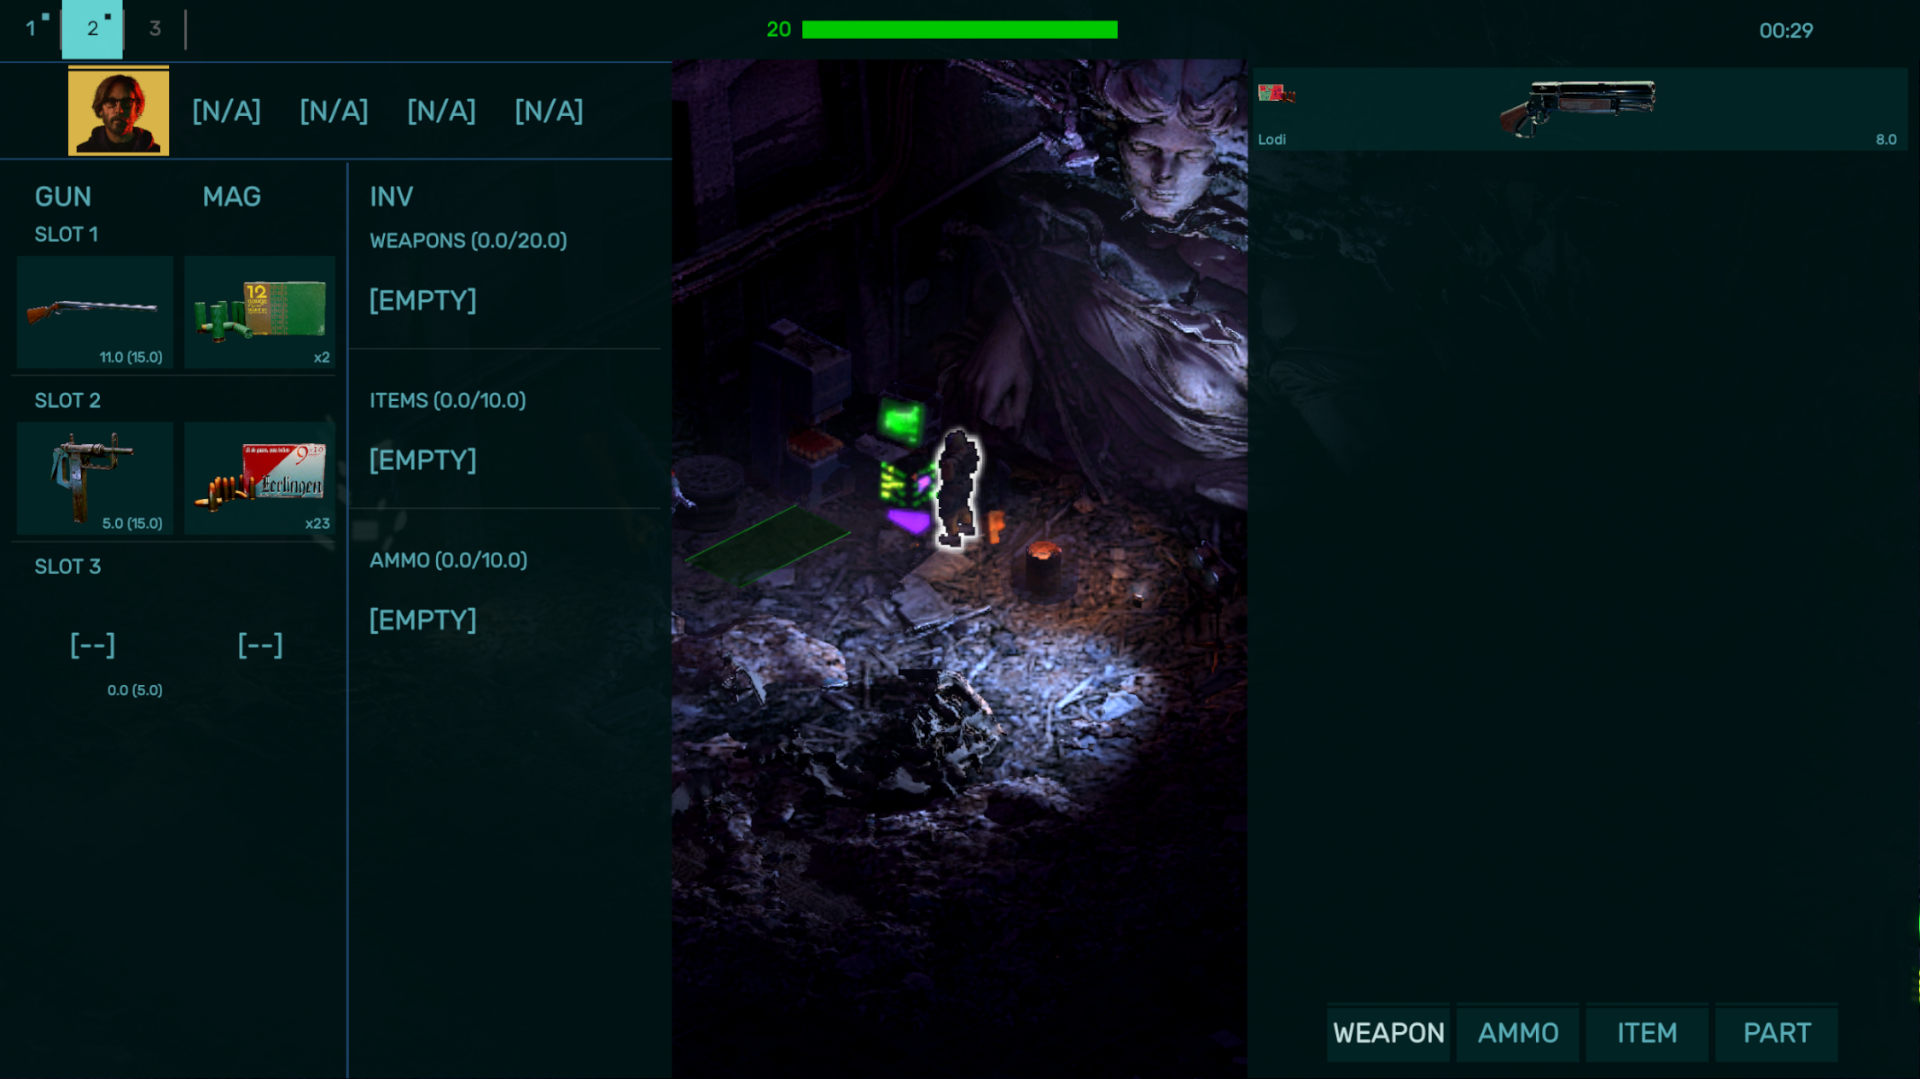
What appears on the left side of the inventory screen is what belongs to the player at that moment. What appears on the right side of the screen is what can be accessed by the player. Tabs can appear at the top of both sides of the screen that can be clicked on to access. The left-most tab on the player's side is the "main" inventory of whatever they are using at that moment, while the left-most tab on the right side of the screen is whatever is on the ground. The iconography of these tabs may differ depending on the context of what is being controlled, and what is accessible at that moment.

The player's inventory is split into three columns: GUN, INV and MNT:
  • GUN – where weapons are equipped to slots.
  • INV – where WEAPONS, ITEMS and AMMO can be stored.
  • MNT – where mountable containers like backpacks can be placed.

Most items have a stowage value indicated on them in the form of a number e.g. a Catfish pistol has a value of 4. The limit on what can go into a weapon slot or an inventory category is indicated in (brackets). For example, if a weapon slot has a value of (5), the player cannot equip a weapon that has a stowage value of 6.

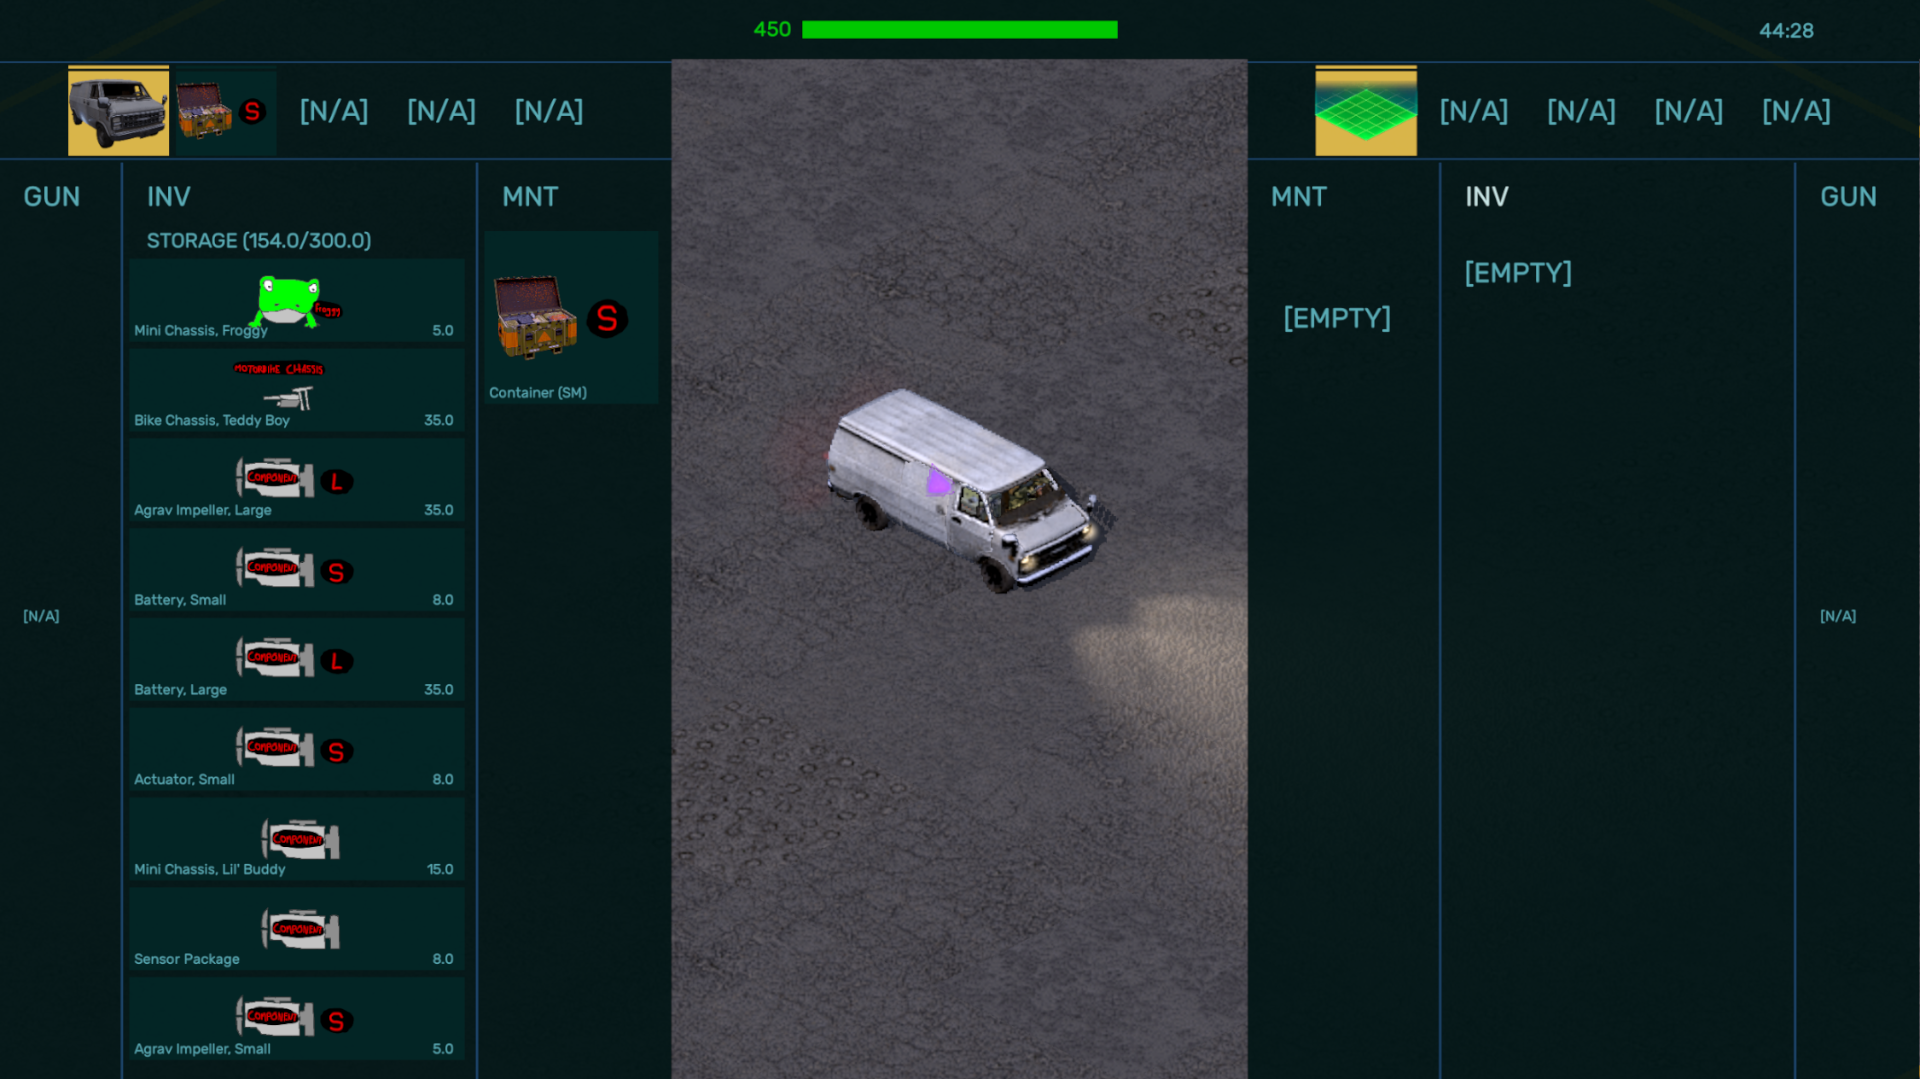
Items that can go into a MNT slot are different and do not have an explicit value attached. Instead they have a size category and where they can be mounted depends on whether the MNT slot is large enough to accommodate it. For example, the player on foot can carry a single backpack on them, but they cannot carry a small container on their back as it is too large. However, if the player has a car with an available passenger seat, a small container can go into one of those MNT slots. Not all vehicles have MNT slots, but some vehicles may be adept at carrying things despite their size. For example, a forklift can carry a large container with ease, but a Betka light tank has no MNT slots at all.

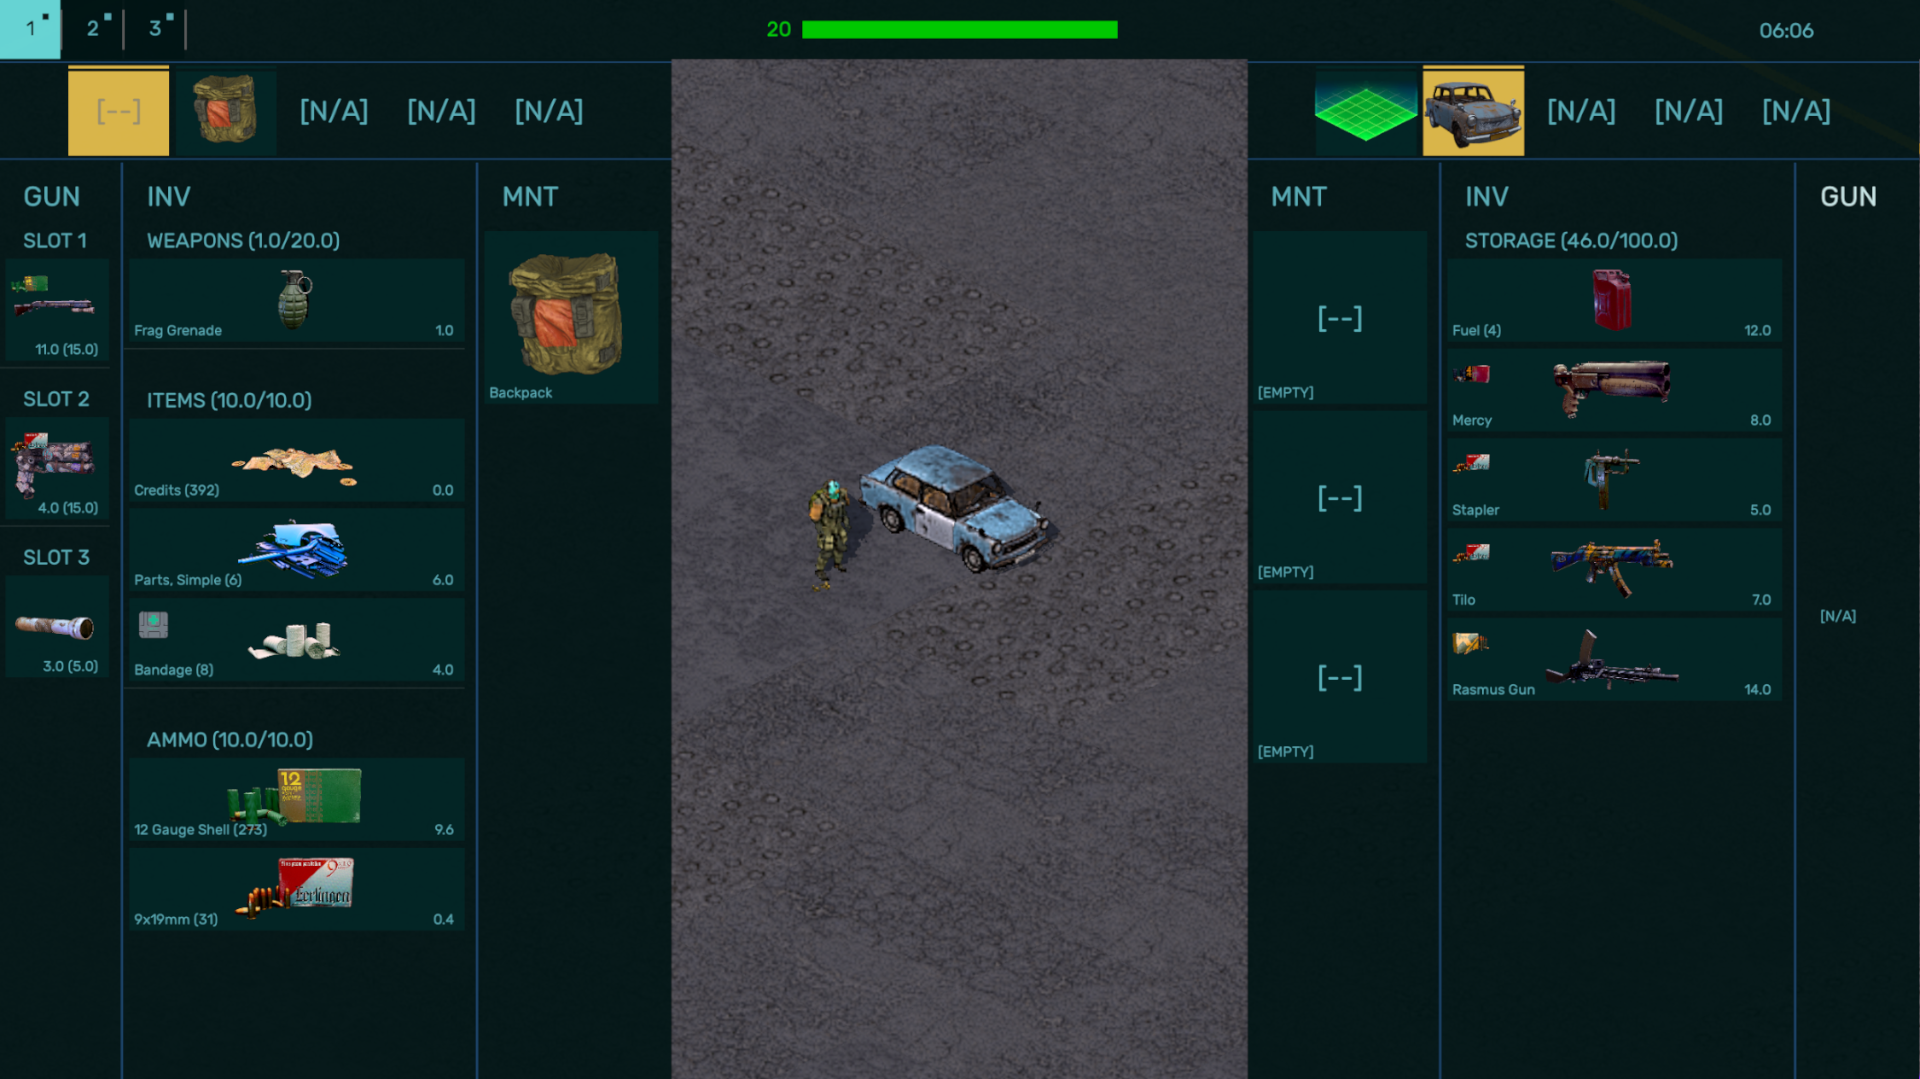
Here is an example of an inventory screen.


The player is on foot positioned next to a car. On the left the player's inventory is visible and all three weapons slots are filled: SLOT 1 contains a Kriel Tet shotgun, SLOT 2 contains a Catfish handgun and SLOT 3 has a flashlight. Meanwhile the player's INV contains a set of grenades, their ITEMS contains some credits, simple parts and some bandages for healing, while AMMO has additional 12 ga shells and 9mm ammo for the equipped firearms. Lastly the player's MNT slot has a backpack equipped, and the backpack icon can be seen again on the list of tabs at the top. The player can either click this tab icon or Alt + left click the MNT slot to display the contents of whatever is inside the backpack.

On the right side of the screen above, the inventory of the car is selected. The car has a generic storage of (100) with 46 of that 100 taken up by some Fuel and four different firearms of different stowage values. The car also has three [EMPTY] MNT slots, meaning it can carry three additional things like small containers.

Transferring items around the inventory screen to another is done by left-clicking an item to select it and put it on the player's cursor and then left clicking again on the relevant destination. If items are left clicked in the middle of the screen, they will be automatically dropped onto the ground.

The player can quickly transfer items from one side to another by holding Left Shift and clicking. If either inventory is full, a chime will be heard to indicate that items cannot be placed there.

To open up a slider to select a specific amount of ammunition, hold Alt + left click the specific ammunition.

Weapons must be equipped to a slot before they can be fired. Weapons stored in the inventory do not count as equipped. To equip a weapon, left click it onto an available weapon slot.

In addition, weapons can be unloaded of their ammo by mousing over the item and pressing E. The ammo from the weapon will transfer onto the cursor.

Healing items can only be used from the inventory screen. To use a healing item, mouse over the item and press E.

Items can be examined by pressing the default bind of F while mousing over the item to see additional information.
Talking to NPCs, selecting missions and opening containers
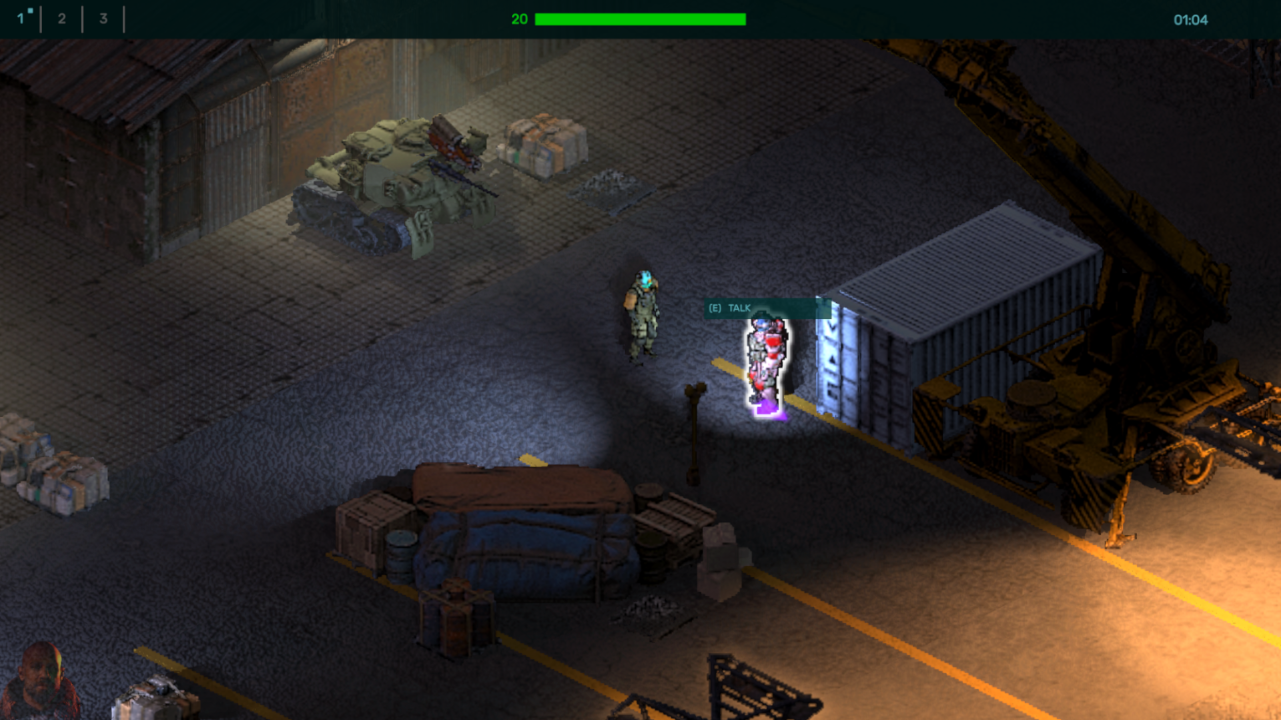
On occasion the player will be able to talk to NPCs. To talk to an NPC, the player character must be physically close enough and have the mouse cursor over the NPC. An interaction prompt will appear over the NPC with the keybind assigned for that action (bound to "E" by default).


Players can advance any dialogue screens by pressing E, Spacebar or left clicking the Continue button.

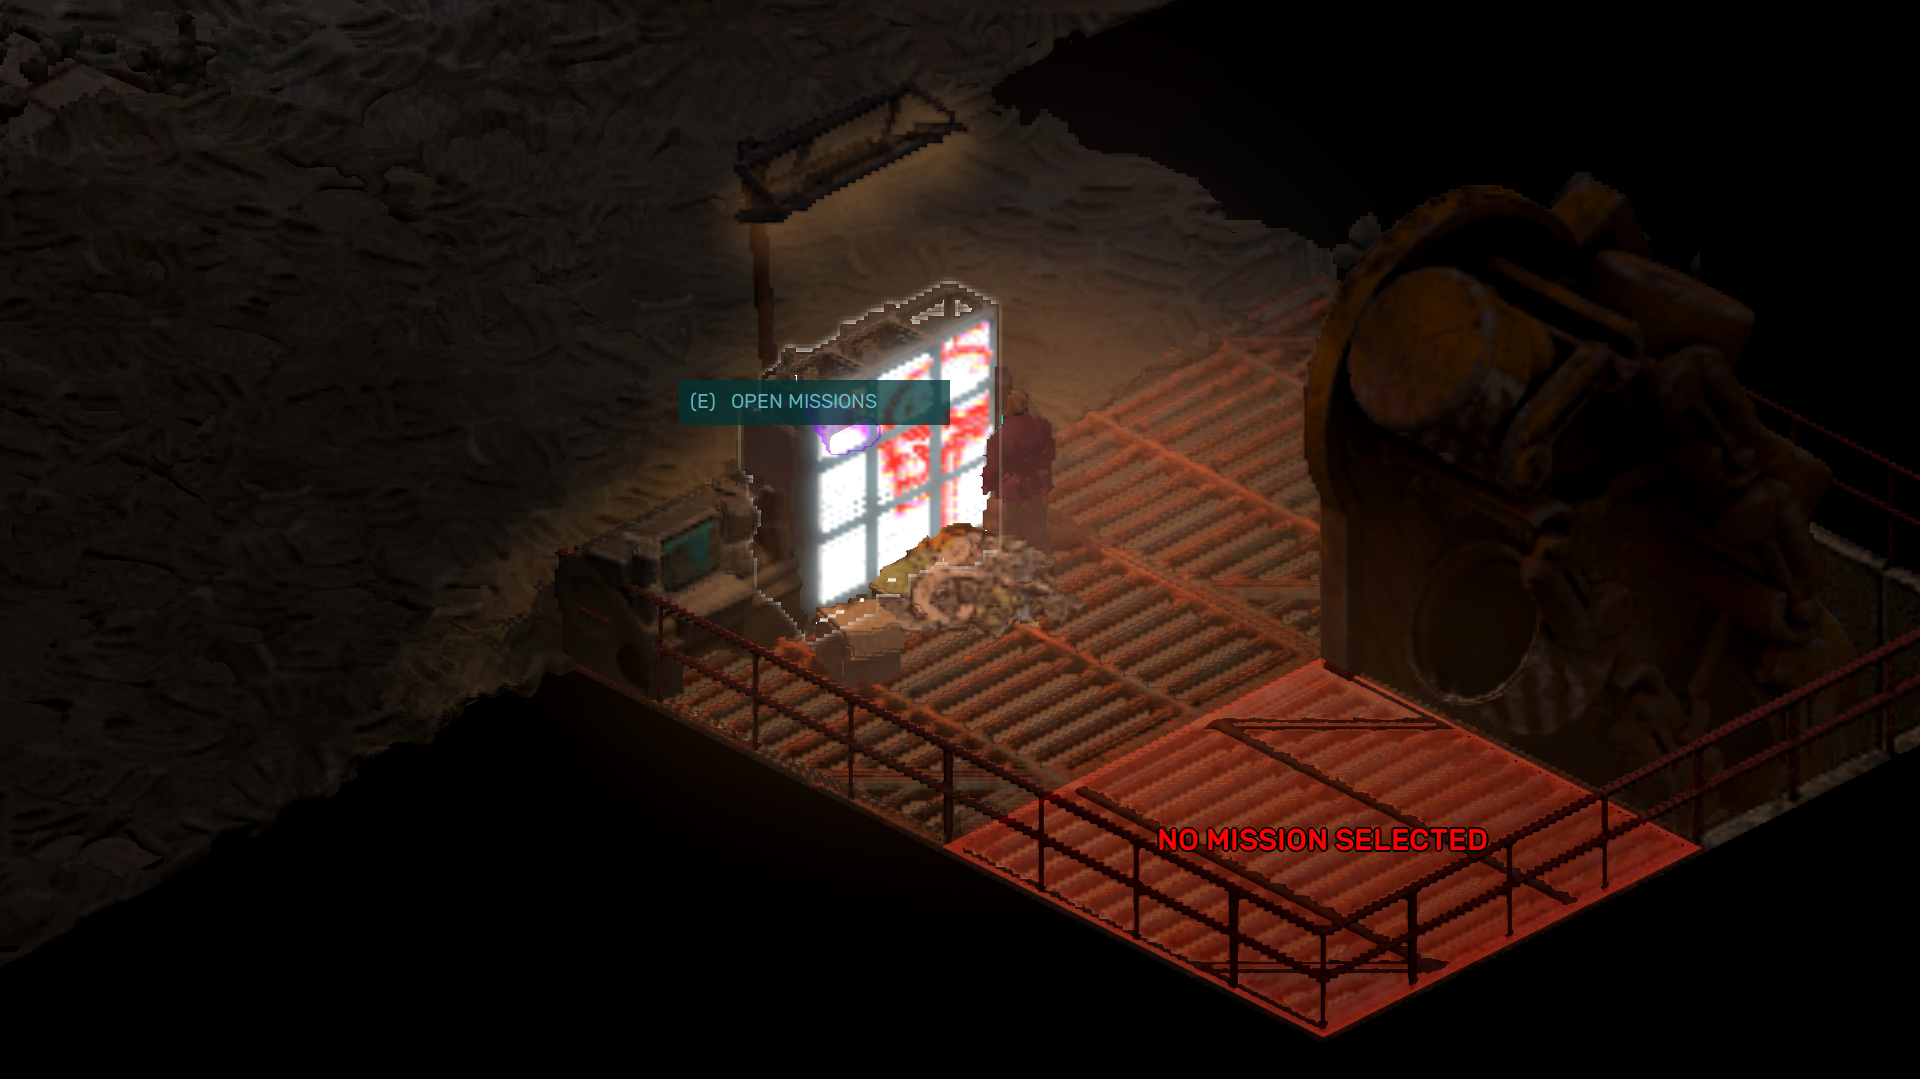
The player will also encounter buttons or consoles they can interact with, such as the mission selector. An interaction prompt is visible when the player character is near enough and facing the interactable object.


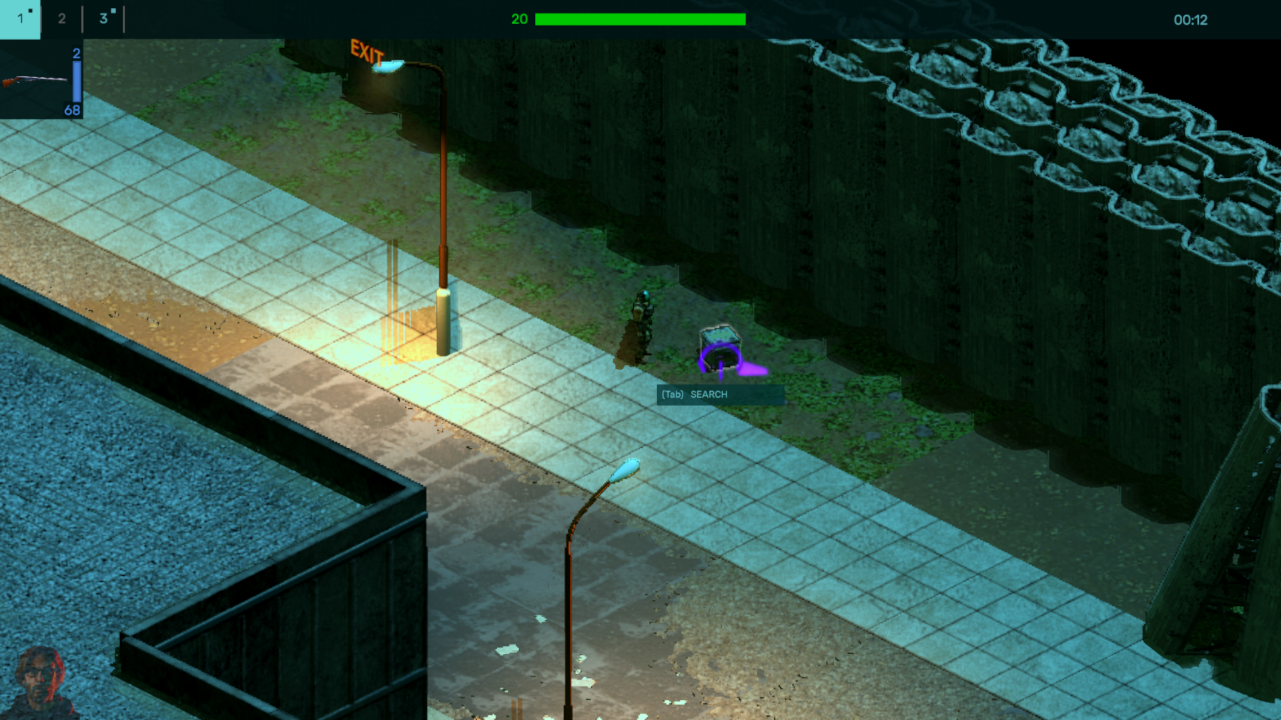
Opening containers is slightly different – press the open inventory button (default bind of "Tab") when near an examinable container to see its contents.

Hubs
After the introductory mission the player begins play from a hub. At the very start the player has access only to a mission selector in the first hub. The player interacts with the mission selector to choose a mission from a list. Successfully completing available missions advances progress in the game. Successfully completed missions will have their names grayed out.

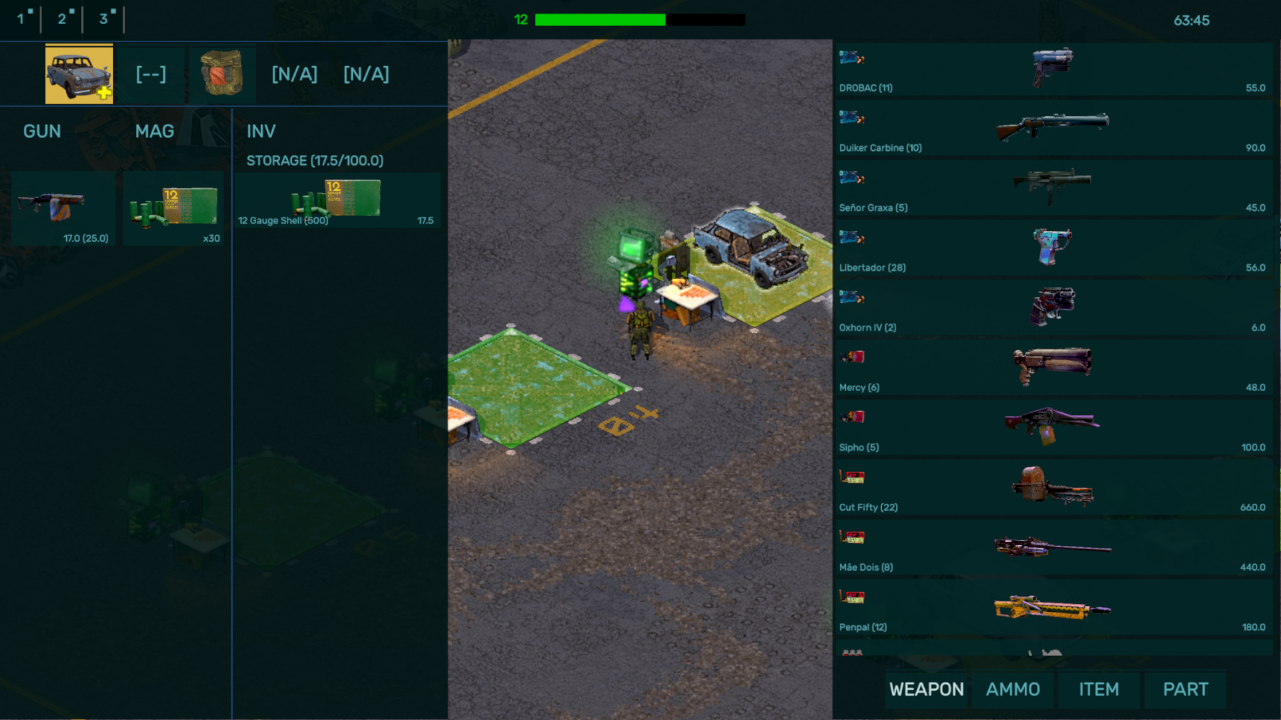
As the game progresses, the player's hub will change and they will gain access to new features exclusive to a hub. The next feature is the ARMORY. It is where the player can permanently store any weapons, ammo, items and parts they have collected during missions for later use.


When accessing it, the player's inventory will be seen on the left side and the contents of the ARMORY on the right. Items in the ARMORY are categorized under four tabs:
  • WEAPON – All firearms including throwables like grenades
  • AMMO – All ammunition types
  • ITEM – Credits and healing items
  • PART – Parts for use in the FABRICATOR

The third feature that appears in a hub are four things:
  • FABRICATOR – A console that crafts vehicles available in the recipe list using parts
  • Gantry pad – A place to permanently park a vehicle
  • SALVAGE – Salvages parked vehicles for parts
  • REPAIR – Repairs vehicles parked on the pad

The number of available gantry pads are limited initially but will grow as the player expands their hub or transfers to a newer one.

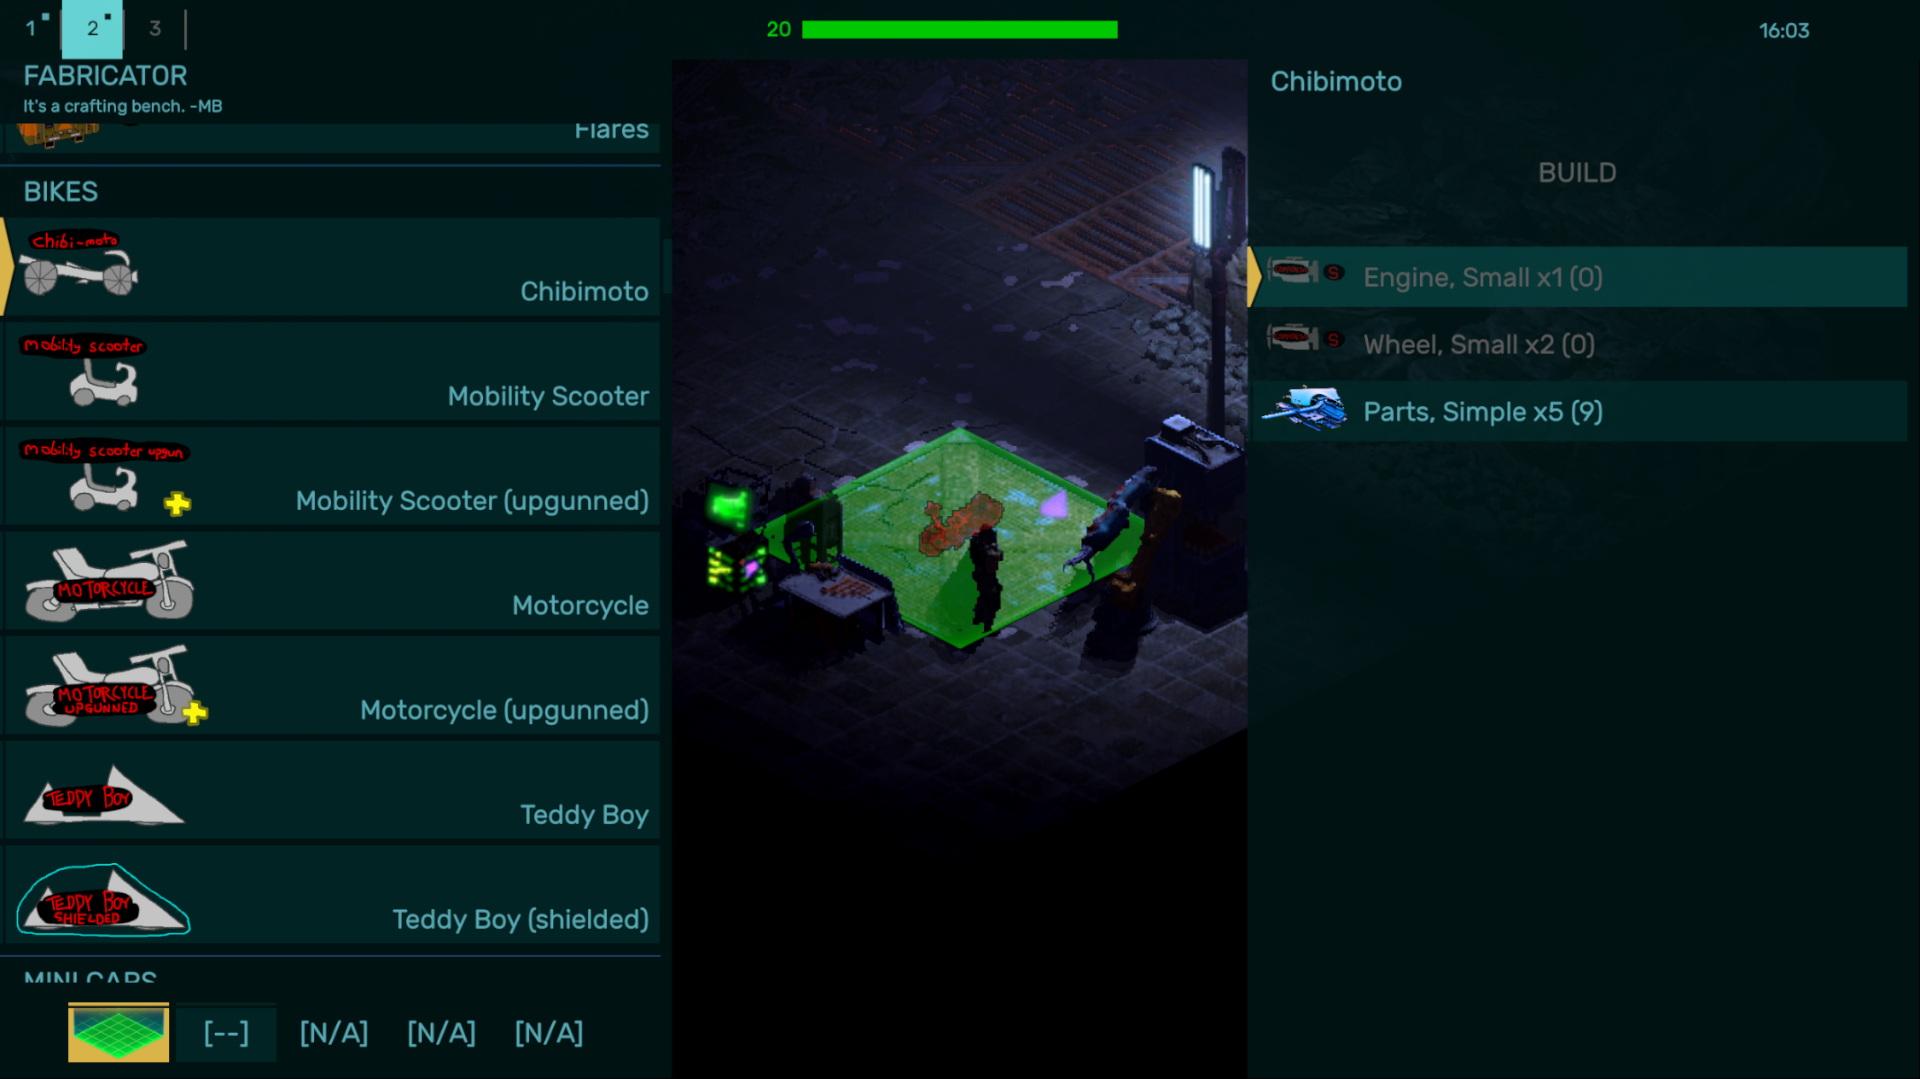
The FABRICATOR is where the player spends parts in order to build something that will appear on the gantry pad. What can be built is listed on the left. What parts are needed to build that object are listed on the right hand side.


The player does not need to have the required parts on them to use the FABRICATOR. Instead it has access to the contents of the player's ARMORY and will draw from that pool of items. In the screenshot above, the player has enough simple parts to make a Chibimoto, but they are missing a small engine and two small wheels.

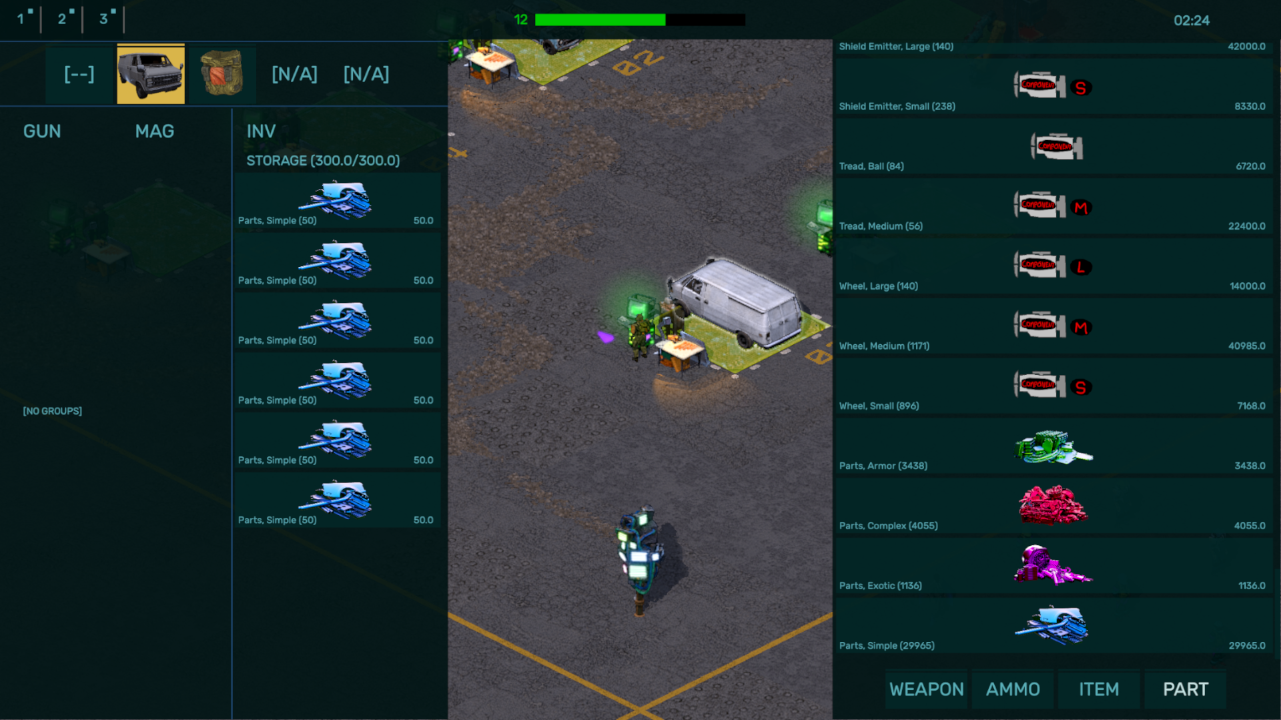
Park a vehicle on a gantry pad and interact with a nearby ARMORY to access and transfer the contents of that vehicle's inventory – the vehicle's icon will appear in the list of tabs on the left side of the screen.


If a gantry pad has a REPAIR console next to it, the player can spend parts to repair the parked vehicle's lost HP. If a gantry pad has a SALVAGE console nearby, the player can break the parked vehicle down into parts which will be deposited in the inventory.

Note that when leaving a hub any vehicles not parked on a gantry or items left on the ground will be automatically salvaged to parts and deposited in the ARMORY.
Merchants
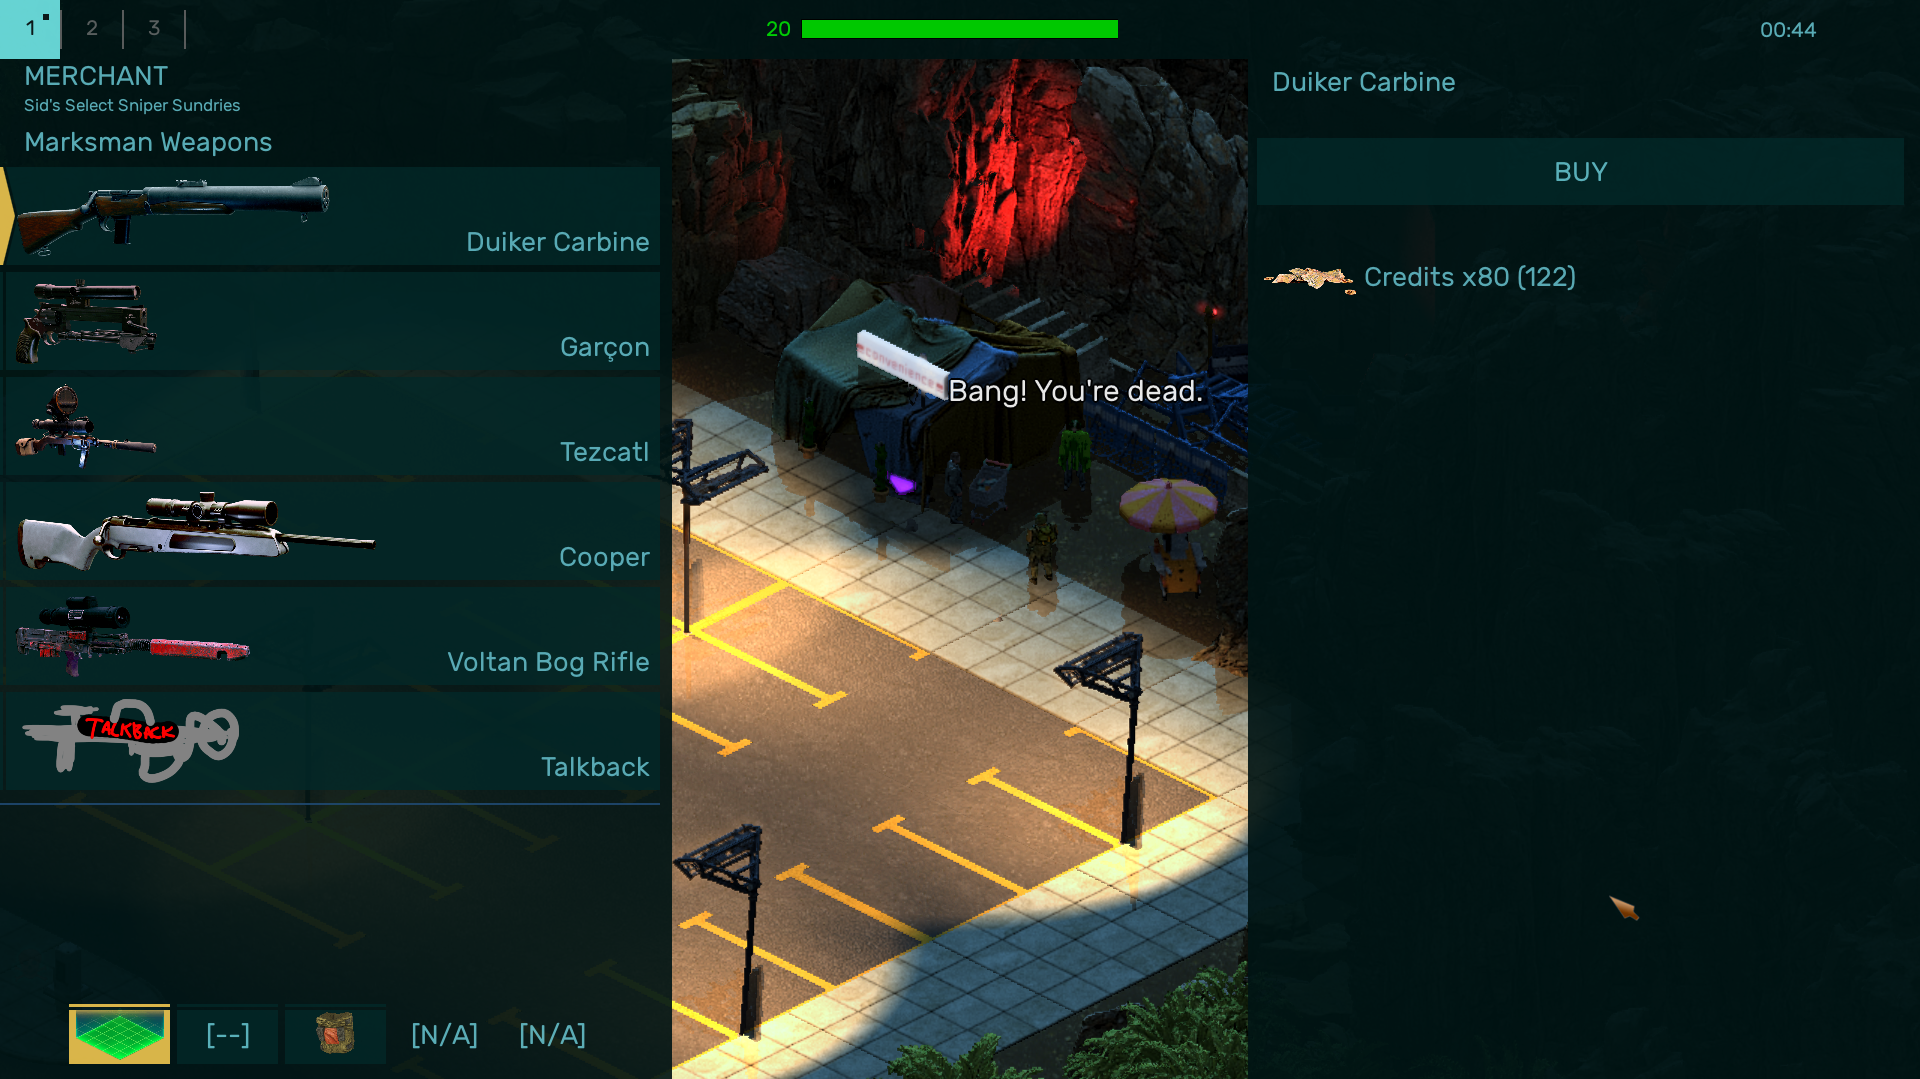
Some levels in the mission selector indicate that a merchant is present in the level. A merchant NPC does not trade directly with the player. Interact with a merchant's shopping cart to see the available wares.

The player will need credits in their inventory to buy items from a merchant. Select the desired item in the list and click the buy button – the item will spawn onto the ground and deduct the credits from the player's inventory. Remember to pick up any purchases.

Merchants may expand their stock after phases of missions have been completed – return to them at a later time to find more powerful items in stock. Some merchants can also be found at the Night Market.

Merchants inhabiting more dangerous levels will sell higher-tier items for the player to acquire.
Combat basics
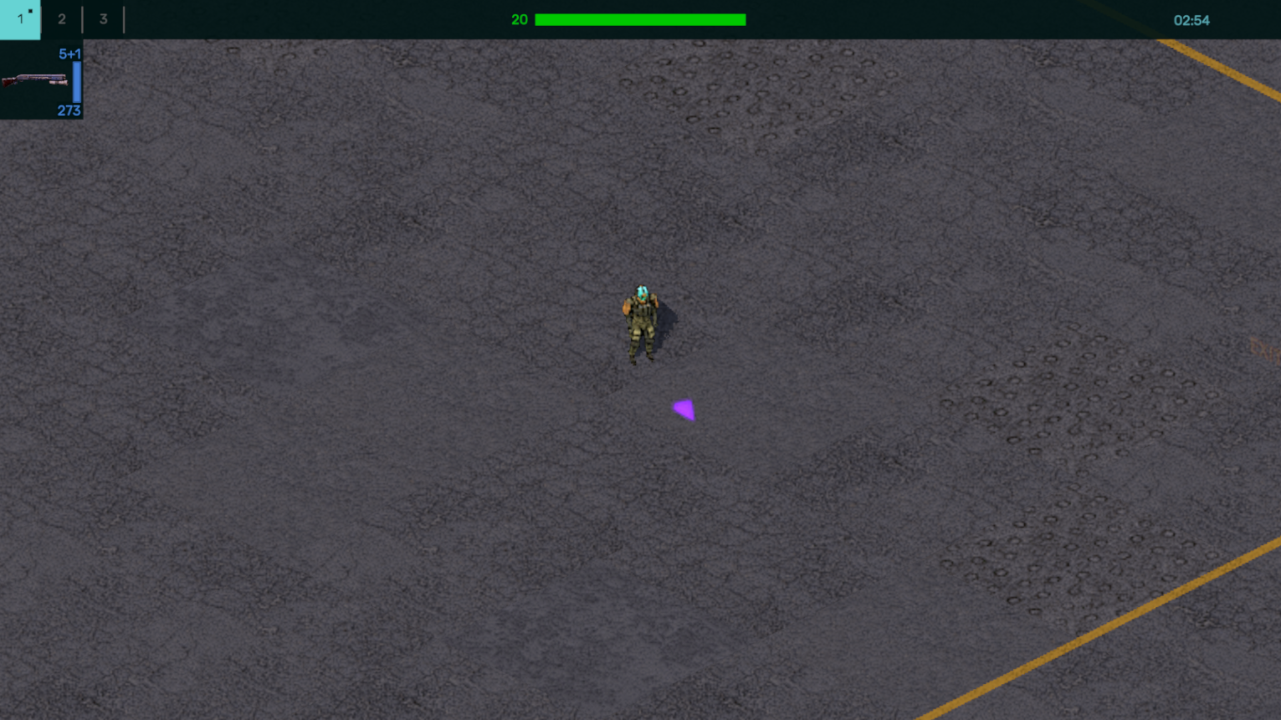
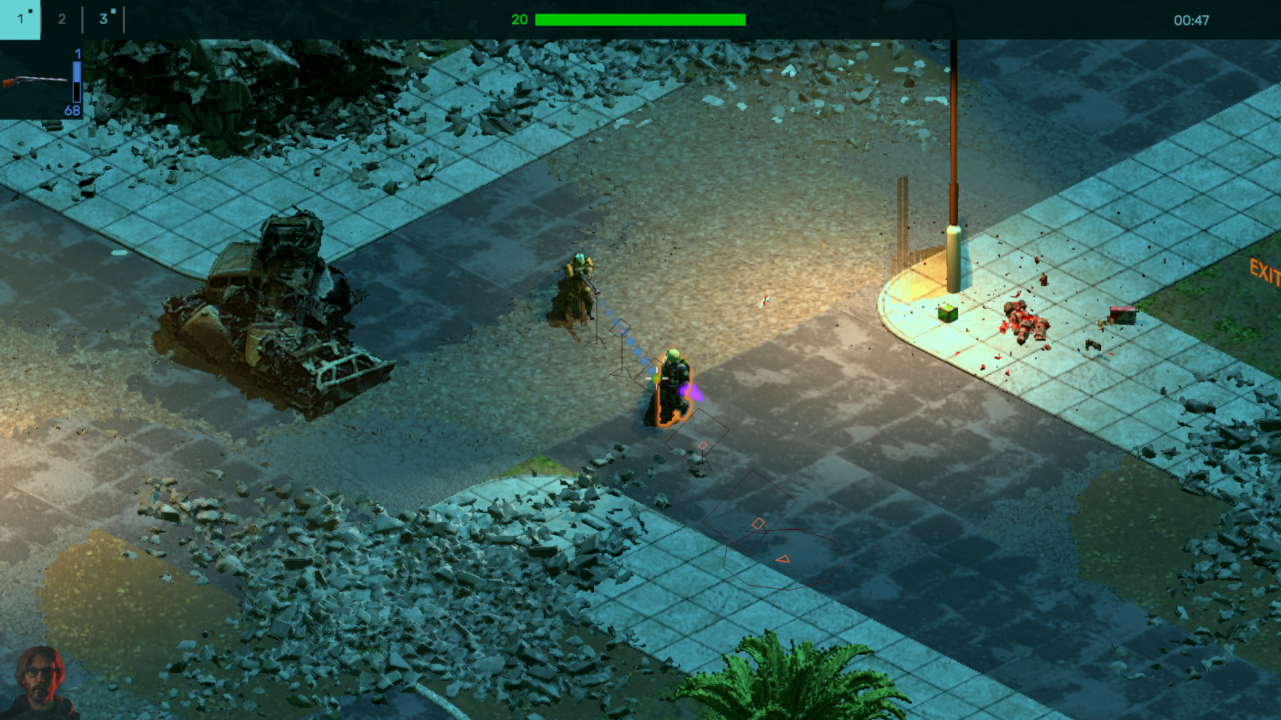
During regular play the Heads Up Display (HUD) will look something like this:


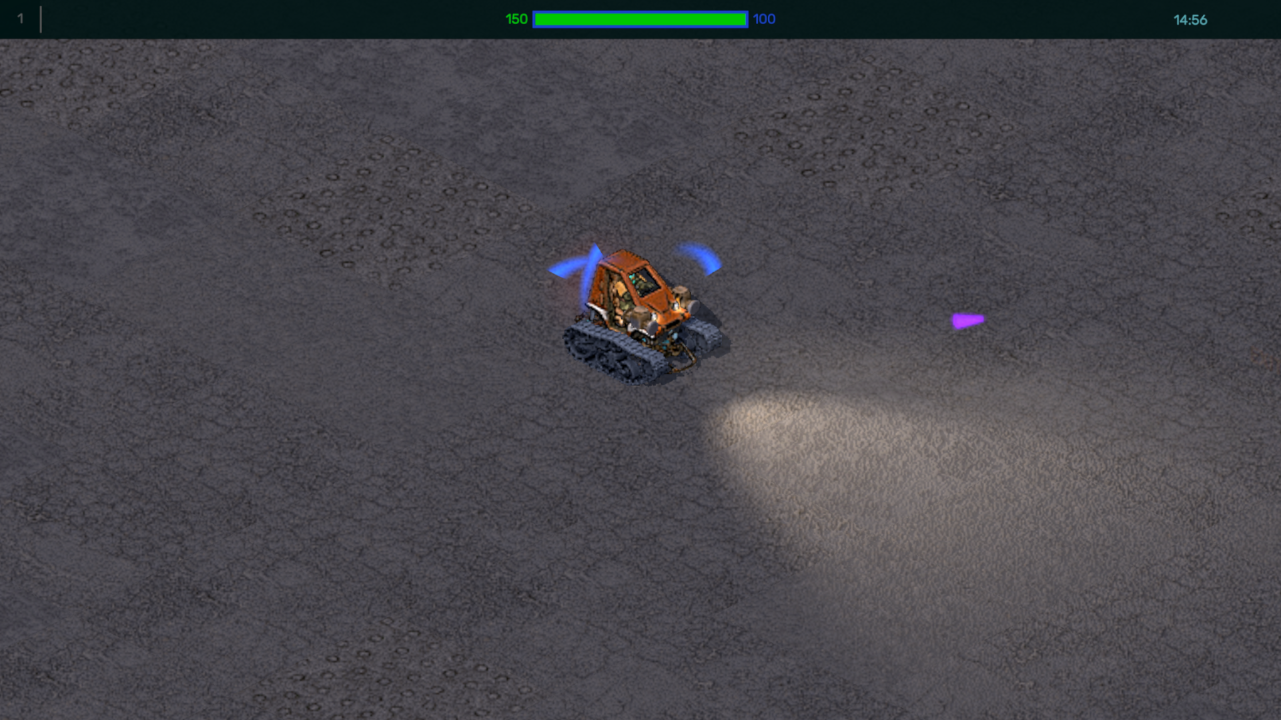
The green bar at the top of the screen is the player's current health for what they are controlling. If this green bar is surrounded with a blue outline, this is an additional defensive layer in the form of shields.


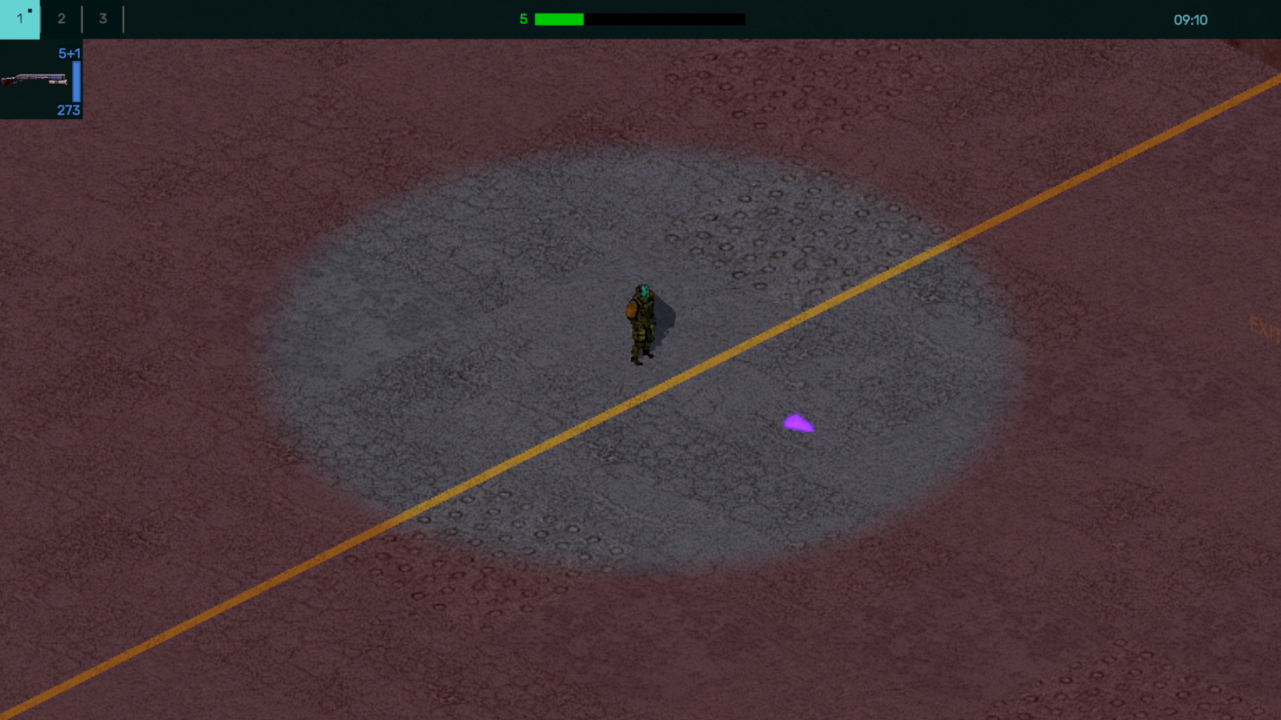
When the player takes damage, both the number and the bar are reduced. Below a certain health threshold, a red ring will start appearing on the edge of the screen that will get more intense if the player takes further damage.


If the player's health drops too low, they may enter a bleedout state, where their remaining health will tick down to zero over time until the player heals themselves, returns to base or they die.

Currently equipped weapons and the ammo count for them are seen in the top left of the HUD. The player can swap equipped weapons by pressing 1, 2 or 3 on the keyboard. If the player has no weapon ready or equipped, they can punch with the left mouse button and kick with Spacebar.

The player can be damaged in different ways, not just directly from bullets and explosions, but also indirectly from being trampled by heavy or fast moving vehicles. In addition, direct damage may be increased depending on whether the player is hit from the side or behind.

In general, the player will take some increased damage to the side, and much more damage from behind. The same is also true for enemies.

If the player dies during mission deployment, they will lose all current equipment and be kicked back to the hub they deployed on the mission from.
Aiming & firing
[Note: Aim behavior and binds can be configured in the SETTINGS.]

When a weapon is equipped to a slot and selected, the player can hold down READY WEAPON (default bind of right mouse button) to bring the weapon up into the aim. When holding down the right mouse button, press the left mouse button to fire the equipped weapon.

With the right mouse button held, several elements will become visible:

  • A dotted line indicating the distance between the player and where their mouse cursor is. When the distance is close, the dots get closer together, when it's far away, the dots are spread apart. When the player is aiming through something solid, the dots along the line will gray out.
  • Along the dotted line is a white crosshair. This white crosshair approximately indicates where bullets will land and most of the time it will be at the end of the dotted line. The more compact this crosshair is, the more accurate the player is going to be. If something intersects along the dotted line, such as an environmental object or an NPC, the crosshair will land on that point on the dotted line.
  • The green dot at the end of the dotted line is the position of the player's mouse cursor on the screen. If the dot is green, the player has a clear line of sight to that point. If the dot is red, something is obstructing the player's line of sight to the thing they're aiming.

Examples of the above can be seen in this video:


What is not present in the video is the aim cone, which does two specific things that compliment the white crosshair:
  • The cone that emits from the player's position gives a visualization of the currently held weapon's spread when aiming.
  • The circle that appears around the mouse cursor location is the potential area in which bullets may land while aiming.

Both the aim cone and circle expand and contract to visualize the stability of the player's aim and thus accuracy. This is affected by whether the player is moving while aiming, whether they have fired recently, or whether they are using a high calibre weapon that may not be appropriate for their current setup. The aim cone can be disabled under SETTINGS > DISPLAY if it is distracting

The player can increase their stability by reducing their movement and crouching, or mounting weapons to vehicles. Here is an example of a player aiming at an enemy unit.


When the player's aim gets close to an enemy NPC, it will "snap" to the enemy's hitbox and highlight the enemy with an orange outline. This is called SOFT AIM LOCK to assist the player's aim, which can be disabled under SETTINGS > GENERAL if the player wants complete free aim.

The player can also press LOCK TARGET (default bind of Q) while aiming to hard lock onto an enemy. Hard lock highlights the enemy with a red outline and the player will remain locked onto the enemy unit until LOCK TARGET is pressed again, the player starts running or is knocked over, or the enemy gets far enough away from the player.

The player can use LEVEL AIM to shoot directly level relative to the player's current height off the ground. Normal aiming the player's mouse cursor usually points somewhere on the ground where bullets will terminate. Level aiming will shoot weapons horizontally "flat". Level aiming is particularly useful when shooting from crouched positions behind objects like concrete barriers.

To reload, press the default bind of R. Single-use weapons like a LAW or throwables like grenades cannot be reloaded and will disappear from the inventory once used.
Enemies
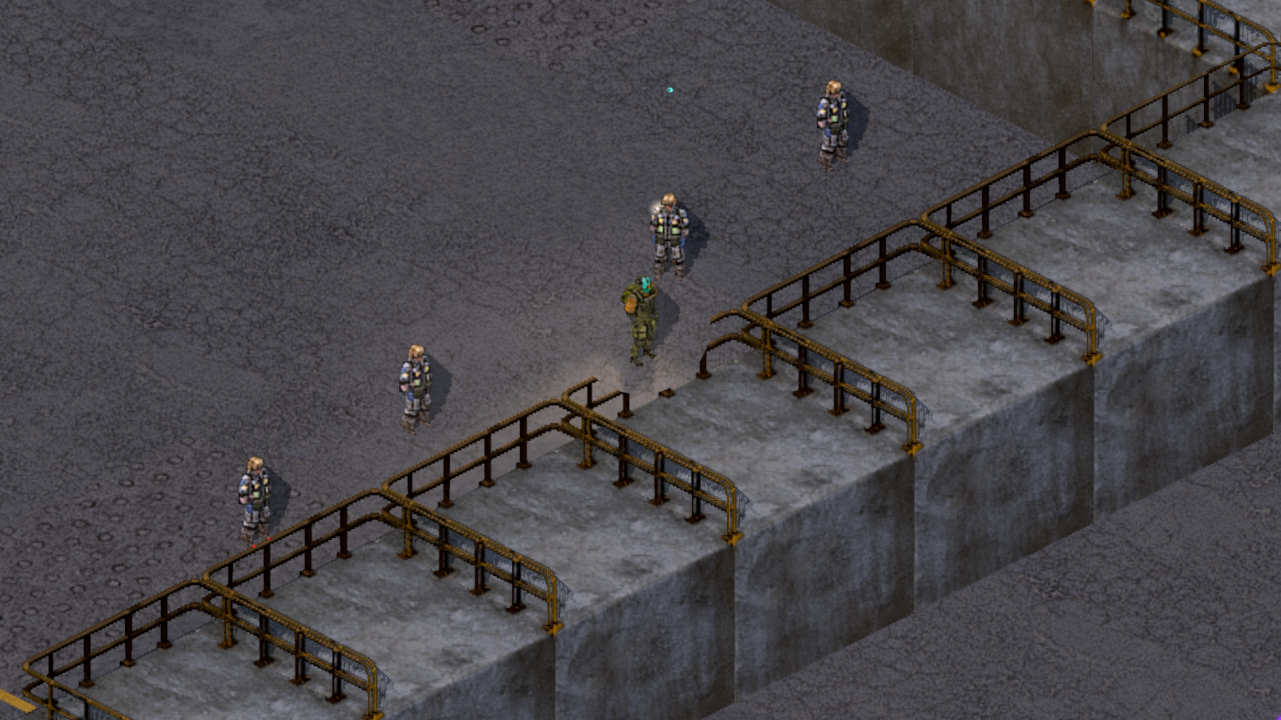
The player will encounter different threats ranging from Chobbers plinking at them with .22 LR to Mar Nosso's finest equipped with automatic weapons, or even armored vehicles. Hostile NPCs will vary in their ability to see the player from afar. A small blue eye icon will appear on top of an enemy that is not yet alerted to the player's presence but can see them.


When this blue eye icon disappears, the enemy will begin attacking the player. Hostile NPCs can already be alerted to the player's presence in a level by hearing nearby gunfire or explosions.

Enemy morale is also a factor – if the player is causing enough damage or killing enough hostile NPCs that are in a group, some of those NPCs may break away to retreat to a safer position in the level, or attempt to flee to a level exit altogether.

Enemies may also be sent in as reinforcements into a level.
Vehicles
[Note: Vehicle availability is limited early on in the game – progress the game to access more vehicles.]

The player is able to control multiple vehicles which come under four categories:
  • WHEELED VEHICLES e.g. Varlet, Rennpappe, Panel Van, Motorcycle
  • TANKS e.g. Betka, Rounder, Rolston
  • SUITS e.g. Mongoose powersuit
  • AGRAVS e.g. Sledge, Skate, Ball motorcycle

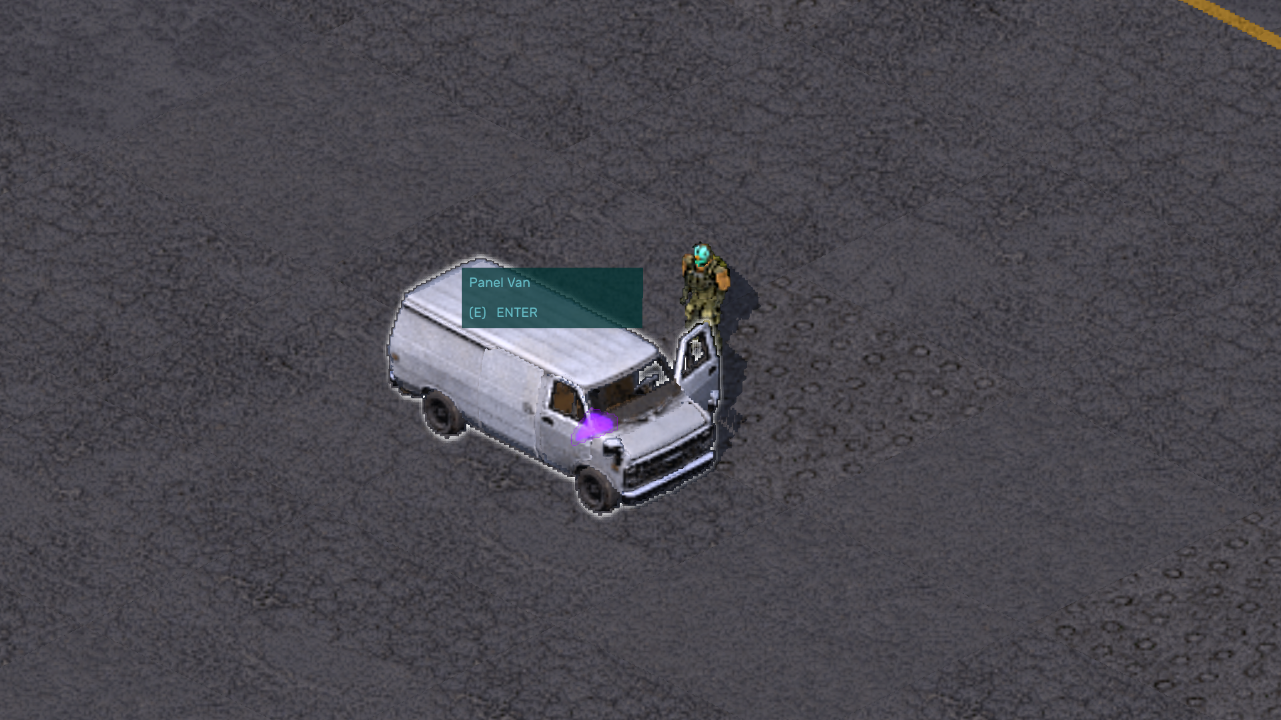
Some of these vehicles can be acquired within missions and driven back to the hub. The player must be close enough and facing the vehicle in order to see the prompt to enter it.


Pressing the same button again will cause the player to exit the vehicle. Vehicles have their own health pool, inventory and MNT slots. For example, the Panel Van has 450 points of health, a total storage space of 300 and a MNT slot that can fit a small container, which is significantly more than what the player is capable of carrying on foot.


If a vehicle's health is reduced to zero while the player is still inside, the player will be automatically ejected from the vehicle and cannot re-enter it, but anything that was in the vehicle's inventory can still be examined. Further damage to the disabled vehicle will destroy it entirely, and any inventory items inside will drop to the ground, along with some parts of the vehicle. Destroying a vehicle in this fashion to gain parts is less efficient than using the SALVAGE console in the hub. Use the REPAIR console in a hub to repair a parked vehicle in exchange for parts.

The FABRICATOR in the hub can be used to build new vehicles, and some vehicles have upgunned variants. For instance, in exchange for just a few parts and a hardpoint, the Rennappe can gain a weapon mount with a value of 25, meaning it can equip an automatic shotgun like the Drummer which is normally too heavy for the player to equip on foot.


The player can strip the vehicle back down to its non-upgunned variant at no cost by taking the vehicle to the SALVAGE console.

Like when the player is firing weapons on foot, upgunned vehicles must have a reserve of ammunition in their inventory. Items the player has on their person are not shared with a vehicle – if the player wants a vehicle to have access to an item in its storage like ammunition, they must exit the vehicle and interact with the inventory, or park the vehicle on a gantry pad and use the ARMORY.

Some vehicles will have room for two weapons at a time, changing how weapons are fired. On foot, the player uses right mouse button to aim and left mouse button to fire. If the player is controlling something like a Betka, two aiming lines will be visible. The left mouse button will fire the primary weapon and the right mouse button will fire the secondary weapon.
Advanced techniques
The following is a series of different tips, tricks and trivia:
  • Press Z to dive to prone while on foot. Diving will temporarily lower the player's hitbox and move them quickly in the direction of the dive. This may be useful in very specific situations.
  • When inside a vehicle, hold down shift and press E to put a brick on the pedal. The vehicle will continue accelerating forward on its own.
  • Do enough damage to enemy vehicles to cause the drivers to bail from them.
  • Both the player and enemy infantry can be knocked over temporarily and need a moment to get back up. Some enemies may be equipped with less lethal beanbag launchers to deliberately annoy the player.
  • The automated Froggies seen in various levels may contain various goodies.
  • Save on ammo by pressing Space to melee attack a prone enemy.
  • OvO electric cars will violently malfunction when only slightly damaged.
  • Crouch on foot will zoom the camera out. Aim with a weapon while crouching to extend the camera out further than normal. Crouch and aim at the same time with the binoculars or a sniper rifle to see even further.
  • Enemies that are behind (or "occluded by") buildings will have a red highlight. When the player is behind certain buildings or objects, they will either see a bubble around them, or a blue highlight.
  • Return to merchants after completing a phase of missions – they might have new items in stock.