Chicory: A Colorful Tale

Chicory: A Colorful Tale

137 ratings
All Litter; All Gifts, Big and Small
By The Sojourner
Still missing that one piece of litter and Spinach isn't helping? Or that one gift in an area and Beetroot is too vague for you? Here's your ultimate reference.
6
19
2
4
2
2
3
   
Award
Favorite
Favorited
Unfavorite
Welcome & General Tips
Yes, I know why you're here. First, a word of consolation: Nothing — absolutely nothing — in this game is missable! Not even after the epilogue! So you have no excuse for any FOMO you may feel.

Now before you peek at how to find the gift(s) and/or litter you're looking for, try these general tips first:
  • Explore the map as much as possible, even areas that appear like dead ends. Trust me on this one...
  • Make note of any areas to return to (e.g. Supper Woods). Often you won't be able to access an area until you've gotten a new ability (e.g. swimming through/across water).
  • Keep an eye out for thin slits or narrow passages — you can paint swim into those!
  • Also keep an eye out for any climbable walls (they're the striped ones that aren't so gray), and be aware of even the tiniest ones.
  • Remember that you can change your direction when bouncing off of mushrooms.
  • Blow up any and all rocks.
  • When hopping between clouds, jumping into an empty cloud automatically fills it with paint.
  • Some geysers will change their arc over time, becoming weaker.
  • For litter tracking, talk to Spinach, on the outskirts of Dinners.
  • For gift tracking, talk to Beetroot, on the edge of the mouth of Sips River.
  • Sparkles mean gifts! Dab the area with paint to reveal the gift.
  • There's more than sparkles though: talk to Biscuit and Gravy in Simmer Springs (image below) to get a treasure map for 3 hidden gifts!
  • If you see a gift or piece of litter on a screen, with very few exceptions, you don't really need to do anything special to get it. All you need are the right abilities and some puzzle solving.


If you've tried all of the above thoroughly and are somehow still stuck (or perhaps merely impatient, for whatever reason), below are all the gift and litter locations for each area of Picnic.

But know that you've been warned:

SPOILER TERRITORY BELOW!


Oh, before you go on, a few things to know about this guide:
  • To get each secret, follow the colored line, plus any notes. Note that sometimes the line may pass through flinging plants or other obstacles. If this is the case, this means said obstacles are to be used. The actual secret is painted in red (and often has arrows pointing to it).
  • Sometimes litter can appear in clusters, but this will never happen with gifts.
  • Instead, some gifts are hidden from plain sight. If you see a gift in an image of this guide but not in your game/save, I promise you it's there! About half the time you just have to get close to the actual location, at which point you'll see sparkles. Then just dab the sparkles repeatedly with paint to reveal the gift. The three exceptions to this are tied to Biscuit and Gravy in Simmer Springs.
  • Throughout this guide, I tried my best to order the litter and gifts by (1) the approximate order you'll likely come across them, and (2) the required abilities to reach them. Some secrets are glaringly obvious, but others...
  • For reference, I have included totals at the beginning of each area. Note that small gifts always contain clothing items and big gifts always contain brush styles, hence the naming.

Finally, just in case you end up scrolling all the way down to the comments section anyway (for whatever reason), I spoiler-proofed this guide.

Appie Foothills
Totals
4 Pieces of litter
5 Clothing items (2 headwear, 3 bodywear)
1 Brush Style

Litter
#1:


#2:


#3:


#4:
The Climb ability is required to reach this one:


Small Gifts
#1: Flower


#2: Howdy


#3: High Nooner


#4: Hotneck


#5: Big Heart

The green path is for the splodey bubble.
Blow yourself across the ledge to reach the gift:


Big Gift
#1: Light Shade

Follow the cyan arrows:


Banquet Rainforest
Totals
6 Pieces of litter
7 Clothing items (2 headwear, 5 bodywear)
1 Brush Style

Litter
#1:


#2:


#3-4:


#5: See also the Big Gift


#6: See Gift #6

Small Gifts
#1: Bolt Tee


#2: Ski Jacket


#3: Shawl

The leveling can get confusing in this area, but it is possible to solve this puzzle


#4: Scientist


#5: Stormy


#6: Big Flower


#7: Dorky

Blow up the rocks first to reveal the gift.


Big Gift
#1: Solid Square


The Big Drink
Totals
6 Pieces of litter
2 Clothing items (0 headwear, 2 bodywear)
No Brush Styles!

Litter
#1: See Gift #1

#2-3:


#4-6:


Small Gifts
#1: Sunny Tee


#2: Splash Onesie

To get that splodey bubble across the water, keep jumping while in the water! Or you can use the indicated path, which goes over a sandbar (i.e. shallow water).

Brekkie (beach)
Totals
7 Pieces of litter
1 Clothing item (0 headwear, 1 bodywear)
No Brush Styles!

Litter
#1:


#2:


#3:


#4-5:


#6:


#7:
The Swim ability is required to reach this one:

This one is at the entrance to Brunch Canyon.


Small Gift
#1: Shell Tee
Chat up Biscuits and Gravy in Simmer Springs to know to reveal this one:


Brekkie (ocean)
Note: this is NOT part of The Big Drink. You just have to Swim out to sea from Brekkie beach to find these.

Totals
1 Piece of litter
1 Clothing item (0 headwear, 1 bodywear)
1 Brush Style

Litter, Small Gift
#1: Nautical


Big Gift
#1: Cream/poo


Brew Path
Totals
No litter!
No clothing items!
1 Brush Style

Big Gift
#1: Pow!
This gift may also be considered to be in Dinners.

 
...and after a maze-like screen (not shown):


Brunch Canyon
Totals
7 Pieces of litter
5 Clothing items (5 headwear, 0 bodywear)
No Brush Styles!

Litter
#1:

You'll be revisiting the initial screen twice here, but ultimately following the colored line:
 
 
(left side)


#2:

 
Rapidly paint the darkness to safely retrieve the litter:


#3:


#4:


#5: See Gift #4 (you can probably see it above too)

#6:


#7:


Small Gifts
#1: Helm

This is kind of a continuation of Litter #1:
 
 
(left side)


#2: Mask


There are a few false paths here, so watch out:


#3: Horns


Rapidly paint the darkness to safely traverse the area:


#4: Pointish Glasses


#5: Crown


Color Lab
Totals
1 Piece of litter
1 Clothing item (0 headwear, 1 bodywear)
No Brush Styles! (not counting talking to Dr. Cheese)

Litter
#1:


Small Gifts
#1: Robo

Getting this one is a little unconventional since you have to paint swim through a vent to get it:


Dessert Mountain
Totals
6 Pieces of litter
7 Clothing items (4 headwear, 3 bodywear)
No Brush Styles!

Litter
#1:


#2:


#3-4: See Gift #1

#5-6:


Small Gifts
#1: Skate Helmet


#2: Earmuffs

Wait for the first geyser's trajectory to fall before riding its stream:


#3: Puffy Jacket


#4: Headscarf

Wait until the upper-rightmost geyser is about to hit the cloud before riding its stream:


#5: Woven

Wait until the geyser is about to hit the cloud before riding its stream:


#6: Hiker
The Swim ability is required to reach this one:


#7: Beard
The Swim ability is required to reach this one. Also, chat up Biscuits and Gravy in Simmer Springs to know to reveal this:


Dessert Peak
Totals
6 Pieces of litter
5 Clothing items (3 headwear, 2 bodywear)
2 Brush Styles

Litter
#1:


#2:

It is not necessary to ride the upper geyser:


#3: See Gift #1

#4-5:

Use your body to keep the bubble stationary in the presence of wind:
1) Hold the bubble in place at the green location.
2) Move the bubble up from the yellow location (it helps to be quick — Paint Swimming is faster than plain running).
3) Blow up the bubble at the red location.


#6:


Small Gifts
#1: Wintry

Be sure to pay attention to the wind!


#2: Fuzzy Jacket

Use your body to keep the bubble stationary in the presence of wind:
1) Hold the bubble in place at the green location.
2) Move the bubble to the yellow location.
3) Blow up the bubble at the red location.


#3: Earflaps

Not shown: you get to the gift via one screen up.


#4: Gorgeous


#5: Tiara


Big Gifts
#1: Dark Shade


#2: Medium Shade

 
...and after solving a puzzle on its own screen (not shown):


Dinners
Totals
6 Pieces of litter
5 Clothing items (3 headwear, 2 bodywear)
1 Brush Style

Litter
#1:


#2:


#3:


#4:


#5:


#6:
The Climb ability is required to reach this one:


Small Gifts
Note: the Climb ability is required to reach all of the gifts in Dinners, including the big gift. Therefore, I recommend returning to this area after you get the ability.

#1: Newsie


#2: Biker Jacket


...and after Paint Swimming all the way up that narrow passageway across a few screens:


#3: Goggles


Be sure to greet Tamarind while you're up there!


#4: Beak


#5: Pilot

 
Leap carefully off the top of the building to reach the gift:


Big Gift
#1: Wavy Draw


Elevenses
Totals
1 Piece of litter
2 Clothing items (1 headwear, 1 bodywear)
1 Brush Style

Litter
#1:


Small Gifts
#1: Half-moons
The Paint swim ability is required to reach this one.


#2: Pajamas
The Climb ability is required to reach this one.


Big Gift
#1: Diamond Texture
The Paint swim ability is required to reach this one. Note that this gift may also be considered to be in Appie Foothills.


Tip: Paint swim behind the splodey bubble to push it to where you want it.


Feast
Totals
3 Pieces of litter
1 Clothing item (0 headwear, 1 bodywear)
No Brush Styles!

Litter
#1:


#2:


#3:
The Climb ability is required to reach this one:


Small Gift
#1: Bee
The Climb ability is required to reach this one:


Grub Caverns
Totals
6 Pieces of litter
4 Clothing items (4 headwear, 0 bodywear)
No Brush Styles!

Litter
#1:


#2-3:
The Climb ability is required to reach the upper piece of litter:


#4-6:

Yes, you can actually hop all of those gaps!


Small Gifts
#1: Spike

 
...rounding a corner...


#2: Bell

You can get this one in total darkness, but it's better to carefully light up the platform (i.e. beware of color-eating bugs!)


#3: Studs

You can get this one in total darkness, but it's better to carefully light up the platform (i.e. beware of color-eating bugs!)


#4: Monocle
The Swim ability is required to reach this one:


Grub Deep
This area is special in that you get to ride color-eating bug blocks! To help with navigation, I painted the paths in two main colors: cyan/blue is the path you'll walk (or otherwise traverse on your own), and yellow is the path you'll ride a bug block.

Totals
6 Pieces of litter
6 Clothing items (3 headwear, 3 bodywear)
1 Brush Style

Litter
#1: See Gift #2

#2:


#3:

Note: the bug block turns out to be unnecessary here.


#4:

Note: the bug block turns out to be unnecessary here.


#5:

Note: the bug block turns out to be unnecessary here.


#6:


Small Gifts
#1: Gothy


#2: Nice Shirt


#3: Big Fungus


#4: Spike Helmet


#5: Tux

 
You'll have to repaint the first mushroom quickly:


#6: Antenna
The Climb ability is required to reach this one:


Big Gift
#1: Straight Draw

 
There is a second bug block, but I couldn't position it correctly for this screenshot. Maybe you can, though?


Gulp Swamp
Totals
6 Pieces of litter
5 Clothing items (4 headwear, 1 bodywear)
2 Brush Styles

Litter
#1:


#2:


#3-4:


#5:


#6:
The Hop ability is required to reach this one:


Small Gifts
#1: Gardener


#2: Leafy

You don't actually need the ability to swim in water here.


#3: Fungus


#4: Clown


#5: Elf
The Hop ability is required to reach this one:


The path leading up to this one is part of normal progression:


Big Gifts
#1: Leaf
The Hop ability is required to reach this one:


The Big Gift is just inside, though you'll need to solve a little puzzle (not shown).


#2: Flower


Spam "erase" on that one flower-tree to progress.


Luncheon
Totals
3 Pieces of litter
5 Clothing items (2 headwear, 3 bodywear)
No Brush Styles!

Litter
#1:


#2:


#3:


Small Gifts
#1: Beanie


#2: Stripey Tee


#3: Pocket Jacket


#4: Brimcap
The Climb ability is required to reach this one:

Alternatively, help out Macaroon to get this immediately.

#5: Dot Dress
Somewhat confusingly, to access this gift, you have to start out in Teatime Meadows.


Nibble Tunnel
Totals
No litter!
2 Clothing items (0 headwear, 2 bodywear)
No Brush Styles!

Small Gifts
#1: Black Dress


#2: Big Star


Potluck
Totals
8 Pieces of litter
2 Clothing items (0 headwear, 2 bodywear)
No Brush Styles!

Litter
#1:


#2:


#3:


#4:


#5-8:
The Swim ability is required to reach this one:


Small Gifts
#1: Cute Dress


#2: College
The Hop ability is required to reach this one:

 
This one can be reached from the other end as well.


Simmer Springs
Totals
9 Pieces of litter
1 Clothing item (1 headwear, 0 bodywear)
No Brush Styles!

Litter
#1:


#2-4:


#5:


#6:


#7-9:

Be sure to climb the front of the Inn first:


Small Gift
#1: Top Hat


Be sure to climb the front of the Inn first:


Sips River
Note: many of these items require diverse abilities to access, so I recommend returning to this area after you get the Swim ability to save you some trips.

Totals
5 Pieces of litter
7 Clothing items (3 headwear, 4 bodywear)
1 Brush Style

Litter
#1:


#2-4:


#5:
The Climb ability is required to reach this one:

This one can also be reached from the other side, and that way you only need the Hop ability, but this way is arguably easier.

Small Gifts
#1: Splashpants
The Swim ability is required to reach this one.


#2: Rex Head
The Swim ability is required to reach this one.

There's no puzzle to be had under the bridge, just the gift.

#3: Sparkles
Chat up Biscuits and Gravy in Simmer Springs to know to reveal this.


#4: Sailor
The Hop ability is required to reach this one.


#5: Rex Bod
The Swim ability is required to reach this one.

There's no puzzle to be had under the bridge, just the gift.

#6: Backwards
The Climb ability is required to reach this one; start in Luncheon to get it.


#7: Royal


Big Gift
#1: Fill Tool


Spoons Island
Totals
10 Pieces of litter
5 Clothing items (3 headwear, 2 bodywear)
1 Brush Style

Litter
#1:


#2:


#3:

This is just as with normal progression, but perhaps with one small twist.
 
The upper-rightmost dot is key here:


#4-5:


#6-7:

Raise and lower the platforms to find your way.


#8-10:

Note: you don't actually have to do the entirety of Spoons Island to access these.


Small Gifts
#1: Island

Raise the platforms partway through.


#2: Strawhat


#3: Eyepatch

Raise the platform while bouncing off of the mushroom to gain height.


#4: Ahoy

Raise and lower the platforms to find your way.


#5: Avast

Raise and lower the platforms to find your way. Also paint/erase the flower-trees as needed so that you're always on top of them.


Big Gift
#1: Flame

Raise the platforms while bouncing off of the mushrooms to gain height.


Supper Woods
Totals
4 Pieces of litter
9 Clothing items (6 headwear, 3 bodywear)
2 Brush Styles

Litter
#1:


#2:


#3-4: See Gift #8

Small Gifts
#1: Flower Dress


#2: Bow


#3: Starry Tee


#4: Sunhat


#5: Hoodie


#6: Scarf


#7: Gnome
The Paint swim ability is required to reach this one:


#8: Foxy
The Paint swim ability is required to reach this one, except for the upper piece of litter, which requires the Climb ability:


#9: Square Glasses
The Paint swim ability is required to reach this one:

 
After this, there is a little puzzle (not shown) that needs to be solved.


Big Gifts
#1: Splat
The Paint swim ability is required to reach this one:

See Gift #9. These are the only two gifts that will co-occur on the same screen.

#2: Slash
The Climb ability is required to reach this one:


Notice the plant here that can fling you off of the base ground:


Teatime Meadows
Note: the Climb ability is required to reach everything here except Litter #3. Therefore, I recommend returning to this area after you get the ability.

Totals
7 Pieces of litter
5 Clothing items (4 headwear, 1 bodywear)
1 Brush Style

Litter
#1:


#2: See Gift #1

#3:


#4:


#5-7:
The Swim ability is required to reach this one:


Small Gifts
#1: Feather


#2: Bard
This gift may also be considered to be in Dinners.


#3: Spellcaster


#4: Chef


#5: Headphones
The Swim ability is required to reach this one:


Big Gift
#1: Rainbow Draw

No image for this one since it's behind that one 5×5 dotted door. Beetroot has the solution in her home at the mouth of Sips River, behind a curtain. To unveil the solution, take art classes at the Art Academy in Potluck, and listen to Radish after each class until she goes home. Help her out from there and Beetroot will return the favor.

Wielder Temple
Totals
3 Pieces of litter
5 Clothing items (2 headwear, 3 bodywear)
1 Brush Style

Litter
#1-2:


#3:


Small Gifts
#1: Black Tee

The gift is just inside:


#2: Beret

The gift is just inside:


#3: Wielder Cloak

Apart from the "X"s in the image, there are two more holes that can be revealed via the splodey bubbles. The corresponding screen (not shown) — the dark one — should tell all.


#4: Smock


#5: Wielder Wrap

Note that if you missed this one, there's a way to go back and get it, starting from the Wielder Temple entrance and Paint swimming through the vine on the screen.


Big Gift
#1: Line Texture

See Gift #3. Same area, different puzzle.

Yum Cave
Totals
No litter!
3 Clothing items (1 headwear, 2 bodywear)
No Brush Styles!

Small Gifts
#1: Cord Coat


#2: Round Glasses


#3: Moon Tee

To reach the gift, make sure the mushrooms have no paint on them nor light shining on them.


Grand Totals and Extras
Grand Totals
121/??? Pieces of litter
101/??? Clothing items (53/?? headwear, 48/?? bodywear)
17/25 Brush Styles

"I've gotten all of your secrets above, but I'm somehow still missing stuff. What now?"

First and foremost, call home as much as you can via the many phone booths, particularly in the post-game. If you're still lost...

For extra litter:
  • Talk to Basil in Luncheon after coloring in all of his plants for a... memento... of his. (Credit: Mars)
  • Talk to Guac in Potluck. Like actually talk. All the way. Good job, your reward is some trash.
  • Talk to Achiote and Olive in Elevenses and do their mini-quest. You'll get Some Trash They Found.
  • Talk to Fennel in Dinners after painting a mural. Feeling not one bit more enlightened, Fennel will give you some trash.
  • Talk to Wisteria in Supper Woods. You'll need to deliver a letter to her (help for that can be found here).
  • ...

For extra clothing items:
  • Help Beans find her lost kiddos and then talk to her. You'll then get the Headband.
  • Help Turnip find his way out of Nibble Tunnel and back to Potluck. Once out of the tunnel, he'll give you a Kerchief.
  • Give up your Transit ID to An Adult, so they can, um... be a complete Adult (wait, is this legal?). They'll leave behind a Stache for you. Also, Plum doesn't really care (what are these Transit IDs really, anyway?), so you can just go get a new one.
  • Talk to Pistachio, the wandering turtle. It'll be easier to encounter him multiple times if you have LOTS of color on your map. After some conversations, he'll give you a Mascot outfit (and maybe something else). (Credit: Krozth)
  • ...

For extra brush styles:
  • Talk to Potato at the mouth of Sips River to forge your own Custom brush style!
  • Talk to Stevia at the outskirts of Dinners and complete his sidequest. Doing this gets you the Flair brush style.
  • Talk to Kiwi at Teatime Meadows and write a little tune for him (or them, if you prefer). Doing this gives you the Note brush style.
  • Did I mention that Dr. Cheese at the Color Lab nearby Brekkie has the best brush style? It's the Palette brush style, where you can use up to 8 custom colors across all of Picnic!
  • Most importantly, take an art class with Quinoa at the Art Academy in Potluck. Doing this grants you the ability to use Brush Styles in the first place. Plus you get the starter set of Brush Styles: O, X, Star, and Heart.

Thanks for Reading
...and in the (immortal?) words of the 'Banov, thanks for caring.

According to the in-game characters, I should have every piece of litter and every gift lying around in Picnic wrapped up in this guide. However, I am not quite sure what other items I've missed, and this guide only feels 99% complete instead of 100%. If anyone would like to pitch in to help 100% this thing, you'll be credited in this guide.
21 Comments
Lucarvee Dec 18, 2023 @ 1:31am 
Who the hecc is "Stevia"?
I'm missing the bursh style in the very bottom left corner?
SertralineCoffee Jun 13, 2023 @ 2:27am 
Forgive me for this comment on such an old thread, but does anyone know if you can 100% the clothes if you used the clothing exchange? I tried to go get the clothing i traded in (cute dress), but the gift is still opened, so I can't get it. Pls help, it's the last clothing item I need!
BulkyPigeon Jan 16, 2023 @ 10:51am 
Thank you for the guide! Super useful and very detailed.
SilverMoon Jul 31, 2022 @ 2:56pm 
In the Brekkie (Ocean) part you list a piece of litter and a clothing gift that is actually in gulp swamp. There is no clothing gift in brekkies oceans.

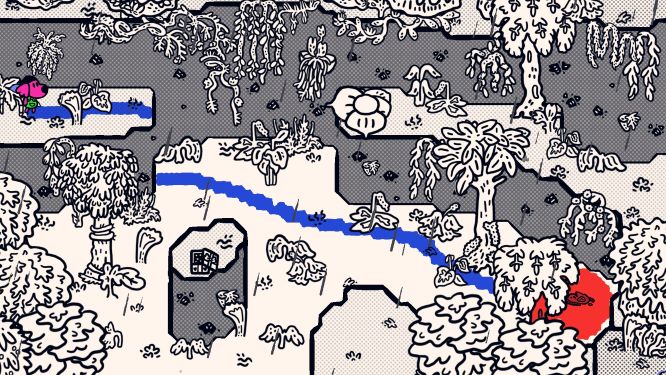
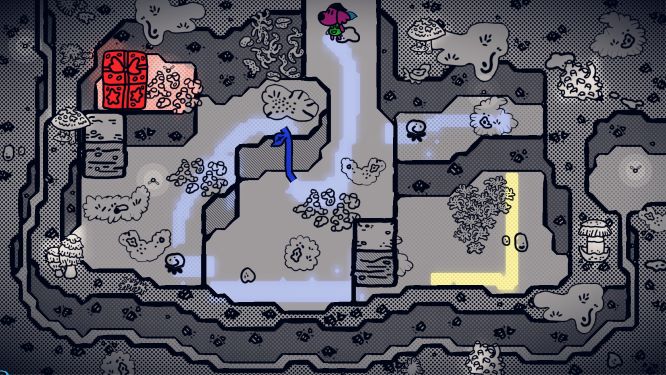
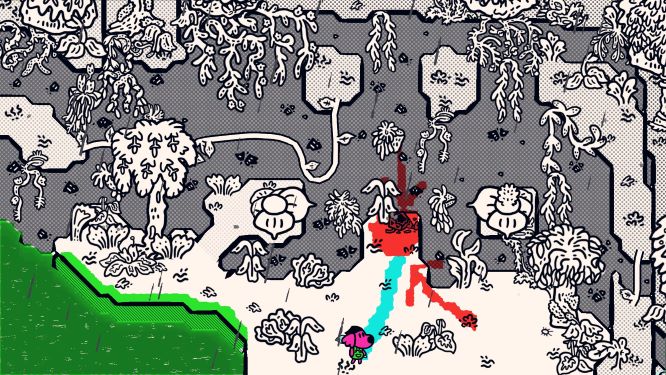
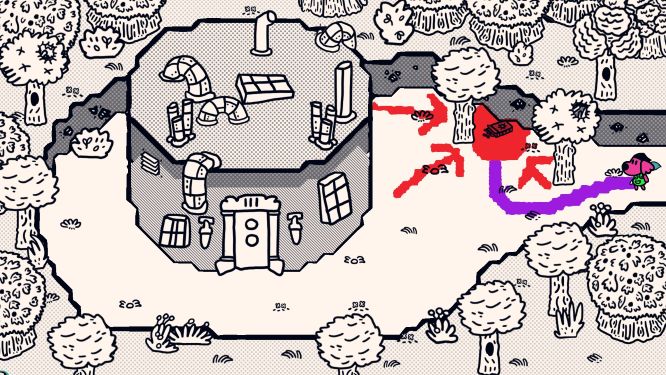
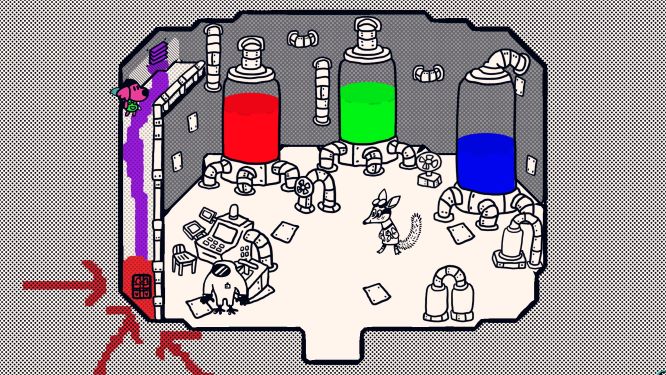
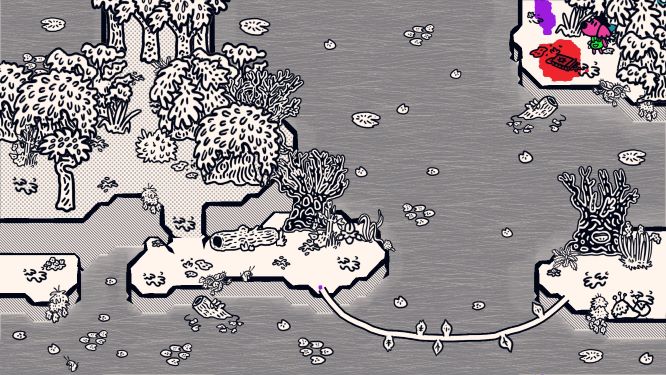
If Beetroot tells you your missing a present in Brekkie It could be the one in color lab
WaySilentBob Jan 18, 2022 @ 5:16am 
Really useful guide! Thanks!
Trinitioss Jan 1, 2022 @ 1:08pm 
There's also another gift and piece of litter you didn't list from Gulp Swamp. They're both in the same area, one screen down and one screen right from the Elf clothing item, just off of the main map. The "paint and swim on water" ability is required for it.
哔哔哔大魔王 Nov 28, 2021 @ 1:29am 
Hi,thanks for your guide,I got the achievement of Gift and Litter,but when I exchanged
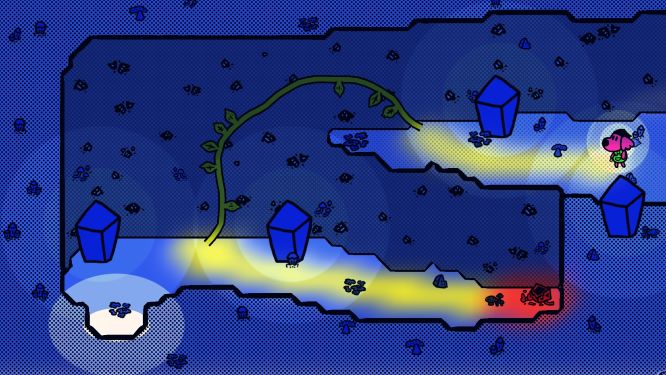
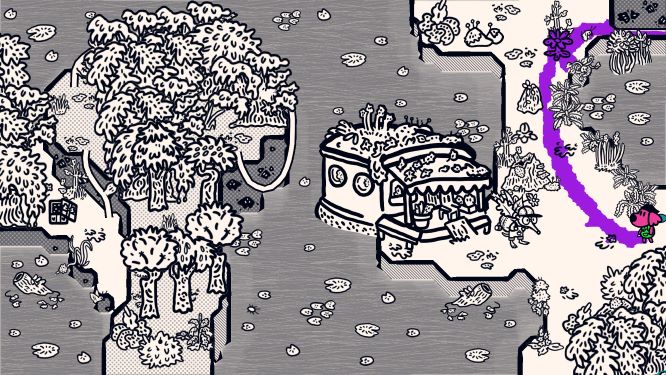
the last music player in Teatime Meadows with Pomelo,I found that I don't have enough litter ,it was 3/4,how can I get the last decoration to unlock the achievement?
The Sojourner  [author] Jul 23, 2021 @ 4:09pm 
Yeah, pretty much when it comes to decoration and outfits you have it nailed. For that, the answer is simple: find as much litter as you can so you can spend it in all those places (Ixora's shop is in Feast btw, not Grub Deep). There are also sidequests for extra stuff (e.g. letter delivery for a special outfit from Potato at Sips River or getting a special plant from Basil ), which I've partially covered in another guide.

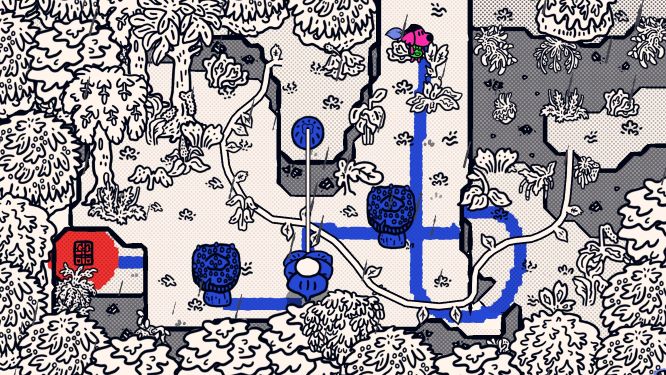
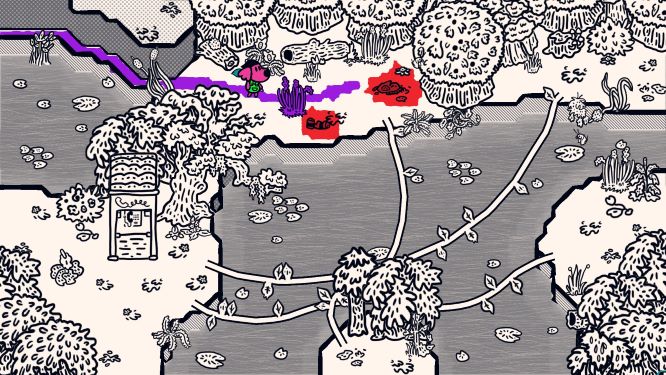
That said, if someone wants to go ahead and document all the outfits and decorations (as well as how to get them), I'm sure it will be appreciated. I probably won't do it in this guide though.
Risovator Jul 23, 2021 @ 7:45am 
Are there any plans on extending this guide with showing where the shops to spend litter/get furniture are? Took me a while to remember them all. Here are those I remember: there's one in Dinners (to buy plants), in Teatime Meadows (The house on the roof of which we can find Kiwi - to buy music stuff), Luncheon (Beans gives away furniture packs for free, but it's worth mentioning), Grub Deep (one bug sells different plant-like furniture for litter)
I don't know if that's all though. Now that I think about it, maybe decoration deserves a guide on its own.
The Sojourner  [author] Jul 15, 2021 @ 8:18pm 
@Neavlof I think I found the issue: I had that gift in Appie Foothills when it really should be Dessert Mountain. Patched that up.