Osteoblasts

Osteoblasts

28 ratings
Osteoblasts Walkthrough
By aquatorrent
This guide will help you to finish the game.
2
2
   
Award
Favorite
Favorited
Unfavorite
Introduction
I didn't see any walkthrough for this game so I decided to make one. I'll try to keep it short and simple.
This guide is made based on version 1.2.2 of the game.

Gamefaqs version in case the images in this guide are deleted by Steam: https://gamefaqs.gamespot.com/pc/305739-osteoblasts/faqs/80249
First Things First
Some tips:
  • Save often. Even though you can revive if you die, it costs a lot of money. Try not to die.
  • Save in multiple slots. Some dungeons won't let you get out once you are inside.
  • Try to get one blast spell book of each type. Check the resistance and weakness chart below.
  • Try to get another blessing instead of Rest for healing. I got Monsoon although Petrichor works better.
  • The game is grindy, so make sure to assign your stat properly. I found focusing all stats on Soul works best. You can try other builds as well, although you might want to assign some other stat to make it work.
  • Retrieve blessings from every statue that you can.
  • Purchasing Phospate from Whale statue help to recover your Bones (HP) out of battles. You just need to walk a few steps to recover.
  • Use all Memory of the Towers that you got. It will increase your passives slot.
  • Use all candies that you got. If you have some spare money, buy them in Bones N' Drinks. After playing as 3 different class, I found that a class can have different stat gain on level up so it can be tough to force a certain build to them (Shaman on Soul build in my case, since it is more focused on Spite build).

I played the game as the Stranger and Simple (hidden) class. All boss fights will be referenced with those characters. You might want to slightly adjust the strategy depends on your class.

Also, the game might have random drops on its chests and other drops, so some items might have been incorrect.

Spells that becomes my favorite in the game: Thunder and Dim Wave (when I played Stranger class), Thunder and Absorb (when I played Simple class).

Weakness and resistance chart:

To check which type the enemy is, look at their outline color. This doesn't work on some enemies though.

Lastly, note that sometimes I didn't catch when the achievement pops, so some of the conditions might be wrong since I just assumed it. Feel free to correct me for those cases.

For Achievement Hunters
You need to play the game twice: once with the hidden class and once with any class. It's up to you whichever you want to play first.
Check here on how to unlock the hidden class, Simple.
TL;DR: press the back button on the class selection.
Walkthrough
1. Chapter 1 - Osteogenesis
Papoulas Graveyard
You can drink the red liquid to restore your HP.
- Interact with the chest to the east.
- Interact with the barrel near the south exit to get 2x Bandage.
- Head to the south exit.

Graveyard Cemetery
- Interact with the graveyard to get 1x Bone Moss.
- Set checkpoint and worship the elk statue to get some stats.
- Open the chest to the southwest.
- Return to the north exit.

Papoulas Graveyard
- Enter the tunnel to the east.

Reverse Burrow
Don't forget to interact with all pots and coins that you see. I won't specify them in the guide since they are very common. If you have trouble with the fights, try using Spook and Rest. Save often.

- Pick up the pickaxe on the dead ends and use it to the boulder blocking your paths.
- Open the chest near to the area exit.
- Head downstairs.

- Open the blue chest.
- Defeat the scripted enemy in the middle of the area.
Awaken
Overcome your first dogged situation


- Step on the magic circle below it.
- Open the other chest on the northwest corner to get Vitamin Gum.
- Exit the area through the stair.

Papoulas Graveyard
- Interact with the pot to get Grilled Bone.
- Pick up the pickaxe to the northeast.
- Interact with the purple gate to unlock it.
- Return downstairs. Feel free to restore your HP from the red liquid near your starting point if you want.

Reverse Burrow
- Use the pickaxe to the boulder to the east.
- DO NOT get close with the bones on west of the exit yet. The enemy is too strong for you to beat.
- Pick up the pickaxe and head downstairs.

- Worship the statue.
- Use the pickaxe and talk to the skeleton.
- Head downstairs.

Decorated Mole Town
- Interact with the stone to the northwest to find Bone Moss.
- Head north, then east. Open the chest.
- Head to the end of the dungeon, interacting with all pots on your way, to reach a chest containing Tomato.
- Save and interact with the boss.

Boss: Lady Caligula
My Level:
[Stranger] Level 4 (Strength 9, Skill 12, Soul 10, Spite 6, Speed 7, Survival 10)
[Simple] Level 5 (Strength 7, Skill 11, Soul 13, Spite 8, Speed 7, Survival 9)

Keep on spamming Spook. Do not use Knock to avoid the counterattack. Heal whenever necessary. The boss will spawn a minion after her health goes ~20%, but just keep on focusing on the boss. Use Parry/Roll if you need more Marrow (MP), but don't use Knock afterward.

- Head upstairs.

Graveyard Cemetery
- Unlock the gate.
- Remember the skeleton that I told you not interact yet? Return there.

Reverse Burrow
- Interact with the skeleton and choose to assimilate with it.

Boss: Ghost
My Level:
[Stranger] Level 5 (Strength 9, Skill 12, Soul 11, Spite 7, Speed 7, Survival 10)
[Simple] Level 6 (Strength 7, Skill 12, Soul 14, Spite 8, Speed 7, Survival 9)

Keep on spamming Spook. Do not use it whenever the boss cast Ward (Reflect). Heal whenever necessary.

- Return to Papoulas Graveyard.

Papoulas Graveyard
- Talk to Witch Cat near the place where you spawned for the first time.
Beware the Dead
Obtain the Emblem of Corpses


- Talk to Violeta. Buy Shack Key from her if you have the money, but if you don't, we'll cover it later. Note that talking to her will make her disappear from this map, but we'll meet her again later in The Bog.
- Head to the south exit.

Graveyard Cemetery
- Use the key to the graveyard to the south.
- Interact with the barrels around the graveyard.
- Interact with the grave in the middle of the cemetery.
Zigguratic Plateau
Place flowers on Gregor's Grave


- Open the chest east of the grave.
- Head south, then east. You can recover some HP by talking to the woman.
- Assimilate with the bones north of the building to increase your Bones.
- Interact with the skeleton to the northeast to get Bone Moss.
- Talk to the man blocking the exit.
- Interact with the locked door.

- Enter the house to the north.

Cemetery Inn
- Talk to the bartender to find some info about forget room.
- Enter the room to the northeast.

Ganfel's House
- Talk to Ganfel twice.
Whose House is this Anyway
Have a seat


- Exit the inn, then enter the previously locked house in the westernmost area of the map.

Hospital
- Talk to the doctor.
- Eleonora, the woman near the doctor, can recover you to full health.
- Exit the hospital.

Graveyard Cemetery
- Enter the graveyard again, but go to the south exit this time.
- Follow the northwest path to reach a chest.
- Head to the south exit.
2. Chapter 2 - Decalcified
Haunted Treeline
- Explore the area. Feel free to head back and recover if you run out of health.
- There is a barely-readably map in the middle of the area.
- Interact with the den of skulls to the northwest to gain some Bones.
- Worship the shrine.
- Open the chest near the area exit.
- Exit the area.

Fishing Village
- Head to the north exit.

Graveyard Cemetery
- Open the chest.
- Open the locked door to the cemetery.
- Follow the path to the northeast.

- Pick up the pickaxe.
- Worship the statue.
- Return to the south exit.

Fishing Village
- Worship the whale statue. Feel free to use your money to buy the passive bonuses. I recommend Calculus. You also need Insomnia passive to access Totem Hills later on so make sure to grab it later.
- Talk to the pumpkin.
- Go inside the inn to the southwest.

Bones N' Drinks
- Talk to the bartender to get a "side quest".
- Talk to the ither skeleton and choose "Ask for directions".
- Exit the pub, unlock the south exit, and head in.

Grave Peninsula
- Worship the shrine and set up your checkpoint.
- Break the boulder. Do not enter the house yet. The boss is too strong for you to beat.
- Head to the west exit.

Mad Meadow
- Head south and open the chest.
- Head west until you see a boulder.
- Use your pickaxe to break the boulder.
- Enter the cave.

- Worship the statue. You also can hibernate to recover your HP.
- Talk to the man to bring him back to the village. You can talk to the pumpkin in front of the whale statue in Fishing Village afterward to receive some reward and an achievement.
Reopened Business
Bring life back to the Fishing Village


- Reenter this screen to find a chest.

- Enter the house nearby.

Dollmaker's Shop
- Talk to the man on the west to receive a quest.
- Talk to the seller.
- Interact with the trash can.
- Exit the area.

Mad Meadow
- Head to the far east to see a statue. Worship it.
- Return to the area near the house.
- Head to the southwest area.

- Pick up the pickaxe to the southeast.
- Follow the southwest path to reach a boulder. Use the pickaxe.
- Open the chest and inspect the den of bones.

- Follow the path to the northwest.
- Open the chest.
- Assimilate with the bones to the north.
- There's another bone that you can assimilate to the east.
- Poke the sleeping cat to the east.
- Proceed to the southwest exit.

Flooded Wetlands
- Follow the path until you reach a chest. Open it.
- Follow the north path to reach a chest and a statue. Worship the statue. It also sold better passives than the one in Fishing Village.
- Return to the previous intersection and follow the south path until you find a statue. Worship it.
- Continue following the path to the south until you meet a samurai. Give him a Bone Meal so he can go back to the village. If you talk to him in the inn, he'll give you a Fishing Rod for you to fish with and an achievement.
Xenomorphs Attacked
Confirm that the Samurai is alive


- Break the wall to the west of this samurai with your lighter.

- Head all the way to the east until you see an elephant enemy. Head north to see a house.
- Interact with the shutters to deliver your pizza.

- Head to the east exit. Watch out for the elephant enemy. It's very strong.

The Bog
Interact with the mushrooms. Sometimes they have enemies or items in it.
- Worship the statue.
- Explore the whole area for chests.
- Buy Shack Key from Violeta if you haven't already.
- Unlock the locked gate to the north.
- Worship the owl statue. - (Total Awareness (1/6))
- Head to the north exit.

Grave Peninsula
- Unlock the locked door.
- Remember the Wizard's House? Let's try beating it. Enter the house to the northeast.

Wizard's House
- Save and interact with the ghost.

Boss: Leaf Wizard
My level:

[Stranger] Level 18 (Strength 12, Skill 27, Soul 29, Spite 19, Speed 11, Survival 17)
Keep on spamming Knock to the boss. Heal whenever you need it. Parry is also helpful if you need more Marrow. Purchasing Rummage from the whale statue might also help with the healing.

[Simple] Level 19 (Strength 10, Skill 23, Soul 29, Spite 21, Speed 12, Survival 16)
Spam Spook on it and heal whenever necessary. If you have Ward, spam it too. Having Spite-based damage also helps since the boss is quite tanky (I used Cumulonimbus). Purchasing Phosphate from the whale statue might also help for tanking.

Quality Procedures
Perform a successful act of burglary


- Exit the house from the north exit.

Grave Peninsula
- Open both chests and unlock the wall.
- Return to The Bog through the south exit.

The Bog
- Save and don't replace this save until you beat the next boss.
- Enter the tower in the middle of the map.

Hall of Uniforms
Note: Once you are climbing the tower, you can't go back. You still can exit the tower if you are in the first floor by stepping on the cracks west of the bear statue. Make sure you have a shield that has Guard skill in your inventory. Parma has this skill and can be bought in the Fishing Village.

- Reenter the room after the cutscene.
- Head upstairs.

Hall of Lights
- Open the chest to get Memory of the Tower. Use it from your inventory to unlock one extra memory slot for passives.
- Touch the flame in the center of the room to reveal the path to the next room.
- Head upstairs.

Nature Above
- Open the chest and worship the statue on the way.
- Head upstairs.

Hall of Thought
- Save before going north.

Boss: Uniformity of Nature
My level:

[Stranger] Level: 19 (Strength 13, Skill 27, Soul 34, Spite 19, Speed 12, Survival 17)
You need to increase your physical defense for this. I equipped Parma to learn Guard, a great defensive move. The boss is weak to Echo, so if you have any echo skill, just use it in between the Guard. Don't use Bunker as an alternative skill. You'll take too much damage on the turn you cast it. Heal whenever you need it and keep Guard up at all times.

[Simple] Level: 20 (Strength 12, Skill 24, Soul 34, Spite 21, Speed 14, Survival 14)
To be honest, I forgot to bring any Guard skill with me, and I'm too lazy to redo since my last save is ~2h away. I used a Parry skill (Gauntlet has this skill) for its dodge chance, while healing and attacking in between.

- Open both chests and exit the tower.
Coward Coalition
Obtain the Emblem of Coalition
3. Chapter 3 - Bone Matrix
The Bog
- Head to the west exit.

Flooded Wetlands
- Head inside the well next to the house to the north.

Inside the Water Well
- Unlock the gate.
- Assimilate with the bones on the southeast corner.
- Head north to reach a statue. Worship it.
- Follow the path to the north exit.
Yellow Path
Ascend from the Water Well


Dollmaker's Shop
- Interact with all boxes to get some items.
- Unlock the door.
- Talk to the man that gave you quest to get the reward.
- Return to Flooded Wetlands and head to the southwest exit.

Snake Crossing
Interact with all mushrooms. The "fireballs" consist of strong enemies, make sure you are prepared before you engage with them.
- Head all the way to the east until you see a locked door. Unlock it.
- Keep on going east, opening the chest on the way, until you see another exit to the north. It's the exit to The Bog. Do not enter it.
- Follow the way to the south to find a statue and a pile of bones to assimilate with. Worship the statue.
- Head west until you reach a skeleton-like pole near the bridge, then head south and east until you see a skeleton. Talk to him to invite him to the village.

- Head west to reach an elk statue. Worship it.
- Head south to find a chest.
- Head north until you see a pumpkin. Remember his location.

- Head north again and unlock the locked wall nearby.
- Continue to the north until you see a chest. Open it and inspect the glowing area nearby for a fight.
- Interact with the red "fireball" to the west to fight it and obtain Pocket Sun.
- Give the Pocket Sun to the pumpkin you met earlier. You'll be able to buy items from him afterward.
- Head to the west exit.

Sapphire Woods
Do not touch the burning logs. It will give you damage.
- There is a barrel to the north. If you are strong enough, you can get some items from it. I'm not sure what "strong" enough means, but you'll be able to break it later. It doesn't have anything too important so don't worry about missing out.
- Follow the east path to find a statue. Worship it.
- Follow the south path until you cross a bridge.

- Pick up the pickaxe to the west.
- Worship the statue to the southwest corner.
- Follow the southeast path to find Edmond, another skeleton. Recruit him.
- Unlock the locked gate.

- Head north, cross the bridge, and continue heading northwest until you see a chest and a house.
- Pick up the pickaxe to the east.
- Enter the house.

Note that there should be a boulder somewhere near the bridge in Sapphire Woods. DO NOT USE YOUR PICKAXE on it yet. You'll need it somewhere else. We'll get back to this later.

The Bastion
- Worship the statue to the northeast.
- Head to the north exit, opening the chest on the way.

Wizard's Dwelling
- Save before interacting with the boss.

Boss: Count Malzarien
My level:
[Stranger] Level 25 (Strength 15, Skill 31, Soul 55, Spite 24, Speed 19, Survival 18)
[Simple] Level 26 (Strength 13, Skill 29, Soul 49, Spite 25, Speed 14, Survival 15)

Just keep on attacking and watch out for the boss' DoTs. To be honest, I only spammed Thunder and Petrichor (and some Parry/Ward/Umbrella whenever I needed more Marrow) in this fight. Don't attack him with Soul/Spite-based attack whenever he casts Ward, though.

- Talk to the black guy.
- Open the chest on the back to get another emblem.
Disheartening Fog
Obtain the Emblem of Clouds


- Head to the south exit.
4. Chapter 4 - Deformation
The Bastion
- Open the locked doors to the east (there is one in the northeast and another in the southeast). Talk to the skeleton on the south door to recruit him.
- Exit the building from the south exit for now. The door to the northeast will connect to Northen Lakes, which I'll explain later.

Sapphire Woods
- Head to the west exit.

Sapphire Clearing
- Open the chest to the west.
- Worship the whale statue to the north.
- Open the chest on the northwest and pick up the pickaxe to the northeast.
- Unlock the locked door. Enter it. If you don't have the key, buy the Shack Key from Violeta, the cat in Papoulas Graveyard (if you didn't talk to her) or The Bog.

Abandoned Shack
- Interact with all barrels.
- Open the chest on the southeast corner of the map.
- Use the pickaxe on the boulder to the northwest.
- Exit the area through this exit.

Labyrinth of the Mind
- Head south, then follow the northeast path. Open the chest.
- Touch the burning skull to the south.
- Talk to the woman to the northwest.
- Touch the burning skull again.
- Explore the area. Your goal is to reach the woman with red clothing. Defeating her will unlock the stair to the exit.

Make sure you have explored everything before doing this, though. There are 2 boulders, 1 pickaxe, and 1 enemy (Graulfist). If you have trouble with the lighting, find Malzarien (the boss you beat for the last emblem) and interact with the red fireball.
Spatial Awareness
Overcome the Labyrinth of the Mind


Cemetery Inn
- Exit the area

Graveyard Cemetery
- Talk to the skeleton near the north exit.
- Head to the hospital to the southwest.

Hospital
- Open all doors and inspect all barrels.
- Visit Fishing Town and talk to everyone to grab the achievements (if you haven't already) and some items while you are at it. Talk to the woman in Bones N' Drinks and answer with "Ask for directions" too to get a candy.
- Return to Abandoned Shack that you came from earlier (it'll take a bit of a walk).

Abandoned Shack
- Head to the northeast exit.

Jufra Waterfalls
- Head to the west exit.

Northen Lakes
Remember the northeast door in The Bastion that we didn't enter? It leads to this screen.
- Explore the area for chests and pile of bones.
- Talk to the woman on the northwest corner.
- Return to Jufra Waterfalls.

Jufra Waterfalls
- Head north to see a statue. Worship it. - (Total Awareness (2/6))
- Interact with the shrine to the west.
- Scavenge the bones to the north.
- Unlock the north exit and proceed to the next area.

Jufra Oldwoods
- Worship the statue on the northeast corner of the map.
- Head to the east exit.

Ragmarian Ruins
- Unlock 2 locked gates that you see.
- Head north to see a statue. Worship it. - (Total Awareness (3/6))
- Return to the inn that you passed and head north from there to reach the other statue.
- Explore the area for chests.
- The south exit here will lead to Mad Meadow, so head to the north exit.

Grigori Village
- Open the chest to the north.
- Step on the flower field around 5 times to reach 2 chests behind it.

- Head to the east exit.

Papoulas Graveyard
- Unlock the locked door.
- Head to the southwest exit.

Grigori Village
- Open the chest.
- Return to the upper path of the village.
- Enter the house with the red light.

Blackfield Estate
- Talk to the guy next to the cat.
- Enter the hole to the east to reach a shiny item.
- Exit the building.

Grigori Village
- Head to the north exit.

The Farm
- Pick up the pickaxe next to the guy.
- Talk to the guy.
- Pick up the pickaxe on the northeast corner of the map.
- Another pickaxe is somewhere on the fields to the west, the second field south of the north exit.
- Open all chests in the area.

- Defeat all enemies in this area and then talk to the man near the south exit.
- Drink the red liquid on the southeast corner of the map.
- Head to the north exit.

Boreal Beach
- Follow the path until you see a boulder. Break it.
- Unlock the locked gate and open the chest.
- Return to Ragmarian Ruins, south of Grigori Village.

Ragmarian Ruins
- Use your pickaxe to break all boulders except for the one near Grigori Village entrance. Open the chest that was behind one of the boulders.
- Head to the east exit.

Haunted Treeline
- Unlock the locked door.
- Return to Jufra Oldwoods (head west from Ragmarian Ruins).

Jufra Oldwoods
- Head to the west area. You'll see a red light. Enter it.


Jufra Interiors
- There are three exits here: north, west, and middle (stairs). The middle one is a shop and there is nothing on the north exit yet.
- Open the chest in the southeast corner of the area.
- Worship the statue near the north exit and another statue near the west exit.
- Head to the west exit.

Inner Jufra
- Follow the path until you reach a statue. Worship it. - (Total Awareness (4/6))


DO NOT DO ANYTHING TO THE SKULL YET!
Make a backup save here.

Interact with it if you want to fight the boss.
Do not interact with it if you want to spare the boss.
Both will grant a different achievement. Once you decide which one to choose, proceed below.


- There is a pickaxe near the skull to the west. Pick it up.
- (optional) Do the ritual by interacting with the skull if you want to fight the boss, otherwise leave it.
- Unlock the locked door to the east.

- Traverse the path that you went through again (south). Notice the boulder to the south. Break it.
- Follow the southeast path to reach a statue. Worship it.
- Talk to the skeleton nearby.
- Return to the previous intersection and head to the southwest exit. Note that you need Insomnia passive to access it. Get it from any whale statue. There is one in Fishing Village.

Totem Hills
- Explore the area for chests and head to the northwest exit, through the locked door.
4.1 The Baroness
Tree House
- Open the chest to get Memory of the Tower. Use it.

The next progression will be based on whether you did or didn't do the ritual.

If you didn't do the ritual:
- Talk to the crow at the end of the road.
Ordovici
Obtain the Emblem of Crows while keeping the peace with the Ordofeus


You'll be presented with 2 choices next. If you choose to defy him, you'll fight the boss. If you choose to comply, you'll be teleported to Tall Sanctuary.

If you did the ritual:
- Exit the building and return to Jufra Interiors by tracing your way back.

Jufra Interiors
- Head to the north exit.

Tall Sanctuary
- Open the chest on the way to the north.
- Save before talking to the boss. You'll fight him next.

If you end up fighting the boss:
Boss: The Baroness
My level:

[Stranger] Level 35 (Strength 17, Skill 35, Soul 90, Spite 36, Speed 20, Survival 22)

Be careful when using Spite/Soul-based attacks. The boss might cast reflective Ward. It will change form later on, focusing more on attacking rather than defending. You're free to attack at this point. The easiest way to defeat the boss is to spam Din Wave over and over.

[Simple] Level 36 (Strength 16, Skill 36, Soul 90, Spite 30, Speed 17, Survival 18)

I just spammed Ward, Petrichor, and Thunder for this fight. As I said before, watch out for the boss' Ward if you use Spite/Soul-based attacks

- Interact with the grave where the boss was standing to get Emblem of the Crows (if you did the ritual).
Emblematic Victory
Obtain the Emblem of Crows


- If you head to the shop in Jufra Interiors (just go downstairs from Jufra Interiors), you can kill all of the residents.

- Go to Tall Sanctuary and head to the east exit.

The Farm
- Unlock the door.
- Return to Ragmarian Ruins.
5. Intermission - Emblem of Chains
Ragmarian Ruins
- Talk to Ganfel near the west exit (only available if you kill The Baroness).
- Head south to unlock the previously locked door.
- Interact with the barrel.

- Enter the building near the west exit.

Barebones Inn
- Interact with the fire at the back, then interact with everything past it to get some items.
- Exit the area.

Ragmarian Ruins
- Traverse to the southeast corner of the map to see another locked door.
- Unlock the door.

Tower of Crows
- Follow the northwest path to reach a chest containing Memory of the Tower. Use it.
- Unlock the locked door.
- Head upstairs.

Keep Hallways
Watch your steps. Stepping from the cracks will send you to the previous floor.
- Follow the east path to reach a chest containing Memory of the Tower. Use it.
- Go to the other path to reach a stair. Head upstairs.

Witch's Prison
- Worship the statue.

Boss: Witch of Chains
My level:
[Stranger] Level 38 (Strength 18, Skill 37, Soul 97, Spite 38, Speed 20, Survival 23)
[Simple] Level 38 (Strength 17, Skill 40, Soul 95, Spite 32, Speed 17, Survival 20)

She doesn't have many HP so just hit her with your strongest skill before she can deal damage to you.

- Open both chests.
Gravitational Shackles
Obtain the Emblem of Chains


- Unlock the chain in the same area.
- Exit the building.

Ragmarian Ruins
- Unlock all chains in this area. You should get another chest and a pickaxe.
- Head north.

Grigori Village
- Unlock the chain to the west to reach a chest.
- (optional) Head 2 screens north.

Boreal Beach
- (optional) Unlock the chains.
- Go to Totem Hills. You can reach it by heading to the west exit from Jufra Interiors (it's 1 screen west, then south from The Farm), then go to the southwest exit.

Totem Hills
- There are 2 big boulders here, but you only have one pickaxe. Use the key to the boulder to the southwest corner.

- You'll be able to reach another pickaxe.
- Open the chest near the south exit.
- Use your pickaxe to the other boulder in this map.
- The south exit will lead to Jufra Waterfalls and you won't be able to return here from there. Whichever exit you take, head to Mad Meadow, accessible south from Ragmarian Ruins.

Mad Meadow
- Head to the southeast area of the map to get a pickaxe and 2 pile of bones to assimilate your bones with.
- Return to Papoulas Graveyard.
6. Chapter 5 - Osteon
Papoulas Graveyard
- Head to the north exit.

Interconnection
- Unlock all gates.
- Pick up the Snail Key to the east.
- Worship the statue. - (Total Awareness (5/6))
- Assimilate with the bones to the southwest.
- Talk to both Violeta (the cat) and Witch Cat.
- Head to the north exit.

Excavation
- Explore the area for chests and 2 pickaxes.
- Worship the statue to the northeast corner.
- Break the boulder on the northwest corner.
- Head east until you see a hole next to the statue of a human. Worship the statue, then use the hole to access 2 chests.

- Head upstairs.

Floating Mountain
- Explore the area to unlock all chains and open all chests.
- Assimilate with the bones to the north.
- Unlock the door to the west exit. It leads to Fishing Village.

- Interact with the skull near the stairs north of this door to get Skill Skull.
- Talk to Boris on the north exit.
- Worship the nearby statue.
- Head south of this statue (you need to go downstairs first) to see another statue. Worship it.

- There are three exits here. One north from the south exit (near the place where you assimilate the bones), one near the stairs leading to the north exit, and the last one is the north exit. The first two exits lead to the same area, so let's cover it first - head inside the cave from the west.

Interior of the Mountain
- Break the boulder.
- Open the chest on the way to the southeast exit.
- Head to the northeast exit. The southeast exit will return you back to the place where you came from.

Bone Tunnels
- Break the boulder to the east to reach a pickaxe and a chest.
- Follow the other path, breaking all boulders and defeating all dogs until you find a door that you see near where you came from. There should be another pickaxe there. Unlock the door.
- Head to the south exit first.

- Talk to the man and open both chests.
- Return to the previous room.

- Head to the west exit.

Decorated Mole Town
- Unlock the chain blocking the way.
- This is the last area of the first dungeon, so there's nothing more you can do in this map. Return to the previous area and head to the north exit instead.

Echo Caves
- Break all boulders that you can see.
- Talk to Pickles that is hiding behind a boulder.
- Worship 4 statues that you see on this area (elk, spider, whale, bat). The bat statue is near the chests on the southeast corner, unlockable after you touch the burning statue. More on that below.

- Pick up the pickaxe on the southeast corner of the map.
- There's another pickaxe on the way to the spider statue.
- Touch the burning statue east of the spider statue.
- Talk to Pickles again to get some candies.
Underdog
Save Pickles from the underdogs


- Head east from the south exit (that red circle) to receive another pickaxe with a chest.
- Proceed to the south exit.

Highbeat
- Note that the south exit leads to the Floating Mountain's north exit.
- This area is very huge. Just explore the whole area (you can go to the area with purple floors from the stairs) and collect everything.
- Use the lighter to access the northeast area.
- Worship the elk statue near the north exit.
- Save your game in another slot. Enter the house in the middle of the map.

City of Glass
- Explore the whole area for 2 chests.
- Head to the north exit in the northwest corner.

- Talk to Ganfel.

Highbeat
- Open the chest to get Emblem of Crosses.
Fragmented Reality
Obtain the Emblem of Crosses


- Head to the north exit.

Gravid Border
This is an endless map, meaning that you will move to the same place if you move in one direction.
- Head downstairs and go to the east to pick up a pickaxe.
- Return to the hole where you came from and head east. Head south at the next intersection (after the stairs) and use the hole.

- Head northeast to find a bone (near where Nana was standing). Assimilate the bones.
- Head northwest from where Nana (the alpaca) was standing. Once you reach a stairs, head west. Do not talk to Ganfel yet.
- You should see a chimney to the west (Ganfel is to the east). Interact with the chimney from the south side.
https://steamcommunity.com/sharedfiles/filedetails/?id=2441035673

Halpeye
- Head west until you can see a house that can be entered and a hole. Do not enter both of them yet. Instead, head north to find an owl statue. Worship it. - (Total Awareness (6/6))
- Use the statue to fly to get your achievement.
Total Awareness
Discover all Teleport statues


There are three areas to proceed from here:
  • The stairs near the owl statue will lead you back to the first screen of Gravid Border.
  • The hole near the house will lead you back to the second screen of Gravid Border.
  • The house will lead you to Ganfel's House.
- Enter the house.

Ganfel's House
- Pick Pocket Sun from the red fireball.

Since you'll be teleported to Cemetery Inn, it's time to do some clean ups. See section 6.1. and 6.2. for more details. If you wish to skip it, jump to section 6.3.
6.1. Intermission - Hall of Doors DLC
You can only access the Hall of Doors DLC after you obtain the Snail Key in Interconnection. The DLC is accessible by going to Cemetery Inn. Find the room number 44.


Hall of Doors
There are 4 doors here, with the last door leading back to Cemetery Inn. I'll start from left to right. Feel free to jump to the appropriate sections if you are doing it in different order.


Principality of Doggerland door:

Doggerland
- Talk to the dog.
- Enter the building in front of you.

Evaporation
- Explore the area, opening all locked doors on your way. If you can't open a door, it means that you need to open it from the other side.
- Worship the bear statue to the northeast.
- Retrieve Dog House Key from the chest to the north.
- Open another chest to the west, and another one to the southwest.
- Exit the area.

Doggerland
- Follow the path to the northeast. Once you find a locked door to the north, enter the house to the west.

Dog House
- Battle one of the dogs to the north to reach the chests.
- Exit the area.

Doggerland
- Unlock the door to the north.

Palace
DO NOT TOUCH THE RED FIREBALL. You'll take damage if you do.
- Head all the way to the north.
- Save before fighting the boss.

Boss: Headless Horseman
My level: Level 48 (Strength 20, Skill 49, Soul 129, Spite 41, Speed 20, Survival 25)

Uhh, I just casted Thunder on him and he dies. I guess I am overleveled. He'll summon 2 minions afterward, but you should be able to kill them easily.


Warring States door:

Wheel of the Past
- Talk to Baroness at the middle of the area.
- Open the chest at the northwest corner from where the Ordofeus are.
- Talk to everyone if you want, then once you are done, head to the north exit after speaking to Malzarien.

Wheel of the Future
- Open the chests in the area and talk to everyone if you want.
- There are 3 den of skulls to the east where you can increase your max HP.
- There is 1 den of skull to the west where you can increase your max HP.
- Worship the elk statue nearby.

- Head north until you see some Ordofeus. There is a Setarus statue that you can stare. Staring at it will get you Maximum Gravity (max HP debuff skill) at the cost of 33 max HP (permanent HP loss).

- Head southwest to find another den to skull to assimilate your bones.
- Worship the bear statue.
- Open the nearby chest.
- Enter the building to the north.

Temple Entrance
I don't know what this place's name is. I just made the name up based on your first enemies' dialogue. This is an endless map.
- There is a den of skull to the southwest.
- Feel free to talk to everyone if you wish (there is also Malzarien in the area). Once you are done, head north from the area entrance.
- Enter the building.

Temple
Again, I don't know what the name of the place is.
- Open the chest to the northwest.
- Head all the way to the north.
- Save before talking to the boss.

Boss: Grigori Shogun, 2x Grigori Skullhunter
My level: Level 50 (Strength 21, Skill 51, Soul 133, Spite 42, Speed 21, Survival 27)

Just keep on attacking the boss until he dies. He'll turn into Shogun Berserk after his health is reduced to half, but he should pose no trouble at your level.

Lustrous Environment
Defeat the Grigori Shogun


You can use the chair to teleport to Barebones Inn.


Temple of Setarus door:

Harvest Factory
- Worship the elk statue to the north.
- Inspect the den of skulls to the west.
- Explore the area: open chests and talk to all witch cats that you find on the way. You can interact with the dolls near the entrance from their back to kill them.
- Interact with the skull north from where the dolls are. This will remove all fireballs in the area.

- Open the 2 chests that you missed on the way to this area: one is on the east, near the witch cat, and another is on the southeast.
- Head north from where the dolls are to find the last witch cat.

Doll House
- Open the chest and head north.
- Save and talk to the skeleton.

Boss: Stheno
My level: Level 52 (Strength 21, Skill 54, Soul 136, Spite 43, Speed 21, Survival 28)

Just keep on attacking the boss until he dies.

Monstarachnid
Defeat Stheno the Spider


- Head north and talk to Ganfel.
- Use the door.

Fishing Village
- Open the nearby chest to get Eggshell of Portals.
6.2. Intermission - Cleanup
Head to Interconnection, located 1 screen north from Papoulas Graveyard.

Interconnection
- Unlock the gate and break the pot.
- Head to Ragmarian Ruins. You can use the owl statue to teleport there.

Ragmarian Ruins
- Destroy the boulder to the northwest corner of the map, near the north exit.
- Head 1 screen south.

Mad Meadow
- Break the boulder east of the north exit. Open all chests. One of them contains Memory of the Tower. Use it.
- Head to Sapphire Woods (1 screen south, 1 screen southwest, 1 screen west from Mad Meadow).

Sapphire Woods
- Remember the barrel that you couldn't break? Head north to find it. Break it to get Ankh. You can keep on reentering the area to get Bait from the same barrel.
- Follow the path until you see a bridge and break the boulder to the southeast. Follow the path again until you see a chest and a boulder on the other side.

If you accidentally used your pickaxe here and didn't manage to break one boulder in Labyrinth of the Mind, go there right now by heading west and entering the Abandoned Shack, then use the northwest exit.

- Go to the Graveyard Cemetery.

Graveyard Cemetery
- Place all of your dead flowers on top of the grave in the center of the area. This is required to unlock a boss.

- Now is a good time to find a fishing spot (there is one in Fishing Village) and keep on fishing until you unlock an achievement. It's going to take a while though (took me 100-200 baits), so use an autoclicker to spam Z or space if you want for it. Feel free to skip or leave it for later too.
Keen Angling
Catch a super rare fish
6.3. Citadel City
Return to Gravid Border's second screen.

Gravid Border
- Head upstairs from the stairs west where Nana was standing to find Ganfel. Talk to him.
Hyperreality Interlocked
Obtain the Emblem of Citadels


- You'll be offered with 2 choices. Asking for his guidance will teleport you right to Citadel City. If you deny him, you can go to Citadel City by interacting with the grave next to him.


Citadel City
- (optional) If you do not kill The Baroness, she'll be on the southeast corner. Feel free to talk to her.
- Head north and talk to the guard. You'll get an achievement once you enter the city.
Visions of Vizier
Reach Citadel City


- Head to the northeast area to find a pile of bones. Assimilate with it.

- Talk to all skeletons to get some items.
- Open the chest on the northwest area.
- Talk to Ganfel. You can choose anything if he asks you something (choices only available if you receive his help in Gravid Border).
- Ascend the tower.

Note: you can return to other areas by interacting with the blue-ish orb near the entrance of this area, but there isn't anything you can do if you already did the cleanup before entering this area.


Citadel Tower
- Worship the owl statue.
- Open the chest to the northeast to get Memory of the Tower. Use it.
- Worship all 4 statues to the northwest path.
- Head upstairs.

- Worship the elk statue.
- Head upstairs.

- Follow the path until you reach a place with stone statue.
- Interact with the stone statue to reach a secret area with a chest containing Memory of the Tower.
- Fall through the cracks.
- Follow the path again and head to the exit.

If you have completed the Temple of Setarus door in Hall of Doors DLC and placed all dead flowers in the Graveyard Cemetery, there should be a skeleton at this spot. Save before talking to him.
Boss: Stheno Reborn
My level: [Simple] Level 54 (Strength 23, Skill 57, Soul 144, Spite 46, Speed 24, Survival 33)

Just attack the boss until he dies.
No Answers
Defeat Stheno Reborn


- Save before talking to the boss.

Boss: The First Liar
My level:

[Stranger] Level 51 (Strength 22, Skill 50, Soul 124, Spite 54, Speed 30, Survival 32)
The boss isn't much. You need to finish it with physical attack though.

[Simple] Level 50 (Strength 21, Skill 52, Soul 136, Spite 44, Speed 21, Survival 30)
I just spammed Ward and Absorb for this fight, and use Thunder ocassionally. Absorb and counter attack are enough to finish the fight.

- Save.
- Interact with the idol.

If you answer with "Absorb Graulf's Thoughtform", you'll get an achievement.
Jurisdiction
Become one with Gravity


If you answer with "End it all", you'll get another fight.

Boss: Graulf
My level:

[Stranger] Level 52 (Strength 22, Skill 51, Soul 125, Spite 54, Speed 30, Survival 32)
Keep Guard up at all times. I usually alternate between attacking and healing on the next 2 turns. Don't use physical attack since the boss might counter you.

[Simple] Level 50 (Strength 26, Skill 52, Soul 112, Spite 53, Speed 21, Survival 30)
For this fight I had to change my equipment and use an equipment that has Guard (Targe). Guard is essential, and Monsoon is more beneficial here for healing so you can focus on attacking and casting Guard.

If you finish the game as any class except the hidden class (Simple), you'll get an achievement after the credits.
Impossible Alternative
Defeat the combined thoughtform Graulf


Congrats for beating the game!

...or not.

If you played the hidden class, Simple, you'll respawn in Northen Lakes (see section 7 for more details). If you played as other class, that's everything!
7. Post-Game (Simple Class Only)
Northen Lakes
- Use the tree to return to Citadel City, then climb the Citadel Tower to the final boss.

Citadel Tower
- Save before talking to the boss.

Boss: Witch Cat
My level: 50 (Strength 28, Skill 64, Soul 148, Spite 64, Speed 21, Survival 28)

Just keep on attacking the boss until she dies.

Note that you can keep on fighting her for extra exp. She gives the most exp and easy to beat.

- Exit Citadel City by using the blue sphere outside the city.


- Go to Excavation, reachable by heading 2 screens north from Papoulas Graveyard. Feel free to talk to the skeleton in Papoulas Graveyard too.

Excavation
- Save and talk to the man on the northeast of the talking dog.


Boss: Graulf
My level: 54 (Strength 35, Skill 69, Soul 108, Spite 61, Speed 25, Survival 28)

Get a blessing from the priest in Fishing Village to improve your chances of winning. Just keep on attacking the boss until he dies. Keep Guard up at all times.

Note that you can also keep on fighting him.

- Head to Jufra Waterfalls. You can reach it from the owl.

Jufra Waterfalls
- Save and talk to the black creature.


Boss: Lost Kid
My level: 56 (Strength 35, Skill 70, Soul 111, Spite 57, Speed 25, Survival 30)

Get a blessing from the priest in Fishing Village to improve your chances of winning. Alternate between Guard > Attack/Heal > Umbrella/Ward. Make sure to get Insomnia memory equipped to negate the status ailments. I found Fractal Bolt to be quite effective against the enemy.

Note that you can also keep on fighting him.

- Head to Fishing Village.

Fishing Village
- Receive Blessing and Heal from the priest.
- Enter the chapel next to the priest.


Chapel of Saint Mortus
- Save and beat the boss.

Boss: Zengyrf
My level: 57 (Strength 35, Skill 70, Soul 151, Spite 53, Speed 22, Survival 30)

My gears:
Katana of the Whale (for Parry)
Spear of the Whale (for physical def stat)
Wand of Osmosis (for Ward + Absorb)
Kite Shield of Thunder (for Guard + counter)
Old Doll of Thunder (can be changed to anything that increases Soul stat)
Ring of Storm (can be changed to anything that increases Soul stat)
Tome of Gust (can be changed to anything that increases Soul stat)
Rune of Thunder (for Thunder)

Memory:
Calculus, Phospate, Bracer Snakes, Insomnia, Retribution, Loud Laughter, In-Sight, Phantom Buddy

Get a blessing from the priest in Fishing Village to improve your chances of winning. Alternate between Guard > Attack > Ward/Parry. I wanted to get Bunker skill but I couldn't seem to get it, so I switched to Parry instead. Try to get Absorb since you need to heal a lot (Monsoon + Petrichor won't be enough for this fight).

The fight will require a bit of luck. If your max HP get debuffed twice, your chance to die is high. If your HP is lower than 100, your chance to die is high. Just cast Parry whenever that happens to test your luck (Guard or Ward won't have any effect if you get attacked by a high damaging skill), then quickly cast heal/Absorb. Make sure to have Guard/Ward/Parry (or Bunker if you have it) up at all times.

If your HP is not maxed, use Absorb. If it's maxed, feel free to switch to other attacks (I used Thunder). Once the boss has less than 50% HP, he'll try to debuff your max HP a lot, so try to save your Ward from time to time and only use it 1 turn after your max HP is debuffed.

If you think that you are not strong enough, level up at Witch Cat and/or increase your stat by eating candies. I had 36k money at this point of the game, meaning that I could buy ~120 candies to increase my Soul stat if I wanted to make the fight easier. You can buy most of them from Bones N' Drinks (the inn in Fishing Village) for 300 each or Violeta in Boreal Beach (2 screens north from Grigori Village) for 400 each. I tried it and managed to beat the boss in 3 turns with 402 Soul stat.

Predecessor
Defeat Zengyrf the First Host


No, you can't refight this boss.
Need More Info
I'll leave some parts that I couldn't obtain here.

Mad Meadow
How to unlock this door.


Ragmarian Ruins
What to do with this shrine.


Wheel of the Future
How to open this chest.


There are also other stuffs like doors that couldn't be opened (the one in Papulous Graveyard and Fishing Village), but I'm not sure whether it's intended or not.

Also, is it possible to go to the upper side in City of Glass?

I'll leave it here for now in case there are other people who wants to explore about this further.
Afterword
I know it doesn't have 100% completion (helpful cartographer said that I missed 1 locked door) and I tend to be lazy at the end to specify the chests, but I hope it helps you to finish the game!
Credits
Takenchi for the info on how to reach 2 chests in Grigori Village.
bugfragged and Thatalent for info on how to spare The Baroness.
blackguard for info on path to Ganfel's house from Gravid Border.
anglerman for info on Jurisdiction and Predecessor achievement unlocks in this comment and info on Keen Angling, No Answers, and Impossible Alternative in this thread.
Pope for the information on how to access Totem Hills.
56 Comments
aquatorrent  [author] Jul 16, 2024 @ 1:00pm 
oioioioioifan: to be honest, i dont remember much of the game, but have you tried doing all the things i mentioned on the bog area? They might unlock something to unlock the area. On the other hand, it is not a missable area and you can proceed the game without it so you might want to continue playing to see if it unlocks that way. Sorry for not being much help, but hopefully it'll help! :)
oioioioioifan Jul 16, 2024 @ 12:02pm 
hey, i'm stuck, i tried going to the well but where the statue is located there's rocks on both sides, so i can't move on, is this a bug? do i need to beat someone or do something to access the place further?
Icy-Cream Aug 12, 2023 @ 3:20am 
Hooray! Thanks for permission! :ojseagull:

Never mind! Maybe its the update issue in chatting. :sadpizzaboy:

I'll leave the message here when I'm done. :chest_px:
aquatorrent  [author] Aug 12, 2023 @ 2:55am 
@Icy-Cream: no problem! and sure, as long as you credit me, that's alright.
and sorry for not responding to your message. i don't think i got it... steam chat notification is a bit weird on mine recently.
Icy-Cream Aug 12, 2023 @ 2:47am 
Oooh, that makes me feel better for not doing something unnecessary, thanks for comfort!!:gnogmusic:

Anyway, may I translate part of your guide into Chinese please?

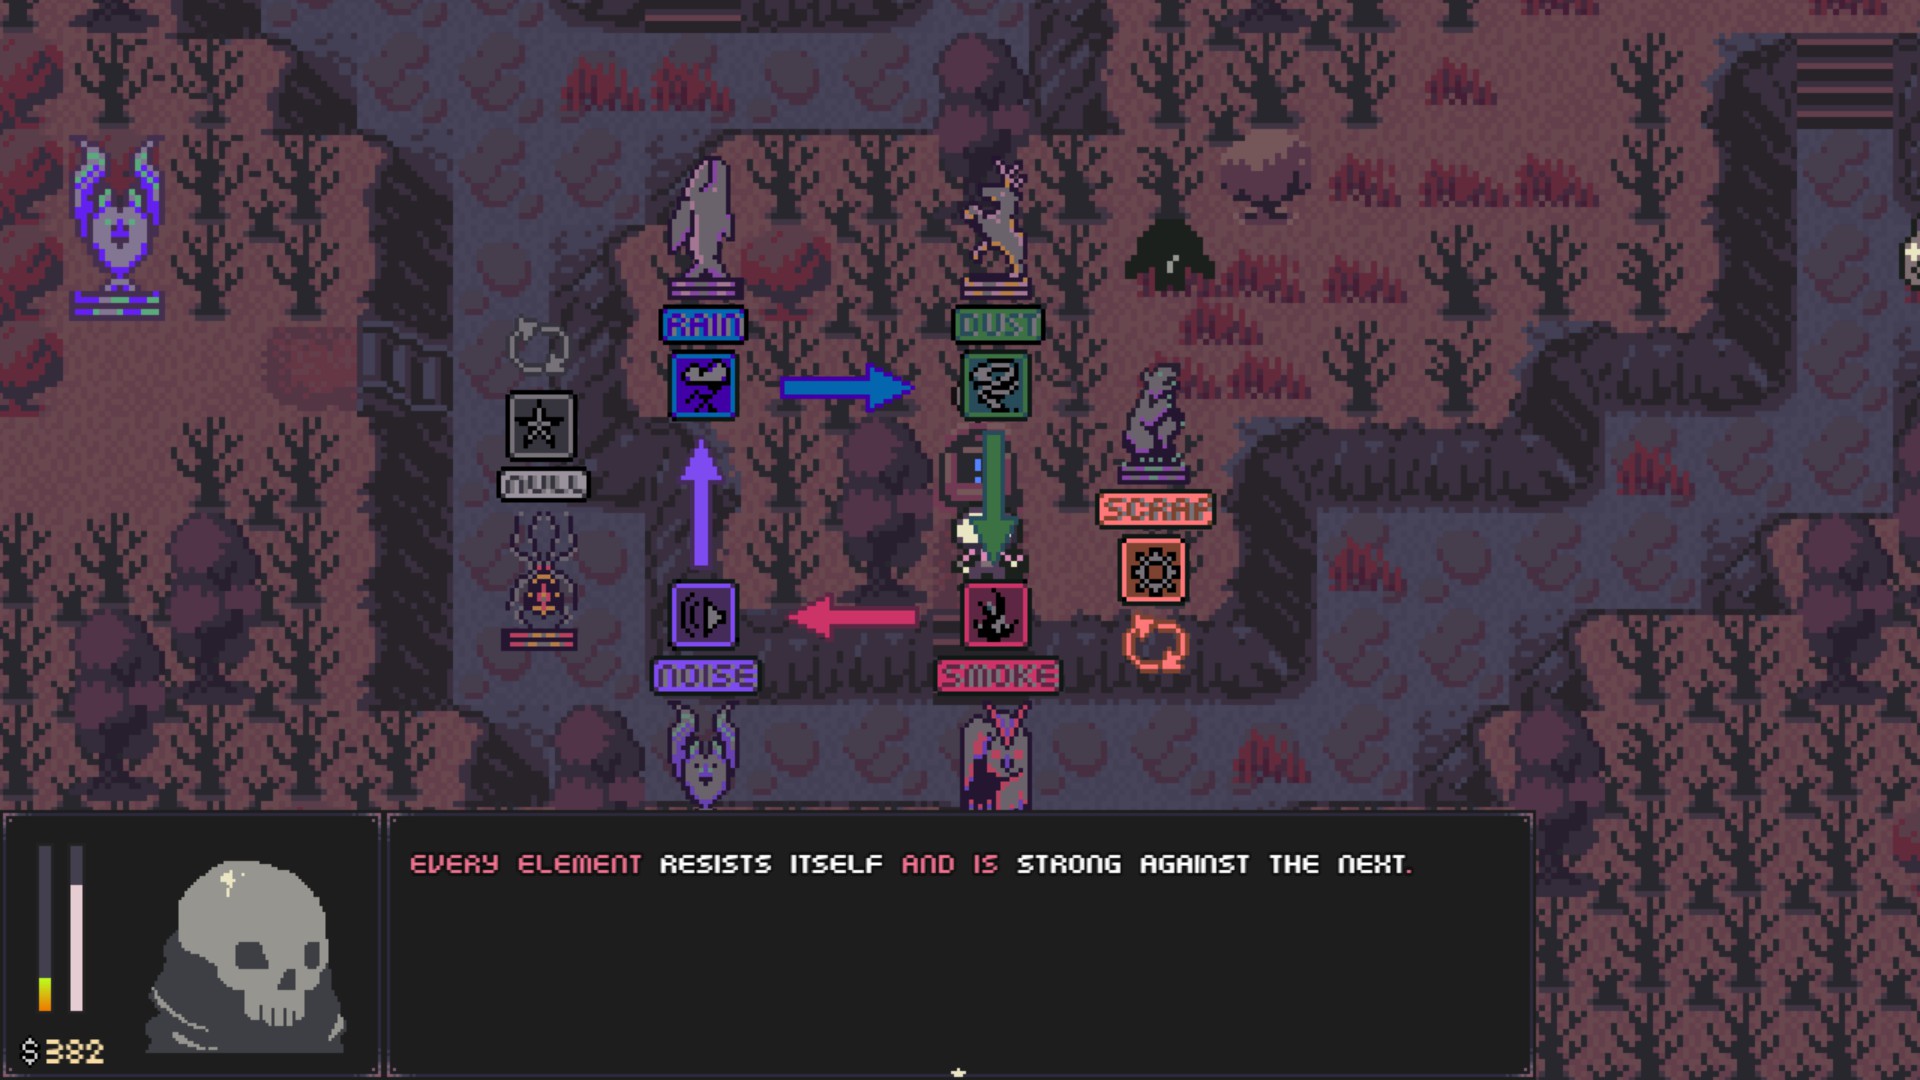
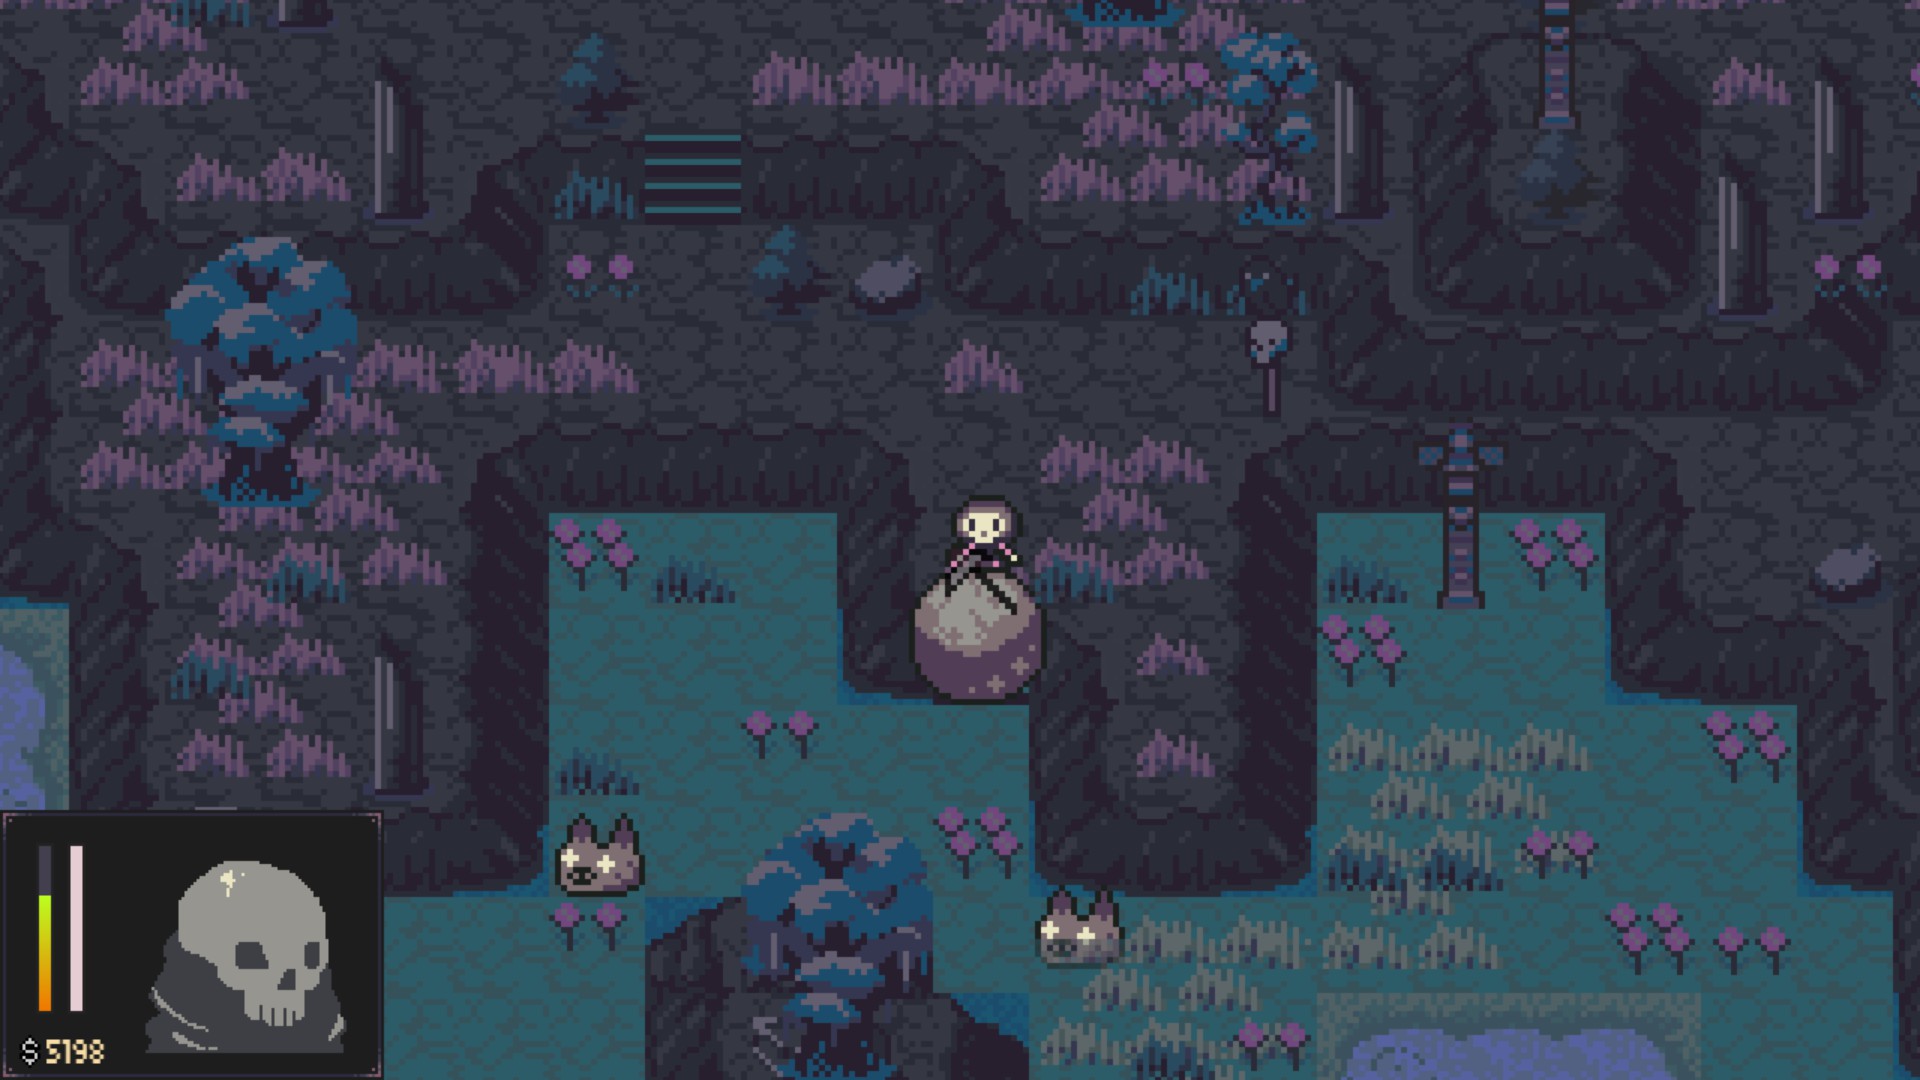
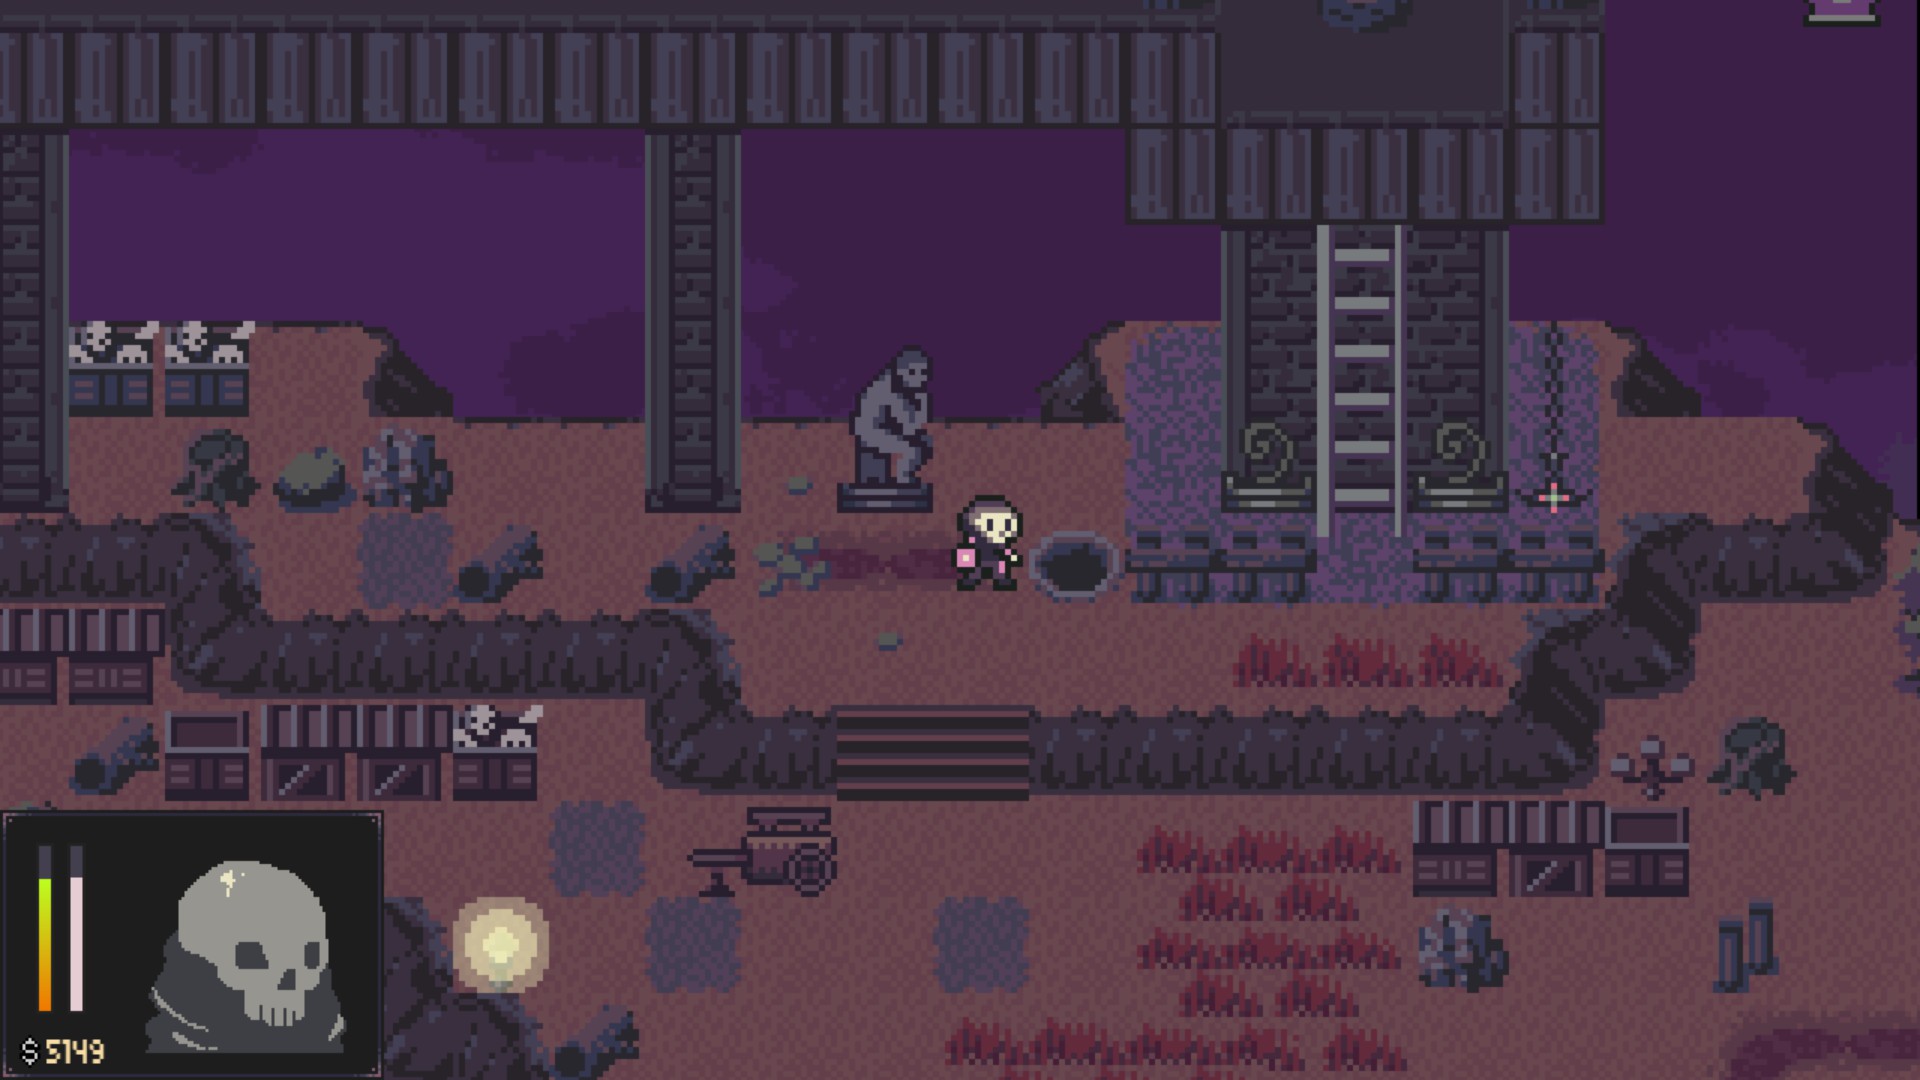
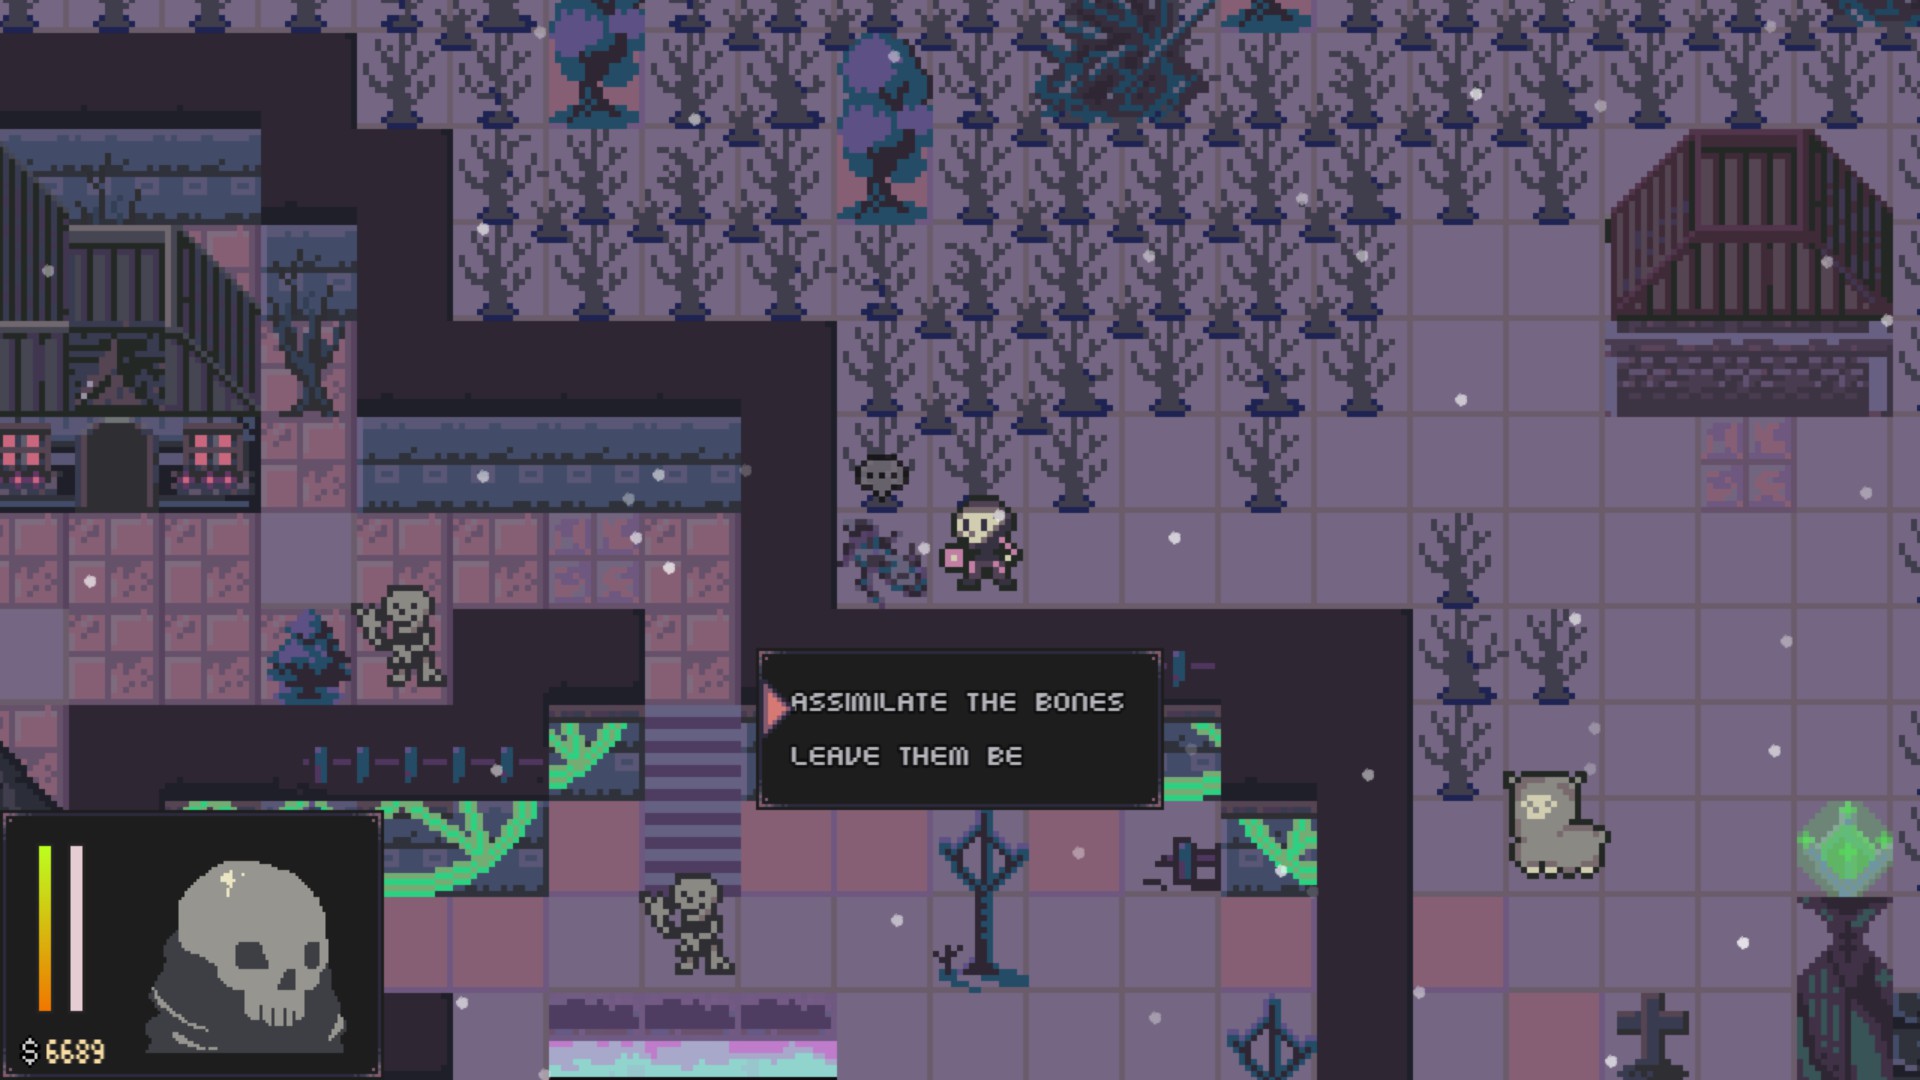
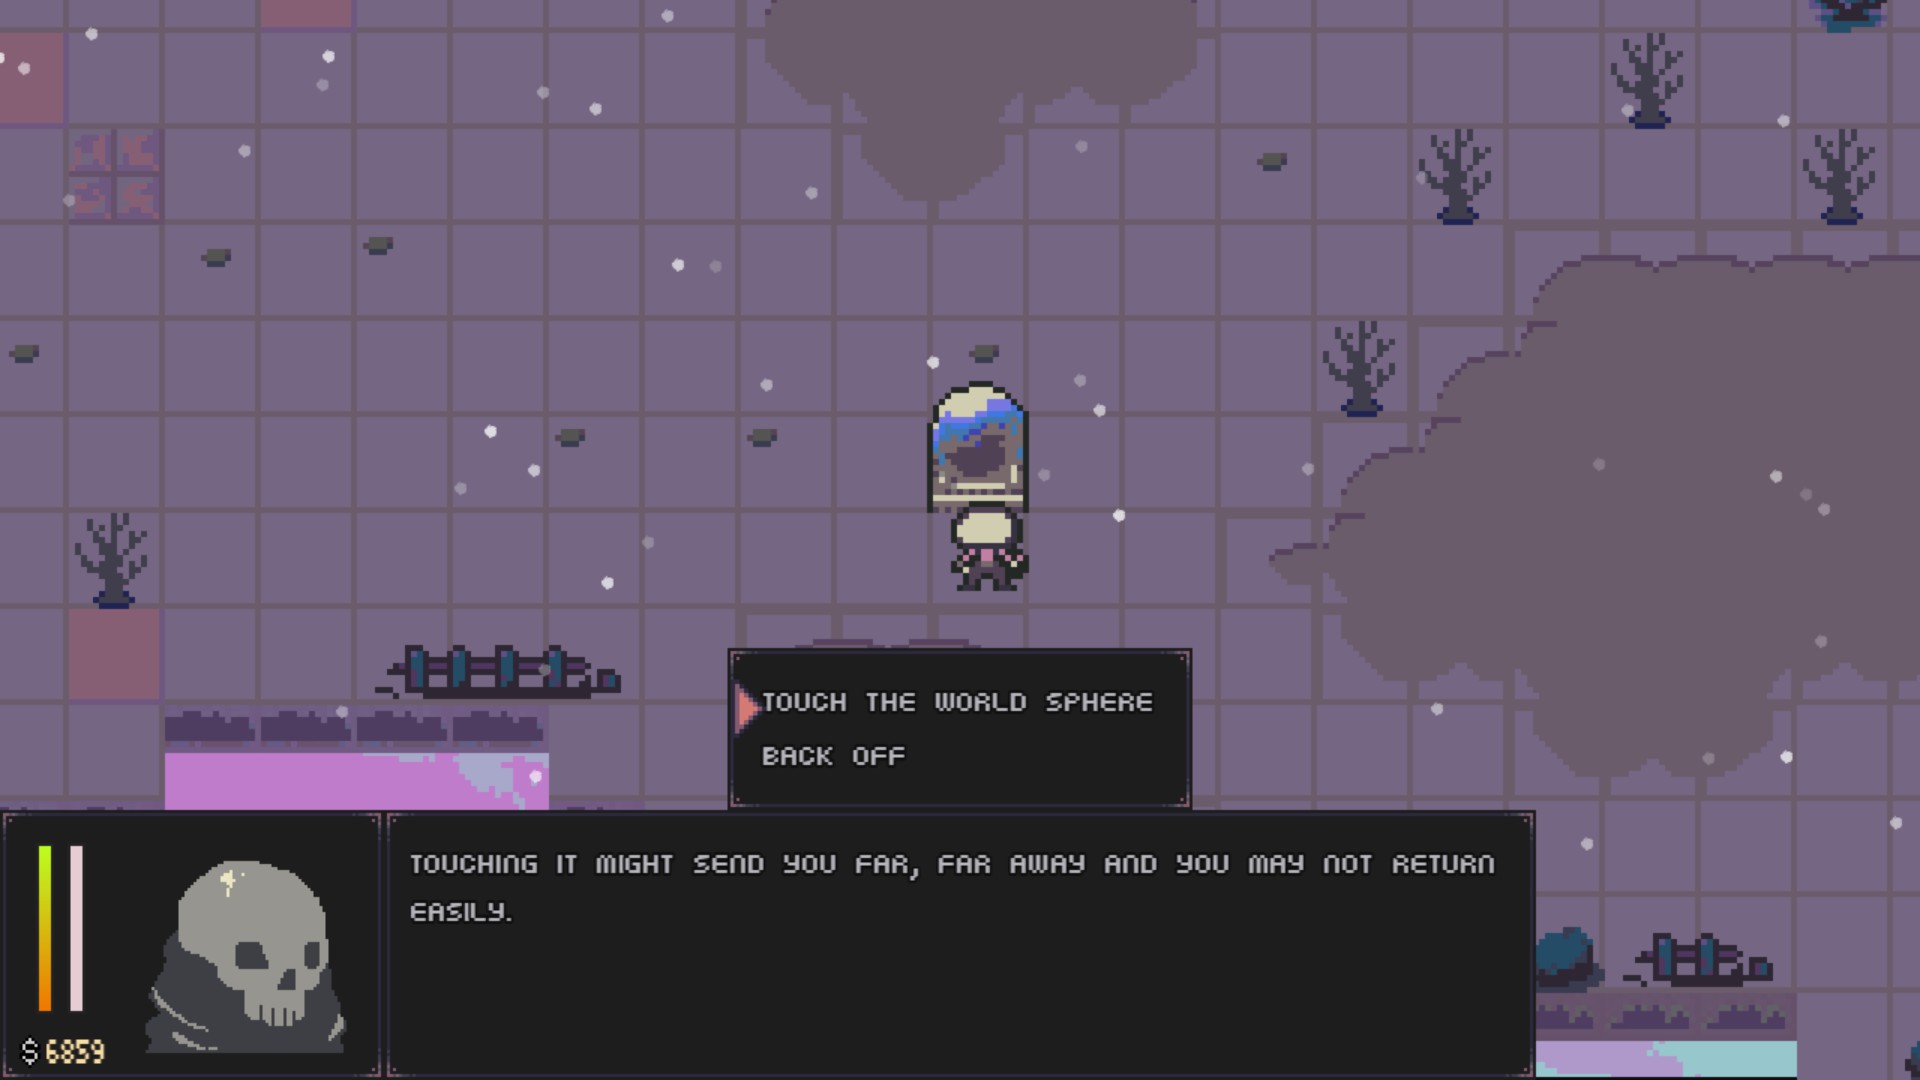
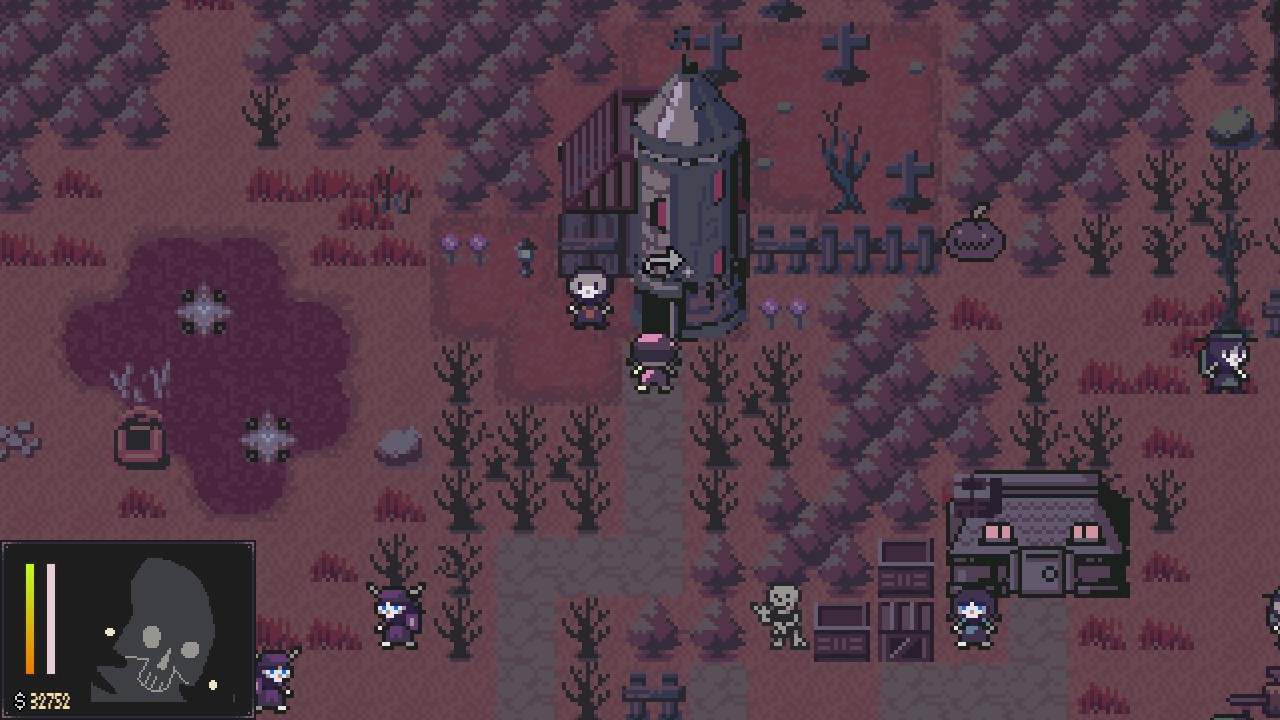
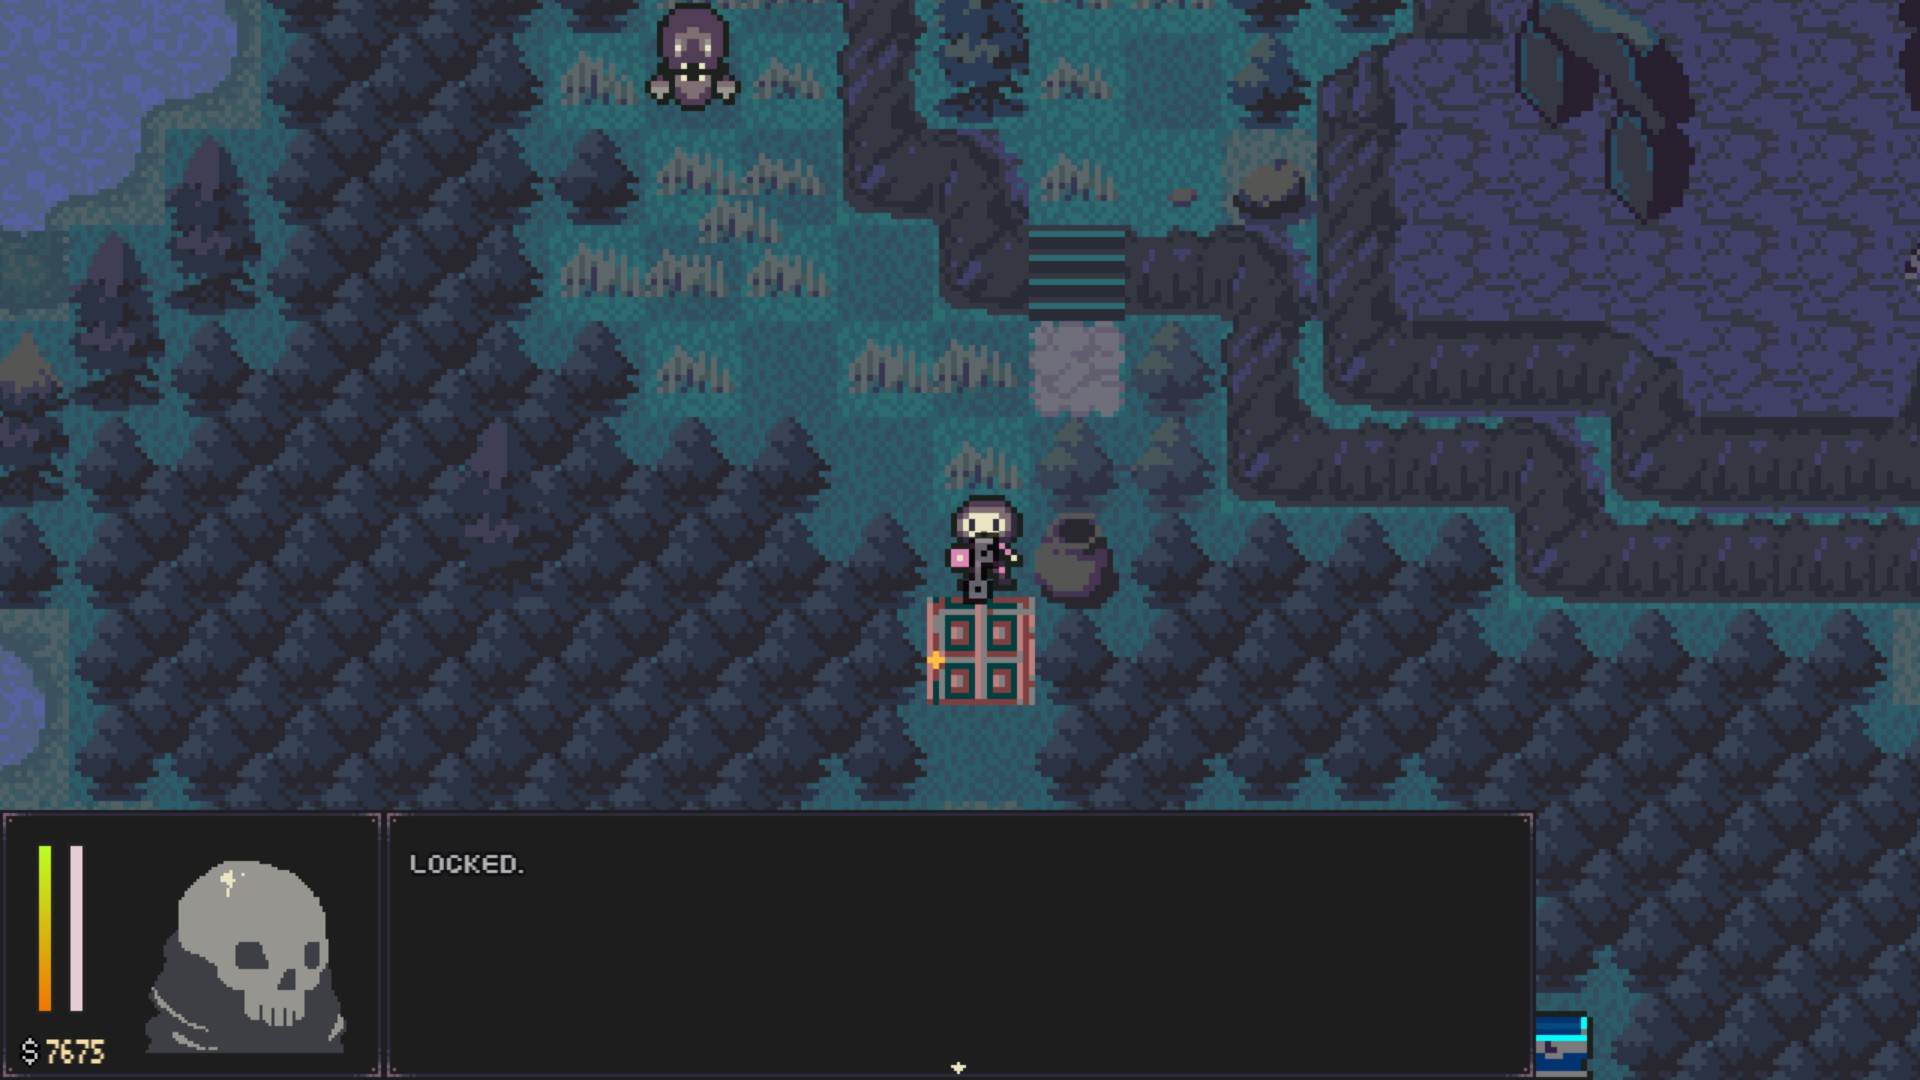
One of my friend Amazing-X-Brain helped devs localize this game in Chinese recently, I want to help out tooo, since there're many Chinese reviews & players who bought it because of their next game Virgo VS Zodiac. But we get lost in maze or trap very soon for the reason that map is blurry or the key is hard to find.

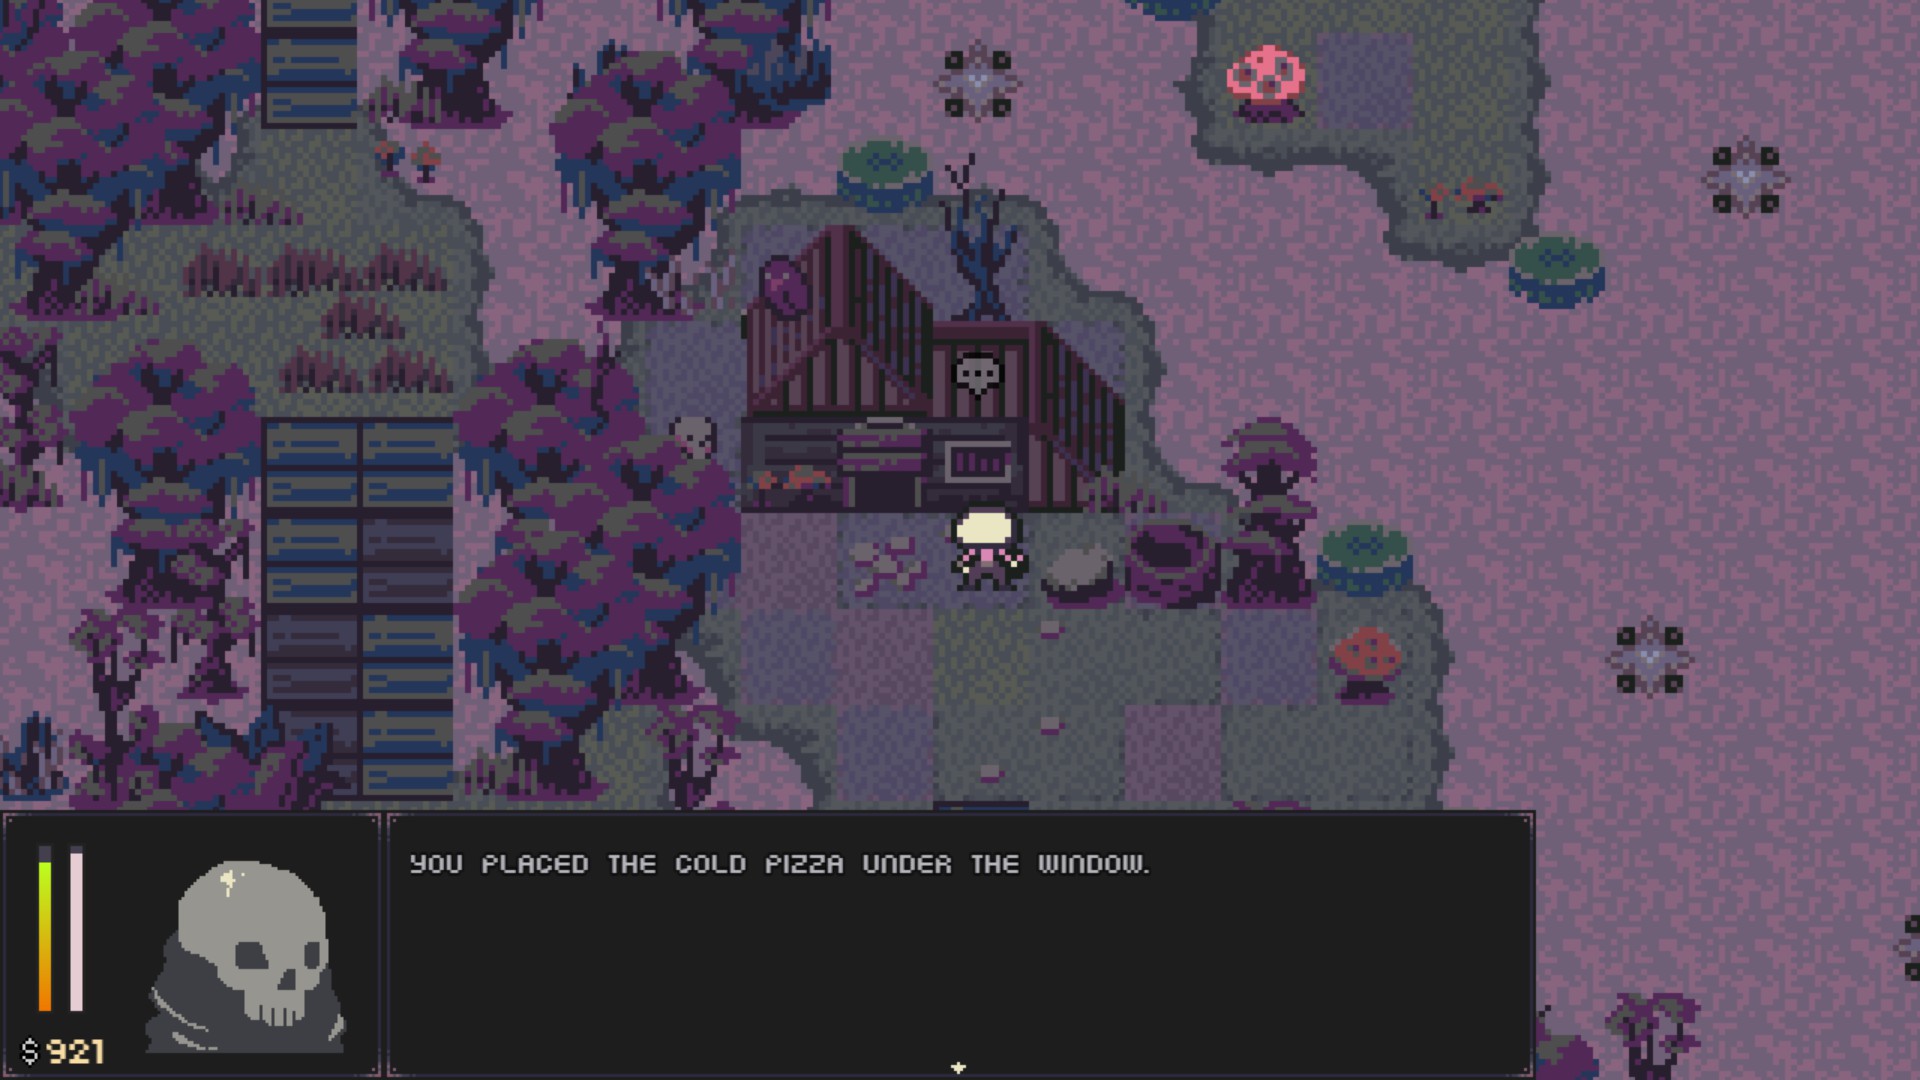
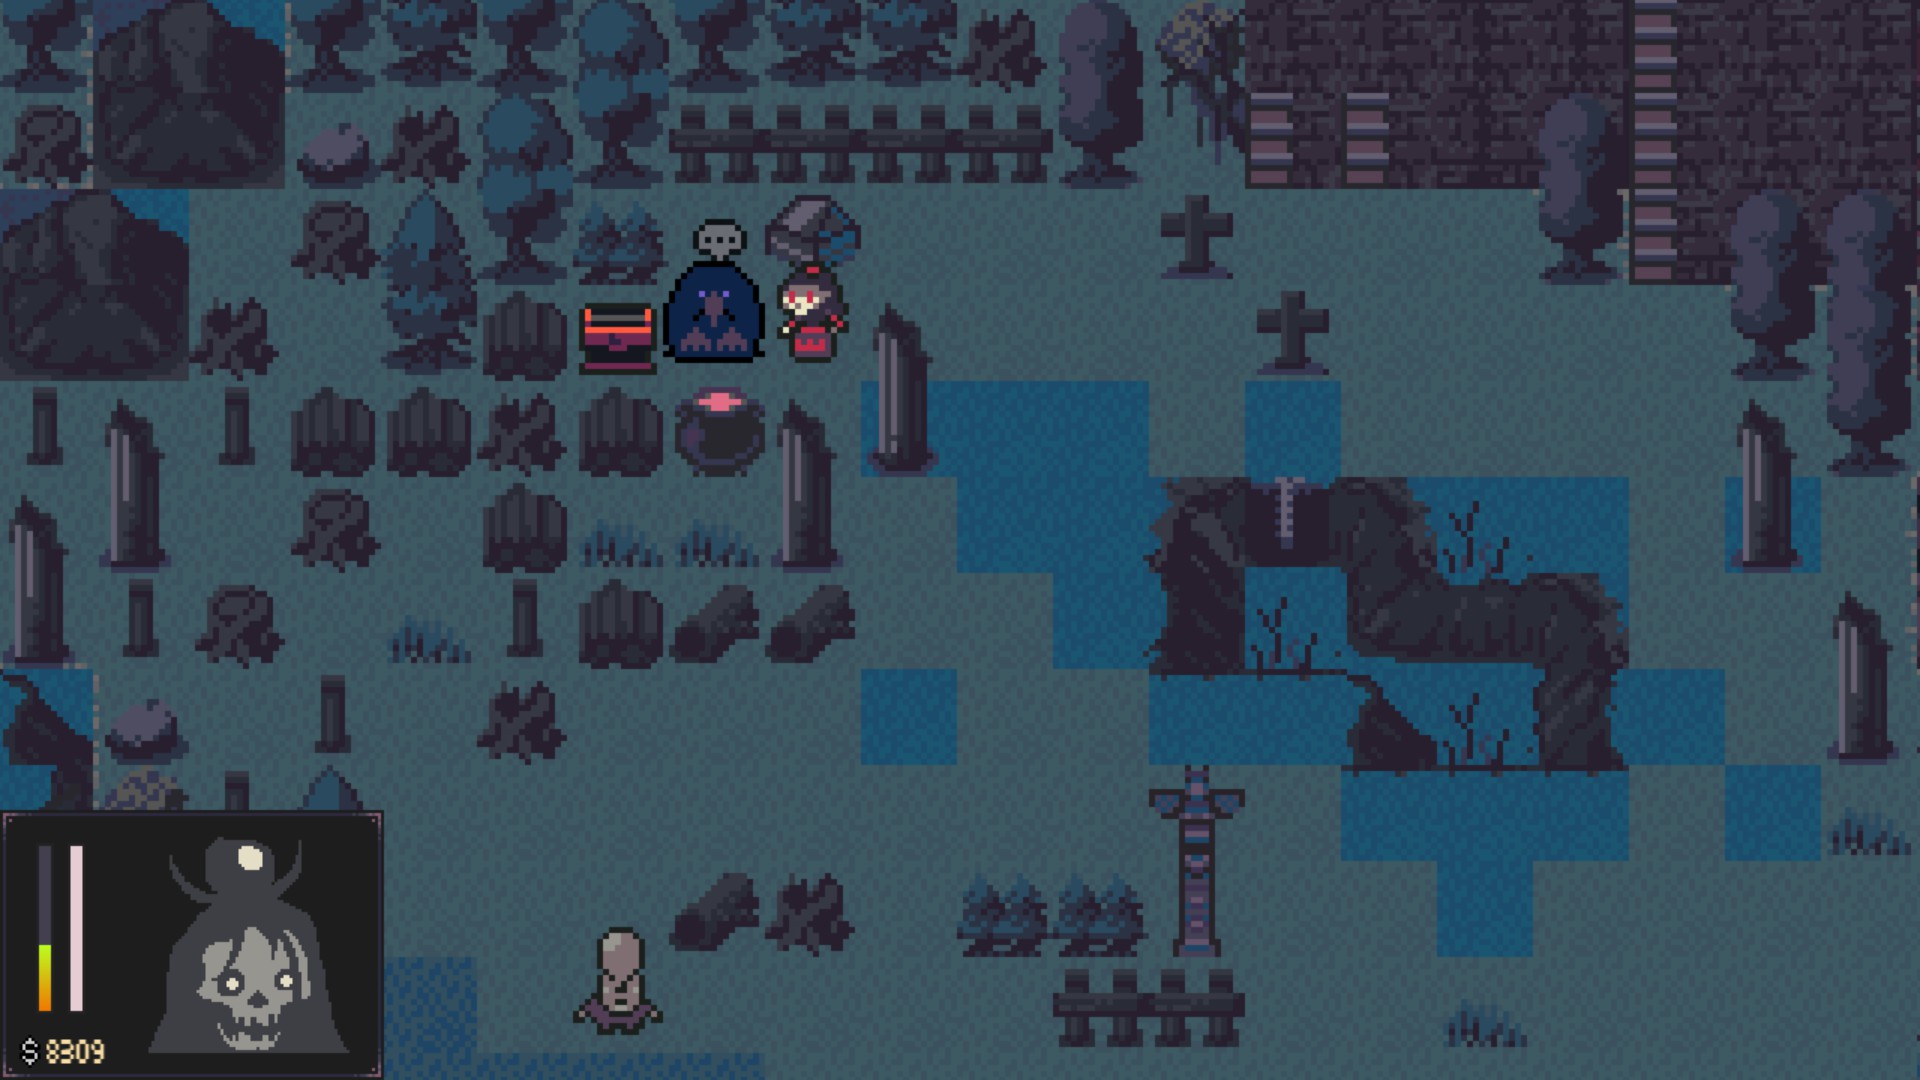
In fact I lost my way finding crow key and sending you message on August 4th in the friends queues. Finally, later on August 10th I manage to find it behind the Abandoned Shack, in the Jufra Waterfalls. :leaCheese: I still miss the Labyrinth of the Mind cause I cannot find the way to it. RPG's faqs I suppose.:ThinkingBetrayal:

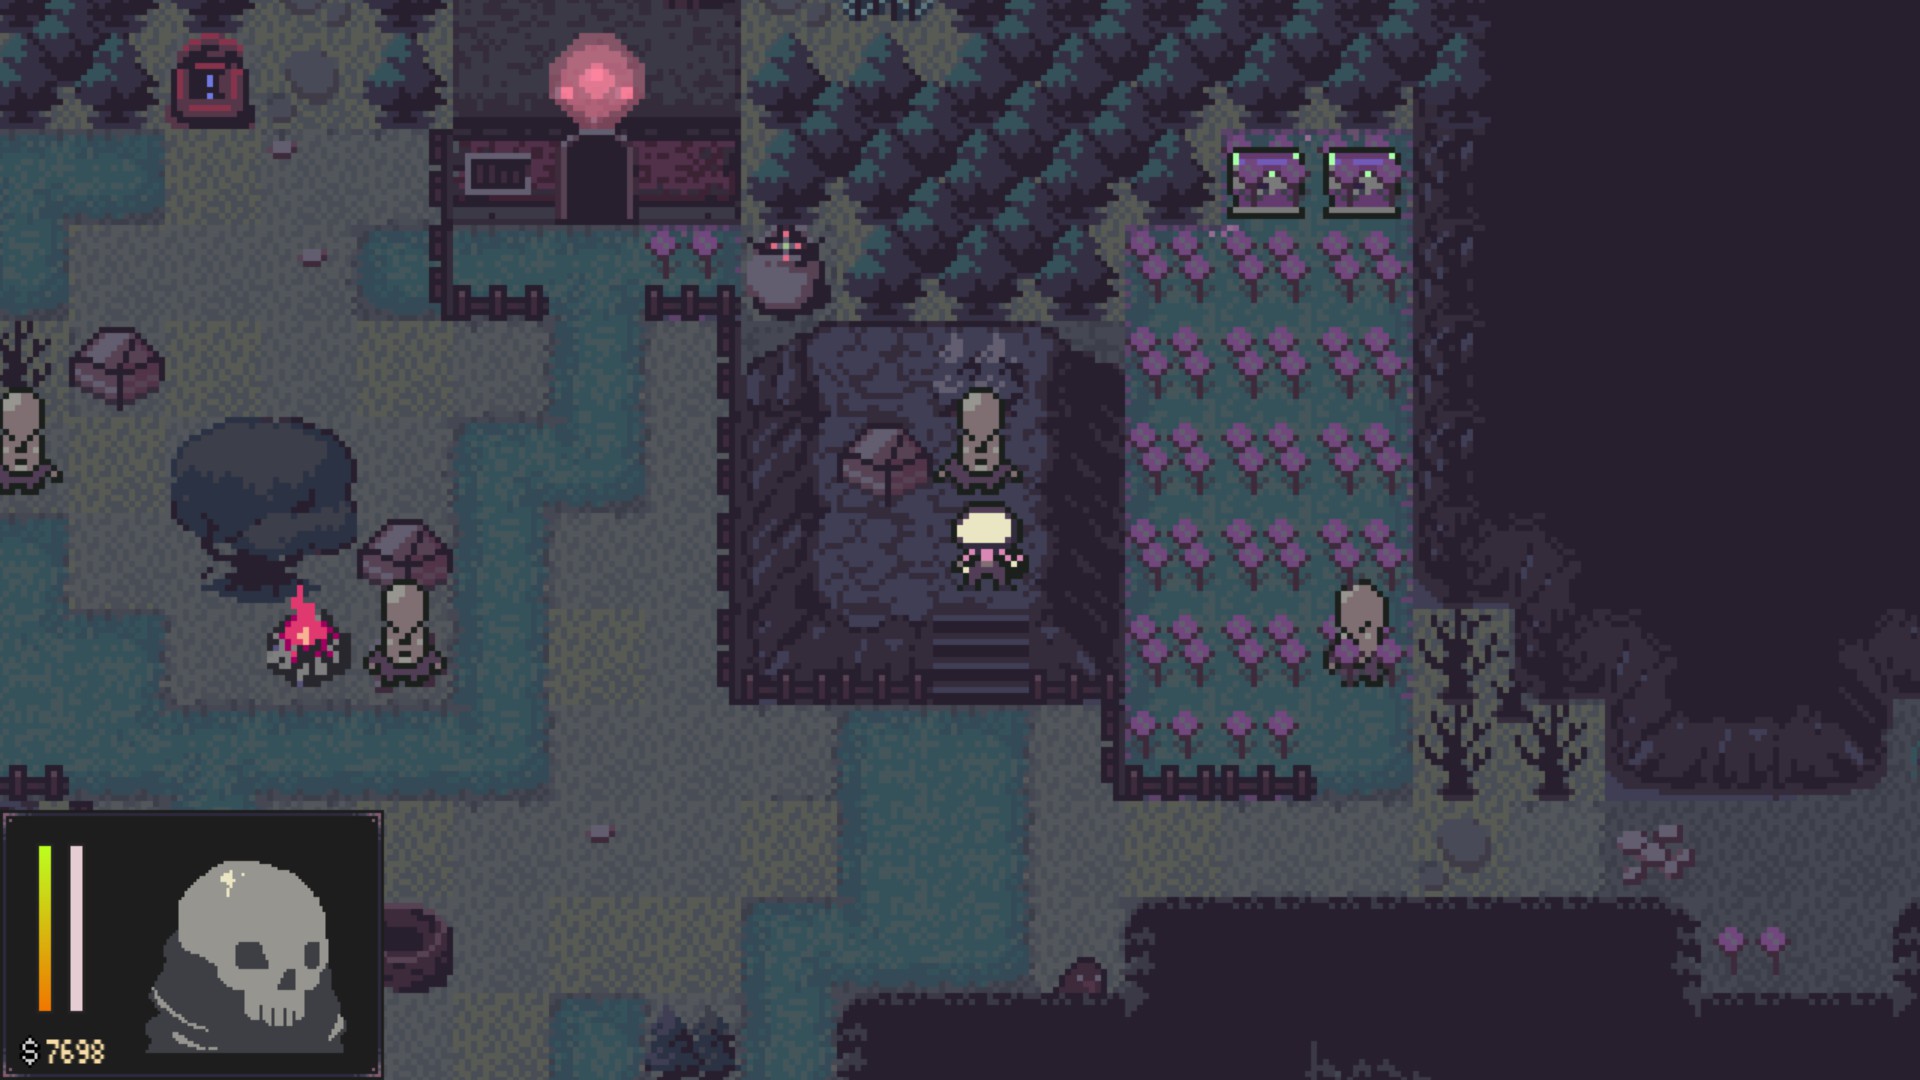
My guide is aiming to solve these place where you easily get lost, I'll @you at the very beginning if It's my honor, please.
aquatorrent  [author] Aug 11, 2023 @ 6:38pm 
@Icy-Cream: thank you! Actually, you still need to finish the game twice even if you play as a simple class. One achievement isnt available as that class :)
Icy-Cream Aug 11, 2023 @ 5:54pm 
Great guide! To whom It may concern, the hidden class Simple is only available when selecting class from the beginning.

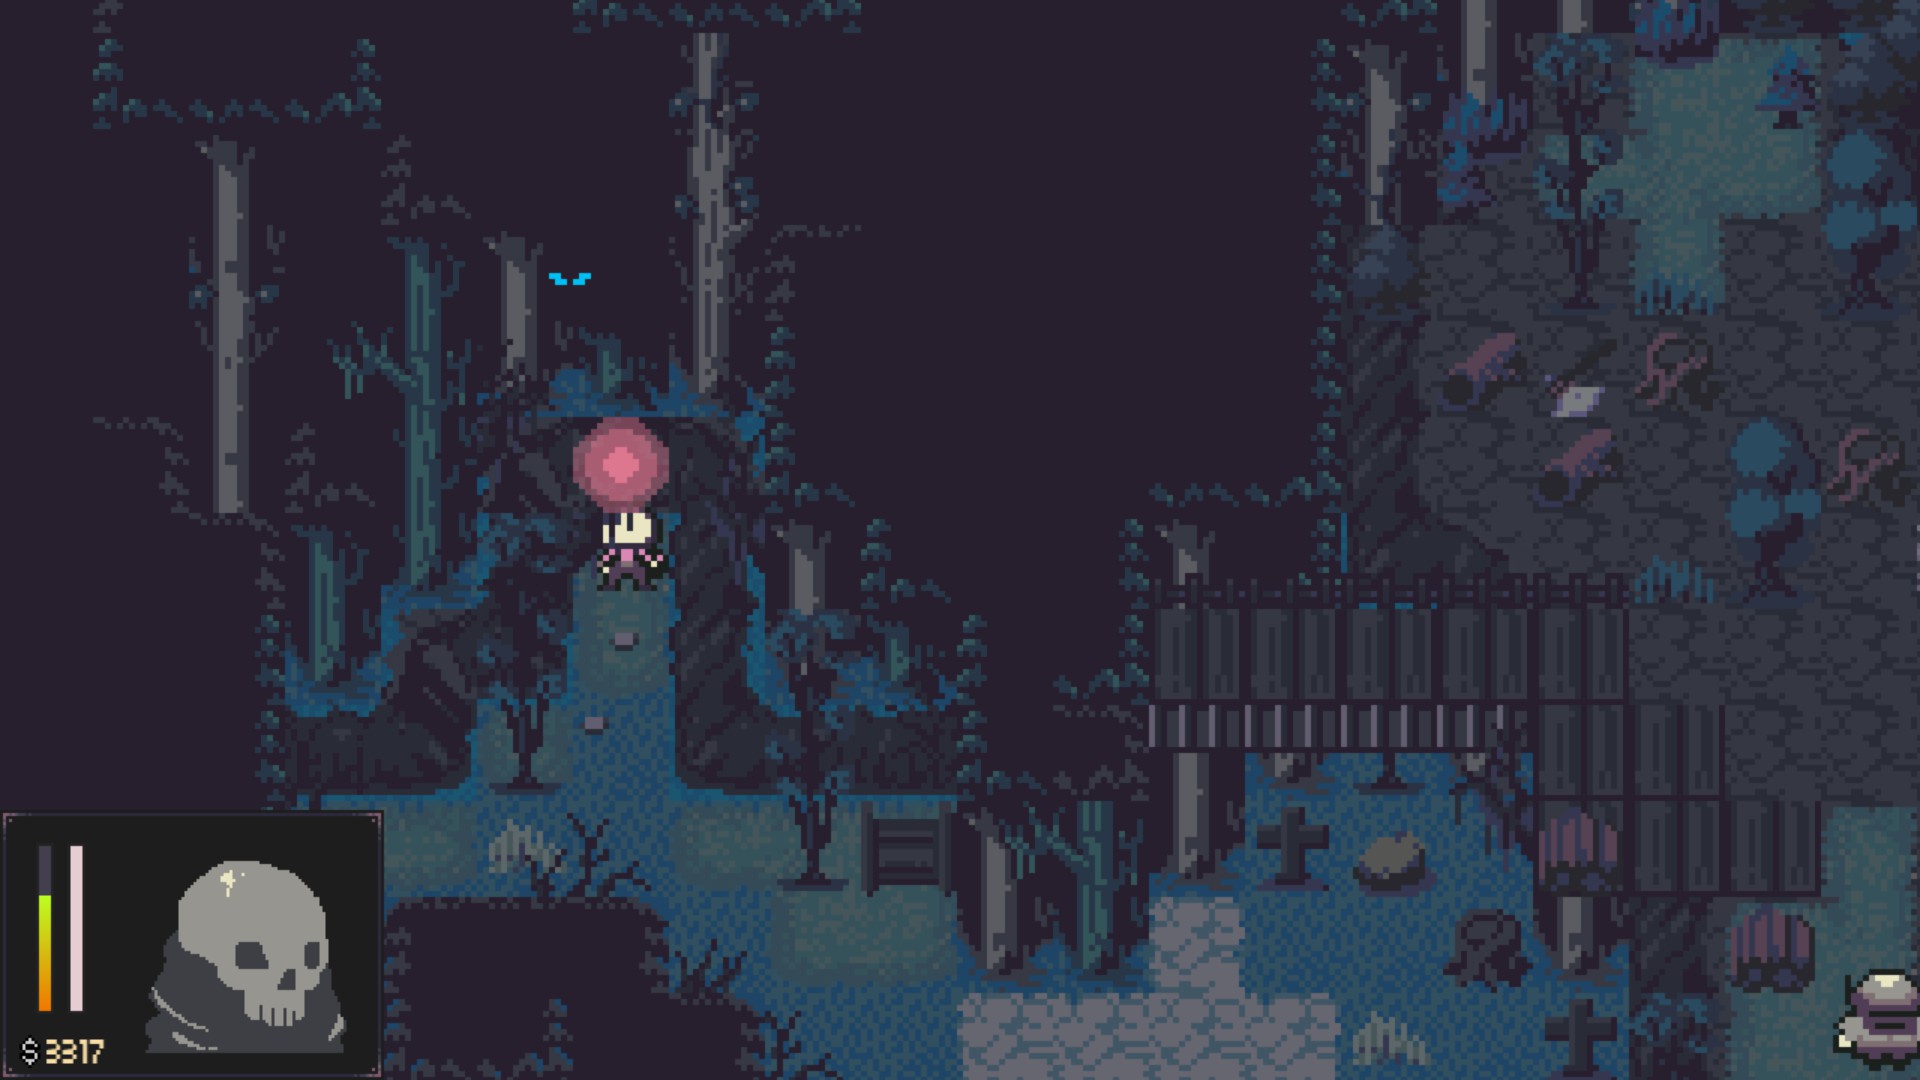
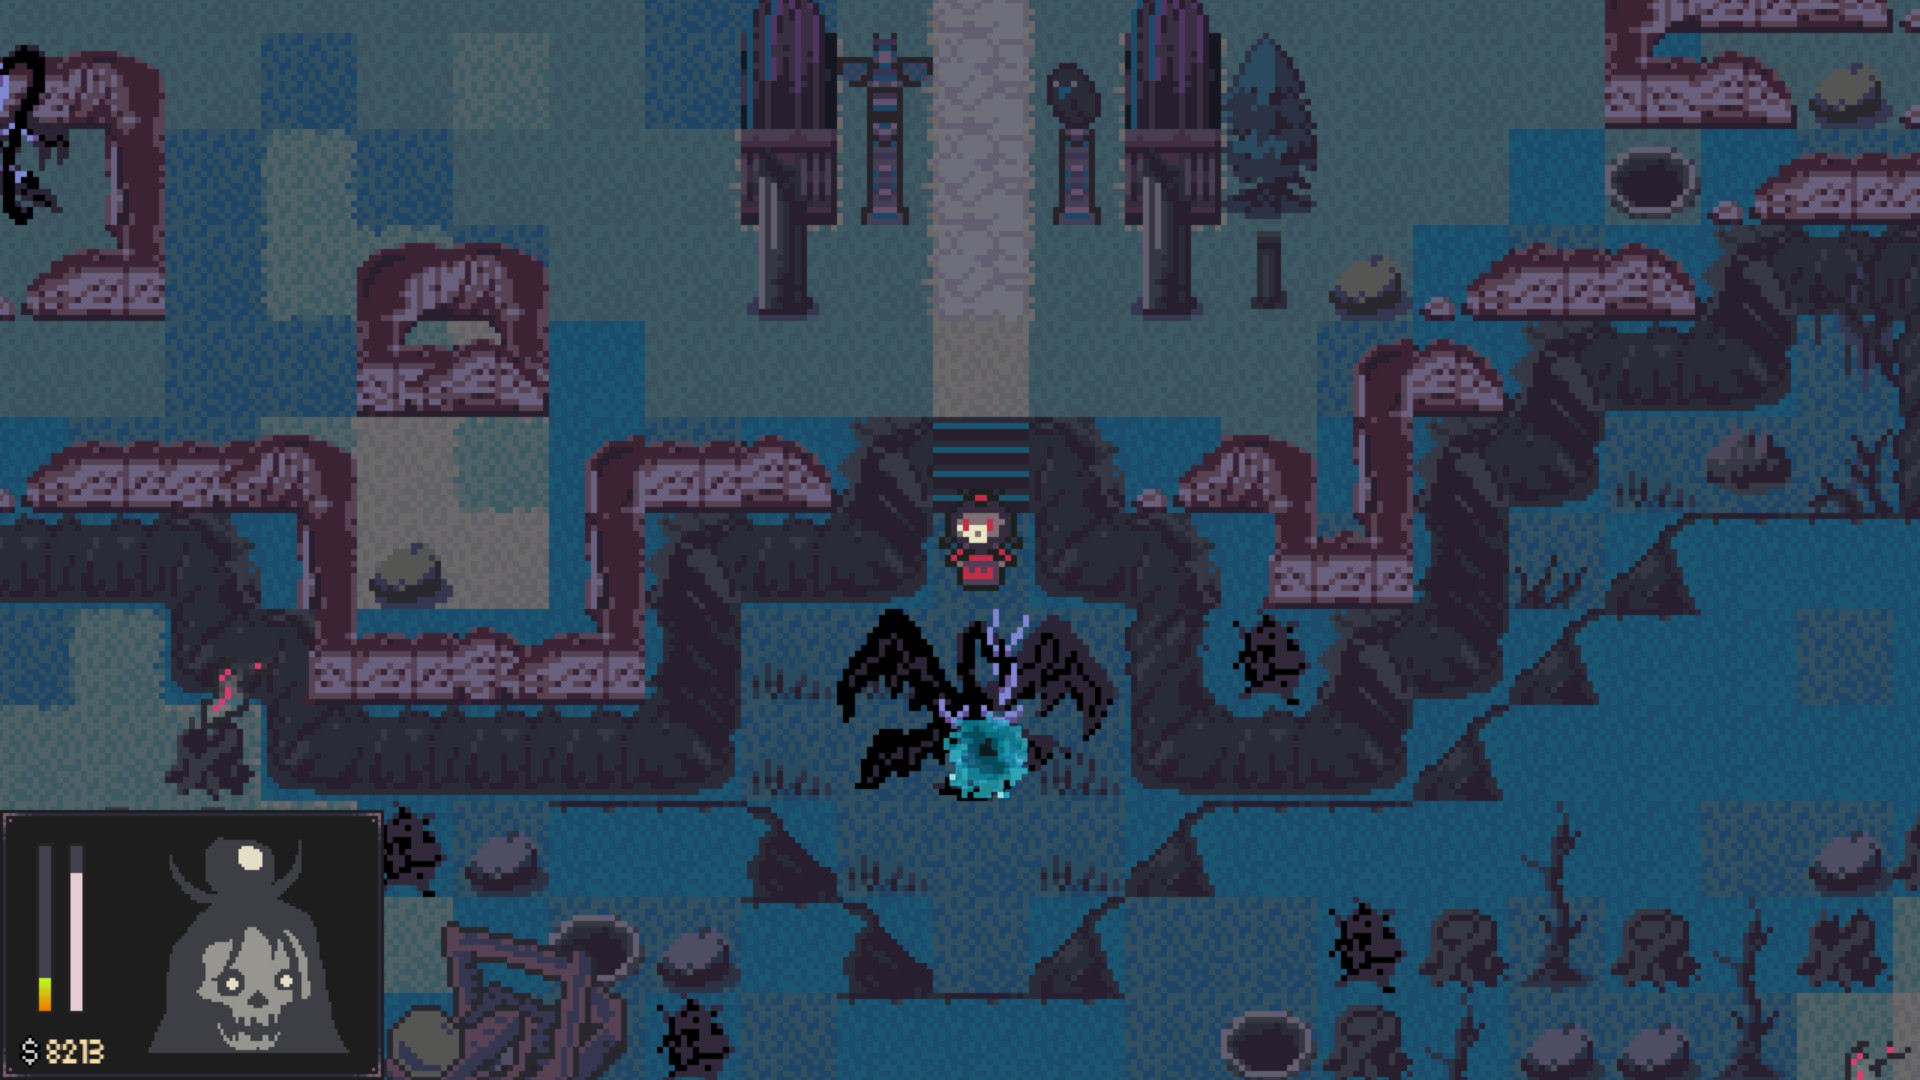
I finish the section 6 as Shaman, level 65, there's no clue to turn into Simple to continue section 7 after beating Graulf with an achievement, which means the second time playing is a necessity.

_(:з」∠)_ How painful to start from nothing once more. sigh:whitehead:
aquatorrent  [author] Mar 7, 2023 @ 2:44am 
@Pope: thanks for letting me know! I'll put it in the guide.
ꜱᴀᴍᴘʟᴇ Mar 6, 2023 @ 12:23pm 
know this is a bit late, but you actually need the insomnia passive to get past the path to totem hills, otherwise you fall asleep along the way
aquatorrent  [author] Feb 4, 2023 @ 5:38am 
@PapaKavs: no problem! you can try creating a thread about it. the developer is usually quite active on the discussion thread :)