Terraria

Terraria

Not enough ratings
Terraria Boss Ideas Part 5 [Bosses 101-120]
By Okami Tomato
Despite what I had originally anticipated and planned, Boss Page 5 didn't end with the 100th boss. Numerous bosses which originally got cut or who lost their places to more interesting or important bosses may finally get a chance to make an appearance. Also, quite a few bosses who were made after #100 was in-production can also be found here.

Anyways, as the usual disclaimer, this isn't a guide and is, in fact, ideas for bosses that do not exist in the vanilla game.

Well, I hope you enjoy more boss ideas :)
   
Award
Favorite
Favorited
Unfavorite
[Prior Notes]
Another small collection of recent news related to the boss pages, as usual they will be marked depending on whether they just affect this page or if it counts for numerous different ones.

1. Pseudo-Calamity-Crossover-Content
The Reanimators (#101) use outdated Calamity boss designs in theirs. This is completely intentional when taking into consideration their lore. However, to make sure the designs are still unique, most of the Reanimator bosses are only parts of the bosses or have been altered to make them more interesting to look at (from the view of people who've played over versions of Calamity). Their fights, stats, and drops will also be different and their colour schemes partially washed out ("Due to age").

This, however, is probably going to be the end of it, unless the Reanimators get any more bosses later in the game.

2. Biomes
Instead of this page only consisting of bosses, some of the biomes mentioned in boss' descriptions will be given brief pages alongside their respective bosses. Currently planned for this are the Necro Dungeon (Which has 2 extra bosses associated with it outside of the ones from Boss Ideas 4), the new Autumn Biome (Which has 2), Buried Undergrowth (1) and the Pearl Seabed (2).

The bosses themselves will still be listed separately, however, and will not be grouped together.

3. Lore
The lore page may not be being made entirely public when finished due to some potential confusion it may cause if people were either expecting more boss sprites, mistake parts of it for me trying to change the official lore or, in case it becomes popular enough to make it to the homepage, confuse people who haven't seen the others.

The page will probably still be finished, but may end up friends-only unless people genuinely want to see it publicly (which is fairly unlikely due to the lack of interest the lore seems to gather).

4. Post-Moon Lord Damage Multipliers
Due to a realisation that the majority of Post-Moon Lord bosses actually deal rather insignificant damage, I have decided to add damage multipliers to their attacks as opposed to going back through each one individually and altering them all (as there are around 100 Post-Moon Lord bossesat this point). Therefore, damage multipliers work like this:
-If 0 Post-Moon Lord bosses have been defeated, the multiplier is 1x
-If 1 has been defeated, the multiplier is 1.15x
-If 2 have been defeated, the multiplier is 1.3x
-If 3 or more have been defeated, the multiplier is 1.5x
This also applies to Chaos Mode bosses; replacing their original ability to ignore 50% of player defence, but the halved bonuses to damage reduction still apply
101 - Reanimators
Appearance: Reanimators themselves are tiny black serpentine creatures. Their bodies so dark in colouration that it absorbs any light that makes contact, leaving them unreflective. The only parts of their bodies that isn't completely unreflective are their eyes, which are a greenish colour. Reanimators have unusual abilities, being able to reactivate slain monsters they encounter, with larger ones being resurrected only when enough Reanimators are present. However, the problem is that reviving these creatures leaves them in a zombified state, thus forcing the Reanimators themselves to pilot them.

[Unofficial Partner Content: Calamity Mod]

Death Weaver - The revived remnants of an old Storm Weaver, brought back by a small group of Reanimators who found his wreckage smouldering away on a sky island. The body, unsalvageable, was replaced entirely by the Reanimators with themselves.

Cryocore - An old Cryogen, revived after Reanimators burrowed through it whilst travelling through the snow. They use it as a mobile nest; using it as a home while also being to control its movements at will. The Cryogen itself, somehow still partially alive, doesn't seem to care all too much.

Astrum Resurgent - Plating of what is believed to have been the original Astrum Deus, found and salvaged after its battle against the Devourer of Gods long ago. Countless Reanimators piled within it, attempting to reactivate what remained of the slain deity; being partially successful.

Defeat: Most of the bosses explode into gibs, with the Reanimators being dropped whole while the previous boss' bodies shatter.

GelTech Info:
[Dropped upon defeating the 2nd Reanimator boss]
-Reanimators, despite their plain and underwhelming appearances, are in fact excessively powerful. The unusual energies surging through their bodies allow them to revive slain creatures they come into contact with, though usually in vague, zombified versions of their former selves.

Drops: Usually only materials with the rare weapon. Their Expert Mode items are usually based at least partially on their boss' Expert Items if applicable.

Extra Info:
-The Reanimator bosses had designs dating back to early 2019, but were scrapped twice since then, only to re-emerge now.
-The bosses the Reanimators have re-awoken are all bosses who received drastically different designs later in their development, but all with heavily-altered designs and inclusion of at least a few visible Reanimators in each of them.
-Their black, non-reflective bodies are fairly similar in nature to the Abyssnails, which also lacked any sort of reflectivity
[Added: 28/6/19 - 28/6/19]
101A - Death Weaver
Appearance: An older version of Storm Weaver, revived by the Reanimators. Its entire body appears to be made of numerous Reanimators clumped together, though the jaws, eye, and bands around the old Weaver managed to survive.

Summon: Use the Reanimated Rune at the surface or in space. The boss will become enraged if taken underground at all, increasing its movement speed significantly.

[Fought: Post-Moon Lord]

Stats:
Health:
-65,000 (100,000) (Phase 1)
-500,000 (850,000) (Phase 2)
Attack:
-130 (300) (Head Melee)
-80 (130) (Body Melee)
-82 (136) (Overflowing Energy)
Defence:
-85,000 (Phase 1 Head, Body)
-20 (Phase 2 Head, Body, Tail)
-0 (Phase 1 Tail)

[All of this boss' attacks inflict Reversed Reanimation]
Debuff: Reversed Reanimation:
-Deals 20 damage per second, reduces damage reduction and damage by 10% and defence by 10

Attacks:
Phase 1:
Death Weaver starts out flying around above the player in a motion similar to a figure of eight. If the player flies too far from the ground it will begin charging into the player directly, being able to turn extremely sharply and reaching speeds up to 120 mph. Its head and body are immune to most damage, though its tail has no defence or damage reduction to speak of; making it the main target.
-Weaver may launch overflowing energy balls from its head which fly directly at the player in a straight line
-The Weaver's tail may launch large flurries of overflowing energy balls at the player and does more often when being damaged or while at lower health.
Once it reaches 0 health it transitions into Phase 2
Phase 2:
The Weaver now attempts to ram into the player regardless of whether they are grounded or not, but takes longer to turn. Its body and head now have the same defence as its tail and the tail is given a bit of defence.
-Its head and tail still act the same when it comes to launching projectiles at the player
-Its body segments may charge up energy balls as well, though they move slower and take ~1-2 seconds to charge before being fired.

Defeat: Explodes into gibs. The Reanimators remain in-tact while the gems that came from the Storm Weaver shatter into pieces.

GelTech Info:
-This former Storm Weaver was replaced long ago after losing to a powerful warrior. Since then, a superior Weaver has taken its place and this one was left to rust and rot among the plants. Reanimators found its remains and began the process of rebuilding it and taking it back to its prime.

Drops: Storm Gemstone Dust; a material used to craft a few weapons and an accessory. In Expert Mode it may also drop a pair of Storm Wings which are fast but have rather poor flight time for Post-Moon Lord wings.

Extra Info:
-Despite apparently being the original Storm Weaver, additional gemstones not seen on the original are present, and the blue band at the front of its body inverted.
--The band also now has a Reanimator through it; potentially the leader of the Death Weaver's Reanimators
-Despite saying they wanted to restore it back its prime in the GelTech the Death Weaver is overall stronger than the original Storm Weaver was anyways, having a more durable Phase 1 and elements of the current Storm Weaver's Death Mode movements in Phase 2. While it lacks the minions, it has more projectiles and is harder to kill.
-The Death Weaver was the 3rd and final of the Reanimator bosses and was originally the only one not at all planned to have a Reanimated variant. However, upon seeing the sheer difference between the original Storm Weaver and the new one, I decided to make it.
[Added: 28/6/19]
101B - Cryocore
Appearance: The old Cryogen, brought back by the Reanimators. 4 Reanimators can be seen inside of it; 3 bursting out of its sides and one who remains stationary inside of its centre. The frost barrier is more jagged and spiky, and is made of more numerous but thinner individual pieces of ice.

Summon: Use the Reanimated Key in the snow biome. The boss becomes enraged if taken out of its biome; gaining 5x defence, 3x attack and 2x speed until re-entering its biome. The boss only despawns if there are no targets nearby or if someone attempts to take it to the underworld, where it flies upwards suddenly and keeps flying upwards until it goes too high and despawns.

[Fought: Post-Moon Lord]

Stats:
Health:
-48,000 (80,000) (x3) (Shield)
-400,000 (675,000) (Cryocore)
--544,000 (915,000) (Total)
Attack:
-80 (145) (Melee)
-70 (128) (Snowflake)
-68 (125) (Snowflake Fragment)
-74 (135) (Cartwheeling Snowflake/ Icicle)
-78 (141) (Icy Bolt)
Defence:
-200 (Shield)
-100 (Cryocore)

[All attacks inflict Chilled 100% of the time, Frostburn 50% of the time, and may inflict Frozen 20% of the time in Expert Mode only]

Attacks:
Phase 1:
The Cryocore moves towards the player, shield active, teleporting every 8-10 seconds. All attacks will only hit the shield and cannot damage the Cryocore at any point.
Once the shield is broken, the Cryocore initiates its 2nd phase
Phase 2:
The Cryocore moves like it did before, but faster. The Cryocore, due to it lacking a shield, is now vulnerable. It gains an actual ranged attack in this phase.
-It may launch several snowflake-shaped projectiles that hang in the air before exploding into smaller shards. These shards are released in random directions and keep travelling outwards until they despawn.
After being taken down to 70 (75)% health it will regenerate its shield and move into Phase 3
Phase 3:
The Cryocore slows down again to a point somewhere between its Phase 1 and Phase 2 speeds, and retains its new attack. Icicles also begin periodically raining down from the sky seemingly randomly.
When the shield is destroyed the 2nd time the Cryocore will transition into Phase 4
Phase 4:
Speeds up to a point a bit faster than in Phase 2 and becomes vulnerable again. Retains its previous attacks, but also gains another new one:
-It may launch Icy Bolts of frigid-cold energy at the player. These will either be in arcs of 3, a barrage of 5 shots launched directly at the player in succession, or between 9-15 launched outwards from the Cryocore's body in random directions
Upon being taken down to 40 (55)% health the Cryocore regenerates the shield again and transitions into a 5th phase
Phase 5:
Same speed as in Phase 2. Retains previous attacks and is once again guarded by its ice shield. Icicles rain down slightly more often
Upon the shield being broken the Cryocore transitions into its 6th phase
Phase 6:
A bit faster than Phase 4, having a little bit of trouble turning as well. Uses all of its previous attacks and gains one last new one
-It may launch a snowflake-like projectile that spins rapidly in-place. It launches numerous snowflake fragments at the player before exploding like the normal snowflakes did.
(In Expert Mode, it transitions to its 7th special phase at 15% health)
Phase 7:
Continuously charges at the player, only retaining the Ice Bolt and icicle attacks. Doesn't regenerate its ice shield despite being an odd-numbered phase.

Defeat: The Cryocore explodes into chunks of ice and the Reanimators fall out of it.

GelTech Info:
-An ancient ice being given new life after being found by the Reanimators. Despite their burrowing, the Cryocore remains stable and doesn't show any signs of hostility towards its new hosts.

Drops: Ultracold Fragments, used to make an armour set and a few ice-themed weapons. In Expert Mode it also drops a pair of wings that can also freeze certain enemies if they hit you and, more rarely, can drop an item that grants immunity to Frostburn, Chilled and Frozen and increases defence by 20.

Extra Info:
-The Cryocore's additional drop that it may sometimes drop rarely in Expert Mode is a reference to the actual Cryogen's Revengeance drop
-Despite being fought near the beginning of the Post-Moon Lord game, the Cryocore is still an extremely tanky boss, boasting almost 1,000,000 health in Expert Mode.
-Most of the Cryocore's phases only have mild differences between them, causing the boss' difficulty to have one of the slowest progressions of any multi-phase boss
-Despite the other Reanimator bosses having countless Reanimators keeping the boss active, the Cryocore apparently only required 4 larger ones to keep it active
--This, however, may be because it is smaller than the other 2 and also is a much simpler being than the others; as it is mainly just an enchanted chunk of ice.
[Added: 28/6/19]
101C - Astrum Resurgent
Appearance: Part of the former Astrum Deus' shell, now swarming with countless Reanimators. Unlike the other two, the shell hasn't lost any colouration and shows less signs of wear overall, likely meaning that this body holds importance to them.

Summon: Use the Star Of Reanimation at night; an item that can only be crafted using the drops the other two Reanimator bosses provide and a few additional items obtained earlier. The boss will despawn during the day of if there are no players left for it to target, like with a lot of other bosses.

[Fought: Post-Moon Lord]

Stats:
Health:
-250,000 (385,000) (Phase 1)
-2,500,000 (4,000,000) (Phase 2)
-0 (0) (Astrum Illusions/ Astral Probes) (Invincible)
Attack:
-220 (400) (Resurgent Head) (Inflicts Ichorian Spark, Frostburn, and Cursed Inferno)
-110 (200) (Resurgent Body) (Inflicts Ichorian Spark and Frostburn)
-200 Max. (300 Max.) (Deflected Projectile)
-95 (170) (Evisceration Laser) (Inflicts On Fire!, Cursed Inferno, and Frostburn)
-100 (188) (Astral Mine) (Inflicts On Fire! and Cursed Inferno)
Defence:
-70 (Head, Phase 1)
-0* (Body, Phase 1)
-50 (Head, Phase 2)
-180 +80% Damage Reduction (Body, Phase 2)

[In Phase 1 attacking its body will not damage the boss but, instead, heal it for 25 (60)% of the damage you would have otherwise dealt]
[Projectiles that hit the head will have their piercing properties removed, meaning any that hit the head will not be able to hit any other segments]

Attacks:
Phase 1:
The boss will alternate between two different attacking patterns; grounded and airborne. While airborne it will mainly use ranged attacks, but will attempt to ram into the player if they are too far from the ground. While grounded it burrows, like many other worm bosses, but can gain a lot more vertical height than most other worms. As attacking the body actually heals the boss at this point, attacking its head specifically is the only way to defeat its 1st phase.
-It may launch a barrage of Evisceration Lasers from all of its segments fairly inaccurately in the player's direction for a few seconds
-It may release numerous 'Astral Mine' projectiles which simply hang in place for a long time before eventually exploding (more are released and they take longer to explode in Expert Mode)
Managing to take this phase down to 0 health will initiate its 2nd phase, where it gains tons more health and its body loses its healing properties in favour of heavy damage reduction. When transitioning the message "A Golden Aura Radiates from Astrum Resurgent" appears.
Phase 2:
Resurgent no longer uses his airborne pattern, instead reverting solely to the grounded one. However, it is able to gain large amounts of vertical height seemingly at-will whilst travelling upwards to ensure it can reach the player even when they are far from the ground. 6 Astral Probes spawn near its head, 3 either side, which can fire lasers at the player regardless of what the Resurgent is doing.
-The Resurgent retains its laser barrage and mine spawning from its 1st phase
-With every 15 (10)% health lost it will spawn an Astrum Illusion; a small, transparent version of the boss which simply attempts to melee the player, but cannot use any of the other attacks that the Resurgent itself has
-Rarely, the Resurgent will take on a powerful golden glow. Whilst glowing it is invulnerable to damage and causes any projectiles that hits it to ricochet off of its body. However, this state only lasts a few seconds and while like this it cannot use its lasers or mines, nor can the Illusions deal damage to the player until it expires again.

Defeat: The Resurgent explodes, scattering the Reanimators everywhere and leaving the Astrum Deus' old shell in ruin.

GelTech Info:
-Upon finding the half-devoured wreckage of the Astrum Deus, the Reanimators immediately began working on reviving it. However, as many as there were, they couldn't quite match its former power. However, despite this apparent failure, they had still created an entity stronger than anything else the Reanimators had made before.

Drops: Golden Shell Fragments; materials used for crafting a few Post-Moon Lord and Chaos Mode items. May also drop a Chain Knife-like weapon, a staff that drops stars from the sky, a magic throwing knife, a gun that launches bursts of bullets, and a summoner staff that summons Astral Probes to orbit the player. In Expert Mode it also drops an accessory that inflicts nearby foes with Frostburn and On Fire!, an uncommon accessory that lets the player inflict foes randomly with Frostburn, Cursed Inferno and On Fire! at the same time rarely when attacking, or very rarely a sword that can also be equipped to increase the damage dealt by melee weapons without projectiles.

Extra Info:
-This boss was the original inspiration for the Reanimators due to a long string of reasons which I won't go into here for sanity's sake
-The 2nd phase of the fight acts as a sort-of 'reverse' of the actual Astrum Deus fight. Instead of destroying smaller worms to make the larger one vulnerable, the larger one needs to be attacked for the smaller worms to appear and the invulnerability activates whenever the boss feels like it.
-This is the only one of the Reanimator bosses to have a decently large list of potential drops.
-Its rare Expert Drop can be used as both a weapon and an accessory, making it a fairly unique item in that regard.
[Added: 28/6/19]
[Autumn Biome]

[A mock-up of what the Autumn Biome may look like]

Appearance: The Autumn Biome appears much like the forest, though the grass is always a golden-y colour, the trees have leaves ranging in colour from reds to yellows, and pumpkins grow abundantly even outside of the halloween event. Stone uses light browns and is often coated lightly in moss, and most of the surface seems mostly friendly.
However, the underground and cavern layers of these biomes are a lot bleaker and use darker browns and reds. The true nature of the biome is made more clear through the underground.
Overall, a lot of this biome's themes and enemies are centred around the idea of trickery or halloween-based aesthetics, with enemies appearing passive and/or on the supernatural.

[Biome Type: World Evil]
[Spawned: World Generation, Hardmode Activation]
[Placement: Anywhere, Surface-Underworld]

Bosses:
Jumpin' Jack - A massive pumpkin-like enemy that is spawned upon smashing 3 Suspicious Pumpkins found in small dirt mounds at the biome's surface. It acts as this biome's own Brain of Cthulhu or Eater of Worlds.
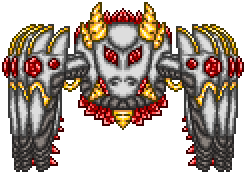
Harvester Wraith - A scythe-wielding spectre who shows up as a Hardmode boss for the biome fought alongside of before the mechanical bosses.

Enemies:
-Pre-Hardmode: Raven (Surface), Rolling Pumpkins (Surface), Eater of Leaves (Surface), Spooky Shambler (Surface Night), Ghostly Spirit (Underground), Mud Monster (Underground), Spooky Bones (Underground)
-Hardmode: Ghost (Surface Night/Underground), Hoppin' Jack (Surface Night), Sunflower Mimic (Surface), Autumn Mimic (Underground, Mini-Boss), Phantom (Underground)
-Post-Moon Lord: Harvester (Surface Night/Underground)

Unique Items:
-Pre-Hardmode: Autumn Wood (Trees), Pumpkin Pelter/ Pumpkin Sword/ Seed Bomber/ Bouncin' Pumpkin Staff/ Seed Necklace (Suspicious Pumpkin), Banners (Enemies), Autumn Fragment (Enemies)
-Hardmode: Pumpkin Hook/ Pumpkin Smasher/ Rusted Blade/ Phantom's Bow/ Horseman's Stabber (Autumn Mimic), Sunthrower (Sunflower Mimic, Post-Golem), Spooky Sickle (Underground Enemies), Hollow Essence (Enemies, Rarely)
-Post-Moon Lord: Pumpking's Staff (Harvester)

Extra Info:
-This biome is exceptionally useful for getting your hands on Pumpkin Moon Medallions with as little effort as possible. Not only are pumpkins naturally-occurring here all year round, but the Harvester Wraith can also drop them and, after the Wraith is killed at least once, Hardmode enemies in the biome can also rarely drop them as well.
-Despite being a 'World Evil' at first glance it doesn't seem that bad, however this is just a ploy as the biome is full of malevolent spirits and deceptive enemies
-Despite being a 'World Evil' it actually has 2 bosses; one fought at the expected time and another thought at the start of Hardmode as well
-Many halloween event exclusive things take place all year round in this biome. Pumpkins, as mentioned prior, always grow here, and Ravens, Ghosts and Hoppin' Jacks can also spawn as well.
[Added: 28/6/19]
102 - Jumpin' Jack
Appearance: A large pumpkin enemy with eyes and a mouth carved into it, making it appear like a massive Hoppin' Jack. It has 4 small legs made of vines which it uses to move itself as opposed to being stationary or hopping.

Summon: Either destroy 3 of the Suspicious Pumpkins found partially-buried at the surface of the Autumn Biome or use Plant Food in the Autumn Biome. The boss will despawn if the player gets too far away or leaves the biome for too long, but is unaffected by the time of day.

[Fought: Pre-Hardmode]

Stats:
Health: 3,500 (5,000)
Attack:
-30 (40) (Melee)
-20 (32) (Fireball)
-22 (34) (Hoppin' Jack*)
Defence:
-8 (Jumpin' Jack)
-0* (Hoppin' Jack*)

[The Hoppin' Jacks in this fight have reduced damage and take 10 (5)x damage from all damage sources. Their health, size and speeds remain the same, however]

Attacks:
Phase 1:
Jumpin' Jack slowly waddles towards the player most of the time, firing the occasional fireball from his mouth that is affected by gravity (and, alongside it, one that travels in a straight line as well). After a few seconds, he will perform a high-jump (followed by a 2nd) which, upon landing, spawns 2 modified Hoppin' Jacks (happens on both jumps in Expert). After a few seconds of rest, he repeats this cycle.
At 33 (50)% health, however, he will become more aggressive.
Phase 2:
Jumpin' Jacks movement becomes much faster than before, and he instead fires fireballs directly at the player which can pass through blocks (fires arcs of 3 in Expert) while moving. He jumps twice (3 times) now, the first being smaller, and then the 2nd being a higher jump which spawns 3 Hoppin' Jacks upon landing (and the 3rd jump both makes a shockwave along the ground that deals his melee damage and spawns 4 bouncing fireballs, 2 either side of him).

Defeat: Explodes into gibs

GelTech Info:
-A giant pumpkin. What? You expected there to be more to it than that? Nope.

Drops: A summer staff that summons Jack'o'lanterns to clamp down and damage foes, a melee catapult that flings pumpkins in an arc, and a pumpkin launcher. In Expert Mode it may also drop the Pumpkin Saddle which summons a pumpkin mount.

Extra Info:
-The Jumpin' Jack both has the same name pun as the Hoppin' Jack enemy, as well as 'Jumping Jacks', which may explain why despite having such poor horizontal movement it can leap massive distances.
-Much like the Eater of Worlds this boss can be cheesed by using a platform. Just be wary of how high it can jump and its phase 2 fireball attacks
-This boss accidentally ended up with an attack pattern similar to Astrum Aureus, with its slow walking whilst shooting projectiles being followed up by some large jumps and minion summons.
-This is one of the slowest bosses in the game in Phase 1, only really losing that position to completely stationary bosses.
[Added: 28/6/19]
103 - Harvester Wraith
Appearance: A scythe-wielding skeletal figure in a dark blue cloak. Its face, at the start, is obscured by a hood, but later on is revealed to be a cracked skull with a jagged, jack'o'lantern like mouth. Its scythe shares the same colours as its cloak.

Summon: Use the Rusted Sickle at night in the Autumn biome. The Rusted Sickle itself was made using a Sickle, Souls of Night, and a couple of Pumpkins. The boss will despawn if taken out of the biome for too long, if it reaches daytime, or if there are no nearby targets.

[Fought: Hardmode]

Stats:
Health: 16,550 (30,000)
Attack:
-65 (110) (Melee)
-50 (90) (Scythe)
Defence: 20

Attacks:
Phase 1:
The Wraith floats towards the player, mostly attempting to just melee the player. It teleports after around 12 seconds have passed, often re-appearing at the other side of the player before using an attack. This is then followed by it once again attempting to melee the player
-It may move horizontally above the player, summoning several scythe projectiles which accelerate towards the player
-It may charge at the player, summoning up to 3 scythe projectiles before stopping. The scythes then accelerate at the player
At 40 (50)% health it will remove its hood, becoming more aggressive and entering a 2nd phase
Phase 2:
Moves faster, teleports more often, and is able to use its two special attacks at any time as opposed to just after teleporting. Does not gain any new attacks, but is still significantly more dangerous due to the changes.

Defeat: Explodes into gibs of its rags and clouds of smoke.

GelTech Info:
-Some refer to it as the caretaker of the Autumn, though much like with the rest of the biome there is far more than meets the eye. In truth he isn't a harvester of pumpkins or wheat, but of souls.

Drops: A scythe which fires projectiles that acts like a weaker Death Sickle, a tome that launches phantom skulls, and an accessory that allows the player to occasionally dodge attacks and boosts damage output mildly in Expert Mode. Can also drop Pumpkins, Souls of Night, and the Pumpkin Moon Medallion.

Extra Info:
-Despite being a very early Hardmode boss, his damage output is exceptionally high, recommending that the player exercise caution even against the earliest Hardmode bosses.
-He can be a good source for gathering lots of Pumpkin Moon Medallions, as he not only can drop one, but can trigger numerous other enemies to be able to drop them as well
[Added: 28/6/19]
[Necro Dungeon]
Appearance: A large dungeon, similar in design to the vanilla Dungeon. Greyish brown bricks make up the Necro Dungeon, sometimes instead being replaced by grey bricks. The bricks have vaguely skull-shaped patterns on some of them. Most of the Necro Dungeon is vertical, as to make it less likely to merge with the Jungle Temple, though if it does the Temple takes priority.
It is composed of 3 layers; surface, underground, and cavern. The surface-level has just the enemies, underground-level has enemies and an immortal Sorrow until the Wall of Flesh is defeated, and finally the cavern-level has the same enemies, and the immortal Sorrow until the Golem is defeated.
No matter what level the player is on an immortal sorrow will charge into them at unusually-fast speed and kill the player instantly before Sorrow is defeated, though this one is much faster than the ones seen inside certain levels of the dungeon.

[Biome Type: Dungeon/Temple]
[Spawned: World Generation]
[Placement: Jungle-Side, Outer]

Bosses:
The Wall - A Pre-Hardmode boss who hides amongst the brickwork of the dungeon. While it appears more like a mini-boss due to it spawning naturally, but its stats are powerful enough to make it a boss.
Soul Stalker - A ghostly boss who slinks through the Necro Dungeon's lower levels. It can only be seen once the Golem has been defeated, however.

Enemies:
-Pre-Hardmode: Dungeon Slider, Rattled Bones, Ghostly Magician, Exoskeleton, Lowly Phantom
-Hardmode: Robed Phantom, Shuffler, Dungeon Phantom, Spirit Stalker
-Post-Moon Lord: Bone Paladin, Elder Phantom

Unique Items:
-Pre-Hardmode: Spinal Tap/ Phantome/ Rusted Cleaver/ Bonesaw/ Flamebolt Staff/ Marrow Blaster (Chests), Rusted Chain (Rattled Bones, Exoskeleton), Ghostly Remnant (Enemies), Necro Brick (Dungeon Slider)
-Hardmode: Spectral Remnant (Enemies), Spirit Weave (Robed Phantom, Dungeon Phantom)
-Post-Moon Lord: Necrotic Shield (Bone Paladin), Phantasmal Axe (Elder Phantom)

Extra Info:
-Many of the items obtainable or craftable using the items found in the Necro Dungeon act similar to ones found in the vanilla Dungeon, but often with twisted additional effects or higher damage in exchange for less reliable attacks.
-The enemies seen within the Necro Dungeon are overall a lot more dangerous than those in the vanilla one. Bosses and mini-bosses can spawn relatively freely, many of the enemies can pass through blocks, and those with the Fighter AIs often boast high stats all-round, meaning it may be best to explore the vanilla Dungeon before entering too far into this one
-The player should be careful when entering the lower levels of the Necro Dungeon due to the ever-approaching Sorrow that spawns at certain levels at certain times. It is suggested the player keep in on-screen, but as far away as possible.
--Due to the dead-ends the player is likely to encounter, it is also suggested the player bring Recall Potions or the Rod of Discord if possible as to avoid being caught in otherwise-inescapable situations.
[Added: 28/6/19 - 30/6/19]
104 - The Wall
Appearance: A creature either made of or hiding in the Necro Dungeon's brickwork. Skull-shaped engravings can be seen on a few of the bricks, but only faintly. A large red eye is visible in the centre of its body, and once opened spends most of the time looking directly at the player.

Summon: Found rarely in the Necro Dungeon at any level. Will always be found passive and stationary until provoked my damaging it. The boss will despawn if unable to reach the player, or if there are no more players near enough to the boss.

[Fought: Pre-Hardmode]

Stats:
Health: 3,000 (4,500) / 10,000 (13,500) / 100,000 (185,000)
Attack:
-60 (100) / 90 (160) / 200 (350) (Melee)
-40 (70) / 70 (120) / 115 (200) (Bricks)
Defence: 22 / 50 / 500

[1. Pre-Hardmode, 2. Hardmode, 3. Post-Moon Lord]

Attacks:
Can only move horizontally or vertically when moving, and cannot move diagonally. However, when moving, it can rapidly accelerate if moving in the same direction for a while. It cannot pass through most walls, but can ignore 1-block walls and ceilings if needed when moving towards the player.
-It it crashes into a wall at high speed a few bricks will fall from above, but smash when they hit another solid object whilst falling.
-Sometimes The Wall may stop moving and release 8 bricks in all directions. The bricks rotate clockwise as they disperse and also accelerate whilst doing so, making them a threat from any range until they despawn.

Defeat: Explodes into gibs of brick and stone.

GelTech Info:
[Doesn't drop any GelTech Info]

Drops: Numerous Necro Bricks, a staff that can launch bricks, and a flail. Can also drop an accessory that grants the player a decently-powerful brick shield which reduces damage taken once every 30 seconds by 25%. The accessory is more common in Expert Mode.

Extra Info:
-The lack of mobility options the player would likely have at this point, combined with the Dungeon's squarer but still fairly cramped corridors, makes dodging this boss very difficult
-Technically speaking it is a mini-boss, but its high stats and defeat message granted it a decent reason for a boss status
-Its damage output is very high for a Pre-Hardmode enemy, surpassing even some Hardmode enemies and bosses.
[Added: 29/6/19]
105 - Soul Stalker
Appearance: A vicious, orange-coloured spirit wearing a shell made of Necro Bricks. It has 3 sets of jaws; one larger pair and two smaller pairs at its sides. An eye is visible right behind its front jaws.

Summon: Can appear in one of two ways: firstly, using the Phantom Beacon in the Underground or Cavern layers of the Necro Dungeon will summon the boss instantly, but it can also appear in the Cavern layer on its own if the player remains there for too long, indicated by the message 'Something lurks in the darkness...', which will be followed by the boss spawning around 15 seconds later if the player remains in that layer.

[Fought: Post-Golem]

Stats:
Health: 70,000 (105,850)
Attack:
-88 (150) (Melee)
-70 (122) (Phantom Magic)
-77 (134) (Jagged Crystal)
Defence: 50

Attacks:
Switches between two different attacking types: passive and aggressive.
Passive has it slowly move towards the player, firing 2 shots at a time (1 shot directly at the player, the 2nd off to the left or right but still in the player's general direction).
Aggressive had it turn around, a mouth open up on its back, and it begins attempting to ram the player at high speeds.
-At 75 (80)% health it can launch 'Jagged Crystals' which start out as small harmless projectiles but eventually explode into large crystals on contact with solid blocks or after travelling too far. These linger for a fairly long time and deal damage on contact.
-At 50 (60)% health its firing speed increases in its passive form, and its movement speed increases in its aggressive form. Its two additional mouths can also fire at the player at irregular intervals as well.
-At 30 (40)% health 2 Spirits begin orbiting the player from a far distance, occasionally firing individual bolts of Phantom Magic at the player.
-At 10 (20)% health another 2 Spirits are added to the orbit, both doing the same thing

Defeat: Explodes into large globules of orange sludge and gibs of the brick on its back.

GelTech Info:
-Made up of large amounts of Spectral Remnant found oozing from the walls, the Soul Stalker is always on the move; searching for more souls to devour. It detects another living entity, somewhere deep within its home, but is never able to locate its whereabouts.

Drops: Spectral Remnant and Spectral Weave, but in larger amounts than the other enemies found in the Necro Dungeon. Can also drop a scythe, a sword, a staff, a sentry staff, and a gun. In Expert Mode it drops a charm that boosts the player's stats whilst in the Dungeon, Lihzahrd Temple or the Necro Dungeon

Extra Info:
-This boss is basically a harder version of Plantera when looking at a fundamental level, though has more dangerous projectiles and can transition between phases at will.
--It also has superior minions and stats all-round, which considering that the only vanilla boss separating it and Plantera is the Golem, would make this fight significantly harder
-For any decent chance of being able to make some of the more expensive Necro Dungeon crafts (like the armour, a couple of the weapons, and an accessory upgrade or two) the player would likely need to defeat this boss in order to gather enough materials without lengthy periods of farming.
-If the player sees its message and doesn't want to face it whilst exploring the dungeon, either warp somewhere outside of it, dig out of it, or move up to the Underground or surface areas to prevent it summoning itself
--It is also likely to attempt to appear whilst making an arena for it, which can be both helpful and frustrating depending on how far the arena is completed when it appears.
[Added: 30/6/19]
[Buried Undergrowth]
Appearance: An isolated 'bubble' of the jungle, hidden in the underground/cavern layer of the Jungle. It is surrounded entirely by a large bubble of 'Archaic Sap', which cannot be mined with anything weaker than a Pickaxe Axe (thus making the biome Post-Mechanical). It is overgrown with large flora and full of massive insects. Some of the enemies include the Millipede; a worm-like enemy with high defence, Sulkers; long-legged spiders that start out passive but suddenly rush down players who attack or get too close, and Jungle Lurkers; massive versions of the Jungle Creepers.

[Biome Type: Mini-Biome]
[Spawned: World Generation]
[Placement: Underground Jungle]

Bosses:
Hardmode:
- Blooming Chrysanthemum - The Biome Champion of the Buried Undergrowth; a plant that has come to life and considers herself the protector of the Undergrowth.

Enemies:
-Hardmode: Hercules Beetle, Millipede, Shrubbery Mimic, Sulker, Dragon Hornet, Jungle Lurker
-Post-Moon Lord: Jungle Antlion, Vampiric Bat, Big Sulker, Executioner Hawk

Unique Items:
-Hardmode*: Archaic Sap (Biome borders, Enemies), Armoured Shell (Hercules Beetle, Millipede, Jungle Antlion), Exoskeleton (Enemies except Shrubbery Mimic and Vampiric Bat), Apex Fang (Sulker, Jungle Lurker), Sting Barrage (Dragon Hornet, Executioner Hawk)
-Post-Moon Lord: Executioner (Executioner Hawk)

[*The enemies still spawn in Pre-Hardmode if the player somehow manages to make it inside of the biome or near enough to trigger its spawns.]

Extra Info:
-Despite the biome being relatively small, it has quite a large amount of unique enemies.
-Much like with the Jungle Temple, waiting close enough to it can cause some enemies to spawn outside of the biome. However, it is likely the player still won't be able to do much using the items until Post-Plantera in most cases.
--However, as the Apex Fang and Sting Barrage are weapons, a VERY dedicated player could obtain them early (but since their drop rates are low, the enemies strong, and other enemies may spawn in their places, this likely isn't worth the time when looking from a fun or progression standpoint.)
-The Undergrowth is positioned to not spawn too close to the Necro Dungeon, and also attempts to distance itself from the Jungle Temple. The Dungeon and Temple take priority, however, so on the very slim chance that the Undergrowth spawns partially inside of the Dungeon the player could get inside early.
[Added: 30/6/19 - 3/7/19]
106 - Biome Champions
Appearance: Humanoid bosses based on specific biomes. Each one usually wields some sort of weapon, though this isn't the case for all of them. The biomes they inhabit are often smaller mini-biomes as opposed to larger ones, often leaving the room to fight them more limited.

Blooming Chrysanthemum - A humanoid plant enemy found within the Buried Undergrowth. Uses magic and a sword in her fight. Once Post-Moon Lord her appearance changes mildly and her sword is larger and more decorated.

Marble Goliath - A massive armoured skeleton, donning fancy equipment and a seemingly-limitless supply of Tomahawks. Once Post-Moon Lord he gets larger axes and gets a new visor.

Frosted Knight - A knight in shining icy armour. The knight wields a spear also made of ice. Once Post-Moon Lord he gets a fancier spear and adds a couple of additions to his armour.

GelTech Info:
[Dropped upon defeating the 2nd Biome Champion]
-Some of the strongest warriors in their respective biomes. However, this is mainly due to their small sizes and/or fairly lacking number of potential competitors in most cases. They are very competitive and will certainly answer any challenge.

Drops: Each will only drop their weapon, some money (as usual), an accessory, and an Expert drop.

Extra Info:
-Despite one of them being a Marble boss, there is no Granite boss alternative amongst them
--Originally, the spear-user was going to be a Granite boss, but this was changed later to an Ice Biome boss due to a better-looking design and because of how few bosses there are in the Ice Biome despite its size.
-Most of the time, they drop items only really useful mainly for melee users, though the Chrysanthemum's accessory drop can actually be beneficial for all classes if playing a more defensive playstyle.
-Originally, none of them were planned to have Post-Moon Lord variants as well. However, due to improvements in their weapon designs and the desire to allow them to have weapons useful throughout a decent chunk of the game, this later changed.
--Of the Post-Moon Lord bosses, the Chrysanthemum is the only one to actually be taller than in her previous encounter.
---The Chrysanthemum is the one whose physical appearance has also changed the most between fights, whereas the others don't change all that much.
-The Goliath's actions are somewhat similar to the Paladin enemies found in the dungeon, but some of them cannot be interrupted like the Paladin's
-The Goliath has a 6-pack shaped into his breastplate, much like how the Hoplites did as well. However, his is hidden mostly under his robe.
[Added: 3/7/19 - 4/7/19]
106A - Blooming Chrysanthemum
Appearance: A humanoid plant-like creature. It has pink petal-like formations making up its 'hair', and armour made of additional plants, including large pink petals that share the same colours as its hair. Its sword, the Chloromore, has a pink blade, a light green handle, and a guard made of additional petals and vines.
Once Post-Moon Lord, her appearance will change slightly. Her hair gets longer and her attire changes mildly, though the main difference is the replacement of the Chloromore with a new weapon called the Everbloom Blade, which has additional petals on the guard and vines creeping up the blade itself.

Summon: Summoned in the Buried Undergrowth using the Champion's Challenge. The boss will enrage if taken out of their respective biomes, doubling their damage and tripling their defence.

[Fought: Hardmode, Post-Moon Lord]

Stats:
Health:
-26,570 (40,000) / 300,000 (445,000) (Chrys)
-340 (600) / 2500 (4500) (Flower Spirit)
Attack:
-60 (110) / 130 (200) (Chrys Melee)
-55 (106) / 112 (180) (Spirit Melee)
-50 (100) / 103 (166) (Nettle Burst, Petal Blizzard)
Defence:
-18 (80) (Chrys)
-20 (100) (Spirit)

[Once Post-Moon Lord all of her attacks can inflict Nature's Wrath]

Attacks:
Moves quite rapidly, only stopping very briefly when attacking. Most of her movements are ground-based, but her ability to jump depends on the player's own height.
-She may swing her sword towards the player. The sword itself deals melee damage, but it also launches a large barrage of petal projectiles at random speeds which deal slightly less damage
-She may slam her sword into the ground, causing a large pillar of nettles to begin forming beneath the player. Up to 3 (5) of these will be summoned under the player in a row before the attack is finished.
-She may summon up to 3 Flower Spirits; floating flower-shaped enemies that attempt to charge into the player. Up to 5 (10) can be active at a time
-Finally, she may rest and begin healing back health. She heals at a rate of 40 (2000) health per second until she takes 100 (2500) damage, where she begins attacking again. This attack can only be used when under 50% health.

Defeat: Drops her sword, staggers back a little, and flees by jumping off-screen. Right-clicking the sword allows the player to pick it up.

GelTech Info:
-Formed at some point amongst the Undergrowth's foliage. She quickly asserted herself as the top of the food chain in her home, and to ensure nobody could come in from elsewhere and try to steal her title she sealed her home inside a large bubble of hardened sap.

Drops: Her sword is dropped 100% of the time, and is dropped separate from the Treasure Bag in Expert (The sword dropped is either the Chloromore or Everbloom Blade, depending on when she is fought). The uncommon accessory provides the player with slight stat buffs in the jungle. Her Expert Mode drop turns the player into a humanoid plant, similar to herself, that also provides the player with buffs depending on the biome the player is currently in.

Extra Info:
-The Everbloom Blade is actually an exceptionally good weapon throughout a lot of the Post-Moon Lord game, despite its fairly slow swing. It can both inflict Nature's Wrath and heal the player, as well as having a high damage output, making it an exceptional weapon for something obtainable right near the start of the Post-Moon Lord game.
-While it would seem the best way to dodge the vines is to fly, they can still be summoned in the air and thus won't work as well as intended.
-Due to her biome being fairly small, it is likely the player will accidentally enrage her at least once during the fight.
-Her Expert Mode accessory provides numerous buffs based on the biome the player is in. This, like with most transformation items, still occurs even if the player has it toggled to be invisible. The basic buff is +2 regen, but the following may also be applied:
--In the Forest or Hallow it provides +2% damage, +10 defence, +2 regen and +10% speed
--In the Ocean or Mushroom it provides +3% damage, +12 defence, +3 regen and +8% speed
--In the Underground, Snow or Desert it provides +8% damage, +10 defence, and -10% speed
--In the Jungle it provides +5% damage, +10 defence, +3 regen and +5% speed
--In the Crimson/Corruption it provides +10% damage, +2 defence, and -1 regen
--In the Underworld it provides +20% damage, -5 defence, -3 regen, and sometimes ignites the player randomly
---The Underworld almost provides strictly debuffs on the player, even going so far as to make their regen -1 and sometimes ignite them randomly. The only buff is a decent +20% damage buff, but this doesn't seem worthwhile
----Of course, this makes sense as the Underworld is a fiery place at the bottom of the world; bad conditions for a plant
[Added: 3/7/19]
106B - Marble Goliath
Appearance: A colossal Hoplite-like foe. It wears the same gladiator-style armour as the Hoplites, but has it covering its entire body, including a face mask with a mesh-like pattern to conceal his face. He wears red robes over his body, mostly concealing the abs moulded into the armour. His weapon is a small, bronze tomahawk and for additional defence he carries a shield.
Once the game is in a Post-Moon Lord state he changes his visor, neatens his robes, defines the abs better, and ditches his original tomahawks for larger axes.

Summon: Use the Champion's Challenge in the Marble Biome. The boss will become enraged if taken out of its biome, increasing its defence by 3x and damage by 2x.

[Fought: Hardmode, Post-Moon Lord]

Stats:
Health: 18,500 (25,000) / 200,000 (324,800)
Attack:
-70 (140) / 200 (340) (Melee)
-60 (116) / 180 (302) (Axe)
-50 (100) / 165 (280) (Phantom Axe)
-30 (50) / 140 (200) (Shockwave)
Defence: 60 / 385

[When the Moon Lord is defeated all of its attacks inflict Withered Armour]

Attacks:
Slowly walks towards the player, mainly using a multitude of throwing weapons to attack the player.
-It may briefly stand still and throw 4-5 tomahawks at the player. They begin to fall after roughly a second of moving and can pass through blocks. They are always aimed a bit above the player, allowing them to fall down above the player as well.
-It may jump a few blocks into the air before landing hard, creating a shockwave which damages anything in the range of up to 10 blocks from the boss horizontally and up to 6 vertically in any direction.
-It may guard with its shield, becoming immune to damage for a few seconds whilst also reducing its movement speed mildly. Post-Moon Lord (or in Expert) it can still throw tomahawks whilst guarding.
-It may summon a phantom axe which moves near to the player, and then charges at them diagonally. One is spawned at 66 (75)%, and the other at 33 (50)% in Hardmode, but in Post-Moon Lord (or Expert) a third is spawned at 25% health as well.

Defeat: Explodes into dust and chunks of its armour, dropping its weapon on the ground.

GelTech Info:
-Once the largest Hoplite in its home, it found itself easily moving up the military ranks as its physical capabilities were far beyond what they should have been. It could even take on tens or even hundreds of its lesser brethren in unarmed combat, so it boasted its excessive strength to the world. Even the Marble Burrower keeps its distance.

Drops: Drops a throwable melee weapon (the Bronze Tomahawk in Hardmode or the Gladiator's Skullbuster Post-Moon Lord) 100% of the time outside the treasure bag, uncommonly drops a shield that increases defence, melee damage and damage reduction at the cost of reduced movement speed, and in Expert Mode it can drop its robe, which increases melee damage and crit chance and, if the player has the shield equipped, lessens the movement speed penalties slightly.

Extra Info:
-The Goliath has a few similar aspects to the Paladin; being a large enemy completely covered in armour carrying a shield whilst throwing powerful weapons. However, it has additional health in exchange for less defence and damage (in Hardmode) and also can use other attacks and throw tomahawks even when damaged.
-The Goliath's size was inspired by the Biblical figure of the same name.
-The Goliath, despite its fairly low health for when it is fought, boasts extreme defence and attack compared to other enemies and bosses seen around that time, making it a massive threat regardless.
-The specific mention of the Marble Burrower is both unusual (as the boss isn't anything to do with Goliath outside of having the same habitat) and gives an idea of the Burrower's eventual power growth, as at this point he is still the Burrower and not yet the Marble Champion that he becomes later.
[Added: 3/7/19]
106C - Frost Knight
Appearance: A knight, possibly made entirely of ice as all that is seen of him is, donning a set of armour made of a darker-coloured ice. It uses a spear tipped with a strangely-shaped blade of ice.
Once in the Post-Moon Lord game, the Knight adds mild improvements to its armour, adding spikes and additional plating to its helmet to give it a more 'angered' expression. Its spear is also more well-crafted and the spear end thinner and pointier.

Summon: Use the Champion's Challenge in the snow biome underground. The boss will become enraged if taken out of the underground snow biome, doubling its damage output and tripling its defence.

[Fought: Hardmode, Post-Moon Lord]

Stats:
Health:
-20,000 (32,450) / 430,500 (688,500) (Knight)
-2,000 (3,245) / 43,050 (68,850) (Icy Mirage)
Attack:
-55 (100) / 185 (300) (Melee)
-45 (88) / 170 (277) (Spear)
-40 (80) / 150 (224) (Icicles)
Defence:
-30 / 105 (Knight)
-32 / 110 (Mirage)

[All of the boss' attacks inflict Chilled once Post-Moon Lord]

Attacks:
The Knight moves and jumps around every now and then, but when moving is extremely fast. It attacks using its spear most of the time.
-It may throw three images of its spear which arc as they travel, passing through blocks as they move
-It may throw a spear over the player on purpose. As it travels it rains down icicles which cannot pass through blocks, acting a bit like the North Pole.
-It may swing its spear, creating crescent-shaped energy waves which get launched directly at the player and can pass through blocks
-At 50 (65)% health it will summon a clone of itself. However, in the Post-Moon Lord game (and in Expert) it summons one at 65% and one at 30% as well. The clones can use the boss' 1st and 3rd attacks, but cannot use the 2nd one (they can only in Post-Moon Lord expert).

Defeat: The Frost Knight's icy armour explodes, revealing the knight's slender endoskeleton. It jumps down and off-screen through any blocks, dropping its spear just as it jumps; which gets stuck in the ground.

GelTech Info:
-While you'd think being one of the most powerful warriors in such a massive biome would be an impressive feat, it is overshadowed by the fact it is the ice biome; the only one lacking any real competition due to the lack of food, and because all the threatening foes in the world end up lost in the jungle or trapped in the dungeon.

Drops: His spear is always dropped outside the treasure bag (Icicle in Hardmode and the Polar Storm in Post-Moon Lord). Also drops an Icy Plating accessory uncommonly which releases shards of ice upon being damaged. In Expert it also drops an accessory that increases damage significantly at the cost of heavily reduced defence whilst below full health.

Extra Info:
-Originally, it was going to be a Granite boss who utilised energy to use a more grappler-oriented attacking style, staying close to the player and using a lot of charges. However, due to how overused this concept is and because of it being fairly boring to fight, it was changed to an icy knight.
--This is the reason that, despite the group having a Marble boss, there is no Granite counterpart.
--This change actually finalised the Fire Emblem melee weapon trio of Axes, Spears, and Swords.
-The Icicle acts as a weaker version of the North Pole, which can be useful for a few early bosses like the destroyer due to its icicles hitting numerous segments
--However, the Polar Storm also adds an explosion of snowflakes when the spear itself hits something, but continues piercing. This makes it even better against worm bosses as hitting numerous segments while it travels means it deals damage with the spear's piercing, the icicles falling from the spear, and the snowflakes that make contact as they get rapidly spawned as the spear travels through many of the worm's segments.
-Overall, when fighting their Post-Moon Lord rematches, the Frost Knight's differences are far less noticeable than the others.
[Added: 4/7/19]
[Pearl Seabed]
Appearance: A large biome made up of lively brightly-coloured corals, glistening seaweed, and even-more-shiny gemstones lodged into the walls. It is found by travelling down a long, thin path beneath the ocean at the jungle-side of the world, though the path travels a very long way down before reaching the biome. While it can be accessed at any time, the blocks can only be broken with Hardmode tools and enemies don't spawn until the player is in Hardmode.
It is devised of two layers; a larger, more open layer at the surface and a darker, more cramped one which can be accessed through a small hole at the bottom of the top layer. Enemies are more common and hostile in the lower layer.

[Biome Type: Mini-Biome]
[Spawned: World Generation]
[Placement: Far Beneath Jungle-Side Ocean]

Bosses:
Hardmode:
Prism Angler - A large angler fish with a lure made of shining crystals. The lure seems most effective at luring in unsuspecting divers.
Post-Moon Lord:
Forgotten Siren - A mermaid who seems to have been overcome with emotion. While it seems passive enough at first even approaching it may bring out its rage unless it is calmed down.

Enemies:
-Hardmode: Crystal Angler, Crystal Clam, Clamimic (Mini-Boss), Giant Eel, Lanternfish, Gem Pufferfish, Prism Angler (Boss)
-Post-Moon Lord: Gloomy Siren (Boss*), Colossal Eel, Vampire Squid, Deep Sea Shark, Plagued Fish
-Special: Heart Siren (Passive) (Only spawns once Heart Siren is defeated)

Unique Items:
-Hardmode: Lively Coral/ Crystalised Seaweed (Biome), Aquatic Crystal/ Shining Pearl (Biome, Crystal Angler, Crystal Clam, Gem Pufferfish), Clamhammer/Clammore/Clamity-Causer/Grappling Clam/ Seastaff (Clamimic), Ocean's Lantern (Lanternfish), Pearl Staff (Crystal Clam)
-Post-Moon Lord: Essence of the Deep (Enemies), True Shark Tooth Necklace (Deep Sea Shark), Plague Toxins (Plagued Fish)

Extra Info:
-The breath loss rate of the Pearl Seabed is slightly different compared to other types of water seen in the game. The breath loss is 1.5x in the top layer, and 3x in the lower layer.
--Therefore, any accessories that can provide infinite breath time might be suggested for the player to be able to explore and/or fight bosses adequately
-Both of this biome's bosses can be found passive in their respective biomes and do not need to be summoned with items. However, re-fights with the Forgotten Siren will require a summoning item if the player has defeated her before as her natural spawns are replaced with passive ones.
--The passive Heart Sirens actually increase the player's life regeneration and can occasionally summon hearts when near to them, making them useful for any farming the player may need to do in that biome if encountered.
[Added: 4/7/19 - 8/7/19]
107 - Prism Angler
Appearance: A large, blubbery angler fish. Its body is dark green and blue, hard to see when under the water and fighting it in the lower layers of the Pearl Seabed. Its spines down its back and its eyes are filled with blue crystals, meaning that it should not really be able to see. A lure made of a glowing pink crystals hangs in front of its face, mere inches away from its jaws.

Summon: Either found on its own in the lower layers of the Pearl Seabed, or summoned manually there via the use of Fishbone. The boss will become enraged if taken into the upper layers or the ocean itself, increasing its aggression and damage by 1.4x, and will flee immediately if the player leaves the ocean.

[Fought: Hardmode]

Stats:
Health:
-20,050 (32,400) (Prism)
-100 (185) (Sea Sulker)
Attack:
-60 (100) (Prism Melee)
-45 (80) (Prism Shards)
-50 (87) (Sulker Melee)
Defence:
-18 (Prism)
-4 (Sulker)

Attacks:
The Angler slowly swims towards the player, though moves slowly as to give players a chance to dodge its attacks underwater.
-It will sometimes stop moving for a second, and then charge at the player
-It may stop moving, make its crystal lure glow brighter, and then have it launch numerous small shards in the player's general direction
-It may summon between 2-3 Sea Sulker enemies which slowly swim at the player, like Piranhas.

Defeat: Explodes into gibs. Sea Sulkers left alive at the end will continue to attack the player until defeated as well.

GelTech Info:
-A deep-sea hunter with a lure made out of crystals that have fallen from the upper layer of the Prism Seabed. Its lure proved effective, hypnotising most fish to leave them as easy prey.

Drops: A Seabubble Staff, a mage weapon, a Pearl-Crusher, a flail with a pearl-shaped end, and a few angler items as well, like the armour sets and accessories.

Extra Info:
-Due to the boss having to be fought underwater it is suggested to bring some form of breath extender or an item that allows proper underwater breathing. While the merfolk items may be found after this boss items like Gills Potions may still suffice
--This is also shared by the Forgotten Siren, the other boss found in the Pearl Seabed.
[Added: 5/7/19]
108 - Forgotten Siren
Appearance: A mermaid-like creature whose body features a lot of reds and pinks for colouration. Its skin is a vivid pink, its hair and tail fin bright red, its shirt magenta and its tail a deeper red than its hair was. Despite being a Post-Moon Lord boss, her physical appearance is rather petit and unthreatening.

Summon: Prior to being defeated she can be found passively in the Pearl Seabed in either layer. Attacking her or getting too close will cause her to suddenly become aggressive, so the player should be careful. Luckily, her appearance makes her stand out, so missing her is often harder than finding her. She can be summoned after being defeated using the Heartbreaker. She will become enraged if taken out of the water, boosting her attack by 1.5x and making her only take 1 damage per attack (or be completely immune in Expert).

[Fought: Post-Moon Lord]

Stats:
Health: 400,000 (655,000)
Attack:
-80 (122) (Melee/ Crystal Burst)
-70 (108) (Falling Crystal)
-82 (126) (Music Note)
-75 (115) (Siren Song)
Defence: 60

Attacks:
Swims around the player in a vague circular formation, occasionally stopping to perform attacks. Her movement speed is extremely fast compared to the player, so outrunning the boss is likely not possible.
-She may sing, summoning numerous jagged pink crystals above the player which fall down
-She may sing and summon a massive music note which decelerates as it travels, eventually stopping. The note will send out small sound waves around itself for a while before it disappears.
-She may summon numerous red crystals in random locations around the arena, which all explode after a short delay. They only deal damage when exploding.
At half health she will become angered, causing her to move faster and gain new attacks alongside boosting a few of her old ones.
-Her 'music note' attack from before now summons up to 4 at a time. Their sound waves travel outwards further and they persist for longer
-She can sometimes use a 'siren's song' attack where she summons numerous small music notes which travel outwards from her in random directions, accelerating as they travel. They inflict the Lovestruck debuff if they hit the player, the same one that Skye's contact damage could inflict.
-The Crystal attacks summon a few more additional projectiles each, but otherwise remain mostly the same

Defeat: Disappears into a pink mist. Afterwards, she can be found passively in the Pearl Ocean as the 'Heart Siren', a friendly NPC that increases regen when nearby and can drop hearts for players. Spawn rates are also reduced while she is active and breath loss is significantly reduced for players not using Merfolk accessories.

GelTech Info:
-The weakest of her sisters, left alone in the Pearl Seabed while her siblings freely travelled the open oceans. Her loneliness caused her to grow bitter, though after getting some attention the bitterness seems to have subsided.

Drops: Drops a few weapons and accessories, as well as Heart Pearls which can be used as materials for making a few consumables and armour sets. The weapons she drops include a trident-like spear, a 'heart tome' for mage, a mermaid staff for summoner, and a bubble launcher for ranger. Her accessories include one that boosts stats while submerged, an upgrade for the Celestial Shell that increases movement speed and damage while submerged, an accessory that makes the player's movements slippery, one that makes it so the player can gain 'submerged' buffs while not underwater, and in Expert Mode an item that turns the player into a smaller version of the boss.

Extra Info:
-Despite apparently having sisters, they are never actually seen in-game at any time
--This may be because of what the GelTech has to say, with all of them having left into the wider ocean a long time before fighting the boss
-The Heart Siren is one of the only friendly NPCs who can actually buff the player without the use of an interaction, with the only vanilla example being the Dryad under certain circumstances.
-Secretly, if the player wears the accessory that turns them into a mini Heart Siren, the mermaid staff's summons will gain additional damage.
-It is recommended to bring accessories to this fight that either aid underwater mobility or grant free underwater movement entirely to help with dodging the boss' attacks
-The Emerald Flames debuff is almost entirely useless in this fight as the debuff doesn't work underwater while the boss becomes almost completely damage immune when not submerged (or, in Expert Mode, completely immune)
[Added: 8/7/19]
109 - Soulkeepers
Appearance: The Guardians of the 6 soul types and the ones put in charge of ciphering their energy; preventing them from overloading with power. The energy they have gathered over many millennia has built up extensively, so much so that each ones' respective soul has become part of their physical form. They are usually summoned using Enhanced Souls; summoning items made using large quantities of their respective soul types, and a few Post-Moon Lord materials. They are intended to be fought fairly late into the Post-Moon Lord game, with their drops often being used for some Chaos Mode items.

Soulkeeper of Fright - A flaming skull with long wisps of flame making up 4 wings for movement. While it is mostly invulnerable, it becomes weaker when it stops to regenerate back the energy lost from using its attacks.

Soulkeeper of Light - Numerous light spirits with only partially-physical forms. They act as a hive mind; with a larger spirit as their leader while the underlings do its bidding.

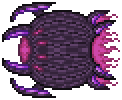
Soulkeeper of Night - A giant serpent whose body is almost impervious to damage. It can utilise its powerful dark energy to deal heavy damage and to keep its body free from harm.

Soulkeeper of Might - Humanoid spirit donning a set of dark blue armour. It has no legs, with just a wisp of energy allowing it to levitate.

Soulkeeper of Flight - An slime-coated orb of light with 4 large wings connected to it by thin strands. It moves extremely fast using its many wings, surpassing most players' maximum speed.

Soulkeeper of Sight - A ring of small mechanical eyes who trap the player within the ring and move with them, making it far harder to dodge their attacks as they will almost always be from point-blank.

Defeat: Most of the time they will not be slain or completely destroyed, often withdrawing from the fight instead while dropping their loot as they do so.

GelTech Info:
[Dropped upon defeating all 6 of the Soulkeepers]
-Entrusted with the task of limiting the energy flow from the 6 soul types, the Soulkeepers have been performing their duties so long that their bodies have fused with their respective souls.

Drops: Each has similar drops to each other at a base level: They all drop their respective 'True' soul types, a weapon based on their soul type, an accessory which enhances certain items made of the 'normal' versions of their soul type, and in Expert Mode they drop additional weapons based on their boss fights.

Extra Info:
-Each of them can inflict a special debuff called Energy Overload. This debuff reduces player defence by 30, deals 10 damage-per-second, and reduces the player's attack and movement speed by 10%.
-The first of the bosses to be sprited and to have their page finished was the Soulkeeper of Night. This is the reason he has the description of the Energy Overload debuff in his description as opposed to it being in the Soulkeeper of Fright's, despite him coming first in the list.
-The Soulkeepers have been planned for a few months but due to lacking designs for a few of them they have only just been made.
--However, the Soulkeeper of Night had the first design to be finished overall, with the Soulkeeper of Light having the final design to be finished
[Added: 8/7/19 - 10/7/19]
109A - Soulkeeper of Fright
Appearance: A giant orange-coloured skull cloaked in a shroud of flames. 4 wings made almost entirely of fire give it movement, with the only parts of them that aren't made of fire being a few small cores which allow the wings to remain in a usable shape.

Summon: Use the Enhanced Soul of Fright in the Underworld. The boss will become enraged and deal 3x damage and gain 5x defence if taken out of the Underworld for any even slightly lengthy period of time.

[Fought: Post-Moon Lord]

Stats:
Health:
-1,000,000 (1,345,000) x4 (Wing Cores)
--4,000,000 (5,380,000) (Total)
Attack:
-158 (280) (Skull Melee) (Inflicts Oiled and On Fire!)
-140 (254) (Skull) (Inflicts Cursed)
-142 (257) (Fireball) (Inflicts On Fire!)
-154 (272) (Large Flame) (Inflicts Oiled and On Fire!)
-137 (246) (Small Ember) (Inflicts On Fire!)
Defence: 200

[All of this boss' attacks inflict the Energy Overload debuff]

Attacks:
The boss flies around above the player, often at high speeds enough to have it fly off-screen before it can decelerate in order to start travelling back towards the player. It is invulnerable whilst flying and uses one of a few attacks:
-It may release numerous fireballs as it flies. These slowly fall down vertically, but try to follow the player's horizontal position after a small delay.
-It may release a burst of 8 fireballs out in all directions, plus an additional 3 which are launched in an arc towards the player
-It may summon Large Flames over its head which then fall down either vertically or diagonally and explode into small embers. Some small embers are affected by gravity and linger on the ground after falling while others hang in the air but don't last as long.
When it slows down and stops the cores in its wings begin glowing and become vulnerable. However, even though it is resting, it isn't entirely defenceless:
-It may fire 4 homing skulls, similar to Skeletrons, out in an 'x' shape. This attack is used first at 80 (90)% health but becomes more rapid as its health gets lower.
After a few seconds of resting, it will revert back to its main state and become invulnerable again. The cycle repeats until it is defeated.

Defeat: The flames die out and the skull's mouth hangs open as it falls down and off-screen, ignoring any solid objects it would have otherwise hit.

GelTech Info:
-Believed to have been a Dungeon Guardian put in charge of ensuring the protecting of the Souls of Fright, it has over time become overwhelmed by their sheer rage and malevolence. Its wings burn with its fury as it scorches all in its wake, causing it to be banished to a place even lower-down than the Dungeon's Depths: The Underworld.

Drops: True Souls of Fright; crafting materials for a large number of items. It also drops an accessory that boosts the damage of all flamethrower weapons significantly, a cross between a flamethrower and a gun, and in Expert Mode it can also drop an additional magic weapon that launches homing flaming skulls at enemies which explode.

Extra Info:
-Due to the fact that the only weapon made directly of Souls of Fright is the Flamethrower, its special accessory is made more useful by outright buffing flamethrowers in general.
--Also helpful is the fact that the Elf Melter, the only other vanilla flamethrower right now, is obtained from the Frost Moon, whose summoning item is also made using Souls of Fright
--This is also the reasoning for most of its attacks being fire-based
---The only ones that aren't, its appearance, and its vulnerability whilst in a special state are all taken in-part from Skeletron
[Added: 9/7/19]
109B - Soulkeeper of Light
Appearance: A pink-coloured wisp radiating a lot of energy. It has two small arms that float beneath it; with each arm plated in a few small plates and gauntlets ending in spiked fingers. There are 3 sizes; a single large one, 2 medium ones, and 4 smaller ones in total.

Summon: Use the Enhanced Soul of Light during the day. The boss will begin dealing instant-kill damage at night, much like how the Soulkeeper of Night did.

[Fought: Post-Moon Lord]

Stats:
Health:
-250,000 (380,000) x4 (Small Wisp)
-500,000 (720,000) x2 (Medium Wisp)
-2,500,000 (4,150,000) (Large Wisp)
--4,500,000 (7,310,000) (Total)
Attack:
-120 (224) / 140 (260) / 160 (298) (Melee) (Inflicts On Fire!, Cursed Inferno, and Frostburn)
-123 (230) / 144 (270) / 165 (307) (Magic Bolt)
Defence:
-110 (Small Wisp)
-134 (Medium Wisp)
-160 (Large Wisp)

[All of this boss' attacks inflict Energy Overload]
[1. Small Wisp attacks, 2. Medium Wisp attacks, 3. Large Wisp attacks]

Attacks:
Phase 1:
All 7 of the Wisps are summoned at the same time: The large one in the centre, the 2 medium ones orbiting it at a fairly close range, and finally the last 4 who orbit further out than the medium ones. The medium and large ones are invulnerable, though the smaller ones are vulnerable.
-The Small Wisps can fire either single bolts directly at the player or volleys of 3 shots in succession that are less accurate
-The Medium Wisps simply fire slow-moving arcs of 3 bolts at the player
-The Large Wisp doesn't do anything except follow the player slowly in this phase
Upon taking all 4 small wisps to 0 health, the fight transitions into the 2nd phase
Phase 2:
All 7 Wisps are still active, but the smaller ones no longer orbit the large one like before and instead fly around randomly. The larger one now moves a bit faster, but movement-wise stays mostly the same. The medium wisps are now vulnerable and the small and large ones aren't.
-The Small Wisps now fire 'v'-shaped shots at the player, one directly at them and one off at a slightly different angle
-The Medium Wisps now fire arcs of 5, though an additional bolt trails behind the centre bolt of the arc.
-The Large Wisp may now sometimes release a burst of 10 shots outwards in all directions
After taking both medium wisps down to 0 health the fight transitions into its 3rd and final phase.
Phase 3:
The Large Wisp now moves a lot faster and becomes vulnerable while the other 6 are invulnerable. The medium wisps still orbit the large one, but orbit at far greater speed.
-The Small Wisps continue using their Phase 2 attacks.
-The Medium Wisps now fire arcs of 3 bolts each, or up to 4 shots in succession at the player
-The Large Wisp now launches 12 shots outwards in all directions, but can also launch an arc of 7 shots at the player, fire a barrage of shots at the player inaccurately, or release a continuous stream of projectiles at the player for a few seconds. It also gains the ability to charge occasionally, something it couldn't do beforehand.

Defeat: The small wisps' arms vanish, followed by the medium ones, and finally the large one. They they all take a formation like the Soul of Light's before disappearing into pink particles. The message "We must withdraw..." appears, signalling the end of the fight.

GelTech Info:
-Souls of Light given life to guard other Souls of Light, as weird as it sounds. However, due to their naturally-benevolent nature they perform this duty with utmost seriousness and importance, ensuring the souls are safeguarded at all times within the swirling mass of the hive mind.

Drops: True Souls of Light; materials used to craft a fairly large number of items found Post-Moon Lord or in Chaos Mode. Also drops an accessory that boosts the power of any weapons made using Souls of Night to a Post-Moon Lord standard, and a summoning staff that summons small versions of the Wisps that orbit the player and launch projectiles at foes. In Expert Mode it can also drop a seemingly-transparent sword with Souls of Light swirling around inside the blade.

Extra Info:
-Despite being able to, and actually having to defeat the main boss' minions, they do not actually despawn until the fight ends.
-The GelTech actually states that the Soulkeeper of Light is actually a hive mind, meaning all of the larger Wisp's underlings are all practically mindless drones with no real individuality to them.
-The player should take care to avoid accidentally making contact with any of the bosses. Not only would they have to be inflicted with Energy Overload, but also 3 other damage-over-time debuffs that in total almost bring the same over time effect to around 30 damage per second.
[Added: 9/7/19]
109C - Soulkeeper of Night
Appearance: A massive serpent made at least partially out of Souls of Night, coated in long thin intertwining plates of a purple metal. Its face looks vaguely like a skull, with empty eyes and visible teeth.

Summon: Use the Enhanced Soul of Night at Night. The boss will gain the ability to instantly kill the player and take 90% less damage during the day, so it is advised strongly not to allow it to survive until the daytime. It only despawns when it has no target, but can pursue players across the map if needed.

[Fought: Post-Moon Lord]

Stats:
-1,200,000 x4 (1,000,000 x6) (Crystal of Night)
--160,000 x4 (130,000 x6) (Crystal Force Field)
---5,440,000 (6,780,000) (Total)
-9,999,999 (Body)
Attack:
-385 (800) (Worm Head Melee) (Inflicts Withered Armour)
-155 (280) (Worm Body Melee, Crystal Melee) (Worm Body can inflict Withered Armour)
-130 (226) (Night Bolt)
-120 (213) (Ichor Laser, Cursed Fireball) (Laser inflicts Ichorian Spark, Fireball inflicts Cursed Inferno)
-138 (240) (Onyx Missile, Homing Ember)
Defence:
-99,999 (Worm)
-200 (Crystal)
--240 (Crystal Force Field)

[Any projectiles that hit the worm lose their piercing properties, destroying the projectile]
[The worm regenerates 250 health per second]
[All of this boss' attacks inflict Energy Overload]
Debuff: Energy Overload:
-Deals 10 damage per second, reduces damage dealt and movement speed by 10%, defence reduced by 30. Often doesn't last too long, however.

Attacks:
Phase 1:
At the start of the fight, only the worm is present. It uses a corruption of the normal Worm AI, burrowing if the player is close to the ground but able to gain additional vertical height if the player would be out of its reach otherwise. At this point the main worm lacks any ranged attacks, and only takes 1 damage itself when attacked.
However, after 10 seconds, the crystals are summoned and the fight drastically changes.
Phase 2:
The 4 (6) crystals are spawned a fair distance apart from each other, often spawning in an almost square (hexagonal) shape, separated by a distance of at least 80 blocks each. The crystals are originally protected by shields which need to be destroyed, though only one shield can be broken at a time.
-Upon a shield being destroyed, the Crystal becomes vulnerable and begins firing Night Bolts at the player roughly every second. These pass through blocks and become slightly faster as a crystal's health gets lower.
The Worm remains the same movement-wise, but will gain new attacks either based on the number of active crystals left or just simply due to the new phase.
-It may launch a massive barrage of Ichor Lasers at the player. They cannot pass through blocks but their sheer number combined with their speed means cover may be necessary to avoid being hit.
-It may launch Cursed Fireballs from some of its segments. These are fired individually as opposed to being from all its segments at once like with the laser barrages, however, these fireballs pass through blocks.
-If at least 1 crystal has been destroyed its head will begin launching large crystal projectiles similar to the Onyx Blaster's. These follow the player, gradually accelerating, but after a few seconds lose their homing capabilities and continue in whichever direction they were travelling. The explosion produced when it hits a solid object also deals damage.
-Finally, when 3 crystals are destroyed, it can occasionally summon small embers near the player which, after around 1.5 seconds, begin homing in on the player and chasing them until either the player gets far enough away or they despawn, much like with the Desert Spirit's projectiles but with increased chasing range.
When all 4 (6) crystals are defeated, the boss is considered defeated.

Defeat: "Alright, Alright, I Yield!" appears in chat and the large worm flees by frantically burrowing downwards. The last crystal defeated drops the loot.

GelTech Info:
-The Keeper of the True Souls of Night. The crystals are extensions to itself, filled to the brim with energy. The crystals are linked to it so strongly that damaging the crystals causes the Keeper great distress.

Drops: The main drop is True Souls of Night; a material used for crafting numerous Post-Moon Lord and Chaos Mode items. It also drops an accessory that buffs the power of items made using Souls of Night (making some Hardmode items viable in the Post-Moon Lord game), a sword that released a short-ranged burst of soul energy, and in Expert Mode drops a tome that launches 1 of 5 types of projectile based on the boss' attacks.

Extra Info:
-Much like with a few other bosses, it has a few different defence-reducing debuffs that it can inflict. The worm's contact damage can inflict Withered Armour, the Ichorian Spark from the lasers can take away 30 defence and 10% damage reduction, and the Energy Overload can also take away 30 defence as well.
--This means that it can take a 120 defence player down to 0 by inflicting Withered Armour followed by hitting the player with a laser.
--This fact, combined with the boss' very high damage output to begin with, means that the player should take extreme caution when fighting the boss as it risks 2-shotting players in Expert Mode, even with preparation.
[Added: 8/7/19]
109D - Soulkeeper of Might
Appearance: A blue spirit made of the same energy as Souls of Might, evidenced by its colour scheme. It wears a set of heavy blue armour with spiked paldrons and horns on the helmet.

Summon: Use the Enhanced Soul of Might in the underground or cavern layers. If taken out of the underground it will become enraged, doubling its damage and multiplying its defence by 4x.

[Fought: Post-Moon Lord]

Stats:
Health: 2,950,000 (4,220,000)
Attack:
-200 (360) (Melee)
-170 (311) (Energy Sphere)
-178 (323) (Meteor)
-185 (340) (Energy Disc)
Defence: 220

[All of the boss' attacks inflict Energy Overload]

Attacks:
Moves towards the player, attempting to deal contact damage to the player. It can perform a few different attacks, with some being based on the boss' remaining health.
-It may perform a charge towards the player. The charge covers a long distance and is fairly fast.
-It can summon blue meteors down from above. They ignore solid blocks until reaching the same vertical height as the player, where they then can explode on contact with the next solid object.
-It may launch 4 arcs at the player of 3 projectiles each in succession.
-It can summon up to 5 energy discs in its hands which it can throw at the player before they return to the boss. They travel a slight distance further than the player and return after hanging in their air for about half a second after stopping. This attack can only be used when at 75 (85)% health or lower.
-It can summon a ring of energy spheres around the player which eventually stop moving. After a few more seconds the Soulkeeper of Might will charge at the player who is still trapped in the ring or energy spheres. The ring has a radius of about 5 blocks, giving a decent amount of room to dodge the charge. This attack can only be used when under 40 (55)% health.

Defeat: The boss' armour explodes and it begins fading away, eventually only leaving behind some blue particles.

GelTech Info:
-The Souls of Might proved extremely unstable, ravaging the Soulkeeper's physical body until it was left as little more than rags. The Soulkeeper returned again as a spectre, with the souls' energy keeping its form together.

Drops: True Souls of Might; materials used to craft a few Post-Moon Lord and Chaos Mode items. Also drops an accessory that boosts the power of the Megashark and Light Discs, both made of Souls of Might. It can drop a boomerang-like disc which pierces enemies indefinitely as it travels. In Expert Mode it can also drop a ranged weapon that launches explosive energy orbs and meteorites at foes at the cost of Fallen Stars.

Extra Info:
-This boss deals exceptionally high damage, even compared to most of the other Soulkeepers faced at this point. Caution is advised to ensure the player avoids being hit as much as possible, as even a couple of hits can be enough to end the fight.
-Fighting this boss in an open area is advised to make dodging its attacks easier. However, open areas also make the meteor attack harder to dodge, meaning it isn't a complete upside.
-The boss' movement speed is designed to roughly match the player's so that no particular loadout has too much of an advantage over others when it comes to dodging.
[Added: 10/7/19]
109E - Soulkeeper of Flight
Appearance: A small slime with 4 wings. Its body is filled with a constantly-moving light similar in colour to Souls of Flight. It has 4 blue wings; 2 larger ones at the top and 2 smaller ones at the bottom.

Summon: Use the Enhanced Soul of Flight in space. The boss will not enrage if only taken down to the surface, but will if taken underground. While enraged it gains even more speed, and increased damage and defence by 5x.

[Fought: Post-Moon Lord]

Stats:
Health: 1,850,000 (3,000,000) x2
Attack:
-130 (250) (Melee)
-125 (243) (Feather)
-134 (260) (Energy Shot)
Defence: 100

[All of this boss' attacks inflict the Energy Overload debuff]

Attacks:
Phase 1:
It has a fairly simple cycle, charging at the player 4 times before attacking. Each charge is very fast and covers large amounts of ground, making them hard to dodge without preparation. The attacks are as follows:
-It may release a barrage of feathers towards the player while slowly moving towards them
-It may fly in a loop, summoning large amounts of feathers which accelerate towards the player.
-It may fly overhead, releasing numerous arcs consisting of 4 feathers each at the player.
-It may perform a 5th, longer charge that spawns feathers as it travels, with the feathers accelerating towards the player as well.
At 0 health, it will regenerate 100,000 health per second whilst continuously charging at the player while immune to damage, once back to full health it will stop with its charges and transition to phase 2. A message appears as well, saying:
"You cannot vanquish me so easily!"
Phase 2:
Its charges cover a bit less ground, but the charges are even faster and 5 charges are performed in succession before using its other attacks.
-It retains all of its phase 1 attacks
-It can summon Energy Shots around itself before launching them at the player. They home in on the player for a few seconds before losing their homing capabilities.
-It may launch an arc of 9 attacks: the 3 middle ones are more homing energy shots while the outer 6 are feathers
-It may grant the player with Featherfall, making dodging more difficult. However, trying to remove the buff by right-clicking will only reset the buff's timer.

Defeat: "...I have been... vanquished" appears as the Soulkeeper slowly falls downwards and off-screen, with feathers continuously falling from its wings.

GelTech Info:
-Souls of Flight overall lack the same level of power as the others, but this does not mean that they aren't dangerous. Given originally to a simple slime due to an underestimation, its body now flows with powerful energy, wings have formed from its gel, and a powerful energy core now radiates from its centre.

Drops: It drops True Souls of Flight, used for crafting a few Post-Moon Lord and Chaos Mode items (mainly wings). It also drops an item that boosts flight speed and time significantly and negates fall damage on things like Rocket Boots. It can also drop a a ranged cannon that launches feather bullets and, in Expert Mode, a summoning staff that summons small versions of the boss to charge at foes.

Extra Info:
-It is strongly recommended to bring some sort of dash-granting item to this fight in order to help avoid the boss attacks, especially the charges.
-When the Featherfall buff is granted do not attempt to remove it via right-clicks or overloading on buffs. Right-clicking will reset the timer back to what it started as and overloading on buffs will instead cause it to replace the 20th buff and also reset its timer.
--The best thing to do is to, when affected by the buff, begin moving horizontally or flying upwards to dodge, with falling being made a last resort if wings fail as the slowed falling speed makes you a very easy target for the boss.
-The boss' fastest movement speed is 100 mph during charges, 140 mph when performing enraged charges, and up to 200 mph if chasing the player across the map (due to things like teleporters). This makes it one of the fastest bosses in the game, outspeeding the player in almost every circumstance.
-The wings are part of its hitbox, making it easier to hit but also more likely to hit you in return.
[Added: 10/7/19]
109F - Soulkeeper of Sight
Appearance: A green metal ring with 4 small eye-like machines separated from each other by equal distances. The player is stuck inside of the ring the entire time, however.

Summon: Use the Enhanced Soul of Sight anywhere in the world and at any time. The boss will summon itself quite literally around the player, keeping them trapped within the ring at all times. In Multiplayer there will be a separate ring for each player, ensuring that players cannot find ways around the confinement. The boss will become enraged if players escape the ring with methods like teleportation, dealing 5x damage and boosting its defence by 20x.

[Fought: Post-Moon Lord]

Stats:
Health: 3,500,000 (5,000,000)
Attack:
-0 (0) (Melee) (Usually isn't possible)
-150 (285) (Drill) (Inflicts Broken Armour)
-138 (268) (Homing Missile) (Inflicts Cursed Inferno)
-134 (261) (Laser) (Inflicts Cursed Inferno)
-144 (276) (Light Disc) (Inflicts Cursed Inferno)
Defence: 175

[All of this boss' attacks can inflict Energy Overload]

Attack:
The main ring remains around the player, slowly rotating. It only moves with the player, keeping the player in the centre. If the player somehow escapes it rapidly accelerates until it gets the player back into the centre of the ring. It attacks with fairly slow attacks most of the time, giving the player a chance to dodge.
-It may have 2 of its eyes begin glowing before both fire slow-moving lasers at the player that accelerate after being shot. The player will need to begin moving in advance to dodge this attack effectively.
-It may launch homing missiles from its eyes which start out stationary, but then begin chasing the player at increasing speed before exploding a few seconds later.
-It may summon fairly large drill-like enemies that remain stationary for a few seconds before charging at the player and becoming stationary again. One is summoned at 70 (82)% health, the second at 40 (60)% health and the third at 10 (30)% health.
-It may summon a small light disc around one of the eyes which is then launched at the player shortly after. It moves quickly from launch and can bounce off of blocks, making it one of the harder attacks to dodge.

Defeat: The ring explodes and the small eye-shaped parts are launched outwards at high speeds.

GelTech Info:
-Machines were put in charge of containing the Souls of Sight due to their strangely-passive nature. The machines analysed the souls, eventually finding more energy within them than first anticipated, causing this Soulkeeper to go haywire.

Drops: True Souls of Sight; a material used for crafting numerous Post-Moon Lord and Chaos Mode items. Also drops an accessory that boosts the power of the Magical Harp, Optic Staff, and Rainbow Rod, all weapons made using Souls of Sight, as well as increasing night vision. It also drops a laser rifle upgrade for mage and in Expert Mode it drops an additional laser cannon for ranger which slowly speeds up the longer it is fired.

Extra Info:
-It is suggested that the player move away from any attacks they see being charged up, as moving away gives the player a little extra time to dodge the incoming attack.
-The boss' design changed drastically throughout its design process. Originally it started as a large mechanical eye, then became a blindfolded humanoid, and eventually became a large ring with mechanical eyes.
[Added: 10/7/19]
110 - Wandering Titan
Appearance: A silvery machine found wandering aimlessly. It has 8 large mechanical legs which it uses for moving its large frame, with each having both a large solid outer shell decorated in gold and gemstones, and an inner shell reinforced with overlapping grey plates. Its main body features an almost dragon-like face acting as its front, with red crystal eyes and golden horns. Countless red crystals are also seen on top of and beneath the machine's main body, jutting out in seemingly random directions.

Summon: Using the Red Remote in the world once Chaos Mode is active will allow 1 Wandering Titan to spawn randomly in the player's world at the surface level. It may wander slightly until the player finds it, where it will almost instantly engage the player. Only 1 can be active in a world at a time and despawn either when all the players in the current world are dead, or if the world is closed (via save and exit).

[Fought: Chaos Mode]
[Special Boss: Weird Summoning Mechanic, Uncraftable Item]

Stats:
Health:
-50,000,000 (75,000,000) (Titan)
-1,650,000 (3,000,000) (Mechs)
Attack:
-500 (950) (Melee) (Inflicts Withered Armour, Withered Weapon, and Broken Armour)
-320 (500) (Crystal Laser) (Inflicts Red Inferno)
-330 (517) (Missile/ Mech Melee) (Inflicts On Fire!)
-345 (550) (Crystal Shower) (Inflicts Red Inferno)
-300 (466) (Crystal Spike Trap/ Crystal Mine)
-270 (419) (Mech Ranged)
-400 (700) (Fusion Flameball) (Inflicts Red Inferno, On Fire!, Ichor, and Nature's Wrath)
Defence:
-1500 +30% Damage Reduction (Titan)
-400 (Mech)

[The Player is inflicted with Heavy Gravity throughout the fight, limiting vertical flight and flight time greatly]
[The Player is inflicted with Teleportation Amnesia throughout the fight, forbidding certain teleportation items from working]
Debuff: Red Inferno:
-Deals 12 damage per second, reduces defence by 18, and reduces any damage vulnerability effects the player has by 50% of their effectiveness (e.g. 24% goes down to 12%, etc.)
Debuff: Teleportation Amnesia:
-Long-ranged teleportation effects do not work. While the Rod of Discord and similar items work, Recall and Teleportation Potions and the Magic Mirror (and similar items) don't.

Attacks:
The Titan itself is very slow, possibly the slowest mobile boss in the entire game, moving at only 1mph at the best of times. However, it has numerous ranged attacks to make up for this:
-It may fire a shotgun-like barrage of Crystal Lasers at the player which pass through blocks
-It may fire a rapid volley of numerous Crystal Lasers in rapid succession at the player for a second
-It may launch numerous missiles out of the top of its body, before all of them lock on to the player's last location and suddenly accelerate towards that point. They also explode violently on contact with solid blocks, with the large explosions dealing the same damage as the missiles themselves did. [Used at under 90% health]
-It may summon a floating crystal above the player which rains down numerous large red crystals for a few seconds until it disappears. There is a small gap between its summon and when the rain starts for the player to prepare [Used at under 75 (78)% health]
-It may stomp down one of its massive legs, causing a large shockwave of red spikes to litter the ground. These spikes travel out for almost 50 blocks and linger for a long time [Used at under 60 (65)% health]
-It may launch a massive bundle of spherical crystal-like projectiles that decelerate as they travel, slowing to a point where they are almost, but not quite, stationary. They linger for a long time before disappearing. [Used at under 50 (55)% health]
-It may charge up numerous wisps near to its 'face' which circle it until 4 have appeared, then they all simultaneously vanish. A second or two later the Titan will launch 2-3 massive golden fireballs at the player at high speeds which pass through blocks and explode violently after travelling too far. [Used at under 40 (50)% health]
At certain percentages of health it will summon 'mechs', bosses similar in appearance to the mechanicals in 3 cases and the other two look like a helicopter-like mech and a smaller version of the Titan using darker colours. Whilst any of these five are active, the Titan will stop using its ranged attacks, but keeps moving. They are all spawned at 20% health integers:
-The lone Retanazer-like mech uses attacks based on both Spazmatism and Retanazer, using lasers and fireballs in Phase 1 and lasers, fireballs and flamethrowers in its 2nd.
-The Skeletron Prime-like mech uses Prime's 4 arms for its attacks, but when its head spins it moves faster and can fire additional lasers in all 4 cardinal directions. Its bombs also explode on contact with platforms and players as well now, not just solid blocks. All 4 arms are indestructible.
-The Destroyer-like mech has an additional 70% damage resistance on its body and tail segments and cannot spawn probes, but is otherwise mostly the same.
-The Helicopter-like mech flies near to the player, firing laser patterns ranging from a string of shots fired directly at the player to an inaccurate random flurry, to up to 3 arcs of 3 projectiles each fired in succession. It shoots faster at lower health.
-Finally, the smaller Titan only has access to the boss' first 3 attacks, but can also perform high-jumps and moves a lot faster then the actual main Titan can. It also speeds up as it loses health.

Defeat: Explodes violently, and slowly, before releasing one final massive explosion as its body explodes into large chunks of metal, letting out one last creak from its body just as it explodes. Upon being defeated, certain things will happen:
-Numerous bosses will begin dropping Critical Cores upon defeat. These bosses will all also be buffed to Chaos Mode standards, making their fights much harder. They also all drop additional items, unique to each boss:
-The Destroyer, The Twins, & Skeletron Prime
-Artificial Agriculture
-Steampunker & Twin Mechanics
-Titanium Gunship & Sentry
-Additional mechanical enemies may begin appearing in the player's world, most dropping Enchanted Steel in small amounts.
-The Wandering Titan may now spawn on its own very rarely, announced by "Heavy stomps shake the ground"

GelTech Info:
-Built as a fail-safe in case of impending destruction, the Titan was planned originally to be a vessel which could safely house the kingdom's inhabitants if disaster should strike. However, a single wrong line of code in its billions caused it to abort its prime objective, leading to it wandering into the wilderness in search of... something

Drops: Drops a single Critical Core, some Enchanted Steel, Energised Ruby Chunks, and Titan Plating; all materials used to craft a massive assortment of items. May also drop some of the craftable weapons in Expert Mode, alongside a special mount. It may also drop one of the following: additional large sums of money, lunar event fragments, all 6 types of soul, a few Post-Moon Lord or early Chaos Mode crafting materials like ores and bars, or the Titan Breaker: a massive sword that swings after an excessive delay, but deals tens of thousands of damage per swing.

Extra Info:
-The Wandering Titan is only able to move at the maximum speed of 1mph, making it slower than the player can even reach under most normal circumstances
--This also makes him the slowest moving boss in the entire game
---This also begs the question of how he left, considering his speed (or lack thereof) would not allow him to do so for an extensive period of time
-Despite not being listed as one of Slimey's creations, it likely is
-The sprite itself seen above would be smaller than how it appears in-game, which would be large enough to potentially fill the screen
-While the boss' melee damage is extremely high, it likely shouldn't get to use it against the majority of players due to it being too slow
110 - Wandering Titan (Continued)
Extra Info (Continued):
-Despite being found at almost any time in Chaos Mode, its stats appear to be comparable to most of the later Chaos Mode bosses. This is because, to an even higher degree than with most of the others, this is an endurance boss fight (hence why the player can leave and continue at almost any time).
--However, escaping the boss may be difficult as its projectiles can cross almost half the map in some cases, potentially catching retreating players unaware.
---This is also made worse by the fact that the player cannot simply use recall potions to get home due to one of the boss' special debuffs
[Added: 3/7/19]
111 - Spectre
Appearance: An armour-clad purple and black-haired warrior. Last seen as a boss in an event from a previous Boss Page, she has has a similar revitalisation to Charlotte by being given her own unique and updated boss outside of her former event.

Summon: Use the Mauve Wisp successfully. This is hard to do as it isn't a simple process to obtain or use correctly. It starts as a Red Wisp, then turns Orange if used in Space at night, then Yellow in the Underworld during the day, Green in the World Evil at night, Blue in the Jungle Temple, Indigo in the Hallow during the day, Purple when used 10 times while a boss is active and finally Mauve at the coordinates 0, 0 when the time is exactly 12:00 (AM or PM). An arena of unbreakable blocks is made around the player, the background colour begins shifting between a greyish purple and black and the fight will begin, only ending when either the boss or player is defeated. Spectre will become enraged if taken out of the arena; massively boosting her defence to make the fight almost impossible.

[Fought: Chaos Mode]
[Special Boss: Uncraftable Summon, Hints Vague, Steps Get Progressively Harder/Stranger]

Stats:
Health:
-8,000,000 (11,350,000) (Armoured Spectre)
-18,950,000 (27,500,000) (Spectre)
-3,500,000 (6,000,000) x2 (Vision)
-2,400,000 (4,050,000) x2 (Wyrm)
--38,750,000 (58,950,000) (Sub-Total)
---42,540,000 (67,200,000) (Real Total)
Attack:
-310 (500) (Melee) (Inflicts Enhanced Vulnerability)
-320 (513) (Sword Beam/ Deflect)
-318 (510) (Purple Phantom)
-340 (560) (Spirit Bomb, Stationary Spirit Bomb, Vision Melee, Wyrm Body Melee) (Inflicts Enhanced Vulnerability)
-300 (488) (Spectral Shards)
-325 (520) (Creeping Crystals, Pink Flame Jet)
-600 (1000) (Wyrm Head) (Inflicts Enhanced Vulnerability)
-308 (497) (Flame Prism) (Inflicts Numerous Debuffs*)
-380 (618) (Giga Spirit Bomb) (Inflicts Enhanced Vulnerability)
-365 (599) (Eviscerator) (Inflicts Enhanced Vulnerability)
Defence:
-400 (Armoured Spectre)
-200 (Spectre)
-230 (Shielded Spectre)
--400 +10% Damage Resistance (Enhanced Shield)
-300 (Vision)
-100 (Wyrm Head)
--9,999,999 (Wyrm Body, Spectre (Enraged))

[All attacks inflict Soul Blaze]
[In Expert Mode all attacks inflict Enhanced Vulnerability]
[*Debuffs inflicted are based on colour. Red inflicts Oiled and On Fire!, Orange inflicts Withered Armour, Yellow inflicts Ichorian Spark, Green inflicts Nature's Wrath, Cyan inflicts Frostburn, Blue inflicts Dazed, Purple inflicts Venom, Violet inflicts Shadowflame, and Pink inflicts Enhanced Vulnerability]
Debuff: Soul Blaze:
-Deals 10 damage-per-second as a base, plus an additional amount based on the player's regeneration capabilities (higher base regeneration = more damage per second).
Debuff: Enhanced Vulnerability:
-Starts by reducing player defence by 70 and removing any damage reduction effects, but as the timer wears off the reductions decrease until returning back to normal as the debuff ends.

Attacks:
The battle starts with Spectre, in her full set of armour, attacking the player with a sword. She has access to wings and thus can gain vertical height if needed, mainly attempting to stay somewhat vertical to the player.
-She may perform a long-ranged dash attack, potentially followed up by a further charge, and potentially a third and final one as well
-She may swing the sword, creating a sword beam which spawns Purple Phantom projectiles as it travels. These projectiles eventually accelerate towards the player roughly half a second after being spawned.
-She may swing her sword and create an arc of 8 beam swords, followed by another arc of 7, then finally by an arc of 6. The secondary arc is faster and the tertiary arc is even faster.
-She may 'guard' with her sword, parrying back any projectiles aimed at her while taking no damage herself. These projectiles, unlike other deflected ones, only deal a set amount of damage. This attack is only used when under 60 (64)% health.
-She may raise her sword to the sky, causing it to release numerous sword beams upwards. After a few seconds they begin raining down at high speeds randomly, shattering on contact with solid objects after reaching or going lower than the horizontal height of the player. This attack is only used below 30 (40)% health.
-She may summon 3 beam swords in a very wide arc. They all release Purple Phantoms as they move, though it takes them a second to begin moving and they accelerate slower than the single-beam variant of the attack. This attack is only used when under 30 (40)% health.
At 50% health her armour shows a couple of minor cracks but, when at 0 health, the armour shatters and releases a bright pink light.
"I did not expect such competition from these lands. A determined spirit indeed, though sadly a mistaken and mislead one also happens to stand before me."
Phase 2:
Spectre herself disappears, leaving instead two orbs, both with 10,000 health. These orbs do nothing themselves, but whilst they are active vertical and horizontal bullet-hells of purple phantom projectiles constantly barrage the player. The player has to defeat one of the orbs to continue the fight, with the other fleeing temporarily and the bullet-hell stopping once this is done. Depending on which is destroyed first either Vision or Wyrm will be summoned.
Phase 2A: Vision:
Vision is a large eye-like creature with pink flames spewing from it and a pink eye at its centre. It spends most of the fight above the player, usually at a fair distance, raining down attacks.
-It may continuously barrage the player with Purple Phantom projectiles either vertically or horizontally, forcing the player to keep moving.
-It may launch up to 3 Spirit Bombs: Large spheres of twisting energy which home-in on the player and either after getting too far away, hitting a solid object, or being active for too long will explode into anywhere from 20-30 (28-35) Spectral Shards which travel outwards from the bomb after it detonates.
-It may move diagonally to the player and launch up to 3 barrages of 6 purple phantoms. These barrages have Vision launch them at the player in succession, aimed directly at the player even if moving mid-barrage.
-It may perform a long-ranged charge, releasing purple phantoms which start off stationary but quickly accelerate towards the player's location roughly half a second later.
Phase 2B: Wyrm:
Wyrm is a large serpent, sharing a few similar designs to its counterpart Vision. It has a pink eye between large blade-like protrusions and a long body covered in pink plates and purple spikes. It flies after the player continuously, slowly gaining speed as it takes damage.
-It may release purple phantoms which accelerate towards the player
-It may release up to 2 spirit bombs in succession from its head
-It may release strange stationary spirit bombs which hang in-place until eventually exploding into only 4 fragments each. Large numbers are spawned at a time, however.
Upon defeating one, the player will have to defeat the other as well. After defeating both of them, the fight will transition into its next phase.
"My underlings proved less of a challenge than anticipated, I will admit, but my former master has taught me well enough not to expect perfection from everyone."
111 - Spectre (Continued)
Phase 3:
Spectre re-appears, now donning a set of black, pink and purple mage robes. She no longer uses her sword, thus completely changing her attack pattern.
She can now move rather freely around the arena. Some of her movements consist of simply floating around, others may use teleportation complete with a motion blur.
-She may summon in up to 4 (5) Spirit Bombs from off-screen, 1 roughly from every corner of the arena.
-She may summon vertical or horizontal bullet-hells, teleporting every few seconds to avoid being a completely open target.
-She may summon numerous vertical walls of purple phantoms, each with only 2-3 (2) openings for the player to pass through.
-She may summon a massive volley of purple phantoms fired in succession
-She may summon numerous large clusters of large crystals that travel from one side of the arena to the other. These may be vertical or horizontal and up to 4 can be active at a time. Their large size and relatively high speed makes them deadly.
At 80% health she will speak again before gaining a few new attacks.
"Couldn't be contempt with just dealing with the essentials, not even with the obvious ones. Went the whole hog and found yourself here. You must've known what you were doing, surely - I mean I put out enough warnings."
-She can summon purple phantoms along the walls, floor and ceiling of the arena. These will begin accelerating towards the player in a clockwise rotation; if all 4 are covered they start at the top and bottom middle and if only 2 opposite walls are covered they start from the edges furthest from each other.
-She may launch a large burst of pink flames at the player. They all travel at varying angles but the ones closest to the centre move fastest and thus travel farthest as well.
At 60% health she gains a barrier around herself, boosting her defence slightly. She also speaks again.
"I will admit, your persistence in combat is both annoying and at the same time intriguing. Perhaps I underestimated you."
-She may now summon what appear to be pink spirit bombs, called Eviscerators. These home-in on the player but slow down as they travel, eventually stopping. A couple of seconds later they detonate, releasing massive jets of flame in the 4 cardinal directions which can reach all the way across the arena. Up to 2 (3) can be summoned at a time.
-She may summon a massive cluster of purple phantoms around herself, teleport, and summon more. After 3 (4) teleports she will teleport elsewhere while the numerous clusters begin launching themselves at the player, 1 phantom from each cluster at a time.
At 40% health she will disappear, sprouting more dialogue while Vision re-appears
"Vision, I call you forth once more. Make me proud."
After Vision is defeated again she will re-appear and continues her assault.
-Bullet-hell attacks are faster now and may contain additional purple phantoms.
At 20% health she disappears again, re-summoning Wyrm and speaking
"I- I'm not sure how much more of this I can withstand. Wyrm - end this would you?"
Upon defeating Wyrm again she re-appears, speaks, and transitions into her last phase.
"You're forcing me to use up all of my power for this. I shall hold back no longer!"
Phase 4:
Her shield becomes larger, summoning a few crystals around her as well. Her movements become faster, she gains attacks, and she heals back to 40 (50)% health for the final phase.
-She retains all of her previous attacks, though most of them now utilise additional purple phantoms and ones with varying amounts begin straying more towards using more projectiles.
-She may summon a prism in front of her whilst near to one of the arena walls. The prism releases numerous different types of flame in an inaccurate flurry towards the player, moving to ensure the player remains in the centre. The different colours of flame are Red, Orange, Yellow, Green, Cyan, Blue, Indigo, Purple, and Pink; all inflicting different debuffs.
-She may summon a large version of the spirit bomb which slowly follows the player. When ready to explode it will explode into 4 (5) normal Spirit Bombs, each then capable of exploding as well.

Defeat: Her magic barrier shatters and she slowly floats to the ground. Vision and Wyrm re-appear, but both of them and Spectre are immobile and are now passive and cannot harm the player. The arena walls, Vision and Wyrm all begin releasing purple particles as they begin to fade. After they have faded Spectre begins releasing a pulsing aura around herself for a few seconds before releasing a bright purple burst and disappearing.
-After being defeated, she can be found as an interract-able NPC who, upon being interacted with, becomes a town NPC who can sell some items or, if the player selects 'Help', give the player a buff to damage, defence, and regeneration.

GelTech Info:
-Former follower of an ancient king, left to wander after his death with a lacking understanding of the outside world. Without a clear purpose, she was left to roam. I wonder where she will go now; move to a new foreign land and seek more challengers, or perhaps even stay?

Drops/Items:
Boss - Up to 3 (4) weapons from the roster of a sword, spear, summoning staff, sentry staff, 2 tomes, a mage staff, a gun, a bow and a miscellaneous ranger weapon. Also drops an accessory that boosts player stats and grants stackable buffs to teammates which also adds further boosts, another accessory that inflicts random debuffs on foes hit with melee or magic attacks, another which causes critical strike chance to increase by 1% for every 3 hits against a foe and resets every time the player is hit. In Expert Mode she drops an additional accessory called the Spectral Heart which increases max life, regen, defence, damage reduction, and allows the player to sometimes rarely inflict a modified Soul Blaze.
NPC - Sells a couple of potions, a Yo-yo, a flail, another summoning staff, a tome, a projectile-less sword, another different sword, a rocket launcher, flamethrower, a magic staff, a mount and a pet.

Extra Info:
-Due to Spectre being originally from a Calamity-inspired boss page, a few aspects of her fight are references to Calamity.
--Her arena, frequent dialogue, and Vision are based on Supreme Calamitas, Wyrm on Calamity's massive roster of Worm Bosses (though shares the most similarities with Astrum Deus), and some of her attacks are also based on some from Calamity as well.
---The mention of a 'former master' in her dialogue and an 'ancient king' in her GelTech Description, it is likely that she was in some way an underling of Yharim, one of the most important figures in the Calamity mod's lore.
-Her armoured form at the beginning of the fight is essentially the only thing brought over from her original battle, but even the armour itself has had some improvements.
-She has some of the highest health of any Chaos Mode boss; though this is because she is intended to be a special secret boss fight found by players who are willing to jump through a few hoops to find her
--This is referenced a couple of times throughout the fight as well through her dialogue.
-She is one of few bosses to drop almost every unique style of weapon, though misses out dedicated thrower weapons (instead only having a throwing spear which counts as melee).
[Added: 15/7/19]
112 - World Purger
Appearance: A large skeletal worm-like creature with strange wisps of green energy emanating from its body. The energy is seen to be able to move and flow, but takes on a vaguely constant form which provides it jaws and spikes across the length of its body. While it is skeletal, the skeleton appears almost human-like in areas, with a humanoid skull and ribs and a spine trailing down the rest of its segments; nothing like the structure seen in worms and snakes.

Summon: Use the Death Catalyst at night. The boss will become immune to damage during the day and begin dealing massive amounts of damage that will likely cause it to kill the player instantly. It will also gain boosts to its defence and damage if in the Dungeon, Crimson, Corruption or Underworld, though in return can also grant further rewards.

[Fought: Post-Moon Lord]

Stats:
Health: 5,240,000 (8,630,000)
Attack:
-340 (850) (Head Melee)
-200 (350) (Body Melee)
-150 (278) (Toxic Missile)
Defence:
-50 (Head)
-200 -98% Damage Taken (Body)

[All of this boss' attacks inflict Venom, Poisoned and Nature's Wrath]
[The body and tail segments take excessively reduced damage, forcing the player to mainly focus on the head]

Attacks:
The boss' attack pattern is luckily extremely simple on-paper, but whist fighting it proves much more difficult than likely anticipated. It continues attempting to ram into the player, but is able to gain any additional vertical height if needed and will accelerate towards players who either are close to the ground or who remain in its direct line of sight for a long time.
-It can also launch homing shots when players are near enough to its body. These move slower than the boss and also move in dashes as opposed to continuous movement. The first dash travellers the least until the 5th which continues on until it hits a solid object or despawns. It can change its trajectory when dashing, often homing-in on the player.

Defeat: Explodes into large skeletal gibs. In Expert Mode it will also release one of its homing shots from each of its segments, acting as a last-ditch attack to finish off unaware or weakened players.

GelTech Info:
-Awakened spirit of a long-deceased entity. It seems to house a burning hatred of life in general and upon coming across any sentient life will immediately be thrown into a hateful fury.

Drops: Acidic Plate; a material which is used not only for weapons, but also for a potion which grants offence-based buffs at the cost of damaging the player. It can also drop some of the weapons you can craft randomly as well, plus an additional boomerang, tome and rocket launcher. In Expert Mode it also drops an accessory which reduces the player's max life at the cost of giving the player a damaging aura around themselves.

Extra Info:
-This boss' moveset, while extremely simple, is also very deadly. Much of the fight involves it attempting to melee the player which seems simple enough until the reminder comes of just how much damage worm bosses can deal on contact.
--Therefore, it is likely this fight will take at least a couple of attempts to get right.
-Outside of the additional stats boosts, the fight doesn't really change in Expert Mode outside of it accelerating a little faster, though this is barely noticeable in-game.
-Its body segments, much like with most worm bosses, house a large amount of defence. The player would need to have an attack capable of dealing over 150 damage to simply deal more than 1 damage, and as simple as it sounds most of the reduction scales which means a 10,000 damage attack could be reduced to only 198.
[Added: 14/7/19]
113 - Golden Star-Scouter
Appearance: A large, brown-coloured worm coated in large chunks of cosmic stone and crystal, concealing its form underneath. Red, crystal-like eyes can be seen underneath thin layers of crystal which discolour them slightly.

Summon: Use the Golden Beacon in space. Luckily, the boss can be taken anywhere and at any time without restriction or consequence, so the player can choose to fight it in favourable conditions.

[Fought: Post-Moon Lord]

Stats:
Health:
-6,350,000 (10,450,000) (True Scouter)
-3,000,000 (8,000,000) (Scouter Illusion)
Attack:
-310 (550) (True Scouter Head)
-185 (300) (True Scouter Body)
-240 (380) (Illusion Head)
-150 (265) (Illusion Body)
Defence:
-70 (True Scouter Head)
-200 +80% Damage Resistance (True Scouter Body)
-500 (Illusion Head, Illusion Body)

Attacks:
Phase 1:
Only the large worm is present at this point. While it is grounded, it is able to gain additional vertical height if needed whilst it travels upwards, like with the majority of other later-game worm bosses. Its movement speed increases as its health gets lower, but may also increase drastically if the player moves too far away from the player.
At 70% health it transitions into its 2nd phase, with some of the stone covering its body breaking away.
Phase 2:
Small golden particles radiate off of some of the recently-exposed areas, making it appear slightly shiny. It also summons 3 minions; 2 smaller ones and a larger one. The smaller ones are immune to damage whilst the larger one has roughly half (80%) of the boss' max health and can be harmed. The minions act similar to the main boss but are slower. There is no real benefit to defeating the vulnerable minion as it will often take more time that just aiming for the actual boss.
Upon being taken down to 40% health it transitions into its 3rd and final phase.
Phase 3:
Its entire rocky exterior has been broken away, revealing its true golden worm. It gains the ability to fly in this phase, though loses some speed in the process. A total of 6 (8) minions are active; 4 (5) smaller invulnerable ones and 2 (3) larger vulnerable ones. The minions act the same as before. As with the other phases, the main worm's speed increases as its health lowers.

Defeat: Explodes into golden gibs. The invulnerable minions despawn along with the boss but the vulnerable ones remain until the player defeats them.

GelTech Info:
-A golden space serpent drawn to the light of the beacon. As it has travelled throughout the cosmos chunks of meteorite and broken fragments of planet have gotten stuck in or on its body, providing it with a heavy but resilient coating.

Drops: Cosmic Gold; a material used for crafting a few armour sets and upgrading a few weapons. May also drop a scythe that can either deal melee or throwing damage, a magic staff, and a gun and bow for ranger. In Expert Mode it can also drop a single piece of Golden Plating; used to make a pet or a mount.

Extra Info:
-It is one of the only Post-Moon Lord bosses to actually lack any sort of projectile of any kind; relying solely on melee damage dealt by the boss and its minions
--However, this doesn't make it an easy fight by any stretch. The boss' high speed and damage, numerous minions and fairly free movement (which only gets free-er as the fight progresses) means that even prepared players can find themselves overwhelmed easily.
-As with most worms, piercing weapons are extremely effective against this boss; both due to hitting numerous segments at once and also being able to hit both the boss and its minions with the same attack occasionally.
[Added: 19/7/19]
114 - Golden Core
Appearance: A small golden ball covered in a nearly-countless number of thin spikes. The spikes have green tips and point outwards at slight angles, with the only part of its body not being covered in these spikes being its 'face'. The 'face' has 6 slits which face inwards and are the only vaguely-symmetrical part of the entire boss.

Summon: Use the Golden Beacon underground. Luckily, the boss doesn't have any requirements for biome, depth or time once summoned and thus can be taken anywhere once it has appeared without consequence.

[Fought: Post-Moon Lord]

Stats:
Health:
-1,450,000 (2,000,000) (Core)
-300,000 (650,000) (False Core)
Attack:
-185 (300) (Core Melee) (Inflicts a long-lingering Venom debuff)
-160 (277) (False Core Melee) (Inflicts Venom)
-130 (230) (Energy Shot)
Defence:
-100 (Core)
-145 (False Core)

Attacks:
The main core's attack pattern is simple in concept; it will stay in-place, fire a single energy bolt at the player, and then rapidly move to a new location where it will stop suddenly and repeat the cycle. As its health wanes it attacks faster and stays still less, making it gradually harder and harder to hit and allowing it to have move active projectiles at once. The projectiles aren't too special, simply moving slowly in whatever direction they were fired and passing through blocks.
-With every 10% health lost it will summon a False Core. These look identical to the boss but follow a different pattern; instead attempting to simply ram the player and not having any projectile attacks. (Once at 30% health or below 2 of these are summoned at a time).

Defeat: Explodes into gibs of its spikes. These spikes don't actually deal damage unlike some other dangerous-looking gibs and thus are only visual effects. The False Cores don't despawn on their own unless the player gets far enough away from them.

GelTech Info:
-A jagged remnant of another powerful entity, destroyed some time long past. The core remains active despite lacking a body; growing in instability as time passes due to it lacking a way of releasing its pent-up energies.

Drops: Golden Spikes; used for crafting a few different weapons that often can inflict Venom. Also drops a special throwing weapon that sticks to foes for additional damage, a sword, a flail, a summoner staff, and a bow. In Expert Mode it also drops a single Golden Core Piece, used to craft either a pet or a mount alongside the other 2 'golden' Expert materials.

Extra Info:
-While his attack pattern may seem simple enough, the movement speed increases as its health lowers makes it progressively harder to actually damage the boss in the later stages.
--This is only worsened in Expert Mode where, not only does the boss have additional health, but also with that moves even faster by the end.
[Added: 19/7/19]
115 - Golden Stomper
Appearance: A mechanical entity with two large legs and no arms. It has two wings protruding from its back which it can use for flight. It has numerous large plates running down its whole body, with the spiked ends of these plates protruding from its hunched back. It hasn't got a face, only a glowing blue 'x' where its face should be. It is larger than the sprite would suggest, being larger than King Slime in-game.

Summon: Use the Golden Beacon in the ice biome at any depth. The boss is unaffected by time, depth or biome after being summoned, so the player doesn't have to worry about any consequences for taking it to a new biome.

[Fought: Post-Moon Lord]

Stats:
Health:
-1,500,000 (2,870,000) (Stomper)
-5,000 (10,000) (Mini-Stomper)
Attack:
-188 (318) (Melee)
-150 (264) (Shockwave)
-165 (290) (Mini-Stomper Melee, Blue Laser)
Defence:
-200 (Stomper)
-800 (Mini-Stomper)

Attacks:
The Stomper will usually follow a simple cycle in which it performs 3 actions in a row: a super-jump, laser barrage, and minions summons, before repeating the cycle.
-The Super Jump has it jump to about roughly 10 blocks above the player before falling down vertically above the player. It cannot move horizontally whilst falling and, upon hitting a solid object, stops falling and releases a shockwave similar to the Old One's Army Ogre enemy.
-The laser barrage has it inaccurately fire 10 clusters of lasers at the player. Each cluster consists of about 5 lasers and the gaps between them shorten as the boss' health gets lower.
-The minions it summons are called 'Mini-Stompers'. They look like smaller versions of the boss and all attempt to use the super-jump attack, but cannot use laser-based attacks. Usually 2-3 are summoned at a time.
As the boss' health gets lower it begins to use these attacks progressively faster, though the only one it affects to a noticeable degree is the laser barrage as the jump takes roughly the same amount of time and the minion summon is already fast to begin with.

Defeat: Explodes into fiery gibs. The gibs release flames which match the colours of the blue segments on the boss as opposed to using normal fire-like colours.

GelTech Info:
-A tundra-walking mech powered by the icy energy of its home. It has slowly developed a cantankerous disposition over many years of near-isolation where its only company is often attempting to attack it. Of course, no normal denizen of the tundra could stop even a single stomp of its hydraulic-powered legs.

Drops: Frozen Gold; a material used for crafting a few weapons and accessories, as well as an armour set. Its weapon drops are a rocket launcher, gun, a tome, and a throwing spear. In Expert Mode it drops the Reinforced Gold Plate which can be used as a material towards either a pet or mount.

Extra Info:
-Despite having a set of wings, it doesn't actually fly throughout most of the fight.
-Despite also being part of a pseudo-trio, none of them are actually connected to each other in the lore, even if some of their drops and their names are connected
-The lasers are actually shaped like 'x'es due to them coming from its face. However, due to both their movement speed and their trails, this would likely be extremely hard to notice in-game
[Added: 19/7/19]
116 - Bygone Familiarity
Appearance: A large purple orb with a cloudy substance moving around inside of it. Two green specs seen in the lower left of its body float relatively in-place, but do not seem to do anything (so they are likely not eyes as they don't watch or follow the player in any way).

Summon: Use the Avalon's Whisper at night anywhere in the world. If it reaches daytime whilst the boss is active it will be forced as an Eclipse regardless of what it would have otherwise been, leaving the fight mostly dark.

[Fought: Chaos Mode]
[Special Boss: Uncraftable Summon]

Stats:
Health:
-19,000,000 (21,560,000) (Phase 1)
-23,850,000 (30,000,000) (Phase 2)
-N/A (48,440,000) (Phase 3)
--42,850,000 (100,000,000) (Total)
-1,000,000 (1,000,000) (Blade of Ascension)
-4,500,000 (10,000,000) (Oblivion Skull)
-N/A (Infinite) (Red Seeker, Blue Seeker, Green Seeker, Armageldon Slime)
--49,350,000 (112,000,000) (Technical Total)
---49,350,000 (114,800,000) (Maximum Total)
Attacks:
-340 (600) (Bygone Melee)
-320 (576) (Bygone Magic, Oblivion Skull Melee)
-400 (695) (Ascension Melee)
-300 (552) (Oblivion Laser, Oblivion Fireball, Seeker Melee, Seeker Magic)
-550 (800) (Armageldon Slime Melee)
Defence:
-200 (Bygone Phase 1, 2)
--500 (Bygone Phase 3)
-850 (99,999) (Ascension)
-285 (Oblivion Skull)
-210 (Seeker)

[All attacks inflict Energy Overload debuff]
[Melee attacks inflict the Enhanced Vulnerability debuff]
[Red, Green and Blue Seeker's attacks inflict On Fire!, Cursed Inferno and Frostburn, respectively]

Attacks:
Phase 1:
The Bygone Familiarity is the only thing active at the beginning of the battle. It starts by taunting the player with dialogue, saying "Another challenger comes to right their wrongs... pathetic!".
The Bygone mainly floats towards the player, teleporting after roughly 5 seconds pass. Whilst attacking its movements may become less predictable and not aim for the player, based on what attack is used.
-It may stop and launch up to 8 dark energy blasts at the player in succession. These move in a slight wave-like pattern as they travel towards the player, with the wave gradually getting larger and the projectile getting faster the further it travels.
-It may summon numerous projectiles from above, below or to the sides. They aren't quite a 'wall' as some are further forwards than the others, but the player still will have to carefully move through them to avoid damage.
-It may launch 8 projectiles outwards in all directions, followed by 10 more
-It may launch 2-3 large flurries of projectiles at the player while moving in a very wide circle around the player. These flurries all move normally for a while before stopping suddenly. A second or two later they will suddenly start moving again, immediately going back to their original speed before accelerating.
At 50% health it will transition into its 2nd phase.
"Your attempts will never prevail, this goal is foolish."
Phase 2:
The Bygone Familiarity acts the same itself, but also summons its first minion; the Blade of Ascension. The Blade is a large sword which acts like a large Enchanted Sword; spinning in-place before dashing at the player. It deals massive damage if it hits the player, but can be stopped if attacked whilst charging, but not when spinning-up. (In Expert Mode the dash also cannot be interrupted, forcing the player to dodge).
-The Bygone's only new attack is to fly above the player in a straight line, dropping a massive amount of projectiles downwards.
Upon taking the Bygone Familiarity down to 10% health it will speak again:
"Why is it that you had to call upon me again?"
Finally, upon taking it down to 0 health, it will explode and the message "The Bygone Familiarity has been defeated..." will appear. However, the Blade doesn't disappear and the boss music doesn't stop...

...Roughly 10 seconds later a new form will appear and the fight will continue.
Phase 3:
The new boss appears to be a heavily-modified version of Skeletron Prime, with additional armour plating and purple eyes. It only has 2 limbs, both of which are invincible. This enemy is called the Oblivion Skull
-The Skull itself may fire 9 pink lasers outwards in all directions and, much like Prime, can perform a headspin which reduces movement speed but boosts contact damage and defence by 2x.
-The Vice may simply dash at the player, and whilst the skull performs a headspin will move rapidly towards the player attempting to deal contact damage
-The Cannon may fire pink fireballs which cannot pass through blocks, but travel quite fast. Whilst the skull performs a headspin the firing speed of these fireballs is greatly increased
Upon taking the Oblivion Skull down to 50% health the Bygone will re-appear in a new form, with a new message:
"Did you really think you'd have rid of me so easily?"
Phase 4:
The Bygone Familiarity's body changes slightly. The green lines are diagonal and vibrate frantically, new shapes are seen forming within its body, and black wisps orbit its body continuously. It retains its old attacks, but also gains new additional ones as well.
-It may launch slim fireballs which split into 3 after travelling for a couple of seconds, and then the middle laser will split in 2 after another couple of seconds pass. Usually up to 5 fireballs are launched in succession before it moves onto another attack.
-It may suddenly dash at the player, covering a large amount of ground extremely fast
-It may launch 4 fireballs, 2 above the player and 2 below, which then all converge at the player's location before travelling in whichever direction they were facing whilst converging.
At 60% health it will speak again, but doesn't change its attack pattern.
"Your face, it is oddly familiar..."
"I seem to recall a past life, a time where I attempted to stop you from bringing destruction"
"Was I, once, a hero?"
It continues attacking until at 40% health, where it will summon a 2nd Blade of Ascension regardless whether or not the first one was defeated. Its own pattern doesn't change, but it speaks again.
"I remember now..."
"I remember... everything..."
The fight remains mostly the same until the Bygone Familiarity is taken down to 5% health where it will say its 'last' line of dialogue.
"I remember... the Avalon..."
Once at 0 health once more, it will once again appear to explode and the message "The Bygone Familiarity has been defeated once more..." shall appear.
If the player is playing in Normal Mode this is when the fight ends, with the boss being defeated and its minions despawning.
However, in Expert Mode, the music stops, but the minions keep attacking.

...After another 15 seconds, the final Expert phase will begin.
116 - Bygone Familiarity (Continued)
Phase 5:
The Bygone Familiarity's appearance shifts into its final form, with the black wisps becoming part of its body and the green specs becoming its eyes. The form, though different, looks familiar...
The Bygone's attacks remain the same, though it gains new minions and assists old ones.
--The Blades of Ascension, if still alive, are healed 40% of their health
--If the Oblivion Skull is still active it is healed 25% of its health
-The 3 new minions are the Red, Green and Blue seekers; enemies that vaguely look like armoured eyes of Cthulhu.
--The Red Seeker may spew flames with roughly twice the reach of the elf melter. After a few seconds it may stop launching flames and charge up to 5 times, leaving flame trails with every charge.
--The Green Seeker launches cursed fireballs at the player which explode on contact with blocks. It charges up to 4 times, with each charge getting faster and covering more ground.
--The Blue Seeker fires lasers at the player, mainly staying above the player. Instead of charging it will move horizontally to the player and fire a rapid barrage of lasers that gets less accurate but faster the lower the Bygone's health.
-It also gains a 4th new minion called the Armageldon Slime. The slime simply hops around like normal slimes, but is faster and deals excessive damage if the player makes contact with it.
While the Bygone's health lowers it will speak at certain percentages of health.
"Did you believe that you had defeated me for good?" (100%)
"No matter how many times you fight me, I shall live on" (90%)
"For as long as Terraria stands, I shall remain here to defend it from the likes of you" (70%)
"You shall bring disorder to these lands no longer" (50%)
"Once I am through with you I shall direct my power towards your so-called friends" (30%)
"My form grows weary..." (10%)
"...the avalon calls..." (2%)
Upon running out of health the boss is truly defeated this time. Its minions despawn and the boss music stops.

Defeat: The boss slowly fades from existence whilst stationary, releasing large amounts of pink and green particles as its body becomes more transparent until it vanishes completely. During this time its minions will flee and despawn as soon as they aren't visible on the player's screen.

GelTech Info:
-A long-forgotten guardian of Terraria, lost in time. Since its original awakening it has witnessed many Ragnaroks and Calamities, with the overflow of power eventually forcing it into an elongated slumber.

Drops: Oblivion Fragments; materials used to upgrade a massive amount of weapons, accessories and armour sets. Also drops a sword, a gun, a mage staff and a summoning staff. In Expert Mode it also drops True Oblivion Fragments which can upgrade weapons upgraded with the Oblivion Fragments to stronger forms plus a few additional weapons as well, a pet that looks like a miniature version of the boss, and an accessory that may heal or buff the player upon dealing damage.

Extra Info:
-This boss' 3rd phase is inspired by two main sources, the most obvious of which is Ultrablivion from the Avalon mod.
--This is not only in its appearance being mainly a more intimidating version of the boss, but also it summoning similar minions and even referencing Avalon twice with its dialogue
---More of its dialogue also references some of its old dialogue as well, mainly when talking about defending the earth from the player's destructive actions
--It also references Polyphemalus; one of the first bosses I made back in the 1st Boss Ideas page, with the Seekers' appearances and colour schemes.
--The Oblivion Skull is a reference to Oblivion; Avalon's penultimate boss
--The Armageldon Slime is a reference to the Armageddon Slime from Avalon as well, but also the Astralgeldon Slime from Calamity
---The Astralgeldon Slime was inspired by the Armageddon Slime, so this is a whole new level of meta going on here
-This boss has not only one fake-out death, but in Expert Mode actually has 2
-Faces can be seen inside of the Bygone Familiarity's orb when in its 2nd and 3rd forms.
--In its 2nd form a vague face can be seen in the lighter areas of the cloudy substance inside the orb, though the face appears unstable and appears to be melting and shifts as the clouds move.
--In its 3rd form a face almost like a smiling skull can be seen below the boss' eyes.
-The Armageldon Slime, despite dealing excessive amounts of damage, lacks any decent vertical movement and thus can be almost entirely nullified by either staying away from the ground or making a sky bridge and dropping the Armageldon Slime through it by passing through it and flying back onto it again.
-The Armageldon Slime appears to have a face inside of it; a face that looks similar to the one inside of the Bygone Familiarity's 3rd Form.
-Originally, this fight was meant to be even harder by having a time limit. However, upon realising how long this boss fight is already and due to how many enemies the player already has to watch out for, this idea was scrapped.
-Ultrablivion, the inspiration for this boss, was also the inspiration for Oblivion; another boss who appeared on the 1st Boss Ideas page (and then appeared again later with a re-design on one of the Boss Ideas 5 pages).
-Despite having stats comparable to the Post-Game Superbosses, the Bygone Familiarity isn't superboss as it can be fought prior to Chaos Doppelganger's Revenge.
[Added: 20/7/19]
117 - The Hive
Appearance: A strange alien-like machine, build out of dark green metals and covered in numerous green lights. While most of its body is rather slender it carries a large cylindrical pod on its lower half, though the contents of the pod remains obscured throughout the battle. It flies on a pair of strangely-shaped wings, supported by an additional rocket on its back.

Summon: Use the Extraterrestrial Pod at night. The boss will despawn if it reaches daytime again, and is unaffected by biome and depth.

[Fought: Hardmode]

Stats:
Health: 33,000 (52,050)
Attack:
-60 (100) (Melee) (Inflicts Venom in Expert Mode)
-55 (90) (Toxic Cloud, Missile) (Inflicts Venom)
-65 (108) (Toxic Explosion) (Inflicts Venom)
Defence: 30

Attacks:
Flies above the player, mainly launching missiles down towards the player which explode on contact with solid blocks. As the boss' health wanes it will fire these missiles faster, and also more accurately as well (even faster in Expert Mode).
-After firing missiles for a few seconds it will drop between 1-3 bombs. These roll across the ground for a few seconds after being fired before exploding into large toxic clouds, similar to the ones dispersed by the Toxic Flash weapon.
-When under 40 (65)% health it may also drop a different type of bomb. This one is distinct as, not only can it be fired at any time, but the bombs glow green and fall slower. Upon hitting a block they will explode and release a large vertical pillar of green flames upwards.

Defeat: Explodes into gibs, with the small worm-like creature inside bursting into small green blobs.

GelTech Info:
-An alien machine built for carrying live cargo to preset destinations. It appears your pod may have overridden its autopilot feature and brought it to earth. Too bad its cargo was destroyed upon being defeated...

Drops: A flamethrower, gun, mana-using blaster, and a sword. In Expert Mode it can also give the player an accessory that boosts player stats under 75% health and even more under 50%, but lowers them when over 75% health.

Extra Info:
-Originally, the boss was designed to be a Post-Moon Lord boss, armed to the teeth with futuristic weapons. However, realising I've done that concept a few times, I changed it.
--I also made it a Hardmode boss due to the overabundance of Post-Moon Lord and Chaos Mode bosses made recently, and wanted to have a break from making the extremely powerful foes for this one.
-The worm-like creature within its 'pod' shares a similar shape to the Reanimators; bosses seen prior whose appearances are all small serpentine creatures. However, as this thing is green and destroyed upon impact, it is unlikely to have been a Reanimator due to their hardy nature.
[Added: 22/7/19]
118 - Alpha Void Purge
Appearance: A large serpent; half made of matter and half made of pure void. A thin blue frame holds the void within its body, as well as several deep purple orbs which act as its sensors. It is believed to be the true form of the Void Purge; having spent enough time in the void to merge with it.

Summon: Use the Rift Amulet anywhere in the world. As soon as it is used the sky will turn black and all players will be given 5 (3) purple hearts which float above them; acting as an additional health counters. Every hit will deplete these hearts by 1 and, when the player reaches 0, will be killed and remain dead until the boss despawns.

[Fought: Chaos Mode]

Stats:
Health:
-33,300,000 (55,785,000) (Void Purge)
-5,000,000 (8,500,000) (Voidling)
Attack:
-2 (2) (Head Melee)
-1 (1) (Body Melee)
-1 (1) (Voidling Melee)
-1 (1) (Void Wisp, Void Rain)
Defence:
-120 (Void Purge Head)
-500 +80% Damage Resistance (Void Purge Body)
-300 (Voidling)

[Attacks are all directed towards Purple Hearts as opposed to the player's health, allowing the player to only survive a maximum of 5 (3) hits before dying instantly to the boss]

Attacks:
Alternates between airborne and grounded abilities throughout the fight. Airborne has it slowly fly towards the player, speeding up as it takes damage. Grounded has it move a lot faster by default, but lacks the flight of its other ability. Both abilities allow it to use attacks.
-It may launch numerous Void Wisps from its segments. They move slowly, but their ability to pass through walls combined with their sheer number makes them a threat.
-It may summon numerous Void Rain projectiles which fall from above the player randomly. They cannot pass through blocks, but are faster than the Void Wisp projectiles.
-It may summon a small vertical bullet-hell which spawns projectiles travelling either upwards or downwards. All projectiles in a single bullet hell travel in the same direction, however.
-It may summon Voidlings; smaller versions of the boss which fly through the air after the player at all times. It spawns these at 60%, 30% and 15% in Normal (and 1 at 70%, 2 at 50% and when below 30% keeps two active at any given time).
-It may go invisible temporarily. While invisible it cannot use its 1st attack or summon Voidlings, but can still summon Void Rain or bullet-hells. It cannot deal contact damage to the player until it is completely visible again. It becomes invisible more often at lower health.

Defeat: Bursts into black smokey clouds and black particles. The Purple Hearts disappear and the minions remain, but can only deal 1 damage to the player due to their fight mechanics.

GelTech Info:
-Armoured serpent formed partially of void. Believed to have been birthed within the darkness of the void; absorbing the nothingness into its body to create a menacingly powerful entity.

Drops: Void-based weapons and Void Bars; bars of contained void used to craft numerous items in Chaos Mode. The weapons include a sword, yo-yo, projectile-less sword, tome, magic staff, bow, summoner staff and throwing spear.

Extra Info:
-This boss was designed to be a replacement for the old Void Purge seen back in Boss Ideas 4 due to me feeling that the previous sprite was inadequate and the fight rather uninteresting
--Therefore, this version received unique concepts for its fight like a unique health bar and damage system, as well as 2 unusual attacks in alternating movement patterns and turning invisible
---Sadly, the Devourer of Gods beat him to it with the pattern changes and the invisibility, but luckily the Void Purge uses them differently as to not copy Calamity.
-Due to the unique damage system it deals the same damage in Expert Mode as in Normal; though this is because instead of increased damage the player's health is decreased instead
--Other enemies separate from the boss can still deal normal damage and kill the player that way; bear this in mind
--If the player has an item that can resurrect them in the middle of the fight they will be revived with 1 Purple Heart
--Immunity frames for Purple Hearts are calculated separately from normal immunity frames, giving 1 second of Purple Heart immunity by default or 1.5 seconds with the Cross Necklace or upgrades.
---Also therefore, trying to cheat the instant death by taking damage as you take the 5th (3rd) hit will not work and you will still die as soon as your normal immunity frames expire.
-In Expert Mode it isn't often worth going out of your way to kill the Voidlings once the Void Purge is down to 50% health as not long later it will be spawning them in continuously. However, keeping them on low health could be a good way to avoid letting them corner you later.
[Added: 23/7/19]
119 - Colossal Jellyfish
Appearance: A massive dark blueish jellyfish, with numerous arms around its main body and a few significantly longer ones dangling from the centre of its body.

Summon: Fish in water using the Jellyfish Bait anywhere in the world. The Jellyfish Bait itself can be fished up in the ocean in Hardmode as long as the player's fishing power is above 50. The boss is unaffected by time, depth and most biomes, though summoning it in the Underworld or Caverns will be harder due to the lack of water. The only biome that makes a difference is the underworld, which enrages the boss and turns it red.

[Fought: Hardmode]
[Special: Uncraftable Summon]

Stats:
Health:
-9,500 (16,000) (Colossal Jellyfish)
-50 (100) (Floating Jelly)
Attack:
-55 (90) (Melee) (Inflicts Electrified in Expert or if enraged)
-45 (78) (Floating Jelly Melee)
-50 (84) (Jelly Blob)
Defence:
-15 (Colossal Jellyfish)
-0 (Floating Jelly)

Attacks:
The floating jelly will follow a pattern of charging at the player 3 times and then using one of two attacks. The charges have it rise vertically slowly for a second before charging at the player in a slight arc, with the charge losing steepness as it continues. Its two attacks are as follows:
-It may launch a large amount of arcing globs of jelly at the player. Many are launched but their random arcs, low overall range and inability to pass through blocks makes them only a close-ranged threat.
-It may summon a large cluster of Floating Jelly enemies around itself, which coat the boss and block attacks until it goes to charge again. Once the Colossal Jellyfish charges they are dispatched and begin chasing the player freely, but also cannot pass through blocks.

Defeat: Explodes into large blobs of jelly, with its minions also instantly being killed upon defeat. If defeated in the Underworld it will also release flames as it dies as well.

GelTech Info:
-A massive jellyfish; some strange anomaly of the ocean world. Its size is far greater than any of its recorded brethren, so does this mean that there are more like it somewhere?

Drops: Electrified Jelly; a material used to make a set of mobility-based armour, as well as a few weapons like a flail and a tome. In Expert Mode it can also drop a summoner staff which summons floating jellyfish minions. If defeated whilst enraged it can also drop an accessory that slows and electrified enemies briefly if the player takes damage.

Extra Info:
-Whilst enraged, the only differences are that it moves and charges faster and that it can deal Electrified briefly on hit. If fighting the boss in Expert mode, fighting it in the Underworld for the added accessory could be a good idea if the accessory sounds useful.
-Using the Hotline Fish Hook allows you to summon it in the Caverns and Underworld easier; useful for if the player wishes to fight its enraged form
[Added: 25/7/19]
120 - The King
Appearance: An elderly man with a grey beard donning a set of golden armour. A red insignia is seen on his chest and a pair of large red and black butterfly-esque wings are seen on his back.

He also has a large assortment of helpers, each with unique appearances to them:
-The Spectral Magus wears a red and black dress and a bow in her red hair. She uses 6 almost petal-like wings to fly, even though they aren't attached to her body.
-Deusparys is a large red and black serpenting boss with a large set of jaws. at the front. Its segments are covered in large scales and numerous spikes protrude all over its body.
-Yverioth is a large almost moth-like creature with a large black body with numerous red patches of fur around its joints. It has 6 legs, the front two ending on claws, and small red wings on its back that move rapidly.
-Pye is the most insect-like creature of the King's minions. It has a black body with a red abdomen and shiny red wings.
-Asdegion appears to be a large mostly-circular being with blade-like arms and a jagged, almost z-shaped body. It spins as it moves.

Summon: Use the Forthcoming Conclusion anywhere in the world. The King does not spawn immediately; only once the required number of minions has been defeated. Minions are spawned 1 (2) at a time for 2 waves before the King appeared.

[Fought: Post-Game]
[Special Boss: Post-Game Boss, Requires Certain Bosses To Be Defeated, Expert Exclusive]

Stats:
[Spectral Magus]
Health:
-40,000,000 (Normal)
-Infinite (Phase 6, 7, 8)
Attack:
-530 (Melee)
-545 (Magic Blast)
-600 (Spectre Bomb)
Defence: 300

[Deusparys]
Health: 48,450,000
Attack:
-750 (Head Melee)
-600 (Body Melee)
-520 (Laser)
Defence:
-100 (Head)
-4000 +85% Damage Resistance (Body)

[Yverioth]
Health: 38,500,000
Attack:
-550 (Melee)
-520 (Moth Dust)
Defence: 400

[Pye]
Health: 32,000,000
Attack:
-0 (Melee)
-530 (Fireball Rain)
-550 (Crystal Shard)
Defence: 280

[Asdegion]
Health: 30,000,000
Attack:
-550 (Melee)
-528 (Magic Blast)
Defence: 500

[The King]
Health: 100,000,000
Attack:
-540 (Melee)
-530 (Sword Beam, Flame Barrage, Icicle Spike, Spark Storm, Razor Typhoon, Leaf Storm)
-570 (Hurricane, Flaming Meteor, Blizzard, Zeus' Bolt, Cthulhunado, Nettle Burst)
-650 (Light of Apothesis)
Defence:
-500 +15% Damage Resistance (Phases 3 & 4)
-- +50% Damage Resistance (Phase 4, Guardian Active)
-500 +25% Damage Resistance (Phase 5 & 6)
-- +85% Damage Resistance (Phase 4's Guardian still active)
-500 +40% Damage Resistance (Phase 7)
-500 +60% Damage Resistance (Phase 8)


[The King's fire, ice, electric, water and grass attacks inflict Red Inferno, Frostburn, Electrified, Chilled and Nature's Wrath, respectively]
[The King's Sword Beam and Hurricane inflict Ichorian Spark and Dazed, respectively]
[The King's Light of Apothesis inflicts Ichorian Spark, Golden Inferno and Nature's Wrath]

Attacks:
[Spectral Magus]
-Teleports around, firing either arcs of 5 shots each or arcs of 3 with mild homing capabilities, or may summon numerous Spectre Bombs which hang in-place for a few seconds before exploding violently. More bombs are summoned at lower health.
[Deusparys]
-Worm enemy that acts like the destroyer; burrowing through the ground whilst occasionally firing barrages of lasers at the player. If the player is close to its head its head can also fire a laser every half-second independent of the barrages.
[Yverioth]
-Charges at the player 3 times, and then either launches a large arc of Moth Dust in front of itself which lingers in the air for a while and damages nearby players, or may instead perform a 4th charge where it circles the player roughly 270 degrees while spawning Moth Dust. Either way it will wait 2 seconds before repeating the cycle.
[Pye]
-Always hovers above the player. May summon fireballs which fall from the sky near the player or summon crystal shards which move with the player for a second before all being launched at the player.
[Asdegion]
-Charges 4-5 times, each charge having limited vertical distance but massive horizontal distance. After charging it will spin in-place and summon a 'death blossom' of countless projectiles fired in random directions for a while before taking a break and restarting its cycle.

Phase 1:
Summons one of the 5 King Guardians, with the Spectral Magus being the least likely to spawn and the others sharing the same chance.
After defeating the Guardian it will transition onto Phase 2 with the message '{Guardian Name} has been held back!'
Phase 2:
Summons two of the Guardians at a time, though the Guardian spawned may not be the Guardian seen in Phase 1.
Defeating the Guardians will provide similar messages to the one in Phase 1 for both Guardians, and having defeated them both it will transition the fight to its 3rd phase.
Phase 3:
"Why do you seek me?"
The King himself shows up, draws his blade, and begins attacking. He will use his wings to stay close to the player, easily being able to match the player's speed in most cases. He has a few attacks in this phase:
-He may swing his blade and summon an arc of 3 Sword Beams. After a second another will appear above the player and move down and, another half-second later, another will appear below the player and start moving upwards.
-He may hold up his sword, causing it to glow red, before swinging it. As it is swung it releases a massive cluster of fireballs which fly out in a large arc, all at varying speeds and random angles. They explode on contact with solid objects like players or walls or after travelling 40 blocks.
-He may hold up his sword, causing it to glow blue, and then slam in downwards. Icicles will appear randomly above the player, with a potential horizontal range of up to 50 blocks in each direction, and then they will all fall down.
-He may hold up his sword, causing it to glow yellow, before a bolt of lightning strikes the sword. Numerous fast-moving lightning bolt-like projectiles are released horizontally or diagonally from both the bolt and the blade.
-He may hold up his sword, causing it to glow dark blue, before swinging it twice towards the player. Two Razorblade Typhoon projectiles are summoned which chase the player at decent speed until they eventually despawn after around 6 seconds.
-He may hold up his sword, causing it to glow green, before a large number of leaves begin descending diagonally downwards. All the leaves are at the same angle and from the same direction, but their spacing is random.
After being taken down to 70% health he will transition into Phase 4, saying;
"Are you, perhaps, from the kingdom I once ruled... or am I being foolish?"
Phase 4:
The King's attacks will slow down and he will summon in one of his minions, though cannot summon the Spectral Knight. While the Guardian is active the King gains an additional 50% damage resistance on top of both the Chaos Mode resistance and his own natural resistance, but this one will disappear upon defeating his minion.
At 50% health, regardless on whether the Guardian is defeated or not, the King will transition into his 5th phase.
"What, then? Do you wish for me to return to my kingdom after all these years? What will they think of me? What would Ga-"
120 - The King (Continued)
Phase 5:
The King's own attacks speed up again, and he also gains a series of new attacks of which he can use in conjunction with his old attacks. He still holds up the sword to perform these attacks.
-If the sword turns white he will swing it down and summon a large twister which travels horizontally in the direction he was facing. While it is affected by gravity it falls slowly and doesn't pass through blocks.
-If the sword glows red and gains flame particles then he will summon large flaming meteorites down from the sky that violently explode on contact with blocks, releasing smaller flaming rocks which perform small arcs before hitting the ground and bursting.
-If the sword glows blue and gains cyan particles then numerous large snowflake-shaped projectiles will rain down diagonally, though as they fall they will eventually explode into 6 smaller snowflakes that travel outwards. The times of each larger snowflakes' detonations are random.
-If the sword glows yellow and sparks then the sword and 2 Sword Beams will be thrown in an arc before stopping suddenly. Only roughly half a second after stopping massive bolts travel from the King's hand to each of the 3 swords. After a second the Sword Beams despawn and the blade returns to the King's hand.
-If the sword glows dark blue and water droplets fall from it then the King will summon two small blue tornadoes; one falling below him and the other chasing the player. They disappear after either hitting the player or a solid block, summoning large Cthulhunadoes wherever they disappear. The Cthulhunadoes don't have Sharkrons in them, but they do linger for an extended time and are taller than Fishron's.
-If the sword glows green and pulsates then he will bring it downwards and large nettles will rise from the ground, travelling upwards for hundreds of blocks almost like worms. They don't travel straight up, instead performing a slight 'wavy' motion.
At 35% health he will transition to his 6th phase, saying;
"I cannot, I have lead them to believe that my fate was sealed. I am a mere ghost now; a memory to them all..."
Phase 6:
He will summon the Spectral Magus and slow down slightly. The Magus, unlike the other Guardians, is immortal at this point and cannot take damage.
At 20% health he will transition into his 7th phase, with more dialogue to signal the transition.
"Would they even... accept me back after all this time?"
Phase 7:
Gains more damage resistance, attacks a little faster, and gains one final attack.
-His final new attack, Light of Apothesis, summons small flickers of light in numerous places almost horizontally to the player. After roughly 1.5 seconds large pillars of light erupt vertically, with the horizontal placements of the flickers which were used to indicate where they would be summoned. These pillars vanish after roughly 2 seconds.
At 10% health he transitions to his final, 8th phase. The beginning of further dialogue signals this, though continues throughout the phase until the dialogue runs out.
"...Maybe...?"
"...Would they truly accept me back after so long?"
"...Would they forgive me for abandoning my people?"
"...What would Garagon think if he saw me like this?"
"...How can I explain that I left..."
"...To try to prevent the disaster..."
"...To try to save them all?"
Phase 8:
He gains additional damage resistance, but both his attacks and the Spectral Magus' both slow down significantly, making this phase easier to cope with.
At 4% health he will call off the fight, becoming immune to damage and speaking once more
"Yes"
"This skirmish has helped clear my head after these years of guilt"
"I thank you greatly for this, young one"
"I shall indeed return to my people, and see if they'd take this tired old fool back as their king"
"I bid you farewell"

Defeat: After speaking again at the end of his 8th phase, he will disappear into particles akin to the Magic Mirror particles, and so will the Spectral Magus. Any Guardians, if they have somehow survived up to this point, will flee and despawn as soon as possible. Numerous things will occur after the King leaves.
-The King's summoning item will be used up from the player's inventory
-Garagon and the Guardians (e.g. Storm, Ember, etc.) will have new dialogue, or dialogue if they didn't originally.
-The Kingseal now boosts damage by an additional 20%, and adds another 0.5x to the damage multipliers against Chaos Doppelganger whilst equipped (additively)
-NPCs charge 30% less for all their items, stacking with other effects
-The player permanently receives the King's Mark buff, giving mild stat boosts to all of the player's stats.

GelTech Info:
-After all these years, the great king has returned to his kingdom. The kingdom is full of celebration, though it seems Garagon may be happiest of all to see the return of both his master and friend. What happens now? Nobody really knows.

Drops: Drops 2 swords, a melee spear, a flail, a yo-yo, 5 tomes, a summoning staff, a gun, bow, flamethrower, rocket launcher, throwing spear, throwing knife, boomerang and a throwing glove. Also drops 3 accessories that either increase damage at the cost of defence, defence at the cost of damage, or health at the cost of speed. Can also drop the Kingsweave; a material used for upgrading a massive assortment of items dating all the way back to some Pre-Hardmode items. It can also rarely drop a pet and mount. As it is an Expert-only boss it technically doesn't have an Expert-only item as all of its items are Expert-only.

Extra Info:
-The idea of bringing back the former king was an idea I had for a fairly long time. Originally he was going to be brought back as more of an antagonist, then having amnesia, then as a faceless wanderer, and finally I settled for a traveller who befriended and recruited those he met; making a small army of sorts as he travelled.
-By the end of the battle the King can actually amass a massive 80% Damage Resistance under normal circumstances which, combined with his massive 500 defence, can reduce even some of the most powerful attacks to only mid-to-late-hundreds.
--Technically, if the player left the Phase 5 Guardian alive, another 85% could be added to this and have the King's defences be 500 defence and 97% damage resistance, though getting to that point would not only take time but caution to avoid defeating the guardian.
-It is one of the few fights where the boss' significant minions are actually spawned randomly and not in some pre-set order (outside of the Spectral Magus in the later phases, who always spawns).
-While a total of 5 minions are spawned throughout the fight and 5 Guardians exist, it isn't guaranteed the player would have to fight all 5 different types in the fight as the spawns are mostly random.
-The maximum amount of health the player would have to get through in this fight is 275,400,000. This is with Spectral Magus, Yverioth and Deusparys being spawned in Phases 1 and 2 and Deusparys being spawned a 2nd time in Phase 4
--The lowest amount of health is 230,500,000, which is with Yverioth, Pye and Asdegion being spawned in Phases 1 and 2 and Asdegion being spawned again in Phase 4.
-The name origins of the minions are either combinations of worlds, or completely made-up gibberish that sounded cool in most cases
--Spectral Magus was made after someone suggested a 'spectral knight' for this boss. However, due to the minions' colour scheming, the knight asethetic didn't work as well and ended up in the King's design instead.
--Deusparys, originally known as Sysparys, is mostly made-up, though with Deus being added to the beginning of its name very recently
--Yverioth contains both Moth and Wyvern, as well as being a reference to Yharon; the current penultimate boss of the Calamity Mod
--Pye and Asdegion's names are just made-up because one sounded silly and the other sounded cool. Unlike the others they did not get any changes mid-development outside of simply being given actual names.
120 - The King (Continued Further)
-In one case, all 6 members of this boss were actually compared by someone to some of the later Calamity bosses, though this was unintentional and almost entirely complete coincidence.
--The King was compared to Yharim; the Jungle Tyrant, due to his golden armour and apparent immense power and importance
--Spectral Knight and Asdegion were compared to Calamitas for being mages with frequent use of red in their colour schemes and abilities to summon numerous hard-to-dodge projectiles, almost like mini bullet-hells
--Deusparys was compared to the Devourer of Gods due to his design sharing similar aspects to the Devourer's 1st phase with its spikes, jaw design, and spike-bordered misshapen tail.
--Yverion being compared to Yharon makes the most sense as it was actually inspired by Yharon, thus receiving a pass
--Finally, Pye was compared to Providence for its forward-facing sprite, moth-like design, and ability to use both fireballs and crystals in its attacks.
--However, in many cases, the arguments for the similarities were overall fairly weak and thus didn't seem too big of an issue.
-King serves as the final boss to be made for Boss Ideas 5, finishing it up on #120.
-This is the first time in the Chaos Mod where the King's appearance is actually seen. Nowhere else is he given an image; even being a mere silhouette on his own Lore page.
[Added: 26/7/19]
[Final Notes]
Well, it seems a bit odd going over #100 for the 5th page, and doing it after a month or so has passed with complete radio silence my end even more-so, but here we are regardless, eh :P

If you're new to these go ahead and check out the previous ones as well, Boss Page 4 and all parts of 5 are grouped together, while 1, 2 and 3 are older and are listed separately due to not following the same base guidelines (as they didn't exist at the time, you see).

Anyways, I don't really know what else to say to be honest, other than saying thanks for viewing and that I hope you enjoyed the bosses :)


[This page wins the Outmemed Medal for almost reaching #1 on trending, though losing to a meme page]
22 Comments
Okami Tomato  [author] Apr 29, 2020 @ 3:06pm 
Of all my Boss Ideas pages to find...

GameRaiders found this one first...
scoot Jan 13, 2020 @ 6:46am 
whoa if you want the creators to script all of this you better join em (unless you are one of them XD)
bib Oct 10, 2019 @ 12:53am 
colossal jellyfish should appear like on the background
Jerphf Oct 9, 2019 @ 11:43am 
this is the top 10 most gamerest moment
Lich_King042 Aug 18, 2019 @ 10:47am 
ok
Okami Tomato  [author] Aug 17, 2019 @ 10:54am 
hey mactrucker1, if you're still in the comments
Boss Ideas 7 may be more helpful to use, as the bosses have actual animated sprites (not great, but smooth enough to work)

also memory_creations what's the 'Terraria Live' your making?
cosmos Aug 13, 2019 @ 7:03pm 
i will love this in my new terraria live im making
Okami Tomato  [author] Aug 13, 2019 @ 4:18pm 
Sadly I lack the coding skills required for most of them atm but, potentially, in the future, I will be able to begin making these...

...but until then I'll keep proactive and keep improving the sprite quality... speaking of which...
Rainst0rm3 Aug 13, 2019 @ 4:16pm 
You can just make a mod for TModLoader with all this
Okami Tomato  [author] Aug 12, 2019 @ 3:37am 
ok.