Gloom
112 ratings
No more Doom in Gloom: A guide to Gloom
By PixelDemise
Gloom can be a tricky game at times, made harder by RNG that doesn't always agree with you. This guide should help with tips to learn more about the game, and get better at beating it.
2
2
   
Award
Favorite
Favorited
Unfavorite
Introduction
Starting off, this guide won't spoil anything either than the first 4 floors unless specified. If you want tips for things beyond the 4th floor, check near the end.

THIS IS A WORK IN PROGRESS

Aside from that, welcome new, or old, player of Gloom. I hope to help you out when it comes to mastering this game, as challanging as it may or may not be.

A few things to keep in mind in general about the game.

One, you will die. A lot.

Like any rougue like game, death will come often and fast early on. As you learn more, you will die less, and learn more, leading to even less deaths.

Two, differing play styles will change things. I personally tend to play a hyper agressive roll heavy build that prioritizes stacking enemies on top of each other so I can hit them all in one swing. I am often only having enough stamina to hit once, then roll dodge, but that works for me.

Lastly, enjoy the game. Gloom is, suprise suprise, gloomy, and that is what makes it good. Relying too much on help from others may make the game less pleasent. The losses and suffering makes the game somewhat more pleasent, so don't rage quit and expect to find chees strats here.

Now then, let's begin.
Good Items
There are a lot of items in Gloom. Not many compared to other similar games, but still quiet a few. Some are more powerful than others, but here I plan to detail all the items worth noting, and how best to use them.


Locke's Hammer
Allows purchasing of the legendary weapons. Pure and simple. If you want one, take it, but you don't need to always take it.


Eden's Necklace
Hands down the single best item in the game. Increased stamina regen is godlike in a game where running out of stamina means death. If you see this, take it. Always.

Amber/Ebony/Ivory Shards
All upgrade materials are very strong, and worth grabbing. However Amber is the strongest, as it lowers the stamina cost of all weapons. Ivory adds lifestealing effects to all weapons, while Ebony summons one orbling per hit enemy. Ebony is the weakest, but is still worth while.

Note that if you use an upgrade shard on a single weapon ALL weapons gain the effects. Even if you replace the upgraded weapon with a new one, you still retain the life steal/orb spawn/reduced stamina cost effect of the shard.


Abyssal Liquid
Something of a step down from the last item, but a powerful item nonetheless. It has a chance to block damage taken. I don't know the exact chance, but it seems somewhere between 20-40% but don't quote me on that. This is usually worth picking up, just, as with all RNG based items, don't rely on it.

Beast Eye
The Beast Eye is very strong, and usually worth taking. Every 7th attack(meaning crit, count 6 attacks, then the next will crit) will deal around triple damage, maybe slightly more. Great item for any build, but favors faster attacks.

Salesman's Hat
This item, at least for me, is rather lackluster as I rarely use guns except for support. However with an upgraded shotgun or flamethrower and this item, you can tear enemies and bosses to peices fast, provided you have the ammo.

Common Dream
Common Dream is a godlike item, at times the single greatest item in the game, with one major downside. It requires other items to be used. Having a 50% chance to make all spawned orblings deal bonus damage and heal you is OP as all living hell. Just make sure you have other orbling generating items.

Yellow Monarch
This item is great, if you are willing to wait a few floors and can get it early. If you can get it on the first floor, you will gain 4 stat ups, only gaining 1 if you get it on floor 3 as you can't "descend" any lower after the next floor.

Trapezohedron
This item is really great. Rather rare, but all stats up. If you find it in the shop, even on floor 1, it may be worth killing the shopkeeper for if you can't pay it's high price of 60 gold.


That does it for all the normal items. Other items may be useful, but these are the ones to keep an eye out for. There are still more though, however they are the items you want to avoid.

Bad Items
There honestly aren't that many bad items in the game, but there are a few I need to point out.

Oracle's Blindfold
This item is useless. Seeing enemy HP doesn't help you kill them, it doesn't help you survive, and it doesn't help you win. It may be nice on your first few play throughs as you learn the HP of enemies, but after a certain point it isn't even worth picking up if you got it for free.

Stone Wing
While not horrible, if there are other items, take them instead. This item is nice, blocking 3 attacks before breaking. But it is an item that is temporary. If you can, take another item, but if you get it free, it can be nice.

Egg of the King
This item doesn't actually make you stronger near death. All it does is when reaching low HP, a large number of orblings spawn, and only seems to trigger once. Like the stone wing, it is a temporary item, but worse than the Stone Wing, it requires you to be dangeriously close to death.

Rosalin's Pipete
The bonus stats you gain from this item are nevr worth the shuffling. Nearly all the time you will lose HP, and any amount of HP below the base 5 is basically a game over, as there are several attacks that can one hit you if you don't have perfect HP. Unless you are skilled enough to never get hit once, in which case why are you reading this, you should never take this, as it is the only item that actively makes the game harder

In all other situations if you don't lose HP, you lose damage which is not worth it.

The pipete isn't like the Binding of Isaac's Experimental Treatment where it shuffles multiple stats a little bit, it more often then not will shuffle etiher stamina and vigor to extreme high or low, with strength and finese going the opposite way.

Avoid this at all costs, expect to simply add it to your Necronomicon

Item Combos
There were a few items I didn't mention in the Good Items section, but are still very strong if pair with other items. You can find those ones here.

Amabelle + Common Dream + other Orbling generators
Amabelle isn't too strong on it's own, as parrying isn't worth useing most of the time. However pair it with the Common Dream item and it allows you to almost just sit and wack enemies. This pairing is ABSOLUTELY vital when trying for the 8:30 "Put the Devs to shame" speedrun. More on that later.

Life regen items
There are 5 life regen items in the game. The imaginary Fruit and Dream Fragment, both heal upon entering a new room, and the Severed Lips and Lament Configuartion, which grants life steal. The last item is Wicked Mother, which heals upon a parry. Excluding the last one, the first 4 items tend to be rather weak on their own, but are still worth picking up. However when paired together, even with just two, they become much stronger.

  • Adding the Occult Ring item to either of these two item pairs adds extra damage to your build

Tidal Spine + Tidal Jaw

Not a particularly amazing pair, these 2 items together allow rolling to take nearly no stamina at all. Which saving Stamina is always worth keeping in mind.

Map to Sombre + Shaman Lantern
These two items alone aren't too noteworthy and even together don't do too much. However together they can be very useful, as most of the flying bug ball enemies will die after about 3 seconds of touching both auras. Plus extra DPS without actually attacking is nice.
Weapons
Time to look over the weapons. Note here that I have extreme bias, and I hate the Rapier and Spear, due to both's lack of overhead attack, so I won't bother with them.


Shortsword/Longsword
For me at least, the best weapon in the game. A strong mix of damage, as long as you don't end up with 9 of one stat, and 2 of the other, good range made better with the upgrade, and good attack speed. Compared to say, a pure STR build with a greatsword, it won't deal as much damage, but as long as you stay within 1-2 stat points of the other stat, this is the weapon you want, even forgoing Legendary ones.

Handaxe/Halberd
While I love the Axe for it's good attackspeed, range, and swing area, the Halberd tends to not be as good. Count it as my bias against the thrusting style weapons. The regular axe though, as long as you are willing to not upgrade it, is fairly good for strength builds.

Greatsword/Zewihander
While the most powerful strength weapon, it suffers from the inverse of the finese weapons. It takes too long to attack. It has good range, strong damage, and is overall rather nice. However unless you have a STR stat worthy of it's base A STR/C FIN scaling, I don't think it is worth while, esscpecially on the two spoiler bosses.

Leo's Twin Blades
While they aren't bad per say, I don't recomend them. They don't deal enough damage versus bosses, lack range for how long their swing speed is, and requires two attacks to get any overhead damage. I honestly perfer the basic shortsword unupgraded over it. Versus normal enemies though, they aren't bad.

Saint Scythe
Second best weapon in the game, hands down. It has strong range, great swing area, alright attack speed, and strong damage. Plus it has a unique effect no other weapon has. Life Steal will trigger on every attack, instead of every few hits. Although it does have a slightly long attack animation, which could mess you up if you aren't careful.

Another small tip. It's attack combo is actually 3 hits long. While the Saint swings the scythe for the second hit, while he brings it behind him, it will hit again. Generally this won't happen often, but if you are face first in the Tidal Giants, or between two enemies, it can help. This also applies to the Halberd's attack combo.

Domnhall's Tomb
The strongest STR weapon in the game, and a contender, depending on playstyle, for the best weapon. It acts like a normal greatsword in terms of range, damage and swing speed. However it has a special effect. On the first hit, it sends out a shockwave that deals the same damage as the swing, on the second hit, a burst of energy will fly out extending the range to that of a greatsword, despite the weapon itself not being that length.

An important thing to note. The shockwave does not proc lifestealing effects, and it does not stack with the main hit. Only the normal attack, or the shockwave will deal damage to a single target, never both.


Now that that is finished, onto the firearms.
Firearms and Throwables
There are a few types of ranged weapons in Gloom, like the rest of the game, some are better than others.

Pistol/Revolver
A fair base weapon. It does the same damage as a base shortsword swing, and penetrates all enemies. I recomend holding onto this gun for the first area only, as it can be used to instantly kill the two fake False Prophet clones and not waste time. After that, it falls fast and should be gotten rid of. It is NOT worth upgrading, as even upgraded it's damage isn't worth the price. Unless of course, you use it only for the stagger, and not the damage.

Rifle/Musket
The strongest firearm in the game. It deals strong damage, penetrates all enemies, and has great versitility. It's one fault is it doens't recharge fast, but gun are meant to support your main weapon, not replace it. This item is ALWAYS a must buy. However, only if you have money to spare. It won't win you the game, but if you have the 15 gold, it is 100% worth picking up.


Shotgun/Sawn off
The Shotgun is a powerful weapon that does a little over 2 hits of base sword damage. The Sawn off increases range, and firepower. It is strong versus normal enemies, but doesn't tend to be worth it for bosses. While nice, generally only get this if you have a crappy ranged weapon by the final blacksmith, or you have the Salesman Hat.

Tomahawk/Cleaver
People tend to say this item is good, but it honestly isn't. If you throw it, and catch it, you don't spend bullets and it can be used instantly. While good if you solely use this, if you have even the base amount of damage, it is not worth it. The time spent trying to catch it costs both time spent attacking, and increases the risk of taking damage. Only really useful if you take Roselin's Pipette and end up with crappy damage.

Flamethrower/Chaingun
The Flamethrower itself isn't too useful, and even with the Salesman's Hat it isn't worth it. However, taking the Hat, and upgrading it into the Chaingun reverses things. It becomes extremely powerful, even more so if you have Orblings-on-hit items. A very powerful combo, but generally one I don't use often.

Molotov/Dream bomb
The Molotov isn't anything special. It is like a ranged shotgun blast, but slightly weaker. The Dream Bomb though, is a little better, as is summons a burst of orblings. Still not all that good, however with Common Dream it can be rather strong.
Common Enemies
Here I will be going into depth on each enemy, their moves, and the best ways to counter them. Some of it might seem basic, but there is still more stuff to learn. These may not be the offical names of the enemies, but as there isn't any Necronomicon entries for normal foes, these are the names I call them.

Unholy Parish Enemies


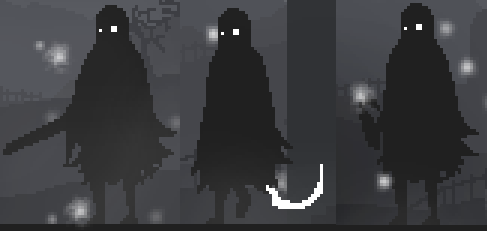
Cloaked Gunners, Molotov Throwers, and Sickle Wielders
The most fundimental basic enemy in the game, in three variants. One that holds a shotgun, one with Molotovs, and one with a Sickle.

The Gunners are the highest priority of the three, as they can be the most dangerous, due to having more range, less wind up, and more damage. They only have a teleport, and simple shotgun blast/

Throwers are the second most important, as they can leave damage over time fields on the ground, and unlike the other three, they will stay at a distance. Something to note, if you can't avoid the molotov in time, let it hit you directly. If it hits you directly, it will not spawn the DoT field, saving some health and movement area.

Last are the Sickle users. They are hardly a threat, even around others. Their only danger is a teleport move that makes them drop from above and deal splash damage, as well as an extremely telegraphed slash attack.

Bishops
These guys alone aren't a threat, but alongside others, they will be problems. They will fire either an orb into the sky that will fire four orbs towards you, or sent an orb right at you. Afterwards they will teleport away if you are close, and do the other move, over and over. They take six basic sword swings, so it might be better to leave them be and focus on others.


Hounds
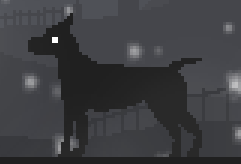
Hounds are very basic, they run up to you, pause, then leap. They go down in three hits, so they don't last that long. However, if you walk halfway across the room, or kill half of the enemies, there is a chance a Hound will break out of the windows above you and join the fight.

Crawler
Crawlers are super basic enemies, but honestly are more dangerous than they appear. They don't move, only repositioning via a teleport, and will send out a shockwave towards you. They can easily overwhelm you if you don't pay attention to them, but otherwise are no threat.


Church Giants
These guys are dangerous. They will attempt to stomp on you, dealing area damage, and then summon a wave of bullets from the sky before teleporting away and doing the same thing. They have a lot of health for an early enemy, so make sure you either can kill them fast, or save them for last.
Bosses
Bosses are usually the main reason runs end. Normal enemies may be tricky, but bosses are the ifnal blow. Here are each of the bosses, and some tips to help with them.

Unholy Prophet

This guy is patheticlly easy compared to the other bosses. He will summon two clones of himself, both die in a single hit, and then either fire a ranged shot, or do a close range AOE slam. After 3 attacks, he begins to teleport on top of you, slam, teleport again, and does that three times before summoning clones again.

I recomend keeping the pistol for the first stage soley for this guy. One shot will both damage him, and kill both clones. Run up and attack him, and dodge through the slam, as rolls make you invincible.


The Renegade

This boss is the hardest of the first area, however he isn't too diffucult as most of his danger comes from not paying attention.

He only has two attacks, a fire blast that leaves a burning field, and a shower of slow falling orbs that expload. He will use his shower attack, and then use his fire blast a number of times before teleporting away and repeating.

As long as you keep track of where the falling orbs are, and avoid the fire blasts, you won't have any trouble.

Like the Molotov throwers, if you can't dodge his fire blast attack, taking it head on will NOT spawn the burning field.


Rage of Sataniel

This boss tends to be the most "boss" like of the three. He can fire out three orbs that cause burning fields, charge forward up to three times one after the others, and strike with it's tail. In nearly all cases, stay close to it, and dodge behind it whenever it does anything. once you learn specifically what animations mean what attacks, you can take advantage of it's orb shot to get more hits in.

Be wary of fighting it near the edges of the room however. The orb shot won't hit you if you stand right up in its face, however if you are pressed into the sides of the room, they will hit you, and they hurt badly...


Sinner Lonan

My personal favorite boss, just out of design(even if outside of his Necronomicon entry he is never mentioned). He tends to either be very easy, or very frustrating, but rarely honestly hard. He has two phases, with three attacks in the first and four in the second.

His first phase lets him swing his sword at you, lean back and lunge towards you, or fire out an orb that causes a large AOE pillar that chips away at your health.

His second phase changes his AOE pillar from one orb, to two orbs, and he also gains the abilit to summon several pillars randomly in the room.

During phase one stay close and roll through him when he attacks, and get him down to 50% HP. During phase two, he will always start with his random pillar summon, the first of which always spawns ontop of him. Stay farther away, and try to wait out the pillars as they eventually go away.


Albino Parasite

This thing is annoying, hard, and brutal all in one. Staying far away makes it use it's more dangerious attacks, but staying close makes it use faster attacks.

It has three phases, though phase two is just a visual change. Phase one will let it try to quickly slam at you with one of its legs, and will leap towards you, summoning two shockwaves that travel outwards. Dodging through it will make you be hit by the other shockwave, while dodging away will leave you with little time to dodge through the shockwave coming at you. Either parry, or, and this is honestly the only use for jumping, jump over it.

Phase two just makes it grow wings and acts more agressive and gets faster.

Phase three allows it to summon several of the floating orb enemies to assist it, or fire out several large orbs upwards that then randomly fall down towards the ground.

Honestly, you will either barely survive, die, or slaughter it. Despite having beaten everything and gotten all achievements in under the 100 death achievement, I still have trouble with this thing.


Disowned Child of Ziz

This thing is annoying as hell. Not hard. Never hard. But really ♥♥♥♥♥♥♥♥ annoying.

It will float up out of reach for a while, attacking every so often. It will either launch two orbs at you that can be dodged through, or slam towards the ground. If it's wings begin to glow, it will launch the orbs at you, if it suddenly stops flapping the wings, it will slam into you, both are easy to dodge.

At 50% HP it enter phase two, where it's orb shot goes from two orbs to four. Nothing really changes about it and dodging, however if you do get hit it will deal more damage. It also gain the ability to drop a single large orb that exploads into several smaller orbs that rain down randomly. It isn't hard to dodge, but if you have trouble with the smaller orbs, just stand under the large one and parry it and none of the small ones will hit you.

Wait until it flies low, and hit it. Not much else to do.

If you are trying for the speedrun achievement. Getting this boss will 99% of the time ruin it, as there is literally no way to aggro it towards the ground. You just need to wait.


Writer Wake

This guy is an interesting boss, even if annoying.

He sits in the center of the room and summons one of two attacks. Either a large pillar that has a windup period, shown by a glowing light on the ground, or fires an orb up high that rapidly fires orbs towards you with low accuracy.

After a certain amount of time, or damage taken, he will teleport away and appear behind a white wall on the edge of the screen, summon either a Tidal spearman, Glave thrower, or Caster, and continue his two attacks from before. Attacking the wall will make it break, letting you hit him. If the wall is broken, he may use a move that summons a huge wind to blow you back that doesn't deal damage. If he takes too much damage he teleports again to the other side of the room.

Be sure to kill the summon Tidal mob, unless you are confident you can kill him before he teleports again. otherwise it is just a matter of dodging his attacks, breaking the wall, and wailing on him.


Nevan H'Mu
Cthullu-I mean Nevan H'Mu is one of the tricker bosses, but not honestly all that hard. Most of it's danger comes from having to balance two foes at once, but neither are honestly that hard.

The Melee one has two moves, a simple jab, and a leaping attack to close the distance. It is better to leave this one alone, as it is easy to avoid.

The Caster is the one to focus on. It has a few attacks, an orb that summons a DOT field, a barrage of orbs that fly upwards and then loosely home in on you, and a barrage of orbs summoned from the ground that fall randomly.

The Caster will teleport away from you if you spend too much time near it, and if it gets into range, the Melee will leap at you doing AOE damage.

Stay near the Caster and wail on it. If you can, try to hit both of them for double damage and the fight won't last long at all.
Bosses Continued
The Abyss
The Abyss has a few tricky attacks at first, but they are all super easy to dodge once you get used to them. All of it's attacks use weapons you yourself can obtain, though they are much stronger when the Abyss uses them.

It can draw a longsword and swing three times before stopping, or pull out a greatsword that it swings with. The greatsword will send out a shockwave on the ground, and explode where the greatsword hits slightly extending it's range. It will use these two attacks if you are near it.

If you are farther away, it may pull a spear out and dash twice to get close to you, just dodge through him and wait for the second dash then whail on him. he may also use a shotgun and fire out a blast of orbs much like the Mire Giants. Roll behind him and move further back to avoid the few rounds that linger behind him. If you are very far, he may pull out a rifle and fire three shots. Don't stop rolling and they will all miss.

Once you get him half dead, this white fog will cover the field making it slightly harder to see. The fog itself does nothing, but it can hide some attacks, mainly the orb attacks. After the fog appears, an orb will rise up from the ground, pause, then fly at you. once it vanishes another will spawn. It isn't hard to dodge, but the fog can make it hard to see until it is moving towards you.

All in all he is rather easy if you keep rolling behind him and give him a few hits after he attacks.
Stages and Strategies
Here I will go over general stratagies for each area, along with some of the special aspects that appear in each.

Unholy Parish
In the Unholy Parish, Crawlers and Hounds are the most dangerous, so if they are on map, kill them first. The Cloaked should generally be your next targets, with Bishops and Giants last.

Altars
In the Unholy Parish you can come across Altars. Using one will cause you to fight several enemies one after the other, with an item reward at the end. It is always a good idea to use these, as the enemies are never that hard, and the extra item will always help.

For this Altar, you will have to fight one Wendigo, followed by two more after. Kill the first one, and then either kite the two extras, or get them close together and attack both to kill them fast.

Lightless Forest
In the Forest, Wendigos and the Baby spiders are absolutely first targets. Afterwards clear out the Spiders, followed by Bushes. Kill the Floating enemies when you can, but generally as long as there aren't that many they don't matter much.

Forest Altar

Like the Parish, Altars spawn in the forest, though they seem to be much more common in the forest. Like before if you survive the enemies you get a free item, and it is always worth using.

The forest Altar will always have two random Cloaked, followed by another two random Cloaked, followed by a lone Giant. Stay on one side, kill the Cloaked that spawn there, kill the other, repeat, and kill the giant.

Quagmire
The quagmire is the hardest area, Mostly due to the types of attacks, rather then the enemies themselves. Most enemies are easy to deal with, but have far reaching AOE attacks. Focus the spellcasters fast, and deal with the Mire Hounds next. After that it is up to you to go after the Spear/Glaive users, or the Mire giants.

The Gauntlet
That is what I call it, as it doesn't really have an offical name. The Mire section usually will send two Spear/Glaive users, then one user and a mire hound, then a mire hound and a Mire giant. the Forest section is one random forest boss alongside an infinite number of flyers, usually spawning in groups of 2-3 and the next group comes when the current group is nearly dead. The Parish section will spawn either the Rage of Sataniel, or the Renegade, but never the Prophet, and when they get low on HP two hounds will spawn. After they are all killed, three cloaked will spawn, one of each type, and then two giants. Clear them to finish the Gauntlet.

Achievements
The achievements in this game are mostly self explanitory. Kill each boss and the merchant and blacksmith once, and get each ending.

The few that might be tricky.

Necronomicon
Beat every boss and find every item and weapon, including the three paper's in each area and the upgraded weapons.

One with the Blade
This one is self explanitory, but may need some clarifacation. Get Leo's blades, and both of Leo's rings. This sounds easy, but is annoyingly hard, as you will often get two, but not the third. Just pray to RNG and keep trying.

Triumphant-Congrats/Baby Streak-Now that is what I call a streak
Triumphant and Congrats are obtained by simply winning 3 and 10 times repsectively. Baby Streak and Now that is what I call a streak are obtained by winning 3 and 10 times in a row without dying once.

For those two just kill the First Dreamer, don't bother with either of the other two extended bosses.

Put the Devs to shame
The devs should already be ashamed. This thing is single handedly the worst achievement of all time. Entirely unfair, and no amount of skill can ever hope to get you this achievement. Even wtih my greatest runs, I can never get below 9 minutes time.

In order to get this, you MUST have these items. Common Dream, at least two orb spawning items. If you do not have these three items, this is 99.99% impossible. The ideal combo would be an orb item, then Amabelle and Common Dream, and just tank hits and let Amabelle's spawned orbs heal you back up. I managed to win via Gateway, a lucky 6 str and 7 vit with an amber longsword, and Bullet collection. I beat the Abyss, then saved up bullets and just let them all lose on the Dreamer. I got out at 8:27.

Also this should be obvious, but don't grab the snowglobe key or do any shrine, the extra fights only drag the time on. I may sometimes take the Offering at the end of the Parish, but only if I have at least 6 Vitality by the end of it, so I don't go below 5.

If any of the devs ever read this guide. Seriously, I love the game so much. But f*** you for putting this in the game. My completionist itch tormented me for so many runs as I tried to get this. I had over 30 runs above 9:30, and around 25 or so at above 9 minutes, and about 6 that got near 8:30, and all of those runs near 8:30 required the Common Dream.

If an achievement is so hard that in a Rouge like game, aka a game designed for random spawns, it REQUIRES a specific extremely rare item, that is some of the worst design I have ever seen.
Spoiler Content
The Dreamer
This guy is flashy, but not that hard. stay calm, and let yourself mess up a few fights to learn his attacks, and you will get him down fast.

His first phase will make him use a lot of lasers to attack, though he does have a basic attack that sends shockwaves in both directions that is used after a teleport. He can either shoot a large laser after a short charge that does a lot of damage. Roll through it to avoid it, though it only takes half a second to charge so be prepared at all times. It can be predicted by seeing a thin black line come from his hand. He tends to use it when you are half the screen away.

He can also sapwn three pillars of black light that deal damage, with each one hitting one second after the last. Just keep moving and you are fine.

He may also launch an orb up high, which fires an extremely accurate stream of orbs at you for several seconds. Don't attack while this is going on, just dodge and let it run out of ammo.

Throughout the fight, and even more so at 50% HP, he spawns random pillars of light beams that deal small amounts of damage extremely fast. You can roll through these, but will take minor chip damage. DO NOT stay in these. If you spend more then a second in one of these they will destroy your HP bar.

Phase two is much much easier. He loses the robes, gains a crown and a rapier. He will do one of two things most of the time. Either teleport to a random side of you and lunge towards you, then teleport to another side and repeat up to five times. A simply dodge will avoid this, make sure to dodge into him. However he may instead teleport above you, and do an AOE explosion instead of a lunge. If he teleports close to you, he will lunge, if he teleports farther away near the edge of the screen you have a chance to hit him.

His other two attacks he uses less often are the exploding blades, and the sickles. The exploding blades will cause blades to appear above you, and after a dely, drop to the ground and explode. If you stay about perfectly between two of the blades, the explosion will miss you, or roll through it. Having it miss you is easier to do though.

The Sickle attack spawns 4 sickles, two on each side, that try to close in on you. Do not move at all, and when they get close, roll in either direction. If you time it right, you will end the roll behind one of the sets and be completely safe. Or you can run towards one set, roll through it, and then roll back through the second set, though I tend to get hit doing that a lot.

A lof of his attacks are flashy, but not any real threat. Stay calm, and he goes down fast.


The Maestro
The Maestro can be fought by obtaining an invitation before the end of the Lightless Forest, and entering the large gate. Invitations can either drop from chests, or be bought with credits from the Merchant before a run is started.

The Maestro, like the Dreamer, is very flashy but not actually that hard. Fitting as the two are brothers in the lore. His main attack is a basic sword combo, it is generic, just roll away. He also has a basic forward thrust attack that he can either use by itself, or combo on the end of his sword swings.

If he is near melee range, but not close enough to attack, he may lunge forward a tiny distance, about less then half of a roll, and do an uppercut attack.

His main two attacks to watch for are both ranged. He may toss out two blades, one in eahc direction, and will typically use this attack right after teleporting. His other attack is his uppercut attack, only he tosses a blade along a curved path that will explode when it hits the ground, sending a shockwave in both directions.

When low on HP every few seconds he will make the screen flash white, and spawn a ton of orbs above the screen that drift down, much like the Church Giants. Find either a gap in the orbs, or stand under the ones that are highest up, so the lower ones will hit the ground and vanish, then roll where they used to be.

Gate of the Cosmo
The Gate can be fought by killing the Maestro, taking the key that drops, then beating the Dreamer.

This jerkwad is the first genuine hard boss in the game. He will make you suffer, no matter how skilled you are.

He has only four attacks, but they take up so much room and two of them can linger around, so they can easily overwhelm you.

The two attacks directly done by him are mostly the same. He fires out a rapid barage of orbs in a straight line from the eyes of the orb part, both go directly for you, so run away and avoid them. The other fires out a single stream of orbs, only they start firing upwards at an angel and sweep down in a circle pattern.

His other two attacks are the hard ones. He spawns unmoving walls of bullets, both upwards and to the sides, even in places they would never hit you. These walls despawn after a while, but the less HP has has the more he summons so they quickly limit your movement.

His other causes a burst of light and spawns two walls of bullets around him. They instantly fly out, left wall to the left, right wall to the right, at random speeds making it hard to dodge through. Do your best to dodge it, and just hope you don't take damage.

The boss itself isn't diffucult to hit, but you rarely are given time to actually attack it unless you are willing to just take some hits. Near the end of the fight, make sure not to be overloaded with the sheer amount of stuff on screen. Not of all it is a danger, but it is very distracting.
Three Papers (Spoilers)
After each of the first three locations, there is a piece of paper across the gap leading down into the next area. These items can not be reached by jumping or rolling, and only give lore and do not effect the Saint's stats. They can be obtained after defeating one of the spoiler bosses, the Gate of the Cosmos. After defeating this boss, an item appears in the Merchant's pre-run shop for 3 credits, the snowglobe. Take this item and a tomb of Domnhal will appear over the gap, letting you cross. The tomb does not vanish until you pick up the paper.

Take the paper and drop down, and collect all three for some lore, and acsess to the true final boss.

Most people won't try this, but taking the snowglobe will not allow acsess to Domnhal, it will only allow you to grab the papers. All three papers are needed to fight Domnhal. If, either through RNG or buying both the snowglobe and invitation, you skip the second paper and visit the Maestro without grabbing it, you WILL NOT fight Domnhal.
Spoiler Content Continued
Old King Domnhall
Unrelated, but this guy's battle theme is very similar to another song from a few years ago by a composer named Ajoura. Not implying anything, they just sound really similar.

Anyways, he can be found after beating the Gate of the Cosmos. Buy the 3 credit Snowglobe from the Merchant in the Common Dream, and then at the end of each area the hole leading to the next area will be blocked by a statue of Domnhall. Run over it and pick the paper up and it will vanish. Beat the Dreamer and you will visit the true final boss. You must pick up all three pages or you will get the normal ending after the First Dreamer is killed.

The Old King is my favorite boss in the game for a number of reasons. His attacks are strong and cool looking, despite their simplicity, and his second phase is a good example of lore-as-gameplay.

His attacks involve teleporting to a new location, and either firing off shockwaves in both directions or just slamming his hammer down on you sending a shockwave in the direct he slams it. SImple, dodge through them. His other attacks involve raising his hammer/tomb and summoning two bursts of homing shots from it that spread out slightly. Lastly he can summon a massive wave of light beams to sweep across the field. They start from whatever side the Old King is on, and can be dodged by moving towards them, and when the beam that will spawn where you are currently is about to appear, dodge roll through it, you learn the timing rather easily.

Attacks are simple, but they can be tricky to evade the first time or two due to their high speed and slight randomness.


Mad King Domnhall
Phase two gets an entirely new name, which I really loved. In the lore over time Domnhall began to lose himself to the demon inside him, which in the battle is represented by the early fight being against Domnhall in his prime, and the second phase being against Domnhall after he began to go mad from the demon inside him.

The Mad King has the exact same attacks, but due to his loss of sanity, they have become more chaotic.

He no longer fires shockwaves in both directions, and he can only use his slam attack. However he may combo them together by slamming, then teleporting to a new location and slamming again, and can do this up to about five times. However, he may also fake out the teleport and appear beside you, only to teleport away. He may even start with a teleport, then just back off entirely.

His other attacks are the same, a bullet burst and light beam. Only this time the bullet burst has a delay between them, and the spread of the bullets is much more random and varied, leading to it being much harder to dodge. Try to stay close to him so most of the shots will come from above, instead of the sides.

His light pillar attack is back as well, only instead of it being a clean sweep it now randomly fires around you. Some of the pillars may spawn on top of you, but some will also just spawn randomly away from you. Stay on your toes and dodge through them.

Yellow Monarch
The true form of the demon that possesed, and eventually killed Domnhall. This guy floats around like the Lost Child of Ziz, however he does stay near the ground almost all the time.

He has a really really long hitbox, so pistol and rifle shots can hit him multiple times.

Upon spawning out of the Mad King's corpse, the area will explode so get away.

At each of his edges, he spawns a permanent wall of bullets that follow him around, so if you want to attack him, you need to roll inside them and stay moving along with him. If you remove the bullets somehow, he will just spawn a new wall so removing them is a waste of time. However if you have the Heal/Damage boost on parry items, just let him move the wall into you for a free parry.

He can drop a small orb onto the ground that then explodes into multiple other orbs that fall and explode. This attack is easy to dodge, but be careful if you are attacking him inside the walls as it can be hard to react in time. This is also the same attack the Lost Child of Ziz uses in it's own fight.

He also can fire out a burst of shots from both wings. There is some minor spread, but generally roll and you will be fine.

His other attack involves spawning a bunch of orbs above the arena, that then weakly home in on you. Most will miss you, but they have a minor AOE effect and dodging the few that may hit you will make you roll into others.

His last attack will spawn a huge orb above him. This orb will fire out 4 fast moving orbs that home in on you. This is honestly one of the only moments in the game where parrying is useful, as you can rarely ever dodge all 4 perfectly. The final shot of the four also will explode, so be sure to parry it. Wait until the shot is half way to you, then parry to not miss the parry.

After beating him, head to the right to see the true ending
Wrapping Up
All in all, Gloom is a fun game. It may not be perfect, but I really enjoyed. Plus I managed to 100% everything before getting the 100 deaths achievement, I had 12 more deaths to go.

Make sure to just try again and again, and learn from mistakes. I can tell you everything, but if you don't get the skills to deal with the stuff the game throws at you, all the information in the world won't help you.

Enjoy the quiet despair, emptiness and gloom, and escape the dream for good.
Personal Thoughts
While Gloom isn't a perfect game, I absolutely love it for it's atmosphere. The black and white art style, the somber and gloomy areas, and the lovely OST. All of it really is amazing.

I personally adore the game for three reasons.

The lore is simple and easy to understand, but still requires a bit of putting together.

The eldritch undertones that are there, but never take center stage.

And the distinct lack of a fire level.

Seriously, F*** fire levels.

Honestly though the level designs are so great. The calm somber snow fall of the Parish, the soft mysterious glow of the Lightless forest, the ruined overgrown Throne room, and the cosmic blood soaked battlefield of the Gate of the Cosmos. All of the levels are so lovely. The Quagmire is the weakest I would say, but it isn't bad either, just not as good.

It may not be an easy game to get into, as starting off is quite annoying, with many rage quit moments. But if you can learn to master it, it is so enjoyable.

However, again, the devs did something foolish by adding in that 8:30 speed run achievement. I don't want to put the devs to shame, they should already be ashmed that they added that into the game at all.

Honestly, if this game removed that achievement or made it easier, this game would be infinitely better.
47 Comments
Spazz Maticus May 11, 2022 @ 6:04am 
Nice guide!:steamthumbsup:
Nocturnal Pearl May 19, 2020 @ 3:23am 
Amazing guide!

Any tips on beating those snail thingies in the lightless forest? For me they drain so much health. Especially when paired with the jumping spider.
PixelDemise  [author] Apr 5, 2020 @ 10:25am 
@Slamlm I admit this guide was written a long time ago, so I can't fully say I understood how I played the game at the time, but from what I remember, I found the time needed to parry, in addition to the bullet cost, to be not worth it compared to the time spent and 0 cost of just dodge rolling. I did bring it up in the Yellow Monarch section, since in that fight some attacks are nearly undodgeable, but in the rest of the game I never felt like it was that strong of an option.
Slamlam Apr 5, 2020 @ 10:14am 
I find it pretty unusual that you would struggle with the Albino Parasite, it's the second easiest boss for me besides the Prophet. All you have to do is stick to it and parry both the jump and the slam, and the timing of the parry for both is very easy. It'll die in less than 10 seconds I assure you.

I noticed however, that you only mentioned parrying a handful of times in your guide, despite it being exceptionally good and not too hard to learn. Parrying gives you a temporary shield that blocks all damage for a short time, this shield will allow you to relentlessly wail on bosses while making you invulnerable for its duration, and right when the shield ends, you can parry again to gain another shield.

It is so good and it's a shame you didn't touch on how good parrying is in this game once you learn it.
Jacob Mar 27, 2020 @ 2:19am 
@PixelDemise Thank you for replying :)

I'll try to reinstall it and see what happens, maybe report it afterwards. In case anyone's curious, I got the Snowglobe either as a random item from a chest or a floating one just before facing Maestro (I can't remember which).
PixelDemise  [author] Mar 26, 2020 @ 4:33pm 
@Jacob, I am not sure what is happening in that case. In all of my runs, after getting all 3 papers, and then defeating the dreamer, I am sent to the Domnhall fight. I have never needed to kill the gate to reach him. Maybe try reinstalling, or report it as a bug to the dev?
Jacob Mar 26, 2020 @ 10:05am 
*UPDATE* I've just taken the same steps again and faced Gate to the Cosmos a second time. I lost, but still no Monarch and no Domnhall , unless they would show up after beating the Gate a second time? Also, I got the Necronomicon achievement after buying and picking up the Snowglobe upon a game restart, even though there is an entry missing, presumably for the Yellow Monarch .

Maybe getting the Monarch item would make a difference?
Jacob Mar 26, 2020 @ 9:11am 
I like this guide very much, but am a little bit confused. I've just faced and beaten (both for the first time) Gate to the Cosmos after obtaining Maestro's Key and the Three Papers , having started with the Snowglobe . How do I get to the Yellow Monarch Boss? I've gone through the game grabbing all Papers and not the Key , but beating the Dreamer in that case just gave me a normal (non-Domnhall) ending. Getting the Key alone did nothing to change the game's ending.

What am I missing? I got the Snowglobe before ever facing the Gate Boss ~ maybe I have to just play through again as written above and I'll get to King Domnhall this time?
AdeptusJoker Feb 26, 2020 @ 3:54pm 
Is there anywhere to find the Item Descriptions from the Necronomicon? I've unlocked a lot of items, but there are some I know I'll never unlock, and I really want to know the full lore.
iamanotherliar Nov 22, 2019 @ 11:14am 
Here's a thing: I got access to the snow globe really early, i didn't kill the Gate to obtain it, so i really thought i needed to get both the invitation AND the globe to get the true ending, so i was suffering a lot because I could only try to beat the game every two (sometimes three) lives... my heart broke when I saw that the key took me to a different boss than the pages (yeah, I got the pages long before defeating Maestro). Fun times.