Rising Storm/Red Orchestra 2 Multiplayer

Rising Storm/Red Orchestra 2 Multiplayer

คะแนนไม่เพียงพอ
Seienchins Guide on defending Iwojima A+B
โดย Vinceas88
Ultimate Guide to defend the first two points at Iwojima. Beginner to Veteran Level.
   
รางวัล
ชื่นชอบ
ชื่นชอบแล้ว
เลิกชื่นชอบ
Introduction
Hello,
Tides of battle on Iwojima shure has changed since RS was realesed. From a map where the Axis mostly got overran to a map where atackers have a really bad time atacking the first objectives now.
I played Iwojima dozens of hours as defender and have a share of atacking experience too. As defending commander I usually win this map but I still see that many players arent aware of good places to defend and an overal strategy. I know a guide like this is nothing you can remember by reading it once but if it gives you a general feel of the map and RS itself it would be an honour for me. Maybe remember 1-2 spots play Iwojima and if they worked then come here again and learn some more ;)

If you like this guide please upvote it and check out my other guids on Trapps, Betio and Kwajalein. iIf you dislike please share you critic points in the comment section. I am always eager to learn.
General Tactical Map
These are the general spots I am gonna talk about in this guide. They will be explained with screenshots one by one allthough I will not go in detail about spots everyone knows like the standing MGs.
Why do you want to be in those spots? Look at the next map. This is just a small overview of witch areas you can cover from the front positions. To cover these spots you need 12 guys. Even less when there is only one point less to defend. Trust me! They allies will find no easy spot to atack this way.
A general tactical overview
Iwojima is not a difficult map to defend. You rarely run out of reinforcements and the enemy needs to atack in very confined areas which is great for artillery and knee mortars. Your worst problem is getting cut of. Every point can be cut of by the americans because of the sloped form of the map. ONLY A+B have pretty much 100% save accesses if they are not cut of by artillery. Furthermore you have the best standing mgs in AB and the allies have little cover against a good organised japanese team.
That is why A+B are the points where you can hold the enemy the longest while having little casualties. (D+E are also good defendable but you will take far more losses there)
With a good Sl1 and commander you can get a lockdown here.
The key for japanese defenders is to shoot enemies from spots where you are hidden from the flanks while you can easily shoot everything in your view. The next chapter contains a lot of spots were you can achieve this. SL stay in cover not directly at the front but also not to far back. Thanks to your nambu you can easily mow down enemies passing your squad and getting into the capzone.

What does the enemy usually do?
Flank you. The americans take points nearly all the time through the flanks. A is sometimes taken from the middle but defensive artillery is really effective there so the best spots to atack are the flanks which have bunkers for their SL to stay in and spawn their squad. This is where you need to hold them.
SL positions
SL in Iwojima is not a rewarding job.
You can either go to a standing MG or other good spots and try too shoot enemies will beeing a spawn and then maybe get killed that one crititical moment the enemies atack and have artillery behind the point and loose the capzone for your team in effect. On some veteran filled servers you might even get kicked for risky gameplay when you are SL1.
If you only stay back there is little you can do besides marking artillery and beeing the last line of defense. HOWEVER, that is exatly what your teams need you to do. Stay in a safe spot and be a spawning point and the last line of defense. Of course SLs with less than 4 guys in a Squad might be playing more aggressivly but the most important SL have to stay hidden BUT not to far away or artillery might catch you.
Look at this. For SL1 there is simply NO alternative when defending both points. At the ammo dump in the middle your team can spawn and go to both points. Furthermore you are never gonna be targeted by artillery AND enemy fire on you is highly unlikely unless they take one of the capzones.
The other SL positions are for holding the flanks. Artillery will probably never fall directly on you there and you can easily kill enemies going in the cap from there, while your squad spawns as safe as it gets there. Enemies most of the time flank you in Iwojima and having all the flanks heavily defended with a squad each and SL1 in the middle is the best thing you can do against standard atacking tactics.
I know the world aint perfect but one SL beeing at one of those positions can change the game.
Useful defense positions in detail
Ok first of all the overview again:

1.The enemy will most likely atack here. Waiting for them and ambushing them will definitly slow/stop their advance. Grenades are recommended.


2.Behind the rock the enemy cant shoot you from your flank while you wait for the enemy coming to the left flank. Great spot for SMGs,MGs and riflemen.


3.Most people know you get a good overview from D but you will be very vulnerable. Try to be at least partially hidden. Only riflemen recommended. MGs will get kills but you are way too easy spotted and taken out.


4.This is a crucial position. When the allies try to enter B from the far left you need someone here. Flamers can clear out the bunkers and the front but you are too far back here. Best and last spot to hold the allies. Even worse if the allies get through there and cut of B from reinforcements. This is the most crucial spot on the left.


5. This is the crucial spot in the middle. Good standing MG and position to defend. No special tipp here.


6.This is the SINGLE BEST killing spot in RS. This MG overwatches most of A and also the middle of B. It is actually really effective on keeping enemies out of B. It needs to fire at all times. The right window of the bunker has no MG but a riflemen can get a lot of kills here on the flank of A.


7. Enemy will always try to get in the Bunker here at G6. It has a decent MG but it is really easy to take out.

8.1 This is the better spot to defend 7 and the middle. A mg man can get a lot of kills here. You will see the enemies most common appraoches to the middle and 7 from here. Highly reccomended.


8.2 You can also stay a little bit further back to be less visible while still controlling the approach to 7.


9.Now you see just why the middle between A and B is so important. You can easily overview both capzone approaches from the middle. From here you can see the enemies advance into the middle of A while beeing really good protected yourself.


10. As I wrote from here you can really good defend. No matter if you are staying in front of the bunker or at the stones to the left its a great spot. This picture shows you facing the right from the inside the destroyed bunker. From here its really easy to overwatch the middle while beeing relativly safe. Watch out you dont hit the metal things coming out the wall but other than that it is a great spot for riflemen or even SMG.


11. Just an example how to stay hidden and shoot the enemies coming to the middle.


12. The Bunker A is often taken from. It has a nice MG in it but has some dead spots which lead to it beeing flanked usually. If you can use the MG anyhow. It slows the enemy down and forces them to flank you where they in turn get much more vulnerable to your teams fire.


13. From the flank over here you can really easily overwatch most approaches to A. Stay behind the stones or go further back to be protected or go in the open and play high risk but with even more overview.


14.This is the spot where a SL needs to be. Its easy to overwatch the side of the bunker where the ally try to get in everytime. You can even lay down on the slopes to your side but make sure you can see the right side of the bunker. Here you can be a good spawn for your team and you can easily stop the enemy without beeing in dange yourself.
Danger close artillery marks
Allright commanders, here some good marks for you:
First of all why danger close marks? On Iwojima A+B your target is holding as long as possible or get a lockdown. Because of the limited spots to get in a capzone the enemy will most likely bunch up in a few places while atacking. This is ideal for keeping the enemy from capping just with a single artillery strike. A commander can actually hold a capzone with artillery on Iwojima. The following marks show you the most attracitve spots for enemies to get in and how to shut off.
On A its pretty simple. Enemy will either atack middle or right (Left on this map). There are simply no other spots enemies can get realistically in. On the right there is a bunker where the enemy can hide but if you can get of other enemies from getting in there your job is done.
In B there are two bunkers the allies will try to get a SL in. If you call artillery there you cut their atack of completly. There is no near entry to the capzone. The middle is just in case they atack there, which is very rare.
Advanced tactics: Thoughts on A or B
This is really advanced stuff for players who can effectivly controll their team. That is not the norm. SL usually dont listen if you suggest anything new to them but if you are in the lucky position of having such a SL here are some thoughts on which point should be defendend. THIS is HIGHLY controversial stuff going against all that is popular at the moment in RS.
AGAIN this only applies to a well coordinated advanced team, when playing a normal match just going for both and see which falls first or suggesting the conservative focus on B are certainly much better.
First lets take a look at the zones again:
This is a crude map BUT as you may know from experience and can read from this map with a little bit of thinking A has a HUGE advantage over B. Both flanks on A can actually overwatch the middle and the other side to an extend while beeing good to defend themselfes. The weakpoint of A is the middle. It is pretty open and tough to defend against a lot of people trying to get in. However As entrances can be overwatched from behind A and from C.
B on the other hand has completly seperated flanks. The middle of B is much easier to hold than the middle of A but the Allies often take the right flank in G6 or sometimes the far left (On release it was 100% the opposite). Also the firing positions behind B are much less effective and have few spots compared to C behind A. It also goes in the opposite directions. The middle of A overwatches the flanks while the middle of B only sees a small part of whats ahead.
Furthermore: When A is down the pressure on the right of B grows even further. Enemies atacking from A cant be targeted easily from points behind B. Only good position to fire there is to an extend the MG in C, which can be taken out more easily if A falls.
However. When B is down the advance to the left of A from B is really easy to target from behind A. The MG in C works even better when firing on people coming from B and it wont be taken out from close distances. The left is also much easier to be shot at from the Capzone in A than the right of B is from Bs middle (impossible).

The question of getting cut of is a difficult one. B is much easier to cut of by artillery. In effect the spawnpoint position and the terrain make it nearly impossible to get in when artillery is landing behind the middle. In A you can flank either side there is no mark that cuts the whole zone of.
On the other hand the entrances to A are much mor exposed than the entrances to B. This one however you can at least control yourself while artillery cant be avoided.

Last question would be what happens after A falls and the enemy gets to D really quick. That is of course a danger you will be facing but on the other hand the enemy team will be mostly at A when capturing it from most of your team and there are always Axis spawning behind B. You cant help it. Just like there is always a too much guys beeing at C when you focus on B.
9 ความเห็น
ingmario_ 19 ก.ค. 2014 @ 3: 36am 
First of all great guide.
And here our some tips you maybe didn't know.
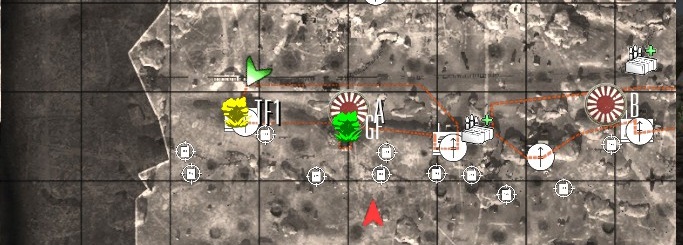
About mortars
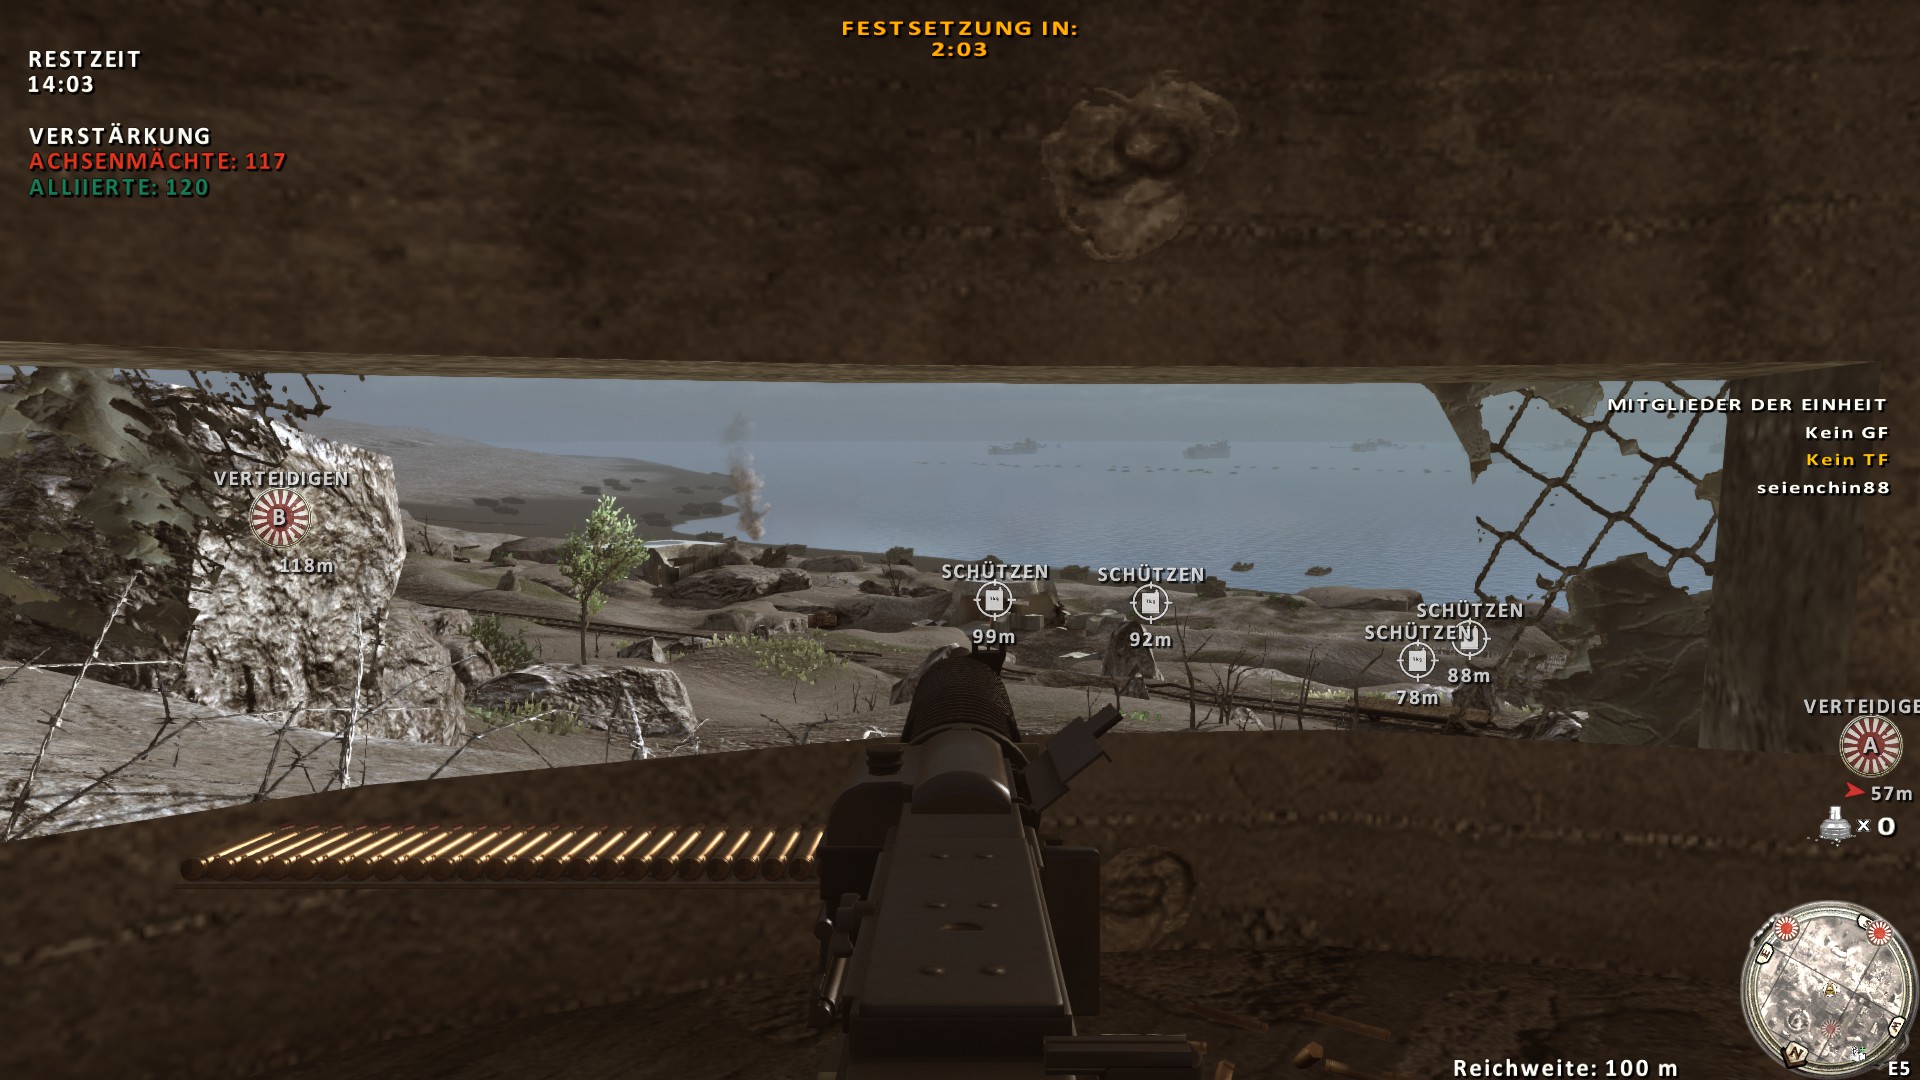
If your on the beach when you press T you can see the range to the enemy ammo crates or the barbwire you have to protect use this to dial in the minimum range you need, this gives you good idea where to aim your mortars without being afraid that your rounds fall short.
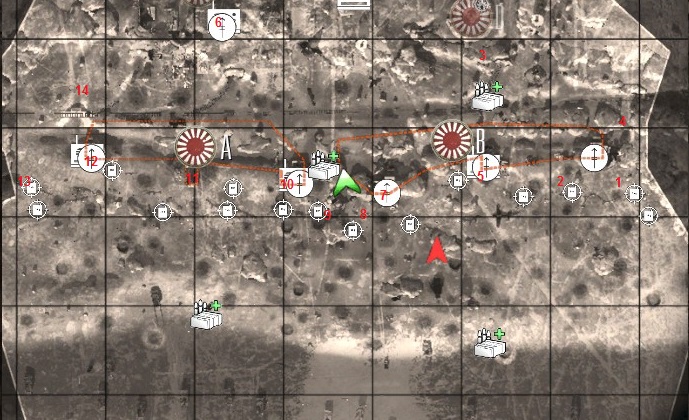
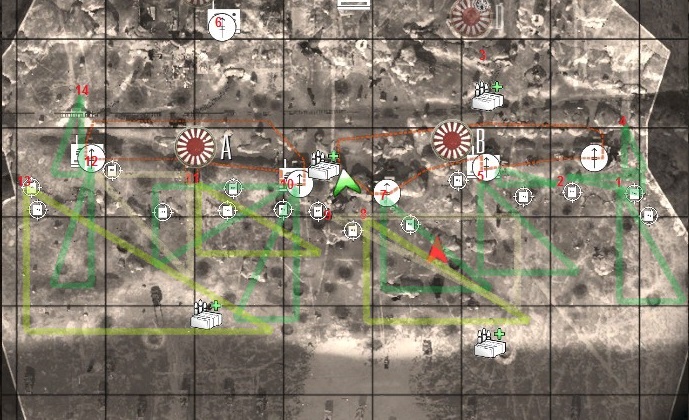
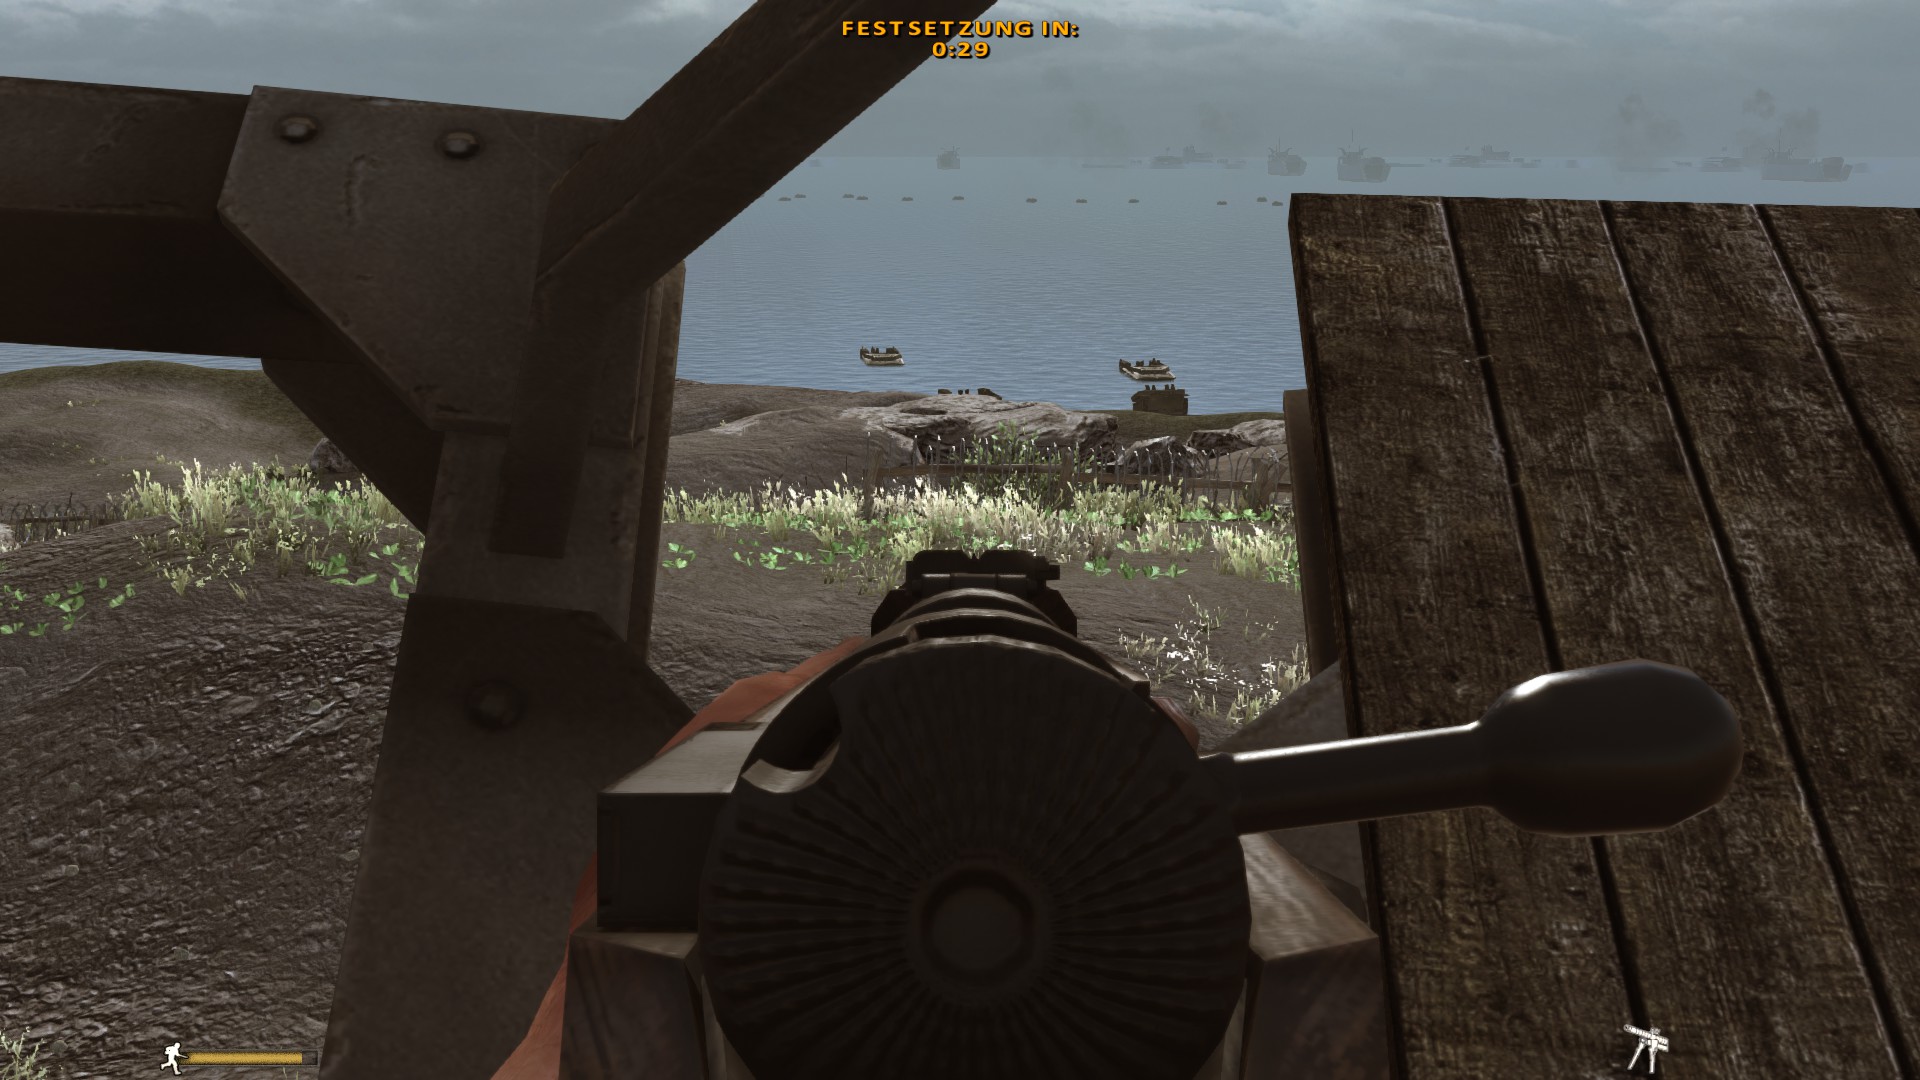
Also i found out you can use the 2 most central hmg's off F to fire on the aprouch to A & B and the objectives themselfs, you have a great overview off the map. Just set your range 200m and start firing on the beaches, your very safe, can create havoc and get some nice 200+m range kills. This way you create a nice in-dept defence. And if the enemy tries to shoot you, someone closer can kill him because he is distracted by me shoting from F

Keep up the good work
Passerby 14 ก.ค. 2014 @ 3: 29pm 
zan
Radmir Rope 14 ก.ค. 2014 @ 10: 47am 
Mostly i play as a SL or TL as a japanese and when i am a SL i prefer to stick to the ammo crate near B, its quit good cos you give your people spawn you know its a crucail point on the far left flank and you also can throw nades and even explosions and if arty comes most likely you got enough time to flee.
Vinceas88  [ผู้สร้าง] 14 ก.ค. 2014 @ 10: 41am 
Thanks a lot! :) Iwojima is really the map I have played the most as Japanese. It was so popular in the beginning because allies always won and now its so popular cause japs win very often. Lets turn very often into always :D
Radmir Rope 13 ก.ค. 2014 @ 9: 15pm 
Well probably first time when i agree with all statements in the guide. 10/10
Vinceas88  [ผู้สร้าง] 12 ก.ค. 2014 @ 1: 23am 
Yes! This guide will be updated with knee mortar marks and a few booby trap places in the future! Thanks for the input.
Traffic Conez 11 ก.ค. 2014 @ 5: 49pm 
An excellent guide but as King_Kosher said few people will make use of.

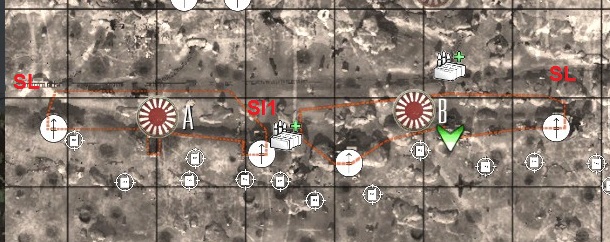
Possibly the worst thing for Allies to face is a decent knee mortar who knows how to sight his weapon. If you can, include places where Allies mostly concentrate. Often a single grenade over the rocks on the side of B kills 3+ men.
Vinceas88  [ผู้สร้าง] 11 ก.ค. 2014 @ 2: 58pm 
Well lets see about that. If at least a few hundred take one good place to hide or be at as a SL it might change a lot ;) Booby trap guide for example was very popular. My last map guides only reached like 800 hits of which most probably didnt remember too much :D Still sometimes I get recognized ingame as the guide maker so I guess some people are into it :)
[40-1]King_Kosher 11 ก.ค. 2014 @ 1: 47pm 
Nice guide,very tacticool.Sadly,few people will make use of it