Warframe
247 avaliações
Warframe Guide and Primes Locations
Por Banken e 1 colaborador(es)
Have you started to play and don't know what to do? Looking for Primes Parts and you don't know where are them? This is your guide!
   
Premiar
Adic. a Favoritos
Nos Favoritos
Desfavoritar
Streams
Here you have my Twitch's channel where I will stream in english every Wednesday:

https://www.twitch.tv/banken93
Frequent Questions
What are Warframes?
Warframes are "armors" of Tenno (the character that you control), every Warframe have diferents skills and characteristics.

What are the abilities and how it use?
Skills are "Powers" which every Warframe have, you have 4 kind of Skills per Warframe. To use them; you only have to press the buttons 1, 2, 3 or 4 depending on the skill that you want to use. The skill number 4 (or Warframe's ability) is often the most powerful skill and consumes more energy.


What is energy for and how it gets?
The energy is what Warframes use to throw their skills, in the match you can restore your energy with blue spheres that the enemies drop or inside the chests that you break. To know how much energy you have; you only have to look during a match in the bottom right of the screen where there is a small and thin bar with a number that determines the amount of energy you have.


How can life and shield regenerate?
Life can regenerate with red spheres that the enemies drops or inside the chests that you break. However, the shield only can regenerate while you don't receive any kind of damage.


What is the affinity for and how it gets?
The affinity are bright yellow "spheres" that gives you extra experience that adds at the end of the mission; it drops from chests and cupboards.


You can also get affinity through secondary missions that appear at the beginning of the match, and if you need to remember what you have to do; just press escape during the match and it will appear at the middle of the screen.


What is the Endo?
Endo is a kind of energy which let us upgrade our Mods. You can get it of many ways:
Killing enemies in every kind of mission, they dropping it in various quantities, 15, 50 or 80.
Getting it like reward in rotations of a mission, it dropping in quantities of 80 to 400.
Speaking with Maroo (Maroo bazaar, in Earth), who give Endo in exchange of Stars or Ayatan sculptures.


What are the Mods?
Mods are "cards" which you obtain after kill enemies or at the end of the mission. It use to improve your Warframes, weapons or companions. Every Mod have a diferent symbol/polarity; that's means that if you put a Mod in a hole that have the same symbol/polarity; the cost of occupation is divided in half. According you level up or implant an Orokin Reactor or Orokin Catalyst you will have more capacity to put more Mods and improve Mods that you already have installed.

There are many colors which represent the value of the Mod: bronze (Common), silver (Uncommon), gold (Rare), platinum (Legendary) and crystal (Riven). Bronze, silver and gold Mod can be get by killing enemies and doing missions. Platinum Mod can be get by buying it on the merchant, who comes every two weeks at the relay's planets. By last, crystal Mods can be get by doing Srotie's missions, are special Mods because you have to unlock them complying the
terms that the Mod ask. You can change the characteristics of the crystal mod ussing Kuva.

What are Ayatan Sculptures and Stars for?
Ayatan Sculptures are little Orokin treasure which can be found hidding in any mission, and it serves to exchange of Endo with Maroo or decorate our ship.
On the other hand, Ayatan Stars are little shining fragments which sometimes are dropped of enemies' containers.
There are two colors (cyan and amber) and it can use to upgrade the Ayatan Sculptures. To do that, we have to use the Mods' machine of our ship and click at the top button to the right dedicated to Ayatan treasures.
When an Ayatan Sculpture is selected, it will be displayed in detail, and if you slide the mouse over its holes, the game will give us the chance to use Ayatan Stars inside (That will consume the star), the sculpture will start to move slightly, and the amount of Endo that Maroo would exchange for it will increase a lot. Each scukpture can receive around 3 or 4 stars, which will fully unblock the movement and will increase the endo value to the maximum.


What are companions for and how to get them?
Companions are very useful when playing, you have sentinels (which blueprints can buy at the shop) and Kubrows (where the only form to get them is in the adventure "The howl of the Kubrow" that start when you kill Jackal [Venus Boss, in Fossa]). There are many types of sentinels: Carrier, Deathcube, Djinn, Helios, Shade and Wyrm. There are also several types of Kubrows: Huras, Raksa, Sahasa, Sunika and Cheesa.
Frequent Questions
What are the archwings and how can it gets?
Archwings are a set of mechanical wings (probably Orokin design) used for a Tenno (Player) to fly and enter combat in space. To get them, you must be Rank 2 of Mastery (Silver Initiate); you have to enter the Codex, in Adventure section and it give to you the blueprint and send you to Venus to recover an Orokin file. When you finish the mission it will show you where you have to go: EGate in Venus, it's a excavation mission: you have to go there until you get the three pieces of the Archwings: Odonata Harness, Odonata Systems and Odonata Wings. After you build it, you will have an extermination mission, but during the mission Lotus will say to you that is a problem and you must go to extraction point; before it let you finish the mission you will must go to space and go to another extraction point to can finish the mission.

Types of Archiwings:
Amesha: is a support-type Archwing that sacrifices offensive power in exchange for area-of-effect defensive abilities that can buff and heal allies and weaken enemies.

Odonata: The systems built into this Archwing balance offensive capabilities with defensive countermeasures.

Odonata Prime:

Elytron: This heavy duty Archiwing was designed for one purpose, destruction.

Itzal: Designed for quick clandestine attacks, the Itzal Archwing excels at striking from the darkness of space.
Mastery Ranks
Mastery Ranks indicate your account level; every weapon, companion and warframes have individual levels (level 30 maximum), regardless of account level (or rank). To rank up you must level up your weapons, warframes or companions (when you level up them at 30 it will keep at the codex, so even if you put a Forma it won't count experience even if you level up to 30 again); when you have X experience on the mastery bar, that you have under your profile when you press escape, it will flicker, that's means that you are ready to rank up.


The maximum mastery level is Rank 30 but right now, the highest rank available is 22 (Dragon)
Every rank level have a specific name:

Rank 1: Initiate -> To rank up you must do an extermination mission. First you have to kill 10 enemies (in one minute), then you have to kill 15 enemies (in two minutes) and finally you have to kill 20 enemies (in three minutes).

Rank 2: Silver Initiate -> To rank up you must kill 8 enemies with a gun (in 45 seconds), then you have to kill 12 enemies (in one minute) and finally you have to kill 16 enemies (in one minute and fifteen seconds).

Rank 3: Gold Initiate -> To rank up you must kill 5 enemies with your melee weapon (in 45 seconds), then you have to kill 7 enemies (in one minute) and finally you have to kill 9 enemies (in one minute and fifteen seconds).

Rank 4: Novice -> To rank up you have to survive during one minute and thirty seconds while you kill Infesteds.

Rank 5: Silver Novice -> To rank up you must do two waves of enemies (in one minute and forty five seconds) and hacks consoles, if you fail when you hack a console you wont fail the test; but you will have less time to hack the others consoles (depending the time that you spent hacking the console where you failed).

Rank 6: Gold Novice -> To rank up you will be in a dark room which will be illuminated for energy spheres, you must shoot these spheres.

Rank 7: Disciple -> To rank up you must kill three enemies waves in less than a minute (it will appear Grineer, Corpus and Infesteds).

Rank 8: Silver Disciple -> To rank up you must run and jump to the platforms that will appear as you progress.

Rank 9: Gold Disciple -> To rank up you must stealthy kill enemies in three diferents stages/phases , if they find you, you will fail. You have three tries (there is no time) and you only can use melee weapons.

Rank 10: Seeker -> To rank up you will have nine platforms that when you step them it will disappear after eight seconds, you must kill 15 enemies before all platforms disappears.

Rank 11: Silver Seeker -> To rank up you must pass a series of platforms while you destroys sphere that will add four seconds to your time.

Rank 12: Gold Seeker -> To rank up you must run in circles on a platform and kill the enemies that will appear in the distance at the same time that you dodge the lasers spinning around the map (like a carousel).

Rank 13: Hunter -> To rank up you will have platforms that when you step them it will disappear after eight seconds, you must kill the enemies before all platforms disappears.

Rank 14: Silver Hunter -> To rank up you must kill three enemies waves; Grineer, Corpus and Infesteds.

Rank 15: Gold Hunter -> To rank up you must do an interception; capturing points and keeping them in your control.

Rank 16: Eagle -> To rank up you must do a defense and survive three waves.

Rank 17: Silver Eagle -> To rank up you must do an extermination of Infected (35 infesteds) before the time is over.

Rank 18: Gold Eagle -> To rank up you must do a defense and survive five waves.

Rank 19: Tiger -> To rank up you must do a rescue mission with only melee.

Rank 20: Silver Tiger -> To rank up you must do a brief race against time witch archiwings.

Rank 21: Gold Tiger -> To rank up you must do an extermination against time. You can hit white orbs will add time to the clock.

Rank 22: Dragon -> To rank up you must do an Arena (like PvP versus grineers) where you have to kill 12 / 18 / 24 enemies (in 3 waves) without dying, and each wave you will have a different disadvantage.

Rank 23: Silver Dragon -> To rank up you will have to capture 6 points which move quickly, there will be many grineers.

Rank 24: Gold Dragon -> To rank up you will need the operator to survive a couple of progeny mothers while you have to destroy a big orb at the middle of the map.

Rank 25: Sage

Rank 26: Silver Sage

Rank 27: Gold Sage

Rank 28: Master

Rank 29: Medium Master

Rank 30: Great Master
Companions: Sentinels, Kubrows and Kavats
What function have every sentinel?

Carrier: With "Striker" and "Vacuum" as default percepts, Carrier is a seeker sentinel. Carrier also comes with a shotgun wapeon.

Dethcube: With "Swift Deth" and "Vaporize as default percepts, Dethcube acts exactly as advertised, as a badass cube of "deth". Comes loaded with Deth Machine Rifle weapon.

Djinn: With "Thumper and "Fatal Attraction" as default percepts, Djinn is a combat sentinel. Djinn also comes with a poison dart weapon.

Diriga: is a Grineer Sentinel pre-equipped with the Vulklok as its default weapon, allowing it to pick off targets at long ranges or constantly stun close ranged targets.

Helios: With "Investigator as its unique percept and "Deconstructor" as its weapon, the versatile Helios sentinel acts as both a lethal guardian and an automatic codex scanner.

Shade: With "Revenge" and "Ghost" as default percepts, Shade is well suited for stealth gameplay. Shade also comes with a burst laser pistol.

Taxon: is a Sentinel pre-equipped with the Artax as its default weapon. Intended for players starting out in WARFRAME, the Taxon is designed to protect Tenno through its Molecular Conversion precept.

Wyrm: With "Warrior" and "Crowd Disperion" as default percepts, Wyrm is a highly offensive sentinel. Wyrm also comes with a laser rifle.


What function have every Kubrow?

Huras: Prized for its ability to sneak up on unsuspecting prey, the Huras Kubrow were first used as hunting companions by the Orokin elite. Orokin Era Tenno soon adapted the strain for use in covert missions and assassinations.

Raksa: Designed by the Orokin to be the perfect companion, a Kubrow was never far from its master's side. Loyal and obedient, these creatures made ideal bodyguards. Equipped with shield generators for added protection, their fierce growl could paralyze any attacker with fear.

Sahasa: Enterprising Orokin genetic designers recognized that the Kubrow's affinity for games of fetch could be used for more serious endeavors. They soon developed a strain adept at reconnaissance and contraband recovery. Tenno often used the creatures to help resupply while in the field.

Sunika: Once the value of Oroki guard-pets had been realized, Orokin scientists began experimenting with strains desifned for combat. These were no longer household pets but superior war animals bred for ferocity and aggression.


How can I keep my Kubrow alive?

Kubrows have two parameters that you must keep them up if you want to guarantee that your Kubrow still live, these parameters are: Genetic Stability and Fidelity, you can see them at the incubator. Genetic Stability means your Kubrow's physical vitality, that affect his maximum health. Newborn's Kubrows begins with 100% Genetic Stability, that's means that it will have 100% in his maximum health; a Kubrow which have 150 of based health will have 300 health points if it have 100% Genetic Stability. His Genetic Stability will degrade 10% per 24 hours, that's means that his health will be reduced even more less of his based health if you don't take care of him for so long. The Kubrow will die if his Genetic Stability is 0%. You can add more Genetic Stability if you use DNA stabilizers, you can buy it at the shop. One DNA stabilizer will restore 40%.

Loyalty means the affection that Kubrow have to the player, that affects the Kubrow's behaviour during battle. One Kubrow start with 100% of loyalty, that means 100% of his based damage. Loyalty will degrade 20% per day and degrade 40% if the Kubrow die in combat and you don't revive him (during the mission, after the mission he will be alive). Loyalty wont degree if it die after his owner die. The loyalty that is lose can be restored if you interact with him with while he is in the incubator, it will restore a 20% of loyalty per interact. Players can interact with their Kubrows many times as they want, but loyalty only will restore until three times per 24 hours.

If you have the incubator's improvement and your Kubrow it's almost die, the incubator automatically will put him hibernate, also the Genetic Stability and Loyalty will degrade slowly.

What function have every Kavat?

Adarza: Piercing eyes reflect lethal instincts.

Smeeta: This feline is playful but astut.


How can I keep my Kavat alive?

It's exactly as keep your Kubrow alive.
Types and modes of missions
What kind of missions there are?

Assassination: Missions which objective is kill a Boss.

Capture: Missions which objective is capture one or two persons.

Conclave: Missions which require a minimum or maximum Conclave level, (you can see your Conclave level pressing Escape and placing the mouse above your profile located in the upper left of the screen).

Deception: Missions which a player must take a data packet and have to insert it on a terminal navigation.

Defense: Missions which objective is defende a core or a cryo-capsule and survive max waves possible.

Espionage or Spy mission: Missions which objective is decode and get three Data Terminals and carry them at the extraction point (you can carry all data terminals at the same time).

Excavation: Missions which you must provide energy to a scanner that will reveal where are the drills on the map, you have to give energy to the scanner and the drills and protect the drills when it appear. You can earn energy by killing the enemies, they will drop it.

Extermination: Missions which objective is kill a specific number of enemies (you can see the number of enemies that you must kill on the top left of the screen, under the map).

Interception: Missions which objective is capture A, B, C and D and keep under your control until the end of the match (or reach the 100% before the enemies).

Invasion: Extermination Missions which objective is help a team to defeat the other faction.

Mobile Defense: Missions which objective is take a Data Terminal and implant it on one or two systems and defend it until the time reaches 0 (you can see the chronometer on the top left of the screen, under the map).

Rescue: Missions which objective is go to a room where you must hack consoles and rescue a person, then you must scort him at the extraction point.

Sabotage: Missions which objective is destroy one or more machines or cores.

Survival: Missions which objectives is survive and keep the oxygen as long as possible, the percentage of oxygen will be reduce as time passes; you must active the life supports and collect life backpacks that drops the enemies when you kill them for increase the oxygen percentage.
Survival's Rotations:
A -> 5 minutes
A -> 10 minutes
B -> 15 minutes
C -> 20 minutes
A -> 25 minutes
A -> 30 minutes
B -> 35 minutes
C -> 40 minutes
A -> 45 minutes
A -> 50 minutes
B -> 55 minutes
C -> 60 minutes
. . etc . .


What modes missions there are?

PvP: Mode which players fight versus other players.

Environmental Hazards: Mode which you can have freeze's maps (it will reduce your shield at half) or blizzard that will cause damage per second.

Nightmare Mode: Mode which exists a probability of: reduce your life or shield per second, be without gravity, lost energy per second, reduced life, no shields... etc.

Alerts: Mode which you can earn an unusual reward. Usually, you have time limit before the Alert disappears of the planet.
Planets
Mercury

Archwings Extermination -> Caduceo
Assassination -> Tolstoj
Capture -> Caloris
Capture -> Suisei
Defense -> Lares
Deception -> Verdi
Exterminate -> Eminescu
Exterminate -> Panteón
Exterminate -> Terminus
Movil Defense -> Boecio
Movil Defense -> Elion
Interception -> Odín
Sabotage -> Neruda
Sabotage -> M.Prime
Survival -> Apolodoro

Venus

Archwings Extermination -> Montes
Assassination -> Fossa
Capture -> Afrodita
Capture -> Ishtar
Dark Sector Defense -> Romula
Dark Sector Excavation -> Malva
Defense -> Kiliken
Defense -> Venera
Espionage -> Unda
Espionage -> Vesper
Excavation -> E Gate
Exterminate -> Citerea
Rescue -> Linea
Rescue -> V Prime
Sabotage -> Tésera

Earth

Archwings Interception -> Erpo
Capture -> Mantle
Capture -> Pacífico
Dark Sector Defense -> Cobá
Dark Sector Excavation -> Tikal
Defense -> Lith
Defense -> Lua
Excavation -> Cambria
Exterminate -> E Prime
Exterminate -> Eurasia
Exterminate -> Everest
Interception -> Gaia
Sabotage -> Mariana
Sabotage -> Oro

Mars

Archwings Extermination -> Syrus
Assassination -> War
Capture -> Alator
Capture -> Ares
Capture -> Quirino
Dark Sector Defense -> Qadesh
Dark Sector Survival -> Wahiba
Defense -> Olimpo
Espionage -> Martialis
Exterminate -> Arval
Exterminate -> Silvanus
Exterminate -> Ultor
Interception -> Augusto
Movil Defense -> Hellas
Rescue -> Spear
Rescue -> Vallis
Sabotage -> Gradivus
Sabotage -> Tharsis
Survival -> Ara
Survival -> Arcadia

Jupiter

Archwings Sabotage -> Amaltea
Assassination -> Temisto
Capture -> Ananké
Capture -> Metis
Dark Sector Defense -> Sinaí
Dark Sector Survival -> Cameria
Deception -> Tebe
Defense -> Io
Exterminate -> Adrastea
Exterminate -> Carpo
Exterminate -> Ganímedes
Interception -> Calisto
Movil Defense -> Carmé
Sabotage -> Galilea
Survival -> Elara

Saturn

Archwings Extermination -> Pandora
Assassination -> Tetis
Capture -> Calipso
Capture -> Encélado
Capture -> Febe
Dark Sector Defense -> Caracol
Dark Sector Survival -> Piscinas
Deception -> Epimeteo
Deception -> Metone
Defense -> Helena
Exterminate -> Egeón
Exterminate -> Hiperión
Exterminate -> Jano
Exterminate -> Telesto
Interception -> Jápeto
Rescue -> Antea
Rescue -> Numa
Sabotage -> Dione
Sabotage -> Palene
Sabotage -> Rea
Sabotage -> Titán
Survival -> Cassini
Survival -> Keeler
Survival -> Mimas

Uranus

Archwings Interception -> Caelus
Assassination -> Titania
Capture -> Desdémona
Capture -> Trinculo
Dark Sector Survival -> Assur
Dark Sector Survival -> Ur
Deception -> Julieta
Deception -> Perdita
Defense -> Bianca
Defense -> Miranda
Espionage -> Rosalinda
Espionage -> Umbriel
Exterminate -> Cordelia
Exterminate -> Oberón
Exterminate -> Puck
Exterminate -> Sicorax
Interception -> Stefano
Movil Defense -> Crésida
Rescue -> Calibán
Rescue -> Mab
Sabotage -> Ariel
Sabotage -> Setebos
Sabotage -> Portia
Sabotage -> Próspero
Survival -> Cupido
Survival -> Ofelia

Neptune

Archwings Sabotage -> Salacia
Assassination -> Psámate
Capture -> Galatea
Dark Sector Defense -> Yursa
Dark Sector Survival -> Kelashin
Deception -> Náyade
Defense -> Proteo
Espionage -> Laomedeia
Espionage -> Sao
Excavation -> Tritón
Exterminate -> Neso
Movil Defense -> Larissa
Rescue -> Nereida
Rescue -> Talasa
Sabotage -> Halimede
Survival -> Despina

Pluto

Assassination -> Hades
Capture -> Hidra
Dark Sector Defense -> Sechura
Dark Sector Survival -> Hieracon
Deception -> Nix
Defense -> Narciso
Defensa -> Terminus Exterior
Espionage -> Oceanum
Exterminate -> Aqueronte
Interception -> Cerberus
Movil Defense -> Minthe
Rescaue -> Regna
Sabotage -> Caronte
Sabotage -> Ciprés
Survival -> Palus

Ceres

Assassination -> Exta
Capture -> Bode
Dark Sector Defense -> Seimeni
Dark Sector Survival -> Gabii
Deception -> Albedo
Deception -> Ker
Defense -> Casta
Defense -> Varro
Espionage -> Hapke
Espionage -> Lex
Exterminate -> Ludi
Exterminate -> Vedic
Interception -> Draco
Movil Defense -> Kiste
Rescue -> Cinxia
Rescue -> Olla
Sabotage -> Palas
Sabotage -> Thon
Survival -> Nuovo
Survival -> Egeria
Usurpation -> Cerio
Usurpation -> Gefion

Eris

Capture -> Cosis
Capture -> Isos
Dark Sector Defense -> Acad
Dark Sector Survival -> Zabala
Defense -> Ixodes
Defense -> Kala-azar
Defense -> Xini
Espionage -> Cyath
Espionage -> Gnathos
Exterminate -> Acanto
Exterminate -> Histo
Exterminate -> Naeglar
Exterminate -> Saxis
Hive -> Candirú
Hive -> Lepis
Hive -> Psoro
Hive -> Sporid
Hive -> Viver
Movil Defense -> Ascar
Movil Defense -> Giardia
Movil Defense -> Oestrus
Movil Defense -> Solium
Rescue -> Brugia
Rescue -> Ranova
Rescue -> Sparga
Survival -> Hymeno
Survival -> Nimus
Survival -> Phalan

Sedna

Assassination -> Merrow
Capture -> Tiamat
Dark Sector Defense -> Sangeru
Dark Sector Survival -> Amarna
Deception -> Caribdis
Deception -> Ponaturi
Deception -> Rusalka
Defense -> Camenas
Defense -> Hidrón
Espionage -> Escila
Espionage -> Tikoloshe
Exterminate -> Adaro
Exterminate -> Marid
Interception -> Bereginia
Movil Defense -> Graeae
Movil Defense -> Kappa
Movil Defense -> Vodyanoi
Rescue -> Jengu
Rescue -> Naga
Rescue -> Veles
Sabotage -> Hyosube
Sabotage -> Kelpie
Sabotage -> Nakki
Sabotage -> Ondina
Sabotage -> Phithale
Sabotage -> Yam
Survival -> Selkie
Survival -> Yemaja

Europe

Assassination -> Naamá
Capture -> Abadón
Capture -> Beleth
Dark Sector Defense -> Larzac
Dark Sector Excavation -> Cholistán
Defense -> Eligor
Defense -> Paimon
Espionage -> Armaros
Espionage -> Valac
Excavation -> Lillith
Excavation -> Valefor
Exterminate -> Marax
Interception -> Ose
Movil Defense -> Baal
Rescue -> Orias
Rescue -> Shax
Sabotage -> Kokabiel
Sabotage -> Samigina
Survival -> Zagan
Usurpation -> Sorath

Phobos

Assassination -> Ilíada
Capture -> Limtoc
Capture -> Todd
Dark Sector Defense -> Menfis
Dark Sector Oscuro Excavation -> Zeugma
Deception -> Skyresh
Defense -> Drunlo
Defense -> Kepler
Espionage -> Grildrig
Espionage -> Shklovsky
Excavation -> Stickney
Excavation -> Wendell
Exterminate -> Clustril
Exterminate -> Roche
Interception -> Opik
Movil Defense -> Hall
Movil Defense -> Sharpless
Rescue -> Guilliver
Rescue -> Monolito
Sabotage -> D'Arrest
Sabotage -> Reldresal
Survival -> Flimnap
Damage and elemental effects on different factions
There are three kind of damage: Physical, elemental and combined elements. Every damage affect more or less to factions, that's the reason that it's so important have a good combination of every damage in your weapons.

In physical damage we can see: Impact, Puncture and Slash.

In elemental damage we can see: Cold, Electricity, Heat and Toxic.

When we combined elements we can find:

-Blast (Heat + Cold): Inflicts knockdown effect in area.
-Corrosive (Electricity + Toxic): Reduces the enemies's armor permanently.
-Gas (Heat + Toxic): Create a poisson effect in area.
-Magnetic (Cold + Electricity): Reduces the maximum shields of enemies and drain their energy.
-Radiation (Heat + Electricity): Reduces the enemy aim and attacks indiscriminately to the first nearby enemy/friend.
-Viral (Cold + Toxic): Reduces the maximum health.

To know what combined elements makes more damage to the factions here you have a little summary:

Grineers:

-For every humanoids Grineers (including Bosses): Slash, Heat and Viral.
-For Lancers,Soldiers, Seekers, Heavy Gunners, Commandaners and all melee Grineer units (Corpus humanoids Bosses are classified with this type): Puncture, Toxic and Corrosive.
-For Elite Lancers, Eviscerators, Bombers, Arsonists, Grineer Bosses, Robot Corpus Bosses and Stalker: Puncture, Cold y Radiation.
-For Rollers, Regulators and Limpets: Impact, Electricity and Blast.


Corpus:

-For every humanoid Corpus (including Bosses like Sgt. Nef Anyo and Alad V [also including Stalker]): Slash, Toxic and Viral.
-For every regular Corpus units, Regulators, and Grineer Bosses: Impact, Cold and Magnetic.
-For every Corpus Bosses (including Zanuka), Technicians and Stalker: Impact, Toxic y Magnetic.
-For every robots Corpus including robotics bosses like Ambulas and Zanuka: Puncture, Electricity and Radiation.


Infesteds:

-For every Chargers and Leapers: Slash, Heat and Gas.
-For every los Volatile Brokers and type enemies dragged: Slash, Heat and Gas.
-For Ancient Disruptors, Ancient Toxics and Lephantis: Slash, Blast and Corrosive.
-For Ancient Healers and Phorid: Puncture, Cold and Radiation.


Corrupts:

-For Corrupt Lancers and Corrupt Heavy Gunners: Slash, Heat and Viral.
-For Corrupt Crewmean: Cutting, Toxic and Viral.
-For Corrupt Heavy Gunners: Puncture, Toxic and corrosive.
-For Corrupt Lancers: Puncture, Cold and Radiation.
-For Orokin Drones and Corrupt Crewmean: Impact, Cold and Magnetic.
-For Corrupt MOAs, Guardians Fusion MOA and Orokin Drones: Puncture, Electricity and Radiation.
-For Ancient Corrupt: Slash, Blast and Corrosive.


To know what combined elements makes less damage to the factions here you have a little summary:

Grineers:

-For every humanoids Grineers (including Bosses): Impact and Gas.
-For Lancers,Soldiers, Seekers, Heavy Gunners, Commandaners and all melee Grineer units (Corpus humanoids Bosses are classified with this type): Slash and Blast.
-For Elite Lancers, Eviscerators, Bombers, Arsonists, Grineer Bosses, Robot Corpus Bosses and Stalker: Slash, Electricity and Magnetic.
-For Rollers, Regulators and Limpets: Toxic and Viral.


Corpus:

-For every humanoid Corpus (including Bosses like Sgt. Nef Anyo and Alad V [also including Stalker]): Impact and Gas.
-For every regular Corpus units, Regulators, and Grineer Bosses: Blast and Radiation.
-For every Corpus Bosses (including Zanuka), Technicians and Stalker: Puncture, Heat and Corrosive.
-For every robots Corpus including robotics bosses like Ambulas and Zanuka: Slash and Toxic.


Infesteds:

-For every Chargers and Leapers: Radiation and Viral.
-For every los Volatile Brokers and type enemies dragged: Cold.
-For Ancient Disruptors, Old Toxics and Lephantis: Cold, Toxic and Radiation.
-For Ancient Healers and Phorid: Blast.


Corrupts:

-For Corrupt Lancers and Corrupt Heavy Gunners: Impact and Gas.
-For Corrupt Crewmean: Impact and Gas.
-For Corrupt Heavy Gunners: Slash and Explosion.
-For Corrupt Lancers: Slash, Electricity and Magnetic.
-For Orokin Drones and Corrupt Crewmean: Puncture and Radiation.
-For Corrupt MOAs, de los Guardians Fusion MOA and Orokin Drones: Slash and Toxic.
-For Ancient Corrupt: Cold, Toxic and Radiation.
Warframes: Characteristics and Location
Ash: Ash is great for players looking for a stealthier approach to combat. Lethal abilities are complemented by powes of distraction.
Ash parts obtain from killing Maniac, it appear in every Grineers mission.


Atlas: Titan of stone, lord of the earhly elementals.
Atlas parts obtain with "The Jordas Percept" adventure, to begin it you must kill Juggernaut (It appear in Infesteds mission when you kill a lot of infesteds). When you get powerful pheromones you must kill Golem (It's an archwing mission), kill it until you get chassis, systems and helmet.


Banshee: Using sonic attacks and acoustic target detection, Banshee is well suited for stealth gameplay and is capable of filling both attack and support roles.
You can obtain Banshee parts in Tenno laboratory, in the Dojo of your clan.


Chroma: A master of the deadly elements, Chroma can alter his damage output by changing his energy color.
You can obtain Chroma parts in junction of planets.


Ember: Ember is perfet for players who likes destroy the enemies with fire, Ember is prepare to calcine every kind of enemies.
You get Ember parts killing the boss: Sargas Ruk (Tethys, Saturn).


Equinox: A duality of contrasting forces in a single entity, Equinox unleashes wrath like the onset of daybreak, or draws life to a close like dusk's approach. Shifting between two forms allows her to bolster Tenno strength in light or provide recuperative respite in darkness.


Excalibur: With a sword can cut easily the enemies and you will lucky if you can survive to Excalibur's abilities.
You get Excalibur parts killing the boss: Ambulas (Hades, Pluto).


Frost: By channeling moisture and vapor in the surrounding environment, Frost creates formidable defenses and lethal attacks from sub zero conditions.
You get Frost parts killing the boss: Lieutenant Lech Kril (Exta, Ceres).


Gara: Clad in lustrous vitrum, Gara sunders her foes with adamantine shards, reflects enemy attacks through enchanted mirrors, and reshapes the landscape with molten crystal.
Gara's main blueprint will be awarded upon completion of the Saya's Vigil quest.
Component blueprints will drop as uncommon rewards from level 5-40 Bounties on the Plains of Eidolon.


Harrow: Dauntless and devout, the dark priest Harrow bestows upon his coven three virtues: salvation through sacrifice, redemption through vengeance, and ascension through defiance.
Harrow's main blueprint is awarded upon completion of the Chains of Harrow quest. The Chassis blueprint drops from enemies Corrupted by Void Fissures. The Systems blueprint can be found in Rotation C of Defection. The Neuroptics blueprint can be found in Rotation C of Kuva Fortress Spy (Pago).


Hydroid: Rising from the ocean depths, Hydroid harnesses the power of water to a devastating effect.
You get Hydroid parts killing the boss: Councilor Vay Hek (Oro, Earth); to do it your Mastery Rank must be level 5.


Inaros: Risen from the sands, Inaros commands the desert's fearsome power.
Inaros parts are obtainable from the "Sands of Inaros" quest. You must buy the quest from Baro Ki'Teer for 200 Ducats and 50,000 Credits.


Ivara: With her quiver of tactical arrows, this huntress prowls unseen and strikes without warning.
To obtain Ivara first you must finish the first "Natah" mission, after that you have to do "The Second Dream" mission. You will obtain Ibara parts in different espionages.
Recommended espionages:
Ivara Systems -> Mercurio - Suisei (LvL 5 - 7)
Ivara Chassis -> Saturno - Egeón (LvL 13 - 15)
Ivara Helmet and Blueprint -> Ceres - Lex (LvL 33 - 35)


Limbo: Limbo manipulates the very planes of existence to divide his enemies and conquer them in the rift.
To get Limbo you have to buy "The Limbo Theorem" on the shop. You must have archwings to do the adventure missions.


Loki: Desired by advanced players, Loki offers a variety of specialized reconfiguring abilities. The creativity of Loki's powers allows players to master the battlefield through manipulation.
You get Loki parts killing the boss: Pack Hyena (Psamathe, Neptune)


Mag: With full command of surrounding magnetic energy, Mag is an expert at enemy manipulation.
You get Mag parts killing the boss: Nef Anyo (War, Mars).


Mesa: With a steady hand and quick reflexes, Mesa is a true gunfighter.
To get Mesa you must buy on the shop the "Patient Zero" mission, to make the key you need 3 Mutalist Coordinates (You'll obtain it in alerts). When you use the key you must kill Alad V who will drop Mesa parts (one key is one try).
Warframes: Characteristics and Location
Mirage: A master of illusion, Mirage confounds the enemy in a spectacle of style and power.
To get Mirage first you must buy "Hidden Messages" on the shop, to build it you will need Ciphers (to get ciphers you have to carry Dragon Keys to can open the Vault in Void). When you build it you must resolve some riddles to get every Mirage parts.
First Riddle: Olympus (Mars)
Second Riddle: Calypso (Saturn)
Third Riddle: Caribdis (Sedna)


Nekros: Nekros uses his dark powers to manipulate his enemies, both living and dead.
You get Nekros parts killing the boss: Lephantis (Derelict) you can buy the key on the shop.


Nezha: A petite and playful facade conceals this frame's immense power.
You can obtain Nezha parts in Tenno laboratory, in the Dojo of your clan.


Nidus: Epitome of the endlessly evolving Infestation, Nidus bends the vile corruption to his will, mutates his genetic potency to adapt and assimilates his victims with an insatiable parasitic hunger.
Nidus' main blueprint is acquired from The Glast Gambit quest. Component blueprints are acquired from rotation C of the Infested Salvage mission in Oestrus, Eris.


Nova: Nova uses electromagnetic energy to contain and control highly volatile antimatter that fuels her abilities.
You get Nova parts killing the boss: Raptor (Naamah, Europe).


Nyx: Mind control and psychic attacks make Nyx a very dangerous foe. Her ability to reach into enemy consciousness and manipulate their behavior can turn the tide of battle.
You get Nyx parts killing the boss: Phorid (Infestation Outbreak).


Oberon: Equally adept at healing friends or striking down the enemy. Oberon embodies the balance Tenno are sworn to uphold.
You get Oberon parts killing every Eximus Units.


Octavia: Rhythmic and imaginative, Octavia conducts her myriad of siren songs and ambient anthems through the mystical Mandachord. Entice enemies with musical instruments that inflict melodic maladies, as the Tenno chorus synchronize their rhythm to sound the drums of war.
Octavia's main blueprint is acquired upon completion of the Octavia's Anthem quest. The Chassis blueprint can be obtained from the choral musical note memory puzzle found in Lua missions. Note that the part will be awarded from an Orokin Storage Container on top of the puzzle, not in the normal Rare Container off to the side. The Systems blueprint has a chance to drop from Rotation A Lua Crossfire (Plato) caches and the Neuroptics blueprint can be found from Rotation C of Orokin Derelict Survival.


Rhino: Rhino is the heaviest Warframe, combining offensive and defensive capabilities.
You get Rhino parts killing the boss: Jackal (Fossa,Venus).


Saryn: Saryn's venomous attacks are horrifyingly effective against organic and synthetic enemies, and her ability to "shed" her skin makes her very elusive.
You get Saryn parts killing the boss: Kela De Thaym (Merrow, Sedna).


Titania: Titania is a deadly and mischievous addition to any squad, but don't take my word for it Tenno.
You get Titania parts from The Silver Grove quest. The quest is obtained from the New Loka leader at any relay.


Trinity: Trinity is great for players who prefer a supportive role. Warframes with healing technology are rare making Trinity a great equalizer when the odds are stacked against the Tenno.
You get Trinity parts killing the boss: Captain Vor and Lieutenant Lech Kril (Iliad, Phobos).


Valkyr: Forged in the labs of the Zanuka project, the original Valkyr was subject to cruel experiments, leaving her scarred, angry and frighteningly adpet at killing.
You get Valkyr parts killing the boss: Alad V (Themisto, Jupiter).


Vauban: The highly tactical Vauban uses his powers to create deadly traps that can zap, imprison and dimensionally crush enemies.
To get Vauban parts you must complete Alerts missions.


Volt: Volt can create and harness electrical elements. This is a high-damage Warframe perfect for players who want a potent alternative to gun-play.
You can obtain Volt parts in Tenno laboratory, in the Dojo of your clan.


Wukong: A primal warrior with the heart of a trickster.
You can obtain Wukong parts in Tenno laboratory, in the Dojo of your clan.


Zephyr: Specializing in air attacks and mobility, Zephyr dominates from above.
You can obtain Zephyr parts in Tenno laboratory, in the Dojo of your clan.
Warframes and Companion Prime
Ash Prime:


Carrier Prime:


Banshee Prime:


Ember Prime (Not available):


Excalibur Prime (Not available):


Frost Prime (Not available):


Helios Prime:


Hydroid Prime:


Loki Prime (Not available):


Mag Prime (Not available):


Mirage Prime


Nekros Prime:


Nova Prime:


Nyx Prime:


Oberon Prime:


Rhino Prime (Not available):


Saryn Prime:


Trinity Prime (Not available):


Valkyr Prime:


Vauban Prime:


Volt Prime:


Wyrm Prime (Not available):
Primes Location
-> Akbolto Prime <-
Blueprint -> Neo M1 Common
Blueprint -> Neo V7 Common
Barrel -> Lith C2 Uncommon
Barrel -> Lith V5 Uncommon
Link -> Lith S7 Uncommon
Link -> Lith N8 Uncommon
Receiver -> Axi A3 Rare
Receiver -> Axi A4 Rare

-> Akbronco Prime <-
Blueprint -> Lith V5 Common
Blueprint -> Lith Z1 Common
Blueprint -> Lith S2 Common
Blueprint -> Lith S3 Common
Blueprint -> Lith T1 Common
Blueprint -> Meso O1 Common
Blueprint -> Meso S3 Common
AkBronco Link -> Meso O2 Uncommon
AkBronco Link -> Lith A2 Uncommon
AkBronco Link -> Lith N1 Uncommon
AkBronco Link -> Lith S5 Uncommon
AkBronco Link -> Axi S1 Uncommon

-> Akstiletto Prime <-
Blueprint -> Lith A1 Rare
Blueprint -> Lith A2 Rare
Blueprint -> Neo A1 Rare
Barrel -> Lith H1 Uncommon
Barrel -> Meso K1 Uncommon
Barrel -> Axi A1 Uncommon
Barrel -> Axi H2 Uncommon
Receiver -> Axi O1 Uncommon
Receiver -> Axi H1 Uncommon
Receiver -> Axi K1 Uncommon
Receiver -> Axi T1 Uncommon
Link -> Meso O1 Uncommon
Link -> Neo N5 Uncommon
Link -> Axi N1 Uncommon

-> Ash Prime <-
Blueprint -> Lith S3 Uncommon
Blueprint -> Meso C1 Uncommon
Blueprint -> Meso S3 Uncommon
Neuroptics -> Meso N2 Uncommon
Neuroptics -> Meso V4 Uncommon
Neuroptics -> Neo N3 Uncommon
Neuroptics -> Neo V4 Uncommon
Neuroptics -> Axi N2 Uncommon
Chassis -> Meso V2 Common
Chassis -> Neo N4 Common
Chassis -> Axi B1 Common
Systems -> Axi N1 Rare
Systems -> Neo N5 Uncommon

-> Braton Prime <-
Blueprint -> Lith N3 Uncommon
Blueprint -> Lith V3 Common
Blueprint -> Axi V6 Common
Blueprint -> Meso V1 Uncommon
Blueprint -> Axi C2 Common
Blueprint -> Axi N1 Common
Barrel -> Meso G1 Common
Barrel -> Axi A3 Common
Barrel -> Lith A1 Common
Barrel -> Meso N3 Common
Barrel -> Meso S5 Common
Barrel -> Neo A1 Common
Receiver -> Lith B2 Uncommon
Receiver -> Axi V2 Uncommon
Receiver -> Axi V3 Uncommon
Receiver -> Axi V5 Uncommon
Stock -> Meso N5 Common
Stock -> Neo B2 Common
Stock -> Neo V2 Common
Stock -> Axi E2 Common
Stock -> Meso N1 Common
Stock -> Neo N4 Common
Stock -> Axi A1 Common

-> Bronco Prime <-
Blueprint -> Neo M1 Common
Blueprint -> Lith H1 Common
Blueprint -> Lith N1 Common
Blueprint -> Lith S1 Common
Blueprint -> Meso C2 Common
Blueprint -> Meso N2 Common
Blueprint -> Meso N3 Common
Blueprint -> Meso S2 Common
Blueprint -> Meso V5 Common
Blueprint -> Axi N2 Common
Blueprint -> Axi S1 Common
Barrel -> Axi E2 Uncommon
Barrel -> Neo V1 Uncommon
Barrel -> Axi N3 Uncommon
Receiver -> Lith C2 Common
Receiver -> Meso F1 Common
Receiver -> Neo B1 Common
Receiver -> Neo N6 Common
Receiver -> Neo S8 Common
Receiver -> Neo V4 Common
Receiver -> Axi S1 Common

-> Burston Prime <-
Blueprint -> Lith T1 Common
Blueprint -> Meso V1 Common
Blueprint -> Neo S6 Common
Blueprint -> Neo T1 Common
Barrel -> Neo V5 Uncommon
Barrel -> Lith F2 Uncommon
Barrel -> Neo B1 Uncommon
Barrel -> Axi T1 Uncommon
Receiver -> Lith N3 Common
Receiver -> Neo H1 Common
Receiver -> Lith S5 Common
Receiver -> Neo S3 Common
Stock -> Neo V6 Common
Stock -> Lith K1 Common
Stock -> Lith V1 Common
Stock -> Meso C3 Common
Stock -> Meso N3 Common
Stock -> Meso S5 Common
Stock -> Neo S2 Common

-> Carrier Prime <-
Blueprint -> Meso V1 Common
Blueprint -> Meso V3 Common
Blueprint -> Meso V4 Common
Blueprint -> Neo S3 Common
Cerebrum -> Lith C1 Rare
Cerebrum -> Meso C1 Rare
Cerebrum -> Meso C2 Rare
Cerebrum -> Meso N3 Uncommon
Carapace -> Neo S1 Common
Carapace -> Axi N2 Common
Carapace -> Lith S5 Common
Systems -> Lith N2 Common
Systems -> Lith S2 Common
Systems -> Lith S3 Common
Systems -> Neo A1 Common
Systems -> Neo V3 Common
Systems -> Axi V1 Common

-> Dual Kamas Prime <-
Blueprint -> Lith S6 Common
Blueprint -> Neo T1 Common
Blueprint -> Neo V1 Common
Blueprint -> Axi N3 Common
Blueprint -> Axi V1 Common
Blueprint -> Axi V5 Common
Blade -> Meso D1 Rare
Handle -> Meso N1 Uncommon
Handle -> Meso F1 Uncommon
Handle -> Axi A1 Uncommon

-> Fang Prime <-
Blueprint -> Lith V2 Common
Blueprint -> Neo B2 Common
Blueprint -> Lith K1 Common
Blueprint -> Meso N1 Common
Blueprint -> Meso S4 Common
Blueprint -> Neo N2 Common
Blade -> Neo S7 Common
Blade -> Axi B2 Common
Blade -> Lith C1 Common
Blade -> Lith F1 Common
Blade -> Lith N1 Common
Blade -> Lith S5 Common
Blade -> Lith S6 Common
Blade -> Axi B1 Common
Blade -> Axi N1 Common
Handle -> Neo V2 Common
Handle -> Axi V6 Uncommon
Handle -> Lith F2 Uncommon
Handle -> Meso N1 Common
Handle -> Meso N2 Common
Handle -> Meso S4 Uncommon
Handle -> Neo N3 Uncommon
Handle -> Axi H2 Common

-> Fragor Prime <-
Blueprint -> Meso H1 Uncommon
Blueprint -> Lith F1 Rare
Blueprint -> Meso F1 Rare
Blueprint -> Neo S8 Uncommon
Head -> Neo H1 Common
Head -> Axi B2 Common
Head -> Axi A1 Common
Head -> Axi H1 Common
Handle -> Neo V6 Uncommon
Handle -> Lith V1 Rare
Handle -> Neo T1 Uncommon
Handle -> Axi C2 Uncommon
Handle -> Axi N4 Uncommon

-> Hikou Prime <-
Blueprint -> Lith S1 Common
Blueprint -> Meso N2 Common
Pouch -> Axi K1 Common
Pouch -> Axi V2 Common
Stars -> Lith F2 Common
Stars -> Neo N1 Common

-> Kogake Prime <-
Blueprint -> Axi V7 No Común
Boot -> Axi A3 Común
Gauntlet -> Meso K1 Raro

-> Kavasa Prime Collar <-
Blueprint -> Lith S4 Uncommon
Blueprint -> Neo N1 Uncommon
Blueprint -> Axi G1 Uncommon
Band -> Lith C1 Uncommon
Band -> Lith N2 Uncommon
Band -> Lith S2 Uncommon
Band -> Lith S6 Uncommon
Band -> Meso V3 Uncommon
Buckle -> Lith K1 Rare
Buckle -> Neo S6 Uncommon
Buckle -> Axi B1 Uncommon
Buckle -> Axi K1 Rare

-> Lex Prime <-
Blueprint -> Lith S7 Common
Blueprint -> Lith S4 Common
Blueprint -> Meso C3 Common
Blueprint -> Meso D1 Common
Blueprint -> Neo N2 Common
Blueprint -> Axi A2 Uncommon
Barrel -> Lith A2 Common
Barrel -> Lith V2 Common
Barrel -> Axi N5 Common
Barrel -> Axi V7 Common
Barrel -> Meso S5 Common
Barrel -> Meso V4 Common
Barrel -> Neo N3 Common
Barrel -> Neo S1 Common
Barrel -> Axi A2 Common
Barrel -> Axi K1 Common
Receiver -> Meso N5 Common
Receiver -> Axi E2 Common
Receiver -> Lith M1 Common
Receiver -> Axi A2 Common
Receiver -> Axi C1 Common
Receiver -> Axi H2 Common
Receiver -> Axi N2 Common

-> Mirage Prime <-
Blueprint -> Neo M1 Rare
Neuroptics -> Meso H1 Common
Chassis -> Lith S7 Common
Systems -> Neo V6 Uncommon

-> Nekros Prime <-
Blueprint -> Lith N3 Rare
Blueprint -> Meso N3 Rare
Blueprint -> Axi N3 Rare
Neuroptics -> Axi N5 Uncommon
Neuroptics -> Meso F1 Uncommon
Chassis -> Meso K1 Common
Chassis -> Lith N1 Common
Chassis -> Lith V4 Common
Chassis -> Meso S3 Common
Chassis -> Axi G1 Common
Chassis -> Axi N4 Common
Systems -> Meso N5 Rare
Systems -> Lith N2 Rare
Systems -> Neo N3 Rare
Systems -> Neo N7 Rare

-> Nikana Prime <-
Blueprint -> Neo N5 Rare
Blueprint -> Neo S8 Uncommon
Blueprint -> Axi A1 Rare
Blade -> Meso N4 Rare
Blade -> Meso V2 Rare
Blade -> Neo N4 Rare
Hilt -> Neo N6 Rare
Hilt -> Axi N2 Rare
Hilt -> Axi N4 Rare

-> Nova Prime <-
Blueprint -> Neo N2 Uncommon
Neuroptics -> Meso C1 Common
Neuroptics -> Lith C1 Common
Chassis -> Neo V1 Rare
Chassis -> Lith N1 Rare
Systems -> Lith C1 Common
Systems -> Meso S1 Common
Systems -> Neo S2 Common

-> Nyx Prime <-
Blueprint -> Lith S2 Common
Blueprint -> Neo V1 Common
Neuroptics -> Meso N1 Rare
Chassis -> Neo N1 Rare
Systems -> Neo S2 Uncommon

-> Odonata Prime <-
Blueprint -> Lith F1 Uncommon
Blueprint -> Meso C2 Uncommon
Blueprint -> Meso S1 Uncommon
Harness -> Lith K1 Common
Harness -> Axi K1 Common
Harness -> Axi T1 Common
Harness -> Axi V4 Common
Wings -> Axi N1 Uncommon
Systems -> Lith F2 Common
Systems -> Axi V1 Common
Systems -> Neo N3 Common
Primes Location
-> Orthos Prime <-
Blueprint -> Axi B2 Uncommon
Blueprint -> Meso B1 Uncommon
Blueprint -> Axi C1 Uncommon
Blueprint -> Axi V3 Uncommon
Blade -> Meso D1 Uncommon
Blade -> Lith B2 Uncommon
Handle -> Meso K1 Common
Handle -> Neo H1 Common
Handle -> Meso B1 Common
Handle -> Meso D1 Common
Handle -> Meso N4 Common

-> Paris Prime <-
Blueprint -> Meso H1 Common
Blueprint -> Axi E2 Common
Blueprint -> Axi O1 Common
Blueprint -> Lith F1 Common
Blueprint -> Lith H1 Common
Blueprint -> Lith S4 Common
Blueprint -> Meso S1 Common
Blueprint -> Meso V2 Common
Blueprint -> Axi G1 Common
Blueprint -> Axi V4 Common
Grip -> Lith S7 Uncommon
Grip -> Lith S1 Uncommon
Grip -> Meso S2 Uncommon
String -> Neo M1 Common
String -> Neo V5 Common
String -> Lith S1 Common
String -> Lith S3 Common
String -> Meso S2 Common
String -> Neo B1 Common
String -> Neo N3 Common
String -> Neo N4 Common
String -> Neo V3 Common
Upper Limb -> Lith C2 Common
Upper Limb -> Lith V2 Uncommon
Upper Limb -> Lith F2 Common
Upper Limb -> Lith N2 Common
Upper Limb -> Lith V1 Common
Upper Limb -> Meso N4 Common
Upper Limb -> Meso S1 Uncommon
Upper Limb -> Neo S2 Uncommon
Upper Limb -> Axi N3 Common
Lower Limb -> Lith B2 Common
Lower Limb -> Lith V2 Common
Lower Limb -> Lith V3 Common
Lower Limb -> Meso O1 Common
Lower Limb -> Lith V1 Common
Lower Limb -> Meso F1 Common
Lower Limb -> Neo S2 Common

-> Saryn Prime <-
Blueprint -> Lith S4 Rare
Blueprint -> Meso C3 Uncommon
Blueprint -> Meso S4 Rare
Blueprint -> Neo S1 Rare
Neuroptics -> Lith A1 Uncommon
Neuroptics -> Meso S5 Uncommon
Neuroptics -> Neo V4 Uncommon
Chassis -> Meso S2 Rare
Chassis -> Neo S2 Rare
Systems -> Lith H1 Common
Systems -> Meso C1 Common
Systems -> Meso F1 Common
Systems -> Meso N4 Common
Systems -> Neo N5 Common
Systems -> Axi G1 Common
Systems -> Axi T1 Common

-> Scindo Prime <-
Blueprint -> Lith F1 Uncommon
Blade -> Axi S1 Rare
Handle -> Meso C1 Uncommon

-> Soma Prime <-
Blueprint -> Lith M1 Uncommon
Blueprint -> Neo S1 Common
Barrel -> Neo S3 Common
Receiver -> Neo N1 Uncommon
Receiver -> Lith S3 Uncommon
Stock -> Lith S2 Rare
Stock -> Meso S1 Rare

-> Spira Prime <-
Blueprint -> Lith N2 Common
Blueprint -> Lith V4 Common
Blueprint -> Meso V1 Common
Blueprint -> Meso V3 Common
Blueprint -> Meso V5 Common
Pouch -> Lith S1 Rare
Pouch -> Lith S3 Rare
Pouch -> Lith S6 Rare
Pouch -> Meso S3 Rare
Pouch -> Neo S8 Rare
Blade -> Lith S5 Rare
Blade -> Meso S6 Rare
Blade -> Neo S3 Rare

-> Trinity Prime <-
Blueprint -> Lith K1 Uncommon
Blueprint -> Meso S4 Uncommon
Blueprint -> Neo N6 Uncommon
Blueprint -> Axi S1 Uncommon
Neuroptics -> Neo D1 Uncommon
Neuroptics -> Neo N7 Common
Neuroptics -> Neo S6 Common
Neuroptics -> Axi C1 Common
Neuroptics -> Axi V3 Common
Chassis -> Lith S4 Uncommon
Chassis -> Neo S1 Uncommon
Chassis -> Axi H1 Uncommon
Chassis -> Axi H2 Uncommon
Systems -> Neo B1 Common
Systems -> Axi A1 Common
Systems -> Axi C2 Common
Systems -> Axi V2 Common
Systems -> Axi V3 Common
Systems -> Axi V4 Common

-> Valkyr Prime <-
Blueprint -> Lith A2 Common
Blueprint -> Lith N3 Common
Blueprint -> Axi V7 Common
Blueprint -> Meso S3 Common
Blueprint -> Meso S6 Common
Neuroptics -> Lith T1 Uncommon
Neuroptics -> Lith S6 Uncommon
Neuroptics -> Meso C2 Uncommon
Neuroptics -> Meso V4 Uncommon
Neuroptics -> Neo N7 Uncommon
Chassis -> Axi V5 Rare
Chassis -> Axi V6 Rare
Systems -> Meso V3 Rare
Systems -> Lith V3 Rare

-> Vasto Prime <-
Blueprint -> Neo S3 Uncommon
Barrel -> Neo D1 Common
Barrel -> Neo N2 Common
Barrel -> Axi V3 Common
Receiver -> Lith A1 Common
Receiver -> Meso V2 Common

-> Vauban Prime <-
Blueprint -> Lith F2 Rare
Blueprint -> Neo V2 Rare
Neuroptics -> Neo V5 Rare
Neuroptics -> Meso N2 Rare
Neuroptics -> Neo V3 Rare
Chassis -> Neo V6 Rare
Chassis -> Lith V4 Rare
Chassis -> Meso V4 Rare
Chassis -> Axi V1 Rare
Systems -> Neo N2 Rare
Systems -> Lith V2 Rare

-> Vectis Prime <-
Blueprint -> Lith A1 Uncommon
Blueprint -> Neo A1 Uncommon
Barrel -> Neo N1 Common
Barrel -> Axi C1 Common
Barrel -> Axi H1 Common
Barrel -> Axi T1 Common
Receiver -> Meso V1 Rare
Stock -> Neo B1 Uncommon
Stock -> Axi V2 Rare
Stock -> Axi V3 Rare
Stock -> Axi V4 Rare

-> Vectis Prime <-
Blueprint -> Lith A1 Uncommon
Blueprint -> Neo A1 Uncommon
Barrel -> Neo N1 Common
Barrel -> Axi C1 Common
Barrel -> Axi H1 Common
Barrel -> Axi T1 Common
Receiver -> Meso V1 Rare
Stock -> Neo B1 Uncommon
Stock -> Axi V2 Rare
Stock -> Axi V3 Rare
Stock -> Axi V4 Rare

-> Volt Prime <-
Blueprint -> Neo V1 Uncommon
Blueprint -> Axi N3 Uncommon
Neuroptics -> Axi V1 Uncommon
Chassis -> Meso V2 Uncommon
Chassis -> Meso V3 Uncommon
Systems -> Lith V1 Uncommon
53 comentários
ItzDelta 5 abr. 2022 às 0:35 
Hello Bye
Dpheonix 18 dez. 2018 às 12:43 
No worries, thank you for your time as well! Hope all is well @Banken ! Good luck on school stuff!
Banken  [autor] 17 dez. 2018 às 1:57 
I'l try to update the information because i have a lot of work and things to study, thanks for the information and your patience.
Dpheonix 17 dez. 2018 às 0:37 
Nothing on Equinox but their info, not where to get their pieces. Is there an update to that? Please and thank you for your time. :)

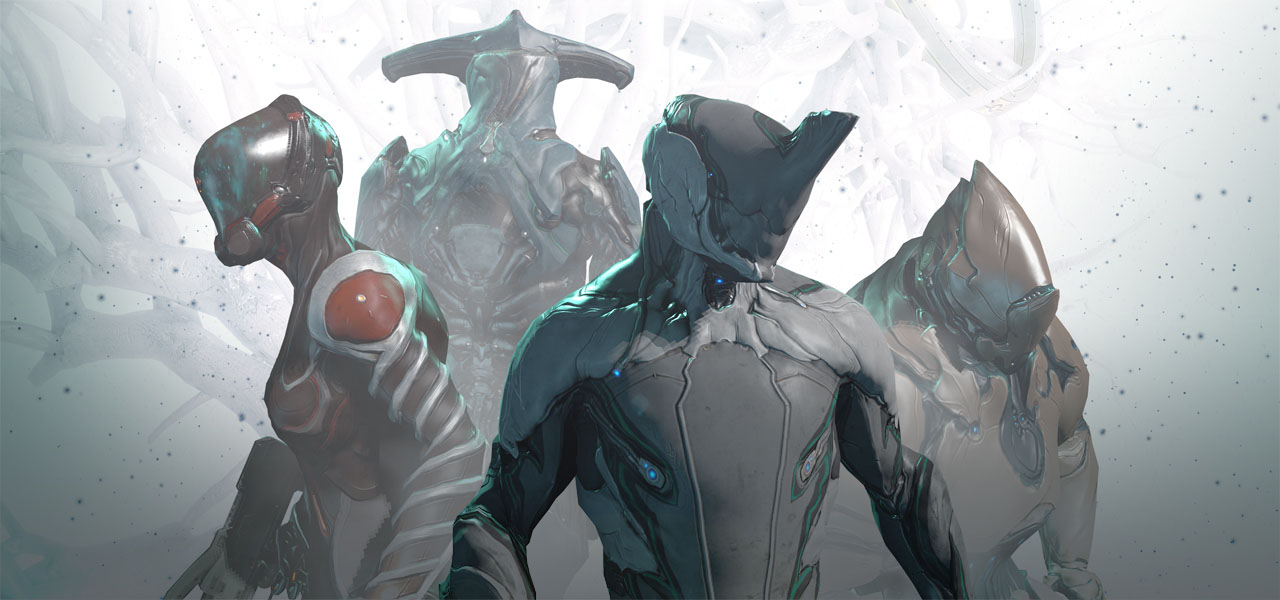
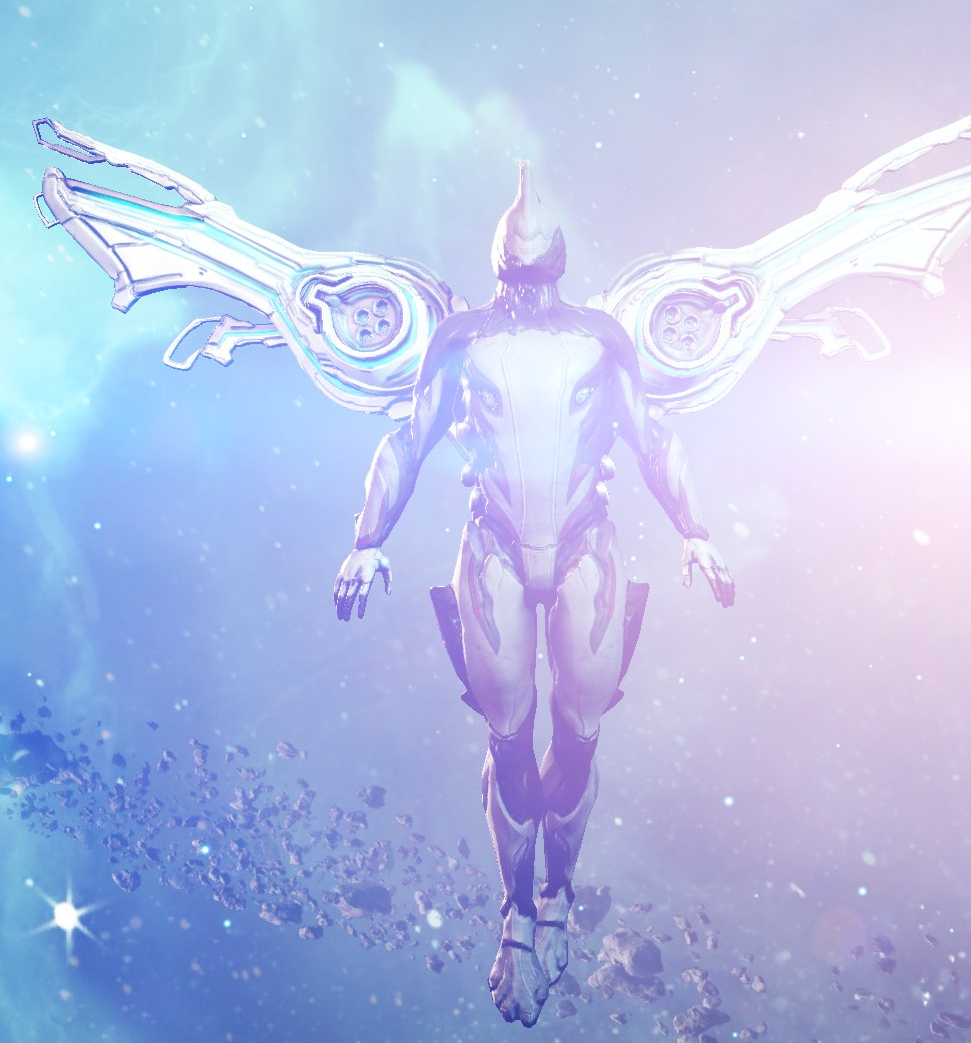
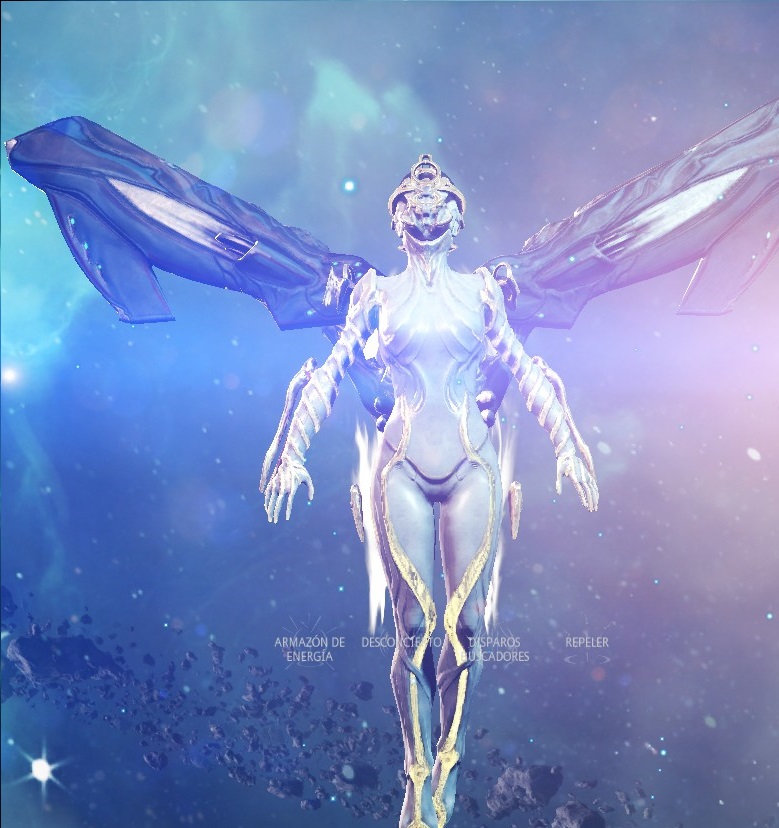
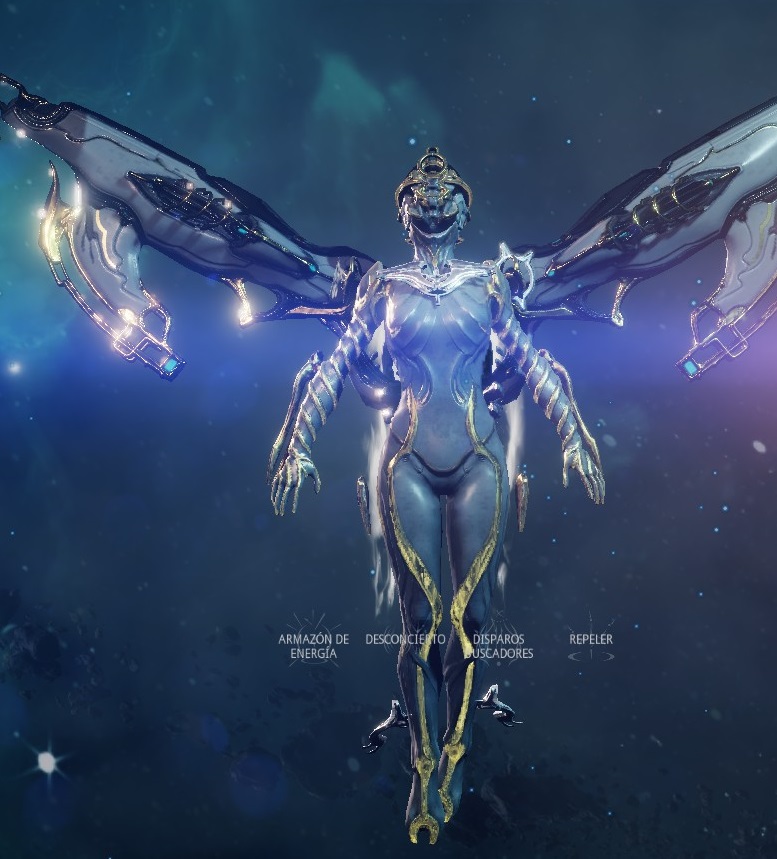
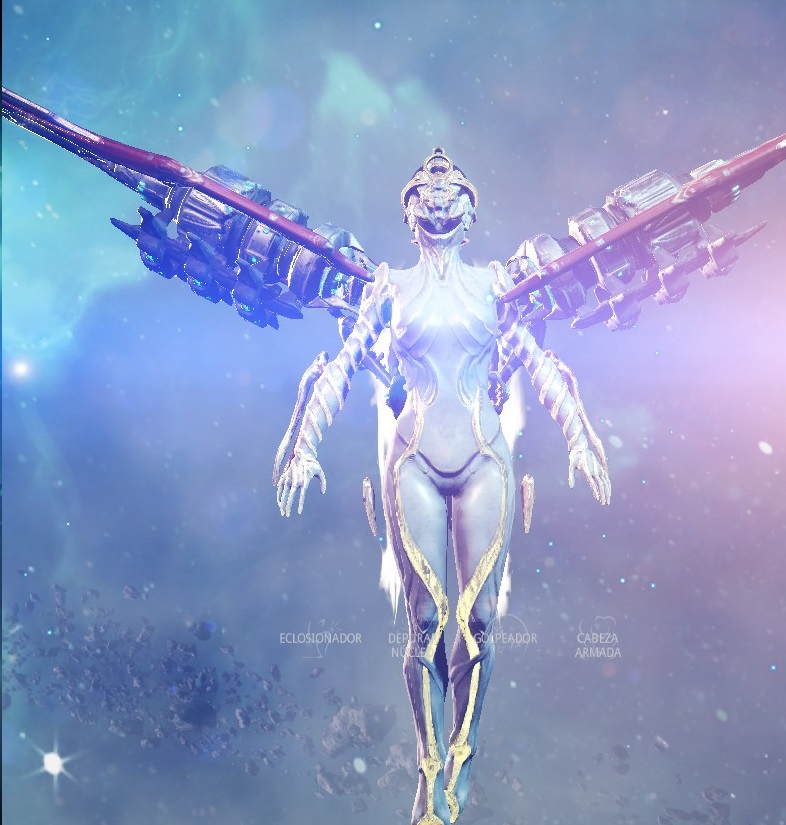
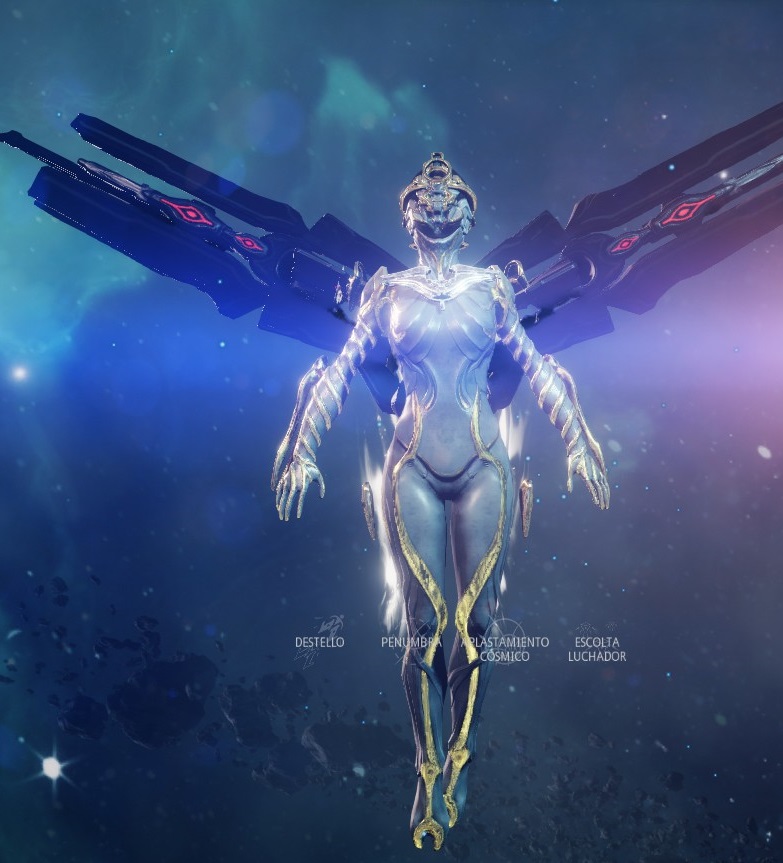
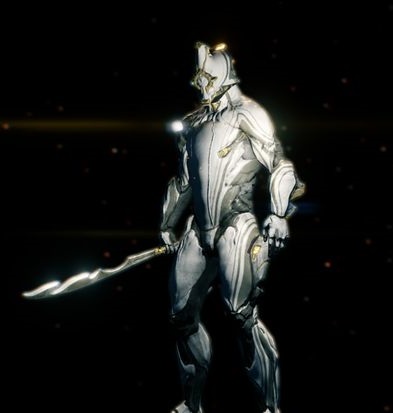
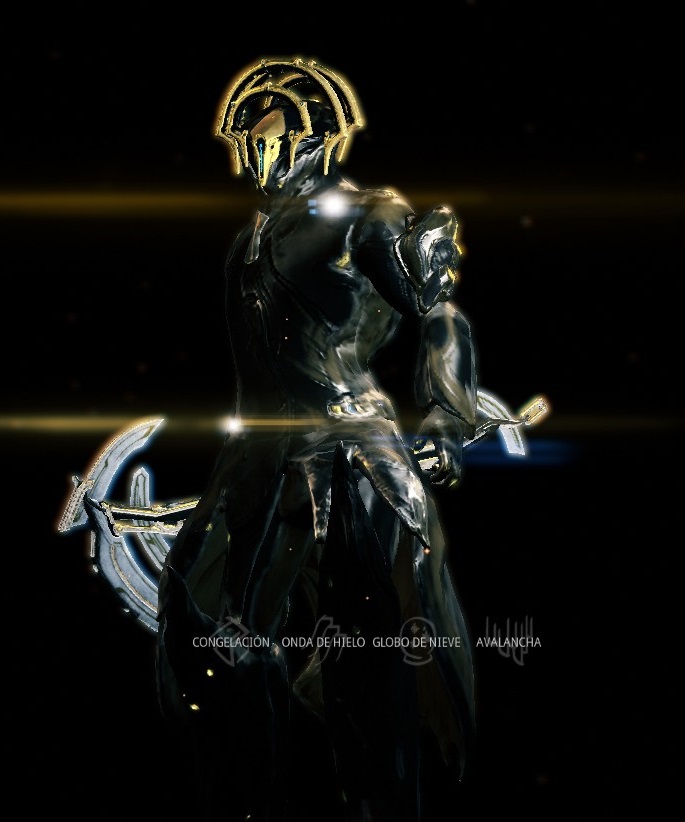
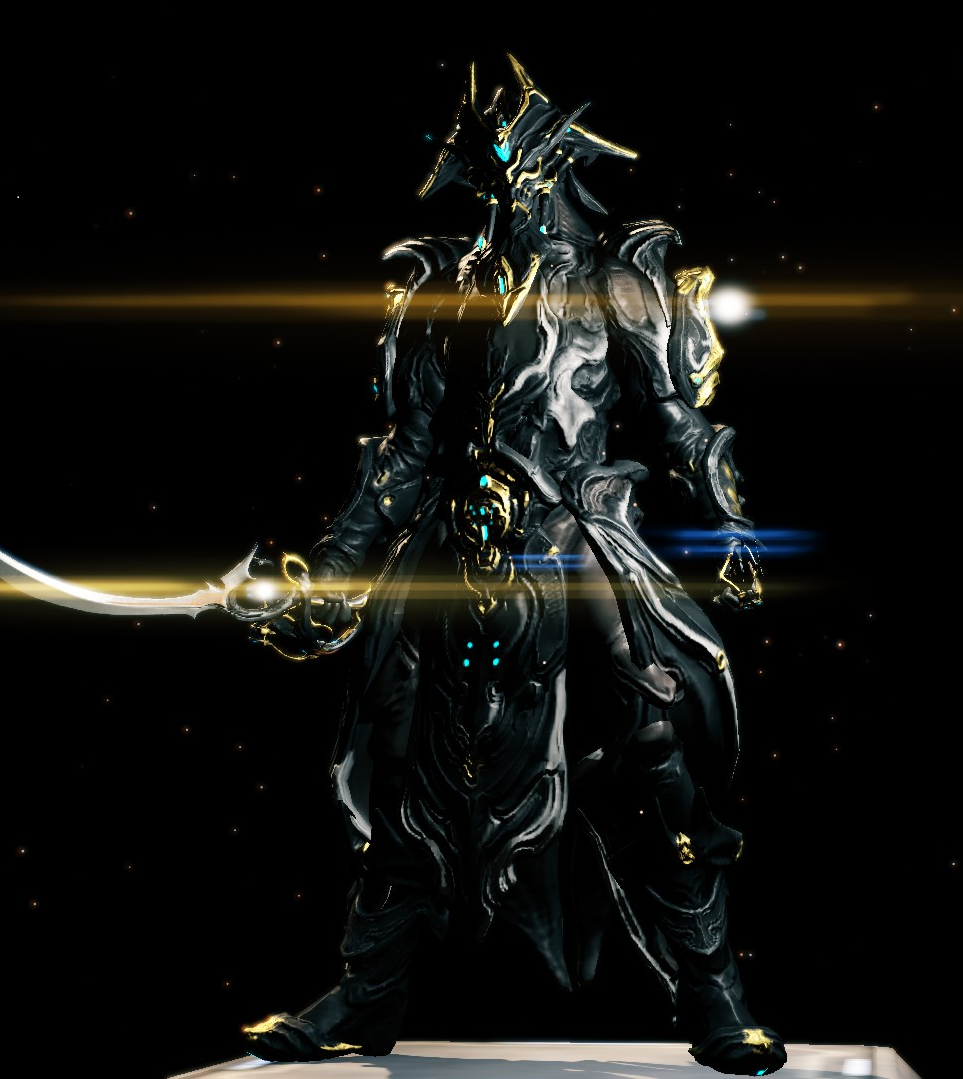
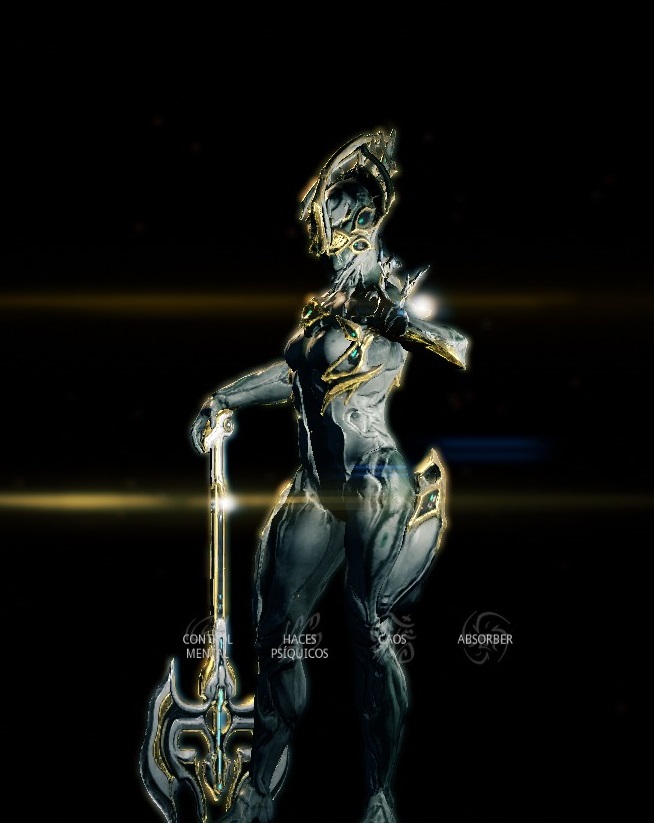
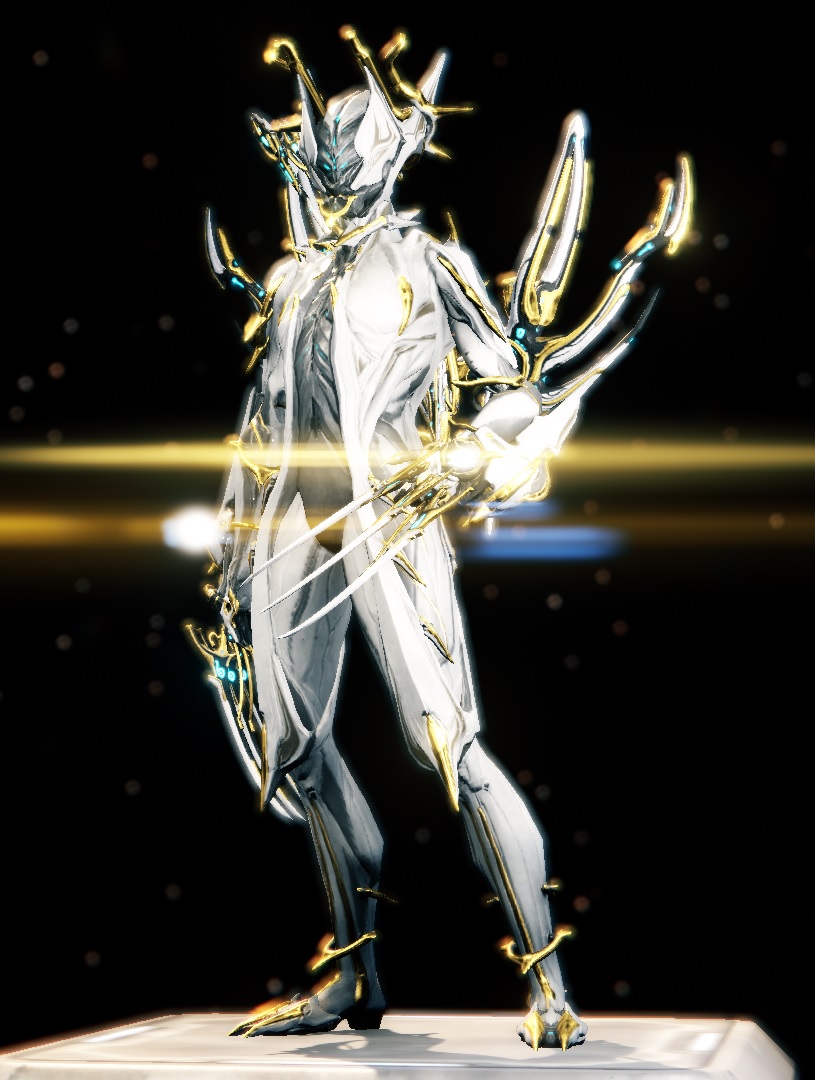
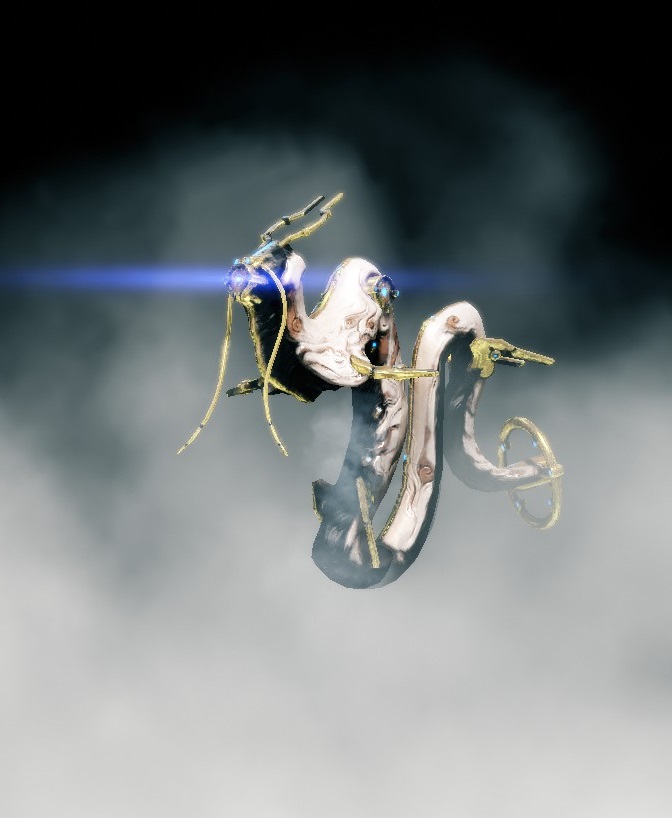
"Equinox: A duality of contrasting forces in a single entity, Equinox unleashes wrath like the onset of daybreak, or draws life to a close like dusk's approach. Shifting between two forms allows her to bolster Tenno strength in light or provide recuperative respite in darkness."
BigBoiTom 4 ago. 2018 às 11:29 
Mirage prime chassis is in neo L1 as well
Whimsical Walking Whale 22 jul. 2018 às 15:24 
Same thing with Volt Prime, the systems appear to be unavailable.
Whimsical Walking Whale 22 jul. 2018 às 15:21 
According to the wiki, at least.
Whimsical Walking Whale 22 jul. 2018 às 15:21 
I believe for it to be impossible to currently get Saryn because both types of chassis relics are vaulted.
Banken  [autor] 22 jul. 2018 às 8:12 
Thanks Whimsical as soon I'm home I'll upgrade the guide ^^
Whimsical Walking Whale 16 jul. 2018 às 15:07 
Limbo prime blue print is a silver drop from a meso Z1