Garry's Mod

Garry's Mod

123 vurderinger
Cinema - Mapping Tutorial
Af Sam og 1 partnere
Step-by-step tutorial for creating a map for the Cinema gamemode available on Steam Workshop.
   
Pris
Føj til foretrukne
Gjort til foretrukken
Fjern som foretrukken
Theatron Map
If you'd like to make edits to the cinema_theatron map, feel free to download the original VMF[github.com].

Please remember to credit the original author, Mr. Sunabouzu.
Hammer Entities
To get started creating maps for the Cinema gamemode it's recommended to download and add the Cinema FGD[raw.github.com] to your Hammer configuration. The FGD includes definitions for entities required for the gamemode. Listed below are descriptions for each entity and how to configure them in your map.

theater_screen (Point entity)
This entity is used to display the 3D2D theater screens found in-game. It should be placed at the top-left corner of where a screen should appear, pointing outwards.


Example placement of theater_screen entity in Hammer's perspective view.

Keyvalues
"Theater Name" (name) : theater name displayed on the scoreboard and thumbnail
"Flags" (flags) : describes which type of theater it is
"Screen Width" (width) : screen width in hammer units
"Screen Height" (height) : screen height in hammer units
"Thumbnail" (target) : refers to the targetname of the corresponding theater_thumbnail entity; note that if you don't want a thumbnail entity, you don't have to provide a value for this


Example keyvalue configuration for theater_screen entity.

theater_thumbnail (Point entity)
Each theater in the Cinema gamemode may be complemented by a thumbnail entity which displays the theater's current playing video. This can be placed anywhere in the map. It's recommended to place it outside of a theater to serve as a preview for what's playing.

Keyvalues
"Name" (targetname) : See the Valve Developer Wiki entry for a detailed description. This is required to match the corresponding theater's target keyvalue, case-sensitive.

Example keyvalue configuration for theater_thumbnail entity.

theater_door (Point entity)
The cinema_theatron map uses a door system to traverse through theater locations. If you would like to use this as well, which you certainly don't have to, you may place this entity in your map with a complementing info_teleport_destination entity. Note that this is only a one-way door system. In order to travel in both ways, you would need to setup two separate doors. The model used by the door is completely up to you.

Example keyvalue configuration for theater_door entity.

Example keyvalue configuration for info_teleport_destination entity.
In-Game Locations
After compiling your map and starting up the Cinema gamemode, you'll be greeted by this message:


The Cinema gamemode relies on a Lua locations system to prepare theater videos for players and describe where in the map a player is located. Naturally, the next step in setting up your map is to configure the locations within your map. Luckly for non-programmers, we've prepared a debug system to help mappers add support for their own maps. Feel free to ask questions if anything below is too confusing.

For this part of the tutorial, I will be using the map theater_gcinema as an example. To begin, you'll want to define bounding boxes within the map as part of specific locations. There are two console commands which you'll need to use to do so. The first is cinema_loc_start, this command is used to begin defining a new 3D space. The second command is cinema_loc_end, this is used when the you're ready to save the currently defined location space. Follow the steps below to define a location; it helps to imagine that you will be "blocking" out your map into locations.

1. Noclip to a starting location, or corner, for a location in your map.

2. Enter cinema_loc_start into the console.

3. Noclip to the opposite corner of the new location. You'll notice a wireframe 3D cube being formed as you move around. This is a preview of the location boundaries which will be used. It's important to try to be efficient as possible when defining a new location as there's currently no way to define priority for overlapping locations.


Location preview described in step 3. The above image shows myself defining the entrance location for the theater_gcinema map.

4. Enter cinema_loc_end into the console.

5. Following entering the commands to define a new location, a configuration will be copied into your clipboard. Open up your favorite text editor and paste it inside of it. It should look something like this,
[] = { Min = Vector( -1446.9011230469, -2250.2802734375, 54.014091491699 ), Max = Vector( 1445.0450439453, -840.00933837891, 413.30743408203 ), },
Name should be changed to whatever you would like to label that location as (e.g. Entrance).

6. The above steps (1-5) will need to be repeated for all locations within your map. Each location configuration should be posted one after the other until you eventually have a list of them.

7. After defining each location in your map, you must now add them to the gamemode. Start by creating a new Lua file named the same as your map (e.g. theater_gcinema.lua). Next, paste your list of location definitions within the template below and replace theater_gcinema with your map name.
Location.Add( "theater_gcinema", { *** Locations list goes here *** } )
In the case that you have gotten the gamemode code from Github, you'll need to save the map configuration as garrysmod/gamemodes/cinema/gamemode/maps/mapname.lua However, in the case that you would like to release your map as standalone, such as on workshop, you'll want to modify the template above as so,
hook.Add( "InitPostEntity", "theater_gcinema", function() if !Location then return end Location.Add( "theater_gcinema", { *** Locations list goes here *** } ) end )
In this case, you'll need to save the file as garrysmod/lua/autorun/mapname.lua. You can refer to the https://github.com/pixeltailgames/cinema/blob/master/cinema/gamemode/maps/theater_nexmultiplex_1m.lua file included with the gamemode for further reference.

8. Finally, you can test out your map to see if everything works. Remember to post any questions in the comments if you're confused about anything. The final outcome should look something like this,


In-game locations displayed with the cinema_debug_locations console command set to 1.
Manual Theater Configuration
In the case that you have definined locations for a map which is already compiled and is not properly built for Cinema, you'll also need to define the theater screen locations, etc. manually. If you have setup your map as shown in the Hammer Entities section, you do not need to follow this section. This section is sort of complex, so if you have the option to, setup your map in the way described in the first section.

As with the previous section, I will be using the map theater_gcinema as an example. On top of the location system used in Cinema, theater entities can either be defined by adding them through Hammer, or they can be defined in Lua code manually. Follow the steps below to manually define theater information,

1. Open the locations configuration you created in the previous section. Adding a theater is as simple as adding additional information to a location entry. Use the following template as a guide,
[] = { Min = Vector( 720.68334960938, 1403.3217773438, 270.52685546875 ), Max = Vector( 1246.5190429688, 2150.435546875, 524.49401855469 ), Theater = { Name = "Private Theater 1", Flags = THEATER_PRIVATE, Pos = Vector( 1180, 1415, 488 ), Ang = Angle(0,180,0), Width = 396, Height = 192, ThumbInfo = { Pos = Vector( 698, 1950, 340 ), Ang = Angle(0, -180, 0) } } },
The theater defined above will appear when a user enters the location. It's important to setup the theater correctly so that it will be visible in the correct location.

2. After adding the above addition to your location code, you may enter the location and notice that the theater doesn't appear. You'll need to supply the correct 3D coordinates and angles for displaying the theater. A useful command, cinema_loc_vector, is available for outputting your correct player location and copying it to your clipboard. Use it and enter the value as the entry for Pos under Theater, NOT ThumbInfo. By using trial-and-error, you can tweak the vector values to place the screen in the desired location. The position used is the topleft corner of the theater screen.

If the theater screen is not facing the correct direction, you can change the second value for Ang under Theater. For example,
Angle(0,90,0) OR Angle(0,0,0)
This is referred to as the yaw[en.wikipedia.org] of the theater screen.

3. Once you're satisfied with the orientation of the theater screen, you can now change the resolution to fit the area needed. You can change the Width and Height properties to set the resolution in world/hammer units.


Theater screen with correct orientation and dimensions

4. If you would like to add a thumbnail display for the theater outside of its entrance (or anywhere else), you must properly configure the Pos and Ang properties under ThumbInfo. Otherwise, the ThumbInfo block can be removed to disable spawning a thumbnail entity. Follow the same trial-and-error process as described in step 2 for setting the correct orientation.


Theater thumbnail setup outside its entrance.

5. Finally, the last properties you'll want to set are Name and Flags. Name is the name that will appear in the scoreboard for relaying the theater's current video information. Flags is used to define which type of theater you're adding. The available options are listed below,
  • THEATER_REPLICATED : a public theater which is open to all, only admins can administrate it
  • THEATER_PRIVATE : a private theater which is controlled and administrated by an owner
  • THEATER_PRIVILEGED : can be used to specify a VIP-only theater
  • THEATER_NONE : similar to a public theater, but it doesn't appear in the scoreboard

At this point the theater you've setup should be working properly. Repeat the steps to define any other theaters for a location. Note that only one theater can be defined per-location.
77 kommentarer
Crizz P. 12. juli 2022 kl. 3:39 
For all the keks out there looking to create maps for Cinema, this guide will help to create maps in Hammer - but - use the updated tools available here... https://steamcommunity.com/sharedfiles/filedetails/?id=2419005587

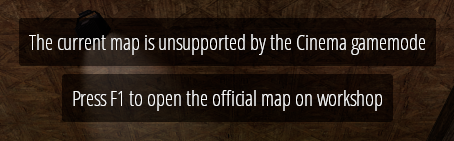
The Git directory from the updated gamemode is updated frequently, and the creators of this gamemode have given this user the right to continue to update it. Check it out.
DatHeroAndy 14. dec. 2019 kl. 12:12 
Why does Fullscreen Mode not work?
Franknog 3. apr. 2019 kl. 23:49 
You saved my life!
Mama Snail 21. jan. 2019 kl. 20:52 
someone needs to make an updated guide or video or something, because it's obvious that this one is either obsolete or just completely not right. that and the authors of this guide don't answer questions anymore.
⛧Voŕt̢eX̷_F̧ưr̡y⛧ 16. aug. 2018 kl. 12:14 
they dont working
⛧Voŕt̢eX̷_F̧ưr̡y⛧ 16. aug. 2018 kl. 12:14 
I have problem with screens
Arachnoides 26. juni 2018 kl. 8:18 
Make a how to video please!
Arachnoides 23. juni 2018 kl. 12:23 
When opening cinema_theatron.vmf in steam, it has very few textures and Errors., When running map , it's allmost all pink(purple missing items). Why is this happening how can I fix this problem?
Mama Snail 3. apr. 2018 kl. 20:51 
Also, where do i put the lua file?
Mama Snail 3. apr. 2018 kl. 15:05 
how do you add the model property to the theater door?