Dota 2
Ikke nok vurderinger
Ish'kafel, the Dark Seer: Guide
Af Radiance og 2 partnere
(Updated 3/4/13) An in-depth guide to Dark Seer.
   
Pris
Føj til foretrukne
Gjort til foretrukken
Fjern som foretrukken
Quick Reference: For Skilling and Item Building.
Skill Order:


Switch Ion Shell with Vacuum if you are on a solo middle or support role.

Item Build:

Starting Items:

Laning:
(recipe)

Jungling:
( or if you wait in fountain.)

Early Game Items:


Always have Teleport Scrolls!


Core Items:
(Do not get both Mekansm and Pipe.)

Late Game Items:


Situational/Luxury:
Welcome!
Hello DotA community! I am Oblivion, here to introduce a guide for you on how to play Dark Seer. Before I go into Dark Seer, here's my profile and my status as Dark Seer.


I have proficient knowledge to give you a good rundown of Dark Seer. But, I do not know everything there is to know about Dark Seer (yet...). Regardless, I do believe this guide will help you become a better Dark Seer and bring your game to the next level.

I would also like to mention that any sourced images and video content belong to their respective owners or websites. These images and videos are used solely for this guide and not for anything else. (And i'm poor, so, yea...) So, without further delay, here is Dark Seer.


(Source: http://www.cyborgmatt.com/2012/10/dota-2-17th-october)
Introduction: Who is Dark Seer?

(Source: http://www.dota2wiki.com/images/f/f7/Dark_Seer.png)

Dark Seer is a melee Intelligence hero who has a very versatile skill set. His skill sets allow him to fill in a variety of roles in a team and be very strong in all stages of the game. He can jungle, support, and solo a lane, all very effectively. Being the "cunning strategist" that he is, his skills require proper placement and, well, skill, in order to maximize his effectiveness.
Statuses of Dark Seer: Number Crunching

(Source: http://www.dota2wiki.com/wiki/Dark_Seer)

Ok. There's a lot of numbers and words on there. So i'll just point out the things that are more important to recognize here:
  • High Strength and Strength gain (Hit Points): See the numbers below the red fist? That's not Intelligence, that is Strength. Some people who are just picking up Dark Seer think it's weird that an Intelligence hero actually has a high Strength, since most Intelligence heroes have horrible Strength. But Dark Seer is one of the few Intelligence heroes to have a high base Strength. This durability will also scale into late games, represented by the second number, where he has to be in the middle of team fights to utilize his spells.

  • Cast duration: Although none of his spells require channeling (yay), his spells do have a cast time (boo). Think of it like baseball, where the pitcher has to "windup" before the ball is tossed, and then the "follow through" after he throws the ball. This is the same concept. All of Dark Seer's spells require a "windup" and a "follow through" whenever he casts a spell, represented by the two numbers under the section respectively. This is very important to keep in mind, as some of his spells require this foreknowledge in order to effectively pull them off (Vacuum and Wall of Replica).

  • Attack Range (Melee): Yes, he's melee, unlike most other Intelligence heroes. So keep that in mind.

The other numbers listed are for the serious Dark Seer players (or for mechanical purposes. I dunno...). But, the only way to understand how these numbers affect him is to actually play him and get comfortable with him.
Lore: The Master Tactician

(Source: http://dotamir.net/uploads/posts/2009-11/1258230081_darkseerpe5.jpg)

Fast when he needs to be, and a cunning strategist, Ish'Kafel the Dark Seer requires no edged weapons to vanquish his enemies, relying instead on the strength of his powerful mind. His talent lies in his ability to maneuver the fight to his advantage. Hailing from a place he calls 'The Land behind the wall,' Dark Seer remains an outsider here—a warrior from a realm beyond the veil of this reality.

Once a great general among his people, and a valiant defender of the god-king Damathryx, Dark Seer’s army was wiped out by a much larger force in the final days of the Great Boundaries War. Facing certain defeat, he made one last desperate act: he led the enemy forces into the maze between the walls. At the last moment, just before capture, he crossed over—then sealed the walls forever in an explosive release of dark energy. When the dust settled, he saw that he had saved his people but found himself blinking at the sun of a different world, with no way to return. Now he is committed to proving his worth as a military strategist, and vows to show that he’s the greatest tactician this strange new world has ever seen.


Abilities: Tools of the Trade
(All numbers and sources for this section taken from: http://www.dota2wiki.com/wiki/Dark_Seer)


Vacuum:
Dark Seer creates a vacuum over the target area that sucks in enemy units, disrupting them and dealing damage.

Ish'Kafel modifies the center of gravity to a place of his choosing.

Cast Range: 500
Radius: 250/350/450/550
Damage (magic): 40/80/120/160
Mana Cost: 100/130/160/190
Cooldown: 22 seconds

The damage is not what is appealing about this spell. It's the HUGE position displacement that it gives when casting it. You can force enemies to be centered at a certain position, which can help you chase or escape from multiple enemies. This is also a big tactical advantage to setup for AoE spells such as Enigma's Black Hole, Earthshaker's Echo Slam, or even Slardar's Slithereen Crush. And as you may have seen in expert games, you can potentially trap an entire team onto a cliff, which is always hilarious if you manage to pull it off.

Notes about Vacuum:
  • Vacuum interrupts, meaning Blink Dagger's global Cooldown will go off and channeling abilities will halt.
  • Banished or invulnerable units will not be affected by Vacuum.
  • Magic Immune units are unaffected by Vacuum.


Ion Shell:
Surrounds the target unit with a bristling shield that damages enemy units in an area around it.

The Dark Seer slices holes into the 'Land Behind the Wall,' causing prismatic energy to seep forth.

Cast Range: 700
Radius: 250
Duration: 20 seconds
Damage (magic): 30/50/70/90 per second
Cooldown: 10 seconds
Mana Cost: 70/90/110/130

Dark Seer's consistant form of damage. This ability techically deals damage every 0.1 second, but the damage it deals will add up to the amount per second respectively for each level. This ability can be cast on any ally or enemy (with some exceptions).

Notes about Ion Shell:
  • The ally or enemy that receives Ion Shell will not take any damage from Ion Shell.
  • Magic immune units will not take any damage from Ion Shell.
  • Ion Shell is considered to be a buff, so Purging effects will remove Ion Shell.
  • Ion Shell can be casted on non-neutral Magic Immune units.


Surge:
Charges a target friendly unit with power, giving it a brief burst of maximum movement speed.

Ish'Kafel once used his speed of mind to navigate the maze between the walls.

Cast Range: 600
Duration: 3/4.5/6/7.5 seconds
Cooldown: 12/11/10/9 seconds
Mana Cost: 20/30/40/50

Essentially, it's a free Haste rune. Having such a powerful ability at your hands for a mere 50 mana on a 9 second cooldown, you should be always surging you and your allies around the map, once you have the mana capacity to do so.

Notes about Surge:
  • Although units that are surged are unaffected by slows, the debuffs of their respective slowing abilities will still apply. For example, when you are surged and hit by Queen of Pain's Shadow Strike, you will not be slowed for 7.5 seconds (assuming you have Level 4 Surge), but the 15 second duration will still be applied on your hero, as well as the damage it deals. So after Surge goes down, you will be slowed for the remaining 7.5 seconds left on Shadow Strike (unless you Surge again.) Therefore, Surge does NOT remove abilities that slow, it ignores the effects of them.
  • Surge is a buff, meaning it can be Purged.
  • Surge can not be cast on Magic Immune units.


Wall of Replica:
Raises a wall of warping light that damages and creates replicas of any enemy hero who crosses it. Enemy replicas serve at the Dark Seer's will.

The Dark Seer, while unable to return to his natural realm, can channel part of the prismatic wall with powerful strength of mind, sowing confusion amongst enemy ranks.

Cast Range: 500/900/1300
Wall Length: 1000
Duration: 15/30/45 seconds
Damage (Magic): 150 anytime affected units generate an illusion.
Illusion Damage Dealt: 70%/80%/90% damage
Illusion Damage Received: 300% damage
Aghanim's Scepter Upgrade Illusion Damage: 100%/120%/140% damage
Cooldown: 100 seconds (1 minute, 40 seconds)
Mana Cost: 200/300/400

Dark Seer's initiating tool and best form of damage from mid game onward. Having the potential to have 5 illusions that deal close (or more damage with a Scepter) "right-click" damage is not something to ignore. This also means you need to be able to micromanage (being able to individually control them) your illusions well from time to time, but in general, having them out is already a huge bonus for your team.

Notes about Wall of Replica:
  • You can not create illusions from other illusions. This includes every single item such as Manta Style, hero ability, and the Illusion rune (sorry, but if this were the case, Dark Seer would be pretty broken). For Meepo, only the original hero can be replicated, not the duplicates.
  • The casting range will create a wall perpendicular (two lines to form the letter "T") to Dark Seer's casting point.
  • Magic Immune units will not generate illusions if passed through.
Usage of Abilities: General
General usage:

The biggest factor to remember is that all of your abilities require a cast time (See? Told you it was important). The two big spells that are affected by this mechanic are Vacuum and Wall of Replica.

Vacuum has a disgusting Cooldown of 22 seconds at all ranks. So if you miss with it or place it in the wrong position, you have lost, perhaps, your main form of utility for that entire duration. Like I stated, the only way to feel comfortable with this is to actually play him and really get comfortable with his animation.

Wall of Replica is the same concept. Dark Seer will generate a wall perpendicular to where he is facing. This is very important to remember, because the Wall itself has a very thin line, which can make it very difficult to force enemies to pass through if you placed a horrible Wall. Of course, you have Vacuum to help you drag enemies through the wall, but placement by itself is always important.

Don't forget you can always spam the "Stop" command (it's "h" as default, but I have mine on "s") to cancel your spell before it actually comes out, which is always a lifesaver on both Mana and Cooldown.
Usage of Abilities: Vacuum
Use of Vacuum:

Before I go into Vacuum, let me show you the cast range and AoE range of Level 4 Vacuum:

The green line represents the cast range of Dark Seer where he currently stands.

This image assume you will try to cast at max range from the previous image.

It's up to you to play Dark Seer and get a feel for the range on this ability. These images simply give you a guide as to how big the spell actually is.
____________________________________________________________________________

Ok, so now onto the ability itself. Despite it's long Cooldown of 22 seconds, it's still a powerful AoE that sets you and your team up for kills with its movement displacement. Instead of me typing how Vacuum can be used (because i'm lazy), i'll show you examples with images.


Here, we see Earthshaker with no Blink Dagger trying to chase down several enemies. With the help of Dark Seer's Vacuum, the enemies are forced right into Earthshaker as seen in the next image:


Unfortunately, only two of the three heroes actually die in this example (Templar Assassin blinks away in the replay), but regardless, a good Vacuum gives Earthshaker the "slam dunk".
____________________________________________________________________________


Here, we see a team chasing down a Venomancer, but can't quite reach him. A simple Vacuum placement puts Venomancer right in the middle of the opposing team:


Easy kill.
____________________________________________________________________________


We see Riki jumping onto a Doom Bringer. The movement Speed boost from Scorched Earth gives him running distance away from Riki.


Dark Seer arrives and uses Vacuum to pull Doom Bringer back closer to Riki and Dark Seer.


Riki gains a few more auto attacks before Dark Seer finishes Doom off with his auto.


____________________________________________________________________________

These are just a few examples how Dark Seer's Vacuum can be used. Once you understand the true utility of Vacuum, you will be the true "tactician".
____________________________________________________________________________

Now onto something else, you notice that Vacuum displaces enemy movement (similar to Force Staff). Vacuum ignores terrain entirely, which allows you to pull enemies onto or off cliffs.You won't be able to pull it off every single time, but if you do, it's quite gamebreaking. It's also nice to keep in mind, too, if you do get the chance ;)

The images below show you examples of some areas where enemies can be pulled through terrain. Not all areas are covered in this guide, but these are a couple of my favorite spots.


Usage of Abilities: Ion Shell
Use of Ion Shell:

The important thing to remember is that Ion Shell can be cast on (almost) any unit. This includes all of the lane creeps (yes, even the catapult) and your opponents. This is very critical to keep in mind since Dark Seer is melee, where he will be taken a lot of harass by ranged heroes. This is also what makes him one of the best suicide heroes, since he can simply cast Ion Shell on a unit, allowing him to create zoning around that unit.

Ion Shell is very weak early in the game, dealing only about 30 damage per second. And you won't expect enemy heroes to actually stay near the unit that has Ion Shell for the entire 20 seconds (duh!). But still, that's 600 damage over 20 seconds at lvl 1, which is pretty stupid if you do manage to get that entire duration to use (although it's very unrealistic).

But once you pump enough levels into it (Level 3 Ion Shell is where it gets noticably strong, at least for me) it deals a lot of damage. And because of his Cooldowns, he can have up to two Ion Shelled units at one time, essentially doubling his damage output with Ion Shell. Yeah, try out the math for that... O.o

Because Ion Shell last for 20 seconds and deals a LOT more than your auto attacks (assuming you are soloing), it's often best just to follow your opponent by casting Ion Shell on yourself and simply walking along with them or attempting to block them (kiting your opponents). It's important to remember to not actually click on the enemy hero when you are attempting this, because Dark Seer will pause for a second to attack the enemy, giving the enemy hero a chance to run away from him. Here's a couple examples (not really good ones because they are screenshots. I find watching replays of this to be much more effective than what I am posting for you guys...).


Notice in the images where the cursor is pointing and clicking. It's not pointing on the enemy hero at all. Instead, it's pointing to where the enemy hero will try to run to. This is much more effective form of damage as opposed to actually clicking on the enemy hero to damage. It was not until the 4th image that Dark Seer actually attacks (with the help of Vacuum) to finish Phantom Assassin off, before retreating from Undying with Surge. This is how you should be dealing damage, once you get enough levels on Ion Shell.
Usage of Abilities: Surge
Use of Surge:

Surge is, more or less, a free Haste rune. Well, ok, it’s not free. It takes up one of your abilities, lasts much shorter than a regular Haste rune, and costs mana. But unlike a Haste rune, you will always have it as an ability, which maximizes the effects of Haste (maximum movement speed and ignoring slowing effects) much more than an actual Haste rune when the situation calls for it. Two such examples below:


Here, we see a Slarder diving under a tower for Phantom Assassin. But thanks to Blur (Evasion) and Venomancer various slows and DoTs, Slarder is kited around and forced to retreat.


A combination of Surge and active use of Pipe of Insight allows Slarder to shake off the slows from Venomancer and Phantom Assassin's dagger, allowing him to retreat to safety to the northeast.


____________________________________________________________________________


Here, a fed Lone Druid attempt to rush into a group of four enemies and take them down.


Fortunately, his Aegis gives him a second life, but loses his Bear in the fight, thereby decreasing his damage output quite significantly.


A quick Surge from Dark Seer allows him to escape to the east and resummon a new bear in the near future.
____________________________________________________________________________

Only good things can come out of using Surge, since it adds so much utility. Surge is on a 9 second Cooldown with a 7.5 second duration, meaning you will always have Surge up and ready to go when the time calls for it. You should always be spamming this ability for you and your teammates whenever it is up. Dark Seer’s primary attribute as Intelligence and your general item builds will easily cover the measly 50 mana cost of Surge.

Don’t forget that it takes about a second for Surge to actually come out (no thanks to cast time…), so you need to learn to use Surge a little bit early than you would normally in order to effectively pull off your ideal end result.

This becomes very apparent for situations that the enemy team attempts to gank you. Although Dark Seer naturally has good escape potential, he still can get caught out of position if he cannot Surge quickly enough. Invoker’s Coldsnap is the best example that punishes Dark Seer, since he can interrupt you before you can actually pull off Surge. This situation becomes more critical to remember if the team has any form of Purges, since Purges remove Surge.
To turn the situation around, using Surge before an actual gank attempt is always the better choice. It gives enemies less time to react and less risk of the ganker actually dying with a bad gank.

To put it simply, Surge should be a supportive spell first, and everything else, second. You and your team still have to be able to escape, gank, or even initiate properly even if they are Surged. Surge allows forgiveness for bad or reckless gameplay by giving a free Haste, but it should not be taken for granted. A single Purge (or a coordinated team) will completely dominate over bad Surge plays any day. In these situations, communication will always be the fail-safe and best option.
Usage of Abilities: Wall of Replica
Use of Wall of Replica:

Before I go into Wall of Replica, here are images of the cast range and size of a Level 3 Wall.


The green line represents the cast range of Wall of Replica, which is pretty darn good.


The Wall can “block” a lane.

Quick notes about the Wall of Replica:
  • The illusion that generate from it will disappear once the Wall’s duration ends. So the earlier you can get illusions, the better.
  • Illusions will gain any passive benefits such as auras (Radiance) or attack modifiers (Mana Burn). They can even crit!
Wall of Replica is pretty weak at Level 1. Level 1 Wall of Replica lasts a measly 15 seconds with a high 250 mana cost and long cooldown of 100 seconds. And worse, it deals only 70% damage to all illusions that it replicates. At early stages of the game, where everyone is still low on levels and damage, the Wall is pretty useless, since you will have neither strong illusions nor the mana capacity to maintain early Walls. Try to avoid using a Level 1 Wall until you have the mana to use it.

A Level 2 Wall of Replica will open up your options a lot more. This is where you can start participating in more sustained fights with the longer duration of Wall. By this point, you should have, at least, enough mana capacity to be able to initiate with the Wall and your other spells and not run out of mana. A Level 3 Wall is where Dark Seer will dominate sustained team fights. If you add an Aghanim’s Scepter at any level of Wall, you can participate in these fights even more often now that your illusions deals full to more damage than their original counterparts (you still need to pay special attention to the duration of Wall if you still have a Level 1 Wall. The 15 second duration is honestly too short…).

The duration of a Level 3 Wall makes him fantastic in objective fights, such as sieging Roshan (be careful that the illusions don’t attack Roshan; he has an ability that instantly destroys any illusion that attack him.) or attacking/defending structures. In all placements of the Wall, I find it best to place the Wall between me and my opponents. This gives Dark Seer safe distance for Vacuum to force enemies through the Wall, and insures that the enemy cannot gain a sure advantage damagewise if they commit to the objective.

Treat your translucent wall like a brick wall. The enemy team isn’t willing to take the risk to walk through the Wall and allowing illusions of themselves to him themselves, let alone take the extra effort to kill off the illusions when they can just come back up again every time they pass through the wall. Simply “blocking” off a lane will be more than enough to force enemy teams to second guess to go through the wall or even drive them off all together.

(I have yet to find good screenshots demonstrating the effective use of Wall, but I will add them once they come up.)
Skill Order: What Skills? These Skills!
(Tools used for this section are taken from: http://www.dotafire.com/dota-2/guide/edit-guide )

WAIT. Don’t level up your first skill yet. Surge is a lifesaver of level 1 fights or ganks, but you need Ion Shell in order to farm or harass effectively early. Just wait until everything settles down.


The Ion Shell/Vacuum is standard no matter what role you are playing. One early level on Surge is enough to get out of a bad situation. Add a maxed out Vacuum and you are sure to get away. The main problem with this build is the mana capacity, specifically Vacuum. Vacuum should be used as a nuke or escape to conserve mana until you can work up on items to compensate for the high mana costs. Wall can be leveled at Level 10 or ignored until Level 13. I usually ignore wall until Level 13 since I prefer pushing and farming before that time. But if you are expected to participate in fights, start leveling your Wall at Level 10.


Maxing Vacuum first instead of Ion Shell is an alternative on a solo middle lane or a support. The reason you would max out Vacuum is the huge AoE it grants when you do max it. This makes it much easier to control runes as a middle lane, since you have a larger movement displacement. And it allows more control over how fast the lanes will push with less damage and less mana cost on Ion Shell. It’s also great to setup for ganks whether you are middle lane or support for the same reason.
Item Build: Tactician's Choice
Item Builds:

Starting items: Three builds are acceptable depending on where you are going.

Side Lane:
 (Recipe)

These starting items will allow you to complete your early game items without having to use the Courier, which saves a trip for someone else who needs it early on. If wards are not needed, then provide the Courier. If both are already provided, then just save up to get your early game items.

Solo Middle:
[/previewicon]

You won’t need too much to survive in lane, since you will only be up against 1 hero. You need to save the rest of the gold to rush your early game items with no side shop to help you.

Jungle:
(Two or another )

You will need to wait in the fountain for the second set of tangos or clarity pots, but you should have enough time to get to jungle.

Early game items:


This is the goal no matter where you are. This gives you all the mana and health regen needed so you never have to go back to fountain, giving you time to farm up or secure lanes in need.

Core items:

Non-support:
and/or

Support:
or (Don't be the one to get both, because if you die early, you and your team won't be able to have the benefit of either active.)

In most cases, only a Pipe of Insight will be needed for core items, since it provides both durability and support. A Mekansm is best for pushing or physical durability, while a Vanguard will cover your early to mid game damage from auto attackers.

Teleport Scroll:


Until you have Boots of Travel, you should always have 2-3 of these at all times. Really...

Late Game:


A powerful disable and the extra mana regen to cover the higher mana costs, pretty sweet. A scepter upgrade that allows level 3 illusions to deal 140% damage, pretty freaking sweet.

Luxury Items/Situational Items:


Disassemble your previous boots for this upgrade. The teleportation allows you to push lanes in a heartbeat and join in fights where your team needs you.


I like Linken’s Sphere when my opponents have a lot of single target disables for me. The stats and regen keep Dark Seer plenty durable even throughout the late game.


You are supportive by nature. Always keep up with any consumables that your team needs if no one else is.


Vacuum and Shiva’s Guard active gives more initiation punch if my team desperately needs it.


Don’t really get this a lot, but can help you to pull off your initiation combo if the opposing team has a lot of AoE disables or if you are going to be in the middle of fights.


Very cheap disable and covers your mana problems early until the end of the game.


It really is an underrated item. Another item for tanky builds. The return damage it grants for tanky build is disgusting if the enemy team really hates your pointy head.


If you REALLY lack initiation…


If no one else has it, provide good enough durabilty with a charged heal or damage. Best on support roles.


Adds more utility with the passive benefits from your minions and pushing power. Great overall.


If you are going to be the main durable hero for your team, you need this.


An alternate sustain for solo middle instead of the Early Game Items. But Bottle is not nearly as cost efficient or reliable as the Early Game items though.


It's ok if your team needs it. But for yourself, you shouldn't have any mana problems with early game items alone.


Great utility, but best if you are playing the support role, since it provides little durability.

Rejected items:


You won’t be dealing a lot of right click damage to benefit from the 60 damage you gain from it.


The tag on Dark Seer might say nuker, but I say there are better heroes for the job. You are not the team's carry.


I have experimented with this item for a while. And what I find is even with a final item build, I struggle to have the reflexes or time to be able to Vacuum, Wall, Refresh, Wall, and Vacuum in that short period of time. And by the time you do get Refresher, the game is pretty much over. It's a very deadweight item, so don't expect to see it in a serious game.


No orb effects or raw damage items. Dark Seer is not a right click damage dealer (His low Agility and Agility Gain means he will have low Attack Speed throughout the entire game).
Gameplay: Application of Knowledge
Early Game Levels 1-7:

On a suicide/short lane, you need to have a set of Observer Wards handy to prevent the enemy team from camp pulling and to avoid ganks. Try to conserve your mana until you can grab a Soul Ring to maintain your mana; this will also prevent you from pushing the lane too much with Ion Shell. Keep at around 1200 distance (a bit less than the cast range of a Level 3 Wall of Replica) as best as you can to keep up with experience. Block the lanes as much as you can to pull the wave closer to your end of the lane.

On a middle lane, push your lane 20 seconds before runes pop up. Drop an Ion Shell on the current wave and the next incoming wave. If your opponent tries to take a rune, Surge to it and Vacuum him up a cliff for his troubles. If your team needs help, be selfless and do help them.

In the jungle you want to focus on the small camps until you can get a level 2 Ion Shell. Try stacking the big camps (avoid the medium camps that spawn the cream-colored golems; they are immune to damage from your Ion Shell) every time the timer hits :53 in order to speed up farming

The best way to farm jungle safely is something I like to call “dancing”. This requires you placing an Ion Shell on a neutral creep and “dance” back and forth with the camps. This will force aggro on you, so move in and out of the camps in order to avoid taking too much damage. This will save up on Tangos early on and give you a much safer jungling experience. Try to avoid placing the Ion Shell on ranged neutral creeps, since they won't be close to any of the stronger melee creeps.

Early-Mid Game Level 8-10:

Once you get your early game items, you shouldn’t have to worry about your health or mana for a while. Feel free to start spamming your Ion Shells a lot more.
If you are on a lane, start pushing aggressively. If you are in a jungle, help your team start pushing aggressively. Keep up with wards if your other supports aren’t doing their job (or if you are the sole support…).

You should be pushing as much as you can at this point of the game with a maxed out Ion Shell, since it is at its peak at this point of the game. Let any carry take over your jungle or lane, while you push/farm a different lane.

Mid Game Level 11-15:

Your Wall will come into better use with at least two levels on it. Start getting into team fights with it. Your Ion Shell should be on melee teammates, while Surge should be on anyone that needs it. Vacuum should be used to peel off enemies off of your teammates, while your Wall should be placed closer to your teammates until you get your Level 3 Wall.

Drop wards in enemy jungle and secret shops. Surge will allow you to go in and out of both of them with ease. If you suspect enemies are going to be waiting for you, push a lane with a couple Ion Shells, then use a TP scroll to go a different lane and ward there.

Mid-Late Game Level 16-19:

Dark Seer’s peak. Initiate with Wall of Replica and position it properly. Your team easily dominates fights with a full illusion army and Level 3 Wall. Now that you are more durable, try to taunt enemies to attack you by surging in with Ion Shell and running around your Wall. Try microing your illusions to deal with one enemy at a time.

Late Game Level 20-25:

Your damage falls off a little bit, even with the 140% damage, since a lot of the enemy heroes are somewhat durable at this point. So you need to be playing a bit more defensive at this point of the game. Stay back and use your spells to peel off threatening carries or help an ally get out of a bad fight. Throw down your Wall and then stay back to peel for your teammates.
Allies: Reliable Companions
Because of his utility and skillset, Dark Seer has tons of heroes who enjoy having him. I would go out of my way to say that everyone likes to have a Dark Seer on their team, but I’ll just stick to generalities:
  • People that love his Vacuum would include other Initiators or any spells or abilities with huge AoE. The movement displacement is also good for squishy carries or heroes that lack the necessary chase/escape early in the game.
  • Ion Shell is best on durable melee heroes, since they will be in the thick of things.
  • Surge is good on just about anyone. Carries have an escape; gankers have better ganks; initiators can initiate without a Blink Dagger; too many uses to list.
  • Wall of Replica is best against a lot of auto attacking heroes, especially those with any passive benefits.
I want to list a couple of my favorite friends to play with:


Very deadly combo. Faceless Void has Chronosphere, which insures 5 seconds of free auto attacks. Dark Seer can cast Ion Shell on Faceless Void to deal damage inside the Chronosphere. Vacuum also can setup for Chronosphere or even force enemies into it. And if Faceless Void has a Battlefury, that will be free cleave damage in a Chronosphere.


With Surge, Pudge doesn’t even need to land Meat Hook. A simple Ion Shell and Surge on Pudge allows him to Dismember and snowball out of control. And the Ion Shell insures that Pudge will deal more damage than what he takes from Rot.


What do you get with a Radiance Bear with an Ion Shell and Surge? You get a world of hurt. Surge also allows the bear more auto attacks, therefore giving more opportunities for Ensnare to proct for the Bear.

Any initiator would love Dark Seer, but these are what I have fun with:


More units Vacuumed in, more damage on Echo Slam (as seen in a previous image).


His ultimate is one of the few that goes through Magic Immunity entirely. Vacuum makes sure that Enigma traps all enemies in his Black Hole (and deal more damage, but that’s a bonus).


His Epicenter deals more damage to enemies that are closer to him. Vacuum centers
around a point, giving Sand King an easy Burrowstrike and high Epicenter damage output.


All of Dark Seer’s basic spells benefit Kunkka. Surge gives great chasing for Kunkka; Ion Shell very effective for melee heroes; and Vacuum sets up all of Kunkka’s damaging spells.
Enemies: Hate Pointy Headed Freaks!
Dark Seer’s Enemies:
  • The biggest enemy to any Intelligence hero is silences.
  • Single target disables (besides slow of course) also cripple Dark Seer, since they can just click on him in order to stop him. A special note about Hexes is if a unit is Surged before they are hexed, they are still silenced and disabled, but still maintain the maximum movement speed.
  • Any purging effects (mainly Diffusal Blade) are also a good counter to Dark Seer, since they remove Surge.
  • You can include any Mana Burns to this list, since Dark Seer will be casting a lot.
Some heroes that Dark Seer can’t stand:


A silence and an ultimate that deals damage based on how far you run. Yeah, talk about annoying…

How to manage: TP scroll/Boots of Travel. Threat avoided.


An Orchid Malevolence buyer. Skeleton Walk also allows him to match Dark Seer’s Surge. He can nuke down Dark Seer before he has the chance to do anything thanks to his ability to go stealth.

How to manage: Keep Sentry Wards in lane or a Level 3 Necronomicon. Linken's Sphere will also help block the silence if he likes to use it on you.


Ok, let’s face it. He counters everyone. But his Doom will prevent Dark Seer from casting.

How to manage: Stay far away from him. He can keep up with you quite well with Scorched Earth’s movement speed, especially if you are silenced before you can Surge. Use your friends instead for spells.


Her entire skillset is made to counter you. Split Shot will deal with your illusions quite well. Her Mystic Snake will nuke and drain your mana. Mana Barrier blocks a lot of the DoT damage from Ion Shell. And her Stone Gaze will remove Surge, Ion Shell, and murders your illusions.

How to manage: DO NOT LET HER FARM.


A single target snare that keeps you in place and another Diffusal Blade buyer. UGH. Not to mention her Song of Siren that gives her a guaranteed chase/escape/initiate.

How to manage: A Linken's Sphere blocks her only way to bind you down. A Black King Bar can remove her net and allows Dark Seer to move around through Song of Siren.


He pretty much forces you to keep Tangos handy. He is also a potential Orchid Malevolence (silence) and Diffusal Blade (Purge) buyer.

How to manage: You need to keep a set of Tangos at all times. Pay attention to your surrounding for any growing plants. That’s the indicator that he’s teleporting in to trap you.


He has both the movement speed to match you (at night) and a very long 7 second silence.

How to manage: Linken’s Sphere can block one of his spells, giving you enough time to Surge out.


He has movement speed to easily match yours. His burst damage is very high, especially since Dark Seer is mainly Intelligence. Mana burn will deal 5 times the amount of your Intelligence and to both your health and mana pool. Yeah, it's gonna hurt...

How to manage: There's nothing that you can do to block Vendetta if he pulls it off. But a Linken's Sphere will be able to block one of his other direct damaging abilities quite well. A Level 3 Necronomicon is very strong to keep track of Nyx and burn his mana.


He can steal your Intelligence, banish you if you try to Surge, and nuke your pointy head to oblivion (no pun intended). He can also deal with your illusions quite handily with Arcane Orb and Sanity Eclipse.

How to manage: The more times he banishes you, the less of a chance you have against him. Play passive and spam your spells on other teammates.


One of the best counters to a Dark Seer. He has a banish to keep you in place and setup for AoE spells. And he’s one of the few heroes to have a Purge as an ability. His Shadow Poison prevents you from pushing with lane minions thanks to its stacking properties. And Soul Catcher can remove all chances of you going durable.

How to manage: Stay away from him at all times. His abilities can cripple you before you have the chance to do anything about it. A Linken's Sphere is a must-have item against this dude.


His entire kit is focused on shutting down casters. And Dark Seer is no exception.

How to manage: You need to Surge every time he casts Last Word on you. You will still take damage, but you can still run away from a potentially bad situation.

Special Mentions:


Like I mentioned eariler in the guide, more units, more damage. Earthshaker will deal even more damage with Echo Slam thanks to your illusions.

How to manage: You need to rush a Pipe against this guy to reduce the amount of damage he can do to you and your team.


These two don’t care how far you run. They’ll just send you right back for a serious world of hurt and crippling with their respective spells.

How to manage: A Black King Bar prevents relocation and disables Although nothing can get you out of a Static Field if you do get caught in it besides a Blink Dagger.


Not exactly a bad guy, but he can utilize all your spells better than you can (even if it doesn't seem like it in your current game). No one likes getting their spells stolen by this guy.

How to manage: You need to be aware of what spell you casted last. Always be spamming Ion Shell or Surge when you are around him to avoid giving him any of your AoE spells.
Final Notes: In Conclusion...
This guide will be updated to meet with any changes made to Dark Seer or his general playstyle. More details or fixes will be made as soon as they come up.

Special thanks to αlpha for help in editing this guide.

And of course, Icefrog and all the staff for bringing this pointy headed tactician into the fields of battle.

My ID extension is Oblivion2011 if you have any questions.

Comment below, rate on top, and tell me what you think of this guide.


(Source: http://browse.deviantart.com/?q=dark+seer+dota#/d56dx26)
Updates.
1/26/13:
  • Reworked Item Build Section & cleaned up descriptions.
  • Updated Abilities section, mainly how Magic Immunity is affected by abilities.
1/28/13
  • Added Quick Reference section.
  • More editing.
3/4/13
  • Cleaned up "Enemies" section.
  • Updated images for "Quick Reference" and "Skill Build" sections.
  • Updated "Gameplay" section; removed "Before we begin" section and reworked "Early Game" section.
______________________________________________________________________________
7 kommentarer
Radiance  [ophavsmand] 28. mar. 2013 kl. 10:11 
@Hipster

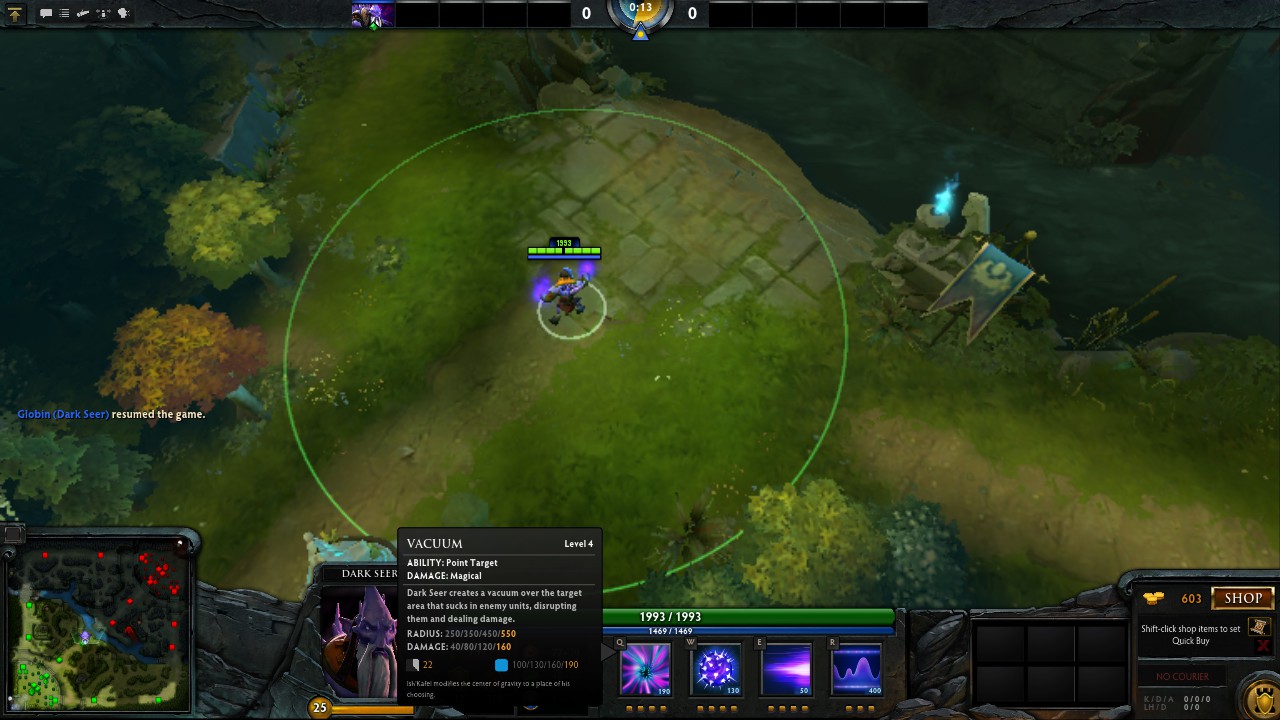
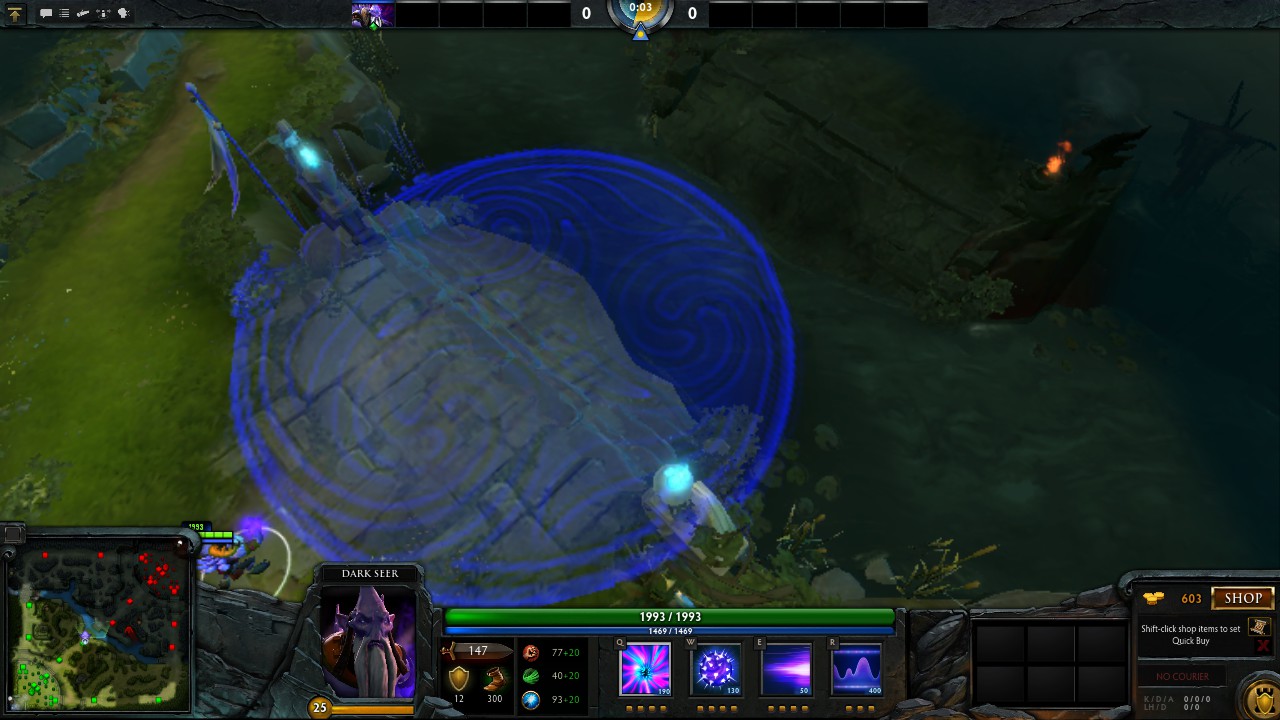
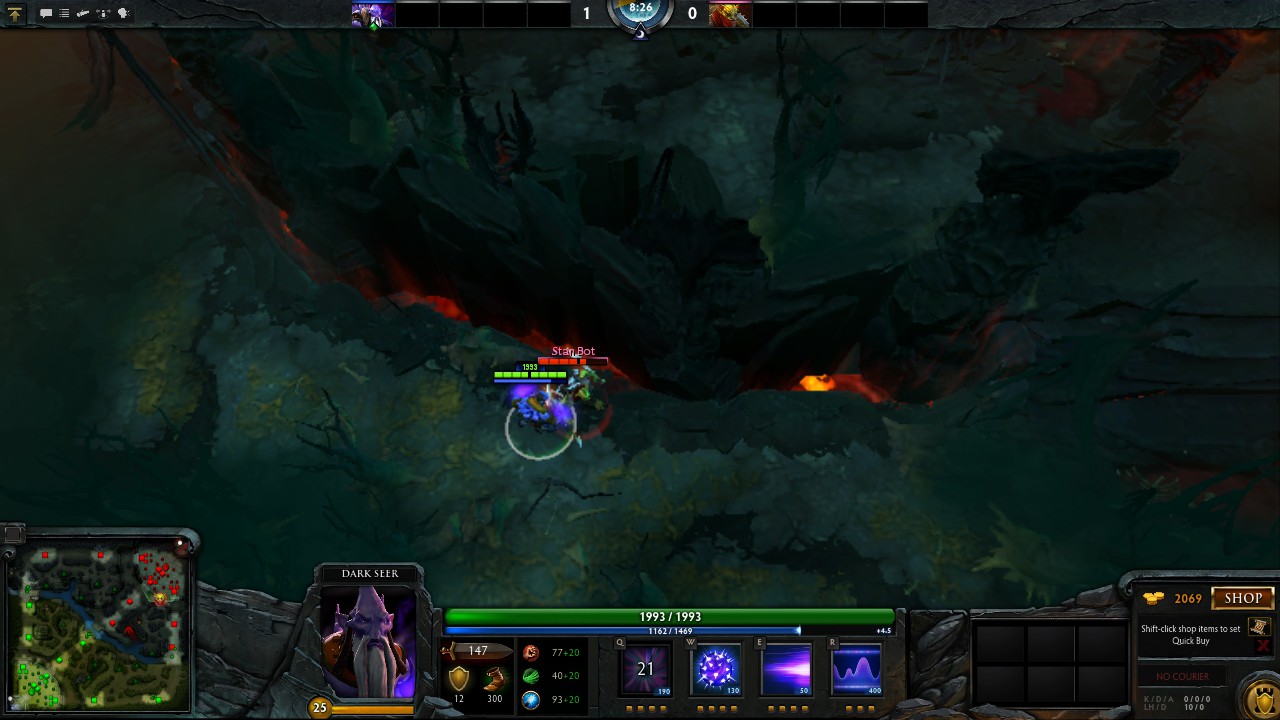
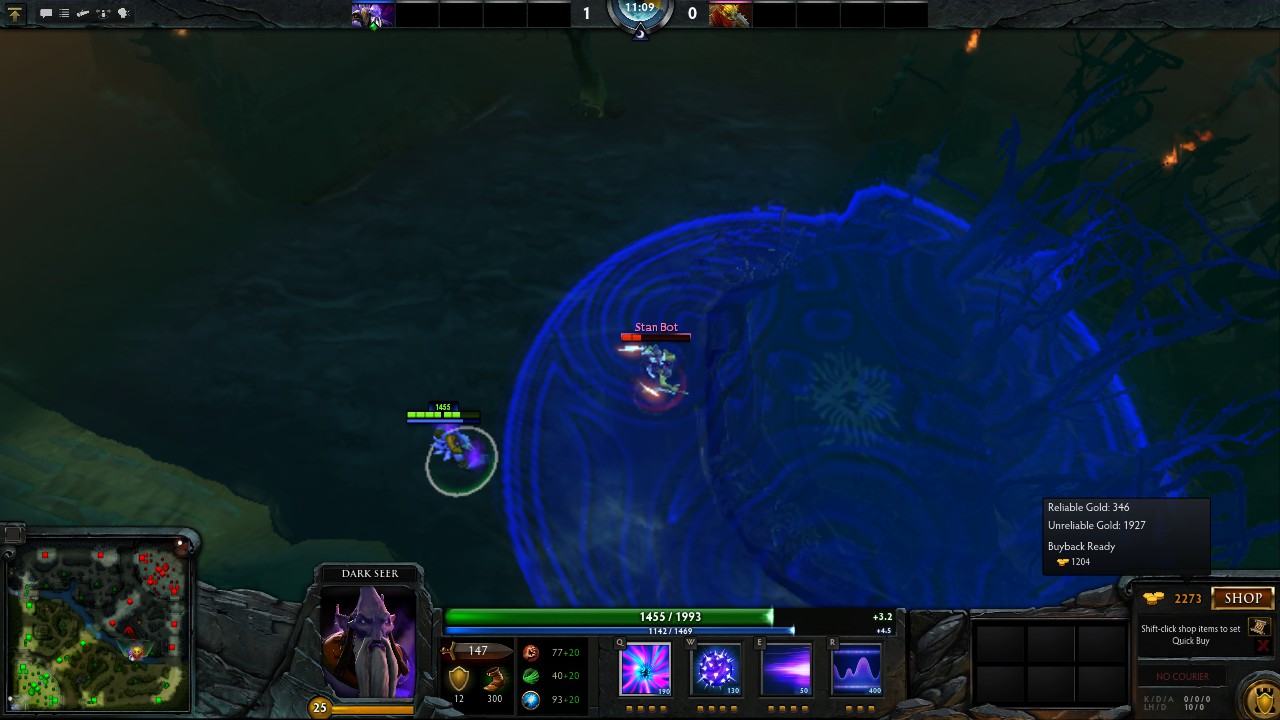
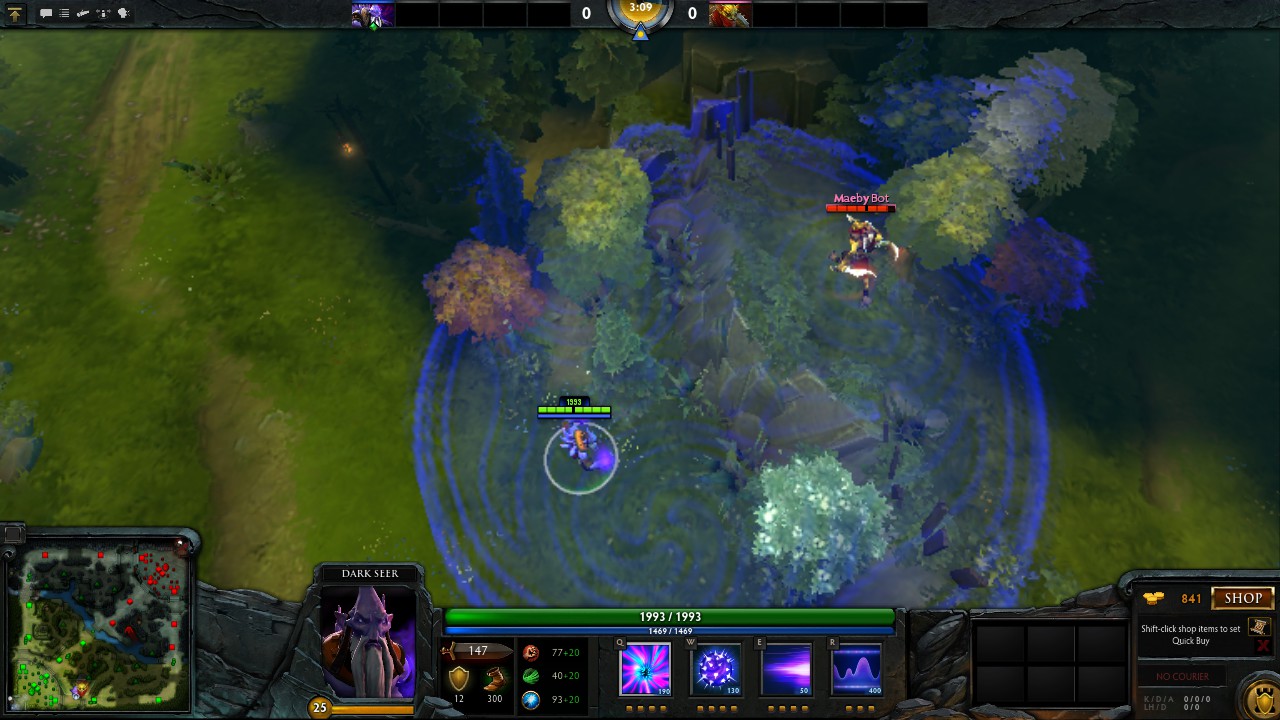
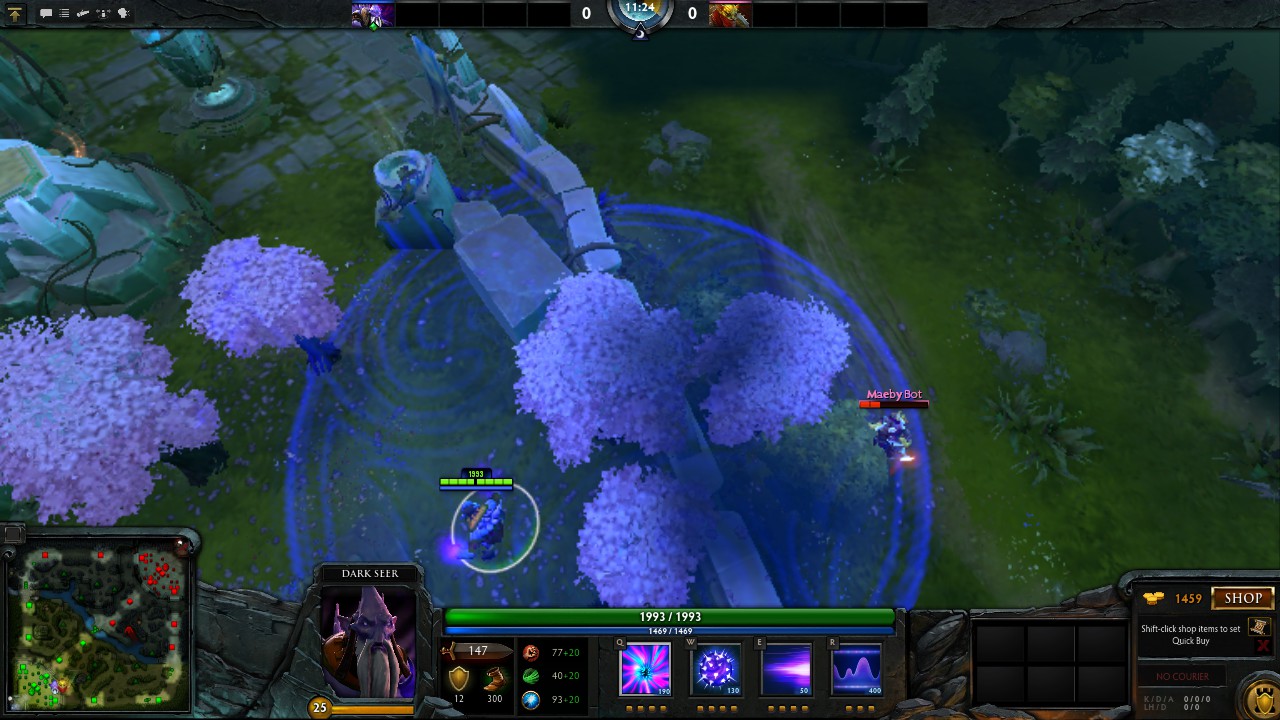
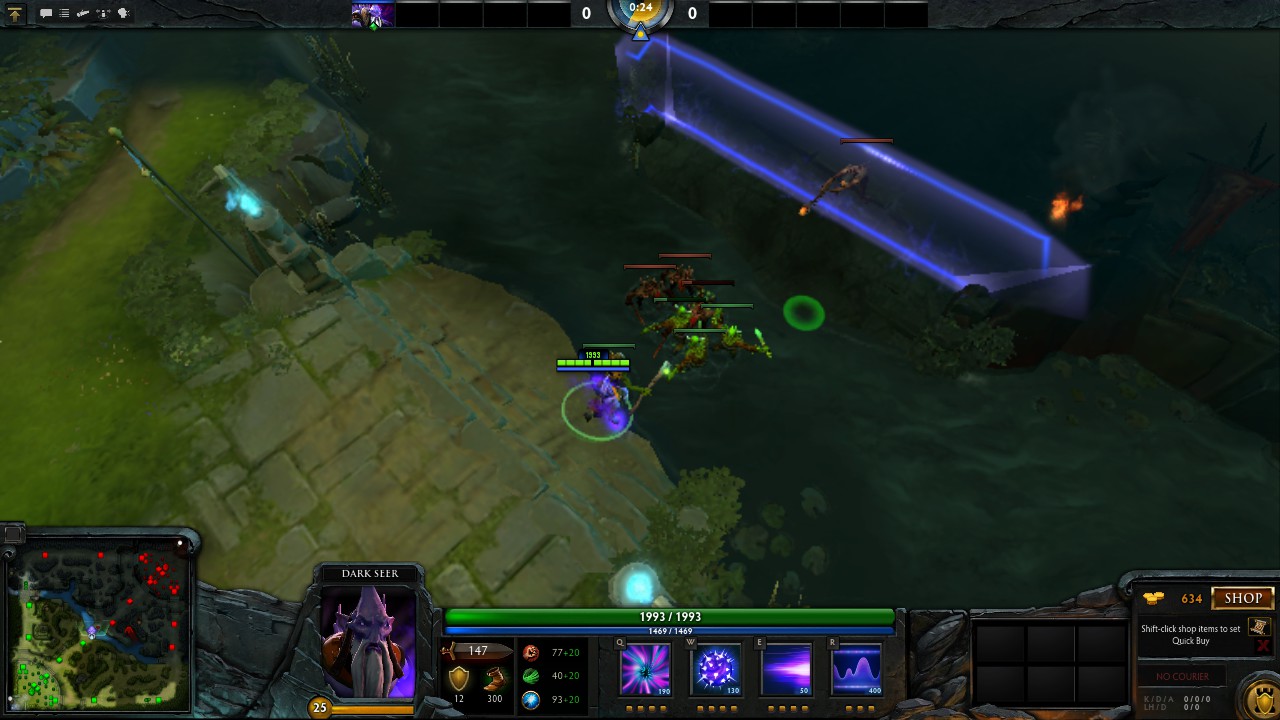
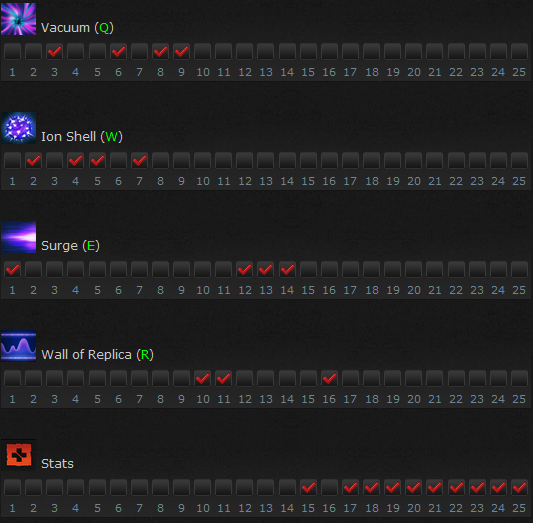
Surge first will insure that you don't give away FB to a gank, especially since you will be suiciding (I assume). But if you are jungling, you will always pick up Ion Shell.

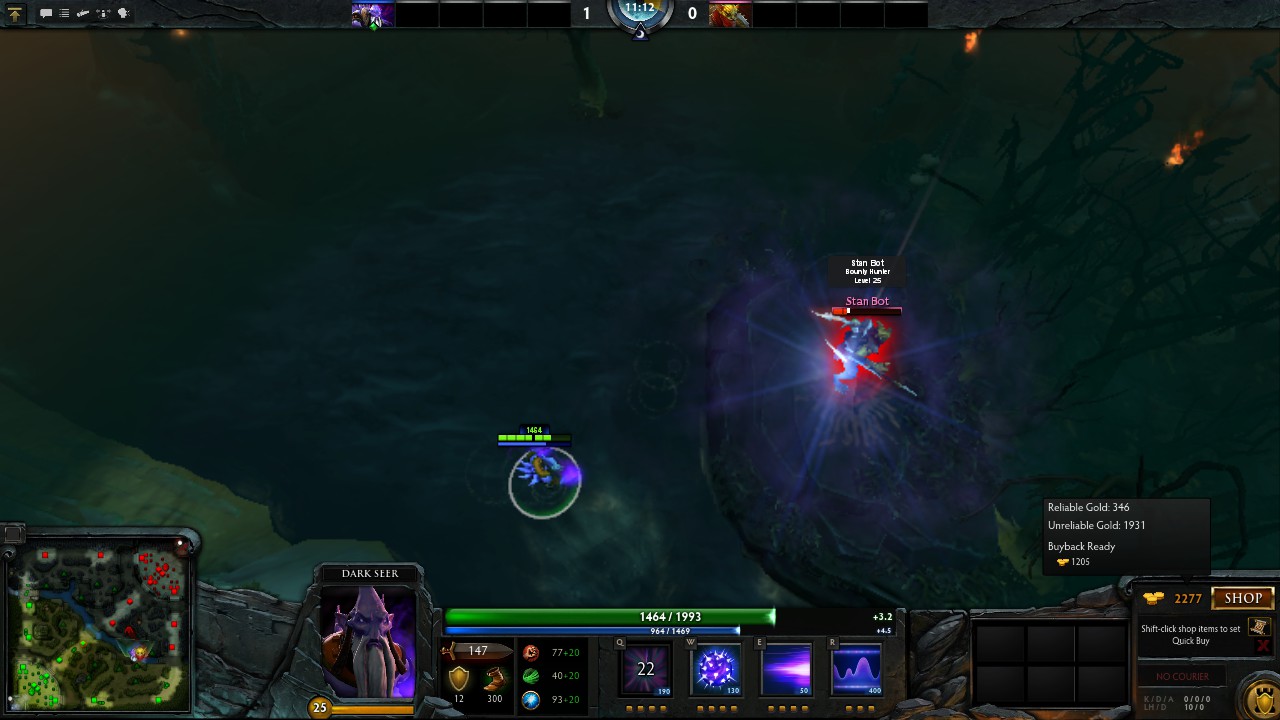
If you feel safe, then take Ion Shell, but I would at least wait until everything settles down before taking your first skill.
僕の名前 (仮) 28. mar. 2013 kl. 9:49 
Can you explain why Surge first and not Ion Shell?
B-simple - Beautiful Lies 22. feb. 2013 kl. 9:08 
Great job =P
& Flyknit 28. jan. 2013 kl. 18:45 
great!
Radiance  [ophavsmand] 28. jan. 2013 kl. 13:09 
@LoN.Calavoow

I'll see what I can do to add a quick reference section.
Calavoow 28. jan. 2013 kl. 10:44 
Not bad, but you might want to include a Tl;Dr section.
Just Practice 22. jan. 2013 kl. 14:02 
Not bad.