Team Fortress 2

Team Fortress 2

453 ratings
The Ultimate Mann Vs. Machine Guide
By eat my soup and 1 collaborators
Everything you need to know to fight the metal menace.
   
Award
Favorite
Favorited
Unfavorite
Introduction
On August 15th, 2012, Valve released Mann Vs. Machine, an addition to Team Fortress 2. Mann Vs. Machine is the best parts of Team Fortress 2 and Killing Floor coming together; you kill swarms of enemies trying to deliver a bomb on their back similar to an intelligence briefcase. To say the least, releasing it so close to the beginning of classes disappointed students everywhere. If you desire to become a stronger player in Mann Vs. Machine, read on as I give important tips both general to the game and specific to each class, implementing personal anecdotes and humor along the way.
Story
Originally posted by In your head:
Mann Vs. Machine has a story?

Yes it does. It takes place after the events of Team Fortress 2, you see-

Originally posted by In your head:
Wait, Team Fortress 2 has a story? I thought it was just about shooting people!

You're new to this, aren't you? Yes, the events of Team Fortress 2 have a purpose behind it. To make a long story short, there are two brothers that have both acquired a large sum of land as inheritance. As is natural with people that live together for a long time, the two brothers despise each other, and want to ruin the other's company. They do this by hiring mercenaries for their company, either Builder's League United (BLU) or Reliable Excavation Demolition (RED). These mercenaries are hired to do anything from stealing the other companies secret documents, place bombs in the heart of the enemies' facility (or prevent the opposing mercenaries from doing the same), or obtaining the honor of fueling the first rocket ship to send a monkey into space.

Now, imagine that these two brothers had a long lost brother that was thought to be dead and did not recieve anything for inheritance. Naturally, he would be mad. He kills his brothers and implicitly takes their land as his own. However, he is not satisfied.

He wants Mann Co. Given to Saxton Hale's ancestor by the father of the three brothers, Mann Co. produces everything from weapons to hats. Unable to kill a man that can simultaneously fight a lion with his bare hands while get his hair cut, this brother wishes to destroy Mann Co.'s facilities. He devises a plan to have robots deliver a bomb into each of the facilities' emergency bomb chutes and destroying the manufacturing machinery beneath. Yes, Valve has a soft spot for the original Star Wars.

This leaves Saxton Hale with a dilemma. He can either continue his journey to fight all of the world's strongest creatures (including the last yeti in existence), or he can cancel and fight the robot armies himself. He decides to contract the now unemployed mercenaries of both RED and BLU, promising that they can keep all of the money the cash-fueled robots drop.

The Source Film used to introduce Mann Vs. Machine to the public.

The mercenaries all don RED garments for easier identification, and march out to fight the robots. For more information, you can read the Mann Vs. Machine comics here.
The Three Things You Need to Know
If there are only three things you can learn from this guide, make it these tips. These pieces are so important, that I have placed them near the top to make sure hasty readers do not avoid them due to a short attention span.

Mann Vs. Machine is a part of Team Fortress 2, but a whole new game.


Team Fortress 2 is to Mann Vs. Machine is as Disney Land is to Disney's California Adventure. However, whereas California Adventure was created for a quick buck because Disney had extra parking lot space nobody was using, Mann Vs. Machine feels like it has been an intended addition for years. Suddenly, weapons that were inconceiveable to use in normal play became a norm, other weapons became even more fun to use with an extreme level of customization (more on that later), and new strategies were required to take down dozens of AI rather than a few players. In all honesty, I have grown to prefer Mann Vs. Machine to the original style of Team Fortress. There is certainly a team and a fortress, as well as a departure large enough to feel like a sequel. I suppose you could call it Team Fortress 2 2.

No class is bad.


Team Fortress 2 has been heralded for its balance; it feels like rock-paper-scissors, but at the same time a crafty Spy can easily avoid and outsmart a Pyro. Fortunately Mann Vs. Machine has replicated this balance to a T. Too many times have I seen people kicked because they would not go the class the others wanted (myself included). The absolute worst case I have seen was when one person went Sniper, another person on the team did the same until he agreed to switch, attempting to push the myth that a Sniper is a wasted slot on the team. Here's a crazy idea, what if a person went a specific class because he or she had a feeling they were competent enough to know what they were going to do with that class? With this in mind, the least you can do is try one round with the person using their specific class. Each class can become useful at different objectives; some classes just require more skill or effort to accomplish it.

Others can help, too.


Closely tied to the second point, this piece of advice is the least remembered of the three. Just because one class is better at completing a task at hand does not mean others cannot go a little out of their way to help. The most popular use of this myth by far is that the Scout is to grab all of the money. If the Scout is being a team player, he is helping other classes with their job by dealing a decent amount of damage as he goes, and may become a little too busy to pick up some of the money. Meanwhile, you are standing right next to the money. There are two things you can do, and they are shown at the bottom of this section.

Option Number
Action
Reaction
Your Role
1
Complain to the Scout to stop what he's doing and come pick up this money.
The Scout doesn't make it in time, you scold him, and there's no bonus obtained for the team.
Victim
2
Pick up the money yourself
The Scout can continue doing what he's doing, everyone is happy because there's a bonus
Team Player
Keep in mind that the reactions are only one possibility for the action. For option one, the scout could grab the money without a hitch, or worse things could happen than just missing the bonus. What if he picks up the money, but because he was helping the other teammates with Mad Milk up front before, the robots no longer have milk and all team members near these robots die? What if he doesn't make it but the time he took out to try has the same effect? What if someone on the team sees you standing near the money and complaining and initiates a vote to kick you? With option two, the two other options are that you die and/or other money is missed and there still is no bonus. Considering how you this situation involves being separated from the team, picking up all the money and then dying can lead you to regrouping after collecting the spoils of previous fighting. If you miss the bonus, the extra money you picked up is better than nothing, and can still be used for canteens and buy ins. In the same trail of thought, thanking only the Scout for collecting the money is (or should be) doing a great disservice to everyone else on your team, including yourself.This rule applies to all things in the game. An Engineer can use his sentry to take out a Snipebot, a Demoman can use explosives wisely to push a bomb carrier backwards, and yes, a Medic does in fact has weapons that he can use on his own in a pinch.Whenever I come across someone with the idea that each class is its own entity rather than an interwoven network, I employ the following analogy:
Originally posted by eat my soup:
A Scout is the best collector at cash, therefore, only he should do it. A Scout is the fastest runner in the game, therefore, only he should move and the rest of the team should stay in spawn.
Anyone with this anti-global ideaology is destroying the very framework of Team Fortress. Yes, you will run into people who can collect cash or take out medics better than others and will need less assitance, but dealing with people that have varying levels of capability is a part of life.
Terminology
Here is a list of vocabulary commonly found in Mann Vs. Machine, as well as this guide.

Relative Power: How quickly you can deal damage without having to reload, measured in damage per second. Power is the proper term for this measurement; in the same way when driving a car you would not say, "I need to increase my MPH." Relative Power is what you desire when speed is truly vital; reloading when a Tank is deploying its bomb is one of the worst feelings in the world. Basic upgrades that increase Relative Power are damage, clip size, firing speed, crit canteens, and the like.

Absolute Power: The true measurement of power, measured in damage per second. To measure Absolute Power, should include the total time it takes you to empty your clip and how quickly you can reload and start emptying again. Basic upgrades that increase power are damage, firing speed, reload speed, clip size, and crit canteens.

Strength: How much damage you have in a unit of attack, measured in damage per unit. A unit can be anything from a swing of a melee attack to a shotgun blast to a single syringe. Strength is necessary in order to kill Uber Medbots before they uber. Since stickybombs can explode at the same time, placing them on top of one another increases the total strength.

Setup: The time before robots arrive.

Trench/Pit: Designated areas that robots can be moved into in order to have them take a detour. Using the word "hole" may confuse other players to think of the hatch.

Chute/Hatch: The area the robots are trying to place a bomb into. Using the word "hole" may confuse players to think of a trench.

Reset: An action that causes the bomb to be sent back to the beggining, commonly done by pushing a bomb carrier off a cliff or, in some sets where the bomb has a timer over it, the timer runs out.

Front/Bot Spawn: From where the robots enter the map. To avoid confusion, use Bot Spawn.

Back/Spawn: The area near the upgrade station and the chute. Since some players may assume that bot spawn is the back because of the distance required to travel there, using "spawn" reduces ambiguity.

Stream: The route that the majority of robots are using to deliver the bomb. Arrows show the stream during setup.

Wave: An attack of robots seperated from other waves by setups in between.

Set/Mission: An entire group of waves. A set ends when the word "Victory" comes across your screen. Not to be confused with a map, as maps can have many set variations.

Tour: An entire group of sets.
Scout
Originally posted by eat my soup:
Of course I can mark the robots for death. Mark is my middle name!

Scout is the most versatile class. He can collect cash, mark enemies for death, slow robots down, make them health sources with Mad Milk, and, if you spend your money well, demolish tanks at speeds that would make most Pyros gasp with jealousy.

The Scout's primary objective is collecting money. A dead Scout is an unhelpful Scout. Staying alive, regardless of loadout, is half of being Scout in Mann Vs. Machine. Being suicidal for the purpose of collecting money about to vaporize is the only completely justifiable explanation for running in front of an enemy sentry. However, money takes a rather long time to disappear. It is better to wait a few seconds so your team can clear out more robots than just jumping into the horde to grab some fresh money. Considering how cash can heal you, onslaughts can become anything but a problem so long as you collect some money first.

The next two important objectives of the Scout are to sodden robots with Mad Milk and to mark them for death. Mad Milk grants 60% of damage dealt to a victim as healing for the attacker. This means that a friendly Heavy can live much longer if face to face with a milk covered Giant Heavy than one uncovered. When upgraded, the Mad Milk can also slow victims down 20%. This is a very welcome upgrade at the beginning of the game, especially since teams starting out have a difficult time stopping faster robots. Mad Milk's healing effect can be amplified if a robot is marked for death, either by the Fan O' War, or an upgraded Sandman. Because a marked robot automatically takes 35% more damage from all attacks, marking is a simple way to make your Mad Milk all the more effective. As expected, marking is effective in itself. Debates will be held for time eternal on whether milking or marking the enemy is more important, but it does not really matter, as both can be applied to a robot in a matter of seconds. Your mark and milk have their limits; you can only mark one robot at a time, and milk takes time to recharge—although you can ease this pain by buyng recharge upgrades. By the end of the game, two or three upgrades are good. Four upgrades is just excessive.

The Damage Dealer


If you have a grip on the primary three objectives as a Scout, then you are ready for the objective commonly overlooked: dealing damage. The normal scattergun has a decent clip, excellent reloading speed, and dishes out devastating doses of destruction at decreased distances. Once you have learned how to collect money well, you can start doing games with lower amounts of upgrades dedicated to money collecting so you can spend more on your Scattergun. Although speed sounds nice, a team that keeps the money in predictable places will make a stronger running capability less valuable than extra firing speed in your gun, and running fast isn't going to help you when the team needs to take down a tank. Because of a stricter budget, using a Fan O' War rather than a Sandman for a marker already saves you $500. If you are going to use the Scattergun to its maximum effect, you will be up close to the robots anyway.

Gotta Go Fast


This loadout is for the risk taker. Your job is to max out your speed and resistances, using methods to avoid robots other than jumping over them while still collecting all of the cash. Jumping is overrated in Mann Vs. Machine; since the robots rarely jump and the Scout has a magnetic pull towards money, there is hardly a time when you will need to jump to grab money as most areas can be reached by running up ramps. In the rare chance money flies out of a robot and lands on an elevated area accessible only by jumping, it is still worth emptying your boost meter to pick up the money. You can refill your boost meter by hitting more robots; the money will be gone forever.

Sooner or later, you will want to upgrade a Sandman to mark for death. Since escaping robots without jumping adds a layer of challenge, close contact with robots is best avoided. Regardless, hitting a robot with the Sandman as a melee weapon will mark a robot for death.

Projectile Penetration lets you hit more robots and fill your boost meter with less shots. Since you start off slow when trying to build up boost and the gun is more accurate than a scattergun, percision comes as a given. Because of this, damage upgrades are better than firing speed or maximum clip sizes for power.

I have included Bonk! as the secondary weapon, as it will assist you greatly in collecting money when having to tackle a sea of robots. This is by no means the only weapon you can use. In fact, I can only suggest it for beginners to this set. If you have enough faith in your ability, you can switch to a pistol for long range combat (boost builds with damage regardless of weapon used), or employ the glorious Mad Milk if boost is not an issue.

Utility


If you have Scout's hubris, this is for you. The Force-a-Nature does more damage per shot up close than the normal scattergun, but the damage lost with each foot of distance is greater. The firing speed is faster than the Scattergun's, even when you spend the $800 to make the Scattergun's firing speed at its maximum capacity. This is offset by a significantly hindered clip size and an iffy reloading system that cannot be sped up. With all of these strengths and weaknesses in mind, the Force-a-Nature may seem inferior to the scattergun, but the Force-a-Nature has one trump card that makes it shine.

It has knockback. The Force-a-Nature is like a mini airblasting device. With this new ability, the Scout's roles expand to five. You must now collect money, sodden robots with milk, mark robots for death, destroy robots, and push smaller robots carrying the bomb back, possibly even into trenches. Is the ability worth it? That depends if you would rather kill the robot quickly than spend a second or two adjusting your angle to push the bomb carrier in the right direction. If not, you are better off using the normal scattergun for a more reliable source of power. If so, there is no doubt it is worth it. The Force-a-Nature can also be used to "triple jump" if you shoot at your feet or stop your falling momentum right before you hit the ground, so that is handy, too. Empty your entire clip before reloading; Scout discards any unused bullets when reloading.

The Atomizer grants you the ability to jump once more. If used with jump height upgrades and the Force-a-Nature, gravity becomes a moot point. If you pair the two weapons with the Pretty Boy's Pocket Pistol, you will not take fall height damage. However, since the Force-a-Nature can stop falling momentum and because the Pretty Boy is unbecoming in every other way, I strongly advise against using it.

The Special Needs Delivery


Are you playing on a relatively low difficulty setting? Want to have fun without putting in much effort? Then the Special Needs Delivery is for you! The plan is to survive. Nothing else. Upgrade resistances, health regen, everything for your milk and fish, uber canteens, and speed to help you collect the health source called "money." Just throw milk and hit things with your fish while running in circles. Nothing to it.
Soldier
Originally posted by Undercover Soldier:
Beep boop. I am a robot. I have come to steal American jobs.

Rockets are wonderful things. Just point and click. No need to adjust for gravity like with grenades, no decrease in your field of view like with sniper rifles, nothing.

General tips? Blast Resistance decreases damage from rocket jumping. Rocket Specialist is worth at least one purchase. Why? Because buying it once grants an ability it does not grant again: direct hits on targets suffer no power scaling penalties. Shoot someone from across the field, it will do the same amount of damage as if you were right next to them.

The Shadow


The Shadow is silent at first, but once provoked unleashes raw, unbridled power. If you desire to purchase resistances to make sure you avoid being a simple kamikaze by all means do so. However, it is your aspiration to provide half of the total team's power. You have the Disciplinary Action to hit teammates for a speed boost (especially effective on Engineers moving buildings), and a Buff Banner to provide 35% more damage for everyone around you. Upgrading the Buff Banner's duration is useful but overated, since you will fill up the rage meter in no time flat with the Pièce de Résistance, the Beggars' Bazooka. What makes this weapon so amazing, you ask? It loads rockets first, shoots second. Still don't get it? Let's imagine you have maxed out the Beggar's Bazooka to its maximum in terms of relative power. Since the Soldier loads eleven rockets at once into the chamber, you can activate a critical canteen right before you fire the eleven rockets, shoot the eleven crit rockets, and still have time to reload and fire a few extras. This method can deal massive damage to any target you hit, including Tanks. Ammo capacity is a must since you expel rockets quickly; more ammo from each pack is immeasurably helpful.

The Survivalist


Whereas the previous loadout focused on offense, the package focuses on more defensive measures. You cannot fire as fast or use critical canteens as effectively, but you gain +15 health on hit, which stacks quickly when clip size, reload speed, and firing speed are all upgraded. Health on kill combined with power upgrades are also helpful to survive. Resistances and health regen need not be mentioned. Of course, power is also important, so its your obligation to find the perfect balance between the two. Use the Escape Plan to sprint to a nearby health source when injured. Your entire plan is based around the idea that going down is a risk too deadly to take.

Here I show the Buff Banner, since it is the only source of minicrits on a tank. If the team's strategey revolves around a single point that if lost the wave is surely over, the Conchecror can provide health for all of your nearby teammates for all targets they hit. The Battalion's Backup is not as effective in keeping people alive as well as the Concheror, unless you are fighting against robots with guaranteed critical hits.

The Human Sentry Buster


Sentries and the Direct Hit; it is as though they were made for one another. Sentries cannot move, and the Direct Hit's rocket travels towards the sentry with the speed of, well, a rocket. Power upgrades can also increase how effective you are at destroying sentries.

Beyond Sentries, the Direct Hit serves as a long range method of destroying everything else. Because tanks and giants move so slow, these enemies are perfect for aiming at with the Direct Hit where the degrees of error on the Beggar's Bazooka would fail. Since smaller robots come in droves, not landing a direct hit is pretty difficult for anyone with intentions. The Direct Hit has a fewer amount of damage upgrades, though, so its maximum damage is equal to other rocket launchers' max.
Pyro
When playing as Pyro, your loadout will be determined by how you answer this burning question:

Do I plan to airblast?

Airblast Activist


Originally posted by Kraal:
Airblast is overpowered, but everything else about the Pyro is underpowered.

As you can probably tell by your answer, the majority of your actions will revolve around airblasting. Half of the strategey is usual control: buy airblast force and maximum ammunition, then push robots carrying the bomb or stall giant robots that can cause a nuisance.

Then there's the combat. Your fighting will revolve around lighting an enemy on fire, airblasting it, and then hitting it with a flare or the Axtinguisher for critical hits, depending how far the robot moves when you airblast it. Your money for combat should revolve around how quickly you can use your secondary and melee weapons after deploying them; firing speed is a must for this set. If you wish to stray a little from airblasting, buy burn duration for the degreaser if you wish to continue hacking at a giant robot without having to relight it.

Other than that, it is all about staying alive long enough to do your job. If you answered the Burning Question with no, however, it becomes much more complicated...

The WM1


Originally posted by Your Motto:
Who needs to delay the problem with airblasting when I can kill the robots in a matter of seconds?

If the Scout and the Heavy had a baby, the end result would be the WM1. Both the Scout and the Heavy excel in close combat but prefer different methods. Scout is fast, harder to manage, and cannot take much pain. The Heavy slowly walks up to his opponent, grinning and bearing those tiny bullets the opponent dares to shoot at him while he starts up his spinning gun of demise. The WM1 has a very strong flamethrower (but still weaker than a minigun), can move at a decent speed, does not have his move speed hindered when using his weapon, and can take a decent amount of punishment before going down. He associates more with his Heavy half than his Scout half in Mann Vs. Machine, as his strategey is closer to the Heavy's. If you like, think of the WM1 as a mini-Heavy.

The focus of the Weapon of Magic and Oneder that was horrible revolves around the MMMPH: how quickly you can get it up, what you do with it, and if you live long enough to melt your opponents. Because your MMMPH gauge is emptied automatically when you die, grab two health on kills for your Phlogistinator before even considering getting a damage upgrade. Staying alive for a few more seconds to obtain triple damage is much better than a consistent 25% damage.

This is not to say that the damage upgrades are bad. Such a statement could not be more wrong. Once you spend your money on enough of the cheaper upgrades to live long and prosper, damage upgrades are the keys to success. It takes a lot of accumulated damage to fill the MMMPH gauge, and as expected a stronger attack will fill the bar faster. Not only that, those damage values triple as well when you activate your critical hits, making damage an even more effective upgrade than before if you live long enough to activate them. Super Scouts tremble at the hands of a Pyro with a fully upgraded Phlogistonator with MMMPH activated. Because you will have a constant supply of crits, any other canteen provides better options than a critical canteen.

Resistances are a given regardless of what class you play, but this is the only loadout where automatic health regeneration is pretty much a requirement. As a person entering close combat a lot, your health will have a tendency to drop below 175, even if you have all four health on kills with your Phlogistinator. What's more, you need to taunt in order to activate MMMPH. Unless you enjoy wasting even more time of the ten second crit boost than the amount you lost when you taunted, you will want to taunt near enemy robots. The WM1 might be able to take down Tanks all by himself, but in the time the Pyro shakes the Phlogistinator above his head, he is a delicate flower. Robots will often rip the WM1 into shreds if he does not have a way to regain health by doing absolutely nothing.

Because you plan to get criticals with your flamethrower, the Axtinguisher is almost useless, really only good for attacking giants from behind while they are on fire, and only then if you have a maximum firing speed. If the set has Engineer robots, the Homewrecker is a fast way to take out teleporters and sentries that engiebots are building. It takes three hits to destroy a teleporter; consider spending a little on firing speed so you can get back into the battle a little faster. If the set does not have Engiebots, consider a Backscratcher if you plan to get more health through packs. If not, then the normal fire axe or Lolichop works, since you won't be using it anyway. The Sharpened Volcano Fragment may give MMMPH, but not enough to be worth considered using.

Finally, the more speed you have, the more robots you can plow through with your MMMPH.


I have tested with the other flare guns, and the original is the best for both sets. The damage you get by hitting a lit robot is much larger than the other two flare guns. When employing the WM1, where the flare gun's damage contributes to MMMPH, shooting the same target with multiple normal flare gun shots is the fastest way to fill it up; much faster than the afterburn damage of five or six robots.
Demoman
Tavish DeGroot deals with robots the same way he deals with almost every other obstacle in life: by blasting it into pieces. Despite your character's love for exploding things, you will never need two explosive weapons. Trust me, upgrading one weapon to its maximum power is better than having two (or three) medium power weapons, if only for the sole reason that it takes time to switch between them.

Bomb Dasher


So, you fancy the Grenade Launcher? I say the Grenade Launcher because it is almost objectively better at blasting robots than the Loch and Load (the Loose Cannon, on the other hand, is not worth the extra trouble for anyone that is not a master with it). The Loch and Load's grenades do no damage if you fail to hit straight on, your maximum clip is reduced by two, and splash damage does more damage to you if you use the weapon in close range combat. The weapon has a little more projectile speed, but that is not even near worth carrying over the Grenade Launcher. I suppose the Loch and Load is acceptable if you need a little more muscle in the first few rounds, but the Grenade Launcher overpowers it quickly.

Next is the Chargin' Targe. This bad boy brings free resistance upgrades and can even allow you to reach 100% blast and fire resistance (although you will still take insignificant damage). Since killing robots with a smash is unreasonable, the defensive capabilities of the Chargin' Targe outperform the offense of the Splendid Screen. Regardless of your shield, charging gives you a temporary speed boost, allowing you to jet to the nearest health pack, a stack of bills the rest of your team missed, or even jump off of ramps by jumping while standing on the ramp followed by charging off of it.

The Eyelander is my favorite weapon in all of Team Fortress. You gain 15 maximum health and an increase of speed with each head, up to four heads. Just put in a little more effort to pick off a Snipebot or Spybot, and you can become the envy of your team. Just make sure to tell your team when they should not kill support classes; they will naturally have an instinct to shoot at anything that moves. If the Eyelander is not your thing, the Claidhem Mor will grant you better charging capability for a minimal decrease in health. If you go this route, recharge rates for your shield are pretty handy. Otherwise, just use the Ullapool Caber, since you will not be using melee often regardless of which melee weapon you choose.

A Sticky Situation


A pair of boots will not provide you more charging capabilities with this loadout, but it will give you the same amount of health as a Soldier. The Scottish Resistance is better during setup mode, but those four-fifths of a second waiting for your stickybomb to become volatile feel like hours when trying to stop a tank about to drop a bomb. You could focus on setting up a minefield for oncoming giants every step of their way, but the only way to deal with fighting a robot face to face is either with a melee weapon or by equiping a grenade launcher and losing the 25 health bonus. Both can be detrimental in the longrun. Because of the versatility of the normal Stickybomb Launcher, it is the reccomended stickybomb launcher.

An increased clip size for the Stickybomb Launcher is unhelpful early on in the game, since the inability to shoot more sitckybombs makes the perfect indication that you have the maximum number bombs on the field. It is only truly helpful near the end, when you have maximum firing speed, maximum damage, and crit canteens. When you use a crit canteen, you have a finite amount of time to shoot your bombs, so you will not want to waste this precious time reloading, and instead will desire place as many bombs near problematic robots as possible. The oldest bombs will explode, severely damaging the robot standing on top of it.

Since you will not rely on your melee weapon much, the time you do need to use it should be a time of extreme desperation. The Ullapool Caber is extremely powerful when it hits something, then becomes a dud. You can get one each life, or each time you purchase something from the upgrade station. If you do not want to purchase something, simply "buy" something and then hit cancel rather than accept. You will still get your new caber.

Because you lack a shield, the Eyelander is little help at best and a burden at worst. If you truly desire the speed and health increases, equip the Eyelander and a shield, grab four heads, change your loadout from a shield to your stickybomb launcher, purchase something from the upgrade station, and prepare to do everything in your power to live. Once you die, you lose all of your heads and will have to painstakingly earn them again. With the ability to run almost as fast as a Scout, collecting might be worth redoing, lest the next wave contains nothing but giants and tanks.

Demoknight


People always tell me, "You can't go Demoknight, that's a horrible idea. Are you stupid?" and I always tell them the exact same response:


Switching out explosives for unmitigated sword slashing, the Demoknight seems like an awful idea, and it is hard to blame anyone for thinking this. Why upgrade your sword when you can upgrade an explosive weapon? Do you not want to have even more power for others to underestimate? Well, yes, a fully upgraded grenade launcher will deal damage faster than an Eyelander, but the actual difference is minimal once both reach their maximum power. With that in mind, the Eyelander is much cheaper to upgrade, allows you to collect money better, and is much more fun to use.

The secret is in the critical hits on kill. For the minimum price of $350, you can kill one robot, then have enough time to slash the robot next to him. Then the one next to him. Then the one next to HIM. With maximum damage upgrades, a critical swing will make quick work of any standard robot that is not an Engiebot. Firing speed can make you have the most amount of damage possible from your crit boost and is helpful when taking down things that will not go down in one blow. Health on kill, combined with the fifteen health gained from killing with the Eyelander and resistances both from the upgrade station and the Chargin' Targe, will make you an unstoppable killing machine. Just use the Chargin' Targe to get that first critical hit on a robot and you are all set for a rampage.

With the money saved from not upgrading explosive weapons, invest in anything that will keep you alive. The first four heads are the hardest to obtain due to a hindrance in health and speed. Staying alive to guarantee you will never slow down is worth the investment. One investment not worth purchasing, however, is recharge rate for your shield. If you fully upgrade your speed and have four heads on the Eyelander, charging forward will add to your running speed the same way spitting in a lake will raise its water level.

If you wish, you could use the Persian Persuader if you feel more like charging rather than running everywhere. None of the other melee weapons are really good in this loadout.
Heavy
I do not enjoy playing as Heavy. Ignoring the fact that his minigun's damage is decreased when it hits a tank, his effort to effectiveness ratio starts out strong but barely goes any higher with skill. You can play a good Heavy without knowing anything about him when starting up the game, and his effectiveness depends almost entirely on how good the rest of his team is.

The main source of your ammunition is the Engineer's dispenser. Just stand near it, hold down the fire button, and aim at robots while Heavy screams in ecstasy. Buy rage to push back bomb carriers; firing speed to increase your power; maximum ammo to fight a tank without having to search for ammunition; health on kill, health regen, and resistances to stay alive; and crit canteens to triple your damage output. Occasionally you will have to move around, so equip the Gloves of Running Urgently when you need to move. Then make sure to keep your eyes open when the announcer says spies are incoming, and you are all set.

The Heavy


The only other minigun possibly worth using is the Natascha to slow down Super Scouts, and even then your team should have other methods of slowing such speedsters down. You can place your Sandvich on the ground while running for a quick health boost, but with dispensers, health on kill, and health regen, you should not really need it anyway. The Sandvich is still more effective than using a shotgun, though. If you desire, you can use a chocolate bar before the round starts for a small boost in health as well.
Engineer
How ironic it is that you can pit machines against machines for your own benefit.

Engineer's primary source of power comes from his sentry gun; any Team Fortress 2 player worth their weight in hats could tell you that. With this in mind, the majority of your upgrades should be for the sentry gun. The Engineer has plenty of unique upgrades, and most of them are horrible. Metal regeneration takes to long to build a significant amount of metal when a quick search will grant more. A disposable sentry gun is very expensive, your other upgrades do not increase its capabilities, and it creates an obstacle for building your bigger sentry. 2-Way teleporters are rarely used, and it is cheaper to have one or two people have a teleport to spawn canteen if getting back quickly is necessary. Upgrade canteens burn money quickly and take up a slot that can be used by critical canteens.

Dispenser Range is not a horrible upgrade, but it is grotesquely overrated. People always demand it at the beggining of the game when your money is limited. Tell your team that your dispenser is not a sanctuary, and buy dispenser range upgrades with other upgrades between each subsequent purchase.

Bob the Builder

Originally posted by eat my soup:
Your sentry is destroyed; nothing but a pile of scrapped iron adorned with sparks stands at your feet. A tank is entering the battlefield, and its only a matter of time before Super Scouts rush into battle, swiftly pick up the bomb, and cross your path. Your team is counting on your sentry to hold up the line. Your team can grant minicrits, but that means nothing now that your sentry is gone. Chase the Super Scout your brain screams. With what? You will only land four shots with your shotgun at best before he outpaces you, and that is if you upgraded the shotgun's firing speed. Of course! The Wrangler can make your sentry deal damage at long range! But your sentry is broken, you remind yourself. At this time, you have to ask yourself one question:

Can you fix it?


Do you see anything odd in this picture?

No, your eyes are not deceiving you, there is no canteen in the action slot. Yes, you can use one under certain circumstances. I simply want to drive a point to clarity.

Upgrade canteens suck.

I am completely serious. With this loadout, the name of the game is to avoid using upgrade canteens in order to keep your money in check. Since nicely informing the robots that you will not use a canteen will not stop them from shooting at your sentry, you must be ready at all times to place a new one if something goes awry. Allow me to introduce the builder's wrench: the Jag. For a damage penalty (no need to worry, you will not use the wrench for combat anyway), your buildings will build twenty-five percent faster. To build it even faster, you will need more firing speed on your wrench and increases on your maximum metal capacity. The wrench speed is a given; a building will build upgrade, and repair faster the quicker you hit it. Not only does an increase in maximum metal affect how much you start off with, it also increases how much metal you can get from an ammo pack. I recommend a minimum of two capacity upgrades, for the following example:

Two metal capacity upgrades grants you 400 metal to start with. You spend 130 to place a sentry near a medium ammo pack. You hit it repeatedly until you have less than 200 metal left, then pick up the pack. You can then easily pay the 530 metal required to reach a level three sentry. Heck, by picking up the metal midway through, you only have to wait a small amount of time before you can pick another one up, and then you have plenty of metal to start your next building! Pick up your sentry, and move it to your desired spot.

The locations of metal are vital pieces of information that will help you pick the one closest to your building spot for quick upgrading. If the nearest one feels too far away, feel free to buy a speed upgrade or two and/or have a friendly Soldier using the Disciplinary Action to give you a speed boost.

If you want metal without having to place your sentry away from your designated spot, use the Widowmaker at close range to gain metal by shooting enemies. Projectile Penetration can increase your bounty. A Widowmaker with maximum firing speed is also helpful in dire situations when you cannot build a sentry quickly enough. For $400, as long as you have enough ammo to cover your shots, you can easily dish out a lot of power by yourself. The more metal upgrades you have, the more secure you and your sentry will be.

Another shotgun you can use is the Frontier Justice. This method decreases the value of keeping your sentry alive; it will give you up to thirty-five guaranteed critical shots when it goes down. Since the amount you get is based off of kills and assists, and since robots come out in droves, getting the critical hits should be of no consequence. Obtain upgrades that increase your overall power, but do not worry too much about things that will keep you alive for the sole purpose of keeping your revenge crits. Getting them back is easy. If you truly desire resistance, it should be so you can stay alive to heal your sentry. The Frontier Justice is for those times when building a sentry at maximum speed is still not fast enough i.e. when a tank is deploying a bomb.

Since this strategey expects that your sentry will die, sentry health upgrades are only encouraged for Engineers with money coming out of their ears. Instead, have your focus primarily on increasing the offensive capabilities of your sentry.

If you are going to use canteens, make them crits. Not only do your weapons deal triple damage, it doubles the firing rate of your sentry. Use it when away from your sentry while using your Widowmaker to fight on two fronts, or use the Wrangler on your sentry for maximum effect. Maximum firing speed upgrades on a wrangled level three sentry while using a crit canteen and standing near a Soldier using a Buff Banner will gnaw through a Tank's metal as though the Tank were made out of solid chocolate.

The Lazy Engie


If you want to use Upgrade Buildings canteens, you will want to keep a few things in mind. First, you will want to use them as little as possible, so sentry health upgrades and firing speed on both your sentry and wrench are essential. Keep your sentry near a source of ammo so you can keep it alive; your dispenser will work perfectly. After you have increased health to the maximum, work on making your gun more effective by buying firing speed.

The Frontier Justice is good for the rare times you will use it. Consider upgrading firing speed to take out nuisances quickly, then taking a little extra time to reload.
Medic
When I first made this guide, the Two Cities Update was not live. I thought the Medic was not underpowered at all beforehand; all that was needed was a good head on your shoulders to be effective with him. Since I was a minority opinion, he is now ridiciously powerful, and all that is needed is stupidity to be awful with him.

Like in normal Team Fortress, the Medic is all about surviving to help others survive. Since you already regenerate health, you can either ignore health regen upgrades or buy them all to send your recovery rate into the stratosphere (I insist on the latter, personally). To find out if you are a good Medic, tell your team to not worry about buying survival-based upgrades and instead buy upgrades that increase power. If you are doing your job correctly, they should still be breathing. Since you have next to no plans in using your primary weapon, use the Overdose for a speed boost or the Crusader's Crossbow with the Amputator for a small boost in health regen.

Healing a player that is fully overhealed is slower than healing someone that is not currently at their maximum. With this in mind, if you are aiming for ubers, it might actually be in your best interest to not buy increases in healing rate and overheal duration, so that you can obtain the maximum ubercharge amount per player. It is a risky strategey, since a lower heal rate possibly means more deaths.

I highly recommend maximum Overheal Expert, though. With it, players can keep their overheal longer so that they lose it to weaponry rather than time. Coupled with increases in healing rate, and you have a pretty capable way of helping teammates live of which health on kill upgrades would be jealous if upgrades could feel emotions.

If you have a lot of money, you can purchase the canteen upgrade to funnel the rest of your money into granting invulns or criticals when you do not have an uber prepared. It soaks money like a sponge even at its highest level, so I only suggest it when everything else you desire is bought.

It's Better on a Kritz


Make no mistake here, critical hits are super effective at making the enemy faint and call out another Pokémon...where was I again? Oh right, the Kritzkrieg. It is common knowledge how this thing builds up uber faster than a normal medigun and its uber grants the target critical hits. If you wish to use it, your primary objective will be to increase your uber as quickly as you can and have it last as long as it can (although healing upgrades are good too since you do not build uber by reviving teammates). Do not be afraid to bust out your Ubersaw to hit a stray robot or two, but firing upgrades for it are not worth the $200 after playing this loadout for much longer, I strongly advise getting maximum ubersaw firing speed once you have your resistances, health regen, and medigun upgrades covered. Spending less time building uber than using it is oh-so-satisfying.

Keep in mind who you are ubering, their weapon, and the situation. Stickybomb launchers are inhibited on how quickly they can fire and the speed of their projectile; even with maximum firing speed they seem to take a little too long to be effective for fast paced or long ranged combat. If your uber target is reloading and there is a nearby person, even if it is an Engineer, switch to them. That reloading is precious time lost if you stick with one target. If you are doing your job correctly, you will carry the power of more than two standard players.

Also, make sure to uber the Demoman during setup if he is using the Stickybomb Launcher, alright? It takes less than ten seconds to recharge uber during setup, and that's with no charge speed upgrades.

Ze Ubermensch


If survival for your team is more important than giving them triple power, use the normal Medigun with the Amputator. The Amputator heals everyone at the same time whereas the Medigun heals one person more thoroughly and builds uber.

If you want to have some fun, you and a buddy can use this loadout to do an Uber Chain. Simply have your partner uber you while you land at least four Ubersaw hits, then when he runs out of uber, you uber him and he swings with his Ubersaw.

Thanks to Morgrim the Pimp Slayer and everyone else involved in the making this video.

Pick Me Up


Imagine using the Quick-Fix to accomplish the same goal as using the Medigun, but through a different method. With a more limited number of upgrades on ubercharge rate and heal rate (with both at maximum, the medigun actually heals faster than the quick fix) and weaker capabilities to overheal, the only reason to really prefer the Quick Fix is with its uber and running ability. The uber does not grant invincibility, but heals you and your target at three times the speed and plants you firm on the ground, almost immovable from blasts and bullets. This is quite handy for aiming considering how a normal uber makes your momentum factor increase immensely. As long as you and your heal target do not die from a single hit (RESISTANCES), you will be fine.

You can run as fast as any faster heal target and ride on explosive jumps using the Quick-Fix, so the overdose and speed upgrades are not too handy unless healing a slower target. Healing a Scout, however, can allow you to help him collect money by picking up some cash yourself and keeping him alive. Since the Quick-Fix keeps overheals on a user continuously, make sure to continue healing the Scout after the wave so he keeps his overheal for the next one; he might be holding over 500 health.

Viva la Resistance


Use your mouse wheel to switch to the resistance your teammate needs. More often than not there will be more than one source damage, you will need to assess the greatest danger and protect from it. In medical terms, this is called "triage."
Sniper
The Sniper is uncontroversially the class that requires the most skill and effort to become effective. If you wish to be a Sniper, you have to know exactly what you are doing, or fear persecution. Fortunately, the Sniper's input to output ratio is an extremely strong upward curve: a Sniper that is bad or average will be almost no help to the team other than throwing piss, but a good Sniper can be a very helpful asset to the team. An excellent Sniper can make the jobs of every single other teammate unspeakably easier. Never underestimate the ability to quickly take out high profile targets and droves of weaker targets instantaneously.

The two rules of employing Sniper are headshots and piss. If you are not shooting the heads of Artificial Intelligence nor working your kidneys into overtime, you are playing Sniper incorrectly. Your major purchases are Explosive Headshot, Projective Penetration, and Damage. All of these maxed out and combined with a headshot will remove many pesky bots instantaneously. In waves where twenty Spybots swarm towards the team, a well-aimed headshot to the center can take all of them down at once and save your team plenty of trouble. If you have a hard time headshotting Medbots because they are behind a giant, shoot the giant in the head, your explosive headshot and strength upgrades should do the rest. Since staying in safe areas comes as a part of the Sniper package, resistances are not a priority during the first waves.

The secondary and melee weapons stay constant throughout all of the recommended loadout types. Unless you are charging headfirst into a wave (see: what a Sniper should not do) or have plans of listening for an electric sound when you will be too busy aiming to notice, you will need Jarate. Every other weapon is selfish; Jarate helps the entire team. Naturally, you will want it to slow down your target and appear often (I recommend three upgrades out of four). The other weapon is the Bushwhacka, which obtains critical hits whenever it would usually minicrit. This is effective with your Jarate, marks for death, and Soldiers' Buff Banner. I emphasize the Buff Banner, for it is the only way to obtain minicrits on a tank. Since you cannot headshot a Tank, upgrades in firing speed on your Bushwhacka can be useful so long as you stay near a Soldier while attacking the Tank. Because all of the other non-rifle Sniper weapons in Mann Vs. Machine are abysmal, each loadout will focus specifically on the rifle.

Be Polite


Okay, I lied with the title.

Does Jarate not provide you with enough urine? Do you not have a strong enough throwing arm? If so, use the Sydney Sleeper with a maximum charge rate upgrade. In 1.5 seconds, you can coat a giant with minicrits from the other side of the map. Although the weapon cannot perform critical hits on headshots, the explosive headshot upgrade still works if you hit the head, and should still be purchased.

Be Efficient


The Bazaar Bargain's charging rate increases with each headshot and decreases with every bodyshot, reaching back to zero if you somehow miss every single robot in a swarm. Since you should be getting headshots by the handful if you have any hope of being an asset to your team, this should not be a problem.

Have a Plan


The Machina deals 15% more damage and penetrates enemies when fully charged. By buying maximum charge rate (which you should be doing anyway), you can save yourself $400 by not buying the projectile penetration upgrade. This rifle is better if you are not as quick, since quick Snipers will land headshots before the meter fills, even on the highest charge rate. Simply put, this weapon provides a mild incentive for not shooting like a complete maniac. However, if you need multiple headshots on a single giant, quick shots can still be an effective strategey as well.

Kill Everyone You Meet


Easily the best Sniper Rifle for Mann Versus Machine, the Hitman's Heatmaker gains focus even when the kills and assists you earn are not from it. Because of Jarate, the Bushwacka, and explosive headshot upgrades, getting your focus up is a breeze. Combine focus with increased charge rate, reload speed, and maximum ammo upgrades or a dispenser, and you can simply hold down the fire button while moving from robot to robot. Truly remarkable.
Spy
Like the Sniper, Spy specializes in selectively taking out highly valued targets. Unlike the Sniper, Spy specializes in close range combat and suffers horrendously from fighting at long range.

Your knife is by far the weapon you will use the most to take out robots, so it should be upgraded to your liking. Armor penetration is a must to help take down giants, firing speed is nice for landing multiple hits on giants, health on kill can keep you alive, and critical hits are just about useless since backstabs already count as critical hits anyway. The only thing critical hits are good for is if you plan to stab a robot in the stomach or use your revolver; both strategies are ineffective. The $350 is much better spent on resistances.

In relation to resistances, you will be wearing a disguise most of the time, so damage should be anything but a problem, right? It would be if your team were perfect, but crossfire exists. Too many times have I been attempting to backstab a Giant Medbot, but a Scout had an idea to mark the Giant Medbot from behind. Naturally, the heal target aims at the Scout, and gets me instead. There has even been a time where a person on the team complained that I was not doing anything when this happened and considered voting to kick me. The nerve. Sadly, the best you can do is communicate to your team, buy resistances, equip the Deadringer and hope for the best.

One of the Spy's greatest abilities is to perform a Spyblock. The robots are not programmed to think critically; anyone that looks like a robot to them is a robot as far as they are concerned. You can use this to your advantage and disguise as a robot and body block a hallway to stall the bomb carrier. Just make sure to tell your team to approach the robot from the other direction; the last thing you need is to die in crossfire. If a Spyblock is unreasonable, the Spy can still slow down robots using his sapper.

When Tanks come, there is little you can do to help it. If you truly desire, you can get a critical boost on kill with you knife and backstab a nearby robot before stabbing the tank. Since this requires you dump increments of $350, it is better to just kill all of the surrounding robots if there are any rather than picking off one then hitting the tank. The rest of your team needs the elbow room. If a Tank is the last thing left, the best you can do is stab it rapidly, but it is better than nothing.

If you truly need to take out a certain bot, an uber canteen can help with landing the killing blow(s). As long as you can avoid excessive momentum, you will land far more backstabs than you would relying on the Deadringer. The best time to use this method? Attacking Giant Medbots. If you plan to not use uber canteens, use recall canteens to quickly chase a stray Super Scout and plant a sapper on him to slow him down.

More Health, More Stabs


Using the original knife is truly a plan beyond innovation. It has no strengths or weaknesses; you just get behind the robot and use it to sever cords connected to its Central Processing Unit. The Ambassador is shown simply because if there is a time you will ever use a revolver, you will be aiming to deal a lot of damage quickly, such as with a Pyrobot. Of course, if you happen to be a lousy aim, you are in trouble and will have to hope that your team can save you. You can also equip the L'Etranger to try your hardest to get your Deadringer running again.

More Cloak, More Health


Your Deadringer shields you from ninety percent of an attack's damage, making it a better fit for robot killing than any other watch. Naturally, you will want to keep this filled as often as possible. With the Big Earner, you sacrifice twenty-five health in hopes of being able to earn 1000 metaphorical health points. The L'Etranger also helps in building up your cloak in times where you are mashing your second mouse button to activate the Deadringer as soon as you can.
Bots of Interest
Now that we have covered the classes, it is time to cover the robots. We all know about the normal, uninteresting robots. We have the Scouts, the Heavyweapons, the Soldiers, you name it. Then there are the Bots of Interest (BoIs). BoIs have more elaborate plans required to take them down effectively.

Pyrobots

For the most part, Pyrobots act in a typical manner. Then there are the Pyrobots that will reflect every single projectile thrown at them, usually these ones surround bigger robots to defend it. Either wait until its back is towards you, fire with a long range arc, use a weapon that shoots bullets, or ignore it completely and hope your much more capable teammates will take it out. Soldiers will most often have to take the last route; Heavies, the least.


Deflector Heavies

When the hard working people at Valve realized that teams could win with nothing but Soldiers and Demomen, they decided to give some Heavybots an upgrade that can be bought in Mann Vs. Machine. When these guys come, all projectiles that are not bullets must be shot from behind. If you excel in bullets, it is your duty to take these guys out and give your teammates space to breathe, especially if it is a Giant Reflector Heavy.


Engiebots


The best way to deal with these robots is preventative. Destroy them before they build anything and destroy its sentry while it is still fragile. Some Engiebots spawn right at a programmed point for sentry placement, giving it a head start in construction. If you see one building, it is often best to stop whatever you are doing and attack it. If it has built a sentry already, consider your capability before rushing in foolishly.


Medbots

Medbots come in multiple types, but the truth is you only need to sort them into three types of groupings: Quick Fix, Uber, and Giant.

Quick Fix Medbots are the easiest, simply shoot at it and kill it before attacking its target.

Uber Medbots are a little more complicated, you can either have them spend their uber quickly by hitting them as soon as possible (and maybe having a Pyro airblasting the Medbot from its target or the pair backwards so the two robots do not gain any distance with their uber), or you can kill them before they uber. The latter method requires preperation; your weapon must have enough strength to kill the Medbot in one shot. If Uber Medbots are in the next wave, consider buying a damage upgrade or two rather than a larger clip or reload speed. The other two upgrades might increase your overall power, but you need as much damage as you can in a single shot to prevent Ubers. Regardless of your method, the main idea is to deal with the Medic before he comes into a position where an uber will cause a problem, such as his heal target delivering the bomb.

Finally there is the Giant Medbot. The Giant Medbot is a robot mothers tell their children about to convince them to eat their vegetables. Shoot it. Everyone should shoot it. Kill it quickly, and its final 25% of its life should be dealt with even more swiftly. If his heal target takes too much damage or if he stays at a low health for too long, he will uber. If my math does not deceive me (24 health per second base healing rate times 200 for the Giant Quick Fix multiplied by the Quick Fix's uber multiplier of 3), the Giant Medbot's ubercharge heals at 14400 health per second. As far as everyone should be concerned, it is a normal uber that instantly heals both patient and doctor, so you will also need to start all over again once it is finished. If the Giant Medbot lives long enough to deliver two ubers, you can kiss your chances of victory goodbye. Also, if a Giant Medbot starts healing a Super Scout...

Snipebots

When Mann Vs. Machine first came out, Snipebots could not hit the broad side of a barn. Now they can shoot it blindfolded upside-down while the barn is moving at 90 MPH, all while knitting a sweater at the same time. In all seriousness, you will want to take these guys out as soon as possible. Classes that can get close without a problem (Scouts and Spies) or classes that perform well in long range combat (Soldier, Demoman, Engineer, and of course, Sniper) should be the ones to take them out. You should have one person on Snipebot Patrol, always going out of their way to kill them.


Bowbots

Because variety is the spice of life, and because there is no picture of a Bowbot, here is a picture of a red Snipebot.Bowbots enjoy traveling in groups. They also occasionally have guaranteed critical hits. To avoid becoming Swiss cheese, buy bullet resistance (it really works) and crit resistance. Classes that specialize in medium to long range combat will have the best chance against Bowbots. Soldiers, Demomen, Engineers, are the most effective because they all have some way of employing long distance blasts that kill multiple Bowbots while still staying a safe distance.


Spybots

When I first heard from the announcer that spies were incoming, I thought all it was going to be was robots in blue trying to get behind you and stab you in the back. That's the dumbest thing I have ever thought of while playing Mann Vs. Machine. Spybots, also known as Nightmare Gasoline, can and will disguise as your teammates. This is not as much of a hindrance as you think once you consider it. Spybots are not very bright, and as a result anything but stealthy. Is your "teammate" hanging around spawn? Spybot. Is he not shooting at robots? Spybot. Is there three of the same person traveling in a group towards you? Spybot. All you need to do when there are Spybots lurking is simply make you do not stare in a single direction for too long. In some cases, the Spybots give up all hope of trying to be stealthy and will charge at you in double digit droves, hoping that one of them will be able to land a backstab and take you out of the fight. Regardless of how many there are, stealthy robots are not an issue, and as such Pyros are surprisingly ineffective at killing them in comparison to every other class but the Medic.

Steel Gauntlets

If there were ever an argument to have a Demoknight on your team, it would be the Steel Gauntlet. Not only does he take reduced damage from ranged sources, but he also has the health of three Heavies. They are simple enough to take one on one in a melee fight due to their vulernability to melee weapons, but they often come in mobs. Unless you excel in melee like the Spy, you have almost no choice but to keep your distance. If this is the case, mini or full crits are a must.
Bots of Interest Part 2
A second part because of the limit of characters per section.

Sentry Busters

Your level of experience with Mann Vs. Machine will determine how you approach the Sentry Buster.

If you are an inexperienced Engineer, you will cry out to your team to kill it either before it blows up your sentry or while it chases you and your sentry (which you have picked up) around the map. If you are not an Engineer, you will stay away from the Engineer's buildings to avoid being caught in an explosion of fury.

If you are an Engineer who knows what you are doing, you will either wait until the Sentry Buster comes near your sentry before you pick it up and run, you will pick it up and run towards the Sentry Buster before running away, or you will pick it up, run, put it some place away from your buildings where it can get a few shots in, and run away once the Sentry Buster is about to explode. If you are not an Engineer, you will have faith that your Engineer will run away from you so that you do not get killed in the explosion, but will keep an eye out for the Sentry Buster just in case.

If you are truly experienced regardless of your class, the Sentry Buster is the robot you are happiest to see. Being big and for the most part unable to hurt anyone, the Sentry Buster becomes a hit magnet once your worries about it destroying anything are done. Hit it with a Baby's Face Blaster to quickly build your boost, a Phlogistinator to fill your MMMPH, a Widowmaker to increase your metal, an Ubersaw to build your uber, the list continues to include anything that gives you a benefit when you hit something with it.

Tank

Tanks nine times out of ten serve as nothing more than a distraction. Because they have high health, teammates will want to attack it quickly. This is bad. When a Tank spawns, it is usually to divide the team so that the ones that stay behind have a harder time facing the incoming robots. The entire team needs to focus on the robots until the difficult robots have been destroyed. Once that is finished, everyone should attack the tank. When your team stays together, the Buff Banner also gets an increase in effectiveness since it serves six. Naturally, if the tank is way too close and giant robots are close too, you will want to divide your work. The team's focus ultimately comes down to what is in your best interest, but you must always keep in mind that the Tank cannot directly fight back while the other robots can.


Super Scout

Unlike other giants, which travel at half the speed of their smaller counterparts, Super Scouts run at twice the speed of the fastest class in the game. If a Super Scout grabs the bomb, you can almost guarantee that the machines will gain the upper hand as either the Super Scout deploys the bomb or brings it close to the chute. To effectively deal with a Super Scout, you must not let it pick up the bomb. Kill it before it gets there. Don't kill any other robot carrying the bomb until the Super Scout is dead. Most importantly, slowing down the Super Scout will make him much less of a hassle, even if he does have a bomb. Sappers, Airblasts, Jarate, and the like can all slow down the Super Scout immensly.

The Super Scout also tries to follow the stream in the least amount of distance possible. After learning the direction the bomb is headed, a sentry can be placed near a corner to act as a barricade for the Super Scout while still damaging him. This obstacle will only stop him for a few seconds, so if you see a sentry block a Super Scout, kill it before it destroys the sentry. If this sentry stands its ground, an Engineer can repair it for future robots.

Boss Robots

Boss Robots are the ones that are so powerful, they have their own health bar on the Heads Up Display. All of them have a very similar strategey to take them out. Are you ready to learn the amazing tactic to destroy the ultimate robots?

Don't get hit.

Shocking, isn't it? When twenty critical rockets hit you in the face, no amount of critical or blast resistance will save you from the Grim Reaper. Make sure to learn the Boss' pattern and exploit it. Captain Punch, for example, uses only melee weapons. Just stay your distance and you will be fine. Sergeant Crits and Major Bomber reload and fire all their bombs at once. Use this reload time to the best of your ability. Using a Heavy's Rage to knock the Boss Robot backwards will make the fight even easier. In fact, your biggest problem more often than not will be the other robots that will have an upper hand in killing you since you are so distracted with the Boss. All bosses recover health over time, so placing more power on one simplifies your problem geometrically.

Heavies can also do something special with Bosses. Using an uber canteen and a full bar of rage, a Heavy can crouch in the path of a Boss so the Boss jumps over him, then aim upward while using rage to launch the Boss in an arc. This results in an incredible loss of distance for the Boss. This technique requires timing, though, especially if the Boss has a rapid fire weapon.
Cash: Real
Originally posted by Homer Simpson:
Whee! I'm sort of rich! I can rent anything I want!

We all know what money is. In real life, there are two things to purchase for Mann Vs. Machine: tour of duty tickets and squad surplus vouchers. Tickets allow you to play the harder sets of robots, titled "Mann Up" missions. These cost $0.99 USD. Squad surplus vouchers are optional additions to a Mann Up game, cost $2 USD, and give everyone in the game an extra piece of loot at the end of a mission. Vouchers are used as a token of good will that sends the message to the other players that you were willing to pay extra for everyone else's benefit. This can lead to other teammates being much more patient with you when you are new to Mann Up or desire to try out a previously untried customization. Aside from this, it is hard to recommend vouchers at the price of two tickets; if playing with five friends, you are all better off agreeing to not spend the money on each other, and instead agree that each of you will use their respective money to buy extra tickets to play more sessions in the future. There is some good news, however. Valve has proven that they are willing to reduce the price of vouchers during a sale at the store.
Cash: Virtual
Originally posted by Colonel Sanders:
There's no reason to be the richest man in the cemetery. You can't do any business there.

Now that we have reality out of the way, we can delve into the much more interesting half of this section: the currency you can pick up after killing robots.

Is it Worth it?


Do not waste your money on worthless upgrades.

For the most part, upgrades are consistent regardless of class or weapon. You have your firing speeds, your health on kills, and your resistances. Some of them are given purchases depending on situations: dying too much from bombs? Try blast resistance. But what about the other upgrades? Is a little extra jump height worth the money?

The simple answer: it depends on your class and strategey. For more information on that, head over to the section cover a class you wish to learn more about. For a more complicated answer, you must understand the economic law of diminishing returns.

To illustrate my point, we shall look at the Chargin' Targe.The weapon takes twelve seconds to recharge and become reusable. Is that too long? Why not buy an upgrade to increase its speed by 100% for only $150? Now it takes only six seconds to recharge! Still not satisfied? You can buy more to have it charge in four seconds, 2.4 seconds, or even two seconds. Do you see the pattern here? The first upgrade cuts the total time by a whopping six seconds, the next one only cuts it by two, the one after by 0.6, and the final one cuts the total time by only 0.4 seconds. Considering that it costs $150 to add another upgrade to the list, each subsequent purchase is less and less worthwhile. This is the law of diminishing returns. To spend your money effectively, you must not think about how fast you are going, but how much time it takes to get to your destination. If you focus on your "speed", you increase the chance that you may think of purchases in terms of addition and subtraction rather than multiplication or division. Thinking of running speed in terms of 100%, 110%, 120%, and 130% will seem much more appealing than thinking of getting to the battle in ten seconds, 9.1 seconds, 8.3, and 7.7 seconds since it is easier to hide the trend of a decrease in value with the former method.

Now, let's talk specifics.

Blast Resistance


The law of diminishing returns is reversed in this case. Two upgrades halves the damage you take from explosives, three quarters it. It's definitely worth the money. Also good for explosive jumping.

Bullet Resistance


Similar to Blast Resistance. This actually protects from all hitscan weapons, so it includes melee attacks as well. It also protects from arrows.

Running Speed


This depends on your objectives. Do you plan to aim for headshots, or are you collecting cash? Do you shoot grenades, where you run towards enemies, or do you place sticky bombs, where the robots run to you?

Health Regen


I have a tendency to always pick up at least one during a long game. Auto-regenerating health has a variety of small benefits, such as cutting down the urgency of grabbing health packs when moving around, decreasing your dependency on a dispenser, and preventing a need to call for the Medic just because you fell from a spot rather high for your liking.

Fire Resistance

Fire Resistance is mostly useless. Just stay away from flamethrowers and dodge flares. However, if you are a Spy who is trying to backstab a pyro or two before activating your Dead Ringer, Fire Resistance is certainly a good investment. Damage from being roasted from ten different directions accumulates unspeakably quickly.

Jump Height


Almost completely useless. If you plan to stay in one spot the entire wave, you can use the tranquillity of setup to make precise jumps to your spot. Most places can be climbed up to by way of ramps anyway. The only class where vertical maneuverability really matters is Scout, and he already has double jump. On the other hand, this does make the jump height upgrade twice as effective...

Crit Resistance

Are there robots that have 100% chance of critical hits? Yes? Buy all of it. No? Disregard it.

Crit Canteens


With every other power upgrade equipped to your weapon of choice, this is the only way to continue converting your money into more power for that weapon. It comes handy in a pinch, but at 100 credits, are you sure there is not something longer lasting that you desire?

Uber Canteens


A great canteen to have when you are using weapons that are guaranteed critical hits; crits mean nothing if you cannot live long enough to use them. They are best used when you have to charge through a horde of robots to get to something specific, such as a Giant Soldier being protected by a swarm of Spybots. Worth mentioning is that uber canteens do not make a suitable substitute for resistances and health upgrades. These canteens last only five seconds. For the price of almost five of them, you can have a permanant upgrade in Bullet or Blast Resistance. If you buy this too early on, you will find yourself dependent on them to stay alive and will be at a loss. What an awful blunder to make.

Ammo Refill


A horrible decision. There are ammo packs scattered all over maps, you can scrap fallen teammate's weapons into metal, you can use a dispenser or even scrap from a dispenser. If you really need more ammo since you are emptying it so quickly, consider purchasing an upgrade on your secondary ammo: not only does it increase the maximum you can carry, but many forget that it increases how much ammunition you receive from a pack.

Recall

One person on the team that has a decent amount of power and normally does not use canteens should purchase one of these, since a Super Scout can easily make a quick trip to the bomb site and a Tank about to deliver its bomb may need only a little more damage before it goes down.

Instant Upgrade

Covered in Engineer.

Buying In


People are divided on this, is it a good idea to buy in all the time, or never? The answer is the path least taken, and it's my favorite answer: depends. Is there money that you need to collect to get a bonus and you know time is running out? Have you bought everything you desire and still have money coming out of your ears? Both reasons are very justifiable. The problem is that some people insist on buying in every single time. This is cash in the trash. Instead of targeting the symptom (the respawn timer), attack the cause (dying) and you will be much better off. Similar to uber canteens, buying in instead of purchasing resistances creates a cycle that is anything but wise to fall into.
Etiquette
Now, I know what you are thinking.

Originally posted by Your Mind:
Who needs manners on the Internet? Nobody knows who I am; I can say anything I want. Free speech is protected under the government in my country.

The most important thing to address is how you feel about teammates and the vibes they receive from you. Where I live in the United States, the First Amendment only protects your free speech from the government. While you will not be arrested for calling someone a dog that has somehow "learned" to play Team Fortress 2, they will certainly be less likely to listen to your ideas, and probably will vote in favor of kicking you from the game. If the person is especially good, having manners may encourage him to add you to his or her friends list so you may go botkilling again in the future. Naturally, people are going to get on your nerves when they constantly try ideas that have been proven not to work, but keeping a level head is almost always the right way to go. Here's a list of techniques to keep your teammates' spirits high.

  • If someone is not saying they are ready, nine times out of ten, they are trying to waste your time actually not ready. You should wait a reasonable amount of time before asking if they are ready. Even if they seem to be in position, they can be doing anything from using the restroom to quickly answering the door to tell Girl Scouts that he or she is not interested in buying cookies at the moment.
  • If you are the person mentioned above, it is common courtesy to let people know you will be away from your keyboard. Especially on harder difficulties, teams are willing to wait for you to come back before starting, since unless you are being bad on purpose, more people on your side is better than less.
  • In the one out of ten chance that someone is not saying they are ready because they forgot, ask them politely if they are ready. Do not just tell them to f4 or press the button yourself repeatedly (the repetitive blinking of a green checkmark is annoying and pretty much sends a middle finger to the other person). It may take a little more time to type a little bit more text, but the extra second is worth it. You can even put your own spin on it if you want.
  • Admit when you mess up. Nobody likes a person that always defends themselves when somebody calls him or her out. Not willing to confess mistakes that you know you made is a sign of insecurity, and if you're willing to continue the same pattern in an attempt to prove that it works, you may be wasting the time of everyone else involved.
  • As stated before, its a good idea to let people try their preferred class at least once when they join in. They may surprise you.
  • By extension of the last point, if it is the first wave you are playing with the team and your method isn't working, you should be willing to switch to something else if necessary.
  • Getting in disputes about anything from age to religion to sexuality to the best place to obtain a cup of coffee to who should have stayed near the hatch to guard the bomb is an easy route to get on some people's bad sides. You never know what might repulse someone unless they tell you, but its in everyone's best interest to drop the subject as soon as you can.
  • People prefer to be called by their username than their class, especially if there are two of any class on the team. Taking the time to learn people's names can be pretty valuable in maintaining morale, since calling someone by their class objectifies them.
  • If a person gives you a suggestion really quickly in the middle of a wave, it is a good idea to not spend time questioning it and instead follow it. This is because the opportunity window for whatever he wished to do may not last forever, and because most people playing Mann Vs. Machine want to win and do not suggest things if they do not believe their plan will follow through.
  • Unless you are telling the team where the money is or you can clearly see he is fighting robots on the opposite side of the battlefield, do not say "Scout get the money." Unless he's an imbecile, he is already actively searching for the cash, and telling him to do something he is already doing is the equivalent of saying he is doing such a horrible job you could not tell the difference in cash collected through his efforts.
Common Sense
Originally posted by Albert Einstein:
Only two things are infinite: the universe and human stupidity; and I'm not so sure about the universe.

There are things in Mann Vs. Machine that you can do, but should not do. These things are so mind numbingly stupid, spectators cannot comprehend how a person can have a thought process that low and still have figured out how to download the game. This section is not so much advice, but sadly more of a comedic stature. Feel free to laugh at some painfully obvious advice. Asterisks next to the point signify that I have actually seen this in action.

  • It is better to buy an instant upgrade canteen than spend any amount of money buying in so you could get a head start on building a sentry from level one to three.*
  • The Rocket Jumper and Gunboats do not make a good combination.
  • In setup mode, Ubercharges take less than ten seconds to rebuild.*
  • An active Sniper is a better healing target than an idle Heavy.
  • Do not move yourself in a way to have your team's Spy die in robot crossfire. If you do, do not blame the Spy for the team's failure because "he is not doing anything."*
  • Aiming at the ceiling is an estimated whopping 90° from any robot. A person firing at it is doing so for sport and is not trying to induce a Medbot's uber in order to screw up the team's plan.*
  • If there is a person surrounded by robots, and the two groups are not beating the ever-loving crap out of each other, that person is a Spy.
  • You can tell if you have run out of ammo if your character switches weapons when you try to fire.
  • If there are an estimated twenty people wearing red walking towards you, there is at least one Spy among them.
  • If you hold forward, you will walk forward.
  • Scouts can only mark one enemy for death at a time.*
  • Larger robots are harder to push backward than smaller ones.*
  • If the wave you are about to face has tons of robots that fire explosive weapons, buy blast resistance.
  • Botkillers do not have special benefits when used against robots, and these do not increase with the amount of kills you have obtained with the weapon on normal Team Fortress 2.*
  • If a teammate is performing a Spyblock and they tell you to approach from a specific direction multiple times, do not go the way he tells you not to go.*
  • The Tank cannot directly harm you. Do not use an Uber canteen against it, let alone three.*
  • If a medic is healing you and has his ubercharge filled, do not use your canteen if it provides the same effect.*
  • If you tell someone to become a certain class and they do it, you really shouldn't kick them for becoming that class.*
  • Arachaic, but still funny: You equipped the canteen. You went to the window. You spent a part of your finite supply of money on a power up. You do not have a taunt equipped to your action slot.*
Conclusion
Originally posted by Department Store Spook:
When you have a good team, MvM is like playing a cheap Tower Defense game on the internet.

As you can tell, there are no regards to achievements or specific maps in this guide. Why? When making this guide, I wanted to make it last as long as possible. If I have done my job properly, this guide will still be relevant in three, four, or even five years. No doubt I will update this guide as necessary, but if I have succeeded that will not be very often.

I'd like to thank Valve for making such an amazing game and a stellar addition to it. I would also like to thank my friend TaylorSwift for some technical advice. Hopefully by making this guide, I will run into better teammates.

With that, I am finished. Now go out and enjoy the rated PG-13 slaughter fest!
141 Comments
eat my soup  [author] Jun 26, 2018 @ 6:40pm 
Thanks, Gawain!
Lecko Jun 20, 2018 @ 11:57pm 
It's been 5 years, and this is still pretty much still the same MvM meta aside from the introduction of the Gas Passer. I found this very helpful, thanks.
mayonnaise Aug 5, 2016 @ 7:20am 
I feel really comfy with my Cow Mangler, as its alt fire is a powerful knockback that also sets things on fire.
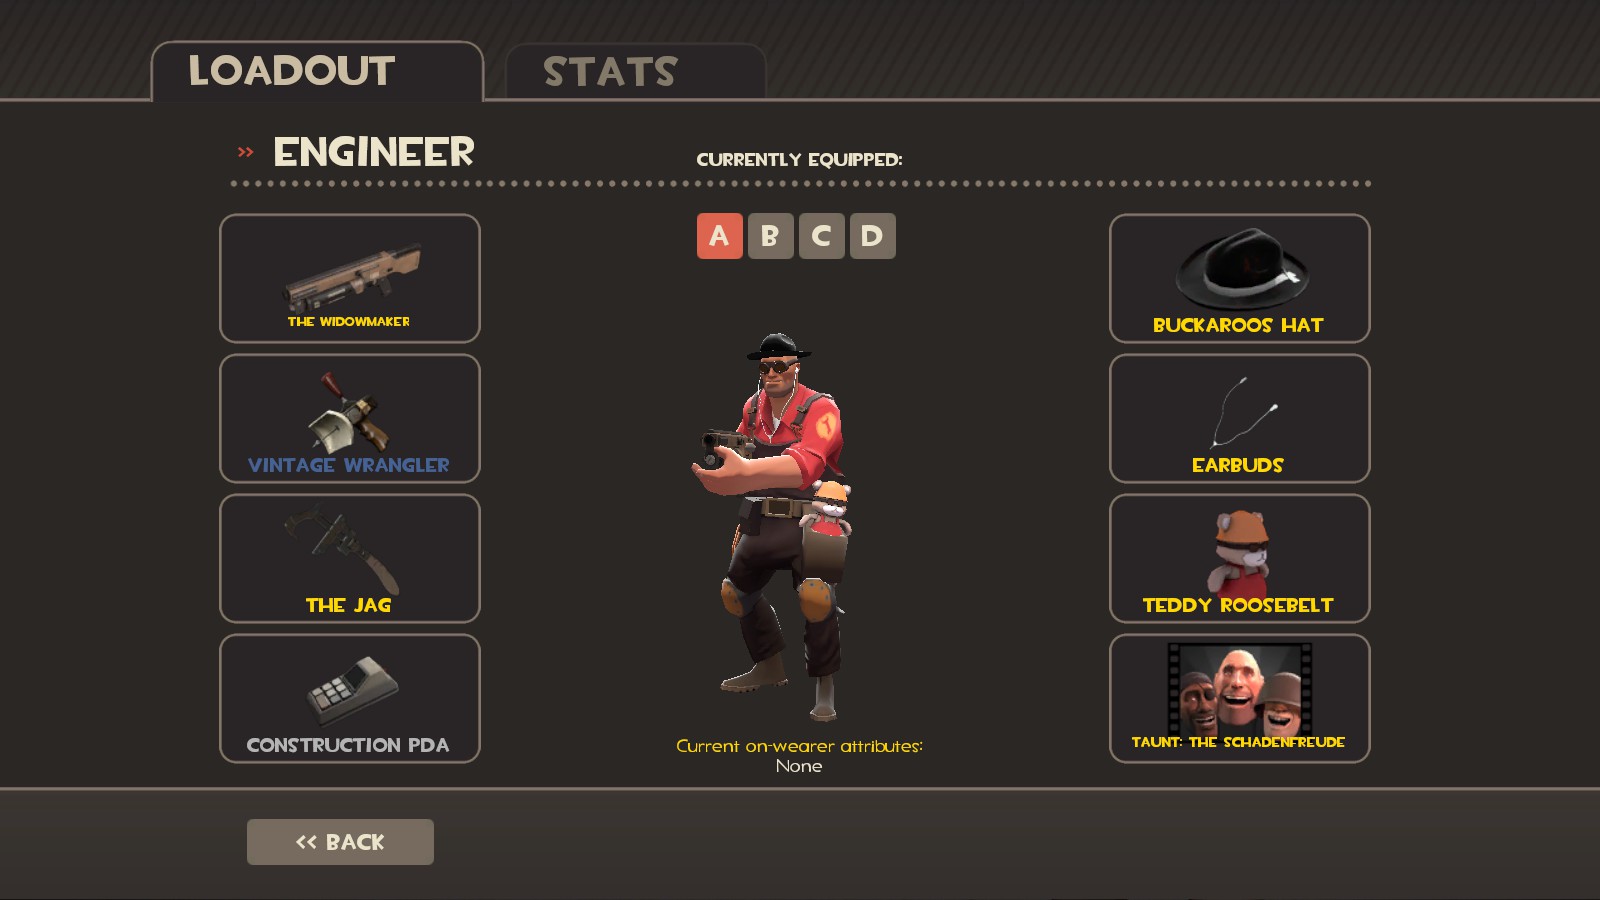
Reload REALLY helps. It loads rather slowly without upgrades.
I also have the Buff Banner and Disciplinary Action, which helps.
frank Apr 16, 2016 @ 4:55pm 
As an Engineer, I always use the Rescue Ranger or stock.


I like to save my buildings


And not waste my metal


Another thing, ENGINEER IS NOT AN OFFENSIVE CLASS
(I'm lookin at you, Gibus Engies!)
Pheaelyx Jan 16, 2016 @ 8:57pm 
Can u tell us how to join blu in mvm
?
SonOfASelkie Nov 8, 2015 @ 10:08am 
Personally, I think that buying ONE insta-upgrade canteen as engine can be really good. Yes, usually you should be set-up in a spot that you don't need it, but sometimes, you just need a sentry.
(Accound deleted) Oct 21, 2015 @ 5:57am 
I pretty much Dissagree and agree with you on most of the parts of this MvM guide.

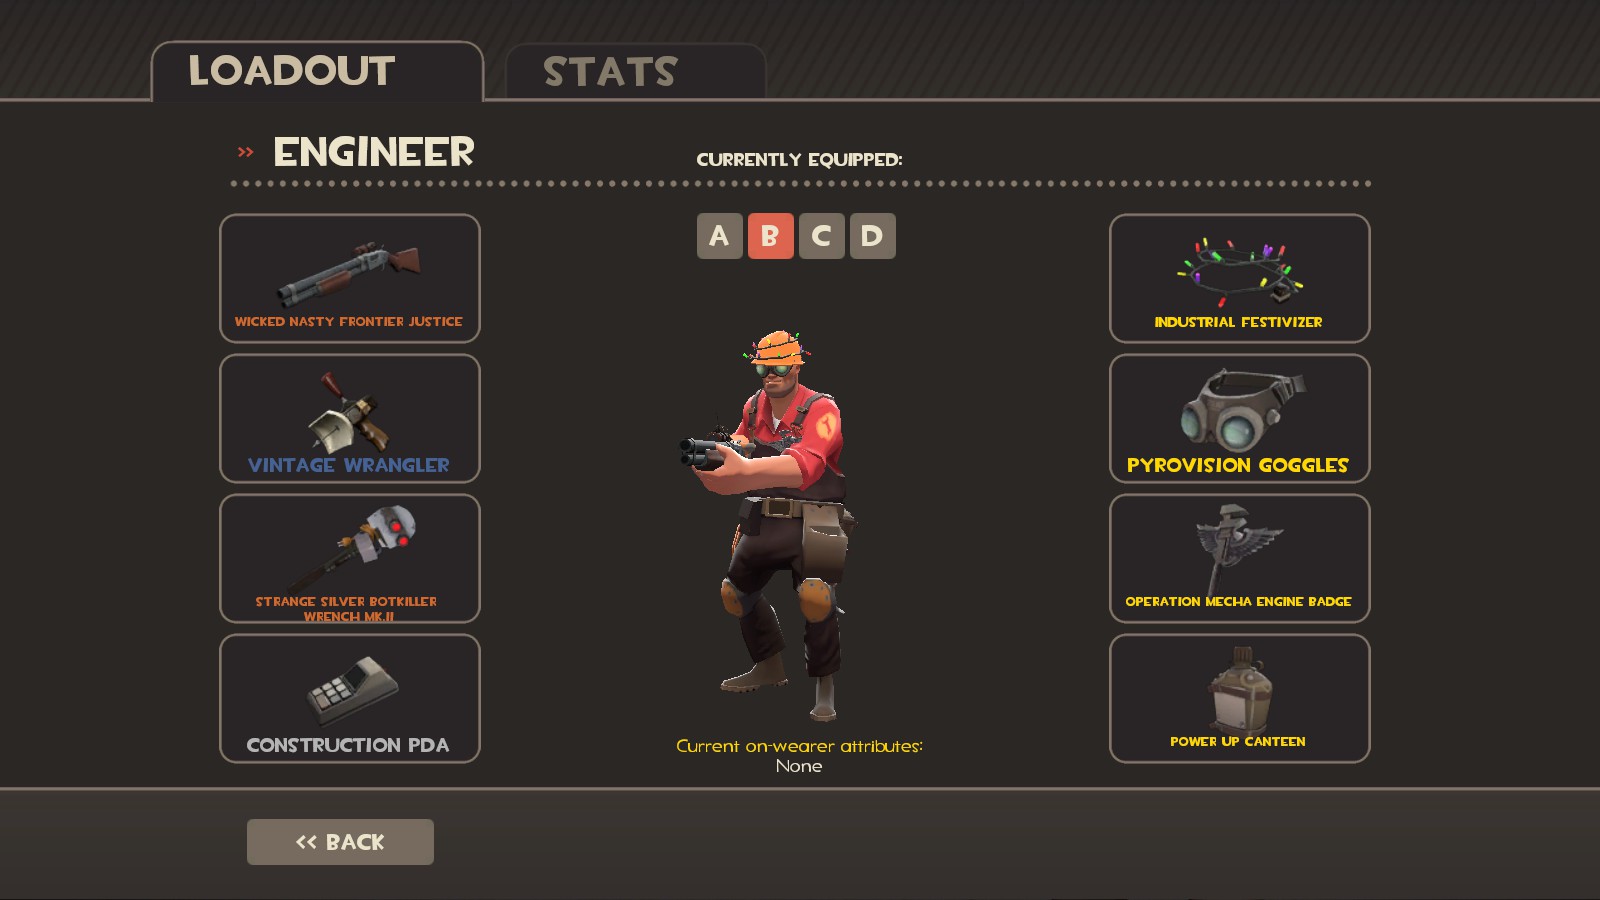
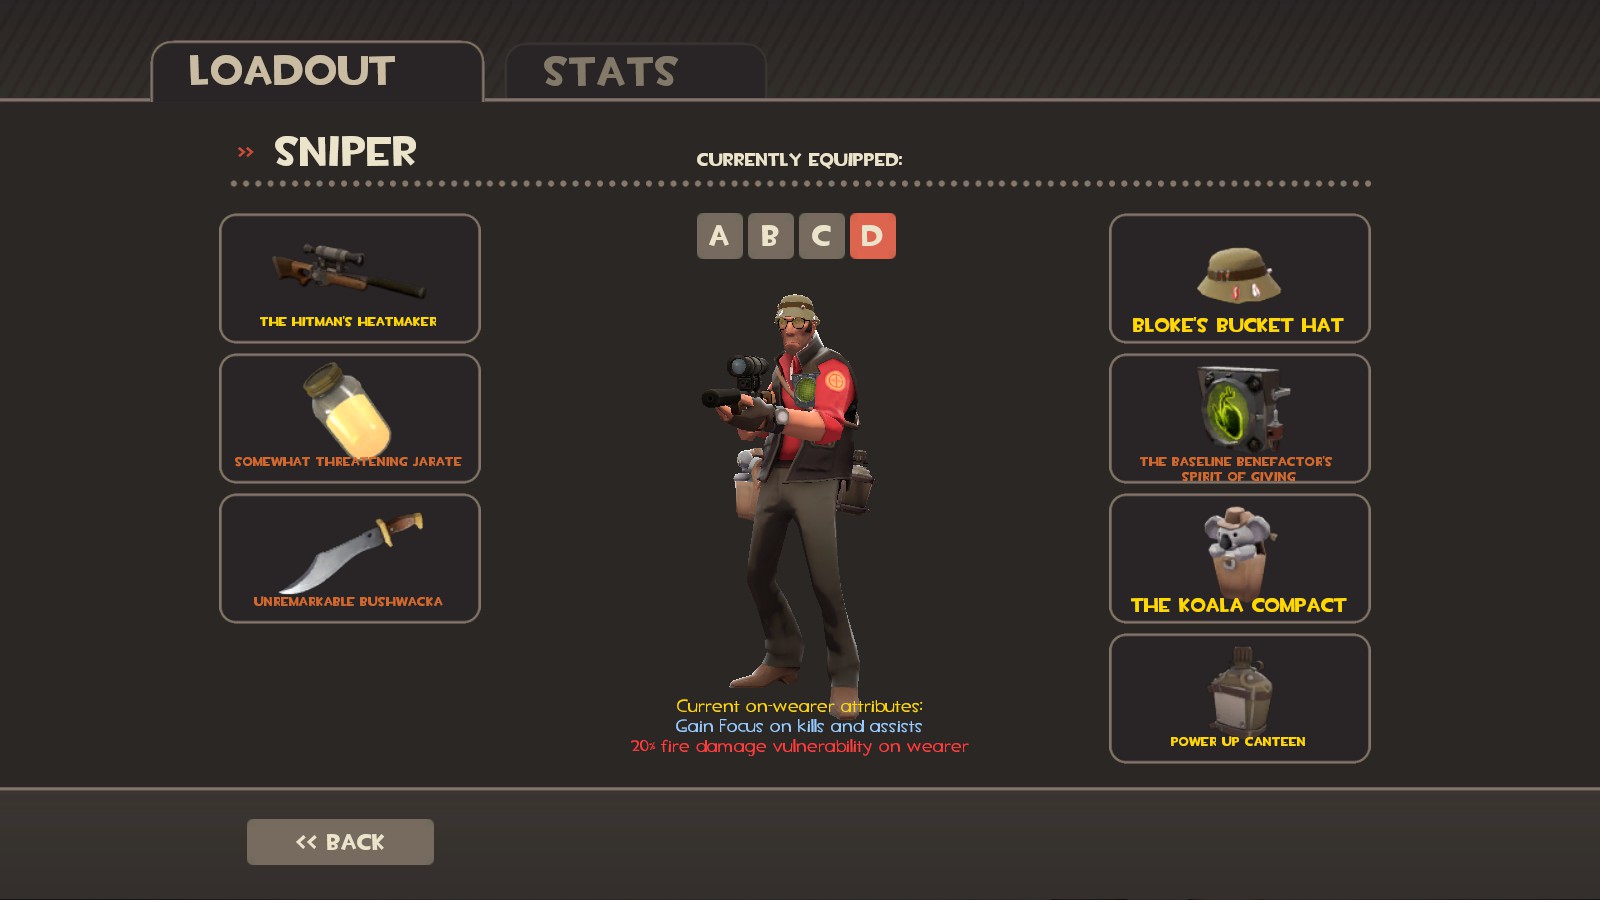
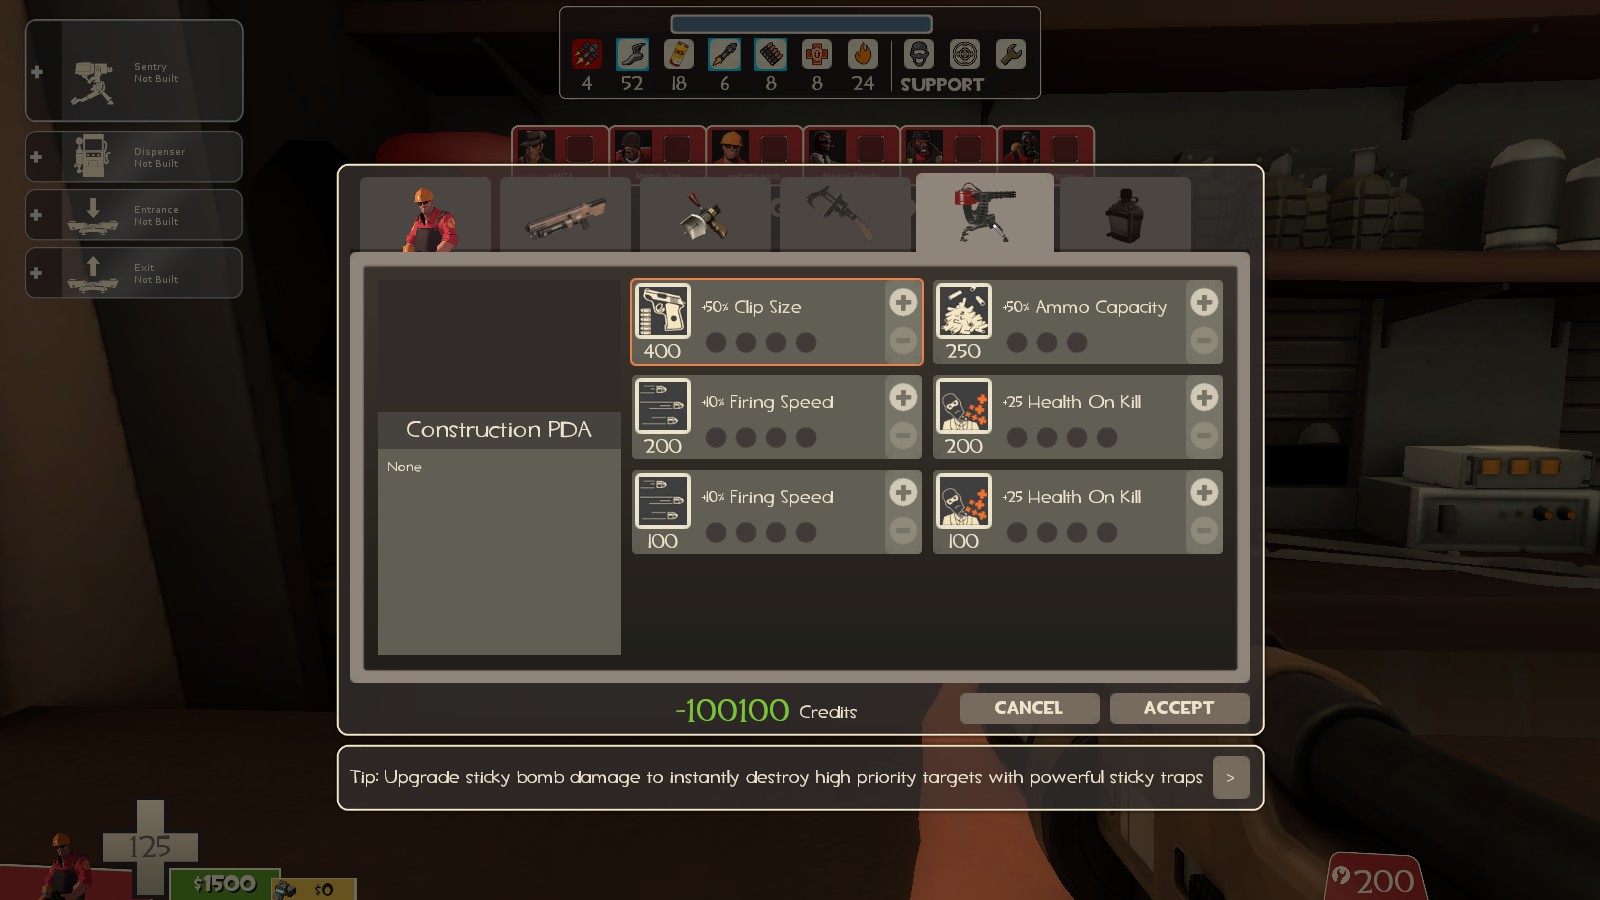
I think differently for example for Upgrade Canteens. I think Engineer should have at least one instant upgrade canteen on his pocket because consider if there will be the moment when robots overrun your team position and force you to retreat in that moment when you are trying to build another frontier: No Instant Upgrade Canteens.

About Common Sense and Etiquette are something that peoples intends to forget often. I must admit that i have never thought about calling player name as "steam username" although I know I should.... And that "F4" and "Money" thing? You don't wanna know....

I am 25 tours completed Two Cities player aand I thank you for doing this manual though. I may check this out time-by-time. Because repeating is for good and I still have much to learn.
AlphaBlaster Jun 15, 2015 @ 1:17am 
I love you for explaining the lore and RED/BLU stuff before beginning the actual MvM guide. It's amazing how many people don't know about the videos and comics.
bees Mar 2, 2015 @ 9:22am 
Valve, dont add MVM autobalance..
eat my soup  [author] Feb 14, 2015 @ 12:15pm 
Mortal Wombat that story is art.